Compressing vocal with a vocal compressor is the best way to give an ideal vocal performance. Its simple but powerful tool makes vocals sound present and lively while maintaining consistency across the recording. Meanwhile, enormous power comes with great responsibility. A vocal with excessive compression might sound flat, whereas a vocal with insufficient compression can be extremely uneven and unpleasant to listen to.
Fortunately, this article will give you all the information you need about compressing vocals. Also, how to use one of the best vocal compression tools ever made. Also, we've included a bonus on how to compress files with large sizes.
Part 1: What is a vocal compressor, and why to use it
Basically, a compressor is a tool that lower the dynamic range of an audio signal, which is the difference between the lowest and highest points in terms of amplitude. Compressors are different in that they can reduce the dynamic range in a smooth, even way so that the highest points of a signal don't clip or peak.
The process to reduce the dynamic range of audio is called gain reduction, which makes a ceiling called a threshold that the highest parts of an audio signal can't go over. Compressors can be used on many different types of instruments, and vocals are no exception.
In conclusion, compressors produce a more constant and typically perceived "louder" sound. In addition to adding tonal quality to the impacted track, they can also be used to shape a signal's transients.
When people might need to use it
Since voice is such a dynamic instrument, it usually needs some kind of compression. Keeping this in mind, the settings for vocal compression vary a lot depending on the use case in a session. You probably need one compressor or six when you compress vocals, however, the primary point is that almost all tracks need some kind of compression on the vocals to make a smooth, and consistent. Therefore, the vocal will sound good.

AniSmall for Desktop
losing quality.

Part 2: The main control factors of the vocal compressor
The following are the fundamental compressor settings. Remember that more specialized compressors may have additional options, such as a dry/wet knob, but basic compressors should contain these essential parameters.
(1) Threshold
It can be thought of as the "ceiling" of your compressor. The threshold of a compressor controls when the compressor starts to work. When the sound is louder than the threshold, the compressor reduces the gain or amplitude of the signal, as shown by the gain reduction meter.
(2) Ratio
The ratio shows how much the volume is turned down, or how strong the gain reduction is. The compression gets greater as the ratio goes up.
(3) Attack
The attack is how quickly the compressor starts working when the sound goes past the threshold. Something that has a slow attack time can sound more punchy and dynamic. Meanwhile, faster attack times may be more accurate, but they may seem a bit more obvious from the listener's point of view.
(4) Release
The release refers to the time necessary for a compressor to return to its resting level after engagement.
(5) Kneen
How intense the compression sounds is how it feels on the knee. A soft knee (1.0) is used for less obvious compression, while a hard knee (0) is used for more obvious compression.
(6) Makeup Gain
"Makeup gain" is the increase in volume that compression adds to make up for the need to lower the gain. Makeup gain turned up the volume of the signal that was fully compressed.
Part 3: How to compress vocals to a ratio quality
This part will show you how to compress vocals with Oxford Dynamics. Indeed, Oxford Dynamic is one of the best vocal compressors since Oxford Dynamic offers everything you need to accurately shape the dynamics of your vocals, including a gate, expander, compressor, limiter, sidechain EQ, and warming function. Also, you can perfectly shape the dynamics of your tracks.
How to compress vocals with Oxford Dynamics
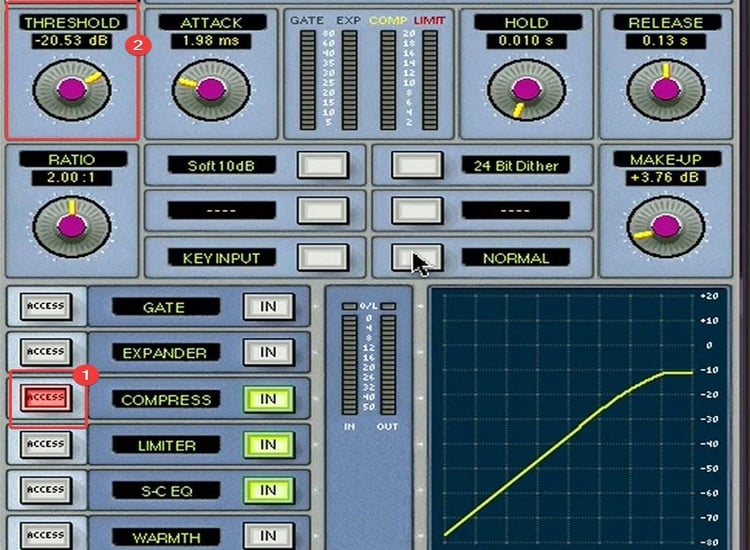
Step 1: You can compress the vocal gradually by pressing "Access" for "Compress" then slide the Threshold bar to the left or right based on your needs.
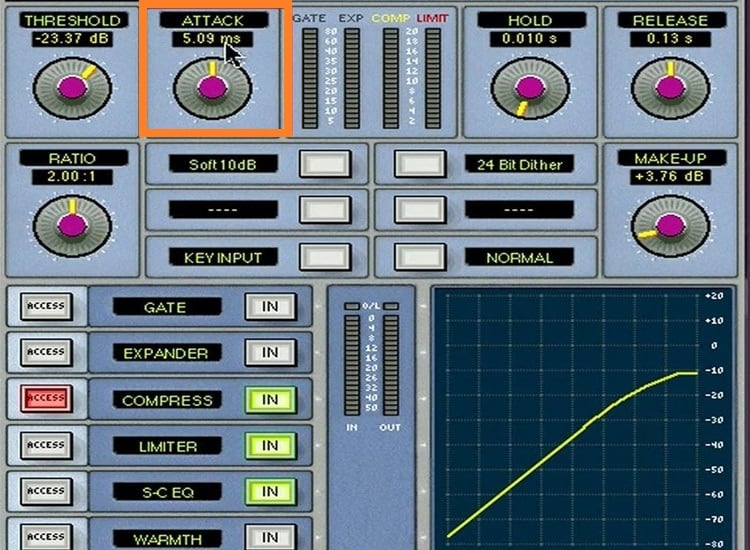
Step 2: Open the "Attack" on the compressor.
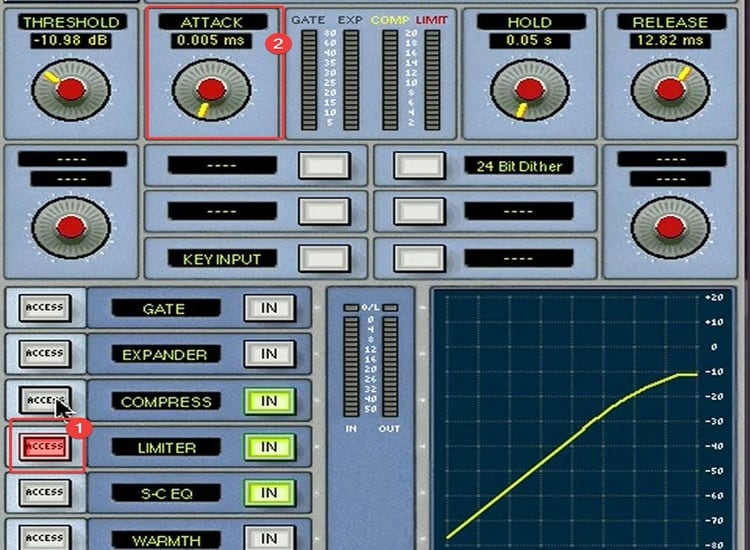
Step 3: After that, click "Access" for "Limiter" and close the "Attack." Finally, you can play the vocal and listen to the difference before you compress and after you compress the vocal
Part 4: Tips for compressing more aggressive vocals
Before you compress a vocal, one of the most important things to think about is your genre. In fact, each genre has its own feel and point of view, so you'll need to mix things up to figure out what genre you're most interested in.
For example, when it comes to compressing rap vocals, metal/rock vocals, or aggressive vocals, it's very different when you compress a common vocal. In aggressive vocals, such as rock vocals, the vocal's role in the final mix will change a bit because of how the dynamics change. Even though it's still the song's centrepiece, the energy is a little different, and the live instruments behind it require a slightly different approach than a common vocal.
Tips for compressing aggressive vocal
- Go for a fuller sound with less top-end and more high-mids.
- The vocals don't have to be so upfront within the combine.
- A medium balance in the consistency should be good for compressing aggressive vocals.
Bonus part: How to compress files with big size
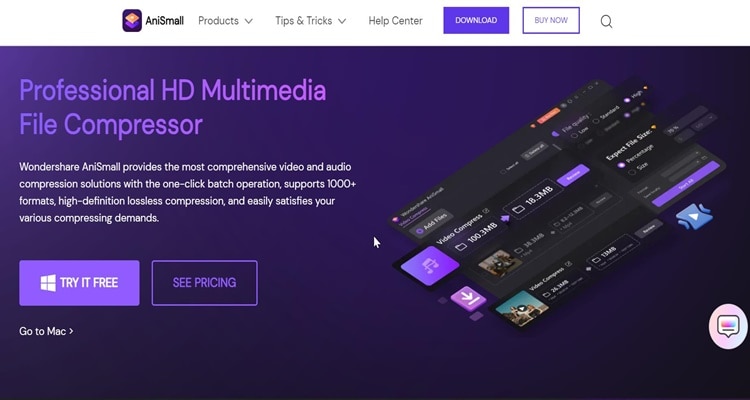
After compressing your vocals, you may be excited to share them with your friends. Nonetheless, the compressed vocal file may be so big that your friends won't download it since it would take a lot of storage space on their devices. Fortunately, you can rely on AniSmall since AniSmall lets you decrease your compressed vocal file in just a few clicks.
Features
- Import and compress files in just one click.
- High-quality lossless compression.
- AniSmall supports 1000+ formats.
Follow the following steps to compress big-size files with AniSmall.
Step 1: Firstly, you need to download AniSmall on their official website and install it. Afterwards, launch the AniSmall application on your computer.
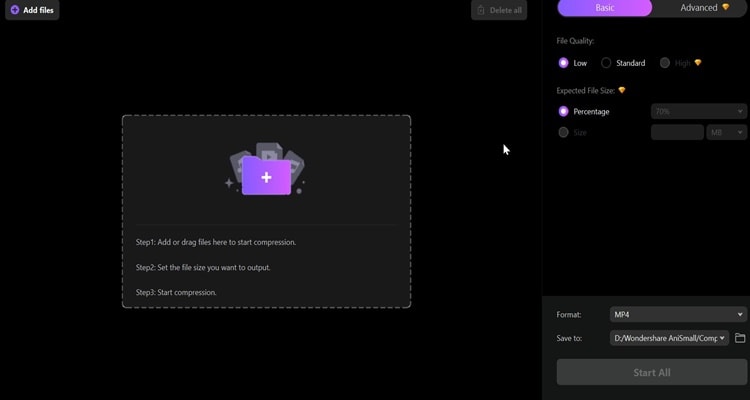
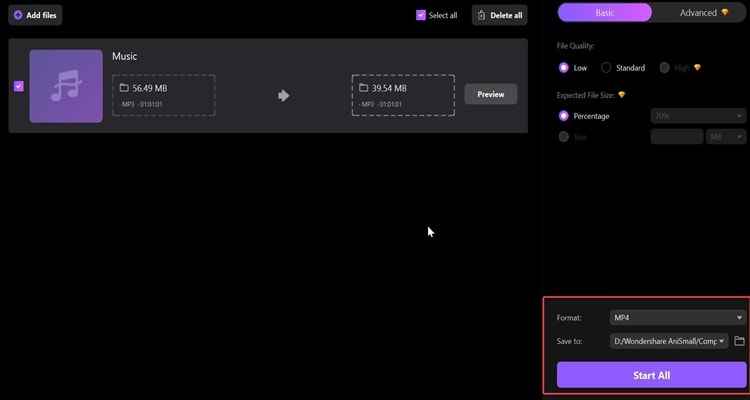
Step 2: You must import your vocal file on AniSmall. You can click "Add file" or simply drag your file into AniSmall.
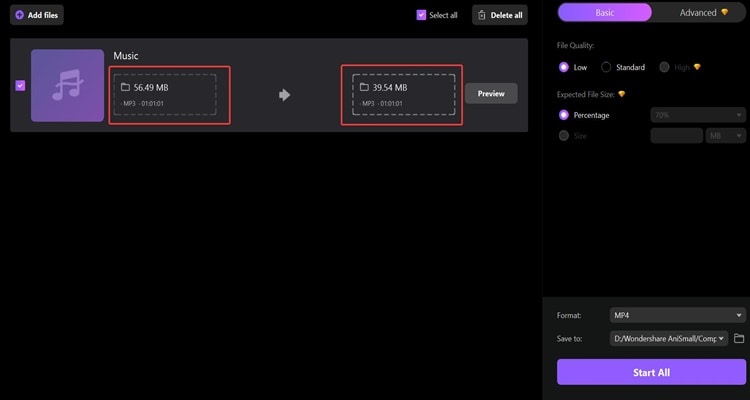
Step 3: Once you import your file into AniSmall, your size file will decrease. If you want to make your vocal file have a lower file size, you can adjust it by navigating right on your screen.
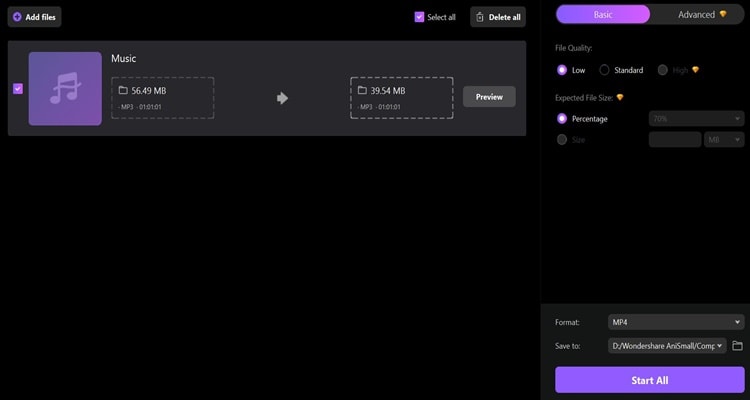
Step 4: Before you compress your file, you can click "Preview" to see how your file will look like
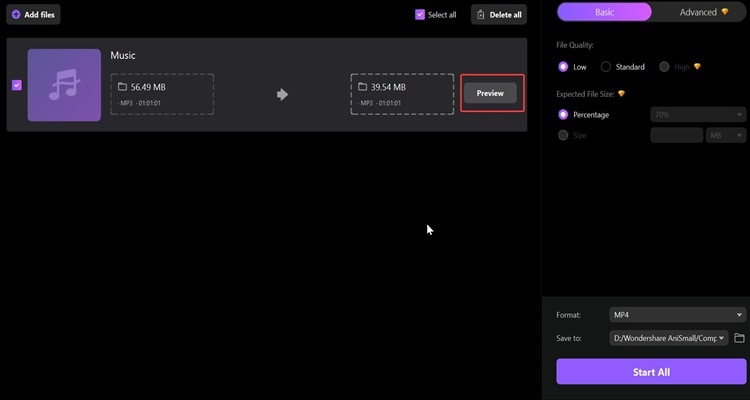
Step 5: Lastly, if you are satisfied with your vocal file, click "Start All" on the bottom right of your screen to save your file.
