Mac
- TRY FREE TRY FREE
- 1. Burn Video/Audio on Mac+
-
- 1.1 Convert AVI to MP4 on Mac
- 1.2 Convert AVCHD on Mac
- 1.3 Convert Audio on Mac
- 1.4 MP3 to WAV Converter Mac
- 1.5 WAV to MP3 Converter Mac
- 1.6 svg converter
- 1.7 music converter
- 1.8 dmg file
- 1.9 webp
- 1.10 online svg converter
- 1.11 ai to svg
- 1.12 music converter
- 1.13 md file
- 1.14 wpd file
- 1.15 djvu file
- 1.16 sf2 file
- 1.17 oga file
- 1.18 arj file
- 1.19 free svg converter
- 1.20 md5 converter
- 1.21 convert dmg to iso
- 1.22 dpi converter
- 1.23 Toast Titanium Alternative for Mac
- 1.24 Copy a CD on Mac
- 1.25 Best GIF Maker for Mac
- 1.26 PPT to Video on Mac
- 1.27 iPad Video Converter Mac
- 1.28 Top 6 Media Converter Mac
- 1.29 Top 8 File Converters for Mac
- 1.30 34 Best Free Video Converters
- 2. Recording Tips on Mac+
- 3. Edit Photos and Videos on Mac+
-
- 3.1 Photo Viewer for Mac
- 3.2 Crop a Picture on Mac
- 3.3 Top 10 Image Editor for Mac
- 3.4 How to Screenshot on Mac
- 3.5 Convert HEIC to JPG on Mac
- 3.6 Best Drawing Software for Mac
- 3.7 How to Resize Photos on Mac
- 3.8 Best Photo Editors for Mac
- 3.9 Convert PNG to JPG
- 3.10 TIFF to JPEG Mac
- 3.11 Convert Picture to SVG
- 3.12 Video Editing Software for Mac
- 3.13 4 Best MP3 Trimmer for Mac
- 4. Other Tips & Trick+
-
- 4.1 Fix Mac Running Slow Problem
- 4.2 How to Run Windows on Mac
- 4.3 How to Use Mac Magic
- 4.4 Best 12 Alternatives to CleanMyMac
- 4.5 How to Make a Collage on Mac
- 4.6 Best Free Voice Changer for Mac
- 4.7 Posting on Instagram from Mac
- 4.8 10 Easy Way Do Split-Screen on Mac
- 4.9 How to Airplay Video to Mac
- 5. Tips for Playing Videos+
All Topic
- YouTube Tips
-
- AI Tools Tips
-
- AI Photo Enhancer Tips
- Voice Changer Tips
- AI Thumbnail Maker Tips
- AI Script Generator Tips
- Smart Summarizer
- AI Subtitle Generator Tips
- Watermark Remover
- Vocal Remover Tips
- Speech to Text Tips
- AI Video Tips
- AI Image Tips
- AI Subtitle Translator Tips
- Video Extractor Tips
- Text to Speech Tips
- AI Video Enhancer Tips
- DVD Users
- Social Media Users
- Camera Users
- Photography
- Creative Design
- Movie Users
- Travelling Fans
- Educational Users
- More Solutions
- Holidays and Commemoration
- Game Lovers
- Other Tips
Top 8 Easy Solutions to Screen Record Audio on Mac
by Kayla Morrison • 2026-01-21 18:56:07 • Proven solutions
Remember that insightful video game tutorial on YouTube? Well, that’s all thanks to a desktop screen recorder! Today, there are hundreds of both paid and free video recording apps online. However, learning how to screen record audio on Mac with these apps is a different ballgame altogether. That’s because most apps are just too difficult to use or can’t record screen with audio. So, this guide will educate you on how to record screen and audio at the same time on Mac.
- Part 1. Step by Step Guide to Record Screen and Audio on Mac
- Part 2. How to Record Screen and Audio on Mac Using QuickTime
- Part 3. Easier Way of How to Screen Record Audio on Mac [Recommended]
- Part 4. 5 Free Ways to Record Screen and Audio on Mac
Part 1. Step by Step Guide to Record Screen and Audio on Mac
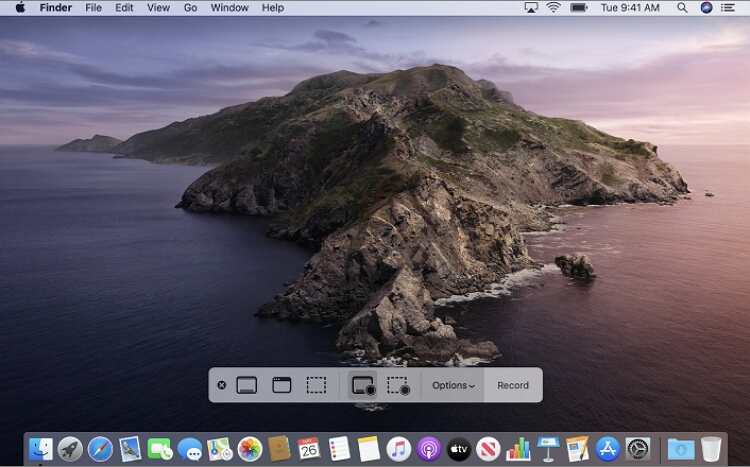
Firstly, you don’t need an app installed on your Mac to record screen if you’re running macOS 10.14 (Mojave) or later. Simply press the Shift + Command buttons on your keyboard to launch the on-screen recording tools. Now follow these steps:
Step 1: Click the Record Entire Screen button to change the pointer to a camera icon.
Step 2: Open the Options menu to select an input microphone.
Step 3: Next, tap any screen that you wish to record or click the Record button.
Step 4: Press the Stop button to finish recording. You can now edit the video by trimming, cropping, saving, and so on.
Part 2. How to Record Screen and Audio on Mac Using QuickTime
If you’re using macOS 10.13 (High Sierra) and above, you can use the bundled QuickTime Player to record your desktop screen with audio. It’s effortless to do that as you don’t need to install anything to record the screen. So, without any further ado, below is how to record screen and audio on Mac with QuickTime Player:
Step 1: Go to your Applications folder and open QuickTime Player.
Step 2: Now click the File > New Screen Recording.
Step 3: Before you begin recording, click the drop-down arrow beside the red Record button to choose a microphone. You can also use the Volume Slider to adjust the sound volume.
Step 4: Tap the Record button and then click the screen that you wish to record. Alternatively, drag an area and then press the Start Recording to capture a specific part.
Step 5: Click the Stop button, and QuickTime Player will automatically open your recorded audio.

Part 3. Easier Way of How to Screen Record Audio on Mac [Recommended]
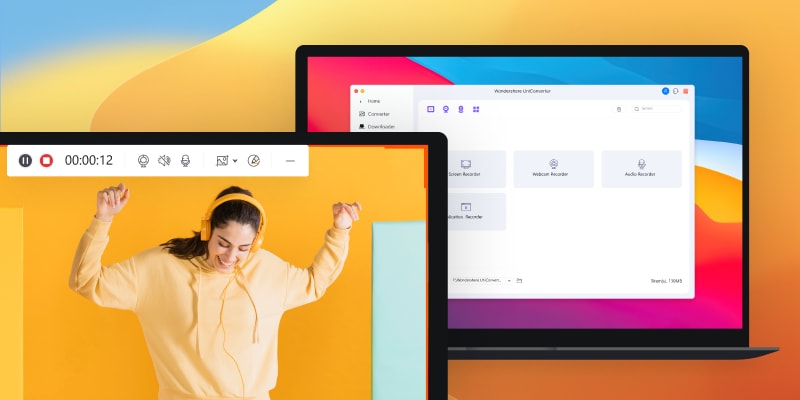
Another excellent way to record desktop screen on Mac is using a professional third-party option like Wondershare UniConverter. It’s a lightweight program that works smoothly on most Mac OS X versions and Windows computers. This tool also allows you to set the frame rate, resolution, duration, and custom screen size on top of the audio-visual recording. Plus, Wondershare UniConverter can directly upload your recorded video to Vimeo or YouTube.
Wondershare UniConverter - All-in-One Video Converter
-
Record desktop screens easily and quickly with internal/external microphone and output speaker.
-
Best free video editor for Mac to crop, rotate, cut, convert, add subtitles, and more.
-
Best YouTube to MP3 converter for Windows/Mac to convert YouTube to MP3 with 90X faster conversion speed than any conventional converters.
-
Toolbox with additional functions like Screen Recorder, VR Converter, GIF Maker, Fixing Media Metadata, and more.
-
Supported OS: Windows 10/8/7/XP/Vista, macOS 11 Big Sur, 10.15 (Catalina), 10.14, 10.13, 10.12, 10.11, 10.10, 10.9, 10.8, 10.7.
Below are the steps to capture a screen with audio on Mac using Wondershare UniConverter:
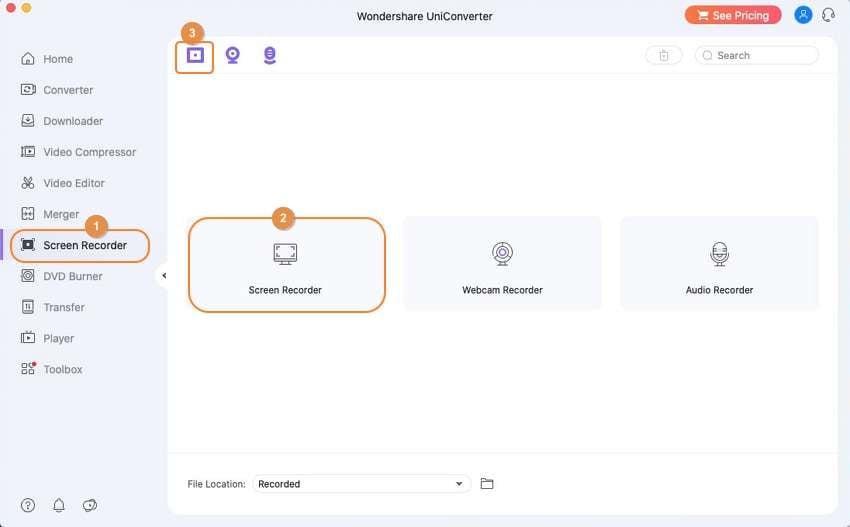
Step 1 Open the Screen Recorder.
Run Wondershare UniConverter and then click the Screen Recorder button on the left pane.
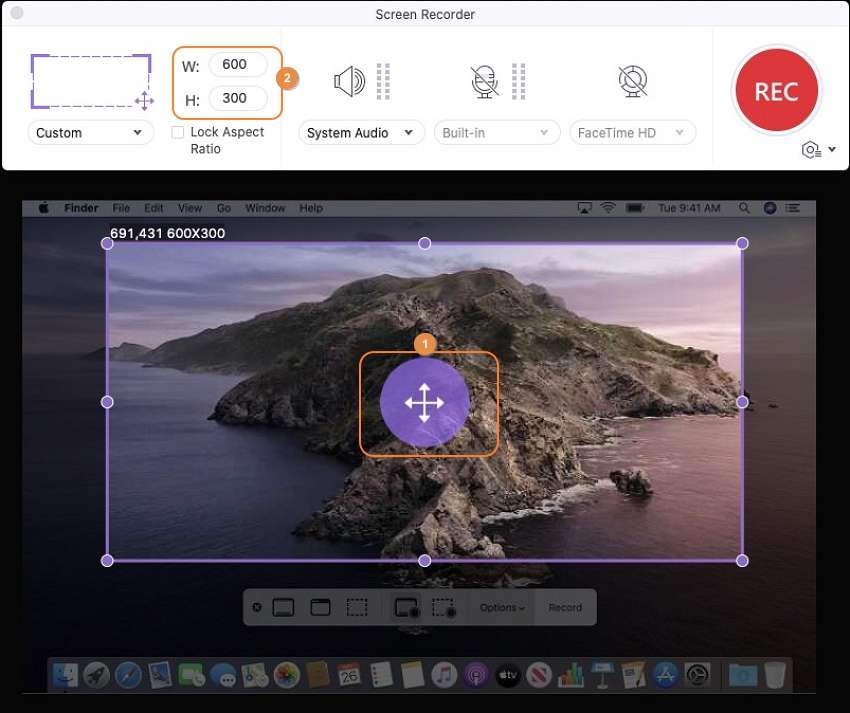
Step 2 Customize settings.
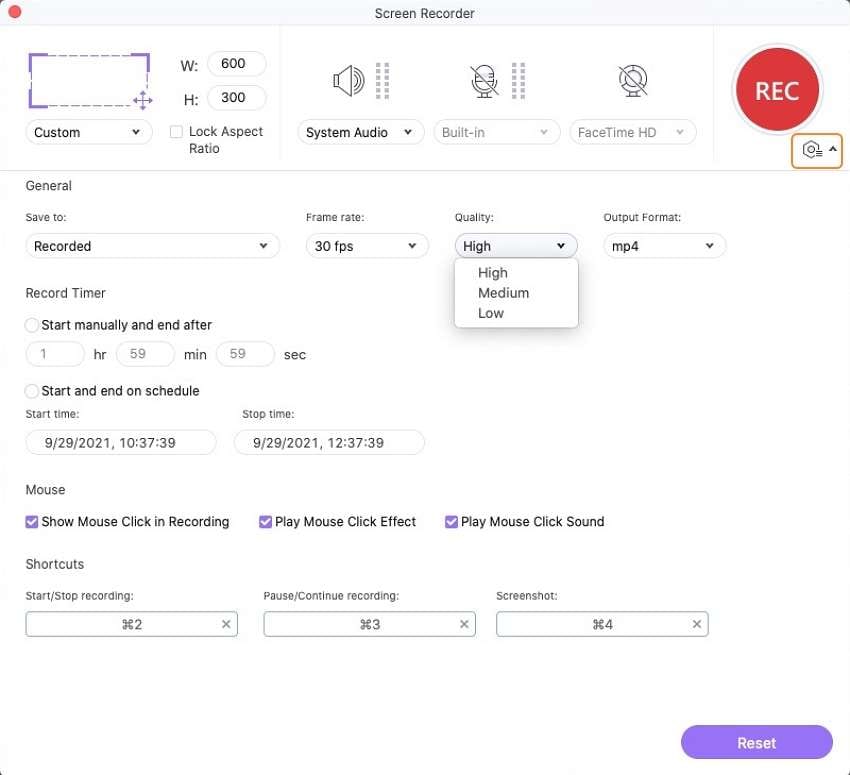
Now click the Camcorder icon at the center of the screen to launch the recording controls. Use the cropper to set a recording area or manually enter your preferred recording dimensions. Proceed to click the Microphone icon to choose an input microphone.
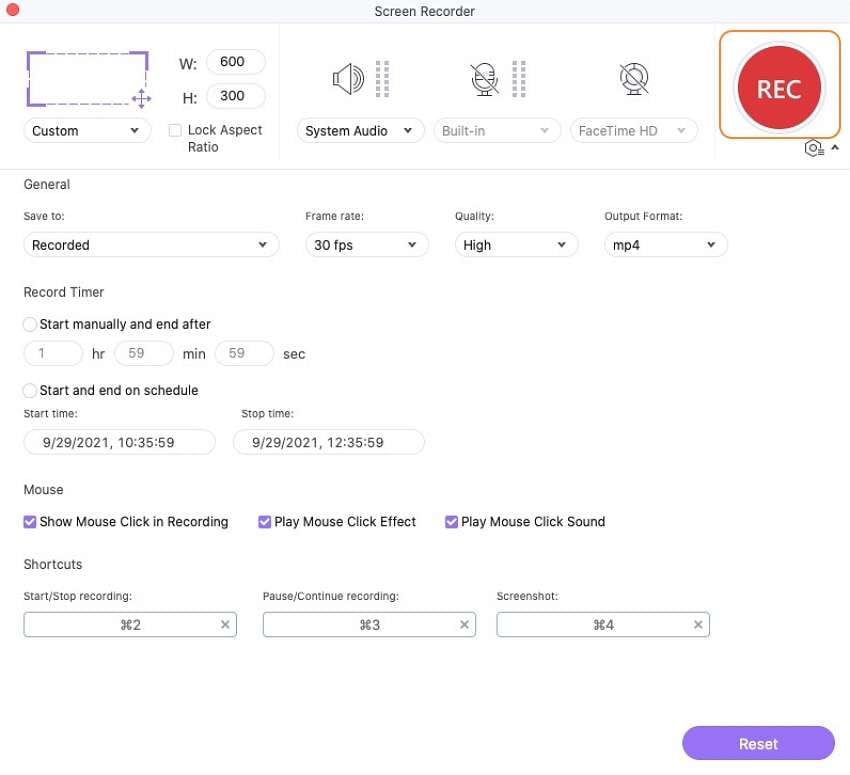
You can also tap the Settings icon below the REC button and do the following:
- Set the frame rate.
- Choose output quality.
- Select a destination folder path.
- Customize keyboard shortcuts.
- Set a recording timer.
Step 3 Record screen.
If satisfied, click the REC button and wait for the 3-second countdown to begin recording. Click the Stop to finish recording. You will see a Share icon to help you upload your new video to YouTube or Vimeo.
Part 4. 5 Free Ways to Record Screen and Audio on Mac
On top of Wondershare UniConverter, you can also download these five screen recording tools for Mac:
1. Snagit
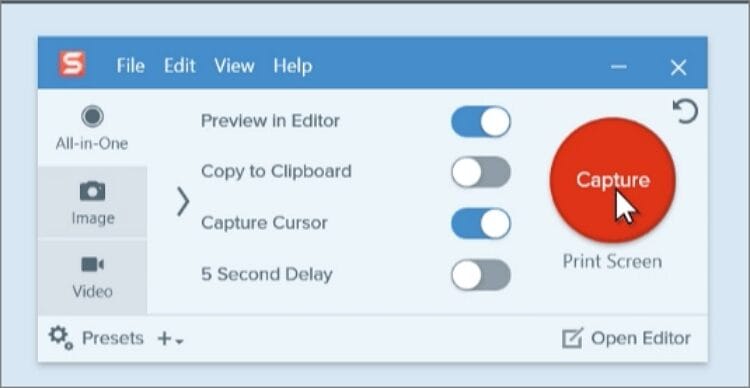
Snagit is a beautifully arranged and reliable app that offers you almost everything you need to capture high-quality screens. It features excellent all-around functionality and is very cost-effective. When you launch it first, you’ll see a mini control box at the top with a red Record icon and other buttons. Interestingly, this app supports 4K resolution and allows you to add narrations using an internal or external mic.
Pros:
- Flexible and powerful.
- Supports 4K video quality.
- Exports to cloud storage.
Cons:
- Not the cheapest option out there.
2. OBS Studio
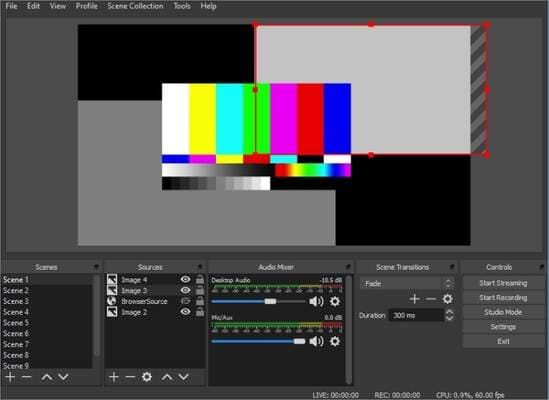
Still looking for a free, open-source screen recorder? Get OBS Studio. This free program lets you record and stream live videos on Mac, Windows, and Linux computers. It packs a whole host of features for setting transitions, adjusting scenes, reducing noise, and so on. However, beginners can find OBS Studio challenging to navigate at first.
Pros:
- Free of charge.
- Supports multiple video/audio files at once.
- Cross-platform app.
Cons:
- Not the best option for greenhorns.
3. Icecream Screen Recorder
Icecream Screen Recorder does the basics so well that you’ll forget about the complicated OBS Studio quickly. Just load it up, tap the Record button, choose a part to capture, and you’re off. However, the free version isn’t the most precise tool out there. But you can still get the Pro version that supports multiple formats and has extended features.
Pros:
- Super-simple to use.
- Includes zoom and annotation tools.
- Record system audio.
Cons:
- Limited free version.

4. ActivePresenter
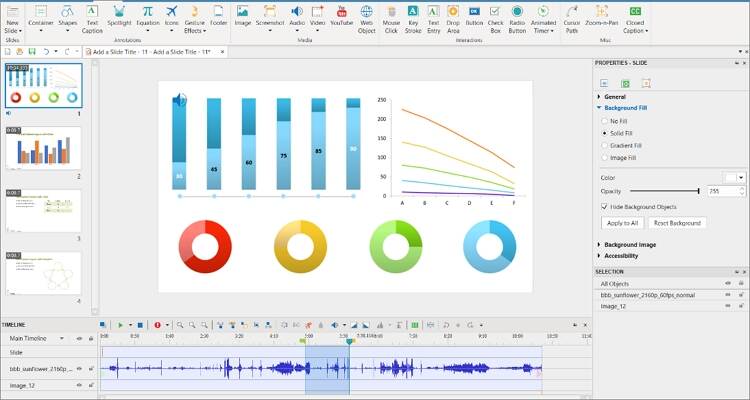
ActivePresenter is a simple all-in-one video editor, screen recorder, and an exciting e-learning platform. Here, you can record video demos easily and quickly, after which you can customize by editing. To edit, you can crop, delete, copy, and cut. Moreover, you can insert audio to video, reduce noise, adjust video volume, etc.
Pros:
- It can blur moving objects.
- Create picture-in-picture effects.
- Insert time to videos.
Cons:
- It is intimidating at first.
5. Screen Capture
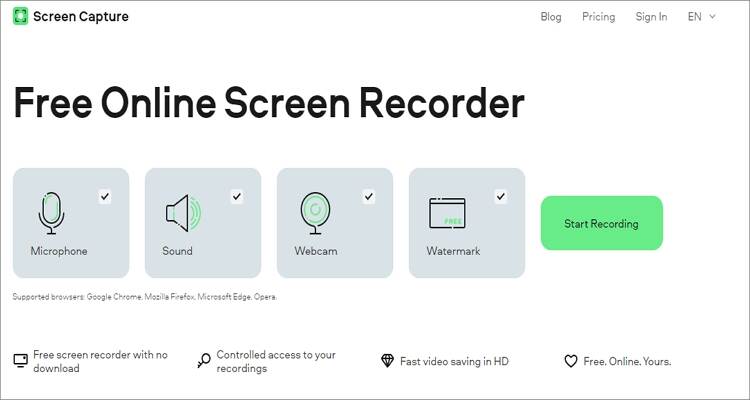
Finally, let’s have a look at one of the best online screen capture tools currently – Online Screen Capture. This software will make you forget that you’re recording online. It captures desktop screens in HD quality and supports your computer’s webcam and microphone. You can also choose to mute sounds before recording videos.
Pros:
- Super-easy to use.
- Customizable platform.
- Cross-platform app.
Cons:
- No offline recording.
Conclusion
There you have it! These are the eight excellent methods of how to record screen and audio on Mac easily. If you want something free, use the QuickTime Player, although you’ll get limited editing capabilities. So, I recommend Wondershare UniConverter, which is fast, simple to use, and feature-rich.
Your complete video toolbox
 Customize duration, frame rate, screen size, and destination folder.



Kayla Morrison
staff Editor