Mac
- TRY FREE TRY FREE
- 1. Burn Video/Audio on Mac+
-
- 1.1 Convert AVI to MP4 on Mac
- 1.2 Convert AVCHD on Mac
- 1.3 Convert Audio on Mac
- 1.4 MP3 to WAV Converter Mac
- 1.5 WAV to MP3 Converter Mac
- 1.6 svg converter
- 1.7 music converter
- 1.8 dmg file
- 1.9 webp
- 1.10 online wpd converter
- 1.11 readme md
- 1.12 online svg converter
- 1.13 ai to svg
- 1.14 music converter
- 1.15 md file
- 1.16 wpd file
- 1.17 djvu file
- 1.18 sf2 file
- 1.19 oga file
- 1.20 arj file
- 1.21 free svg converter
- 1.22 md5 converter
- 1.23 convert dmg to iso
- 1.24 dpi converter
- 1.25 Toast Titanium Alternative for Mac
- 1.26 Copy a CD on Mac
- 1.27 Best GIF Maker for Mac
- 1.28 PPT to Video on Mac
- 1.29 iPad Video Converter Mac
- 1.30 Top 6 Media Converter Mac
- 1.31 Top 8 File Converters for Mac
- 1.32 34 Best Free Video Converters
- 2. Recording Tips on Mac+
- 3. Edit Photos and Videos on Mac+
-
- 3.1 Photo Viewer for Mac
- 3.2 Crop a Picture on Mac
- 3.3 Top 10 Image Editor for Mac
- 3.4 How to Screenshot on Mac
- 3.5 Convert HEIC to JPG on Mac
- 3.6 Best Drawing Software for Mac
- 3.7 How to Resize Photos on Mac
- 3.8 Best Photo Editors for Mac
- 3.9 Convert PNG to JPG
- 3.10 TIFF to JPEG Mac
- 3.11 Convert Picture to SVG
- 3.12 How to Edit MP4 on Mac
- 3.13 Video Editing Software for Mac
- 3.14 4 Best MP3 Trimmer for Mac
- 4. Other Tips & Trick+
-
- 4.1 An Intel Mac VS ARM
- 4.2 Fix Mac Running Slow Problem
- 4.3 How to Run Windows on Mac
- 4.4 Everything about macOS 11 Big Sur
- 4.5 How to Use Mac Magic
- 4.6 Best 12 Alternatives to CleanMyMac
- 4.7 How to Make a Collage on Mac
- 4.8 Best Free Voice Changer for Mac
- 4.9 Posting on Instagram from Mac
- 4.10 10 Easy Way Do Split-Screen on Mac
- 4.11 How to Airplay Video to Mac
- 5. Tips for Playing Videos+
All Topic
- AI Tools Tips
-
- AI Photo Enhancer Tips
- Voice Changer Tips
- AI Thumbnail Maker Tips
- AI Script Generator Tips
- Smart Summarizer
- AI Subtitle Generator Tips
- Watermark Remover
- Vocal Remover Tips
- Speech to Text Tips
- AI Video Tips
- AI Image Tips
- AI Subtitle Translator Tips
- Video Extractor Tips
- Text to Speech Tips
- AI Video Enhancer Tips
- DVD Users
- Social Media Users
- Camera Users
- Photography
- Creative Design
- Movie Users
- Travelling Fans
- Educational Users
- More Solutions
- Holidays and Commemoration
- Game Lovers
- Other Tips
How to Record Zoom Meeting on Mac Easily
by Kayla Morrison • 2025-10-21 20:06:08 • Proven solutions
Are you still trying to figure out the best method of how to record a Zoom meeting on Mac? This is the right page. Long gone are the days when boardroom meetings had to take place in physical offices. And with global respiratory diseases like Coronavirus, holding virtual meetings on the Zoom app is now more critical. But what if you want to record the session and share it with someone who didn’t attend? Don't worry because this guide will teach you how to record a Zoom meeting on Mac with high-quality. Read on!
- Part 1. How to Record a Zoom Meeting on Mac with Simple Methods
- Part 2. The Easiest Way to Record Zoom Meeting on Mac
- Part 3. Top 5 Free Recorder for Zoom Meetings on Mac
Part 1. How to Record a Zoom Meeting on Mac with Simple Methods
First of all, you don’t need any third-party app to record a Zoom meeting. That’s because the app allows both paid and free subscribers to record sessions for free. Take note, however, that local recording is only available on desktops – Mac and Windows.
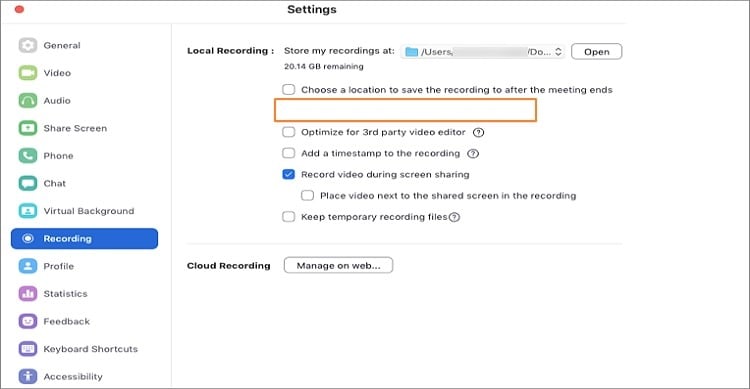
Enable a local saving folder:
Step 1: Go to the Zoom app and then click the Settings or Gear icon.
Step 2: Tap the Recording tab and then click Local Recording, and the app will automatically create the destination folder. You can change it if you want.
Record a local meeting:
Step 1: As the host, start a Zoom meeting.
Step 2: Now click the Record button.
Step 3: In the pop-up menu, click the Record on this Computer, and both the host and participants will see a Recording indicator on the top-left corner.
Step 4: After dismissing the meeting, Zoom will process your recording automatically. Note that the video file is usually in MP4, whereas an audio file is saved in M4A format.
Part 2. The Easiest Way to Record Zoom Meeting on Mac
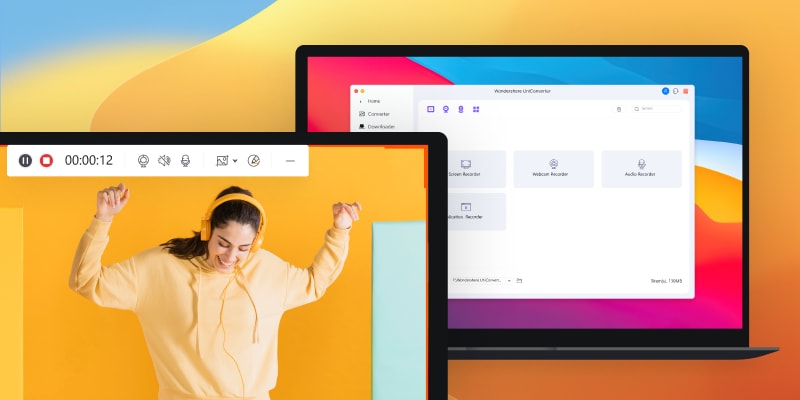
If you find the Zoom process too long and confusing like me, there is a more straightforward way in Wondershare UniConverter. With this method, you only need to download the lightweight app and enjoy a fast and professional screen recording experience. On top of capturing a desktop screen with high-quality, Wondershare UniConverter also allows users to record webcams and audios on their desktops. Plus, it comes with multiple editing functions to customize your recorded Zoom meeting.
Wondershare UniConverter - All-in-One Video Converter
-
Supports recording all activities on the screen with no quality loss.
-
Best free video editor for Mac to crop, rotate, cut, convert, add subtitles, and more.
-
30X faster conversion speed than any conventional converters.
-
Batch video/audio compression and conversion are allowed.
-
Toolbox with additional functions like Screen Recorder, VR Converter, GIF Maker, Fixing Media Metadata, and more.
-
Supported OS: Windows 10/8/7/XP/Vista, macOS 11 Big Sur, 10.15 (Catalina), 10.14, 10.13, 10.12, 10.11, 10.10, 10.9, 10.8, 10.7.
Here is how to record a Zoom meeting on Mac with Wondershare Screen Recorder:
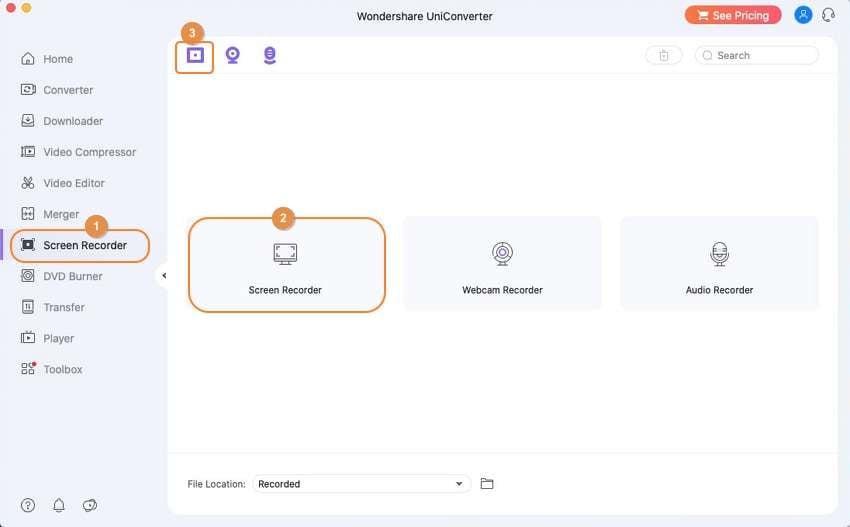
Step 1 Open the Screen Recorder tool.
Install and run the app on your Mac and then click the Screen Recorder tab. On the Screen Recorder window, click the Camcorder icon at the top-left corner.
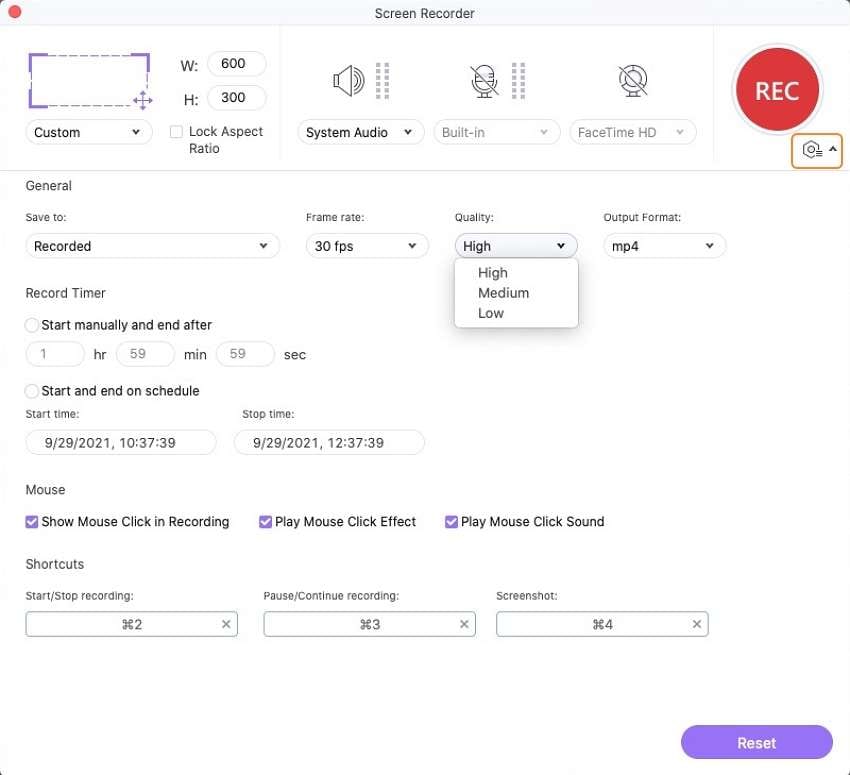
Step 2 Customize your recording setting.
Do you want to record the full screen or only part of it? Use the Cropper to set that. You can also connect a microphone to your Mac and choose it under the Microphone menu.
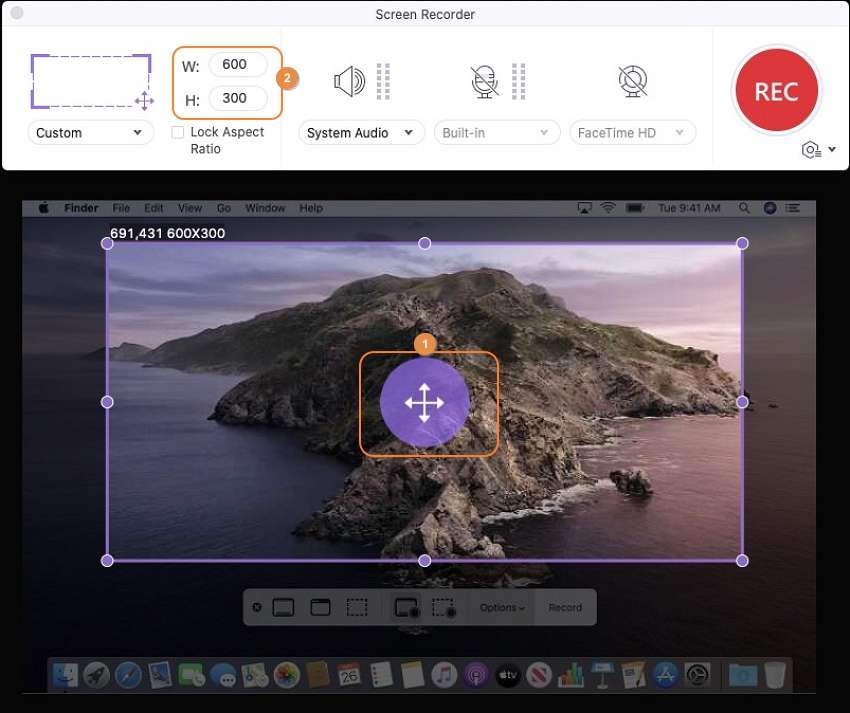
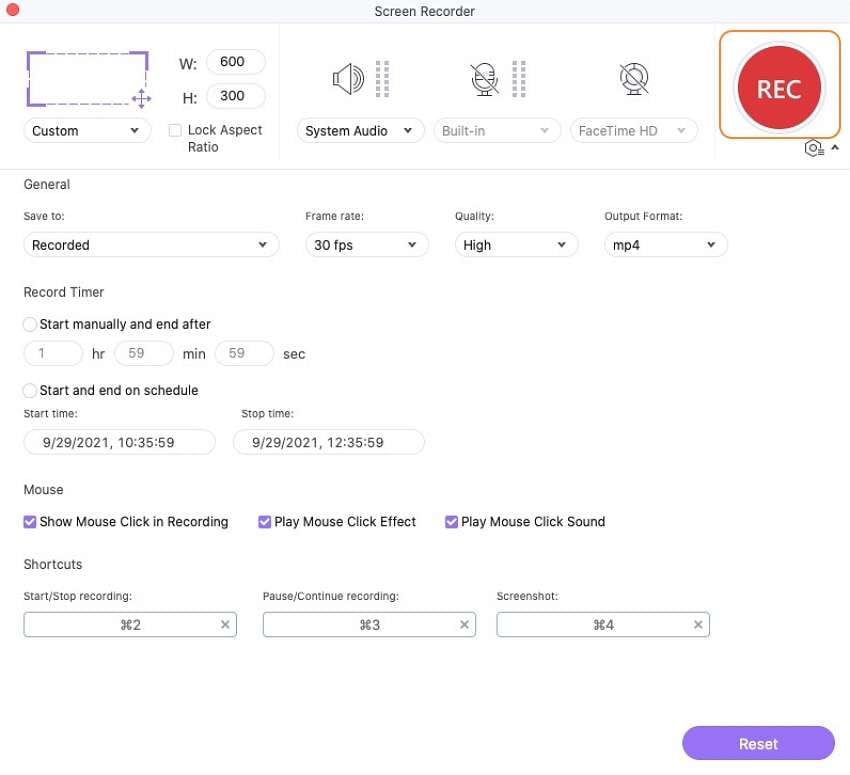
After that, click the Settings button below the red REC button to open additional customization tools. You can now do the following:
- Set the frame rate.
- Adjust output quality to High, Medium, or Low.
- Choose a destination path/folder.
- Set the recording duration.
- Choose keyboard shortcuts.
Step 3 Start recording.
Now open Zoom and begin your meeting. After that, click the red REC button on Wondershare Screen Recorder to start recording your Zoom meeting on Mac. Click the Stop button once the session is over. It’s that easy!
Part 3. Top 5 Free Recorder for Zoom Meetings on Mac
As usual, it’s always my pleasure to introduce you to a few other options. So, if you’re still in need of more screen recording apps, check these five programs:
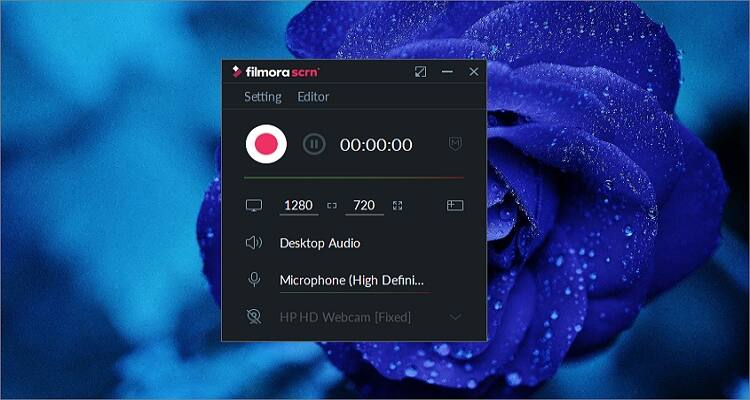
1. Wondershare FilmoraScrn
Wondershare never disappoints with its great desktop and mobile apps. Well, they are at it again with the FilmoraScrn. This desktop app is compatible with both Macs and PCs and boasts powerful screen recording features. It can easily record fast-moving objects like video games, thanks to its capturing ability of 15fps up to 120fps. It also comes with a full editing suite to help users professionalize their screen recordings. And lastly, it can export recordings to multiple formats like MOV, MP4, GIF, etc.
Pros:
- Choose a custom recording field.
- Record up to 120fps.
- Multiple editing options.
Cons:
- Free subscription but with paid options.
- Can be confusing for beginners.
2. Screencast-O-Matic
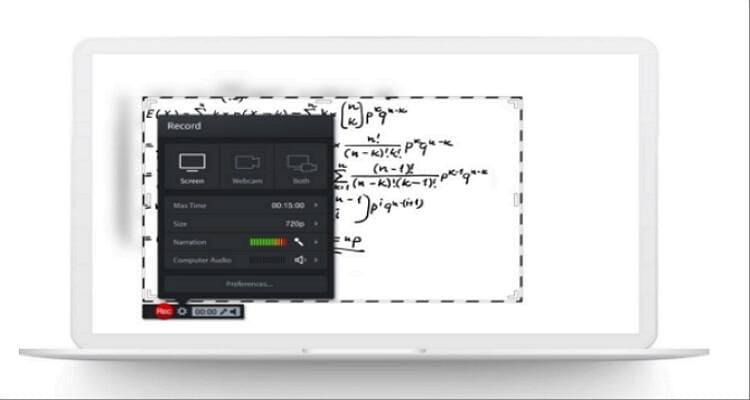
Screencast-O-Matic is another free and simple-to-use screen recorder for Mac, Windows, Android, and iOS devices. Here, users can capture either fullscreen or a selected area of their desktop screen. You can also narrate to your microphone while recording, zoom in, and pan to record essential regions. Also, you can trim off unwanted parts of your recording. What’s more, you can use Screencast-O-Matic to add music or text to your recordings.
Pros:
- Simple to use.
- Multiple customization tools.
- Cross-platform app.
Cons:
- The free version is limited.
- No customer service.
3. OBS Studio
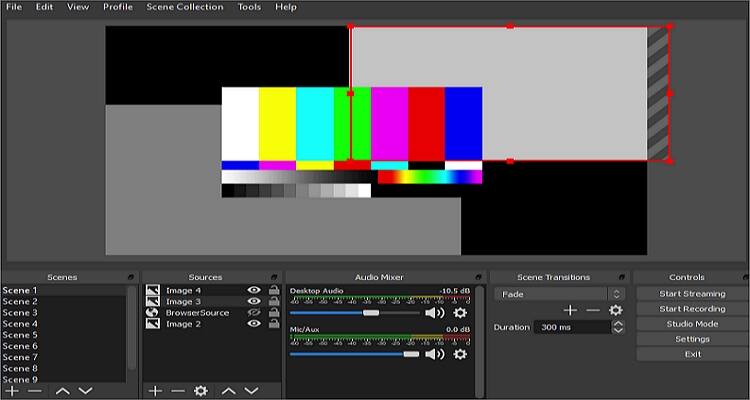
OBS Studio is a desktop app for capturing Zoom meetings on Mac, Windows, and Linux platforms. It’s a straightforward app that won’t take you more than a few seconds to set up a recording session. OBS allows you to choose whether you want to record the screen with microphone audio, desktop sounds, or even both. Plus, you can set up multiple scenes to record. This way, you won’t waste time switching between desktop windows and screens.
Pros:
- Robust and simple to use.
- Customizable layout.
- Supports most VoIP apps.
Cons:
- Not for beginners.
- No customer support.
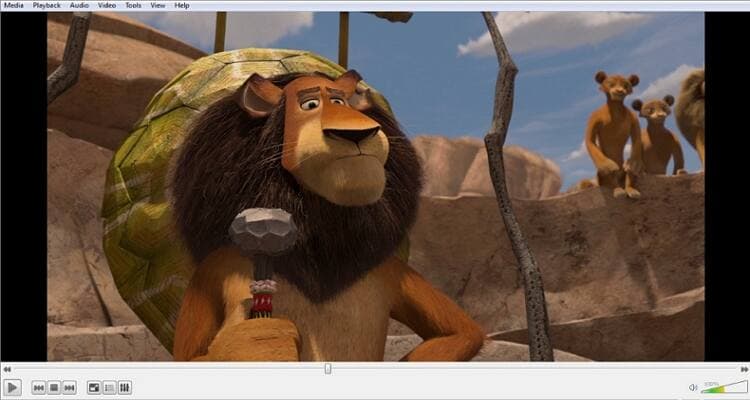
4. VLC Media Player
VLC is undoubtedly the most popular multimedia player app for desktop platforms. It can open most audio and video file formats with minimal fuss. But did you know that VLC can also record screen? Well, VLC can capture screen easily and quickly. Surprisingly, VLC users can customize recordings by choosing the frame rate. For instance, you can set the frame rate at 30 to enjoy high-quality videos, though with larger file size.
Pros:
- A free, open-source app.
- Multimedia player.
- Cross-platform app.
Cons:
- No advanced features.
- Outdated UI.
5. QuickTime Player
URL: https://support.apple.com/kb/DL923?viewlocale=en_KE&locale=en_KE
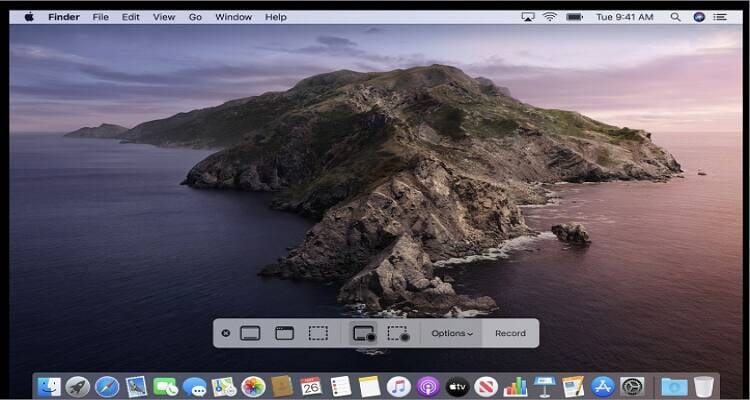
Lastly, Mac users can use the bundled QuickTime Player to record their desktop screens. Like VLC media player, this app is a free-for-all and supports the opening of most audio and video file formats. Another VLC similarity is that QuickTime Player can record screens quickly and easily. Just click File > New Screen Recording and then choose whether you want to record with a microphone or not. Lastly, click the Record button to start capturing your Zoom meeting for free on Mac.
Pros:
- A free, open-source app.
- Simple to use.
- High-quality outputs.
Cons:
- Zero customization options.
- Only for Mac/Windows.
Conclusion
Learning how to record a Zoom meeting on Mac is a cakewalk with the right apps. If you’re out of storage space, you can use Zoom’s internal screen recording feature. However, I recommend a third-party app like Wondershare UniConverter if you’d like more customization tools.
Your complete video toolbox
 A flexible and easy video recorder with explicit controls on the user interface.



Kayla Morrison
staff Editor