Captions and subtitles add value to films by making them more accessible to a wider range of people and contributing to a better audience engagement. Thus, you can try including captions in your movies and YouTube videos because they enable viewers to comprehend what is being said more accurately and help with SEO.
Closed captions and subtitles are two methods by which the audience can comprehend what is being said in the video. Although some videos do not have subtitles, it is essential to include them to increase the number of views on a video. As a result, this article will show you How to Add Subtitles in Premiere Pro in some easy ways. Let's get started!
Part 1. How to Add Subtitles in Premiere Pro?
Subtitles for any video can be manually added, but it might take a long time. That is because you would need to view the movie numerous times and then add subtitles one by one, one frame at a time. Now, this is where professional video editing software can be of use. Closed captions can be generated and automatically added to your movie using Adobe Premiere Pro. It isn't that difficult, and you can easily include subtitles in your video.
It should come as no surprise that Premiere Pro provides an extensive selection of text alternatives for titles and captions. It can import XML or SRT files. Let's look at how we can use Adobe Premiere Pro to add subtitles to any film automatically. The process consists of a few straightforward stages. Here's how:
Step 1: To use Adobe Premiere Pro, you must first download and install it on your computer. Open it and add a project to the editing window.
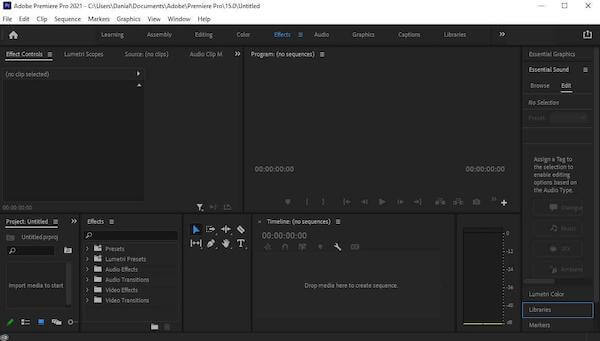
Step 2: Many choices, including aesthetic and graphical adjustments, are available in the editing window. Navigate to the import window and import your video to apply automated subtitles.
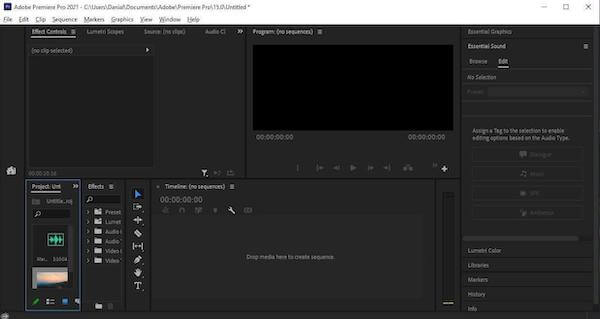
Step 3: After importing the video, drag it to the timeline, where you may make adjustments to the movie. You may use this tool to edit your video in whatever way you like.
Step 4: You must complete this step to add subtitles to your video. First, go to the "Captions" menu. You will be presented with three alternatives, one of which is "Transcribe Sequence." A popup will appear asking you to choose the language you want subtitles for. Because English is the language of choice globally, leave the settings alone and click "Transcribe."
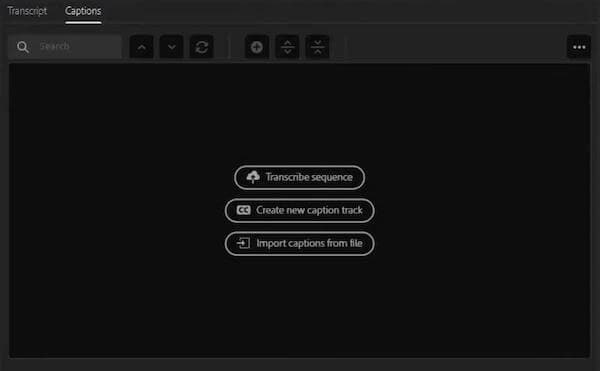
Note: The transcribing will be completed in a few seconds. Subtitles will be added to your video once you click "Create Captions." You may, however, go to the captions box and alter the closed captions if you like).
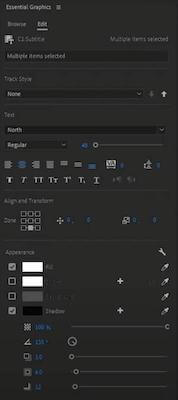
Note: If you wish to format the subtitle text, select all captions on the timeline. It'll bring up the "Essential Graphics" tab. The font and size of the closed caption may be changed here. You may also download the subtitles as an SRT file after modifications).
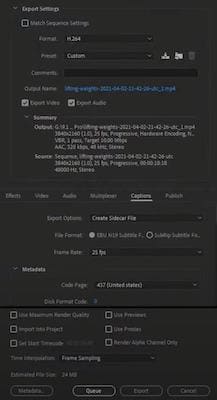
Step 5: Subtitles must be imported together with the video when exporting the video after adding subtitles. Go to the Export menu and look for the "caption" item. You may either burn the subtitle with the movie or download it as a separate file from this page. Choose the best option for you and export the video.
Part 2. The Most Time-Saving Method to Add Subtitles to Premiere Pro Video Manually or Automatically
Wondershare UniConverter is a sophisticated video program that includes many essential functions (originally Wondershare Video Converter Ultimate). It may be used as a video file converter, video compressor, video editor, DVD burner, and other things. However, here we will show you how Wondershare UniConverter can add subtitles to your Premiere Pro video.
Wondershare UniConverter has introduced a new handy tool to its Toolbox area that allows users to generate new subtitles for movies, search for subtitles online, import subtitles to videos locally, and modify them.
Wondershare UniConverter — All-in-one Video Toolbox for Windows and Mac.
Visual subtitle timeline for real-time preview
Customize subtitle styles and apply them to all subtitles
Support for multiple videos and subtitle formats
Multiple options to add subtitles to your videos
Automatically generate your video subtitles
Now that we are done with the features of Wondershare UniConverter, it's time to finally see how you can add subtitles to your Premiere Pro video using this tool.
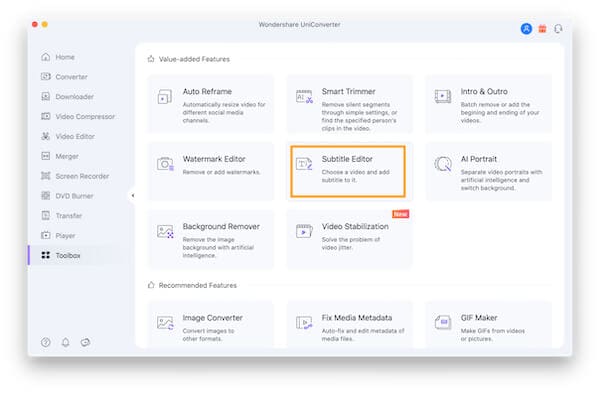
Step 1 Open Subtitle Editor from Wondershare UniConverter
Open the installed program on your machine and choose the Subtitle Editor option from the Toolbox area.
Step 2 Upload the Video to Subtitle Editor
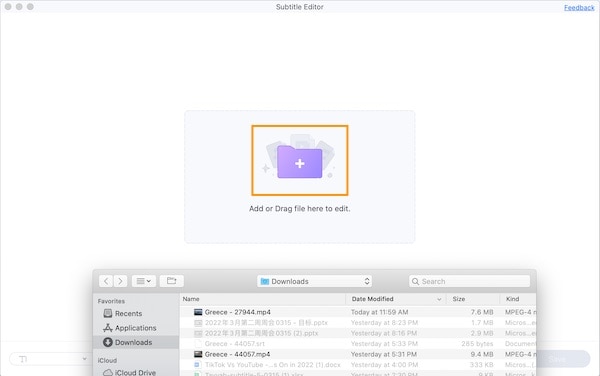
A new pop-up window will appear, in which you must upload the video to which the subtitle will be inserted. To browse and add the video, click the Plus symbol or the Add Files option.
Step 3 Create New Subtitles
After you've uploaded the file, you'll see three choices beneath the video: New, Import, and Auto-Subtitle Generator. To create a new .srt file, choose the New option.
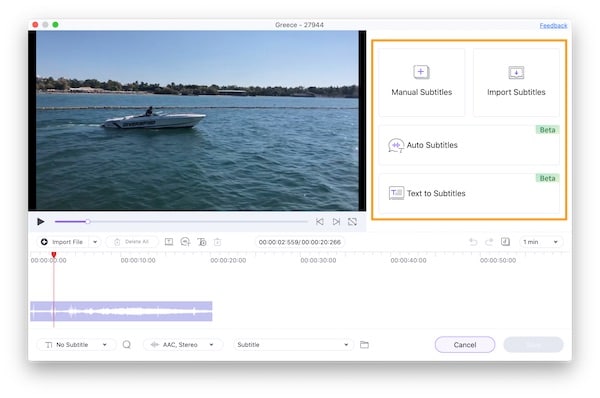
Note: For the first three seconds, the interface will display the video selection. The appropriate subtitle content for the first three seconds may be entered into the area given on the right side of the window).
Step 4 Add and Edit Subtitle Lines
The program defaults to 3 seconds for the subtitle, but you may change it to a larger or shorter length by choosing the Start Time and End Time.
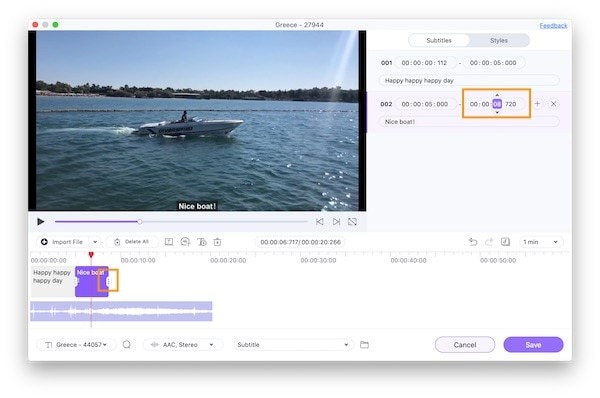
Tip 1: After you've inserted the subtitle content, you may customize it by selecting Font, Size, Color, Bold, Italics, and Underline from the right-side panel.
Tip 2: The subtitle's outline width and color may be customized as desired.
Tip 3: Then, adjust the Opacity by sliding the bar as necessary. The greater the Opacity, the more noticeable the subtitle.
Tip 4: You may set the subtitle at the upper, middle, or lower area of the video by using the Position tab. You may also move the bar adjacent to the desired spot to fine-tune the position.
Tip 5: If you want the same settings for all subtitles, choose to Apply to all. To undo the changes, click the Reset button.
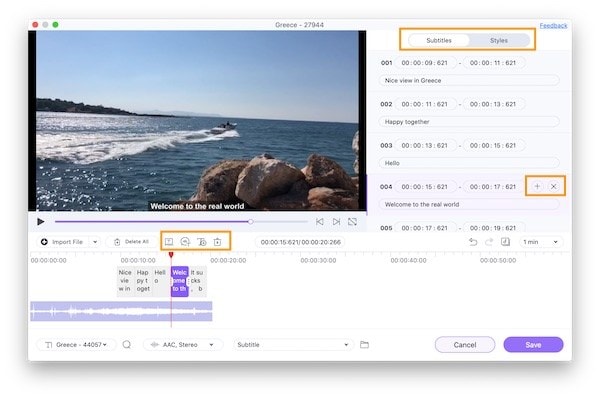
After you've added the first subtitle, you may add the next one by clicking on the T+ symbol on the left side of the video. Again, a subtitle will be picked by default for 3 seconds. If you wish to remove a subtitle, click the delete symbol.
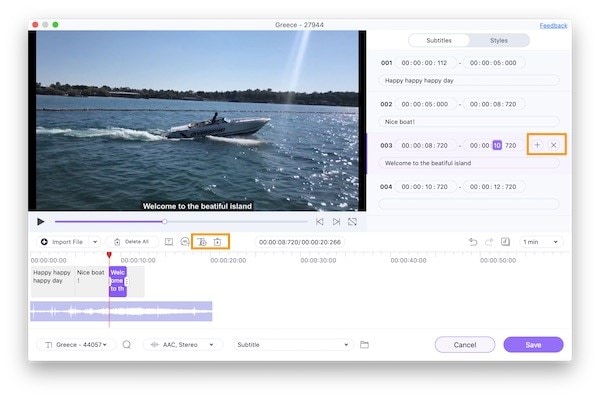
Note: Similarly, when appropriate, numerous subtitles for the video may be supplied. As noted in Step 4, editing for each subtitle may be done independently
Step 6 Export Video with Subtitles
After all of the subtitles have been added to the video, the Subtitle List tab will display the kind of subtitle that has been added. At the File Location tab, choose the desktop folder to which you want to store the processed movie. Finally, click the Save option to process the video and add subtitles.
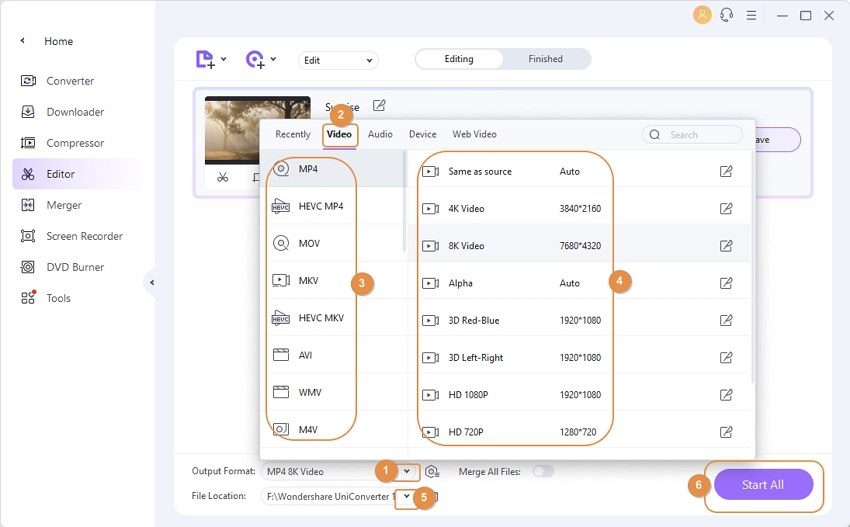
Tip 1: If you wish to add two or more .srt files to your video, click the T+ symbol on the left side of the movie to import a local .srt file once you complete the custom one.
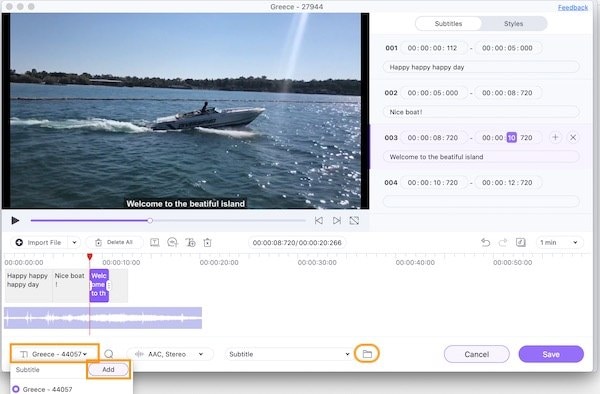
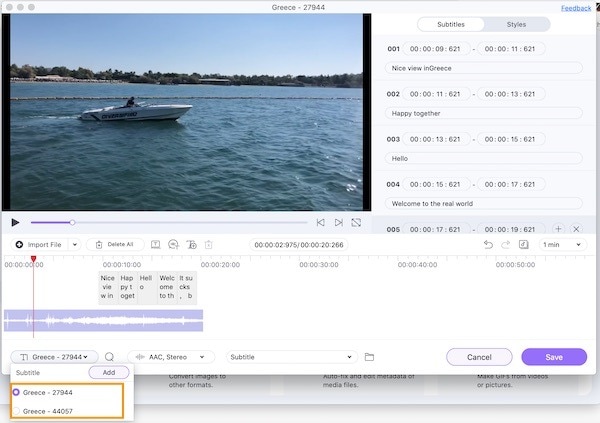
Tip 2: Select the Subtitle List option by clicking the down arrow symbol. There are two embedded subtitle files that you may flip between to alter.
If you already have an SRT subtitle file for your video, you can choose Import in the first step rather than Create, then it is easy to edit and change the style of your subtitles.
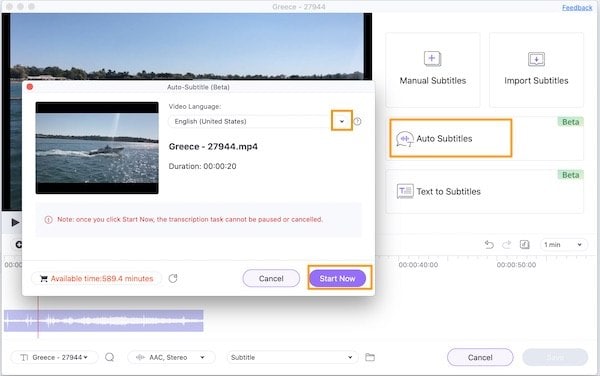
If you want to add subtitles quickly, you may use Wondershare UniConverter's Auto-Subtitle Generator option. Its intelligent speech recognition technology will convert the audio in the video instantly and correctly into words.
Part 3. How to Add Subtitles to a Premiere Pro Video Online Free
Although Adobe Premiere's built-in feature is convenient and allows you to add subtitles easily, it is not the only option to add text overlays to your current video output. Here's the kicker: You may utilize HappyScribe's free subtitling options to expedite the process!

Here is how you can use the Happyscribe to add subtitles:
Step 1: Make a copy of your Adobe Premiere video and Upload it.
Step 2: Choose the language in which the video will be played.
Step 3: Choose between "Machine generated" and "Human created."
Step 4: You will receive your subtitles now.
Step 5: Select the file you want to export by clicking "Export."
Part 4. More Knowledge about Adding Subtitles in Premiere
1. What caption formats does Adobe Premiere Pro support?
There are several formats that Adobe Premiere Pro supports when it comes to the subtitles in a video. Formats like SCC, MCC, XML, STL, SRT, DFXMP, W3C TTML, SMPTE-TT, EBU-TT, etc., are many of the major formats supported.
2. What are the Keyboard Shortcuts for adding captions in the premiere?
In the Text panel, click the Plus symbol to add captions to enter a blank caption. Alternatively, you may use the keyboard shortcuts (macOS: Opt + Cmd + C | Windows: Ctrl +Alt + C). Double-click New Caption in the Text panel or the Program Monitor to begin changing the caption. The caption text is then entered.

