

- Built-in Option: Mac includes the Voice Memos app, allowing users to record, edit, and organize audio recordings easily.
- Quality Factors: A good microphone, quiet environment, and proper macOS version are essential for high-quality recordings.
- Alternative Tools: QuickTime, GarageBand, and online recorders provide additional features for different recording needs.
- Efficient Solution: Wondershare UniConverter enables unlimited recording time, multiple output formats, and advanced audio editing.
Recording a voice memo on Mac comes is an operation that comes in handy in several scenarios, from capturing ideas to recording lectures or tutorials, and many others. While it may sound like an easy task to accomplish, lots of people find it tough to complete. If you are struggling to record a voice memo on your Mac and you need a guide for assistance, this post is for you. Here, you will learn how to record a voice memo on Mac using the built-in tool and third party tools.
In this article
Part 1. What Is Voice Memo?
Voice memo is a system application integrated into macOS and other Apple devices like iPhone and iPad to assist end-users with audio recording. With this tool, you can easily take notes, capture interviews, save ideas and also create podcasts from your comfort zone. Besides capturing audio, you can count on this tool to assist with editing and organizing your audio recordings effortlessly.
Part 2. Requirements to Record a Top Quality Voice Memo on Mac
If you are using the built in voice memo app on your Mac, here are some important requirements you need to fulfil for you to get astonishing results when recording.
A Compatible macOS
If you use macOS Mojave and later versions, you can use the built-in voice memo app to record audio. However, if you are using an older macOS, using the built-in is impossible. Rather you employ the services of QuickTime Player or other third party tools.
Get Working Microphone
Though your Mac comes with a built-in microphone, having an external voice enhancer like an external USB microphone or a headset with microphone support isn't bad.
Ensure A Quiet Atmosphere
To get the best voice memo on your Mac, having a quiet surroundings is very important as it lets you capture your recordings without background noise.
Get a Reliable Recording Software
You can use a voice memo app to capture your recording. However, most times, your recording won't come in the format you want. So employing the services of a third-party audio recorder like Wondershare Uniconverter could be a great choice. With this software, you can learn how to record voice memo on Mac within the snap of your fingers.
Part 3. How to Record Voice Memo on Mac Using Apple Voice Memo App
Find below the clear stepwise guide covering how to record voice memo on Mac with the voice memo program. Follow and apply accordingly:
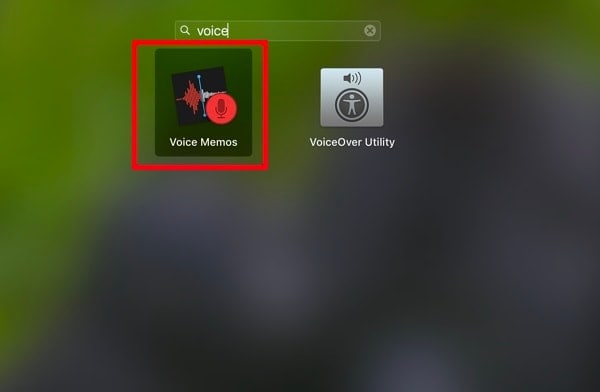
Step 1: Launch Voice Memo App
Hold down the hotkeys Cmd + Space and an empty search field (also known as Spotlight search)will appear on your screen. Input Voice Memos in the space and click on the corresponding button to launch the app. Speak clearly into your microphone (could be your Mac's or an external one). Audio recording will commence in no time. To confirm the app is working, a waveform will start moving on your screen.
Step 2: Start Audio Recording
Once Voice memo comes up, locate the Red circular record button and click on it to initiate audio recording.
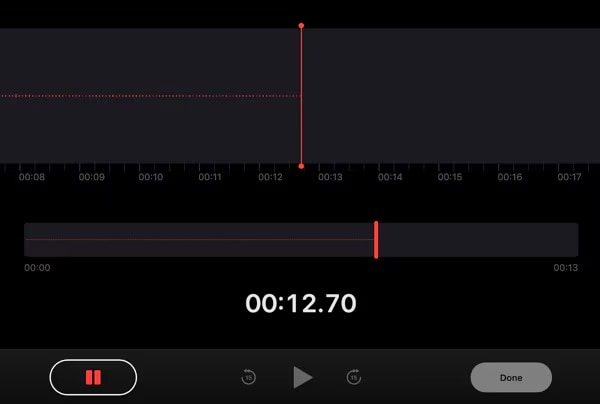
Step 3: Pause and/or Resume Audio Recording
If you want to stop the recording for a while to continue later, click on the Pause icon and the app will do as requested. To resume recording, click on the Resume button and start speaking into your microphone to continue recording your audio.
Step 4: End Recording and Name the Voice Memo
Once you are done with recording your audio, hit the Stop button to end it. The voice memo app will immediately save your recording.
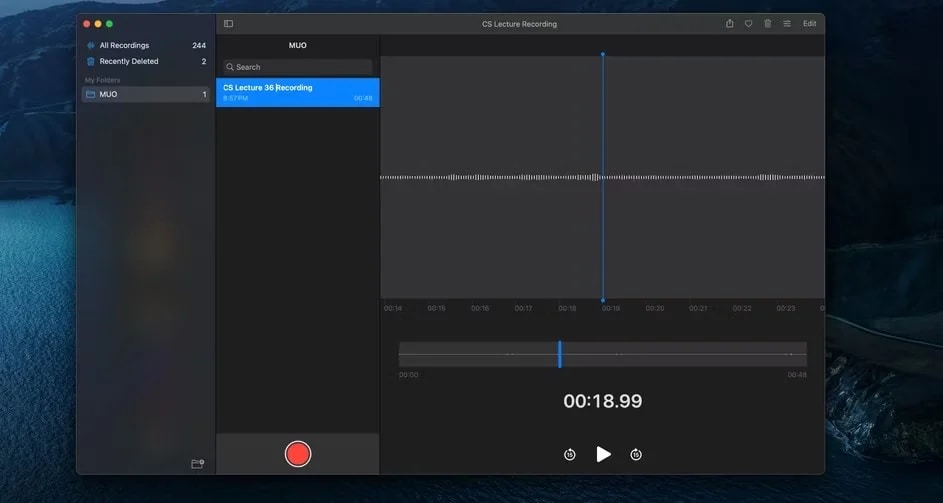
Since voice memo save and name your work based on time or location, renaming the corresponding file is very important if you want an organized recording library.
To rename the file, go to the sidebar and click on the recording. Afterward, tap on the title and input your preferred name to save the file.
Step 5: Edit Voice Memo
Voice memo comes with some basic editing tools for you to adjust your recordings to suit your project requirements. Some of the editing tools include:
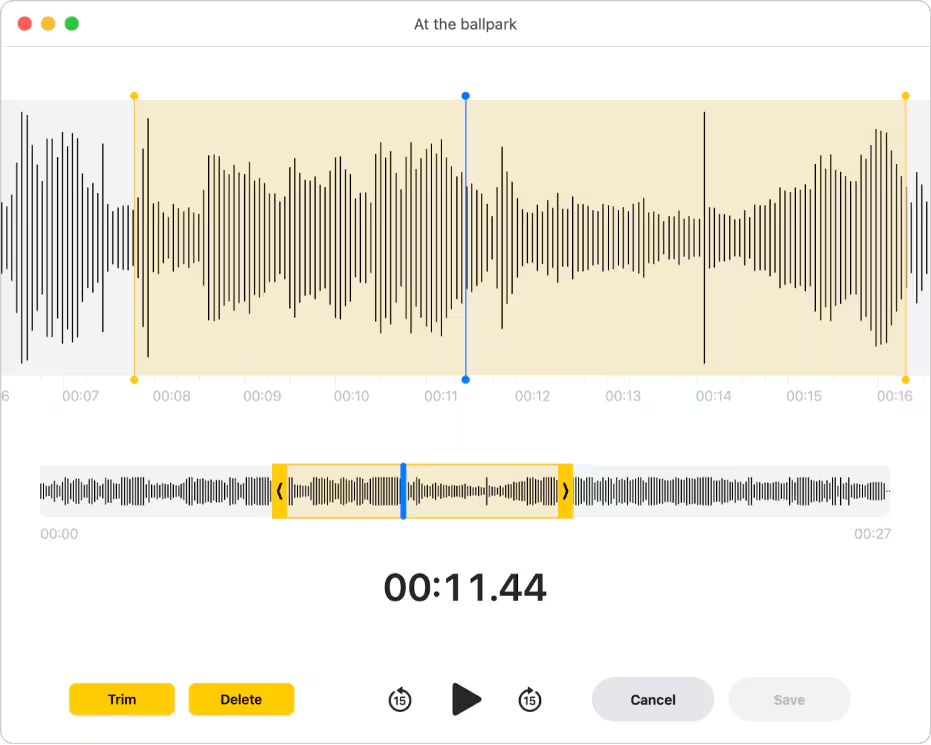
Trimming which lets you cut out unwanted parts from your recording. To use this tool, to edit voice memos on Mac, follow the steps below:
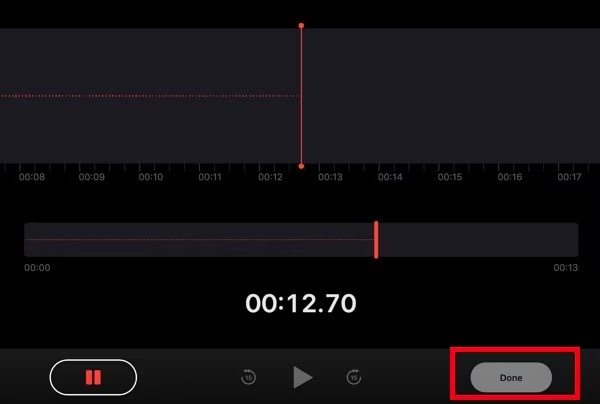
- Find and select the voice memo you want to work on.
- Go to the top right corner of your screen and click on the Edit button.
- Drag the yellow sliders in the trimmer to delete the unwanted portions from your recording.
- Hit the Done button to save your work.
Part 4. Alternative Ways to Record a Voice Memo on Mac
In case you don't want to work with the voice memo app, there are other audio recording options that you can use to capture audio recording. This section will introduce you to some tools and the corresponding guide to follow.
Record Audio on Mac with QuickTime Player
QuickTime Player is another built-in tool that supports audio recording on Mac. Though the interface is outdated, this tool can capture your voice and any sound within your surroundings.
To use QuickTime Player for your voice memo recording, implement the stepwise guide below:
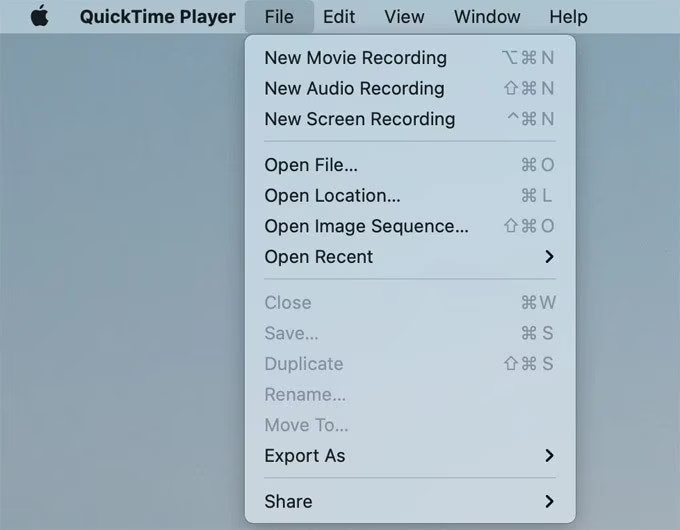
- Open QuickTime Player on your Mac.
- Navigate to the top, click on the File option and select New Audio Recording from the drop-down menu.
- If you want to adjust recording settings before commencing audio recording, click on the Options icon (the drop-down icon beside the record button) and then make the necessary adjustments.

- Next, click on the Record icon to start audio recording.
- Complete your recording and hit the Stop icon to end audio recording.
- Now go to File and select Save to choose where you want to store your recorded file.
Record Voice on Mac Using GarageBand
GarageBand is another good open source audio recording app established by Apple for their devices, including macOS and iOS. Besides recording, this app supports other advanced functionalities such as sound effects, filters, and more, that you can use to pump your recordings when editing them.
Unlike QuickTime Player and voice memo app, GarageBand supports multi-track editing, which means you can record multiple tracks at the same time and edit directly from the same app. To record voice memo with GarageBand, follow these steps:
- Run the GarageBand program on your Mac.
- Click on New Project > Empty Project on the subsequent interface that appears.
- Select the output and input devices that you want to use to capture audio on GarageBand.
- Next, configure the vocal channel and activate recording so GarageBand can capture your audio is the best quality.
- Hold down R or hit the Record button to start recording audio.
- Wait for the recording to complete then click on the appropriate button to end the operation.
Use Online Tools
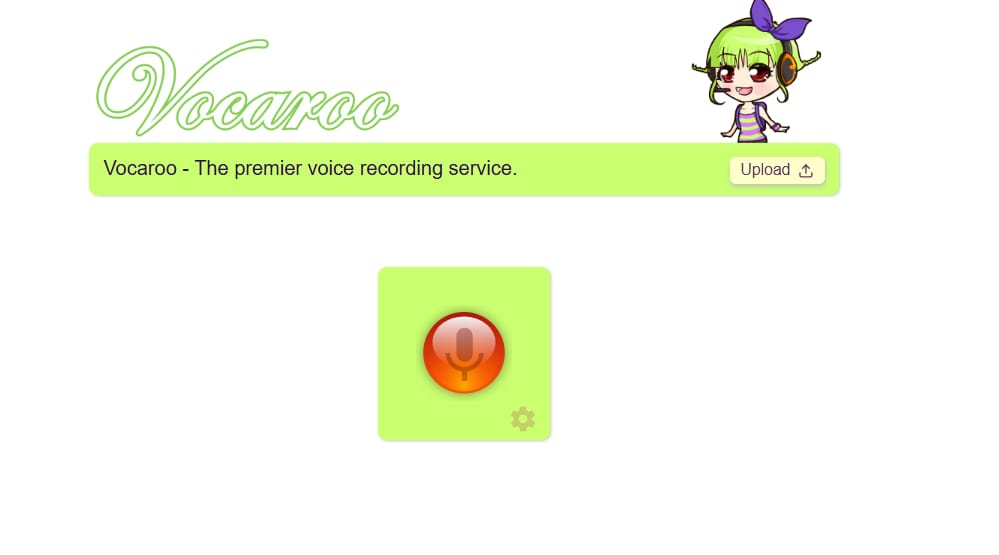
Online voice recording tools like Vocaroo is one of the numerous options available for capturing voice memos if you don't want to install a third-party tool on your Mac. This program runs directly in your browser and it's free to use. With this tool, you can record, edit and download voice memos to your local storage without stress.
Apply the stepwise guide below to record voice memo on Mac using Vocaroo:
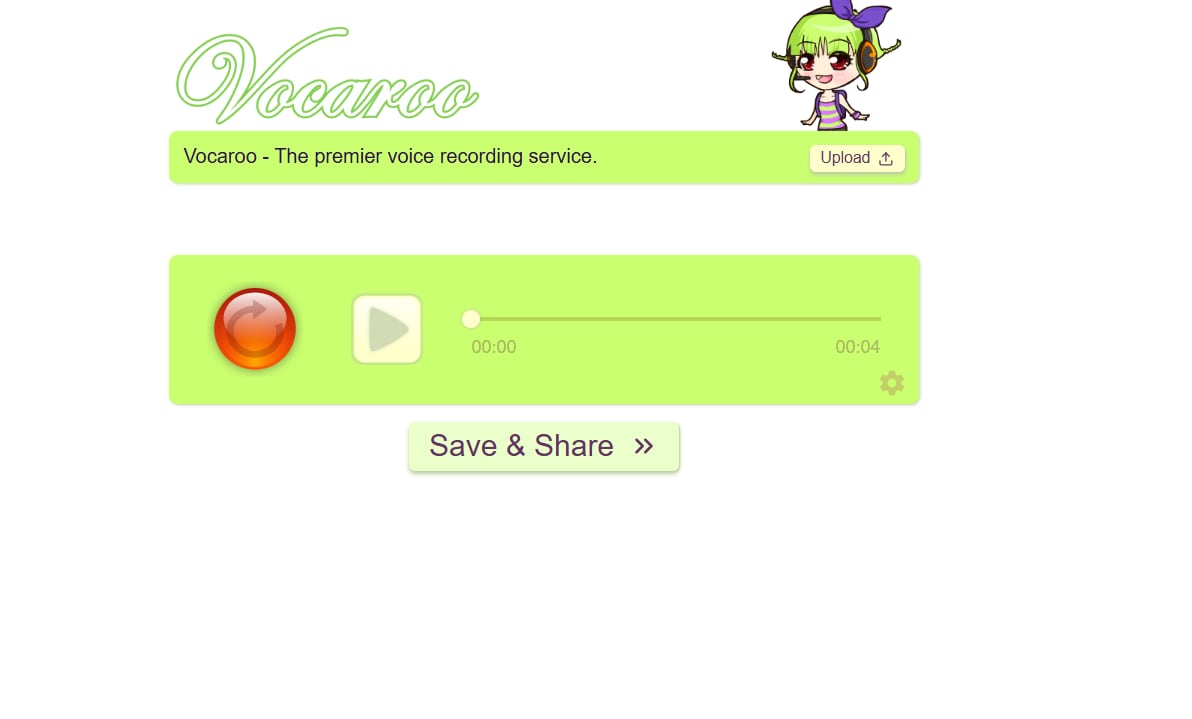
- Go to the official website for Vocaroo on your Mac.
- Click on the red Record icon to commence audio recording.
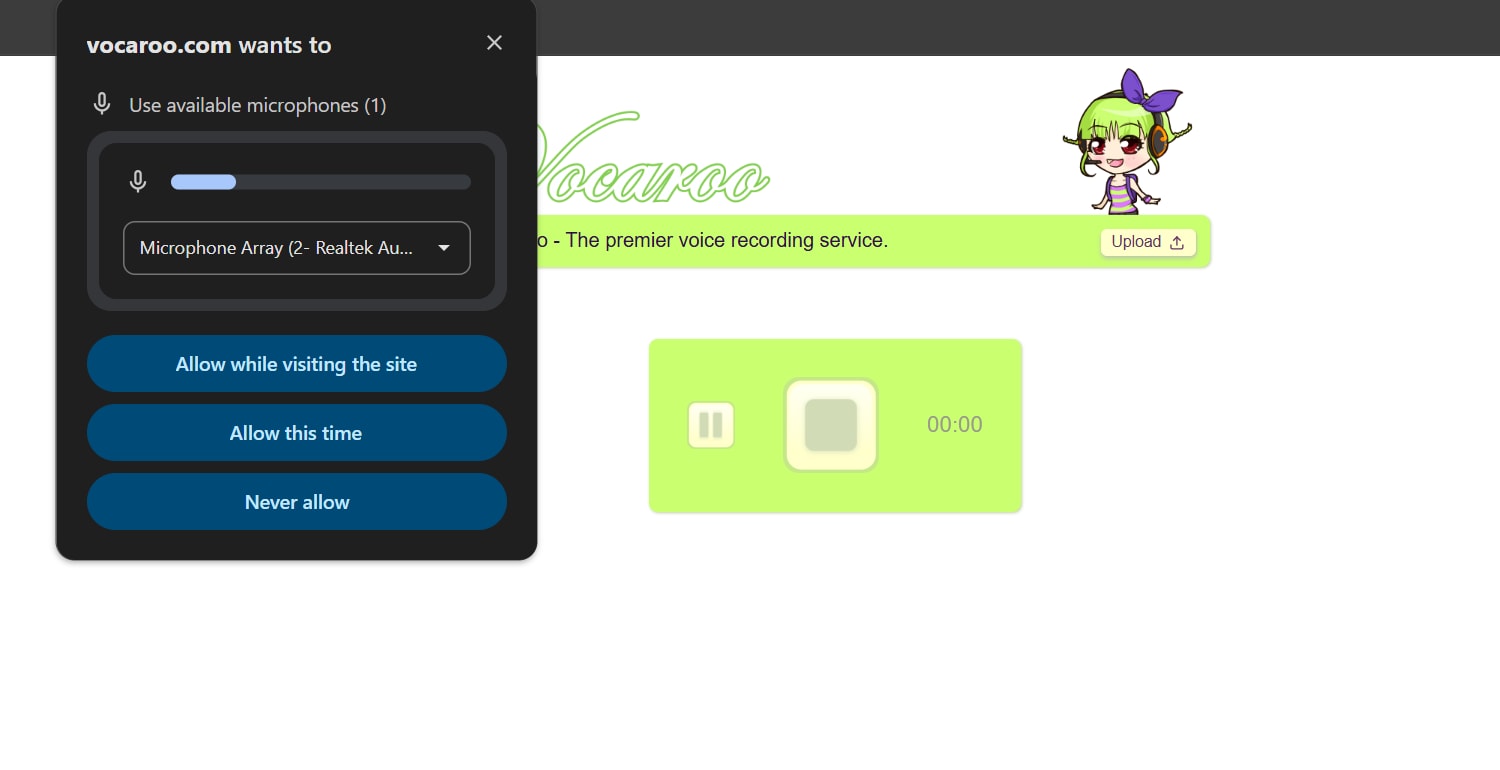
- If it's your first time using the program, you have to grant permission to use your microphone. Do that and start capturing your audio.
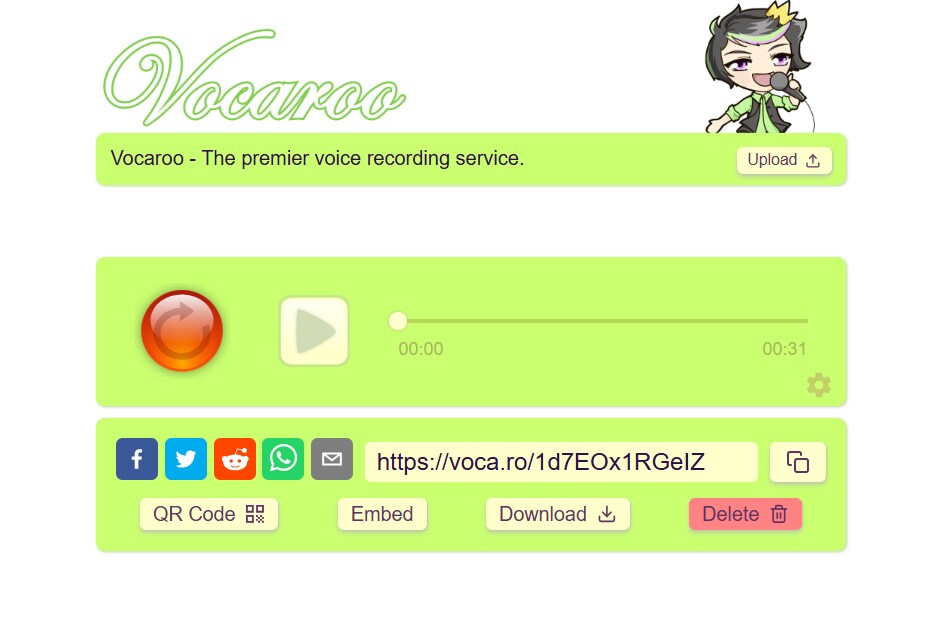
- Click on the Stop icon to end recording.
- Now, hit the Save & Share icon.
- Click on Download to save the recorded voice memo to your local storage.
Part 5. Best Way to Record Voice Memo on Mac [No Time Limit]
Designed with a friendly interface, Wondershare Uniconverter is the best alternative to voice memo app if you want to capture audio on Mac with control over the output formats and storage location. This software lets you record audio in popular formats like MP3, WAV, AAC and more using the screen recording function. It can capture both microphone and system audio in high quality within a few clicks. You can also use it for your video recording to capture lecture notes, video games and presentations.
When using this software, you don't have to worry about time limits. It records your audio for as long as you want and saves directly to your local storage in any name that you want. Asides recording stereo audio recording, Wondershare Uniconverter can also serve as a media converter and editing tool for you to convert between media formats and also manipulate media files to fit your project requirements.
Key Features
- 1-click to record your screen, audio and webcam simultaneously in 4K quality.
- Saves to local storage in MP3, WAV, M4A, OGG, and more.
- Powers incredible editing functions such as trimming, subtitle addition, vocal enhancement, fade in and fade out and many others.
- Supports real-time annotation tools, such as texts, shapes, and colors for you to pimp your recordings.
- Use the AI noise reduction function to eliminate background noise from audio recording.
Steps to Record Voice Memo on Mac Using Wondershare Uniconverter
Firstly, install the Wondershare Uniconverter software on your Mac, then follow the step-by-step guide below to record a voice memo on Mac without hassles:
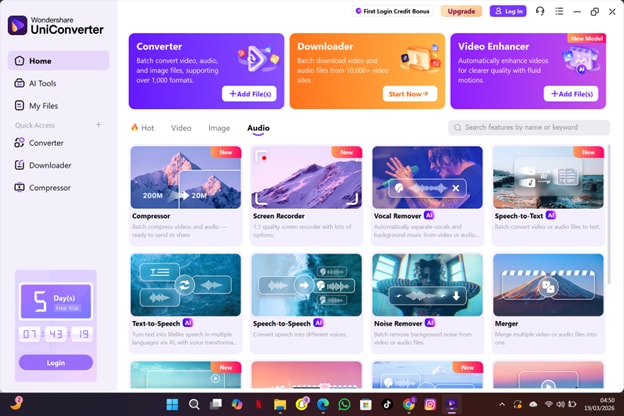
Step 1: Open Wondershare Uniconverter and Access Screen Recorder
Run the software after the successful installation on your Mac. The following interface will come up. Click on the Audio tab and select Screen Recorder from the functions displayed.
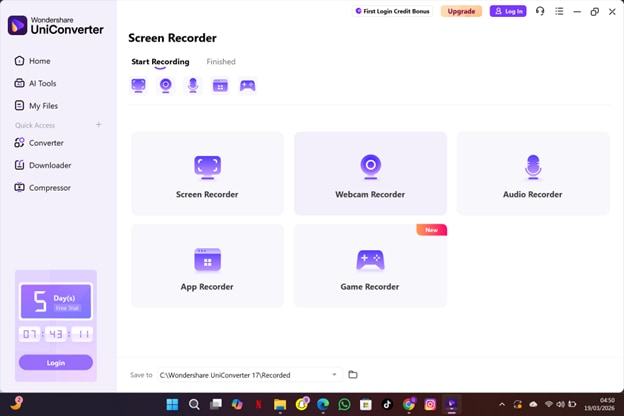
Step 2: Choose Audio Recorder
Next, select the Recorder when the recording window pops up. Better yet, you can hit the Audio Recorder function to get a similar result.
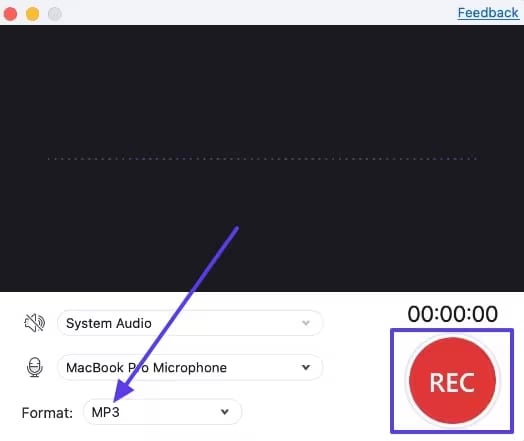
Step 3: Commence and End Audio Recording
Click on REC to start voice memo recording on your Mac. Wait till it's over and hit the Stop button to end audio recording.
Step 4: Choose Format Destination to Export Recording
After recording your voice memo, select the format to export the corresponding file. Afterward, navigate to the bottom of the screen and click on the drop-down menu next to Save to tab to choose where you want your recordings to be saved.

Voice Memo Recorder for Mac — Capture Ideas Anytime
Conclusion
Even though Mac comes with a built-in voice memo app, you are limited to basic recording functions like the start and stop audio recording which makes your operation subpar. Employing the services of other recording tools isn't a bad idea, however, we suggest you use the Wondershare Uniconverter. This multi-purpose software helps you record voice memo on mac, rename it, edit and save in your desired format within a few clicks. It's not limited to Mac only as it also integrates with Windows.
FAQs
-
1. Where can I find recorded voice memos on Mac?
If you recorded audio using a voice memo app on your Mac, finding the corresponding file isn't a tough thing. However, the designated location isn't always obvious. To discover where your voice memo recording is, you can check the voice memo app or Finder. You can also search voice memo using spotlight search by holding down Command + Space and then enter the name of the recording in the search field. -
2. How long can I record a voice memo on Mac?
Depending on the program you are using, there is no stipulated time limit for capturing voice memos on Mac. If you use the built-in voice memo app, you can record for as long as possible so long as you have enough storage space and battery life on your Mac. -
3. Can I convert voice memo to MP3 on Mac?
Yes, you can convert voice memo to MP3 on your Mac even though the voice memo app stores recordings only in M4A format. To convert voice memo recordings to MP3, it's best you use audio converting tools like Wondershare Uniconverter. The software allows you to convert audio files to several formats including MP3 without compromising the quality. -
4. Can voice memos sync between Mac and iPhone?
Yes, voice memos can sync between Mac and iPhone so far you are using the same iCloud details on both devices.

