TV Recording Tips
- TRY FREE TRY FREE
- 1. DVR for TV Recording+
-
- 1.1 How to Choose the Best Digital Video Recorders for TV in 2026
- 1.2 4 Ways You Shoud Know for TV Recording in 2026
- 1.3 Top 6 DVR Recorders for TV in 2026
- 1.4 5 Methods to Record TV Shows without DVR in 2026
- 1.5 Top 5 PVR Recorder for Live TV Shows in 2026
- 1.6 All Ways to Record TV Shows on Fire TV Stick in 2026
- 1.7 All Things to Know About TV Shows Recording on Philo TV in 2026
- 1.8 Easy Ways to Record Programs on Roku in 2026
- 1.9 Best TV Recording Box: the 9 Best Ways to Enjoy TV Shows
- 1.10 What are the Best TV Recording Devices in 2026
- 1.11 The Most Efficient Steps to Record TV Videos in 2026
- 1.12 How to Record TV Programs On An External Hard Drive in 2026
- 1.13 How to Record TV Shows on DVD Recorder Easily in 2026
- 1.14 How to Record Shows from Samsung Smart TV via USB by Simple Steps in 2026
- 1.15 Deserved to Have Top 12 Freeview TV Recorders in 2026
- 1.16 How to Use Tablo TV Kill Time During Self-Quarantine Period in 2026
- 1.17 How to Edit TV Shows Recorded from Xfinity in 2026
- 2. Record Cable TV+
- 3. Record Live TV+
-
- 3.1 6 Popular HD TV Recorders in 2026
- 3.2 Top 5 Live TV Recorders on PC in 2026
- 3.3 How to Record Online TV Shows Easily for 2026
- 3.4 Easy Steps to Record Live TV Shows in 2026
- 3.5 How to Record Shows from Streaming Services in 2026
- 3.6 Simple Methods to Record TV Shows on OTA Streaming Devices in 2026
- 4. Record Screen+
- 5. Other Tips for TV Recording+
How to Record TV Shows with USB Stick in 2026
by Christine Smith • 2026-01-21 18:55:40 • Proven solutions
Traditionally, people used to purchase a VCR or video cassette to record TV programs. This trend lasted for many years, but the invention of the USB stick changed everything. You don’t need VCR or DVR to record TV shows anymore. USB for recording TV programs works with the help of an external USB drive. You can use it to record your favorite TV shows - all you have to check if your TV is compatible to recording or not. Nowadays, almost every TV model is equipped with a USB to record TV programs. You can view shows without any loss in quality while recording. This article has introduced some steps of recording TV shows to USB sticks using tools like Wondershare Uniconverter. Additionally, we have also shared the best USB sticks for recording TV.
- Part 1. How Does USB Stick Work on Recording TV Shows
- Part 2. Best Alternative to USB Stick on Recording TV Show
Part 1: How Does USB Stick Work on Recording TV Shows
USB sticks have gained popularity among a wide range of people. Almost every person uses it today to store data. It is used for storing a variety of information and files. Do not confuse Pen Drive and or USB drive. Both are USB flash drives for storage. A USB stick is an electronic device meant for transferring files, backing up, and many other purposes. It uses flash memory for storing everything. It also works for recording TV via a USB stick.
There are numerous USB sticks, but we only communicated about the best USB memory stick for recording TV. However, you know that the best USB stick for recording TV should have a minimum of 128 GB size with USB 3.0. Assuming you want to record a high-definition TV show, a 128 GB USB stick is the best USB memory stick for recording TV. The top three best USB memory sticks for recording TV are:
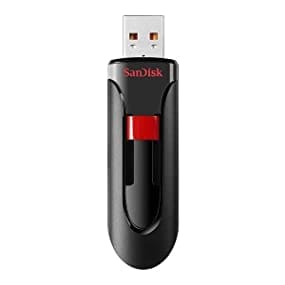
1) SanDisk Flash Cruzer Glide USB Driver
SanDisk is one of the leading brands accessible in manufacturing quality USB memory sticks. It offers capacities ranging from 8GB to 256GB, which can store all your TV in HD format. Moreover, the retractable design makes it more efficient and safe to use as you can withdraw the connector while not using it.

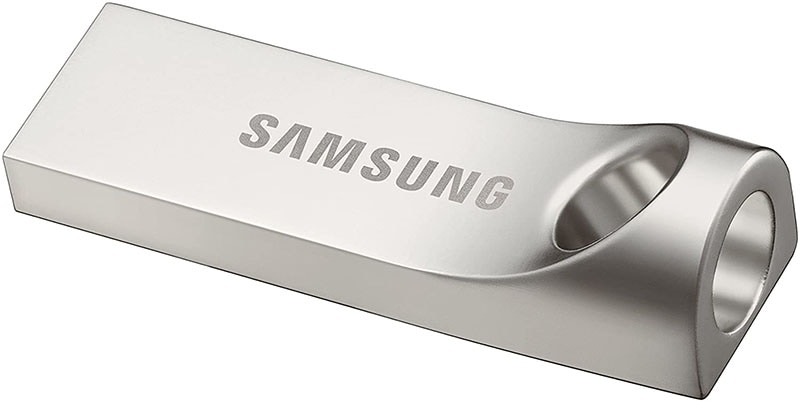
2) Samsung USB 3.0 Flash Drive
Samsung has always been on the top list for its amazing performance in the electronic field. And another top-notch USB stick you can find is Samsung USB 3.0. It claims to be waterproof, shockproof, magnet proof. You get a 5-year warranty with this.

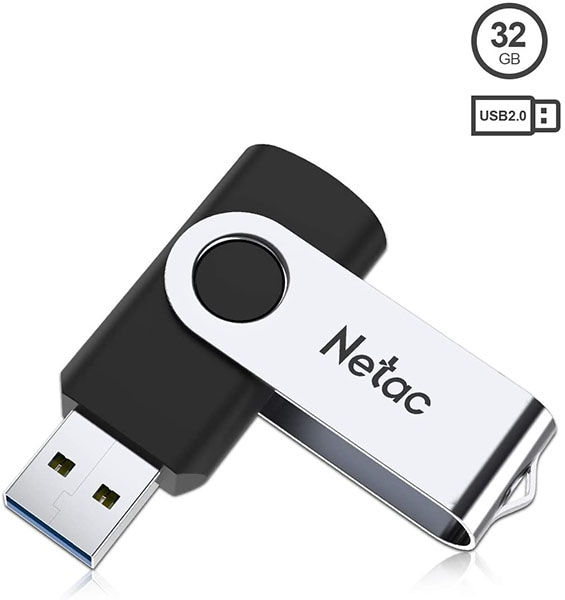
3) Netac 32G USB 2.0 Flash Drive
Yet another USB stick to record TV is Netac Flash Drive. It has a unique design, a metal clip that can rotate 360 degrees, and a small ring attached to the key chains so that you can easily take it anywhere with you.

If your TV comes with a USB stick port, plug a USB memory stick for recording the TV via USB. For detailed steps, read the following points.
Step 1: Connect USB HDD
Get a USB HDD and connect it to a free USB port located on the TV's back.
Step 2: Format the USS HDD
Format it to remove all the data and start using a USB stick to record the TV. Some models identify the USB HDD automatically and tell you to format it. However, there are models in which you have to go to the menu and choose Format HDD.
The format is performed in the proprietary format. It attaches to the TV, and you won’t record any TV programs on a TV. Therefore, disconnect it to view the program on another TV. The maximum number of USB HDDs allowed by a TV is 8
Step 3: Start recording
Start the recording of a TV program by using the remote control. Press the recording button and schedule it for daily records with the timer function. This process fits most televisions. The detailed process is given in a TV user manual.
Part 2: Best Alternative to USB Stick for Recording TV Shows
Wondershare UniConverter is the best alternative for recording TV shows on a USB stick. This computer software allows users to record all desktop activities such as video games, movies, sounds, software tutorials, etc. It’s simple to use and lets you add voice narrations via the system microphone or an external microphone and a Picture in Picture (PIP) effect utilizing a webcam. Interestingly, this app supports adding multiple annotations like lines, drawings, shapes, and texts. Plus, you can customize the output frame rate, quality, and format.
Wondershare UniConverter – Best Desktop Screen Recorder
 Wondershare UniConverter - Best Video Converter for Mac/Windows

- Record all desktop activities such as playing video games, making VoIP calls, watching movies, and so on.
- Capture the desktop screen in full-screen or custom mode.
- Add voice narrations and the PIP effects using an internal or external microphone and webcam.
- Apply special characters like text, shapes, lines, and drawings to desktop recordings.
- Preset the recording duration, frame rate, format, and quality before capturing the desktop screen.
- Edit the recorded video by compressing, cropping, converting, adding video effects, applying captions, etc.
- Best screen recorder for Mac OS X 10.9+ (Catalina included) & Windows 10/8/7.
Below are the steps to record a desktop screen on Win/Mac using Wondershare UniConverter:
Step 1Launch the Screen Recorder.
Install and run Wondershare UniConverter, then press the Screen Recorder tab. After that, press the Camcorder button to launch the screen recorder tool.
![]()
Step 2Select an area to capture.
Next, launch the app or video you wish to record, then drag the cropper to choose an area to capture. You can grab the whole screen if you want. Wondershare Screen Recorder also lets you enter custom frame height and width and lock the aspect ratio to make the video output look more professional.
![]()
Step 3Enter the recording preferences.
Now it’s time to choose a microphone and webcam that you’ll use to add a voiceover and PIP effect. To do that, open the Microphone and Webcam menu lists and select a device. Note, however, that this is optional. Don’t forget to choose an output device under the System Audio section. This way, you can record all computer sounds.
![]()
Proceed to click the Settings icon and set the target format as MP4, AVI, or FLV. You can also set a frame rate, quality, destination path, and recording timer. Under the destination folder, choose your connected USB stick as the saving path.
![]()
Step 4Start recording your desktop screen.
Last but not least, press the REC button to start capturing the video on a USB stick. Now open the taskbar and click the Annotation button to add lines, texts, symbols, and drawings. Click Stop to finish recording the video. Remember to use the Video Editor tool to edit the footage where necessary.
![]()
Conclusion
We understand that it’s not possible to remain stuck to your TV to watch your favorite TV shows at a particular time. If you are missing daily TV shows, then the best option is to record and save them. Wondershare UniConverter eases the recording of TV via USB. It would be a much more excellent option than the previous one. Run your PC or laptop, connect the USB memory stick and then launch the UniConverter when your show begins.


Christine Smith
chief Editor