TV Recording Tips
- TRY FREE TRY FREE
- 1. DVR for TV Recording+
-
- 1.1 How to Choose the Best Digital Video Recorders for TV in 2026
- 1.2 4 Ways You Shoud Know for TV Recording in 2026
- 1.3 Top 6 DVR Recorders for TV in 2026
- 1.4 5 Methods to Record TV Shows without DVR in 2026
- 1.5 Top 5 PVR Recorder for Live TV Shows in 2026
- 1.6 All Ways to Record TV Shows on Fire TV Stick in 2026
- 1.7 All Things to Know About TV Shows Recording on Philo TV in 2026
- 1.8 Easy Ways to Record Programs on Roku in 2026
- 1.9 Best TV Recording Box: the 9 Best Ways to Enjoy TV Shows
- 1.10 What are the Best TV Recording Devices in 2026
- 1.11 The Most Efficient Steps to Record TV Videos in 2026
- 1.12 How to Record TV Programs On An External Hard Drive in 2026
- 1.13 How to Record TV Shows on DVD Recorder Easily in 2026
- 1.14 How to Record Shows from Samsung Smart TV via USB by Simple Steps in 2026
- 1.15 Deserved to Have Top 12 Freeview TV Recorders in 2026
- 1.16 How to Use Tablo TV Kill Time During Self-Quarantine Period in 2026
- 1.17 How to Edit TV Shows Recorded from Xfinity in 2026
- 2. Record Cable TV+
- 3. Record Live TV+
-
- 3.1 6 Popular HD TV Recorders in 2026
- 3.2 Top 5 Live TV Recorders on PC in 2026
- 3.3 How to Record Online TV Shows Easily for 2026
- 3.4 Easy Steps to Record Live TV Shows in 2026
- 3.5 How to Record Shows from Streaming Services in 2026
- 3.6 Simple Methods to Record TV Shows on OTA Streaming Devices in 2026
- 4. Record Screen+
- 5. Other Tips for TV Recording+
How to Record Shows from Streaming Services in 2026
by Christine Smith • 2026-01-21 18:55:43 • Proven solutions
We are living in an era where streaming services are kind of a blessing, and we can consider them coming to our rescue, especially when we are quarantined these days. Where these days are hard, these services can make them bearable by providing content that can engage us the whole day.
However, there comes a time when recording from streaming services becomes a topic to be considered. If you want to know how to record streaming shows, this article is just for you. Here we are going to talk about streaming recording devices and a lot more. Explore this article to know what you have always wanted. We hope you will get the information that can interest you.
- Part 1. DVR for Live TV Streaming
- Part 2. How to Record from Streaming with DVR
- Part 3. Simple Way to Record the Live Streaming Video
Part 1. DVR for Live TV Streaming
DVR are the devices that allow you to record your TV shows and movies that will be aired on cable networks. Here are some of the selected DVRs that may be suitable for you for TV streaming.
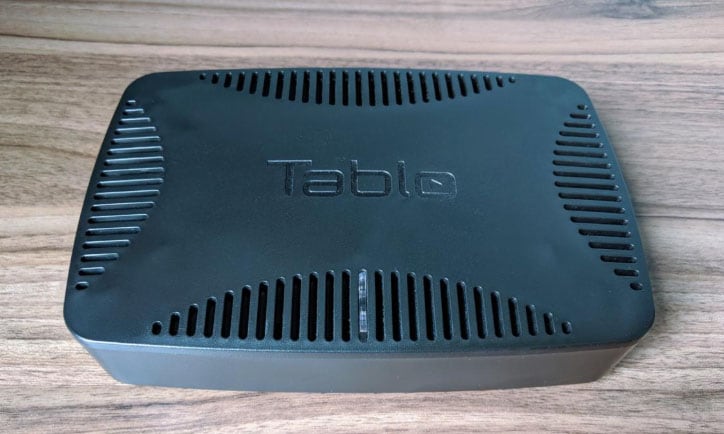
Tablo Quad DVR
Get this DVR box, and you will stream your videos at a pretty good speed. This DVR box is from Ottawa-based Nuvyyo, and this device can turn a single antenna into a complete home DVR. This device is capable of playing and recording four broadcasting TV channels at a time. It will work perfectly fine either you connect this device with a PC, TV device, phone, or with your tablet.

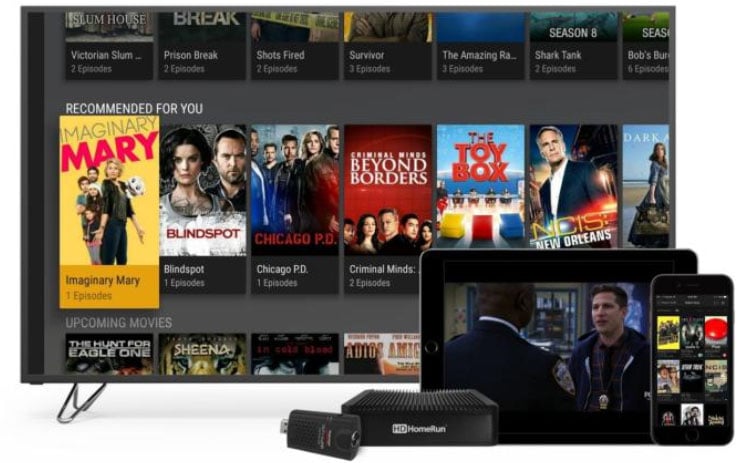
Plex DVR
If you search for the easiest way and want to know how to record streaming shows, probably plex is the best option available for you. It is a streaming recording device, well if we see from the recording live broadcasts TV, it is not so easy because of assembling so many accessories, but yeah! This device is one of the most versatile devices among all.

Part 2. How to Record from Streaming with DVR
To learn how to record streaming shows, we will take an example of Hulu’s Cloud DVR service. With its help, you can stream your favorite live TV show aired and broadcasted on a wide range of cable networks. There is no need to sit the whole day in front of your TV when you have Hulu’s Cloud DVR service. It enables you to watch your shows anytime and anywhere at your convenience.
Suppose you are willing to watch any show that will be aired on TV, but the twist is you’ve got an important meeting to attend, frustrating, right? Well, you can relax as Cloud DVR brings you the provision of adding your favorite movies or the going-to-bed entertaining episode/show in the “My Stuff” section. The one that is your favorite and you are not available at the time when the show is going to be broadcasted, you can mark it, and it will get recorded automatically through Hulu. Later, when you are free, you will get those shows on your list and enjoy them whenever you want. Let us learn how you can do that.
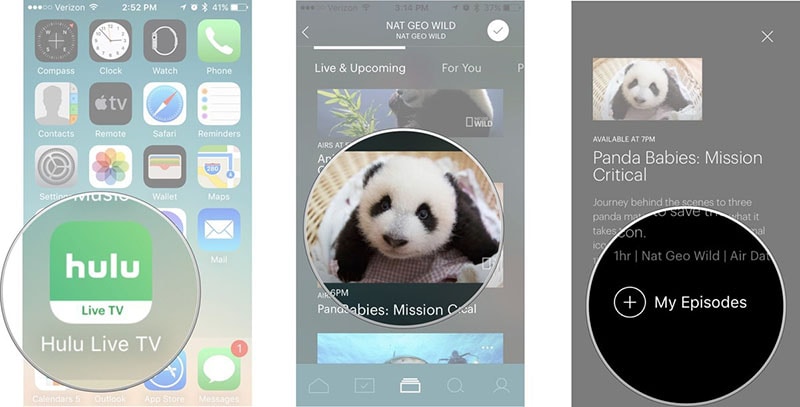
How to record live TV with Cloud DVR in Hulu with Live TV
When you want to know how to record streaming shows, the process is not that difficult as it might seem to you. It just requires you to browse through the content you like (for example, movies and TV series) and add it to the app, and you’re done!
Check out the following steps to accomplish this process:
Step 1: or else if you want to open it from Apple TV, you can open the Hulu app.
Step 2: Now you need to choose the TV show or the movie that is not available on-demand, but it is available through the Live TV; once you’ve done the above process, you need to navigate in the description of your desired movies of a TV show.S
Step 3: After that, hit on the option naming My Stuff.

When you are done with the above process and selected the TV show or movie – now whenever it will be aired on TV, Hulu will record it automatically.
Step 4: To watch the recorded video/show, you can open the app and simply check it from the My Stuff section and watch it.
Part 3. Simplest Way to Record Live Streaming Video
Fortunately, most live streaming services are accessible via computers. Therefore, it’s easier to record live streams on Mac/Win using third-party software like Wondershare UniConverter. With this program, you don’t need any specialized knowledge to record high-quality videos on your computer. It can capture videos in either custom or full-screen modes. After selecting a recording area, users can add video overlays using s webcam, voice narrations using a mic, and annotations like shapes and texts. Most importantly, you can edit the captured TV show by trimming, cropping, applying subtitles, and more.
Wondershare UniConverter – Best Live Streaming Recorder for Mac/Win
 Wondershare UniConverter - Best Video Converter for Mac/Windows

- It can record live streaming services in full-screen or custom mode.
- Record live streaming services with voice narrations and Picture in Picture effects (PIP).
- Apply annotations like colorful texts, fonts, arrows, shapes, and more.
- Preset the output format, frame rate, and video quality before recording.
- Edit the recorded content by trimming, adding watermarks, applying subtitles, cropping, and more.
- Best video recorder and audio capture tool for Mac OS X 10.9+ and Windows 10/8/7.
Below are the steps to record live streaming video on Mac/Win using Wondershare UniConverter:
Step 1 Run the screen recorder function.
Install and run Wondershare UniConverter, then press the Screen Recorder button on the left pane. After that, tap the Screen Recorder icon in the main interface to open the recorder.
![]()
Step 2 Choose an area you wish to record.
Drag the recording cropper inwards or outwards to fit a specific area of the live TV screen you wish to record. Alternatively, choose either Full Screen or Custom under the recording mode drop-down list. Remember to enter the appropriate frame dimensions if you select the Custom mode. Also, click the Lock Aspect Ratio button.
![]()
Step 3 Configure the recording settings.
Before you start recording, you should adjust a few settings first. Firstly, click the System Audio menu and choose a sound output device. Secondly, tap the Microphone menu and select a voice input device. Last but not least, tap the Webcam menu to select a camera that you’ll use to capture a PIP effect.
![]()
In addition to selecting input and output devices, click the Settings menu to set the output file format as AVI, FLV, or MP4. Here, you can also set the frame rate and the output quality. Moreover, users can customize the keyboard shortcuts.
![]()
Step 4 Start capturing your desktop screen.
Click the REC button to start capturing a live streaming service on Mac or Windows. If you want to add shapes, drawings, texts, lines, and arrows as you record, click the Annotation button on the recording taskbar. You can even enable or disable voice narrations, PIP effect, and system audio. If you’re okay with the recorded content, click Stop. Now preview and edit where necessary.
![]()
Conclusion
We brought you the information related to how to record streaming shows that could seem the best to us. We hope you liked this article and know all the good ways you can do the same. Apart from this, you will find that Wondershare UniConverter is the easiest and convenient way if you want to record your favorite streaming TV shows and movies from your PC, no matter Windows or Mac.


Christine Smith
chief Editor