TV Recording Tips
- TRY FREE TRY FREE
- 1. DVR for TV Recording+
-
- 1.1 How to Choose the Best Digital Video Recorders for TV in 2026
- 1.2 4 Ways You Shoud Know for TV Recording in 2026
- 1.3 Top 6 DVR Recorders for TV in 2026
- 1.4 5 Methods to Record TV Shows without DVR in 2026
- 1.5 Top 5 PVR Recorder for Live TV Shows in 2026
- 1.6 All Ways to Record TV Shows on Fire TV Stick in 2026
- 1.7 All Things to Know About TV Shows Recording on Philo TV in 2026
- 1.8 Easy Ways to Record Programs on Roku in 2026
- 1.9 Best TV Recording Box: the 9 Best Ways to Enjoy TV Shows
- 1.10 What are the Best TV Recording Devices in 2026
- 1.11 The Most Efficient Steps to Record TV Videos in 2026
- 1.12 How to Record TV Programs On An External Hard Drive in 2026
- 1.13 How to Record TV Shows on DVD Recorder Easily in 2026
- 1.14 How to Record Shows from Samsung Smart TV via USB by Simple Steps in 2026
- 1.15 Deserved to Have Top 12 Freeview TV Recorders in 2026
- 1.16 How to Use Tablo TV Kill Time During Self-Quarantine Period in 2026
- 1.17 How to Edit TV Shows Recorded from Xfinity in 2026
- 2. Record Cable TV+
- 3. Record Live TV+
- 4. Record Screen+
- 5. Other Tips for TV Recording+
How to Record Cable TV in 2026
by Christine Smith • 2026-06-23 14:39:28 • Proven solutions
In the past, people used to have a digital TV recording device that was able to record your favorite TV shows automatically at a set time easily. These devices are used in nearly every house in the old days, but this has faded over time. Screen recorders now replace DVR recorders for cable TV, and people rarely need to record TV shows as they can easily find it on the Internet. Nowadays, people usually make use of screen recording tools on computers to record movies and TV shows.
- Part 1. How to Record Cable TV with DVR
- Part 2. How to Record Cable TV on Your PC
- Part 3. The Other Alternative to Record TV Shows on PC
Part 1. How to Record Cable TV with DVR
If you have a DVR for cable TV, it can be used to record the TV shows with high-quality sound and graphics. This device looks like a DVD player box and needs to be connected with your television to record. People need to insert cassettes in the machine to record the shows, and some even have internal memory that can be formatted as well. It is easy to use to record TV shows with the system sounds in high quality.
The following are the step of recording cable TV shows with the help of DVR.
Step 1 Connect the wires of the DVR to your television correctly in the proper audio and video sockets. Make sure that you have turned the switch off before connecting the cables to avoid getting electric shocks.
Step 2 Insert the cassettes or connect the hard disk to the DVR and turn it on. Your DVR will then be able to recognize it within a few seconds. Now, turn the TV on and set the TV show that you want to record and turn on the DVR. Your recording will start. Once you are done, press the stop button on DVR.
Part 2. How to Record Cable TV on Your PC
If you have capture cards that can connect your computer and PC, it will be easy to record the screen. It can be the best DVR for cable TV and can be a reliable replacement for DVRs. This tool is free to use the open-source tool with a lot of features related to screening recording and streaming.
It has a very simple and clean user interface due to which it is very easy to operate. The following are the steps to use this tool to record TV shows.
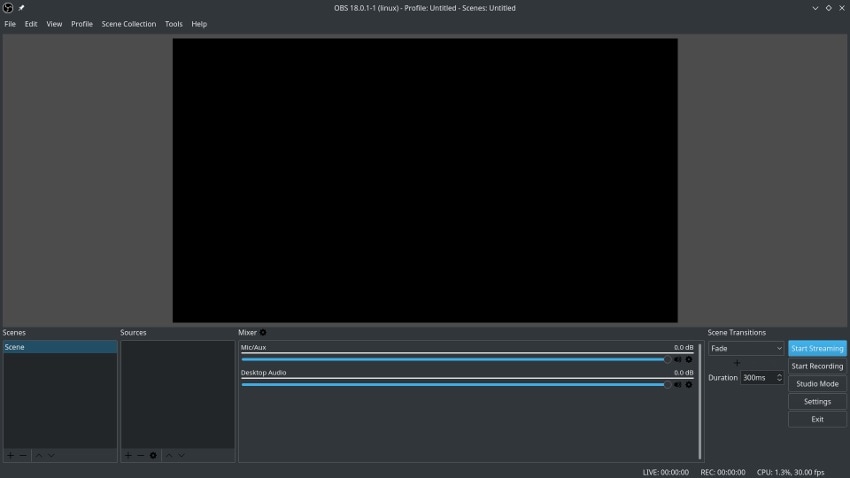
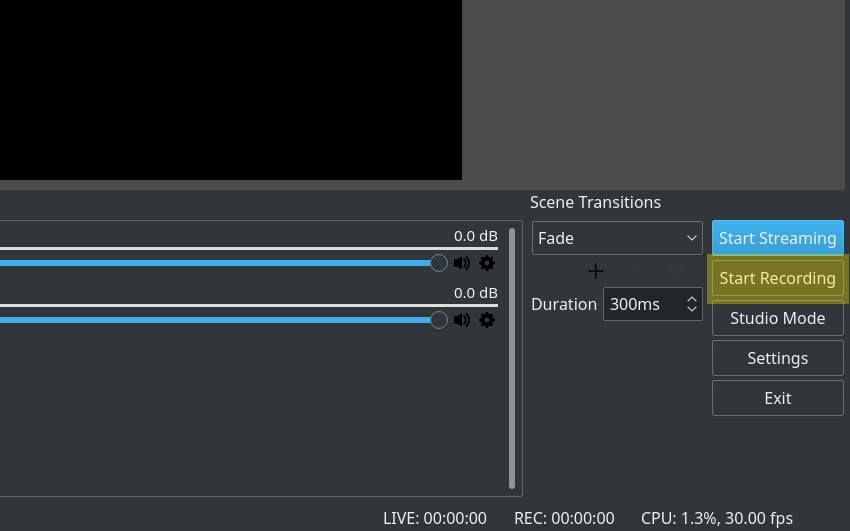
Step 1. Open broadcaster software
Visit the OBS website and download the software on your computer device. After finishing the download, install and launch it on your computer. Click on the start recording option present on the right side of the screen just below the start streaming option.
Step 2. Set everything up
You will have to set up the recorder as your convenience and adjust the various settings related to it. You will have to adjust the scene first, and then you will be able to see that there is already a seen created and present on the screen.
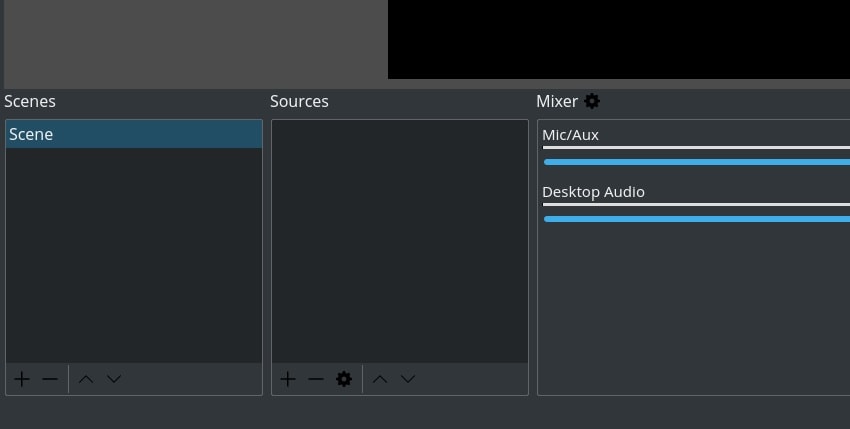
Before you can initiate a recording, you will have to set a source as well. Click on the + option beside the area labeled as sources and select display capture and click on the OK button that pops up.

Now, look at the bottom right side of the screen and click on the setting options.
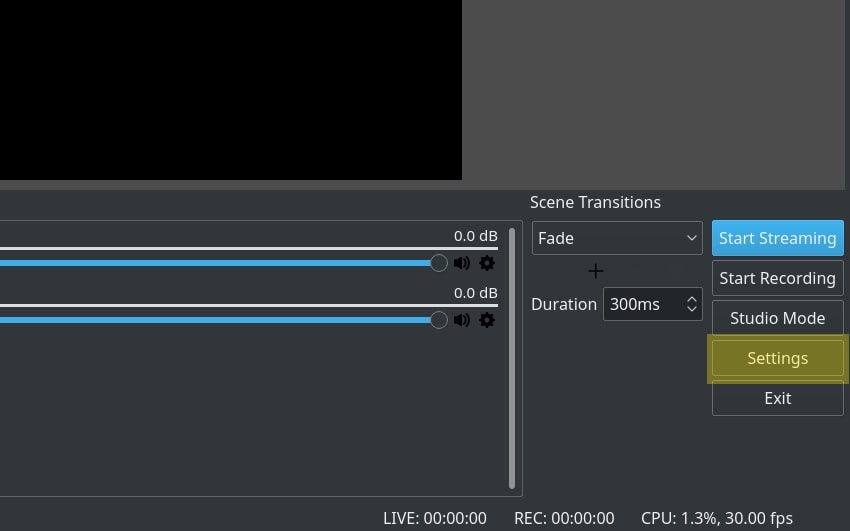
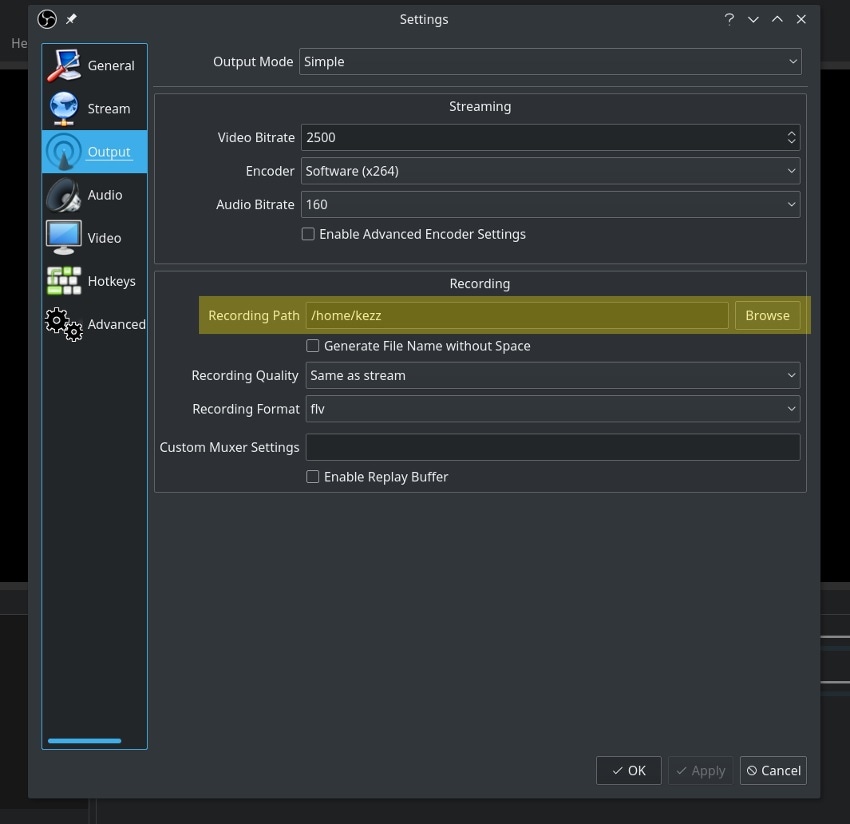
Go to the Output tab and select the recording path field. Set it to the location where you want to save the recorded videos.
Step 3. Initiate the recording process
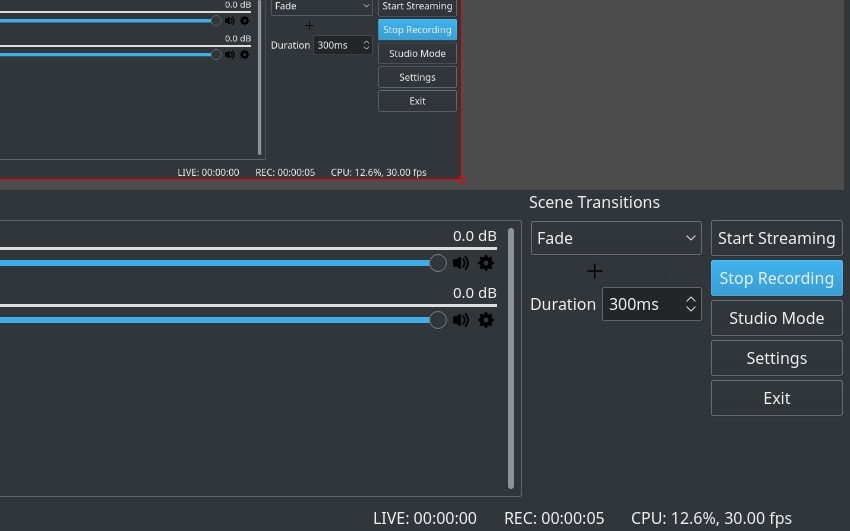
Once everything is done, open the streaming website where your TV show or movie is present and select the video. As soon as it starts playing, pause it and come back to OBS and click on the start recording option on the bottom right side of your screen. Go back to the streaming website, play the movie, and your video will start getting recorded.
After you have recorded the entire duration of the TV show that you needed, come back to OBS and click on the stop recording button. Your recording will then be exported to your hard disk at the location that you provide.
Part 3. The Other Alternative to Record TV Shows on PC
If OBS Studio is too complicated to use, use Wondershare UniConverter, which is more straightforward and effective. With this versatile desktop app, users can record their desktop activities, including TV shows, in full-screen or customized mode. Interestingly, it allows you to add voice narrations using a mic, video overlays with a webcam, and system audio. You can also apply annotations like texts, shapes, drawings, lines, and arrows as you record. And above all, it lets you edit the captured TV shows by cropping, cutting, trimming, adding watermarks, and more.
Wondershare UniConverter – Best Desktop Screen Recorder
 Wondershare UniConverter - Best Video Converter for Mac/Windows

- Record all desktop activities and apps like video games, live TV shows, VoIP apps, and more.
- Record the desktop screen in full-screen or customized mode.
- Apply voice narrations, video overlays, system sound, and annotations as you record a TV show.
- Edit the recorded TV show by trimming, rotating, cropping, adding subtitles, and more.
- Convert the recorded TV show to MP4, VOB, FLV, WMV, AVI, and other video formats.
- Best TV show recorder for OS X 10.9+ (including Catalina) & Win 10/8/7.
Step-by-step procedure to record a live TV show on Mac or Win using Wondershare UniConverter:
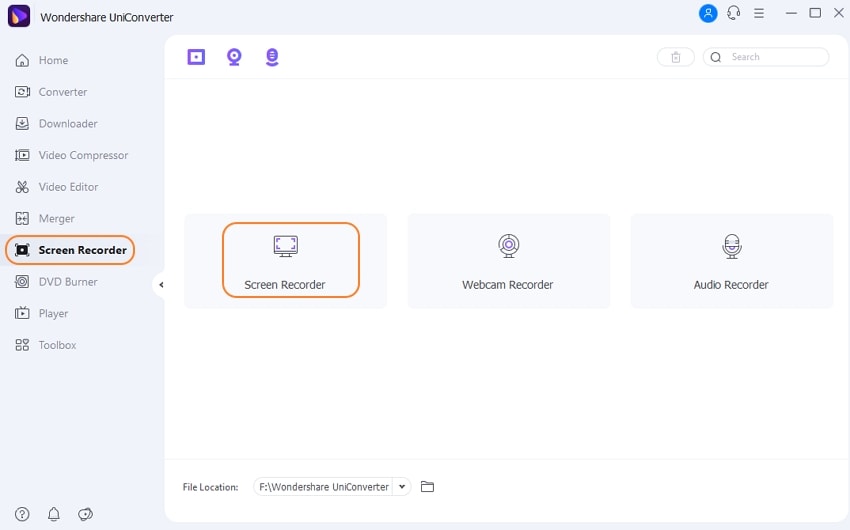
Step 1Launch the Screen Recorder.
Install and launch the app, then click the Screen Recorder tab. After that, hit the Camcorder icon to open the recording function.
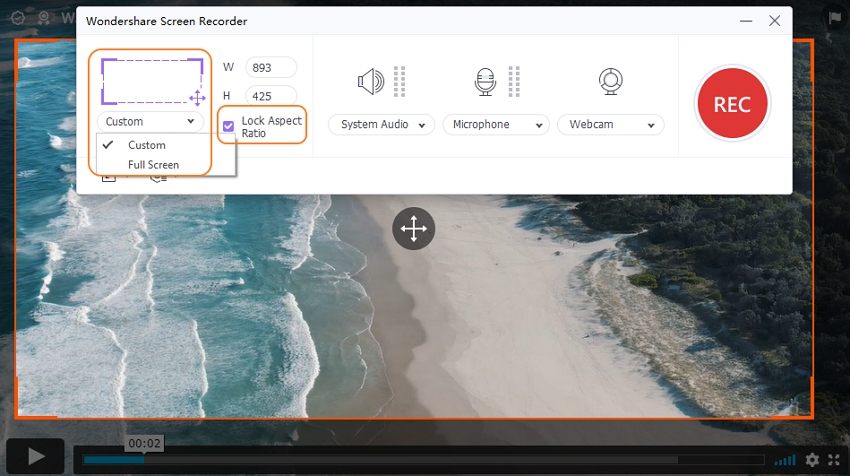
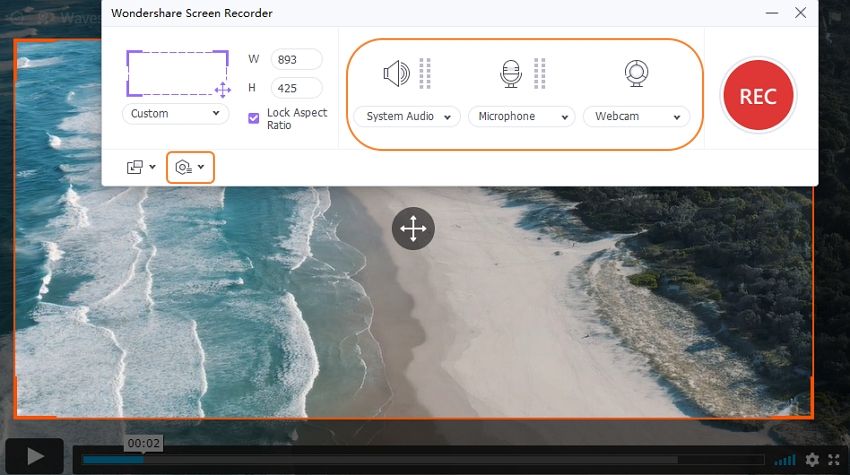
Step 2Set the capture area.
You can set the recording area by dragging the cropper’s edges inwards or outwards. Alternatively, set the capture area as Full Screen or Custom. With the Custom mode, enter the screen dimensions, then click Lock Aspect Ratio.
Step 3Configure your recording preferences.
You’ll see the following options on the Screen Recorder tool:
- System Audio– Open this menu to choose a device for capturing the system sound.
- Microphone– If you want to add voice narrations, choose a device under this menu.
- Webcam– Do you want to add a video overlay or Picture in Picture effect? Choose a camera under Webcam.
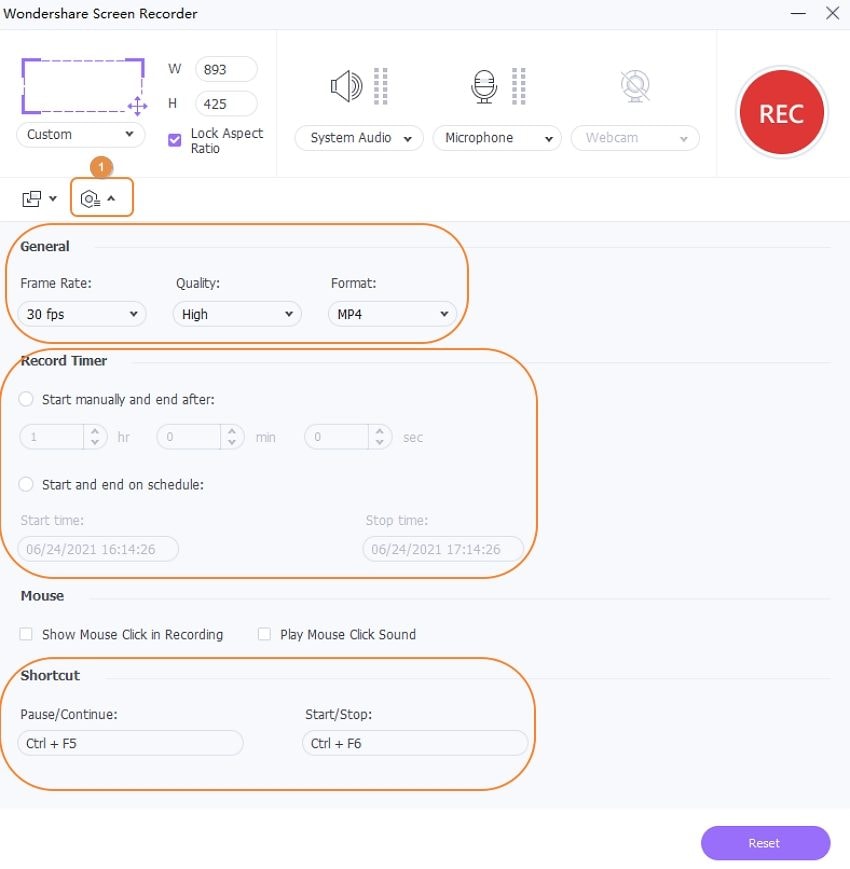
- Settings– Open this drop-down menu to set the output format, frame rate, quality, folder path, recording timer, and keyboard shortcuts.
Step 4Start recording the TV show.
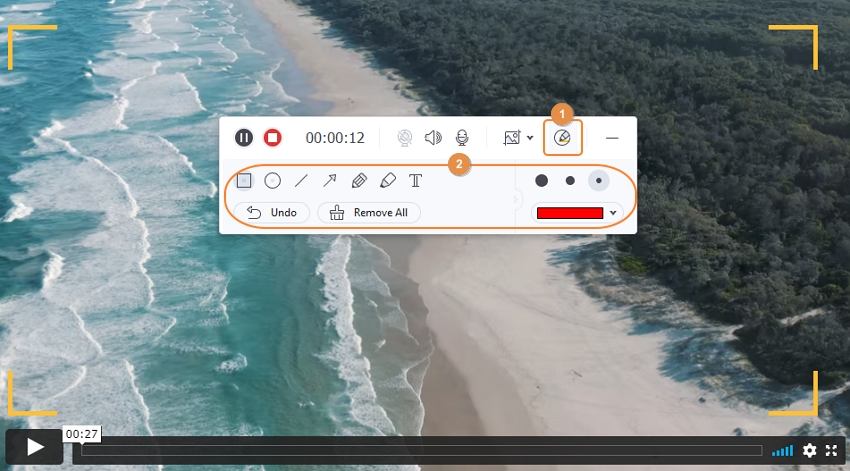
Launch the TV channel, then click the REC button to start recording the desktop activity. Now open the recording taskbar, then click Annotation to add texts, lines, drawings, shapes, and so on. Lastly, press Stop to finish recording the TV channel. It’s that easy!
Conclusion
Before computers and the Internet were popular, people used to record TV shows with the help of digital TV recording device. With advancements in technology, it has become a lot easier for people to record their TV shows with the help of a capture card, a computer, and a screen recording tool. OBS and other third party screen recorders are commonly used. One of the best tools for recording TV shows is surely Wondershare UniConverter. It is a versatile and powerful, free-to-use software used by a lot of users for conversions, screen recording, video editing, and more.
- How to Record Videos on Mac with Helpful Ways
- 15 Websites to Download Web Series & TV Shows (Free Options)
- How to Record Online TV Shows Easily for 2026
- How to Record Cable TV in 2026
- All Ways to Record TV Shows on Fire TV Stick in 2026
- Easy Ways to Record TV Shows to a Computer in 2026
- Simple Steps to Capture Video on Win/Mac in 2026


Christine Smith
chief Editor