Known to be one of the biggest multimedia messaging apps, Snapchat allows users to share customized pictures and videos using its fun interface and powerful editing tools. The pictures or videos are called Snaps - typically, users need to take or record them at the exact moment using the built-in camera. Thus, they are called live snaps. This gives the feeling of authenticity and is one of the app's main selling points.
However, there may be times for people to wonder about how to send video/photo from camera roll as a snap. Maybe it was recorded 15 minutes ago or a year ago and you want to share the memory with a friend as a regular snap. In that case, here we list some easy tips on how to send snaps from camera roll as normal snaps.
Part 1: How to send pictures from the camera roll as a snap
There are several ways to send snaps from the camera roll and both involve Snapchat's own built-in features. The first uses the stickers feature while the second uses the lenses or filter feature. Both methods are relatively easy and we have prepared a simple guide to help you navigate each one so you can find the best method for you.
(1) How to send a photo as a snap using the sticker feature
One method to send a photo as a snap from your camera roll is by using the sticker feature. This method is simple.
You can start by tapping on the "Memories" icon on the Snapchat app - this looks like two overlapping rectangles next to the "Capture" button.
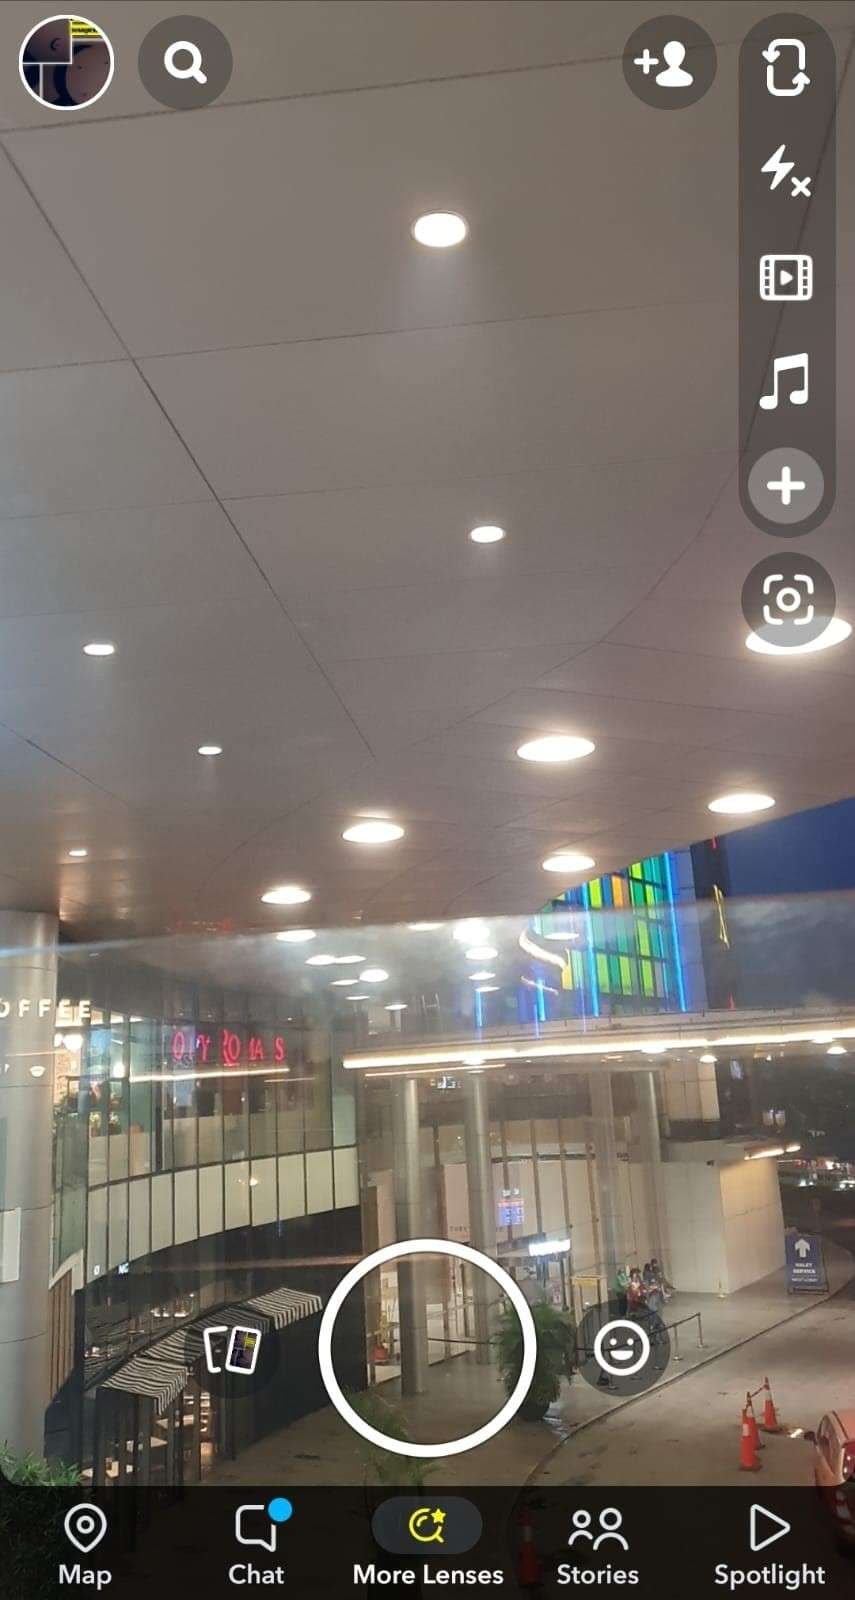
Go to your camera roll and choose the photo you want to post. Once the photo loads, tap on the pencil icon in the bottom left of the screen to edit it with the "Cutout" tool. This tool can be accessed by tapping the scissor icon.
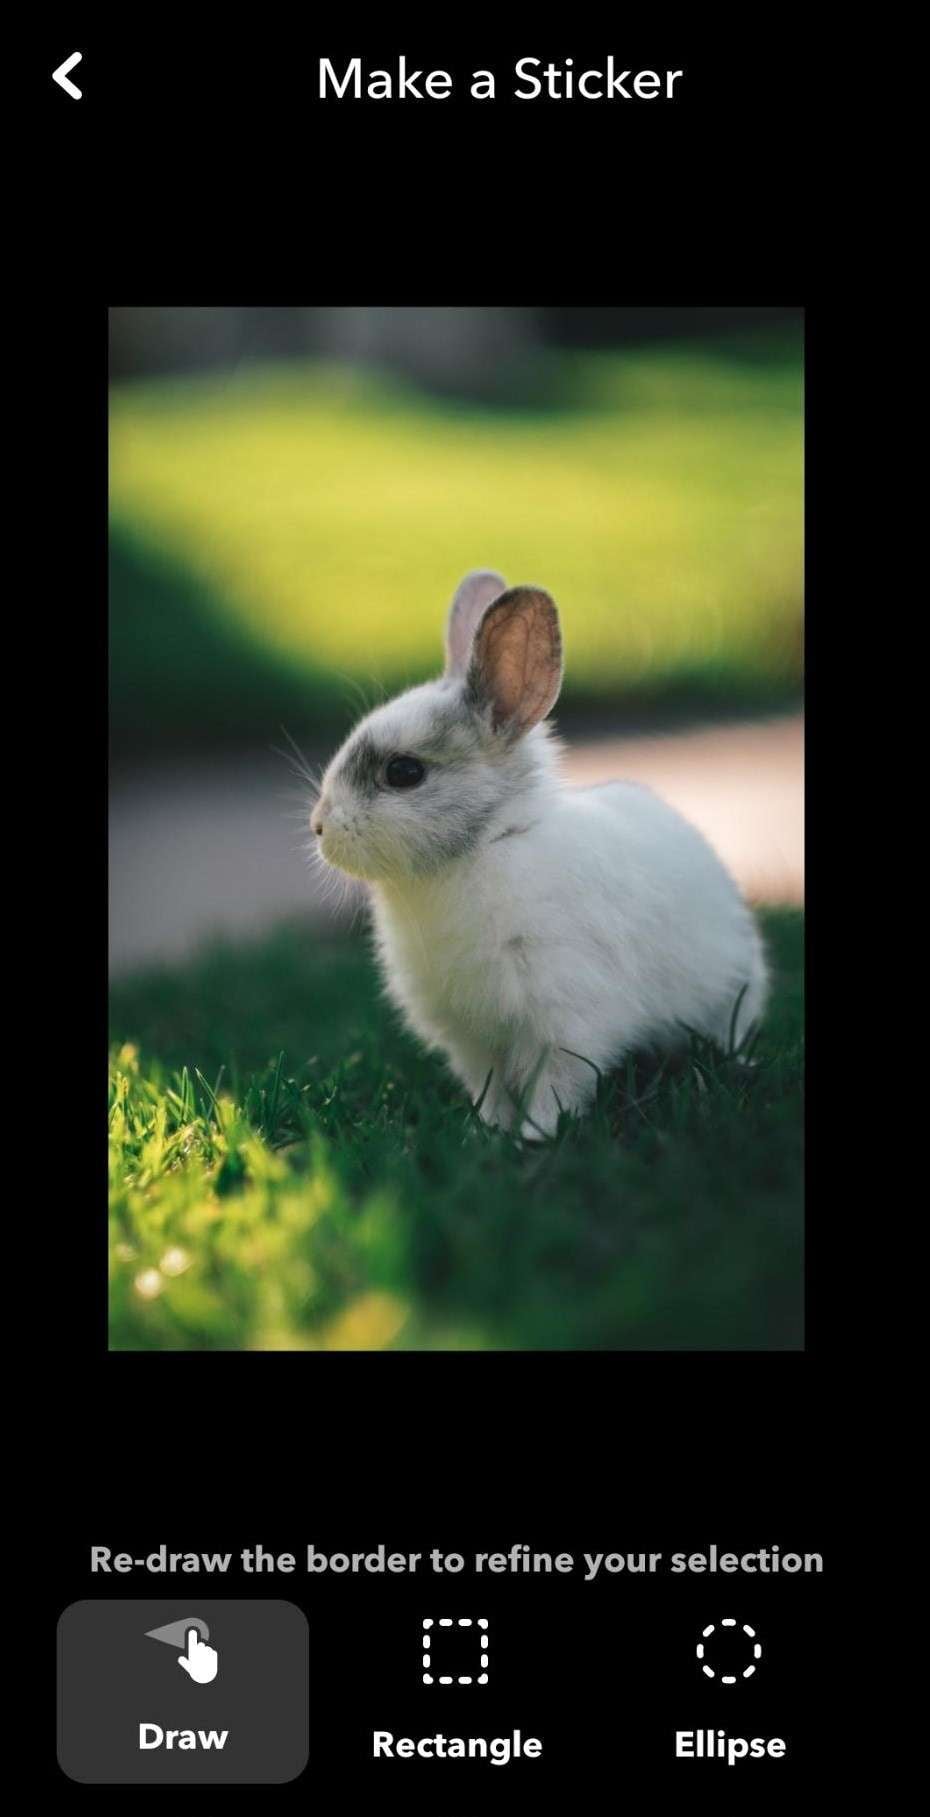
Trace around the part of the image you want to snap. Once you finish tracing, the picture will be saved to your sticker library automatically.

Now, you will need to go to the app's main screen where you can take a live picture with your phone camera. Tap the stickers icon that looks like a folded piece of paper to insert your previously made stickers. You need to adjust the size by pinching the sticker with your two fingers so it covers the entire screen.
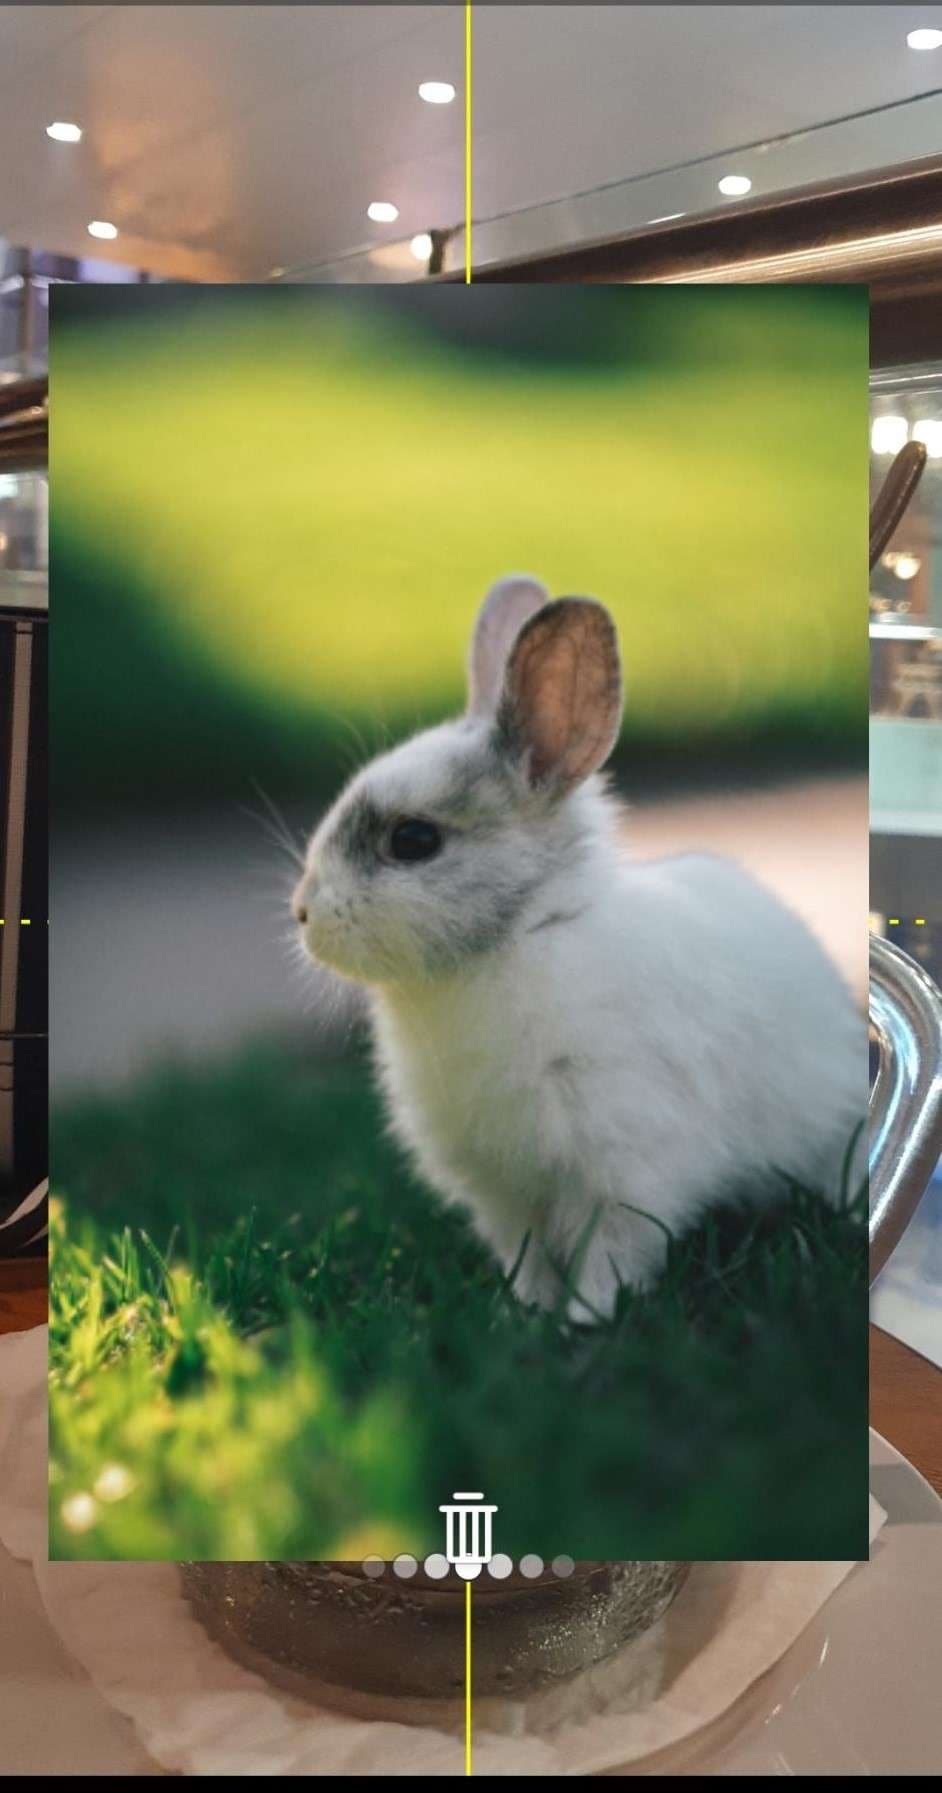
Now you can post it as usual like your typical snap by tapping on the "+ Story" button or click next to send it privately to a friend.
(2) How to send snaps from camera roll as a normal snap using the Snapchat filter feature
There are several unique filters in the Snapchat filter library that allow you to upload your old photo or video as a brand-new normal snap.
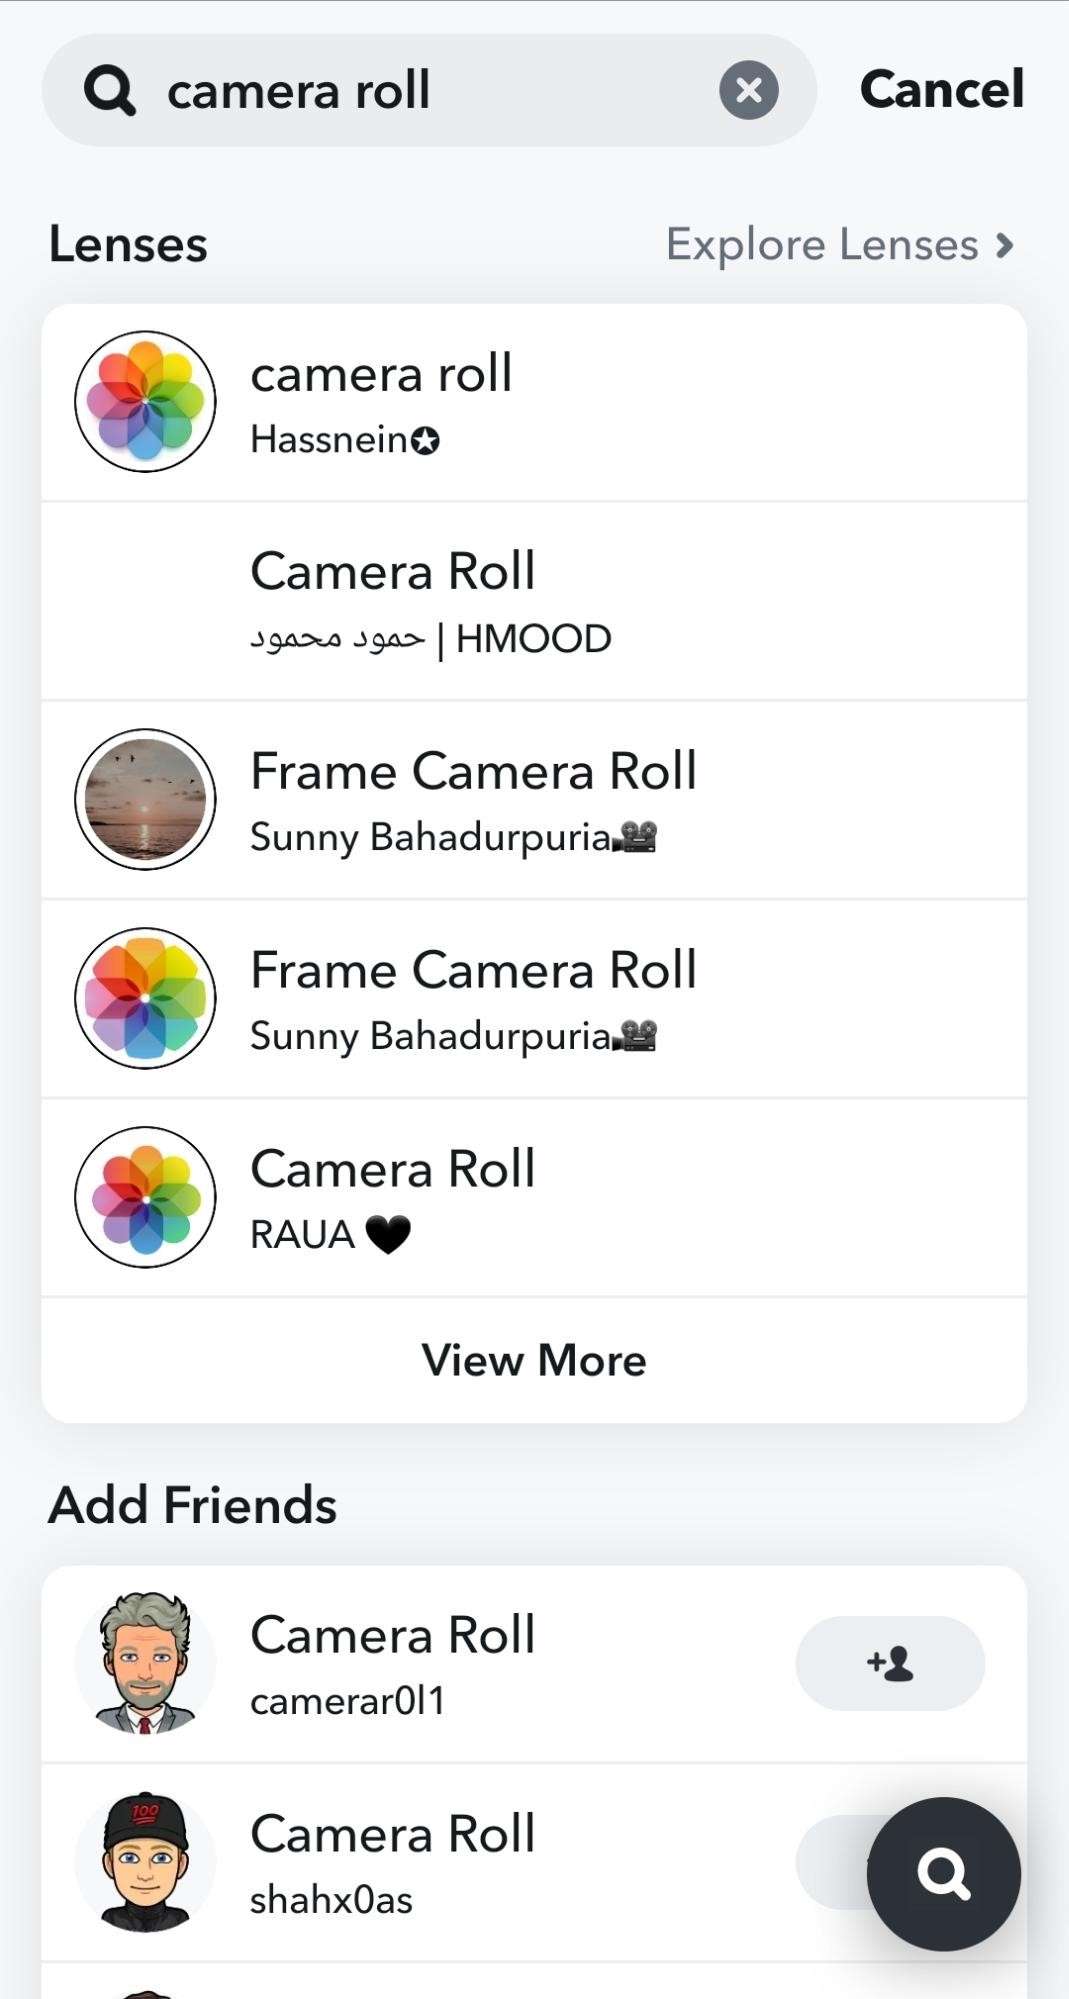
Open the filter library and find a filter that suits your need. If you want to upload a saved photo, you can search the filter using "camera roll" as the keyword. For videos, use "upload video" as the keyword.
You will be prompted to select a photo or video from your Snapchat camera roll. Select the one that you want to post and continue as usual.

Batch Video Editor
Part 2: How do I save a Snap to memories and camera roll?
When a friend sends you a video or photo on Snapchat, it lasts for only a limited time. Although this is interesting in its own way, there are times that we want to keep those photos or videos with us a little bit longer.
It wouldn't be a problem, however, now that Snapchat allows you to save a snap directly to your camera roll or memories. You can save your own snaps to your camera roll by tapping the "Save" button in the lower-left corner of your screen once you finished editing something.
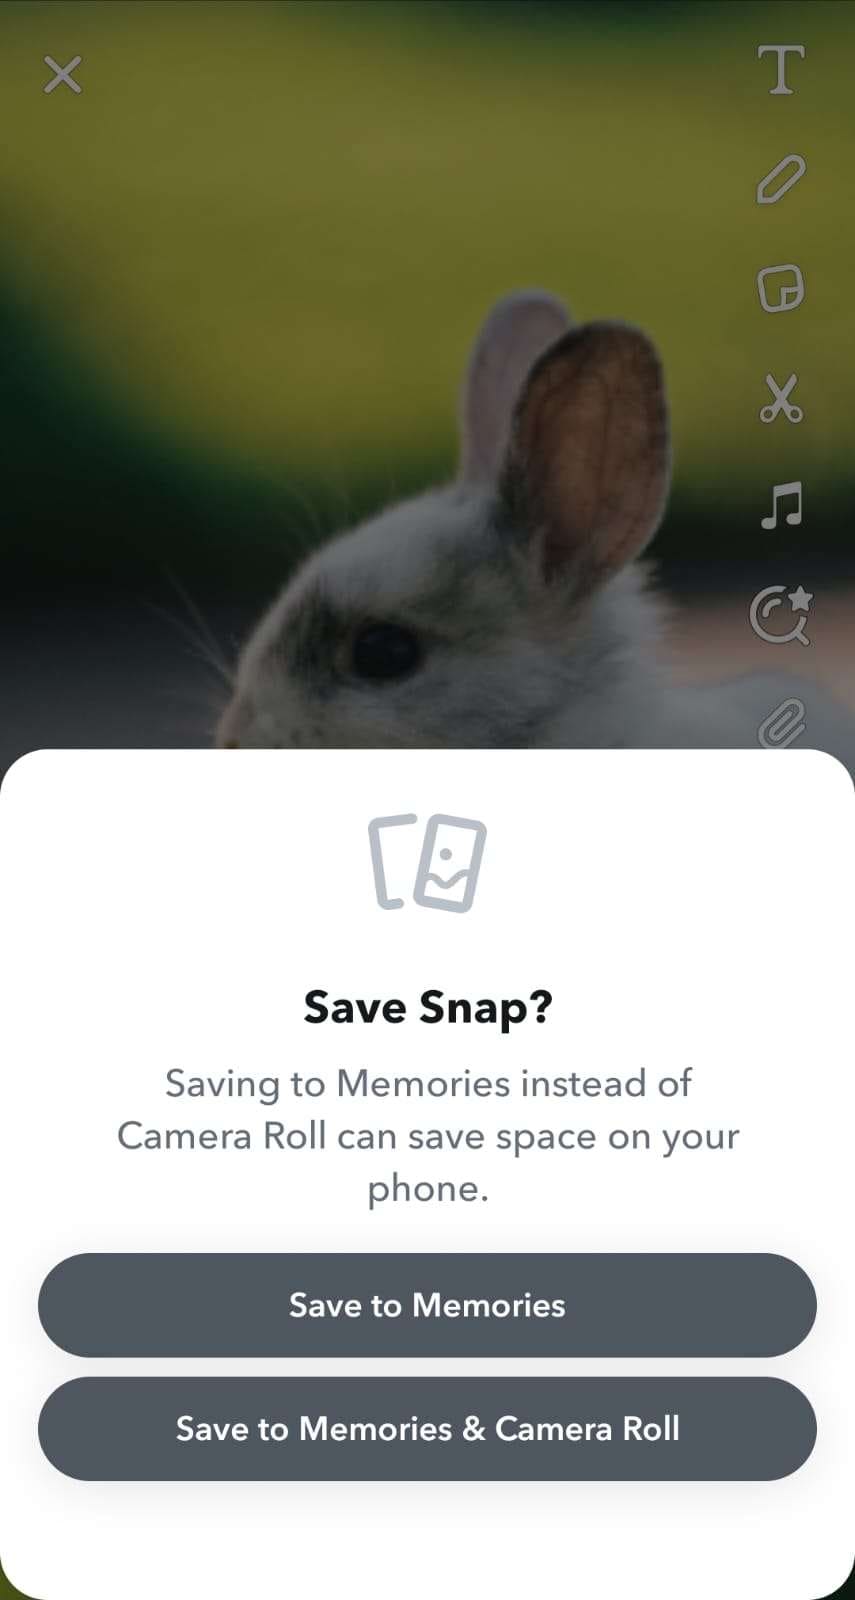
A pop-up will ask you whether to save it to Memories or to both Memories and Camera Roll. You can also let the app keep each snap without doing it manually, one by one.
To let the app do the savings automatically on your own snaps, you can open the app's settings through the gear icon in the top right corner of your profile. Go to My Account>Memories>Save To.
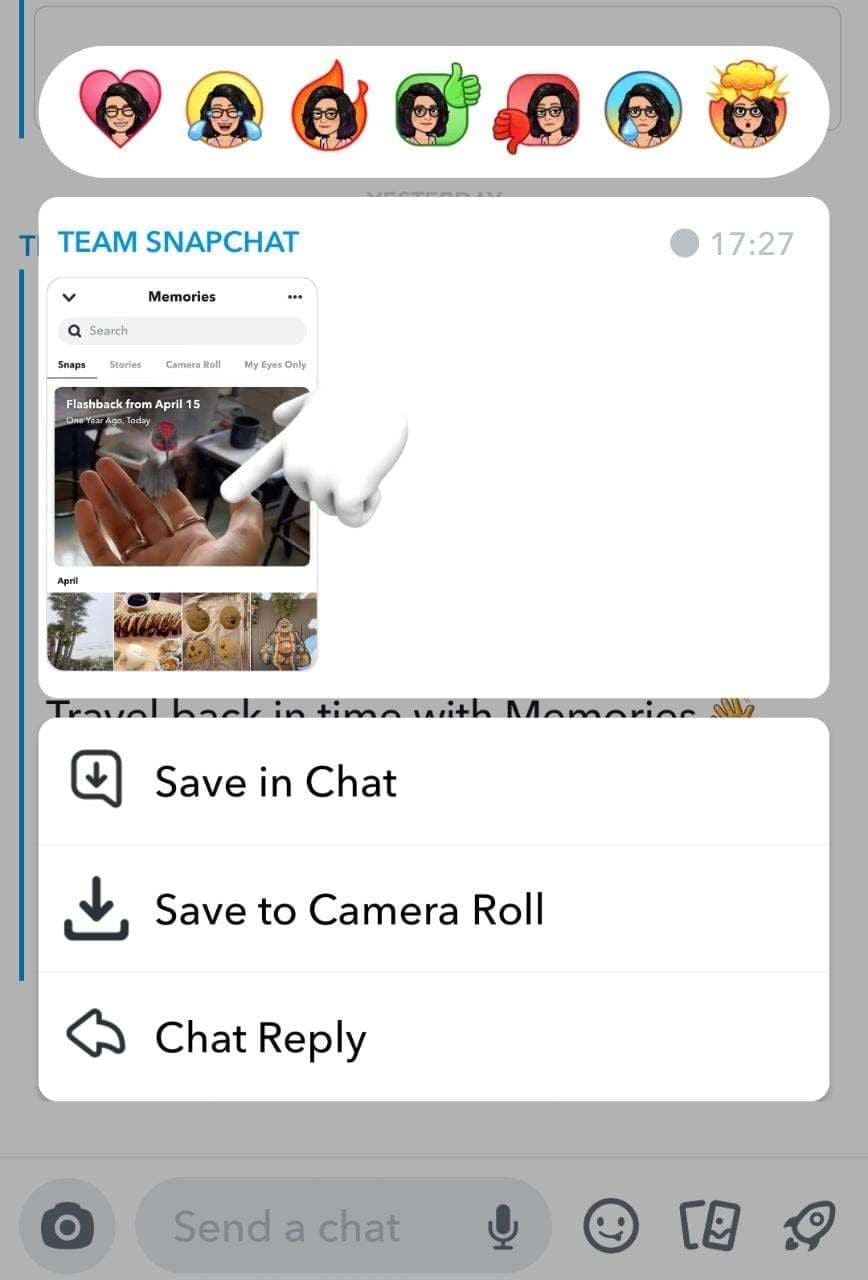
You can choose whether you want to auto-save all your story snaps or not. You will also find several handy options to go with the auto-save feature, which are:
- Camera Roll Only - this option allows you to save your snaps directly to your phone.
- Memories - this option allows you to Snapchat Memories. Snapchat Memories is a collection of all your Snaps and Stories, saved within the app instead of your phone gallery.
- Memories & Camera Roll - this allows you to save your snaps in both locations.

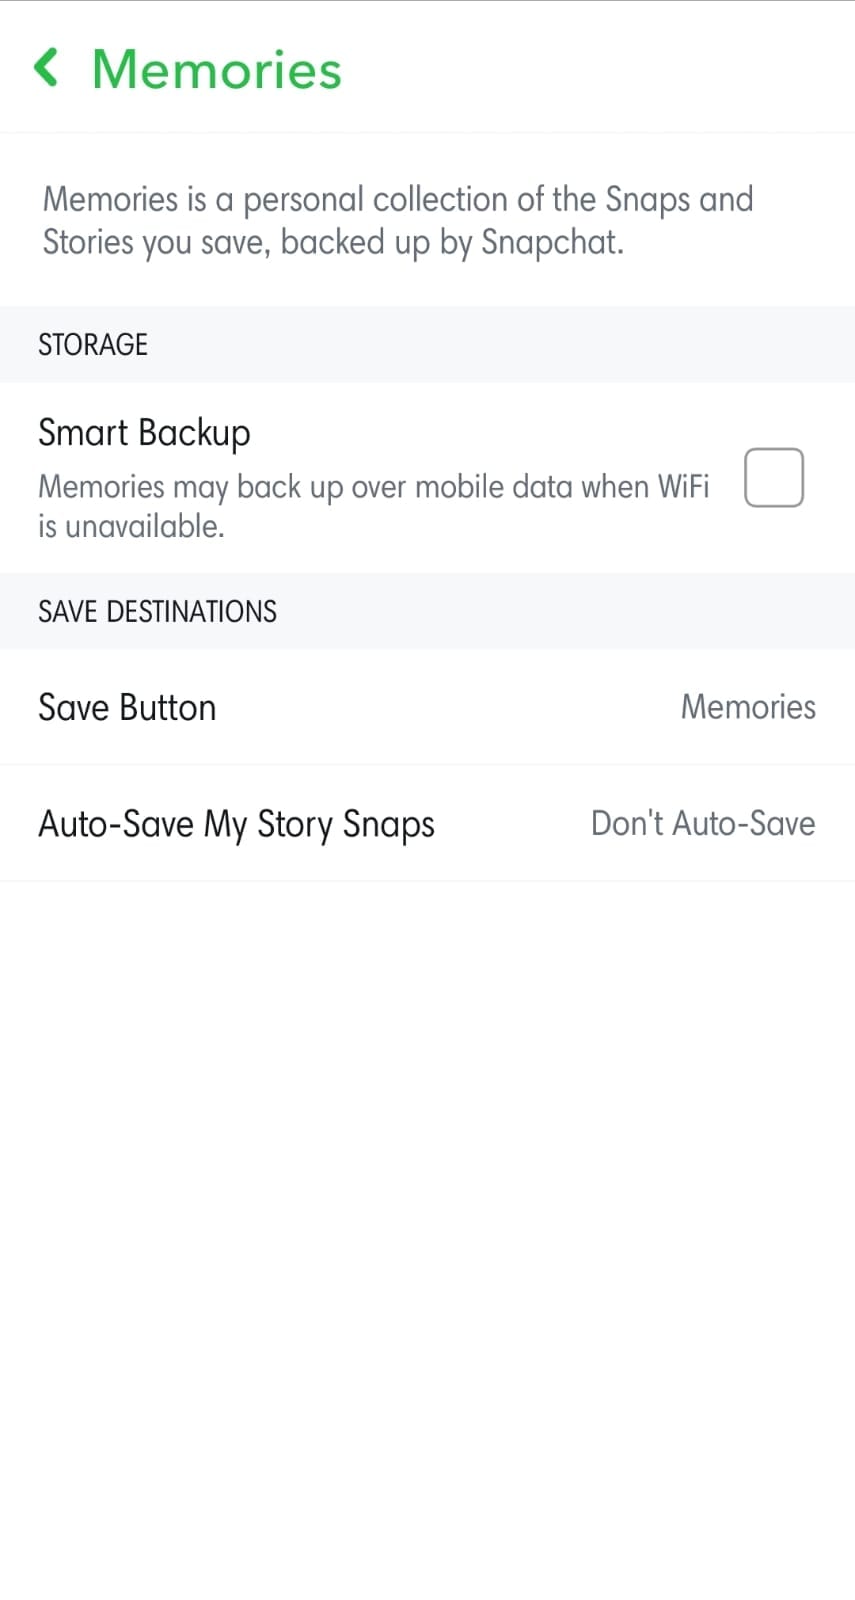
You can also save the picture you receive by long-tapping the snap you receive. Then, a pop-up will show up with the options to "Save in Chat" which gives you the screenshot version of the snap, and to "Save to Camera Roll" which will allow Snapchat to download and save the video or photo to your camera roll.
Part 3: How to edit videos uploaded to Snapchat with the best editing tool
Now you know how to upload pre-existing photos and videos to Snapchat, you might have a horde of content to share or reshare. If you've been doing video content for quite some time, maybe it's time for you to repackage all those horizontal videos into vertical ones, as Snapchat is best to use on smartphones that favor the ratio more.
Wondershare UniConverter can be your sidekick in reviving your content library or even creating new ones. The software can be easily downloaded and installed on many devices, but to edit videos professionally, it's always best to use laptops or desktop computers.
Wondershare UniConverter — All-in-one Video Toolbox for Windows and Mac.
Edit videos on Mac by trimming, cropping, adding effects, and subtitles.
Converter videos to any format at 130X faster speed.
Compress your video or audio files without quality loss.
Excellent smart trimmer for cutting and splitting videos automatically.
Nice AI-enabled subtitle editor for adding subtitles to your tutorial videos automatically.
Although it is free software, Wondershare UniConverter offers a robust editing suite with many impressive features, including:
- merge
- compression
- resize
- rotate
- speed
- filter adding
- watermark adding
- ratio editing
- screen recorder
You can navigate all these features easily as the commands are pretty much straightforward.
How to edit your saved videos before sending snaps
Step 1. You can Download Download UniConverter 16 and head to the video editor in UniConverter homepage.
![]()
Step 2. Add or drag your videos there, and you are also allowed to edit videos in batches. After uploading videos you want to edit, you can find a bunch of features you can use while editing videos, like cropping, rotating, adding filter, change aspect ratio, etc.
![]()
Step 3. For instance, if you want to create a video with your own watermark, you can use its Watermark feature. To protect your video from unauthorized re-uploads, it's always best to add a watermark to your content.You just need to enable the Add Watermark feature, and choose the watermark type, being it text or image.
Step 4. You can customize your watermark by adding an image as the watermark by choosing Image Type or by typing in text if you opt for Text Type. This feature also allows you to adjust the Opacity and Position of the watermark. Plus, if you choose Dynamic Watermark, your watermark will move around at your selected speed instead of being static on one part of the screen.
FAQs about Sending Snaps from Camera Roll
(1) Is there any way to know if the snap is from the camera roll?
It will be pretty obvious. On the top right corner near the username, Snapchat will reveal that the photo or video was uploaded from the camera roll. Alternatively, if you use the sticker feature, the picture will appear in lower resolution. Meanwhile, if you use the filter feature, the recipient will be notified that you've uploaded the snap with certain filters, as usual.
(2) Can you fake Snapchat pictures?
Snapchat will always reveal whether you have uploaded something from your Camera Roll or using filters, or from your Memories. So although you can upload your old photos or videos, the recipient will always know they were not taken live.
(3) Why some snaps are purple?
This is a built-in read receipt feature from Snapchat. A solid purple box means that your snap comes with audio and has not been viewed by the recipient. The box will turn unfilled once the content has been viewed. This is to differentiate from the ones in the blue box, which contains simply a chat message, and in red, which contains pictures.
(4) How to send snap from gallery?
Open Snapchat and tap the "Memories" icon (two overlapping rectangles). Choose the photo from your camera roll. Tap the pencil icon, then the scissor icon to access the "Cutout" tool. Trace the area you want to use, which will save automatically to your sticker library. Return to the main screen and tap the stickers icon (folded paper) to insert your sticker. Adjust the size by pinching. Post your snap by tapping "+ Story" or send it privately to a friend.
(5) How to send fake snaps from camera roll?
Open the filter library and search for a filter using "camera roll" for photos or "upload video" for videos. Select the photo or video from your camera roll. Continue editing and posting as usual.
Batch Video Editor
Conclusion
The above-mentioned methods are effective and efficient ways to send a photo/video as a snap from camera roll. While you want to upload the saved videos in gallery, you can edit videos first to make them polished using Wondershare UniConverter.

