Wondershare UniConverter
-
 Best screen recorder to record a lecture or game with Picture-in-Picture effect.
 - Add voice narrations to the recorded video with the internal or external microphone.
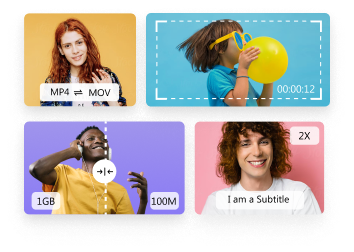
- Versatile toolbox combines screen recorder, GIF maker, fix video metadata, etc.


Screen Recorder
- 1. Top 7 Facecam Screen Recorders
- 2. How to Make a Picture-in-Picture Effect
- 3. Does Picture-in-Picture Work with Zoom
- 4. How to Record a Lecture or Game with Picture-in-Picture Effect
- 5. Record Yourself and Your Screen at the Same Time
- 6. Record Webcam and Screen at the Same Tim
- 7. How to Record Picture-in-Picture Video
All Topic
- AI Tools Tips
-
- AI Photo Enhancer Tips
- Voice Changer Tips
- AI Thumbnail Maker Tips
- AI Script Generator Tips
- Smart Summarizer
- AI Subtitle Generator Tips
- Watermark Remover
- Vocal Remover Tips
- Speech to Text Tips
- AI Video Tips
- AI Image Tips
- AI Subtitle Translator Tips
- Video Extractor Tips
- Text to Speech Tips
- AI Video Enhancer Tips
- DVD Users
- Social Media Users
- Camera Users
- Photography
- Creative Design
- Movie Users
- Travelling Fans
- Educational Users
- More Solutions
- Holidays and Commemoration
- Game Lovers
- Other Tips
How to Record a Lecture or Game with Picture-in-Picture Effect
by Kayla Morrison • 2025-11-14 10:38:47 • Proven solutions
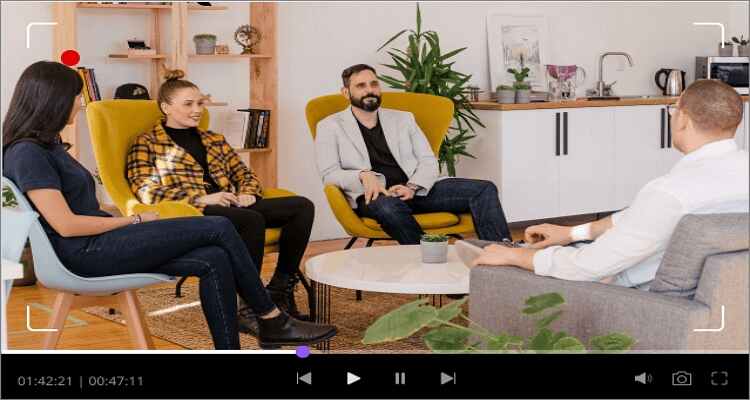
Sometimes you may want to record a lecture or game with Picture-in-Picture on your computer. That's common if you manage a software tutorial channel on YouTube, Vimeo, or any other content-sharing platform. But how exactly do you record a desktop screen with Facecam concurrently? If that is your worry, read on to learn a few simple tricks.
- Part 1. Best Way to Record a Lecture or Game with Picture-in-Picture Effect
- Part 2. 3 Other Common Ways to Record a Lecture or Game with Picture-in-Picture Effect
Part 1. Best Way to Record a Lecture or Game with Picture-in-Picture Effect
Let's start with the best screen recorder for Windows and Mac – Wondershare UniConverter. It's a professional tool that offers a simple UI with many user-friendly screen capture functions. Firstly, Wondershare UniConverter lets users record desktop screens in full-screen mode or select a specific capture area. After that, users can set an input microphone and webcam for recording PIP videos with voice narrations. You can also set an output format, folder path, frame rate, and quality. Moreover, users can overlay annotations like symbols, lines, arrows, texts, etc.
Wondershare UniConverter - Best Desktop Screen Recorder
-
Record a Picture-in-Picture overlay video on the captured screen using an internal or external webcam.
-
Edit videos with features of cropping, trimming, rotating, adding watermarks, applying effects, and others.
-
Edit, enhance & personalize your videos file.
-
Batch video/audio compression and conversion are allowed.
-
Toolbox with additional functions like Screen Recorder, VR Converter, GIF Maker, Fixing Media Metadata, and more.
-
Supported OS: Windows 10/8/7/XP/Vista, macOS 11 Big Sur, 10.15 (Catalina), 10.14, 10.13, 10.12, 10.11, 10.10, 10.9, 10.8, 10.7.
A step-by-step process of how to record a lecture or game with picture-in-picture using Wondershare UniConverter:
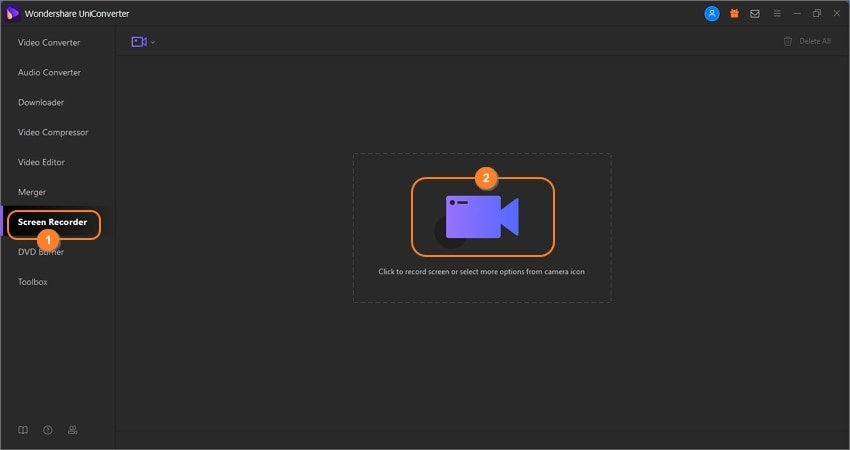
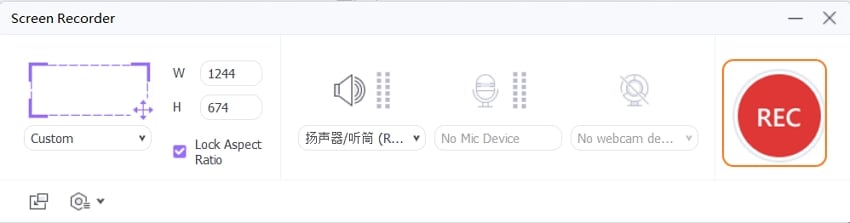
Step 1 Launch the Screen Recorder function on Wondershare UniConverter.
Download, install, and launch Wondershare UniConverter, then click the Screen Recorder on the left pane. Now click the Camcorder button at the center of the window before opening the video game you wish to record.
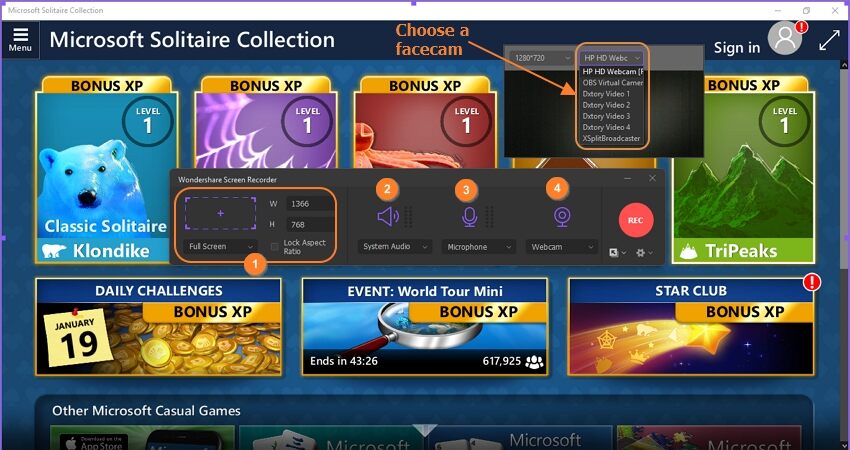
Step 2 Choose a recording area and set the input/output microphone and webcam.
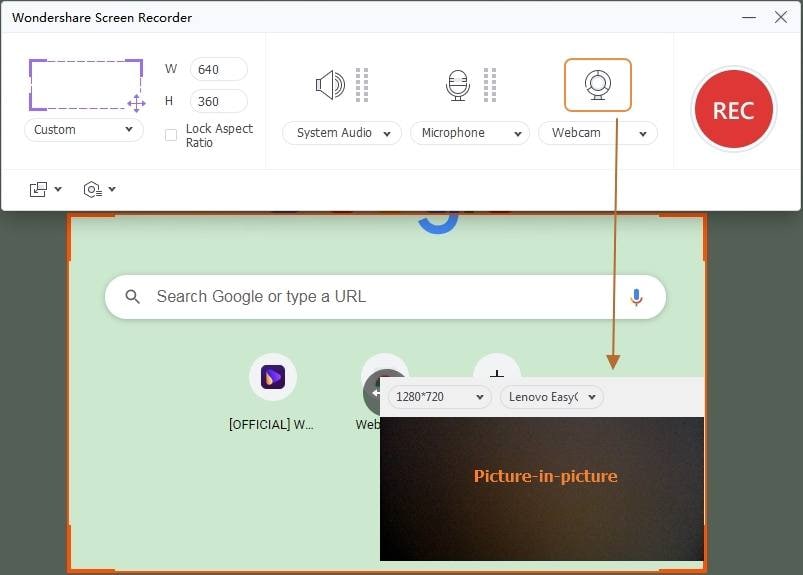
Drag the cropper inwards or outwards to select a capture area. You can even set it to full-screen mode to take the whole desktop screen. After that, open the Microphone menu and choose a microphone for adding voice narrations. You can also click the Webcam menu to set a camera that you'll use to make a Picture-in-Picture video. Finally, click the Speaker icon to choose a device for recording the system audio.
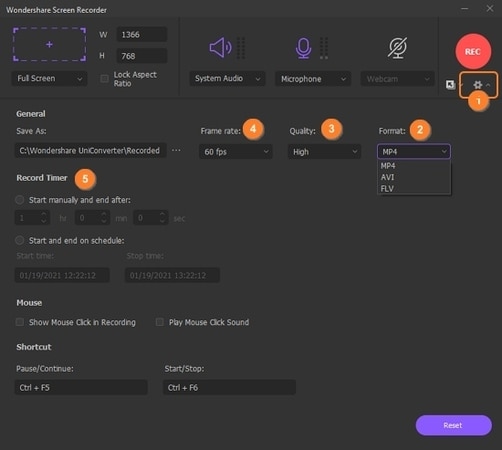
Step 3 Customize recording settings.
Now it's time to customize a few settings before you start recording. Click the Settings icon and adjust the following functions:
- Frame Rate - Open this menu and set the frame rate as 15fps up to 60fps. Note that a higher frame rate is best if you're capturing a fast video game.
- Quality - For your video to stand out, quality is crucial. However, better quality requires more storage space.
- Format - To enjoy an effortless playback on any device or website, set the target format as MP4. Users can also choose AVI or FLV.
- Record Timer - You can manually enter the start and stop recording time for your video.
Step 4 Begin recording the PIP video.
Finally, press the REC button to start recording the video. Tap the arrow on the left side to open the recording toolbar. Here, you can complete these actions:
- Add annotations – Adding annotations to your video can make it simpler to understand and more enjoyable to watch. So to do that, press the Annotation button and add customized texts, arrows, drawings, rectangles, circles, and so on.

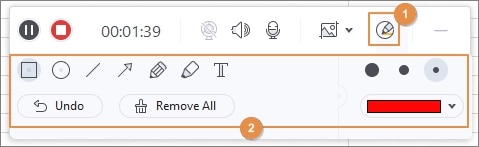
- Apply voice narrations – Click the Microphone icon to enable or disable voice narrations as you record the video.
- Add system audio – You can enable or disable the system audio by clicking the Speaker icon.
- Webcam – Click the Webcam icon to open the Picture-in-Picture window. You'll see it launch at the bottom-right corner. Drag the PIP window to an area of your choice to change its positioning.
- Stop – Press the Stop button if you've recorded enough content. You can now preview the video before sharing it with your online following.

Part 2. 3 Other Common Ways to Record a Lecture or Game with Picture-in-Picture Effect
Below are some other four excellent video recording apps for desktops:
1. Wondershare DemoCreator
Credit where it's due; Wondershare has perfected the art of creating apps that solve most desktop file manipulation needs. That said, Wondershare DemoCreator is a fantastic app that's designed to capture high-quality desktop videos. It comes with an attractive 30-day money-back guarantee and offers free 24/7 support. When recording PIP videos, users can crop, change video speed, and apply annotations. Plus, it can export videos as MOV, MP4, or GIF.
Pros:
- Excellent customer support.
- User-friendly app.
Cons:
- Limited editing functionalities.
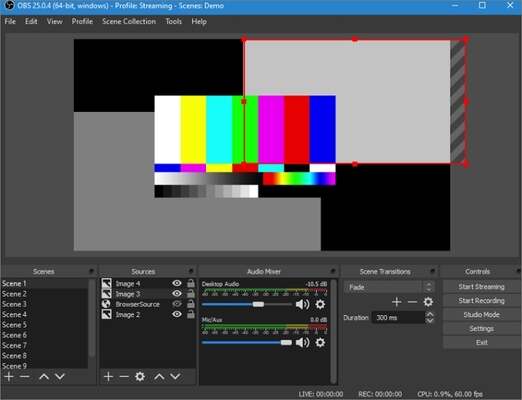
2. OBS Studio
OBS Studio is an excellent free, open-source video recording app that lets you do almost anything. But that's only if you don't mind the steep learning curve. That aside, this app offers real-time video capturing performance. Users can set up multiple capturing scenes and switch between them effortlessly. It also provides powerful and straightforward configuration options to add new sources and seamlessly adjust their properties. What's more, OBS Studio boasts an intuitive audio mixer.
Pros:
- Free, open-source app.
- Multiple configuration options.
Cons:
- Requires a bit of learning to understand.
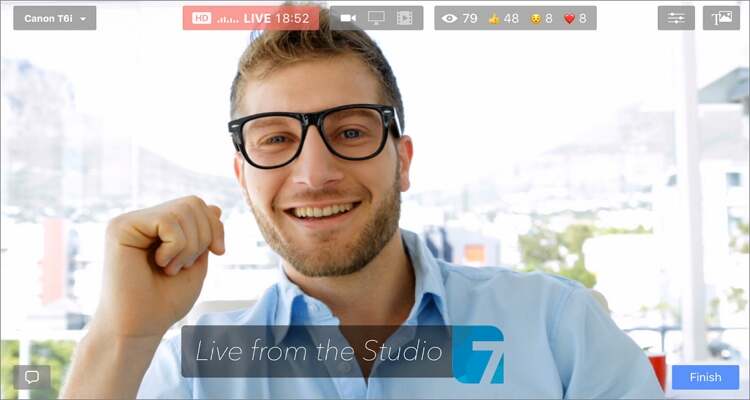
3. Ecamm Live
If you're a Mac user, Ecamm Live should come in handy. First of all, this app gives users a 14-day free trial period. After that, you can subscribe to one of the affordable plans and start capturing Mac and iPhone screens. When recording a live video, you can add a live PIP and annotations such as texts, stickers, logos, and other graphics. Even better, it supports HDMI encoders such as Blackmagic Design, Elgato Cam Link, and more.
Pros:
- Supports live streaming via a camcorder.
- Add multiple overlays on the video.
Cons:
- Only for Mac users.
Conclusion
Have you already identified the Picture-in-Picture recorder you'll use on your next video-creation project? Although the apps mentioned above will get the job done, choose Wondershare UniConverter if you want something affordable, powerful, and simple to use. Thank me later!
Your complete video toolbox

Other popular Articles From Wondershare


Kayla Morrison
staff Editor