


Capturing screenshots and recording videos on your Mac is easier than you think, especially when you know the right hotkeys. This guide will walk you through everything you need to know about screen snipping on the Mac.
From basic hotkey commands that you can use, to customizing your settings and even adding the snipping tool to your Touch Bar, we cover everything in this write-up. If you want an alternative to snip on Apple MAC, we will introduce you to one that takes screenshotting and video capturing to the next level.
In this article
Part 1: Complete Guide: Screenshot and Capture Video with Hotkeys
Mastering hotkeys is the quickest way to take screenshots and record videos on your Mac. Here’s a rundown of the most important ones when snipping for MAC:
-
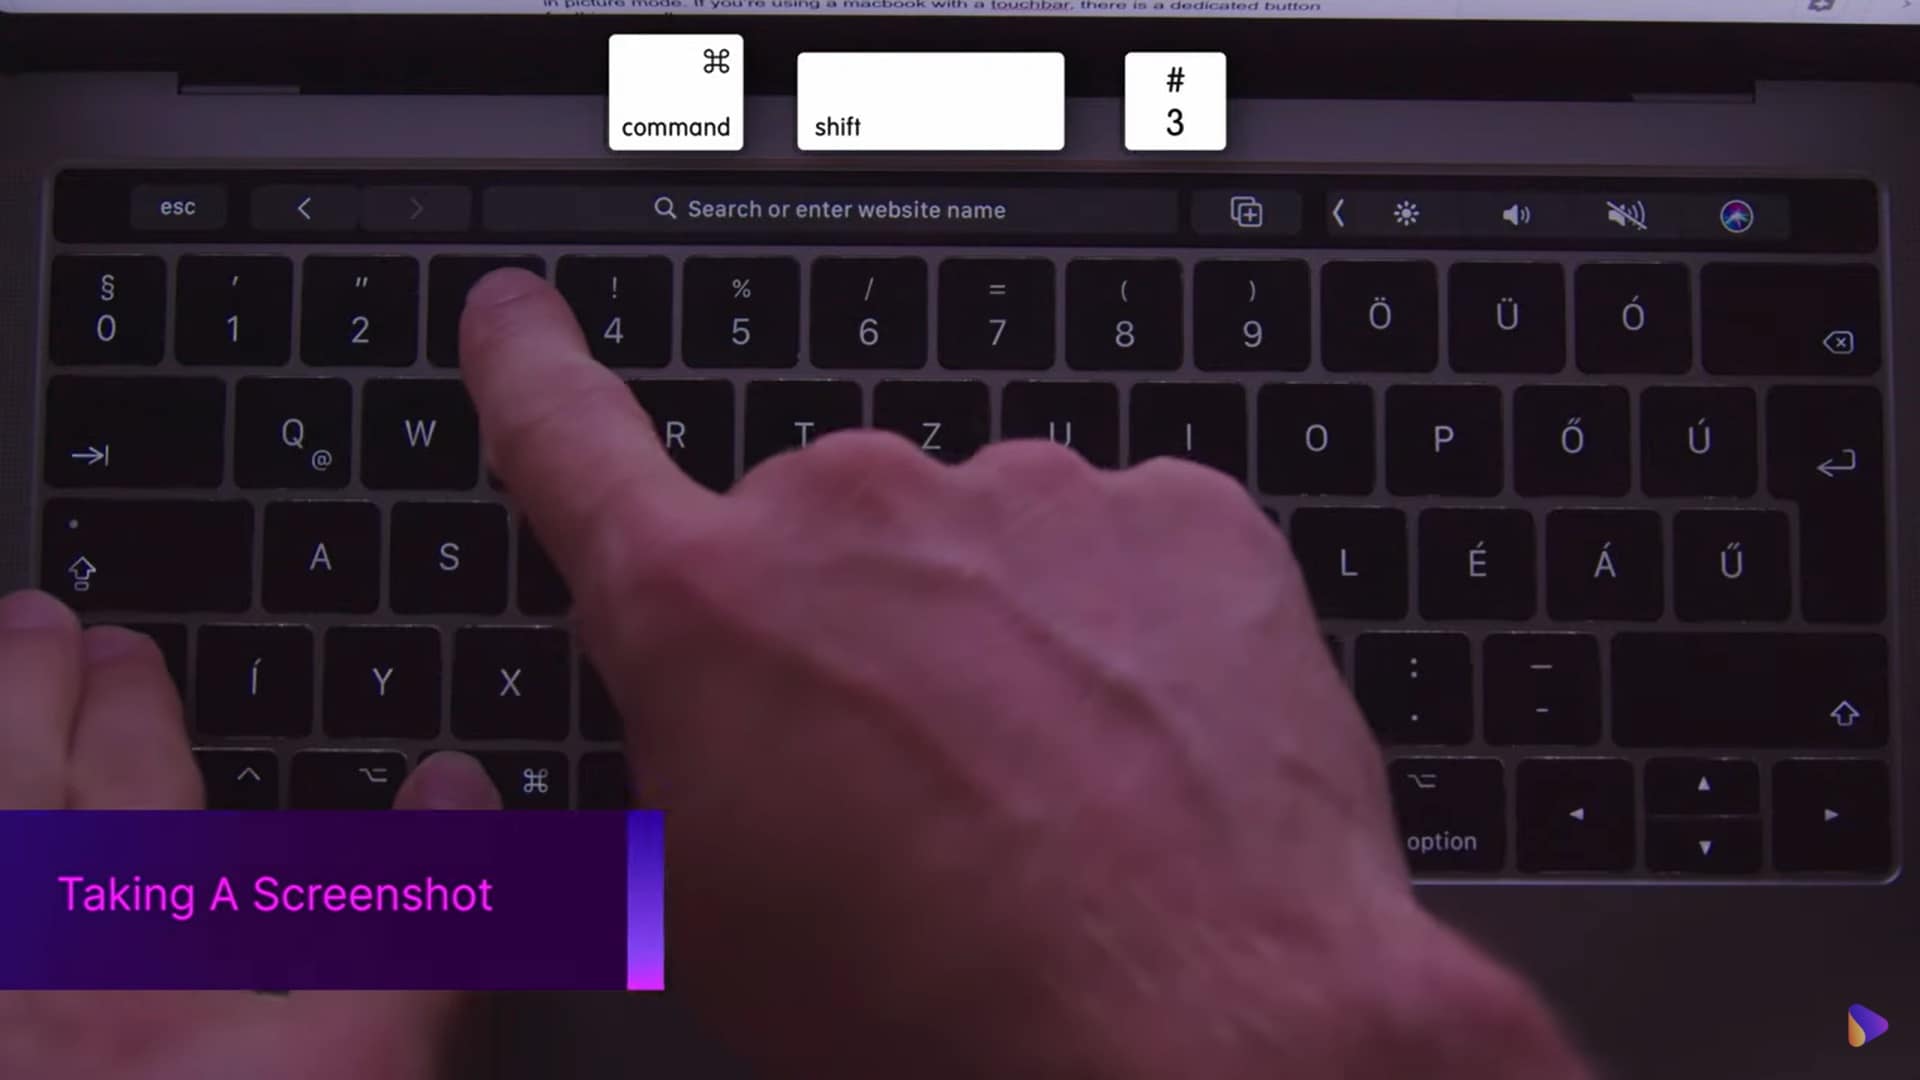
Take a screenshot of full screen: Shift + Command + 3
Instantly capture everything on your screen. By default, the image will be saved to your desktop.
-
Capture a specific portion of screen:Shift + Command + 4
Your cursor will change to a crosshair. Click and drag to select the area you want to capture.
-
Take a screenshot of a window or menu:Shift + Command + 4 (then press Spacebar)
Your cursor will turn into a camera icon. Click on any window or menu to capture it.
-
Capture the Touch Bar (MacBook Pro only):Shift + Command + 6
This will save an image of your Touch Bar directly to your desktop.
-
Open the Screenshot Toolbar: Shift + Command + 5
This hotkey launches a versatile toolbar with options for taking screenshots and recording videos.
Read on to find out how to customize snips on MAC to suit your needs.
Part 2: How to Customize Settings
Customizing your screenshot and video capture settings can significantly improve your workflow. Here's how to do it:
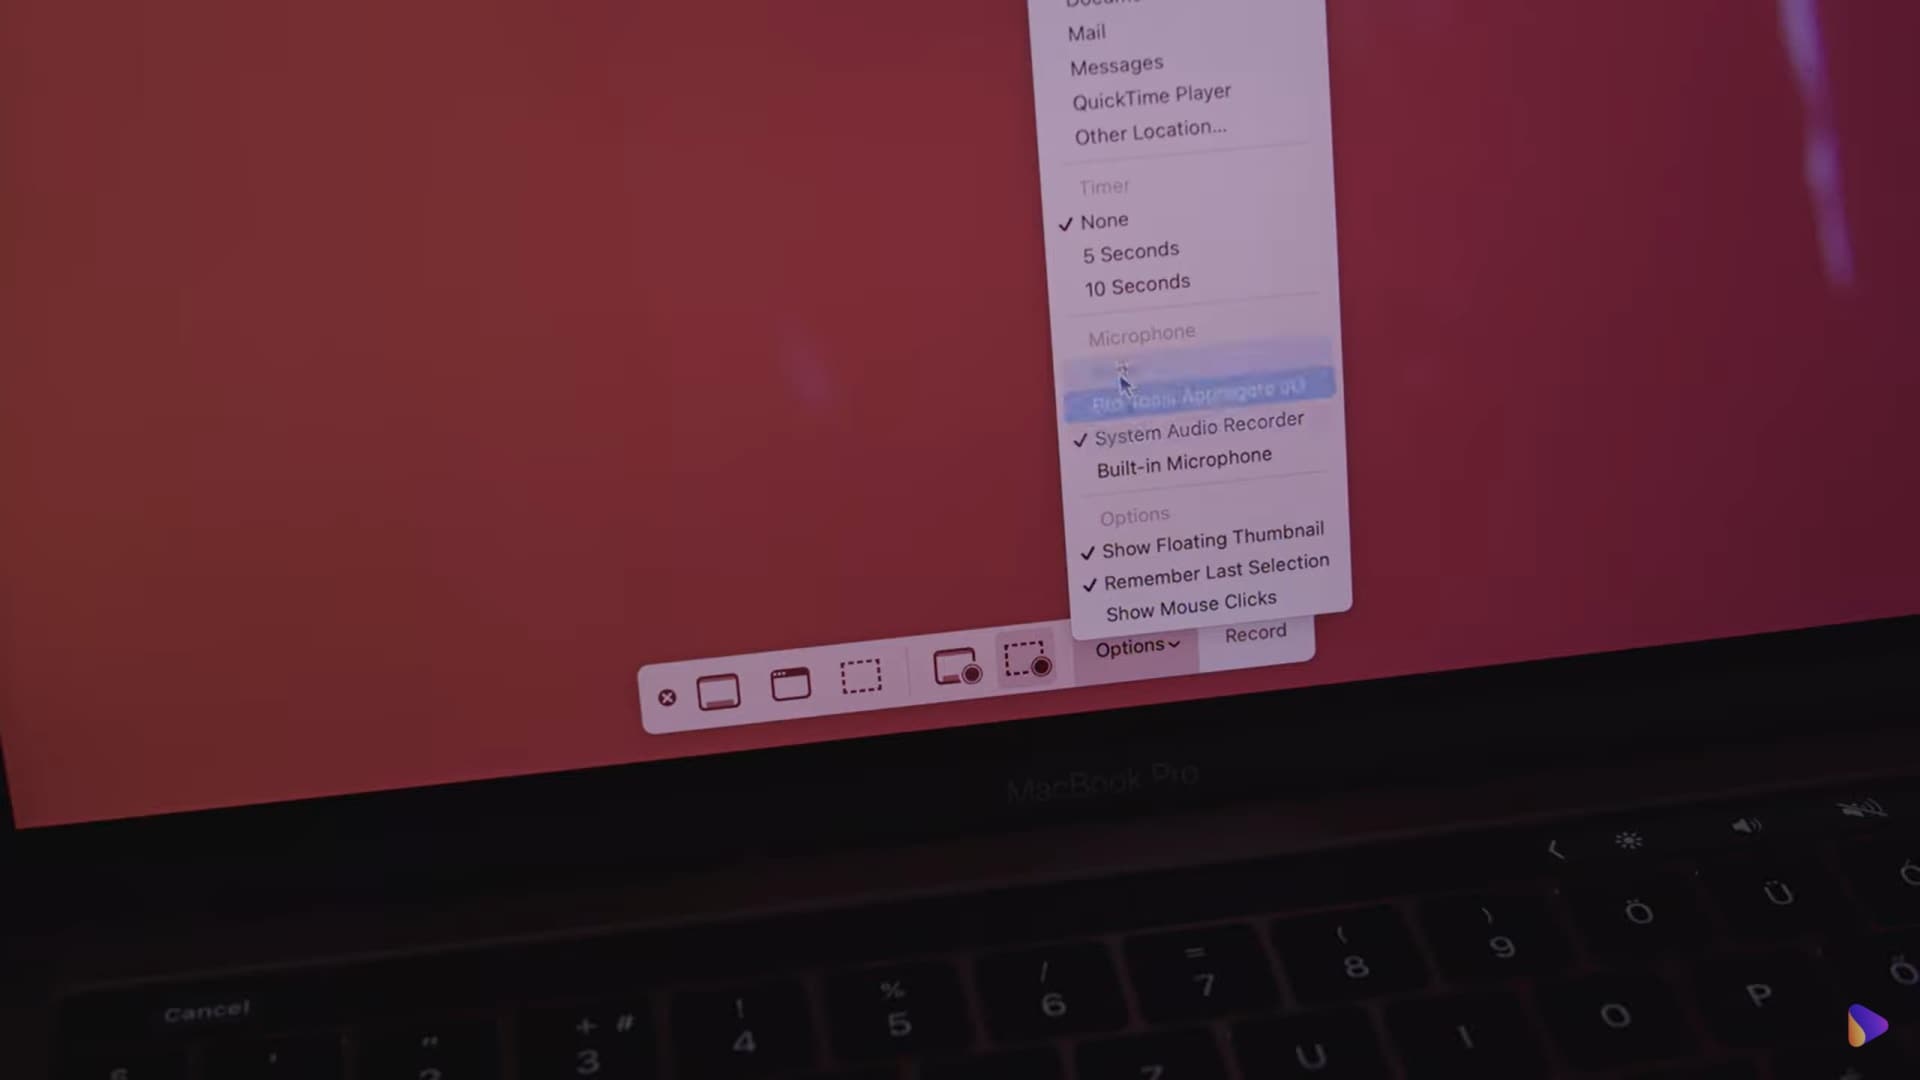
- Open the Screenshot Toolbar: Press Shift + Command + 5.
- Click on Options: A dropdown menu will appear where you can select your preferred settings, as shown in the screenshot above.
- Set a timer: If you need to set up your screen before capturing, you can choose between 5 or 10 seconds.
- Change Audio Settings: This option lets you choose various audio formats if you are taking a short video.
- Show or hide the mouse pointer: This option is handy when recording video tutorials.
Next, we will look at how you can change the location of saved screenshots.
Part 3: How to Change Where the Screenshots Save
By default, the snipping tool for Mac stores all screenshots on your desktop, but you can change this to any location you prefer.

- Open the Screenshot Toolbar: Press Shift + Command + 5.
- Click on Options: A dropdown menu will appear.
- Select your desired save location: You can choose from existing locations or click Other Location, as seen in the screenshot above, to specify a new one.
Part 4: How to Add the Snipping Tool to the Touch Bar
Adding the snipping tool to your Touch Bar for MacBook Pro users can make capturing screenshots even more convenient.

- Click on the Apple icon in the top-left corner of your screen and select System Preferences.
- Go to Keyboard: Select the Keyboard option.
- Click the dropdown menu next to the Touch Bar shows and choose App Controls.
- Select Customize Control Strip.
- You'll see a preview of your Touch Bar. Drag the Screenshot icon to your Touch Bar.
Part 5: Bonus: A Better Snipping Tool Alternative – UniConverter
If you want a better snipping tool software alternative, we suggest looking into UniConverter by Wondershare.
UniConverter is more than just a simple cut-and-snipping tool. It's a comprehensive media toolkit that allows you to take screenshots, record videos, modify them, and do much more.
Here's why we believe UniConverter is a much superior choice as a snipping tool on Mac:
- Multiple Screenshot Modes: UniConverter offers full-screen, window, and custom area captures, similar to Mac’s built-in tool but with extra features that enhance your work.
- Video Recording with High-Quality Output: Easily record your screen with customizable settings for resolution, frame rate, and more.
- Audio, Webcam, and App Recorder: This section also features an audio recorder tool, a webcam recorder tool, and an app recorder tool that can take your productivity to the next level.
- Built-In Editor: After capturing, you can instantly edit your screenshots or videos within the tool.
Step-by-Step Guide: Taking Screenshots and Recording Videos with UniConverter
Let us take a detailed look at how you can use UniConverter instead of using the Snipping Tool for MAC.
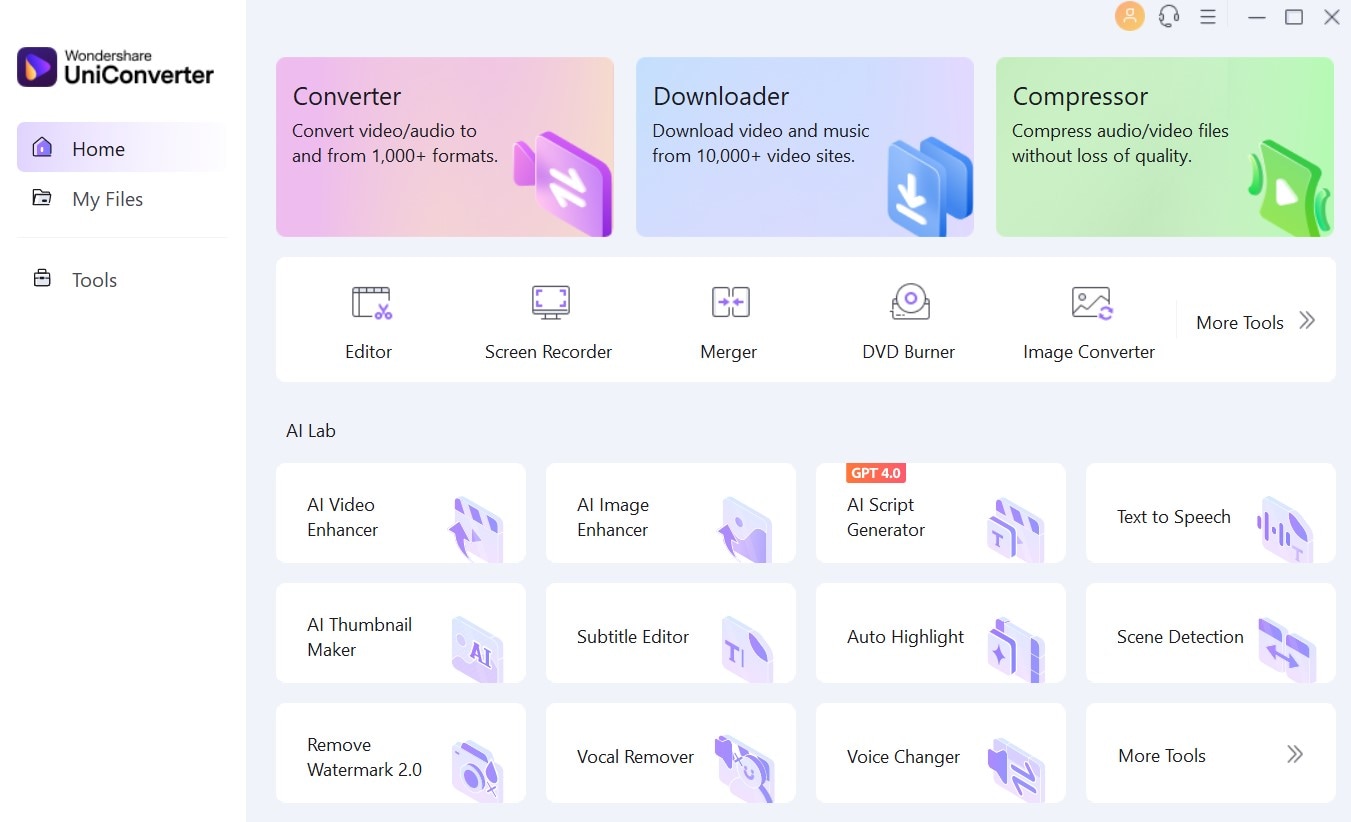
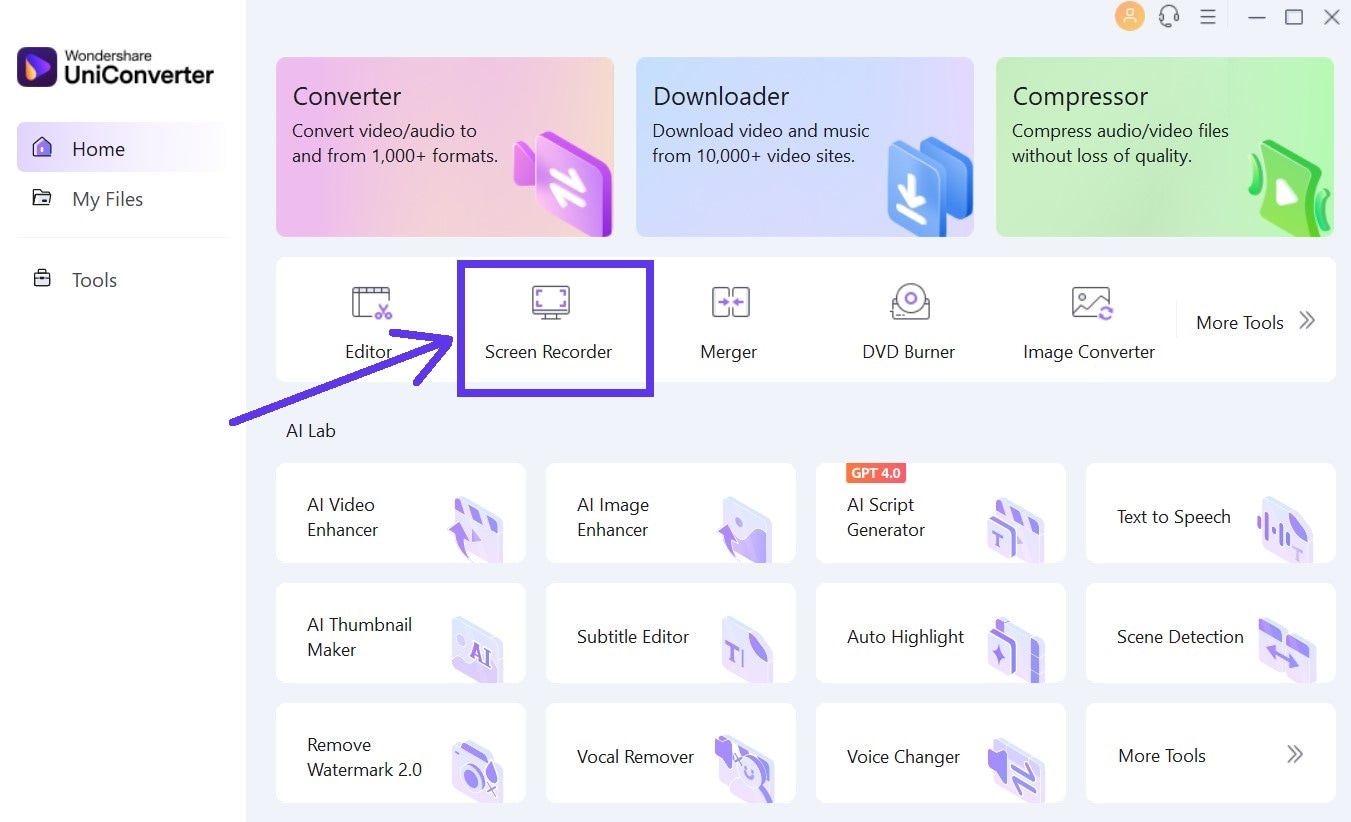
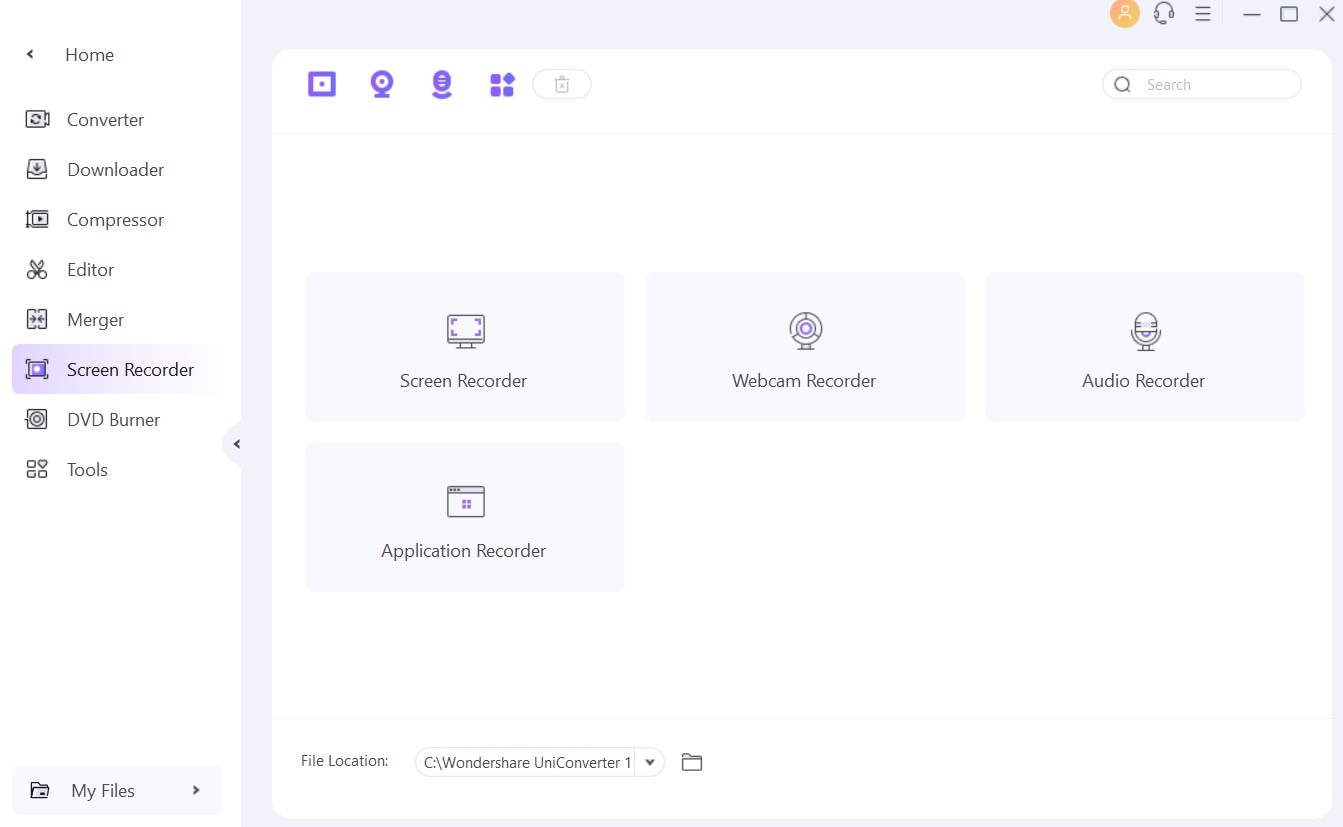
Step 1 Find Screen Recorder Tool
Download and install UniConverter. Launch UniConverter and select the Screen Recorder option.
Step 2 Choose your capture mode
As you can see in the screenshot below, UniConverter lets you select taking a screenshot or recording a webcam video, audio, or recording from an app. Select Screen Recorder for now.
Step 3 Adjust your Settings if you want to
UniConverter lets you adjust screenshot settings. Click on the gear icon at the top right corner. You can customize the capture area, resolution, and other settings to your preference.

Step 4 Capture the Screenshot or a Video
Click the capture area option on the top left corner of the image above and select the area on your screen that you would want to capture. After that, you can click on the red REC button to begin recording the video.
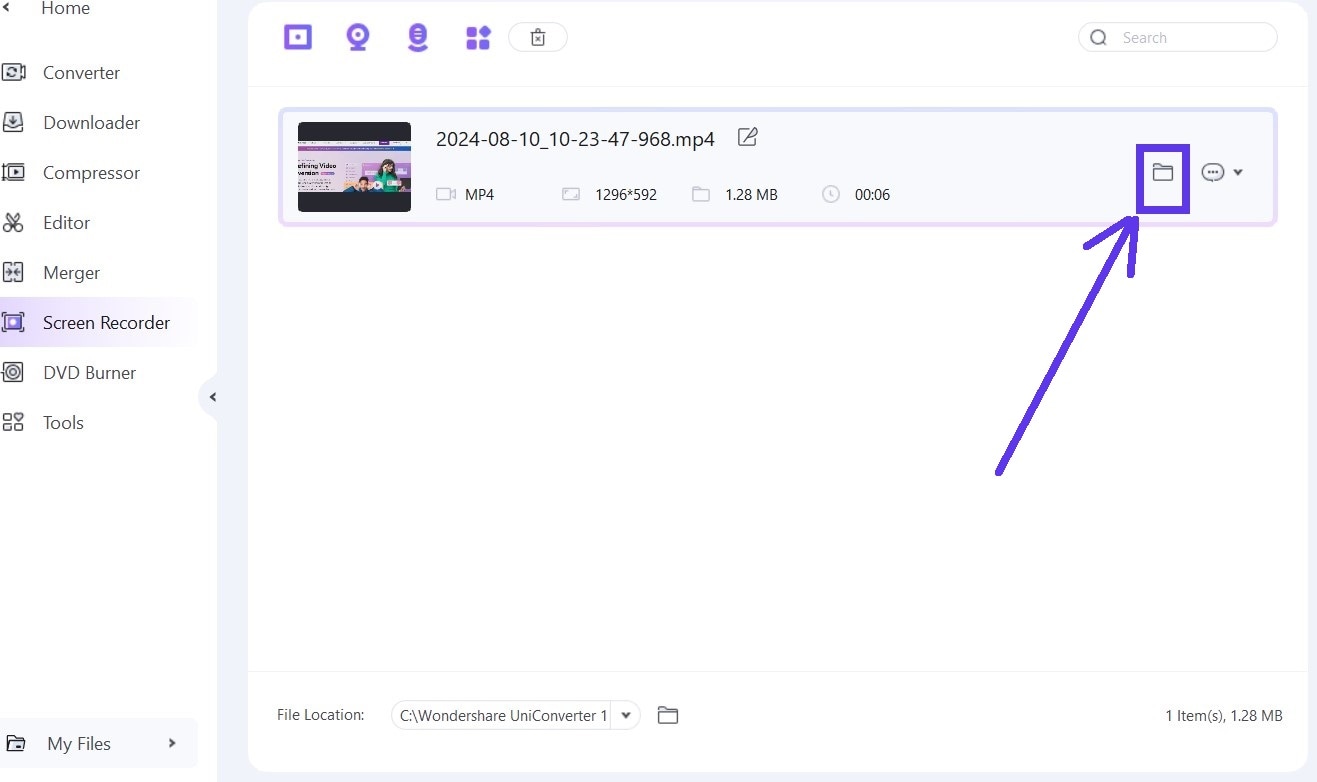
Step 5 Stop Recording and Access Recorded Files
Stop once you are done, and your file will be saved to your chosen location.
Conclusion
That’s pretty much all about snipping tool on MAC laptops. If you are a casual user or a pro content creator, knowing how to take screenshots and capture videos on your Mac can save you time and effort. With this guide, we hope you now have all the necessary information you need to get started.
And if you are looking for something more powerful, UniConverter is a fantastic alternative that offers additional features to make you more productive. Don't forget to try it out!

