There is no built-in screen recorder for laptop Windows 7. So to say the least, Windows 7 will not be able to help you with screen recording by any means. But you don't need to worry if you are reading this article. This article will introduce the top 8 screen recorder for laptops on Windows 7 for you. So without wasting any time, let's dive into the details to learn about these screen recorder for laptop Windows 7 and choose the best one among them.
Part 1. How Do I Record My Computer Screen Without third-party software?
The closest thing that you can use to do this, is by using Steps Recorder. Users can access this tool easily from the "Start" button of your Windows 7 computer. Just right click on it and search by typing "psr.exe", then press the Enter button to proceed.
To be precise, you will get to record each mouse click by this tool and save these recordings as an image file. After that, the tool will compile all the images into an HTML file. Specifically, this tool will save these images together into a Microsoft MHT file. As this tool is not a video capture tool and there is no built-in screen recording tool available in Windows 7, we suggest you take help from the other solutions mentioned further in this article.
Part 2. 8 best screen recorder for laptop windows 7
Among a great number of screen recorders, you might face difficulty with which one to download. So to make your work quick and easy, we are suggesting you 8 best screen recorder for laptop windows 7 below-
1. Wondershare UniConverter
Wondershare UniConverter is one of the best screens and video recorders with a complete video toolbox to edit recorded videos. It is available for both Mac and Windows. Compared to other software, this tool has a 90X faster conversion speed. While using other apps on your screen, you can record stream video on streaming apps/internet browsers or meetings on Zoom/Skype/Teams etc. Before recording the application, you can custom settings for frame rate, quality and output format. Without losing any quality, this app supports you to record full screen with system sound and also allows you to record games without losing frame rate. You can capture your webcam in this program with the original quality. Without compromising on quality, you can record both system audio and microphone on Wondershare UniConverter. This program is not online-based, so you need to download it to use. You can get it for free and also if you want, you can upgrade it with money. The interface of this program is easy to understand, simple and beautiful.
2. Free Cam
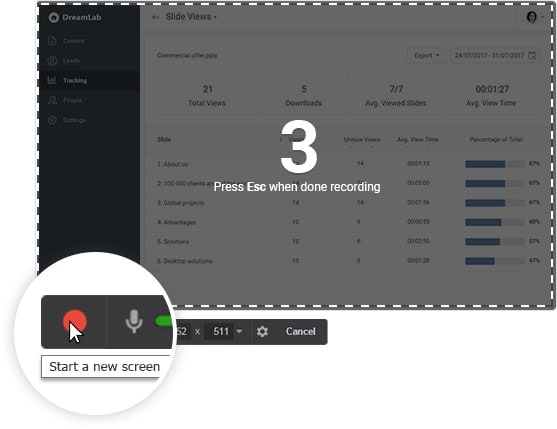
Free cam is another straightforward screen recorder for Windows 7. With a built-in audio/video editor, this software is very simple and free to use. It doesn't place any watermark and is ad-free even though this software is free. You can create screencasts with both the whole screen and a portion of your screen in this intuitive and attractive interface. You are allowed to create professional video lessons and e-Learning presentations because of its full set of features. This software provides you to highlight the mouse cursor while recording and to emphasize important details or steps, you can enable mouse click. You can record voiceovers as well as system sounds while recording. Users can upload exported videos directly to YouTube and also save them in WMV file format. You cannot record webcam like sound or videos. Free Cam is only available for Windows and you have to install this program on your desktop. As it is free software, there is no need to pay. The interface of this program is quite easy and simple. Exported files can only be saved in WMV format.
3. Free Screen Video Recorder
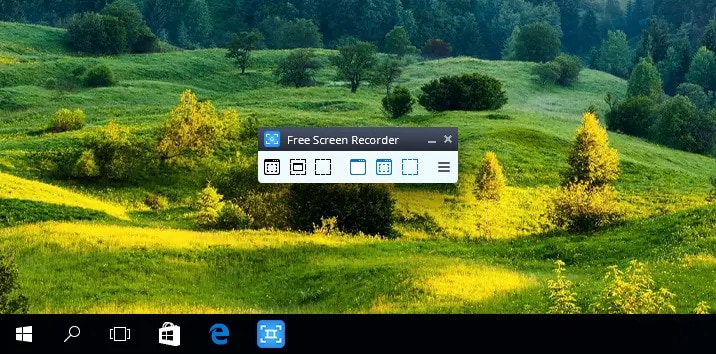
Free Screen Video Recorder is a free screen recorder that lets you record screen activities. It is a full-featured but lightweight screen recorder. With any limitation, you can record Skype conversations with this tool. It is a useful tool for Skype interviews and online conference calls. Including multi-level menus, you can capture multiple windows and objects in this program. For clarity, this software allows you to highlight your cursor path. This free tool runs on Windows only. You can record videos with the microphone sound. This screen recorder doesn't contain any spyware or adware. You don't have to pay for this software because it's free. To run this on your device, you have to install it. You can record full screen through this program and it can also record camera. It lacks a coherent interface and doesn't record system sound. During download, it might install unwanted software and if disconnection occurs, it doesn't notify users.
4. ShareX
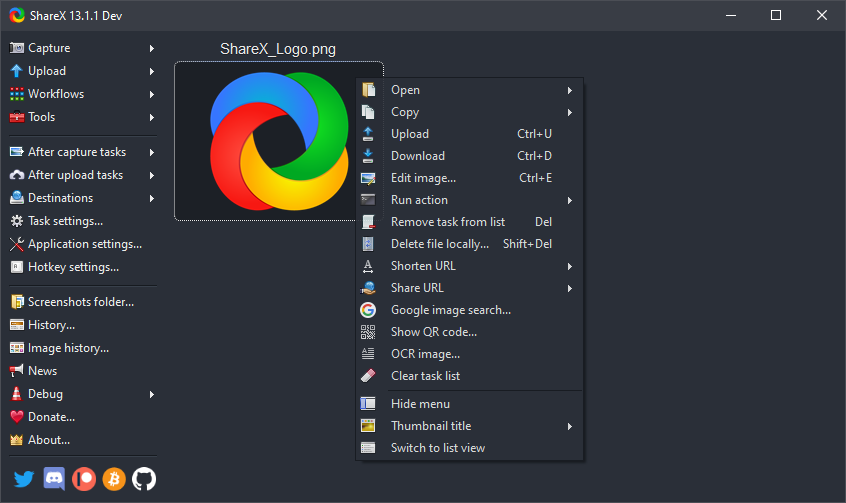
ShareX is a free screen recorder that lets you capture the full or partial screen flexibly. This tool boasts almost as many custom features as some paid software screen recorders. An average customer might get lost in the many advanced tools and editors because ShareX is mostly targeted toward developers. Many URL sharing services are supported by this tool. For easier and quicker navigation, it incorporates hotkeys. You are allowed to add custom watermarks and colour effects to your video. This software only runs on Windows. While recording this tool, you will be able to record sound. For common users, the interface is complicated. There is no option to record a webcam in this free screen recorder. It doesn't have easy to understanding operation interface. As it is a free tool, there is no hidden charge. To run ShareX, you need to install this. It doesn't have any video editor compared to other tools and also it has a low quality for game recordings.
5. FlashBack
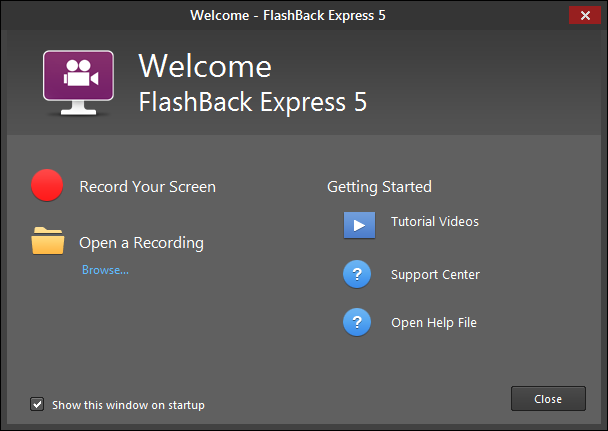
FlashBack is a screen recorder that allows you to capture your screen along with a webcam and mic. It is a full-motion-based screen recorder and by adding captions/arrows/images/highlights, you can make the recording better. This tool has a simple and handy interface. Multiple monitors can be recorded in this tool. You can add distinctive and custom watermarks to your videos. It supports quick upload to FlashBack Connect, and YouTube or you can also export recorded videos as GIF, MP4, WMV, AVI, Flash and QuickTime. While recording, you can zoom in and out. This screen recorder is available for only Windows and you have to install this on your desktop. You will have 30 day's free trial in this program and then you have to buy it for $49 for 1 PC. Modifying existing demons is very much difficult. You can import files only in FBR format.
6. Screencast-O-Matic
For PC and mobile devices, Screencast-O-Matic is considered one of the best screen recorders. To personalize recordings and make them more attractive, it comes with a video editor. The interface of this program is fast and fairly easy to use. You can use the built-in tools to add text, customize your clips and much more after your finish recording your screen. This tool is also compatible with various collaboration and sharing platforms. You are allowed to upload videos to YouTube, Google Drive, Vimeo and Dropbox. For Android and iOS, there is also a mobile app. Only premium plan users can use the advanced functionality. It allows you to record videos with a webcam and audio narration. You can customize the recording area through this app. There is a free version of this program but the free version has limitations on the screen recording time. To get more advanced features, you can upgrade it by spending money. The interface of Screencast-O-Matic is user friendly. You have to install this program on your device to use it for screen recording. This software is available for Mac and iOS, Windows, Android and Chromebook. The free version leaves a watermark on videos. Behind a paywall, many features are locked.
7. Movavi Screen Recorder
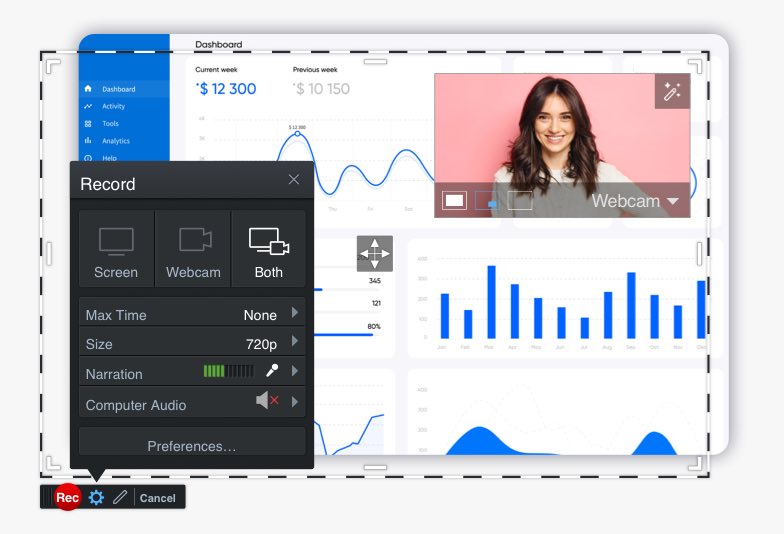
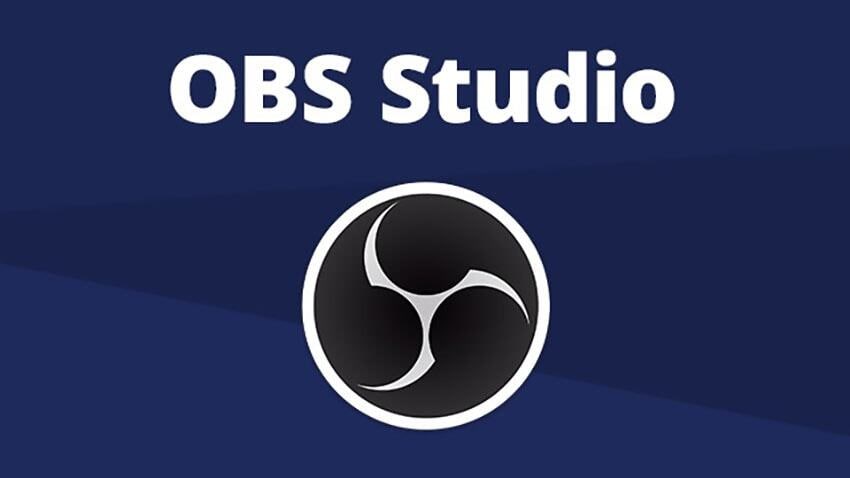
Movavi Screen Recorder is a screen recording tool that lets you perform computer recording, and capture audio and webcam. With high-quality recordings and GIFs, you can save recordings. This software supports uploading videos to YouTube or Google Drive. For recording webinars, lectures, calls, gameplay, guides and more, this tool is very much useful. Movavi Screen Recorder has a simple editing and seamless user interface. You can schedule recordings in this tool. It is available for both Windows PCs and Mac computers. This software has a free version with an impressive set of editing tools. You can buy this tool for 1 year for $44.95. To run this tool on both Windows and Mac, you have to download it. You can capture full screen by choosing "Record Entire Screen". The free version has watermarks and it is reported to have periodic crashes.
8. OBS Studio
OBS Studio is a pro-level screen recorder that allows you to create high quality and detailed screen recordings. The interface of this program is fully customizable which is good for the advanced and intermediate users but difficult for the beginners. With advanced audio mixing, exciting transitions and more, you can create genuinely unique clips. This program has a lot of advanced features and functions. You are allowed to capture Webcam and audio while recording in this tool. With per source filters, it includes a built-in audio mixer. This screen recording doesn't add any watermarks and also doesn't have any limitations over recordings. It is available for Windows, Mac and Linux. You can record in full screen in OBS Studio and have to install it on your device to use. It is a free screen recorder so you don't have to pay for it. Reviewers have reported that this tool might crash often. Video qualities are not that good and also it is not suited for quick recordings.
Part 3. How to screen record in laptop windows 7?
Wondershare UniConverter is one of the most high-rated screen recording software for both Mac and Windows. You can record top-quality screencasts and save them as MP4, AVI or FLV through this program. This tool will provide you with an intuitive video converter and editor.
Steps to record screen in laptop Windows 7:
Step 1 Open the Screen Recorder
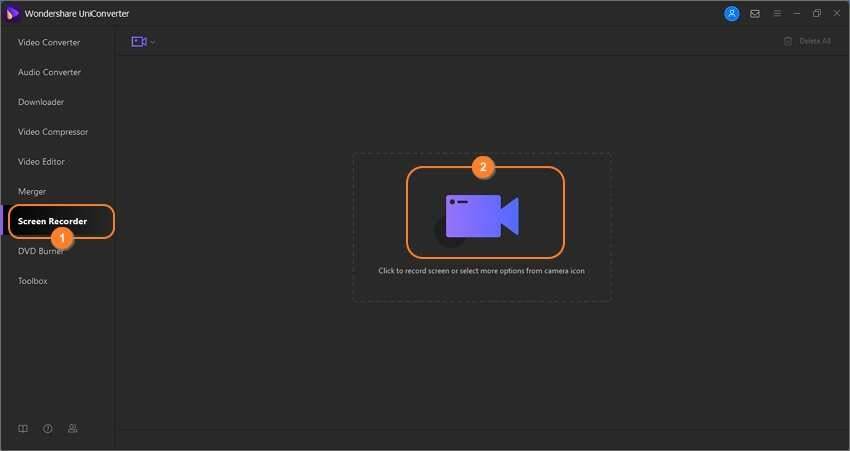
First of all, download and install Wondershare UniConverter on your laptop. After installing it, launch the program and click on the "Screen Recorder" tab. To load the screen capture function, press the "Camcorder" icon after that.
Step 2 Choose a region for recording
Open the browser tab or app which you want to record and to set a record region, drag the recording frame. You can also choose "Custom or Full Screen" by opening the recording mode menu list. To enter precise video frame dimensions, select "custom" if you want. And of course, for the best output, click on the "Lock Aspect Ratio".
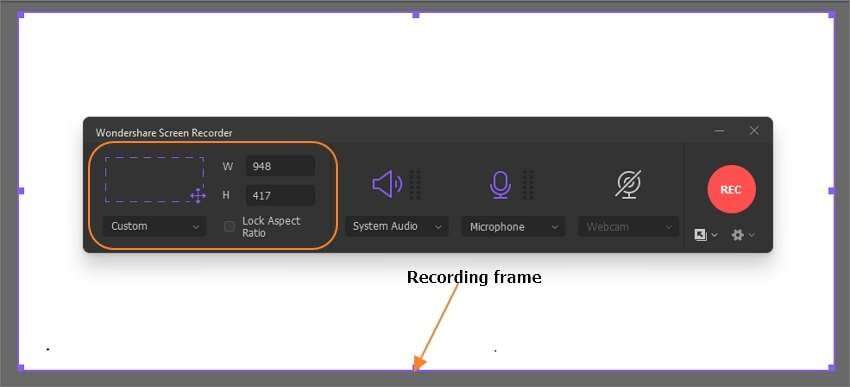
Step 3 Personalize the recording settings and devices
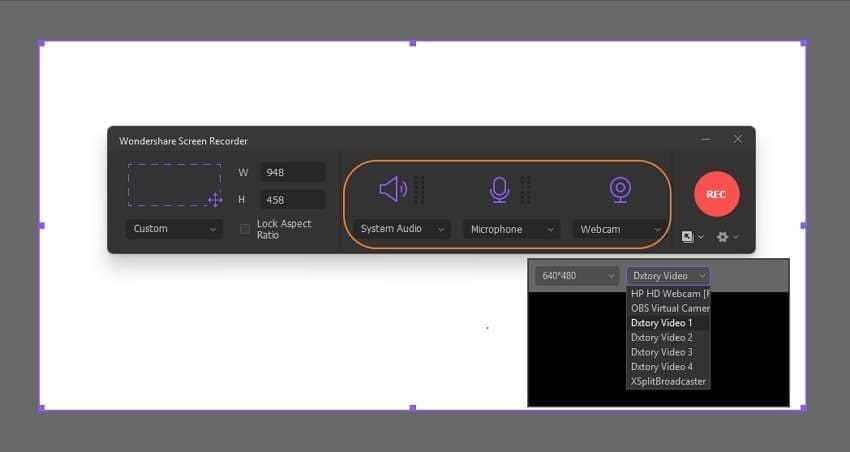
Choose an output device on the "System Audio" menu if you want to capture sound outputs from the laptop speakers. Next to apply voice narrations, select a mic on the "Microphone" menu and then to record a PIP effect, choose a "Webcam" camera.
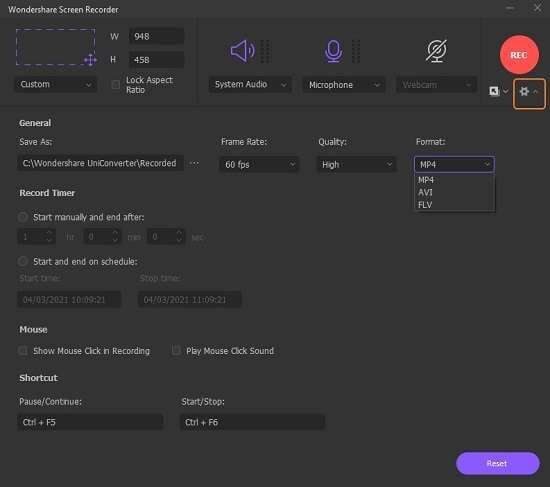
Open the "Advanced Settings" menu to adjust settings and after that as the targeted format, choose AVI, FLV or MP4. This software also allows you to choose an output frame rate, quality, folder path and personalize the keyboard shortcuts.
Step 4 Begin recording a screencast on a laptop
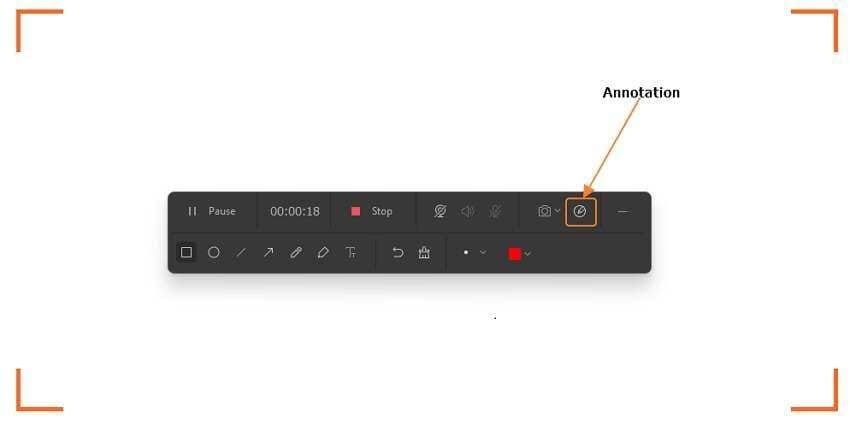
You can start after previewing the recording area. To begin recording a screencast, click on "Rec". You can apply highlights like texts, drawings, shapes, arrows and lines through this program. Launch the recording control panel to access all these features and after that tap on "Annotation". This program also allows you to enable/disable the microphone, webcam or system audio. Finally to finish grabbing your computer screen, click on the "Stop" button.
Conclusion
There are several purposes for which you have to record your screen. To capture the screen, you have to use a third-party tool. In this article, we have suggested you 8 screen recorder for laptop Windows 7 and guided you on how to record the screen. Among all of the apps, we would highly recommend you to use WonderShare UniConverter. This tool assures you top-quality videos and it is also simple to understand. It has all important features like webcam and microphone recording, annotations and video editing capabilities. So we hope that you would use this software.

