There was a time when the term screen recording was almost non-existent. But as times have progressed, screen recording is the new normal. From recording your screen to show your friend something, to recording tutorials, to using screen recorders for official purposes, Screen Recorders have become a need of the day.
As screen recorders become common, the demand for high resolution, i.e., 4k Screen Recorders, has increased. People want clearer and more realistic recorded videos. So, if you are looking for the best 4k Screen Recorders for your PC, you have come to the right place.
In this article, we will discuss different 4k Screen Recorders for PCs, their features, and pros and cons.
Why Do You Need 4k Video Recording for PC?
4k is the best type of resolution that has almost four times the pixels of HD. It enhances your videos by making them much richer and more realistic, giving the viewers a very immersive experience.
Using 4k Screen Recorders on your PC can ensure whenever you record your screen, the resulting content is of high quality and has excellent resolution. This will surely give a more professional look to your recordings, and the viewers will likely engage more.
Best 4k Screen Recorder for PC
So, now that we know 4k Screen Recorders are a must-have let's look at some of the best ones available to you.
1. UniConverter
The first and one of the best tools you can use for 4k screen recording is Wondershare UniConverter. Wondershare UniConverter is essentially a video converter, but along with that, it also allows you to edit record, and transfer videos.
It offers a bunch of features that other brands do not provide.
Features:
Let's take a look at all the features provided by Wondershare UniConverter.
- 1000+ Video Formats: UniConverter offers about 1000+ formats for your video conversions.
- CD Burning: You can also use UniConverter to burn a video of any format to DVD (Windows and Mac).
- GPU Acceleration: It has excellent GPU acceleration, making it have almost 90 times faster converting speed.
- Watermark Editor:UniConverter also allows you to remove or add watermarks from your recorded videos.
Pros and Cons
Pros
Has amazing features
No loss of quality
User friendly
Cons
Complicated refund process
Video length limit in free version
Wondershare UniConverter — All-in-one Video Toolbox for Windows and Mac.
Edit videos on Mac by trimming, cropping, adding effects, and subtitles.
Converter videos to any format at 90X faster speed.
Compress your video or audio files without quality loss.
Excellent smart trimmer for cutting and splitting videos automatically.
Nice AI-enabled subtitle editor for adding subtitles to your tutorial videos automatically.
Download any online video for teaching from more than 10,000 platforms and sites.
2. DemoCreator
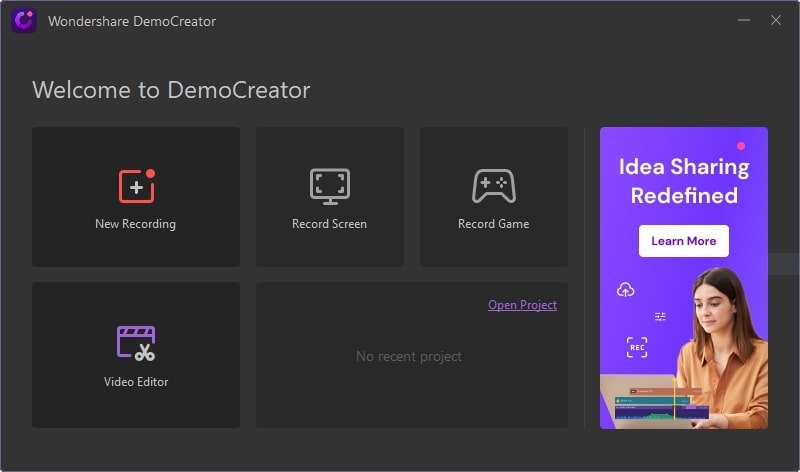
Apart from UniConverter, Wondershare also offers another tool that can be used as a 4k Screen Recorder. DemoCreator is a video editor offering extraordinary features for editing and recording your videos. It allows you to record your computer screen and webcam simultaneously. It is perfect for enhancing your recorded videos.
Features:
Among its various features, here we have mentioned a few key ones.
- Adjustable frame: Before recording, DemoCreator allows you to adjust the frame. You can add or remove any part of your computer screen.
- Real-time Screen Drawing: During recording, DemoCreator provides you with screen drawing tools such as highlighters, pens, and more that you can use to draw lines and other symbols on the screen.
- Fast Export without Editing: DemoCreator also works for users who are only interested in Screen Recording and not the Editing part. With its Fast Export feature, you can export your video with just a click.
Pros and Cons
Pros
Screen magnifier
Free updates
Easy-to-use interface
Cons
Mic stays on even after the recording is over
3. Bandicam
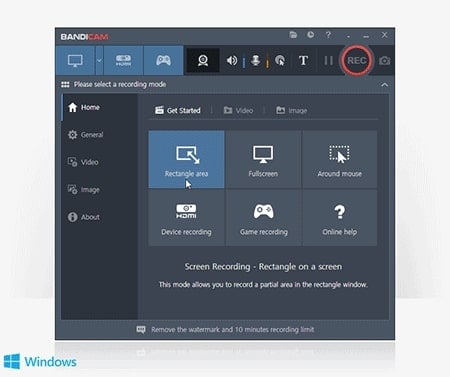
Bandicam is a closed-source screen recorder that allows you to capture your PC Screen in 4k resolution. The end video results in high-quality content that can be exported and shared with other people. It is very user-friendly and offers many features such as audio recording, webcam overlay, etc.
Features:
Let's look at some of the key features of this 4k Screen Recorder.
- Real-time Drawing: Just like DemoCreator, Bandicam also offers the option of real-time drawing. In real-time, you can use the drawing tools to draw and outline your screenshots and videos.
- Mouse Effects: Bandicam also offers you different mouse effects that can be used to make the movement of your mouse more visible to the audience.
- Chroma Key: Bandicam allows you to make a chroma key video in real-time while recording your computer screen.
- Scheduled Recording: You can also schedule your recordings in the premium version. You can set a specific time for your recording to start daily or weekly.
Pros and Cons
Pros
Good sound and video quality
Direct upload on YouTube
Smooth set up
Cons
10 minutes time limit in the free version
Watermark in the free version
Does not support live streaming
4. Snagit
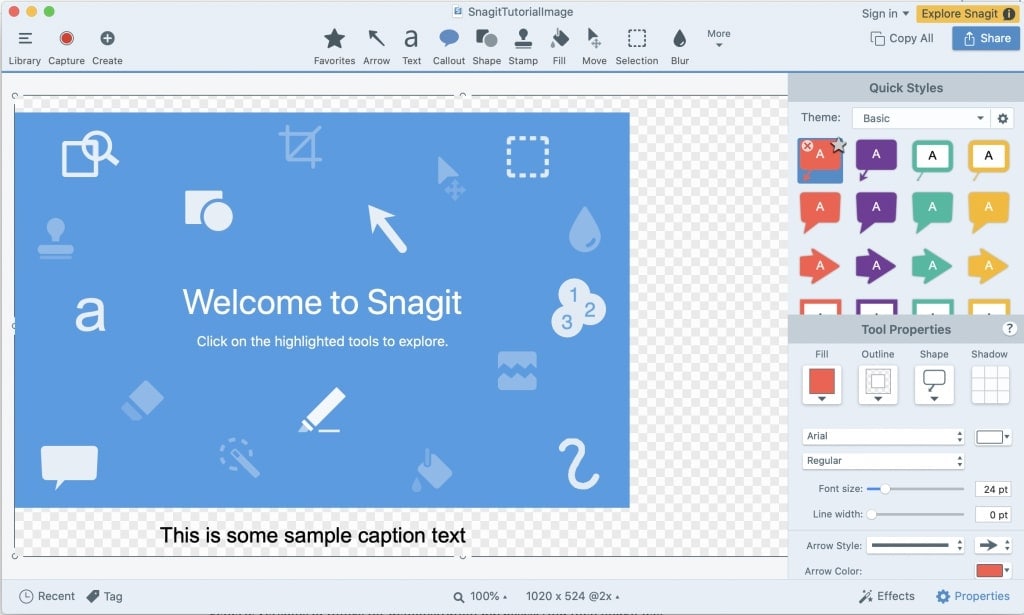
Snagit is a 4k Screen Recorder that is compatible with Windows as well as macOS. It was developed in 1990 and had versions available in different languages. It lets you capture screens, add additional context, share images, and much more.
Features:
Some main features include:
- Panoramic Scrolling Capture: You can use Snagit in order to capture a scrolling screenshot. It allows you to capture the full length of a page by scrolling vertically or horizontally.
- Cloud Library: With this feature, you can sync devices and find, open, and edit videos between different devices (Windows as well as Mac).
- Animated GIFs: With Snagit, you can turn any short video recording into a GIF.
- Smart Move:You can automatically make objects in your screen captures movable. You can also rearrange buttons, delete text, or edit other elements in your screenshots.
Pros and Cons
Pros
Grab Text feature, which helps in obtaining or copying on-screen texts
Integrating with email, image editors, and Microsoft Office documents
Cons
Image size adjustments
Could do better with capturing text content that can be edited.
5. OBS Studio
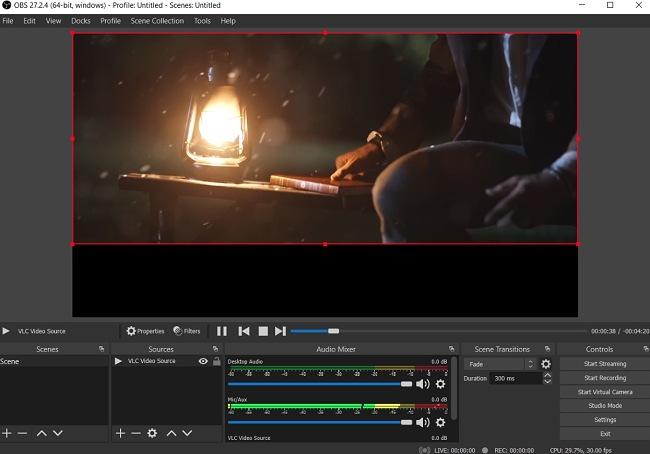
OBS Studio or Open Broadcaster Software is a great tool for video recording and live streaming. You can use it on your Windows, macOS, and Linux.
Features:
Some key features include:
- Unlimited Scenes: You can use custom transitions to switch seamlessly between an unlimited number of scenes.
- Audio Mixer:OBS Studio has an intuitive audio mixer using which you can handle filters such as noise gate, noise suppression, and gain.
- Streamlined Settings:OBS Studio has a wide range of array of configuration options that are streamlined in settings. You can tweak many aspects of your recording.
- Modular Dock UI:This feature allows you to rearrange the layout as you desire. You can also separate each individual dock out of its own window.
Pros and Cons
Pros
Robust feature set
4k Video Quality
Cons
Multiple sources not working at a time
Steep learning curve
6. Camtasia
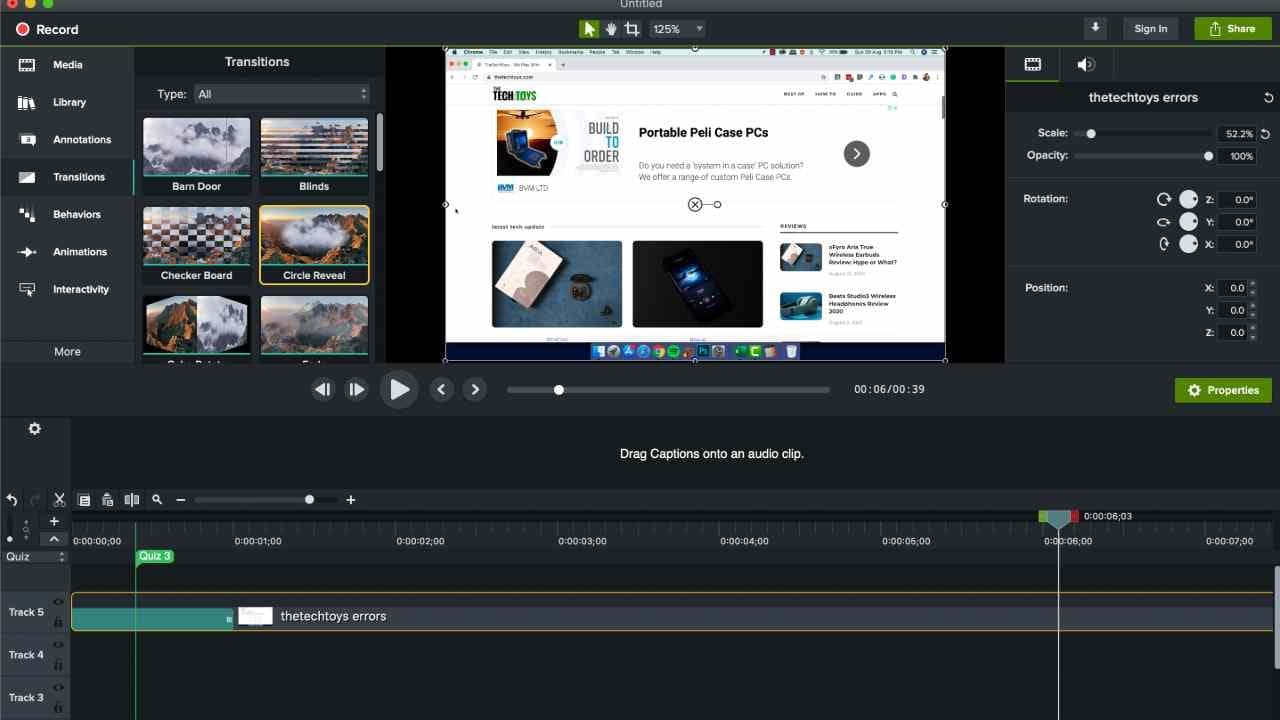
Camtasia is another suitable screen recorder for PCs with a built-in video editor. You can use it for creating video tutorials and presentations using the Microsoft PowerPoint plug-in. You can also record other multimedia recordings simultaneously or separately.
Features:
Some key features are:
- Visual Effects: A lot of visual effects are available for professional results, such as motion blur effect, corner rounding effect, Lottie support, and the option to customize media clips.
- Audio Effects: Camtasia has some amazing audio features like emphasizing audio effects and an audio meter, which provides a visual readout of your audio levels within the editor.
- Sharing Narration. To improve the sound of your recording and for detailed editing, you can pass narrations back and forth through TechSmith Audiate.
- Fast Editing: Proxy Video. In order to display and edit large and high-resolution videos smoothly, Camtasia offers the option to use proxy video. These temporary copies can be edited quickly due to their low data volume and are then returned to the original high-quality recording.
Pros and Cons
Pros
Simple User Interface
High-quality screen recording
Super easy cutting/ trimming/ editing tools
Cons
Limited annotation options
Software is not light enough for mid-spec machines
7. QuickTime
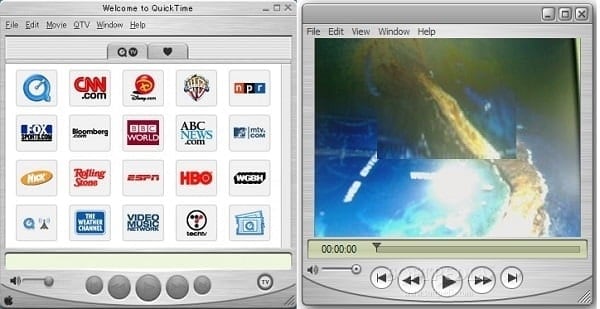
QuickTime is a popular multimedia player that provides additional features like 4K screen recording. Developed by Apple, it is one of the most popular screen recording software for Mac devices. This tool has stopped receiving support on Windows. However, it is still a good option.
Features:
Some of the features that QuickTime provides its users include:
- Different recording options: You can use QuickTime to record your screen with the help of different audio and video options available to you.
- Editing tools: QuickTime provides you with different editing tools such as trimming, splitting, detaching, merging, and rotating.
- Compress Videos: You can also use QuickTime to compress videos from 4K to 480P.
- Share directly to YouTube: Lastly, the process of exporting videos is very easy and simple.
Pros and Cons
Pros
It is free and easily available for macOS
Simple and focused design
Easy to use even for beginners
Cons
Does support screen drawing
Not stable in-game recording
Screen recording limited to .mov format
8. Movavi Screen Recorder
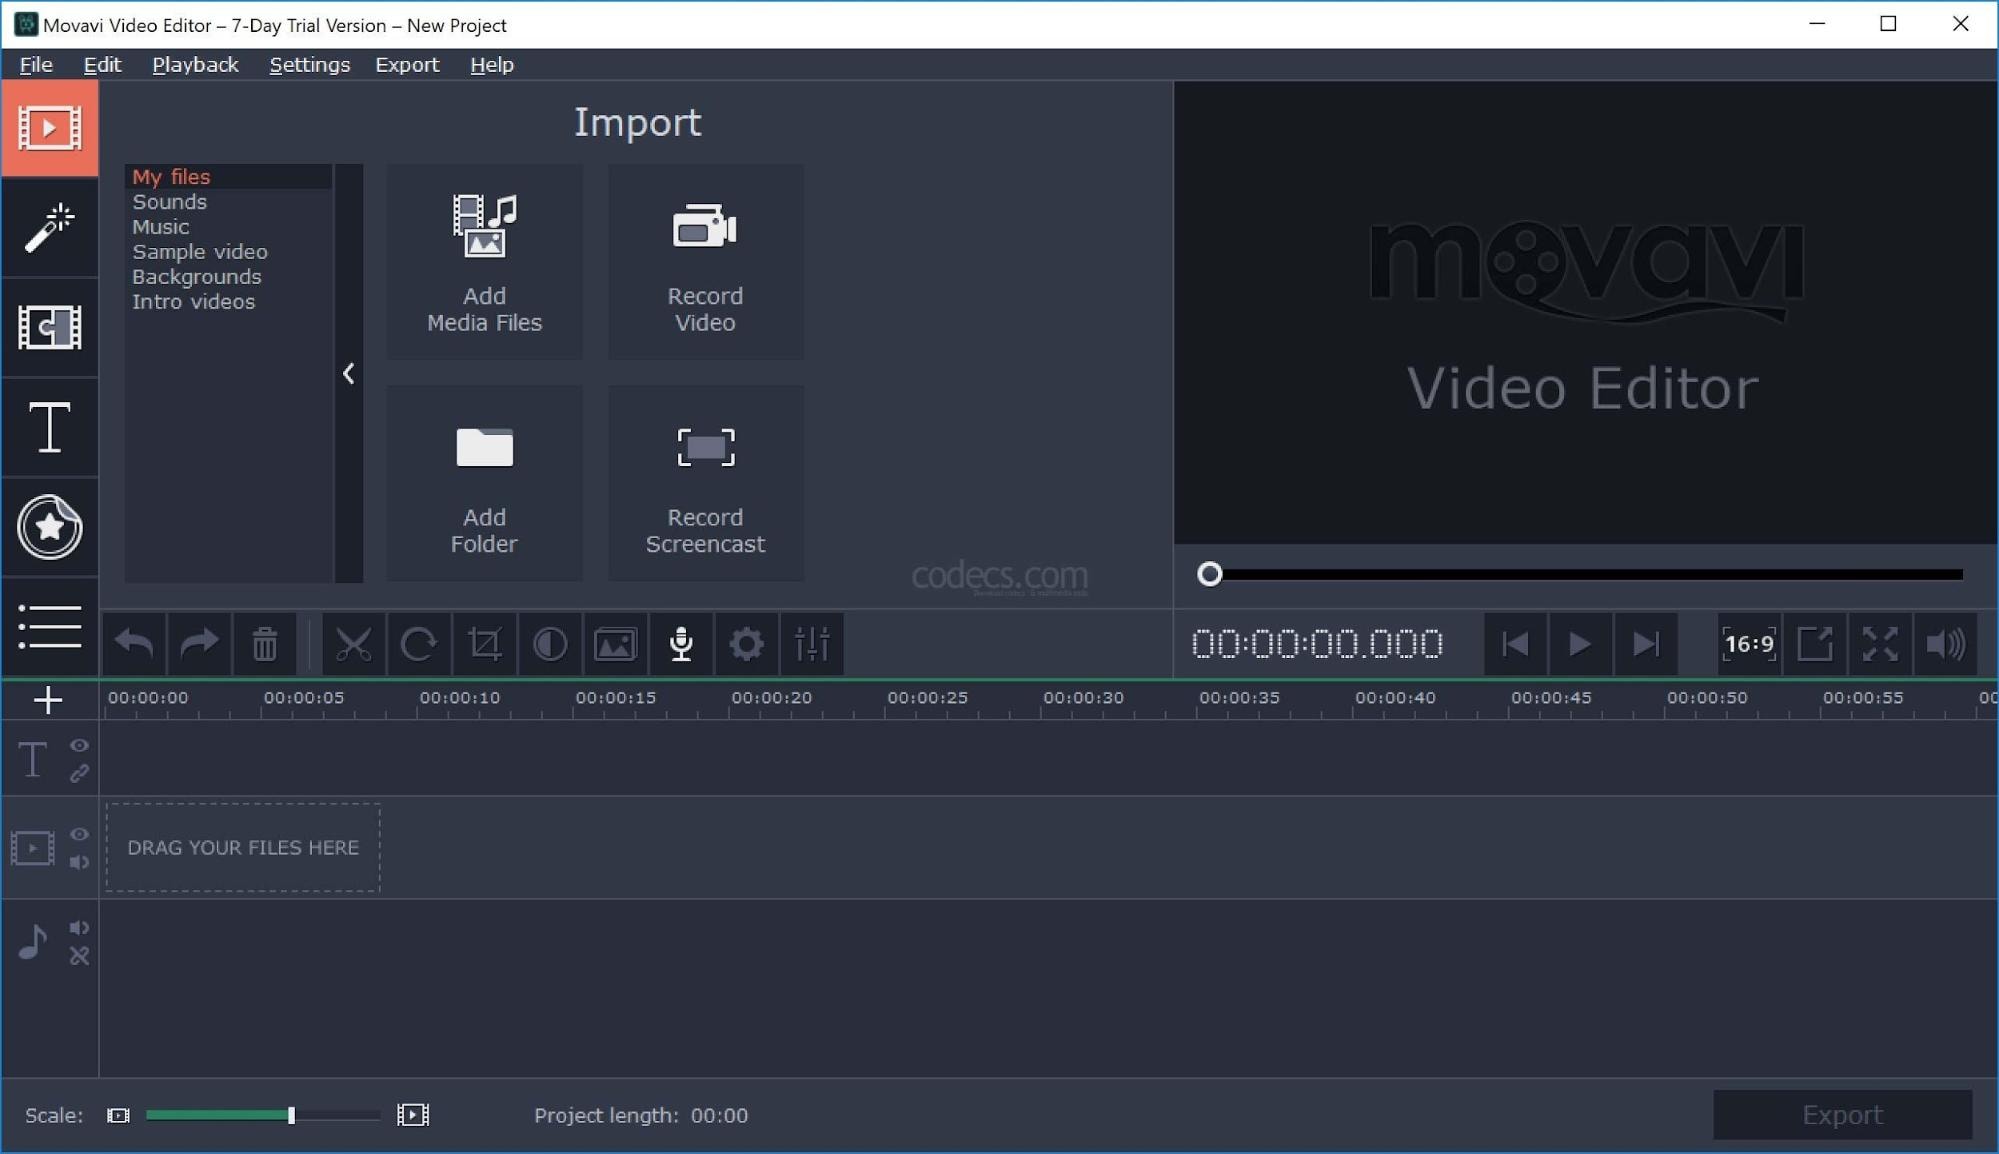
Movavi Screen Recorder is not just a simple screen recorder. In fact, it is a simple, user-friendly tool that can help you in recording games, YouTube tutorials, and training videos. It is very easy to download and install, and you can start recording in a few simple steps. It also provides numerous editing tools to edit your recording before saving it.
Features:
Some of the features of Movavi Screen Recorder are:
- Scheduled Screen Recoding. It allows you to schedule your recording and then actions on completion of recording.
- Draw While Recording. You can draw on your screen while recording, which can assist you in explaining your tutorials better.
- Helpsyou record microphone, webcam, and system sound simultaneously or separately.
- Multiple Supported Output Formats. Movavi provides output in various formats, which include MP4, AVI, MOV, MKV, GIF, MP3, PNG, BMP, and JPG.
Pros and Cons
Pros
No recording limit
Advanced features made easy
Intuitive for beginner
Cons
Underdeveloped functions
Not for professional use
How to Use UniConverter to Screen Record Your PC in 4k?
From all the screen recorders listed above, the one that we recommend is Wondershare UniConverter. Due to its simplicity and immaculate features, it is the best choice for recording your PC screens in 4k.
We have given a step-by-step guide for you to follow in order to record your screen.
Step 1 Download UniConverter
Go to the official Wondershare website and download UniConverter for your PC.
Step 2 Open Wondershare UniConverter
Once you have downloaded Wondershare UniConverter, click on it to open it.
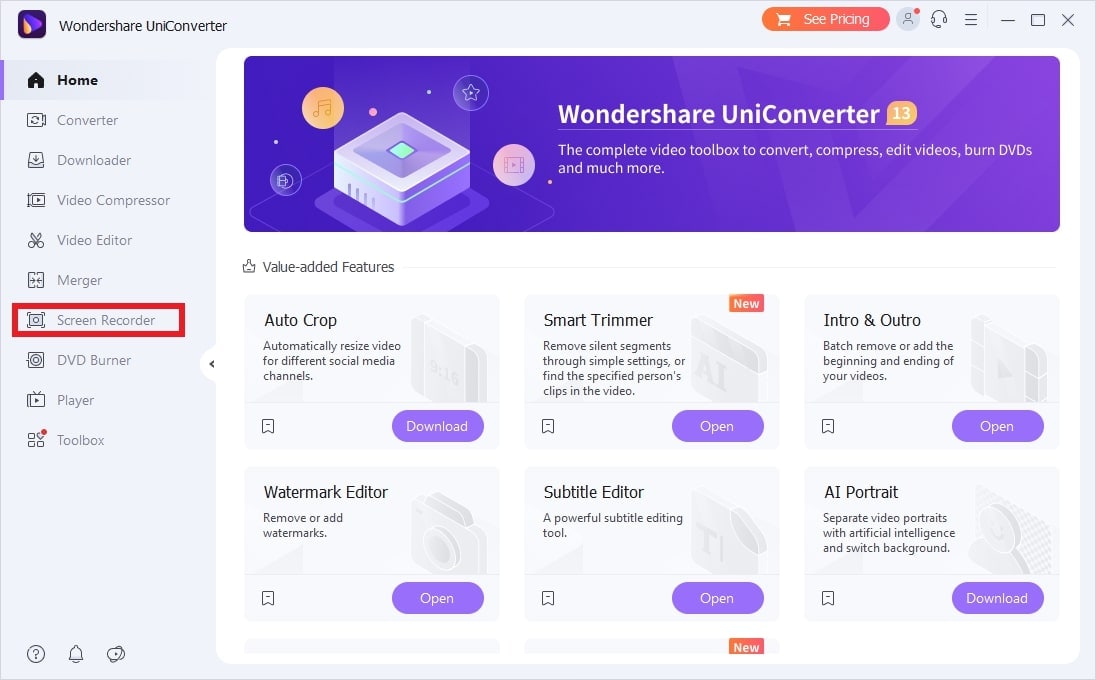
Step 3 Go to Screen Recorder
Different modes are available in the panel on the left of the screen. Click on the Screen Recorder mode.
Step 4 Choose the Desired Mode
From the window that appears, choose the desired option.
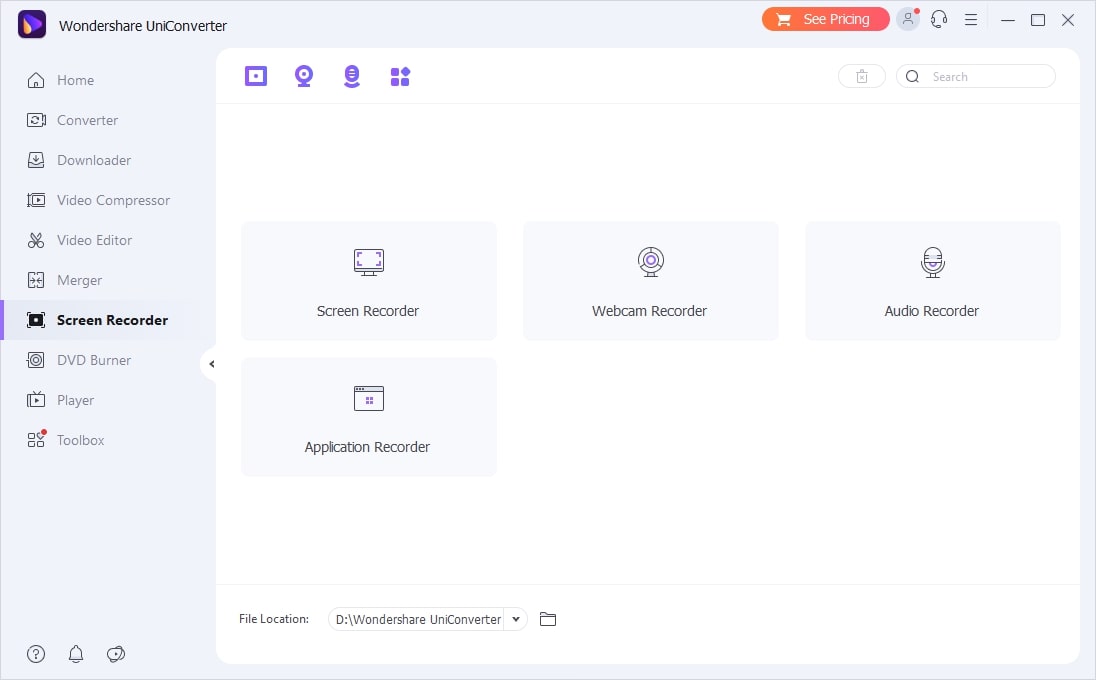
UniConverter gives you four options. You can either simply screen record or use a webcam recorder, audio recorder, or application recorder.
Moreover, also set the location where you want the final file to appear.
Screen Recorder
If you click on the screen recorder, a window will pop up, and a square will appear on the screen. The square will show the frame of the video; you can adjust it according to your requirement.
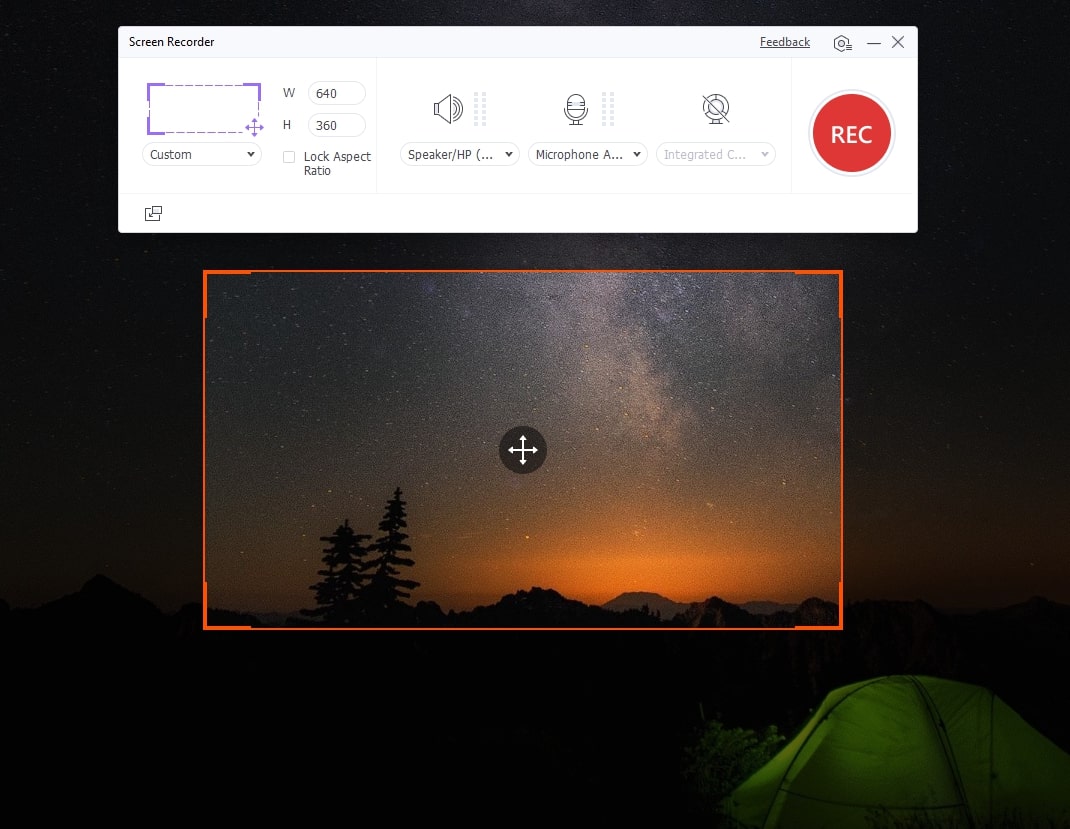
Other than that, you can use the different settings available to you in the dialogue box. Adjust your speaker and mic settings.
Webcam Recorder
When you click on Webcam Recorder, the following window pops up. Here, you can adjust the settings before you begin recording.
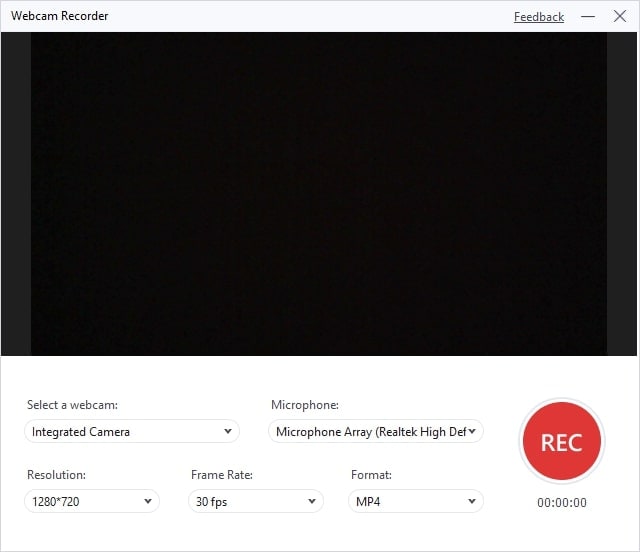
Set the desired resolution, frame rate, and format, and then hit record.
Audio Recorder
If you want to record audio without any video, choose the Audio Recorder mode.
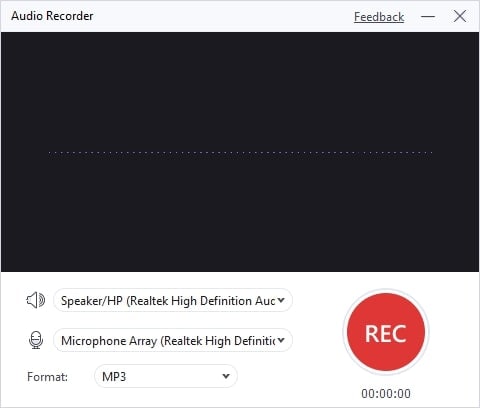
The dialogue box allows you to set your speaker and microphone settings. You can also change the format as per your requirement. Hit record to begin.
Application Recorder
If you wish to record a single application and not your whole screen, then simply choose the Application Recorder mode.

The pop-up window lets you select the application you want to record. Once you have the application selected, adjust the speaker and mic settings, and hit record.
Step 5 Stop the Recording
Once you are done recording, click on the stop button to stop recording. Your recorded file will appear in the UniConverter library.
Here you can open the file location or add it to other lists in order to use other features on the recorded file.
Click on the play button to see a preview of your recorded video.
The best part is that you don't need any additional steps to save your file. Once you stop the recording, the file will automatically be saved to the location set before recording.
Conclusion:
4k Screen Recorders have become pretty common and are a need of the day. This article gives you loads of options in order to choose a 4k Screen Recorder that best fits your need.
However, we recommend Wondershare UniConverter to you as it provides all the features with a twist at the end (automatic file saving). It is a great tool that is not only easy to use but also efficient.
So, what are you waiting for? Go, get a UniConverter now!


