Switch is a game console from Nintendo released in 2017. With this hand-held gadget, you'll enjoy a traditional gaming experience as well as play against other players online. However, sometimes you may want to show your YouTube followers how to play video games on Nintendo Switch. In that case, this article shows you how to record videos on Switch for YouTube using the console's inbuilt game recorder. You'll also learn how to record Switch gameplay for YouTube on your computer using a capture card and a screen recorder. Let's learn!
Part 1. How to record Switch gameplay using its built-in feature [basic way]
In 2017, the Nintendo Switch game console received a massive 4.0 update. With it came the ability to capture 30-second gameplay videos and directly share them on social media. This marked a significant step forward, as initially, gamers could only grab screenshots and share them with their social media friends. Although only a few games were supported back then, the list has expanded to include dozens of games.
So, without wasting time, below is how to record Nintendo Switch gameplay for YouTube using its inbuilt screen mirroring function:
Step 1. Launch the Switch game you want to record.
Step 2. Hold down the Capture button on your Nintendo Switch joystick control for three to four seconds. The screen capture button is the square button under the directional pad.
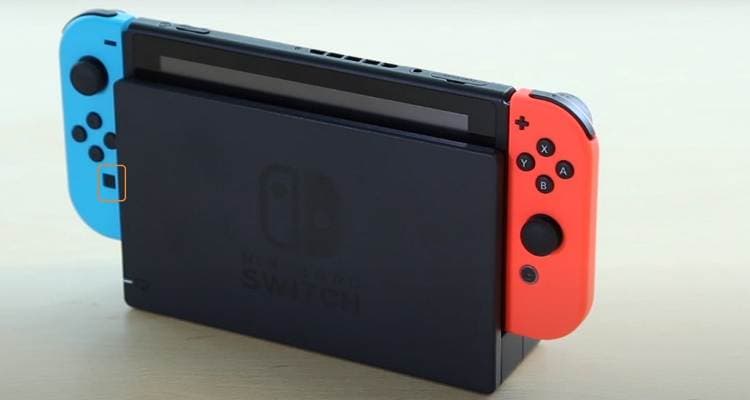
Step 3. After recording your 30-second clip, you can view it in the Nintendo Switch Album. That's it.
Note: Although recording a gameplay clip on Nintendo Switch is the most straightforward and cost-effective method, you're only limited to 30-second videos. So, if you want to record longer, high-quality videos on Nintendo Switch, keep reading to learn how to do that on a PC with a capture card.
Part 2. How to record Switch gameplay for YouTube using the best screen recorder [advanced way]
Like I said before, you can only capture a half-minute clip using the Nintendo Switch game recorder. Fortunately, you can record longer games on Switch using a capture card. With this method, you'll stream all your game activities to your computer before using a screen recorder to capture the gameplay with lossless quality.
Below is your checklist for recording Switch gameplay with a capture card:
- Computer
- Capture card
- Screen recording software (Wondershare UniConverter)
- 2 HDMI cables
- USB cable
Use Wondershare UniConverter because this software is beginner-friendly, unlike other desktop screen recorders out there. Also, UniConverter lets you record the gameplay session in full-screen mode or choose a particular screen area to record. While recording, the app enables you to insert a picture-in-picture effect using an internal/external webcam, voice narration with a mic, and annotations like shapes, texts, lines, and drawings. And after capturing enough content, you can export it to MP4, AVI, or FLV before editing it by trimming, cropping, adding effects, etc.
Wondershare UniConverter - The Ultimate Switch Gameplay Recorder
Capture Nintendo Switch gameplay in full-screen or partial mode.
Record the Switch gameplay alongside PiP effects, microphone narrations, and annotations.
Export the recorded Switch gameplay to MP4, AVI, or FLV files.
Edit the captured gameplay by trimming, rotating, cropping, adding subtitles, applying watermarks, etc.
Directly convert Nintendo Switch gameplay video to YouTube and other standard video formats.
Record high-quality Nintendo Switch gameplay on macOS 10.9+ & Windows 10/8/8.1/7.
Below is how to record YouTube videos on Nintendo Switch using a capture card and Wondershare UniConverter:
Step 1 Connect your Switch console to your computer and the capture card.
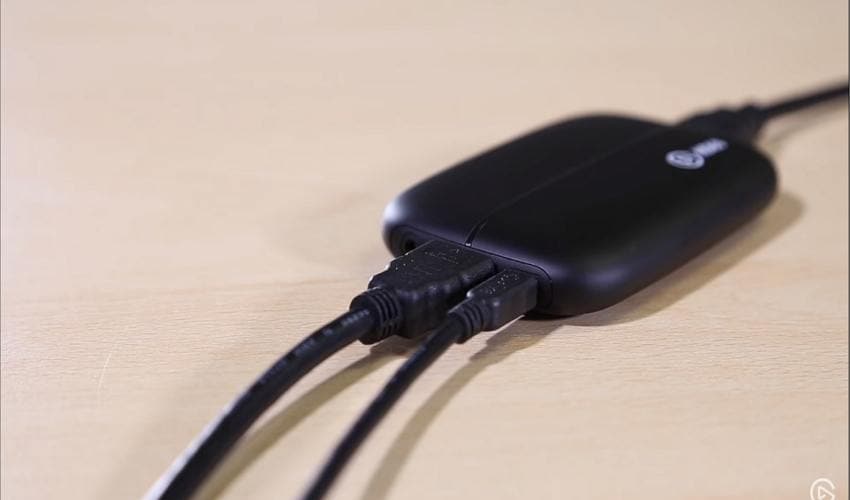
Start by connecting your Nintendo Switch console to your computer using an HDMI cable and USB cable. To do that, insert one end of the provided HDMI cable on the input side of the capture box and then connect it to your Switch console.
Then, insert the remaining HDMI cable to the output HDMI port on your capture card and plug the other side into your computer's HDMI port. Also, connect your capture box to your laptop or desktop using the USB cable. Your computer should recognize the new capture device immediately.
Step 2 Run Wondershare Screen Recorder on your computer.
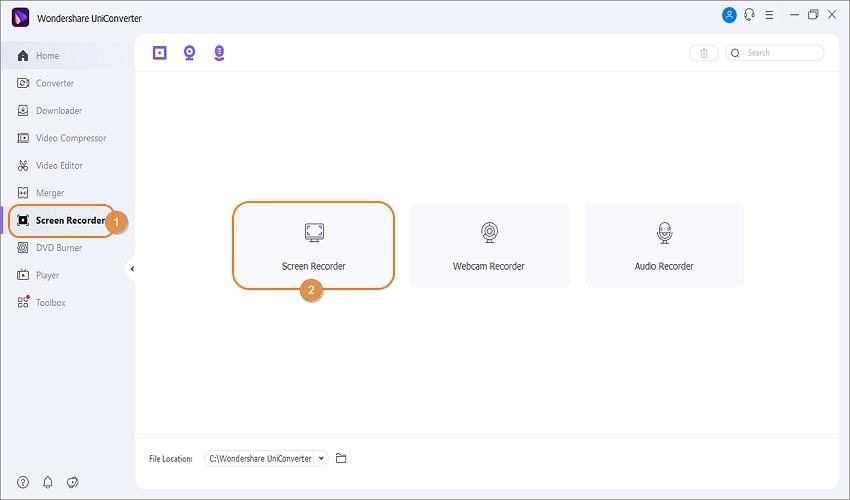
Once your Nintendo Switch is ready to play on your PC, download, install, and fire up Wondershare UniConverter 13. Then, tap the Screen Recorder tab on the left pane to launch the recording function.
Step 3 Choose a capture are on the Nintendo Switch gameplay screen.
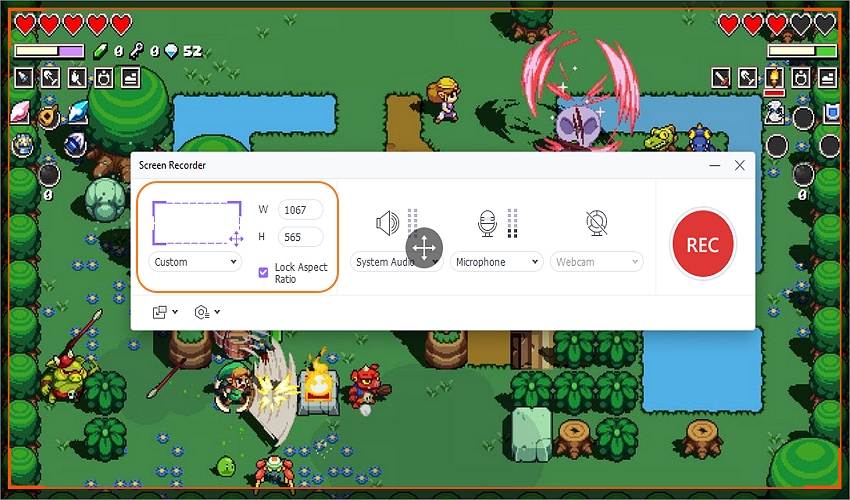
Open the Nintendo Switch screen you want to record and then crop the lasso tool on UniConverter to set up a capture area. Alternatively, tap the recording mode drop-down arrow and choose Full Screen or Custom. With the Full-Screen mode, you'll record the entire computer screen. On the other hand, the Custom mode lets you record specific video frame dimensions. Whichever recording mode you choose, tap Lock Aspect Ratio.
Step 4 Configure the video recording devices and settings.
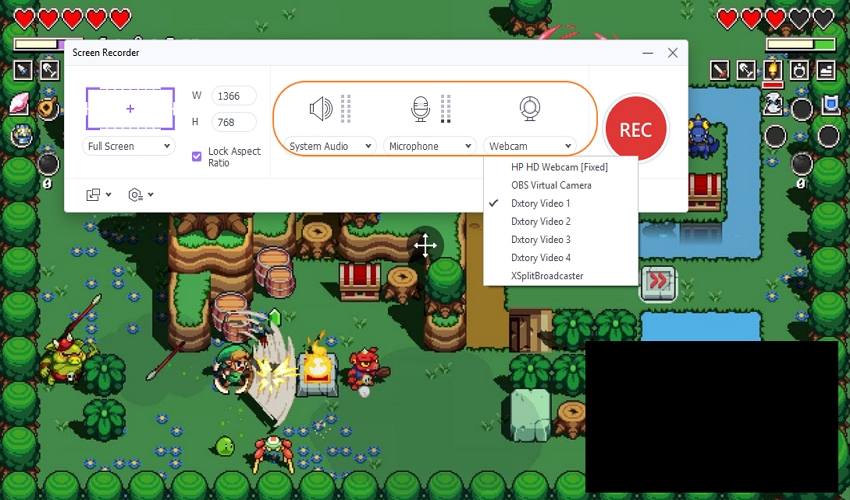
To create a serious Switch gameplay tutorial for your YouTube following, you must include a webcam and microphone recording. In that case, you can use an internal or external webcam and mic by selecting the respective devices on the Webcam and Microphone menus. Also, don't forget to choose a sound output device on the System Audio menu.
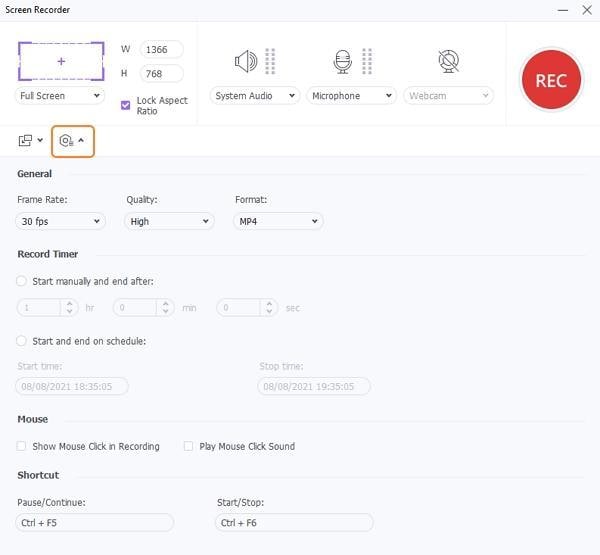
Now let's configure a few settings before we start recording the Switch gameplay. Click the Settings drop-down menu and then choose MP4, AVI, or FLV as the output format. In addition to that, you can preset the recording frame rate, quality, and recording timer. And, of course, choose an output folder for more seamless access to your captured video.
Step 5 Start recording the Switch gameplay.
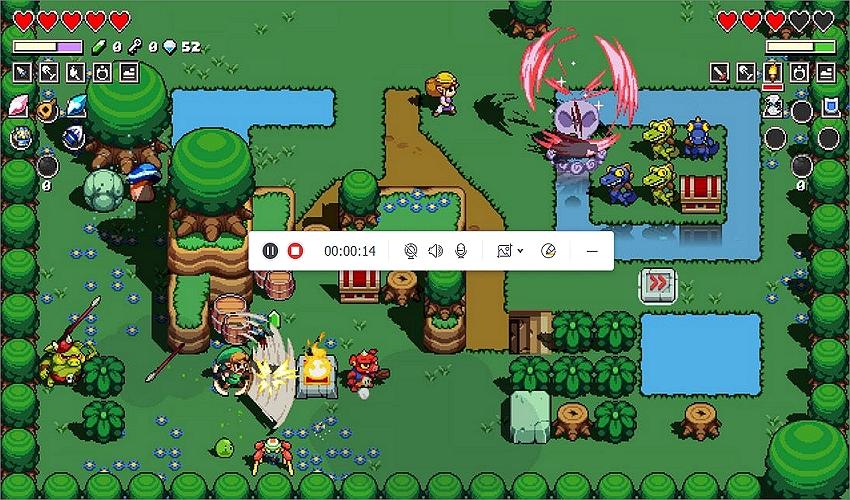
Preview the recording connections, settings, and capture area and tap the Rec button to capture the computer screen. Now play the game you wish to record. As said before, you can record the video alongside a video overlay, voice narration, and annotations. You'll see the buttons for inserting these options on the recording taskbar. Finally, press Stop once you capture enough gameplay content. And that's how to record on Switch for YouTube easily with unlimited playback duration.
Pro tip: Before uploading your video to YouTube, you may want to edit it to make the video more attractive to watch. To do that, right-click the captured video, tap Add, and then choose Video Editor. Now open the Video Editor window and start editing your clip professionally. You can even export it to the YouTube-optimized format for a seamless upload process.
Part 3. Extensive knowledge regarding recording switch gameplay
Q1: How do you use a video capture card?
Basically, a capture card will help you stream your Nintendo Switch gameplay to your computer or TV in real-time. It also works with other game consoles like Nintendo Wii, Xbox One, Xbox 360, PS4, PS5, and more. As you've seen above, you only need to connect your capture box to your display screen using a USB cable and HDMI wire. That's just about it!
Q2: Does a capture card improve performance?
Yes, a capture card is vital if you want to capture unlimited video lengths. It's also crucial if you're going to edit your gameplay videos directly on your PC before sharing. And yes, avid gamers looking to play on larger and high-quality computer screens will need a capture card to project their game consoles.
Conclusion
There you go; that's how to record YouTube videos on Switch with zero hassles. Of course, a quicker but more limited way is to do that directly on your Nintendo Switch console. However, you can get an affordable capture card and enjoy your gameplay sessions on a bigger screen. Plus, use Wondershare UniConverter to record, edit, and convert your recorded video clips.


