

As a free open-source video editing and converting software, VLC is easy to handle and grasp to use. However sometimes some less-used functions might not be fully-taped by all users.
Fred not! In this guide, we will provide you with step-by-step instructions to make the process easy, even for beginners. With VLC’s powerful yet user-friendly features, you'll master video looping in no time.
In this article
Part 1. How to Record Screen with Audio and Mic in VLC
It is not difficult to record the screen using VLC media player. You can start by simply downloading the VLC media player onto your Windows device for free. You will find the download link on the official Free Download. After installing the VLC media player, follow these steps:
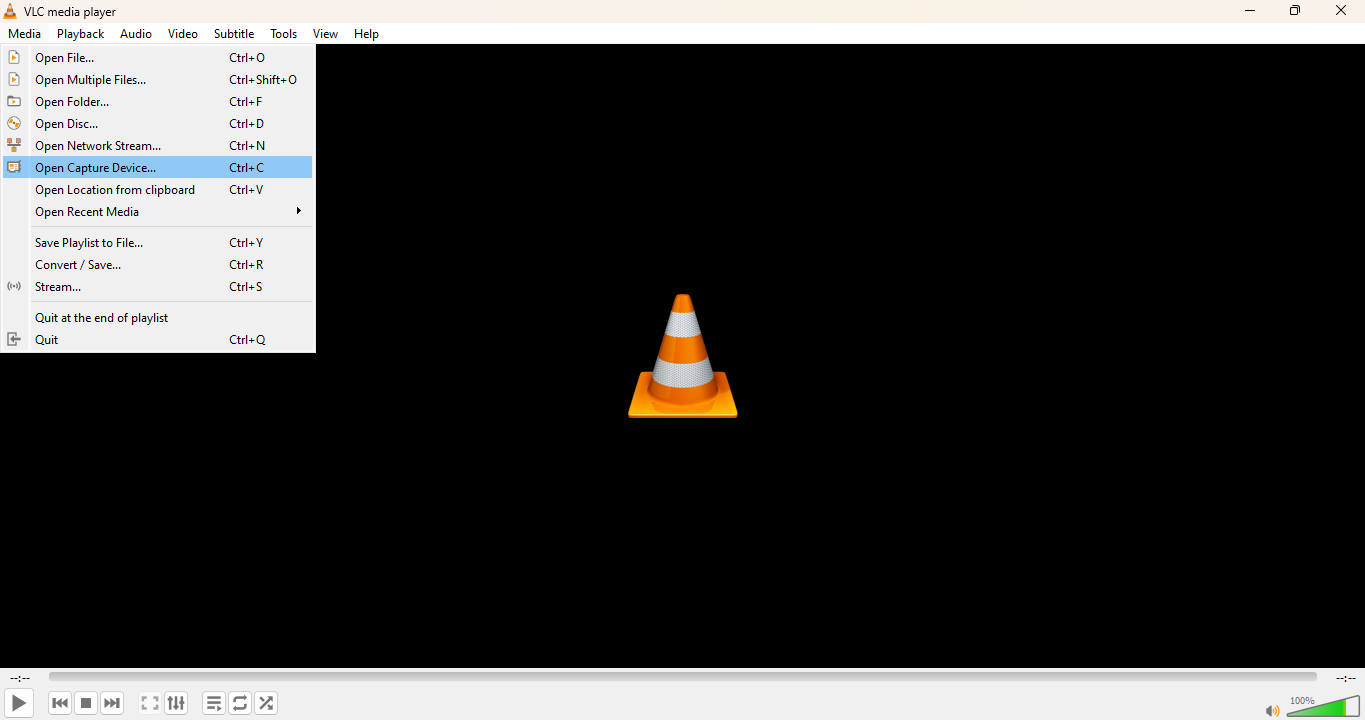
1. Open VLC Media Player on your Windows computer. Click on Media in the top menu and choose Open Capture Device.
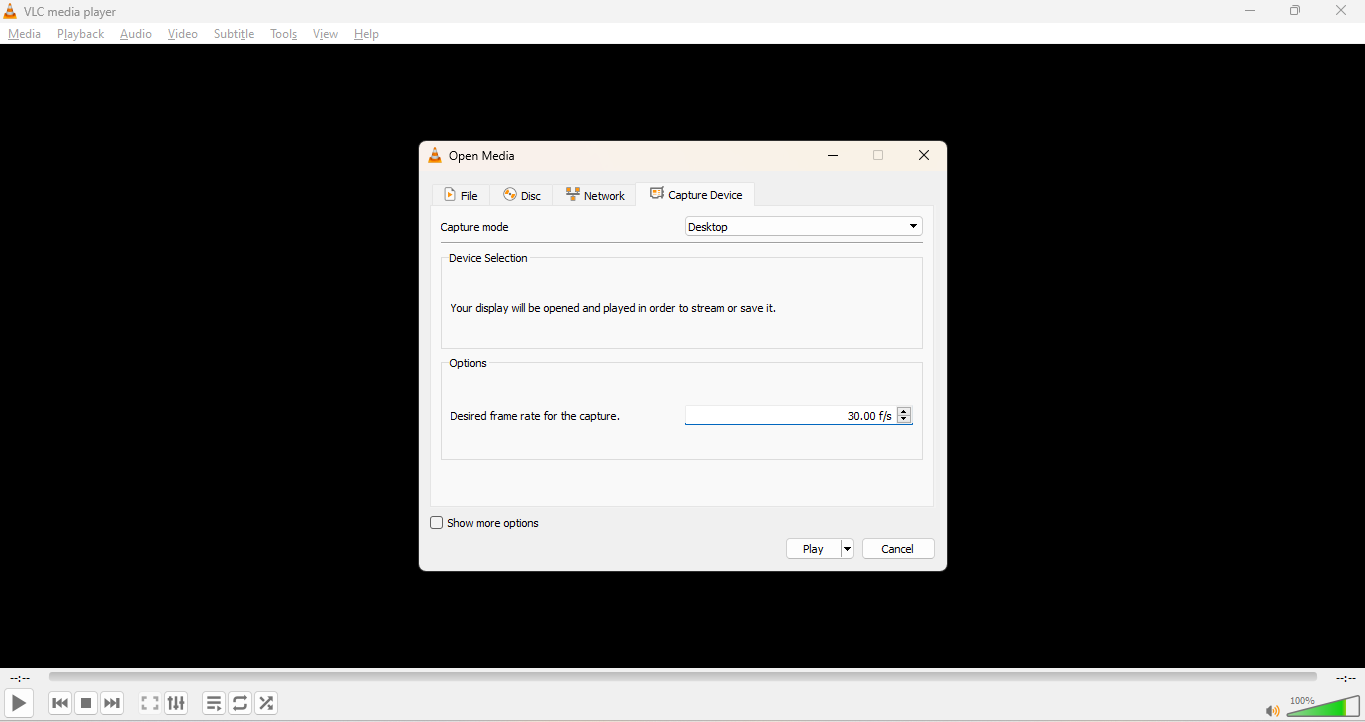
2. In the Capture mode dropdown, select Desktop. Set the desired frame rate. For smooth recordings, go with 30 fps.
3. Click the arrow next to Play and choose Convert. In the Convert window, set a Destination file name and location.
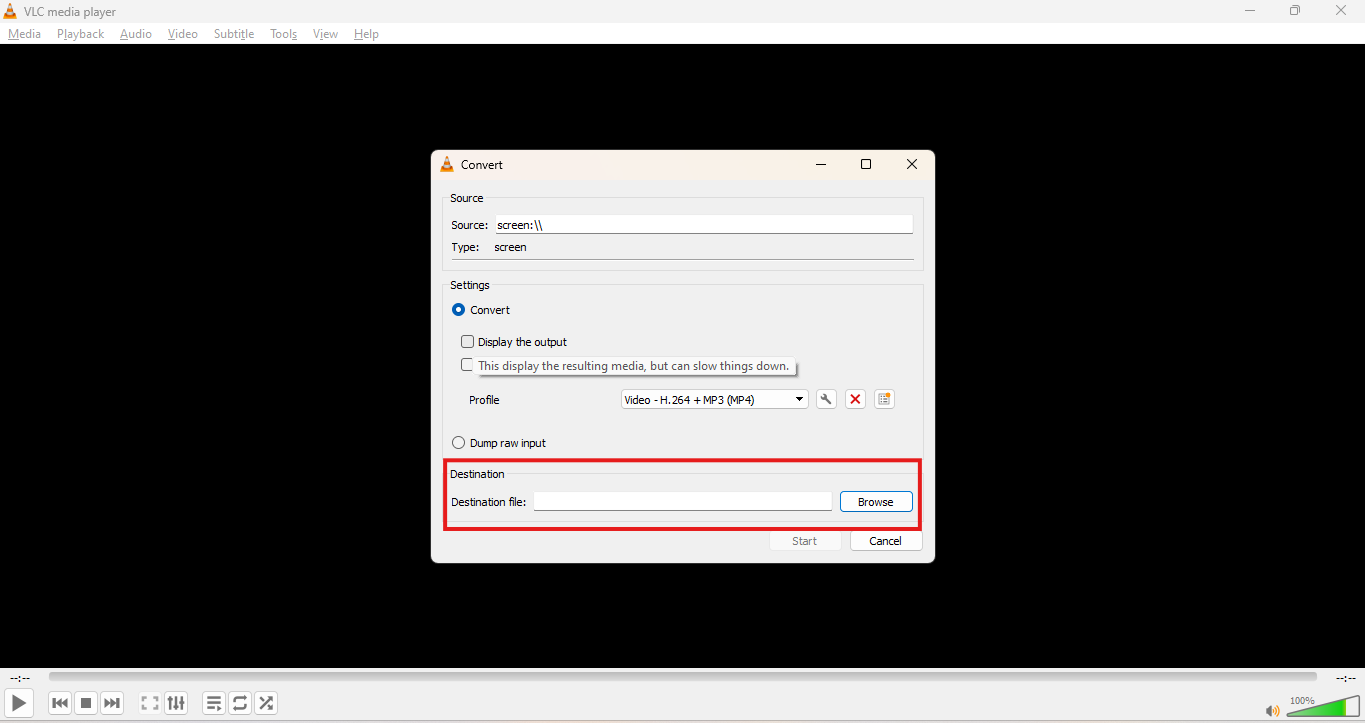
4. Under Profile, choose a format like MP4. Click Start to begin screen recording.
When you follow these steps accurately, you will be able to record a screen with audio and a microphone in VLC. However, this method can feel lengthy and complicated, and you might want to use a tool that has a more interactive user interface.
Part 2.How to Record Screen with Mic or Audio by VLC
VLC can also record your screen along with audio using a WASAPI device. WASAPI stands for Windows Audio Session API. It’s a low-level audio API in Windows that lets applications access and control audio streams with high precision. When you choose a microphone source via WASAPI, VLC can capture audio with better sync and stability.
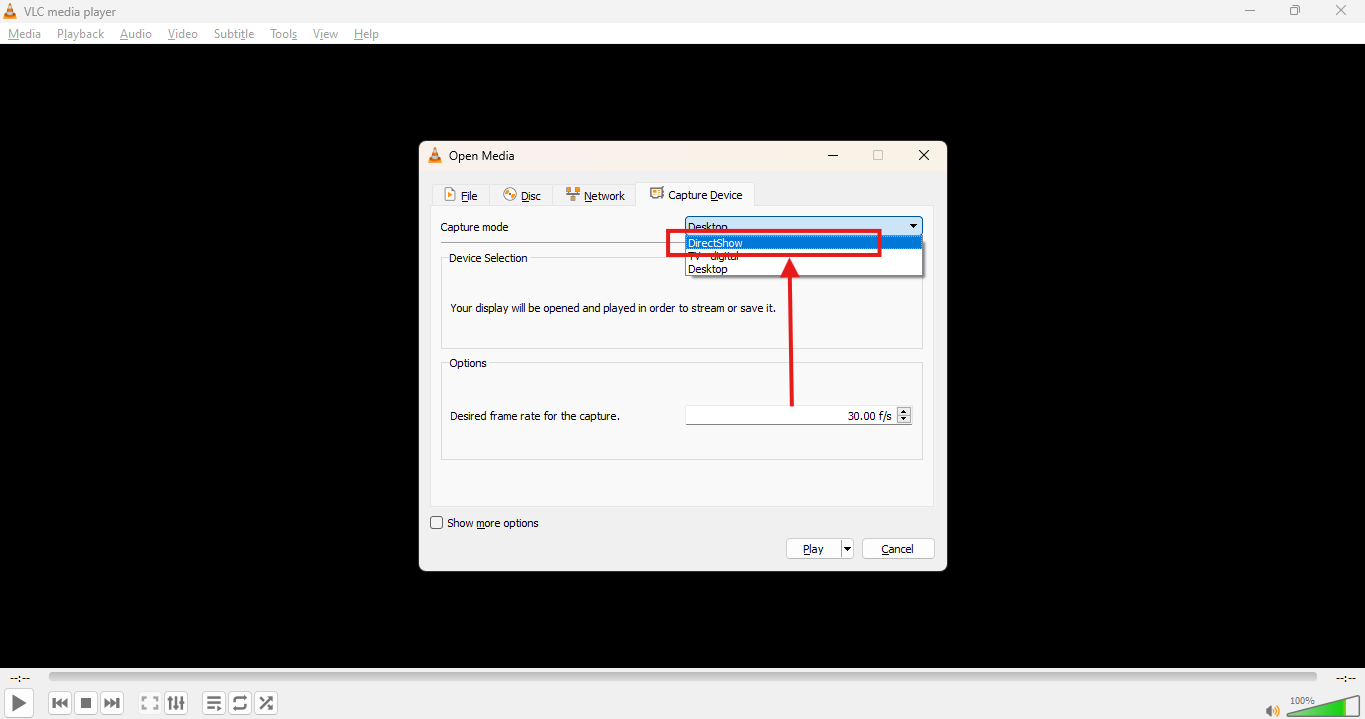
2. In the Video device name, select your screen or camera if needed. In the Audio device name, select Microphone (via WASAPI) for clean audio input.
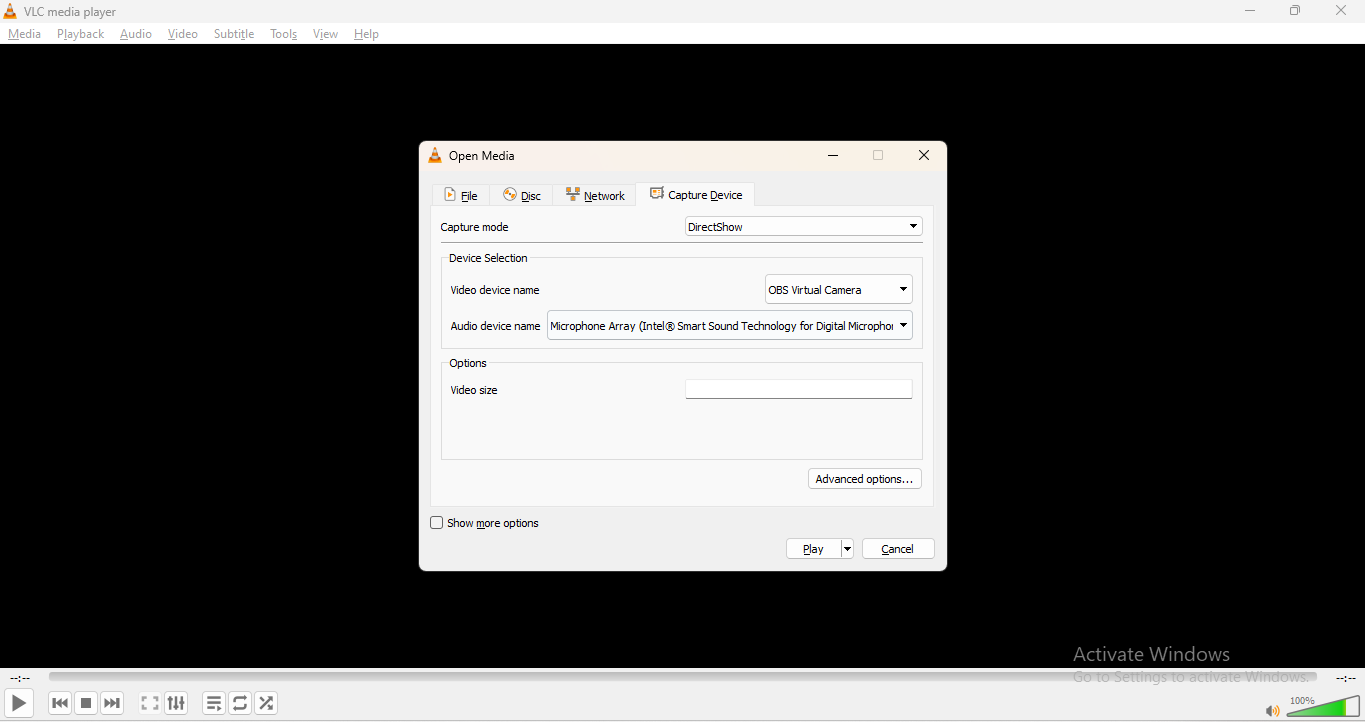
3. Click Advanced options if needed to set audio delay or configure sync. Now, click the dropdown next to Play and choose Convert.
4. Select an output format under Profile. MP4 is a safe option. Choose the file location and click Start.
Recording will begin with both screen and mic input. Make sure the audio device uses the WASAPI address to avoid errors.

Easy to Use Screen Recorder
Part 3. Bonus: How to Record Screen Without Any Latency
VLC greatly helps with the problem of screen recording as a basic screen recorder. However, recording screen with VLC sometimes may face the problems of frequent latency, insufficient demonstration tool, etc. This is where UniConverter stands out.
UniConverter Screen Recorder is a free tool that you can use to capture important moments of your digital life journey without compromising on the video quality or frame rate. Let’s walk through it step by step and understand how it helps to preserve screen recording quality:
1. Install UniConverter from the official Wondershare website. It is free and easy. Just install it and come to the page where you will find the screen recorder in the bottom row.

2. Upon entering the tool, choose the “Screen Recorder”, and head over to the screen that you want to record.
3. Once you enter the screen that you want to record, the floating options will help to manage the quality, aspect ratio, and frame rate of the video. Tap the “Rec” icon to start recording.
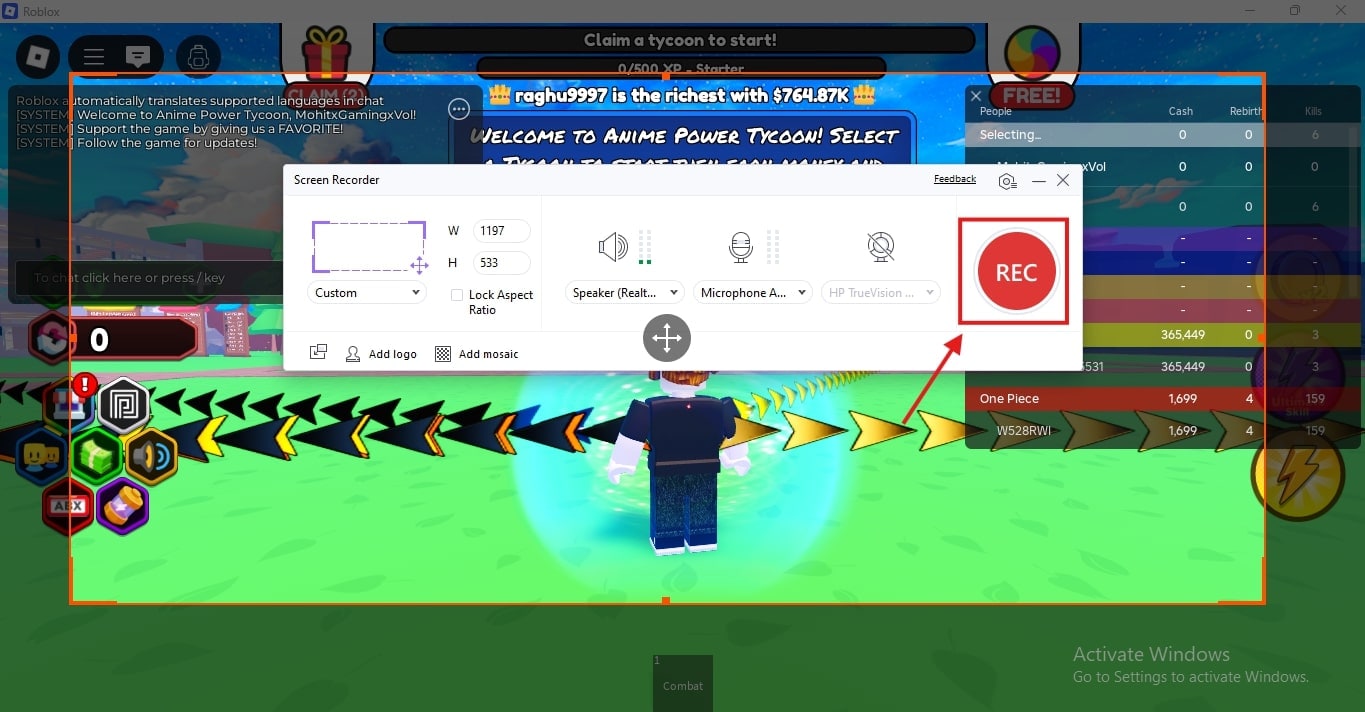
4. End the recording, and the video will be saved to your device instantly. Additionally, you can edit the video using the compressor, converter, and other editing tools.
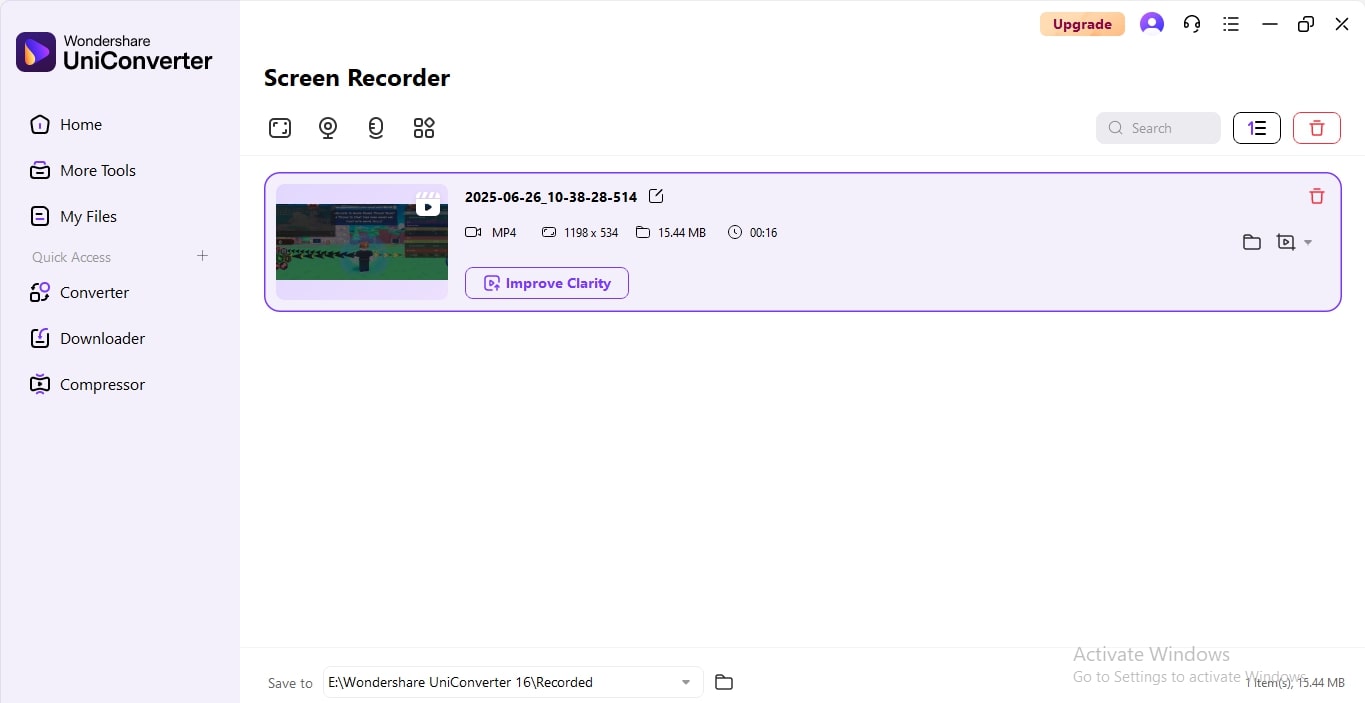
This process is easy and free to follow. You can start by simply downloading the UniConverter tool onto your Mac devices.
Conclusion
VLC Media Player offers a practical way to record your screen on Windows, with or without audio. By using DirectShow and WASAPI settings, you can capture both your screen and microphone input with better accuracy. Still, the process can feel technical and less intuitive for some users.
If you want a simpler and more feature-rich experience, UniConverter stands out. It delivers easy controls, smoother performance, and editing tools all in one place. Choose the method that fits your device best, follow the steps, and start recording your screen with confidence.
Easy to Use Screen Recorder
FAQs
-
1. Can VLC record gameplay or high-motion content?
VLC can record gameplay, but it may not be as smooth as dedicated tools like UniConverter, especially for high FPS content. -
2. How large are VLC screen recording files?
File size depends on resolution, frame rate, and duration. On average, a 5-minute recording at 1080p and 30fps may be around 100–200 MB in MP4 format. -
3. Can VLC schedule screen recordings automatically?
No. VLC does not support scheduled recordings. You must start and stop recordings manually. -
4. Does VLC support keyboard shortcuts for starting or stopping screen recordings?
Not by default for screen recording. You'll need to manually click through the menu to start or stop a session.

