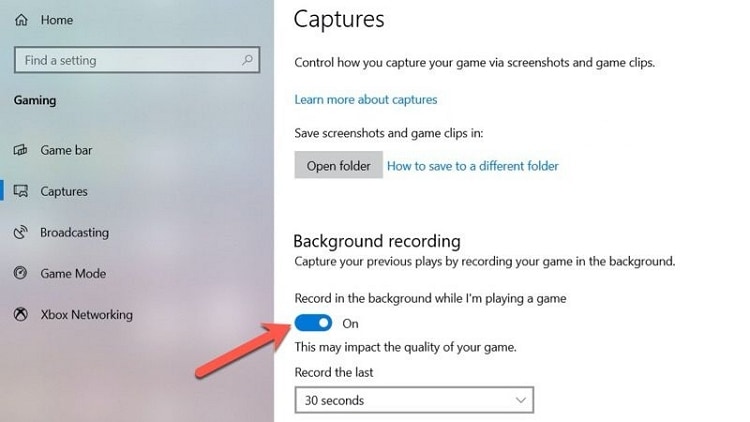
The Game DVR feature in Xbox is quite popular among users. If you want to enable or disable this feature on your Windows 10, you have landed on the right page. Keep reading to learn what is Game DVR, along with quick and easy methods that can help you enable or disable Xbox Game DVR on your PC.
Part 1: What's Game DVR and its working principle
The Xbox app offers an in-built tool that automatically allows users to record their gameplay. This feature is known as Game DVR and has the capacity to run in the background. Once you finish playing a game, you can choose if you want to save the recorded video or not.
The downside to the Game DVR feature is that it requires top-quality resources, which often take its toll on the performance of the CPU. Using the feature can significantly slow the fps rate and interrupt your gaming experience. Thus, if you do not want the Xbox Game DVR, it is advisable to disable it from the system.
Part 2: How to disable Xbox Game DVR on Windows 10
After knowing what is Game DVR, it is now time to learn how to disable Xbox Game DVR on Windows 10. Numerous potential reasons might cause you to disable the feature on your device. Some of the reasons for disabling Game DVR are mentioned below:
- Xbox Game DVR requires high CPU resources, which can cause low FPS on the computer and affect your gameplay.
- If you are running out of storage on your computer and no longer wish to record videos of your games, it might be a good idea to disable Game DVR.
- For people who don’t need clips of their gameplays, the Game DVR is an unrequired function that costs more than it delivers. Thus, you will need to disable Game DVR on your device.
Method 1: Disable background recording in device settings
Step 1
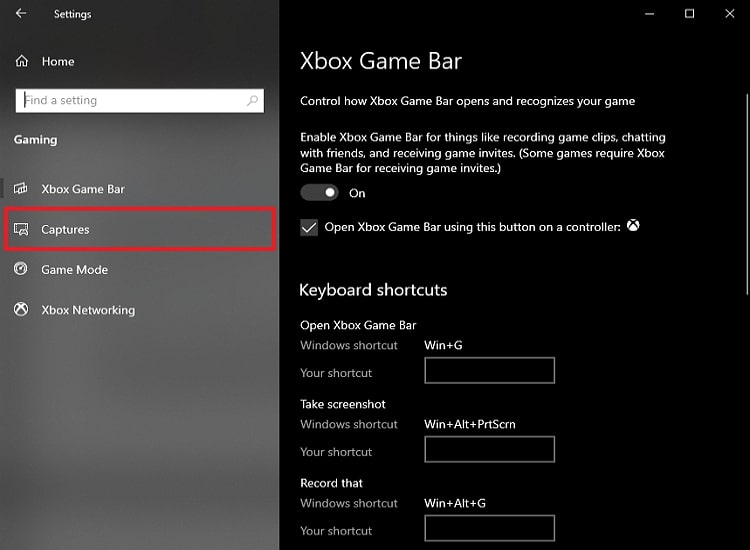
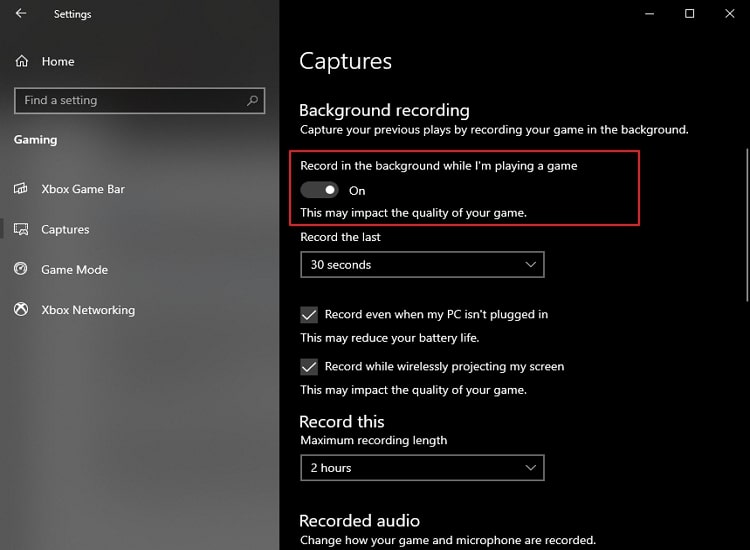
Right-click the “Start” button on your Windows and select “Settings” from the list. In the PC’s settings, go to the “Gaming” settings and click on the “Captures” option.
Step 2
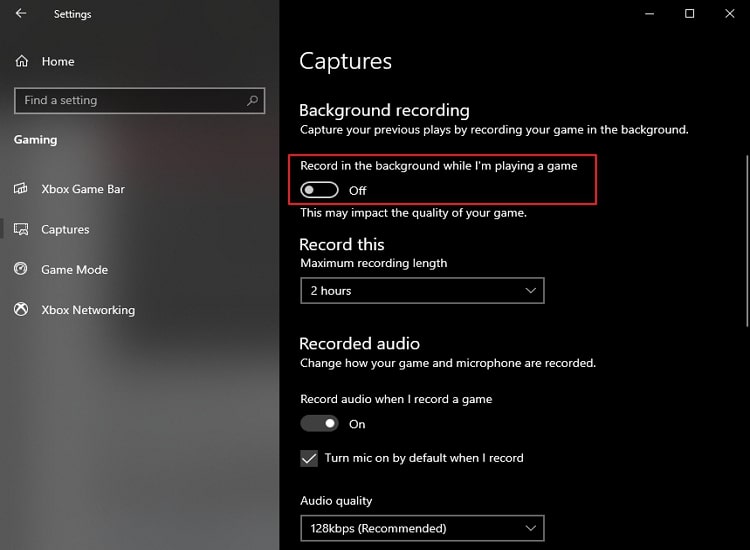
Now find the option that reads “Record in the background while I’m playing a game” and tap the switch under it to turn it off.
Method 2: Disable Game DVR from the Xbox app
Step 1
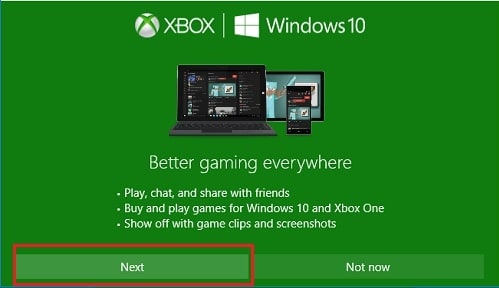
Click the “Start” button on your Windows 10 and open the Xbox app. On the proceeding interface, click on “Next” and sign in using your Microsoft account.
Step 2
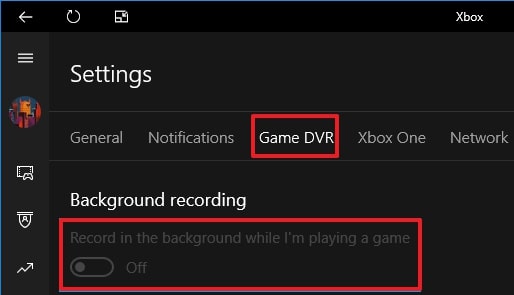
Once you are inside the Xbox app, click on the "Menu" icon and click on "Settings." From the next screen, go to the "Game DVR" tab. Here, turn off the buttons under the "Background recording" and the "Take screenshots using Game DVR" options.
Part 3: How to enable Xbox Game DVR on Windows 10
The Xbox Game DVR feature is useful for various purposes. The Game DVR provides an easy solution if you want to record your gameplays and share them on different social media platforms. The built-in feature saves users the trouble of external screen recorders and can record high-quality gameplays quietly in the background. You can use the following methods to enable the Xbox Game DVR feature on your computer:
Method 1: Enable Game DVR from the Xbox app
Step 1
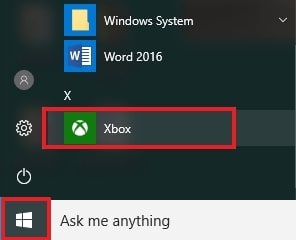
Click on the “Start” button on your computer and launch the Xbox app. From the subsequent interface, click on the “Next” button and use your Microsoft account to log in to the app if you are not logged in.
Step 2
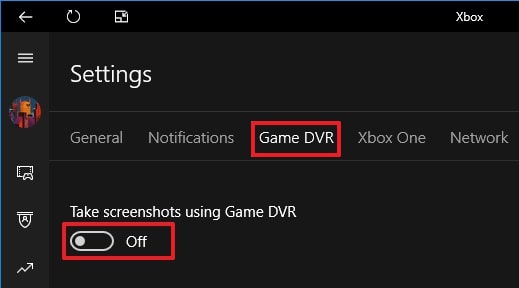
Now access the "Menu" options from the side and tap on "Settings." Go to the "Game DVR" tab inside the app. Here, use the toggle switches under the "Background recording" and the "Take screenshots using Game DVR" options to enable them.
Method 2: Enable background recording from Windows settings
Step 1
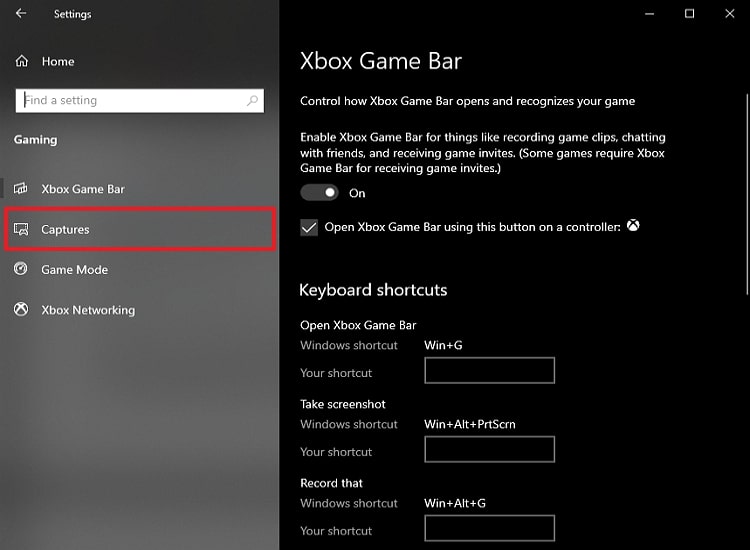
Right-click on the “Start” button and hit “Settings” from the menu. Once inside the computer’s settings, go to “Gaming” and tap on the “Captures” option.
Step 2
Now click on the toggle under “Record in the background while I’m playing a game” to enable the option.
Conclusion
Using the Game DVR feature available to Windows users in the Xbox app, you can easily record your gameplay and directly post it on any social sharing site. With the help of the guide mentioned above, you now know how to easily enable or disable the Xbox Game DVR feature on your computer.
You may also want to ask: How to fix high RAM usage by Game DVR server
The Xbox Game DVR can sometimes cause excessive RAM usage in the form of its Broadcast DVR server. The main function of this process is to record your gameplay in the background, but it can significantly impact the performance of middle or low-end computers. Since the process is designed to run in the background, it can hog up your computer’s memory storage.
You must disable the broadcast DVR server from your PC’s settings to eliminate this issue. The following steps indicate how to do that:
Step 1
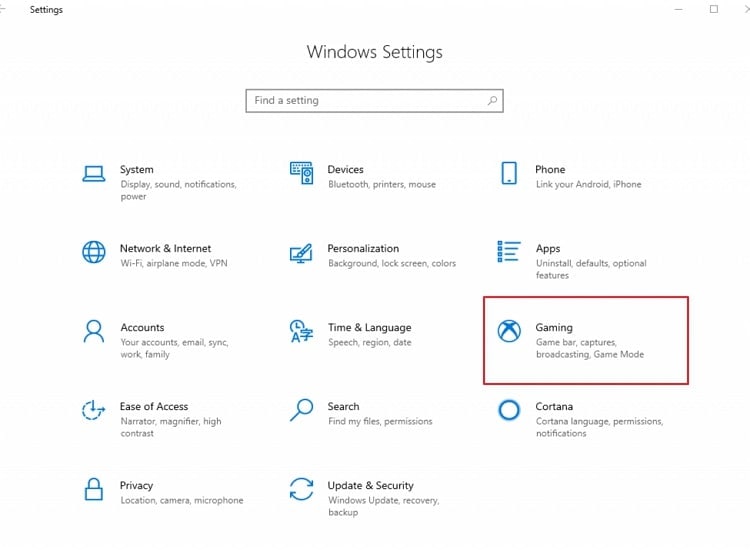
From the bottom-left corner of your screen, tap on the “Start” button and go to the device’s settings. Find the “Gaming” option in your computer’s settings and click on it.
Step 2
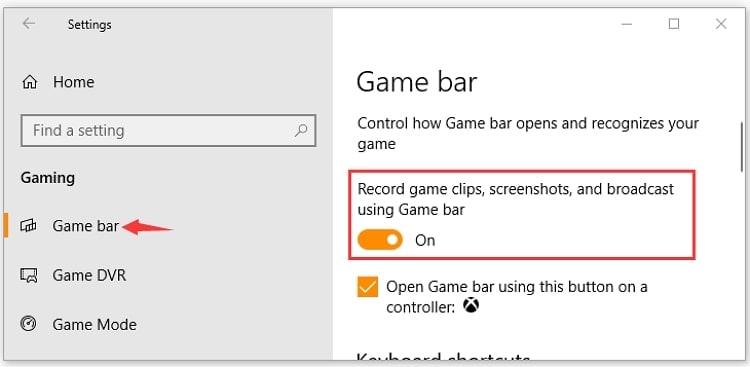
Go to the “Game Bar” section and disable the switch under the “Record game clips, screenshots, and broadcast using Game bar” option.
Step 3
Now go to the “Captures” tab and disable the toggle switches next to the “Background recording” and “Recorded audio” options. Now restart your PC to implement the changes.
