

Many players want to share their Minecraft adventures but run into the same frustrating issues. The recordings look blurry, the game lags, audio cuts out, or nothing gets captured at all. Beginners and professionals alike face issues when recording videos in HD.
This guide tackles those problems head‑on, showing exactly how to record Minecraft without lacking quality. So, if you are also exploring efficient methods to record videos, then read the following article to the end.
In this article
- How to Record Minecraft Quickly and Easily - Quick Overview of All Ways
- Step-By-Step Guide to Screen Record Minecraft on PC [UniConverter - Best Overall]
- How to Record Minecraft Gameplay Using Built-In Tools
- Top Online Tools to Record Minecraft Smoothly on PC
- Step-by-Step: How to Screen Record Minecraft on Mac
- Easy Ways to Screen Record Minecraft on iPhone and Android
- Capture Your Minecraft Adventures: Why Recording Matters
- 5 Pro Tips for 5 Pro Tips for Recording High-Quality Minecraft Videos
- Conclusion
- Frequently Asked Questions
Part 1. How to Record Minecraft Quickly and Easily - Quick Overview of All Ways
Before you dive into exploring how to record screen Minecraft, let’s first have a quick comparison of all the discussed methods:
| Method | Platform(s) | Difficulty | Best for | Key strengths | Main drawbacks |
| UniConverter | Windows, Mac | Easy–Medium | Players who want an all‑in‑one recorder + converter, and editor | Desktop screen & game recorder, record screen/app, system audio, mic, optional webcam | The free trial is limited |
| Xbox Game Bar Free | Windows 10/11 | Very Easy | Beginners on PC who want quick clips | Overlay, capture widget for screenshots & recordings | Limited to game/app windows, basic controls. |
| OBS Studio | Windows, Mac, Linux | Medium–hard | Creators who want YouTube/Twitch‑level videos | High‑performance real‑time capture, scenes with many sources | Steep learning curve and no built‑in full editor |
| Veed Game Recorder | Any desktop with a browser | Easy | Browser‑based recording + editing | Record screen/window/tab + webcam | Free plan watermark, 720p caps |
| Screen Recorder | Windows, Mac, mobile | Easy | Teachers, students, casual creators | Record screen/region/webcam/mic, draw & zoom while recording | Free tier is time‑limited and feature‑locked |
| Apowersoft | Any desktop with a browser | Easy | One‑off long recordings with no watermark | Web‑based; no watermark, no time limit | Needs a Launcher; fewer quality controls |
| QuickTime Player | Mac | Easy | Mac users needing simple gameplay capture | Built‑in, File → New Screen Recording, integrates well with iMovie/Final Cut | No native internal‑audio capture; no overlays or webcam |
| Screenshot Toolbar | Mac (Mojave+) | Very Easy | Fast clips on Mac with one shortcut | Full or region recording; choose save location, timer. | Same audio/feature limits as QuickTime |
| Screen Record – iPhone | iPhone/iPad (iOS 11+) | Very Easy | Minecraft PE players on iOS | Built‑in Control Center screen recorder; 3‑second countdown | Basic editing only |
| Screen Record – Android | Android (modern devices) | Very Easy | Minecraft PE players on Android | Quick Settings Screen Recorder on many phones | Some phones lack internal audio capture |
Part 2. Step‑By‑Step Guide to Screen Record Minecraft on PC [UniConverter - Best Overall]
Imagine you were building an insane red stone farm and defeated the Ender Dragon without dying once. You stop your screen recording only to know that the video is lagging and half the screen is cropped off. In this scenario, we recommend UniConverter, which supports HD game recording. UniConverter Screen Recorder lets you record the full screen, a selected region, or a specific app window. It also has a dedicated game recorder for Windows users, which is ideal for game lovers who are going to record game like Minecraft.
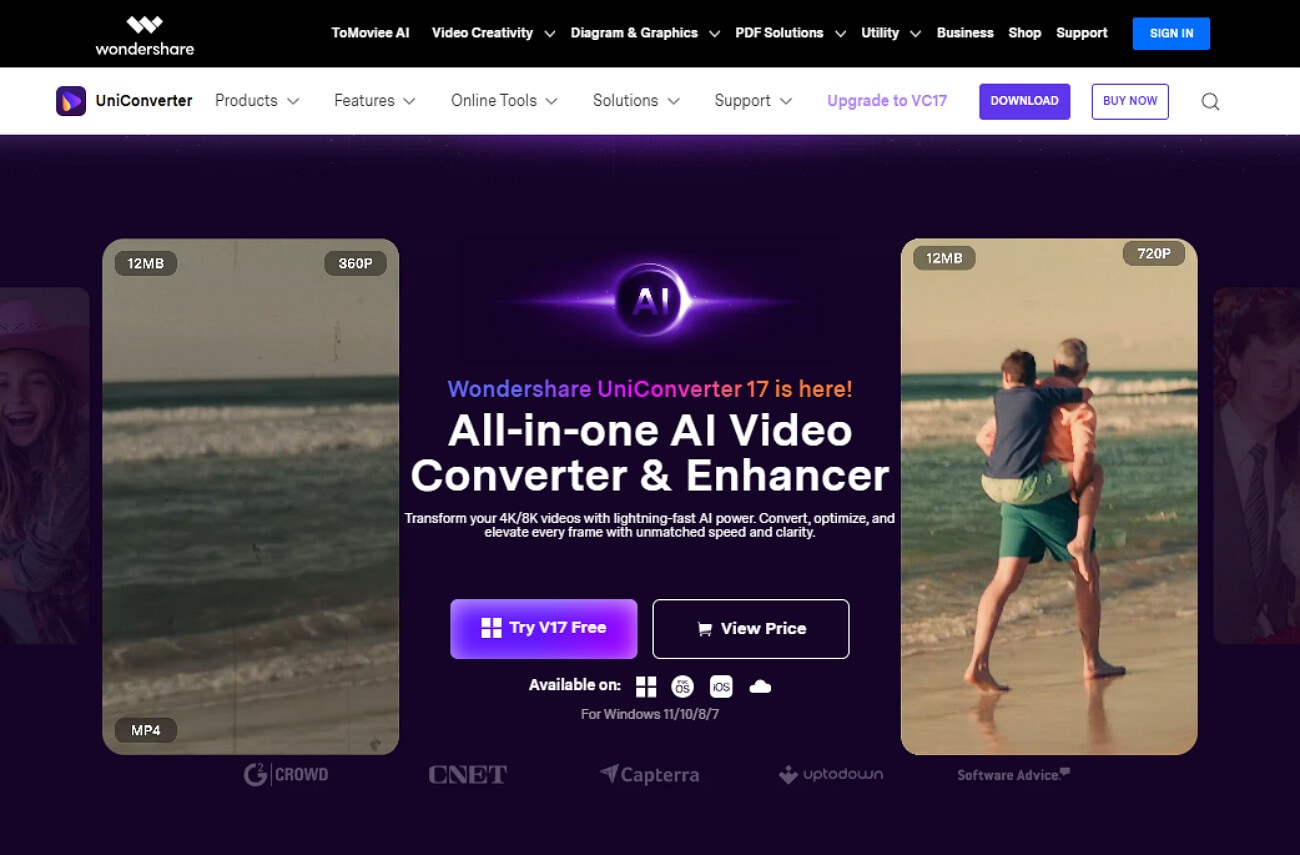
This software efficiently syncs the video visuals with your sound using its Mic feature. Users can also add a free cam overlay to the screen to provide live video commentary. Furthermore, you can access this tool via its desktop and online web interfaces, depending on your preferred method. It also support stereo sound recording to offer better audio quality.
Key Features
Recording Options: UniConverter offers various recording options, including Screen Recorder, Web Recorder, and Game Recorder.
Custom Quality Settings: Users can choose the desired resolution, frame rate, and overall quality to match their PC and target platform.
Improve Clarity: After downloading the video, it lets you enhance the overall recording to make it look more appealing.
Detailed Guide on How to Use UniConverter Screen Recorder
Upon hearing the extensive features, let's dive into its detailed guide to know how to record Minecraft screen:
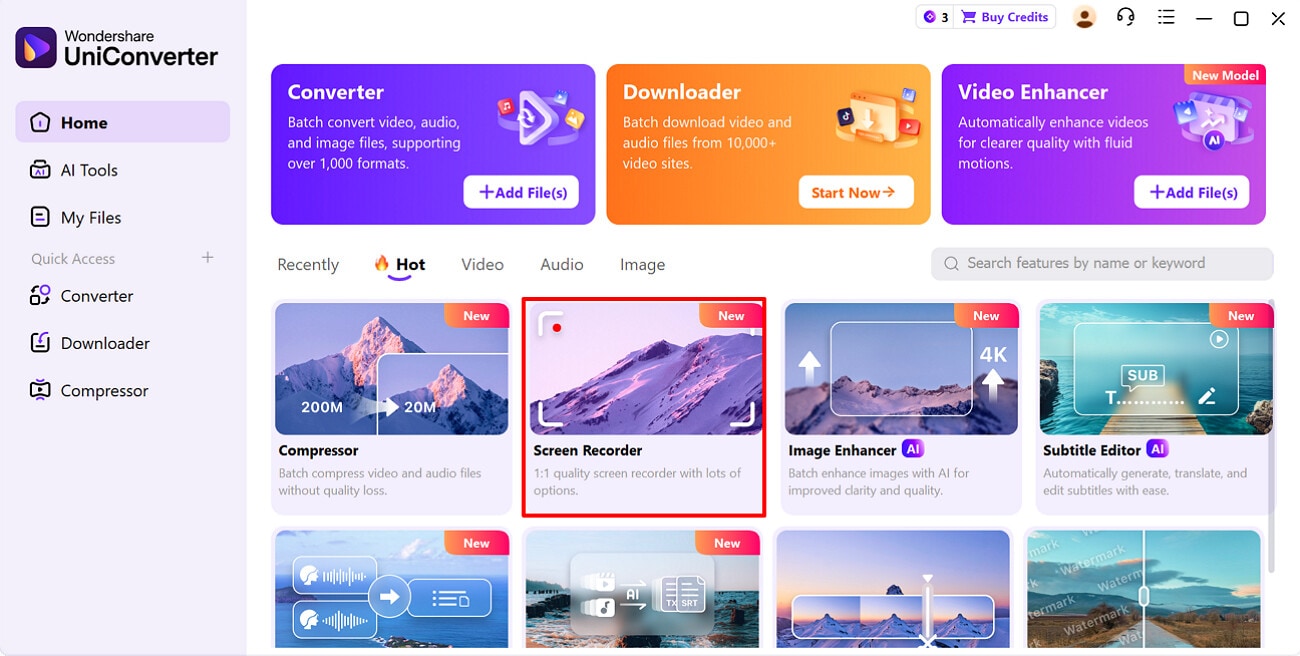
Step 1. Access the Screen Recorder Feature from the Homepage
While the tool is running, select the “Screen Recorder” feature to open the next interface.
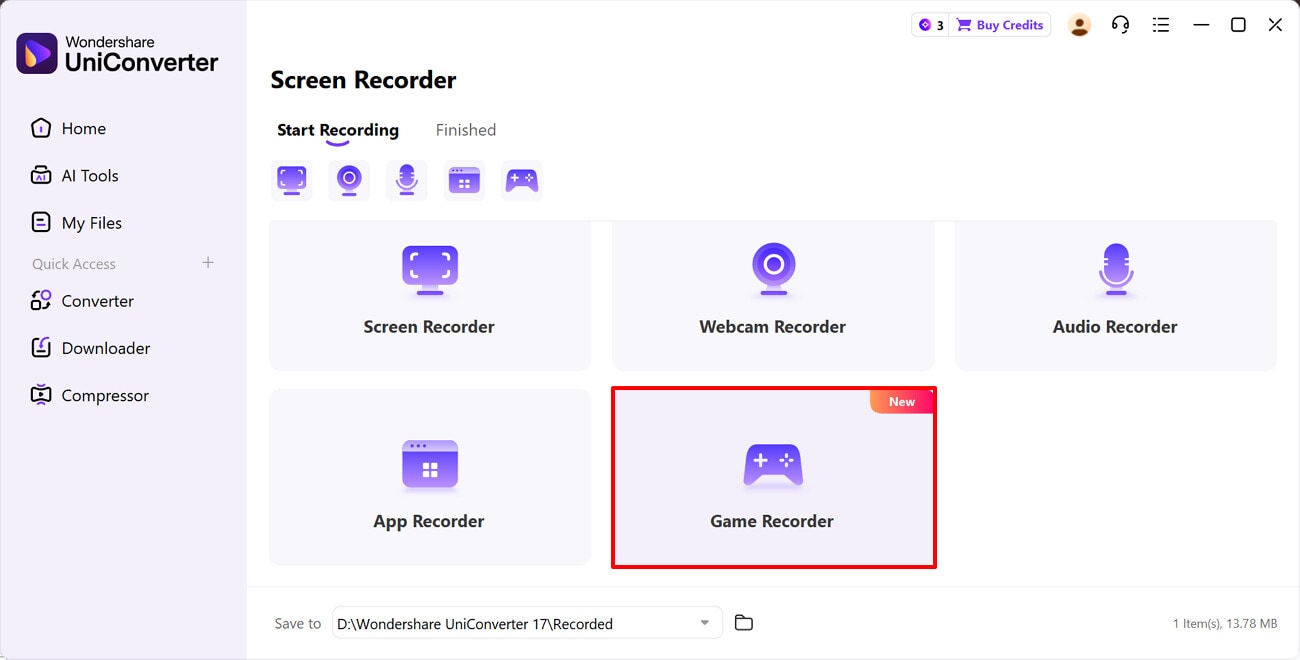
Step 2. Select the Desired Recording Option Here
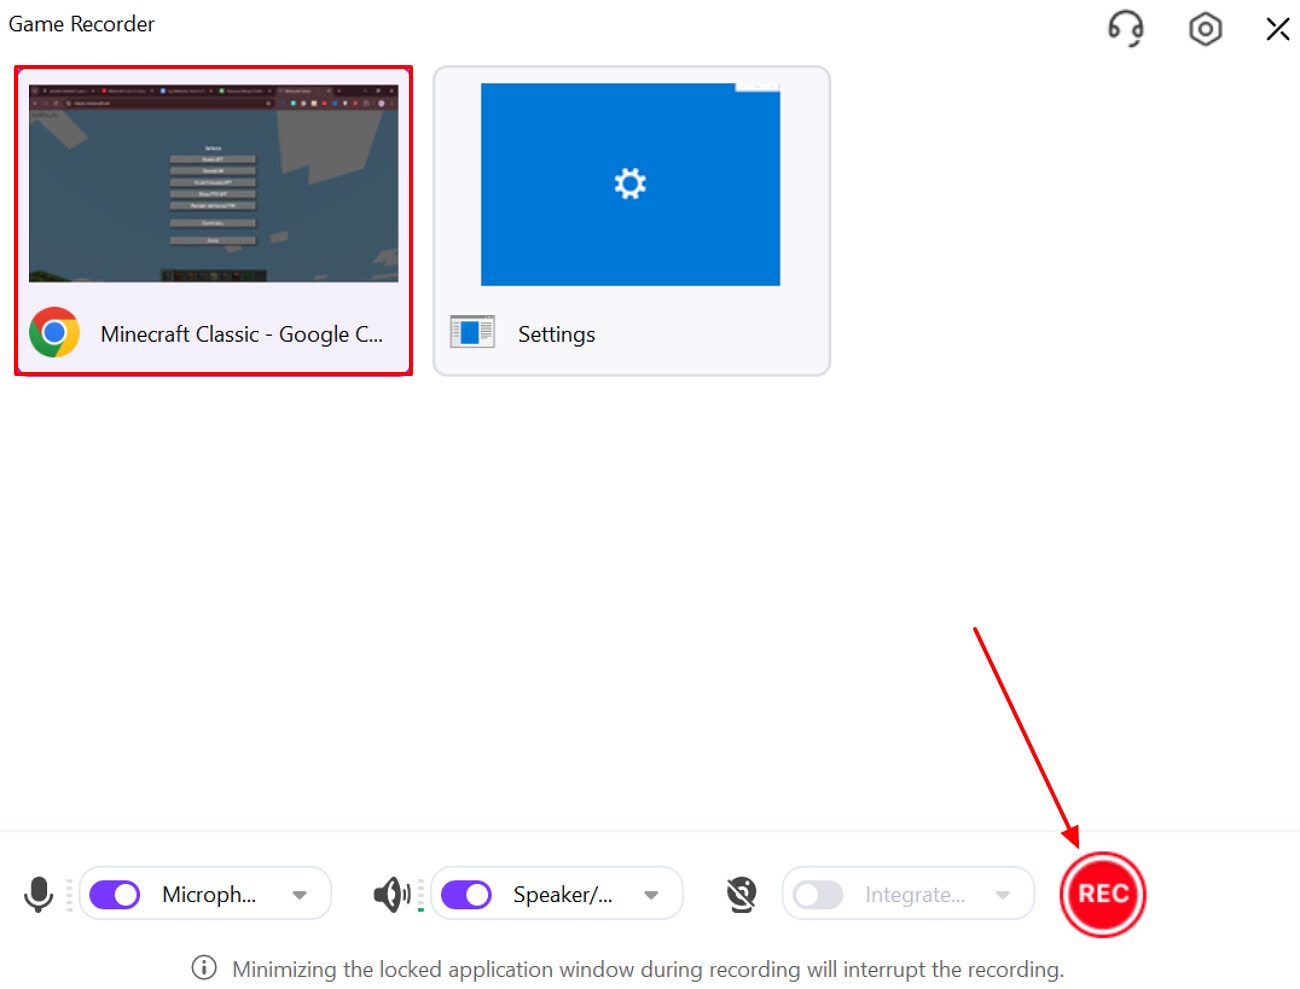
Following this, choose the “Game Recorder” option in the following interface.
Step 3. Initiate the Screen Recording Procedure
Here, select the desired screen interface, then click the “Recording” icon to start the screen recording instantly.
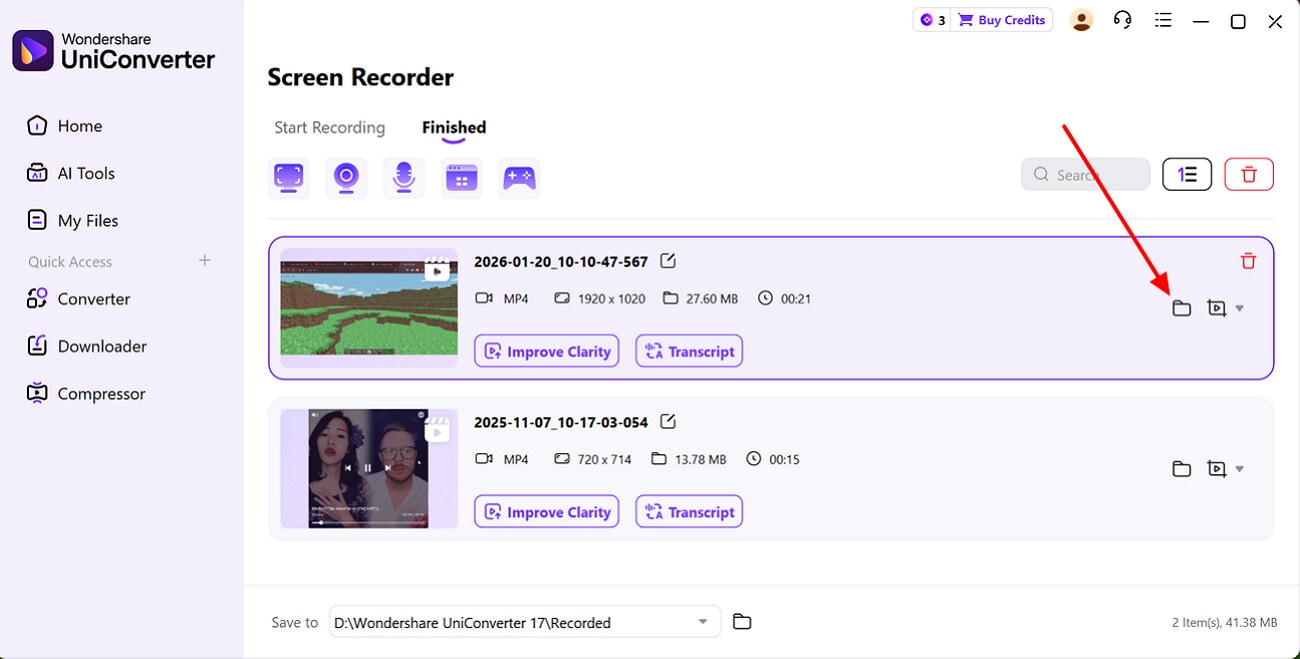
Step 4. Locate the Saved Video to the Device Folder
Finally, the screen-recorded video is automatically saved to the device folder. At this point, you can directly locate the video by clicking the "File" icon available adjacent to the video.

Game Recorder for Minecraft Without Lag
Part 3. How to Record Minecraft Gameplay Using Built-In Tools
Let’s move on to how to record screen Minecraft gameplay using the built-in tools available on your system:
Option 1: Xbox Game Bar Free
Xbox is a built-in game overlay in Windows 10 and 11. It lets you capture, monitor, and share your live game without leaving the interface. Users simply press Windows + G to instantly launch the Xbox Game Bar. Furthermore, it also provides you with the option to review the CPU/GPU stats while gaming. Specifically designed for gamers, it also lets you take instant screenshots of different interfaces.
Extensive Guide to Download the Minecraft Visuals
With the key features in mind lets go through the following guide to explore how to screen record in Minecraft:
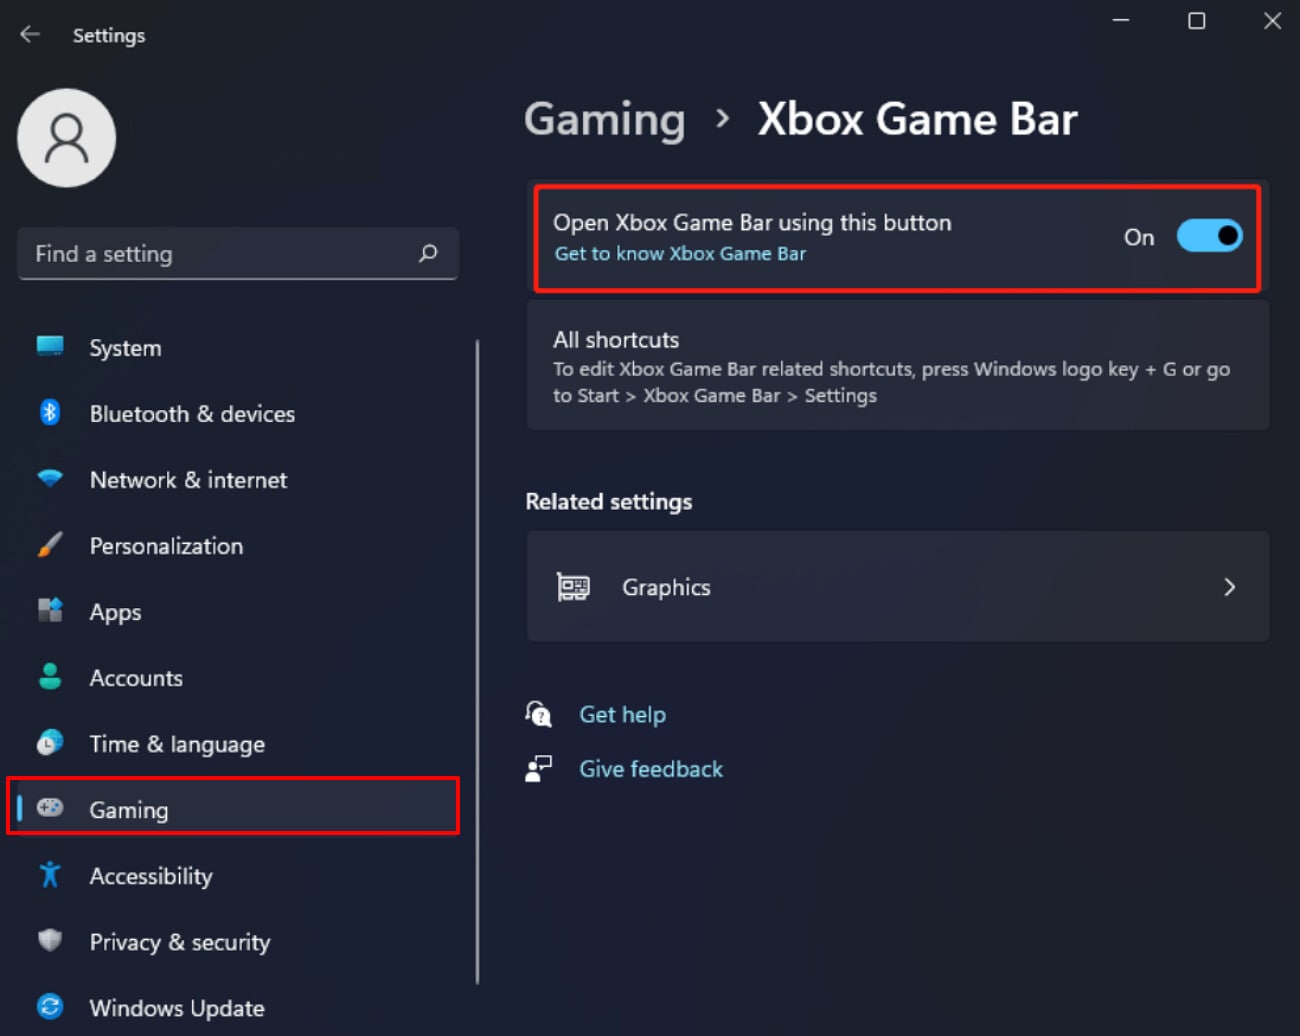
Step 1. At first, go to the system settings and select the Gaming option from the left sidebar. Afterwards, enable the “Open Xbox Game Bar Using This Button” option.
Step 2. Now, enter the gaming interface and choose the "Capture" option. Following this, select the "Recording" button to initiate the screen recording of the Minecraft game.
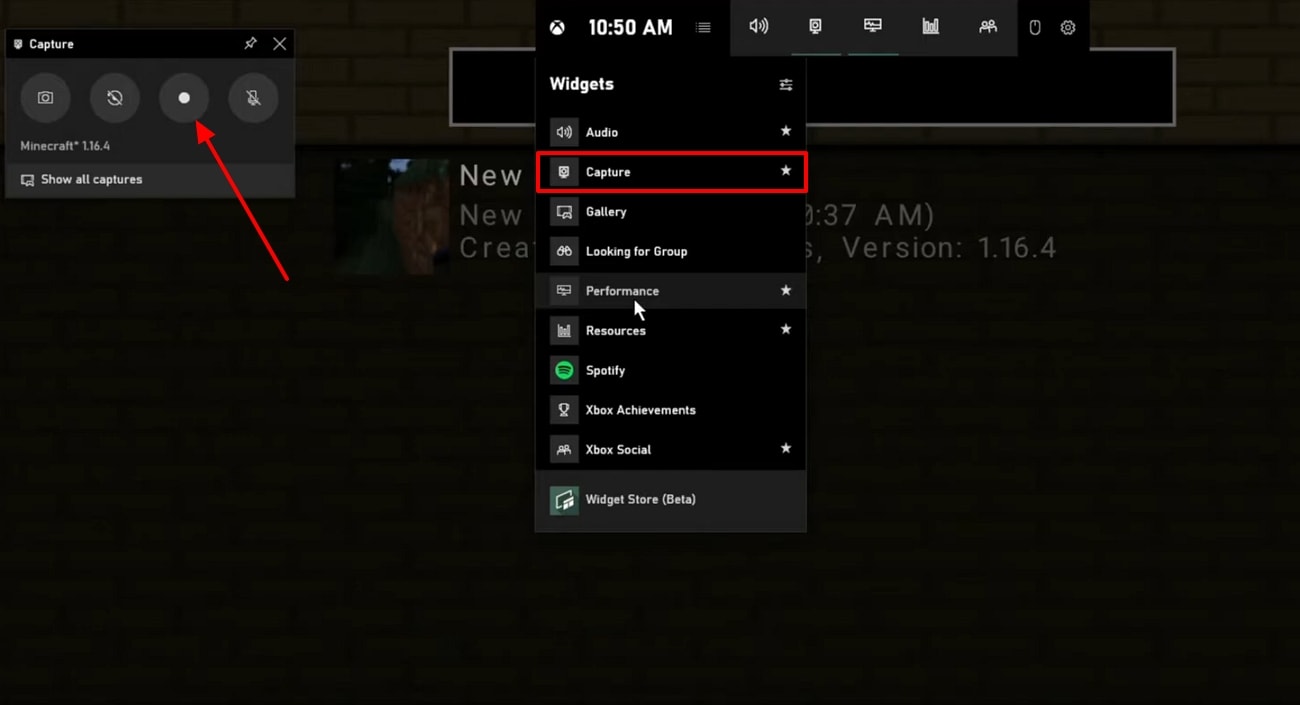
Step 3. After completing the recording, press the “Windows + Alt + R” buttons to stop the recording. The recording will be directly saved to your device's folder instantly.
Key Features
Allows viewing who is online and adds text to the live video visuals.
Lets you also capture the short 30-second style videos for social media platforms.
Gives you the option to only record the live audio for later editing.
Option 2: OBS
It is an open-source app for high-quality recording and live streaming on Windows, Linux, and Mac. This efficient tool lets you record audio and video from multiple sources simultaneously. Users can access multiple templates to efficiently merge different screens. Furthermore, it offers detailed settings for customization, including resolution, FPS, encoder, and bitrate.
Quick Guide to Use OBS Built-in Tool to Screen Record Minecraft
Once you are familiar with its key features, you can now proceed to learn how to screen record on Minecraft:
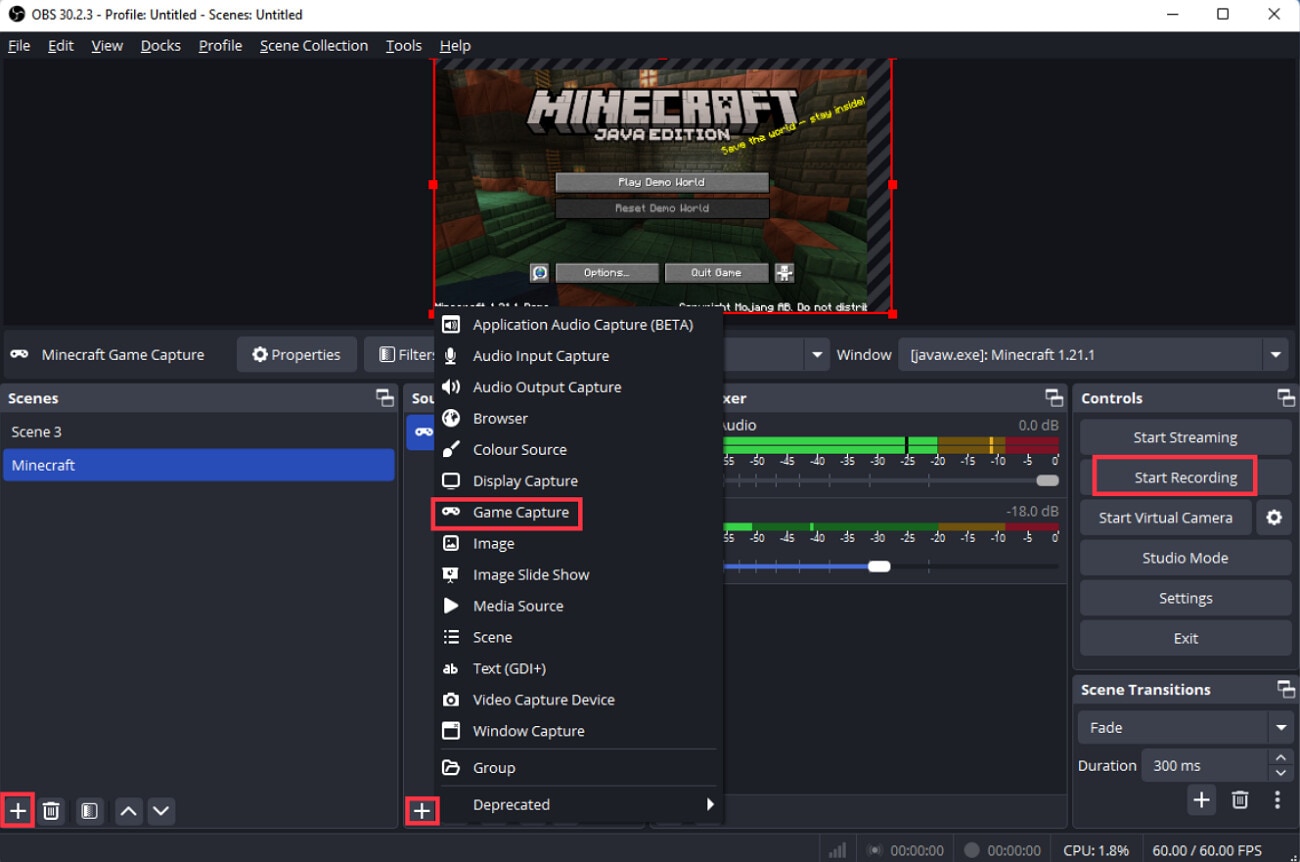
Step 1. Once you open the tool, click on the "+" icon and choose the "Game Capture" option. Afterwards, select the Minecraft screen and hit the "Start Recording" option from the right tab.
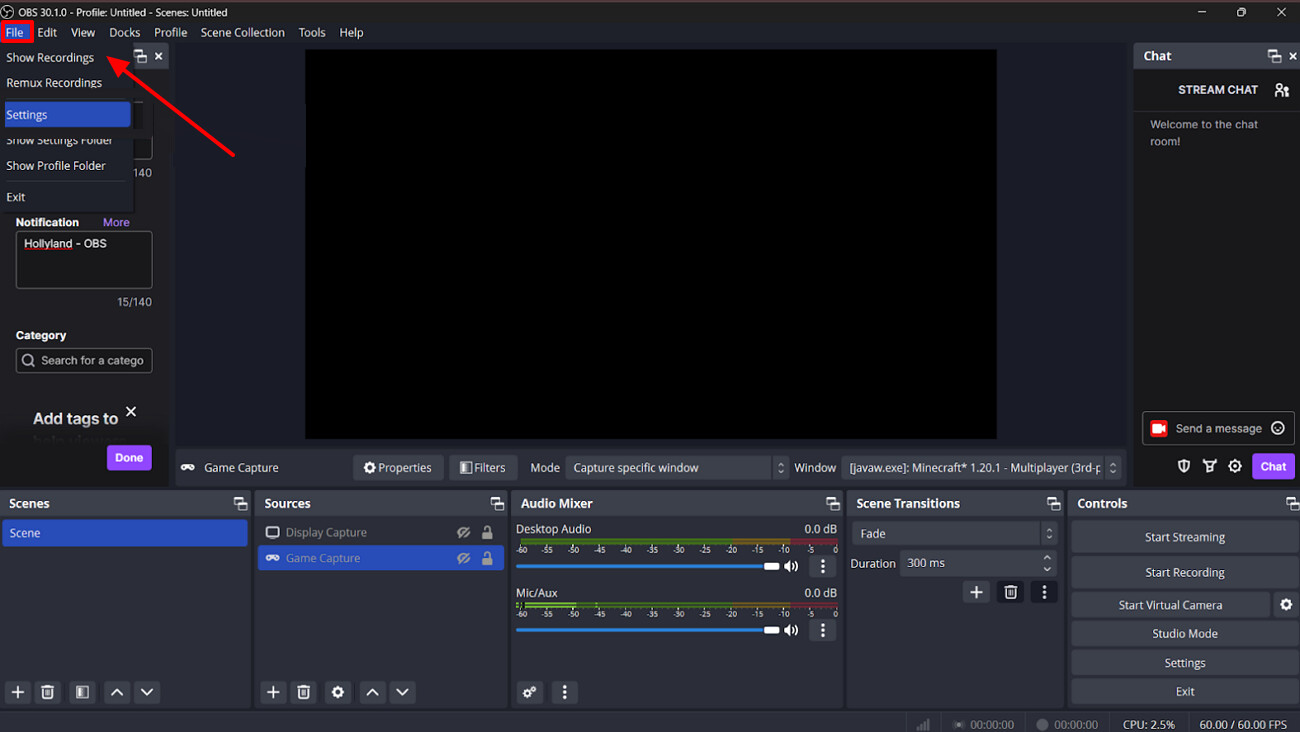
Step 2. After completing the recording, choose the “File” menu in the top-left corner of the screen. After that, select the "Show Recording" option to view all the recorded videos.
Key Features
Provides complete volume control with filters like a noise gate and gain.
Lets you customize the interface by rearranging the panels and pop-docks.
Gives hotkeys to provide quick shortcuts for start and stop recordings.
Part 4. Top Online Tools to Record Minecraft Smoothly on PC
To know how do you record a Minecraft video with web tools, go through the following section:
Option 1. Veed.io
Veed is an online web-based tool that lets you record gameplay, screen, and webcam together. Users simply hit the Record button and allow access to start game recordings. Before recording, it gives you the option to select only the screen, audio, or front camera, depending on your needs. Moreover, users can also overlay their front camera screen on the live recorded videos.
Detailed Guide to Use the Veed Online Tool
Now, if you are exploring how to record a Minecraft video using this Veed tool, then read the following guide:
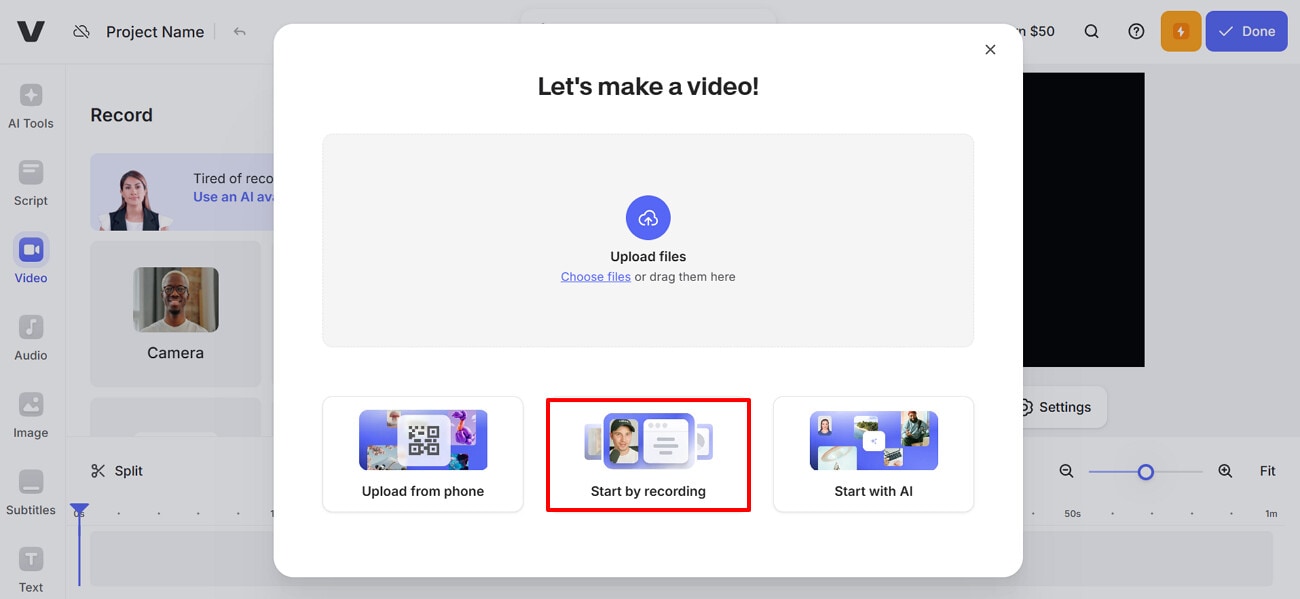
Step 1. As you enter the tool, click on the “Start by Recording” option available on the main interface.
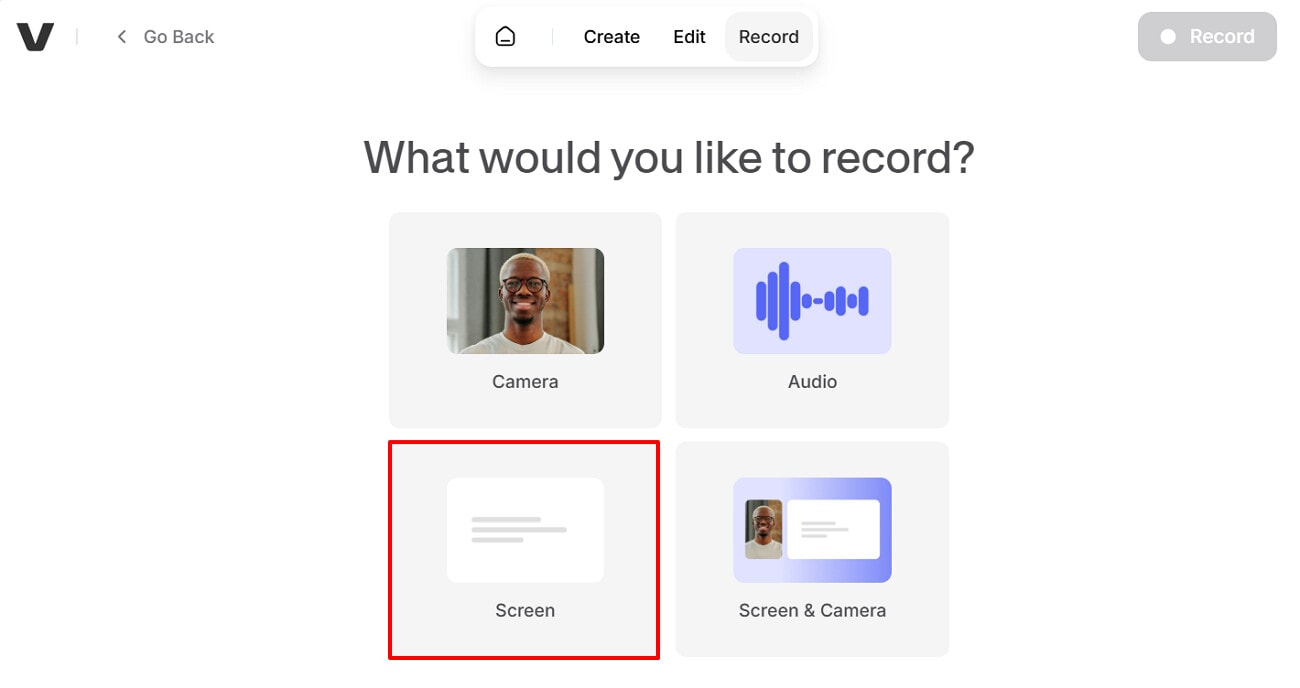
Step 2. Here, choose the “Screen” option to let the tool start the screen recording automatically.
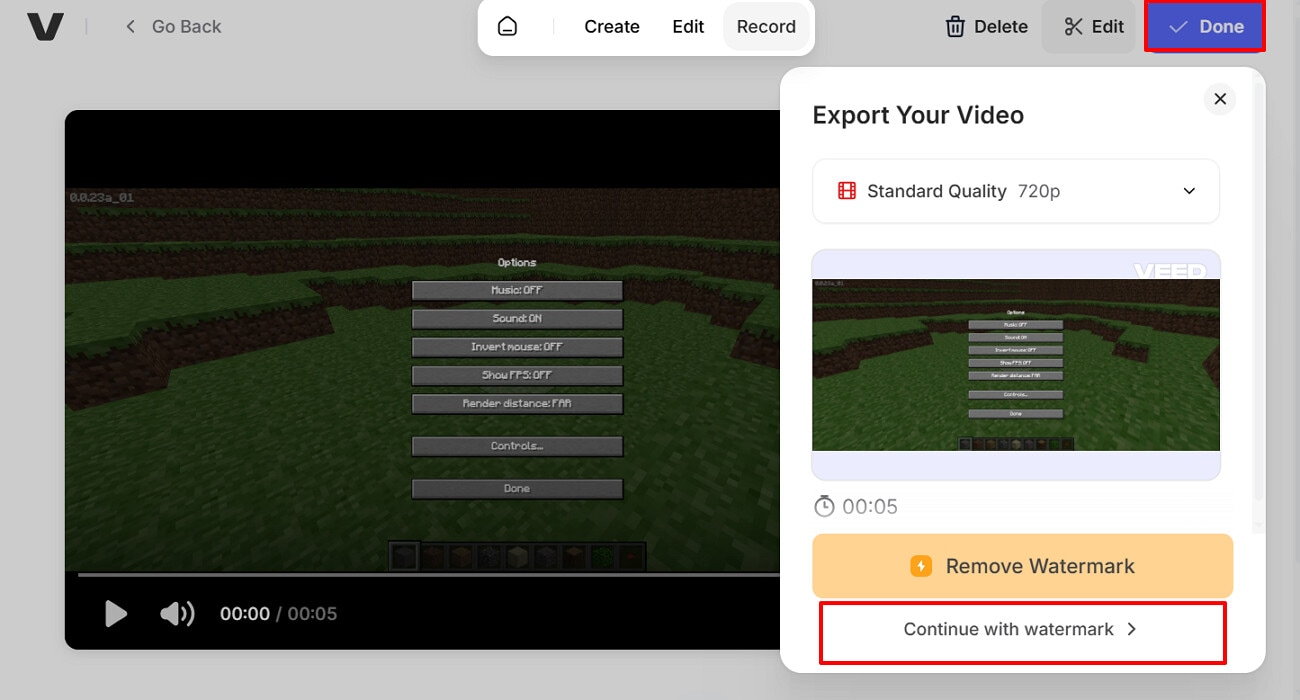
Step 3. Finally, after downloading the video, select the “Done” button, then choose the “Continue with Watermark” option to save it.
Key Features
Allows selection between full screen, a specific game window, or just a browser tab.
Let you record gaming sessions of up to one hour per recording.
Provides a built-in video editor to crop and trim the recorded videos.
Option 2. Screen Recorder
While learning how to record a video in Minecraft, you can try using the Screen Recorder online tool. This web-based tool allows you to multi-screen recording, including full desktop and targeted windows. Being an online web tool, it can work efficiently on any device and browser. Plus, users can even draw and highlight the area while recording the video.
Complete Tutorial: How to Screen Record Minecraft Games
After examining the features of this tool, go through the following detailed guide on how to record Minecraft gameplay:
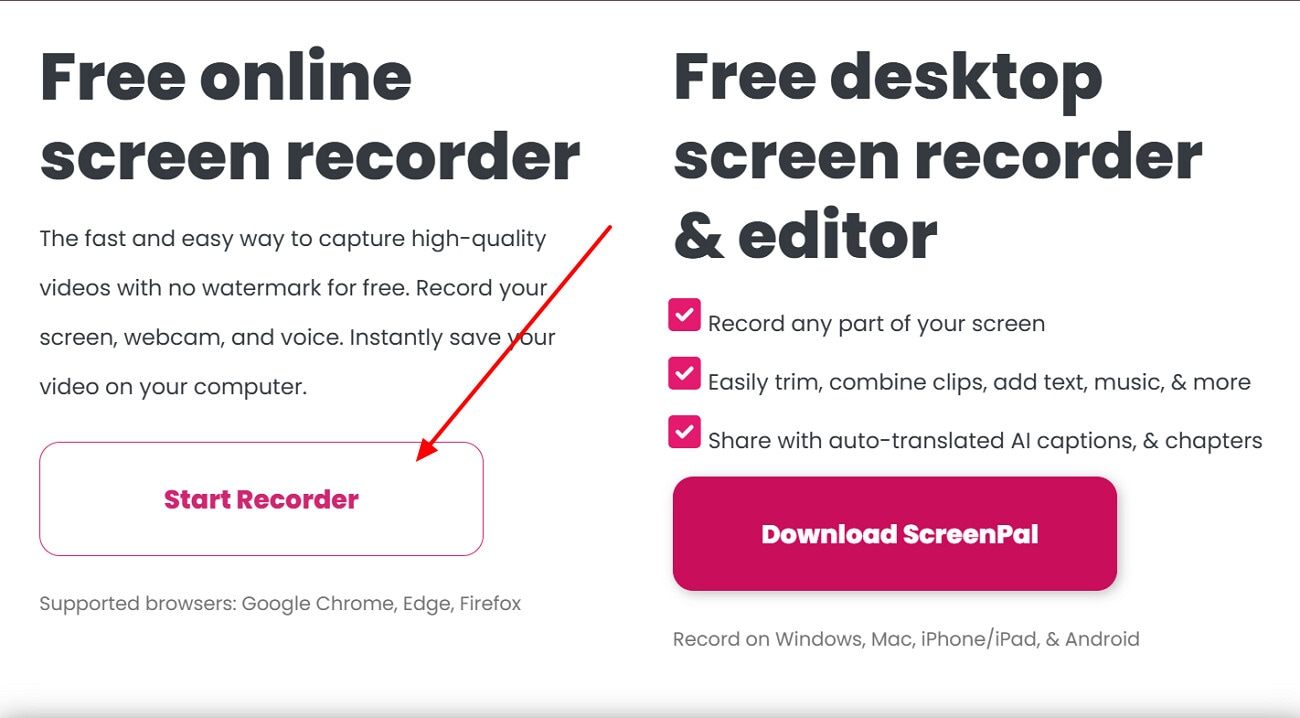
Step 1. Initiate by choosing the “Start Recorder” button to enter the recording interface.
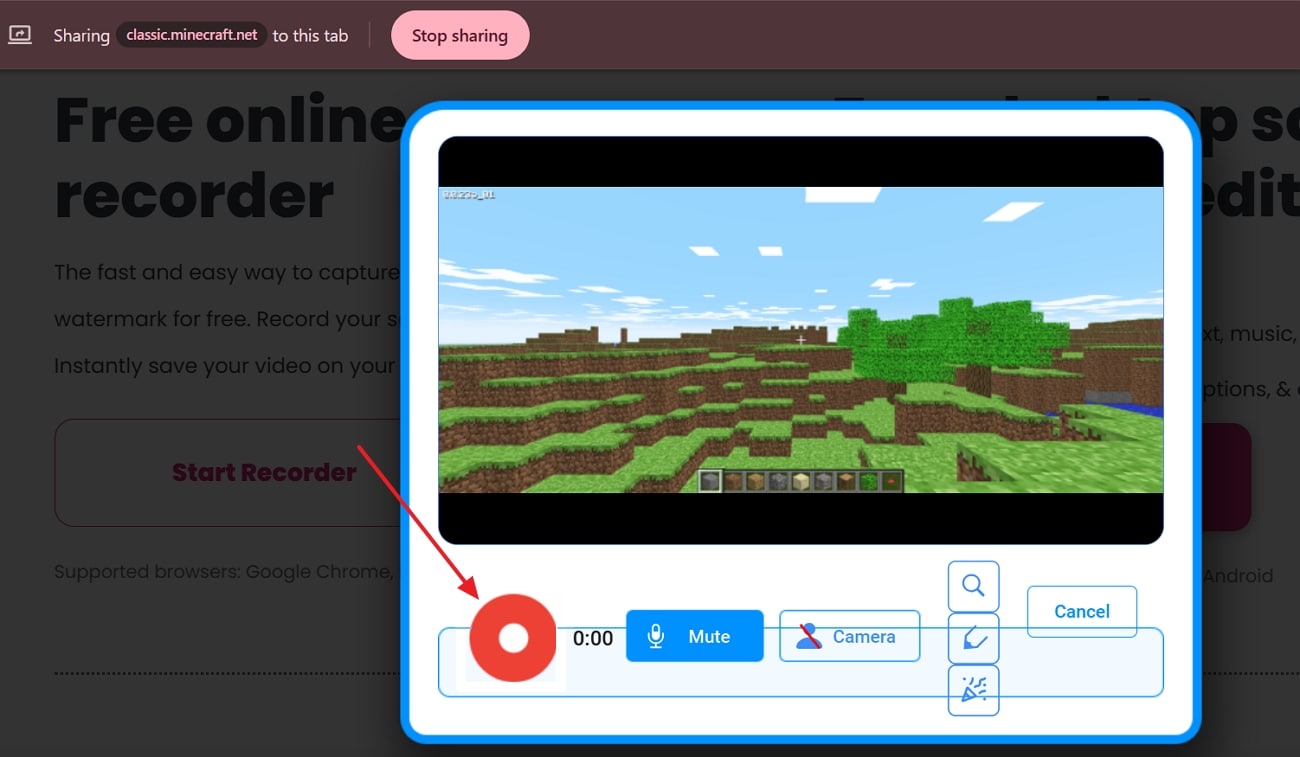
Step 2. Here, click on the “Recorder” button to start recording your targeted game screen.
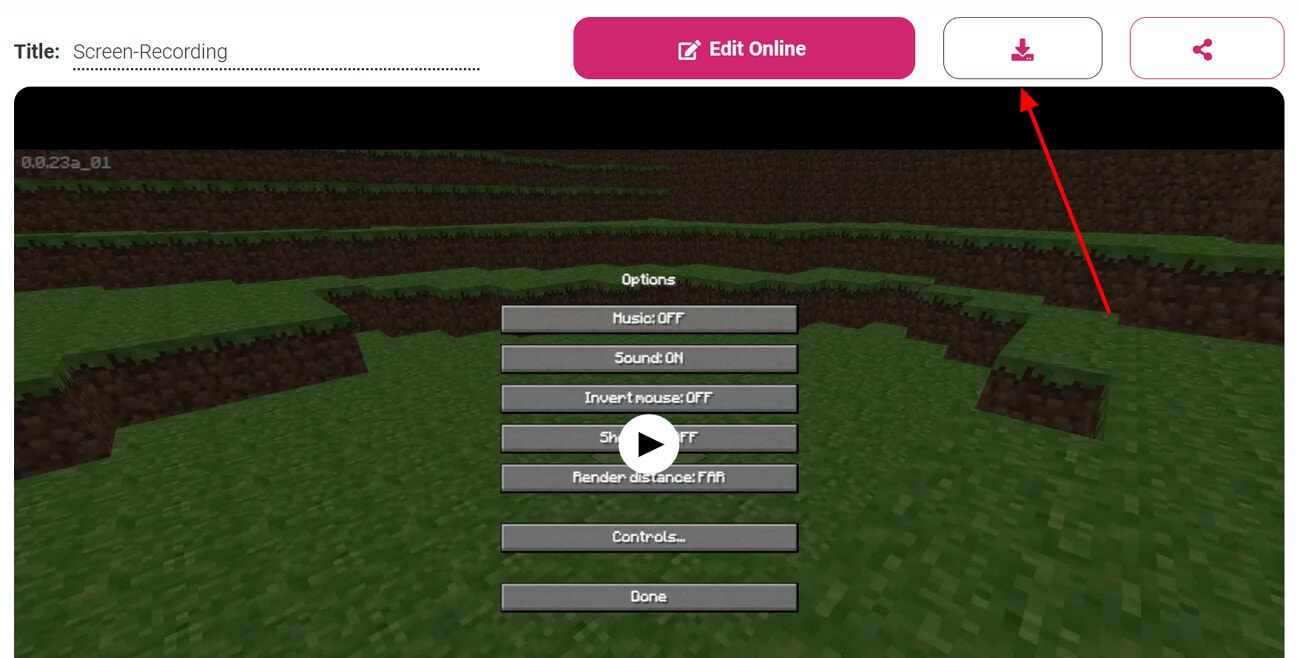
Step 3. At the end, choose the "Download" icon to save the recorded video to the device.
Key Features
Provides advanced features like auto-generated captions and summaries in 150+ languages.
Generates quick quizzes about recording to check the viewers' understanding.
Allows saving videos directly or sharing them via shareable links.
Option 3. Apowersoft
This web-based tool lets you record game video without a watermark. It allows you to record for as long as you want without any time limit. Users can record system sound and microphone together with good audio‑video synchronization. Furthermore, it lets you export the recorded video in multiple formats, including MP4, WMV, AVI, FLV, and MPEG. After recording the video, you can also crop and trim for better results.
Advanced Guide to Capturing Minecraft Gameplay Smoothly
Here we have provided a quick, detailed guide on how to record in Minecraft Java using the Apowersoft tool:
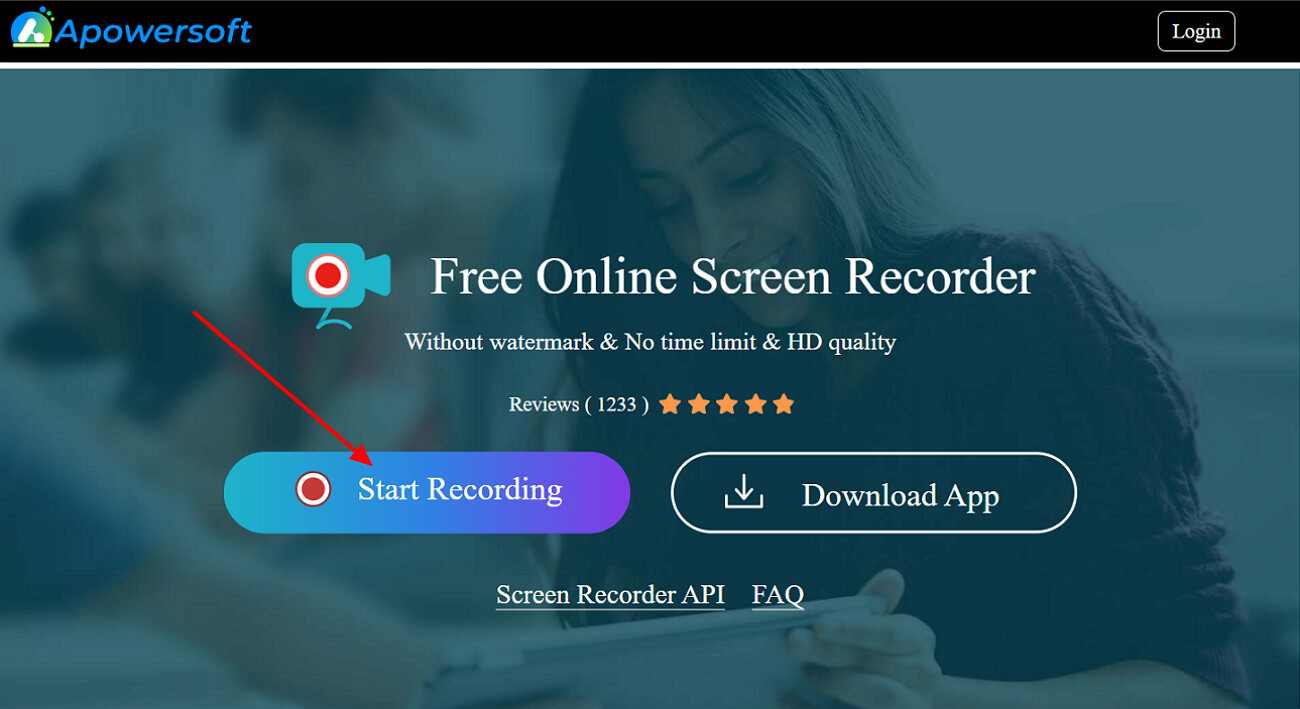
Step 1. As you access the Apowersoft tool, select the “Start Recording” button.
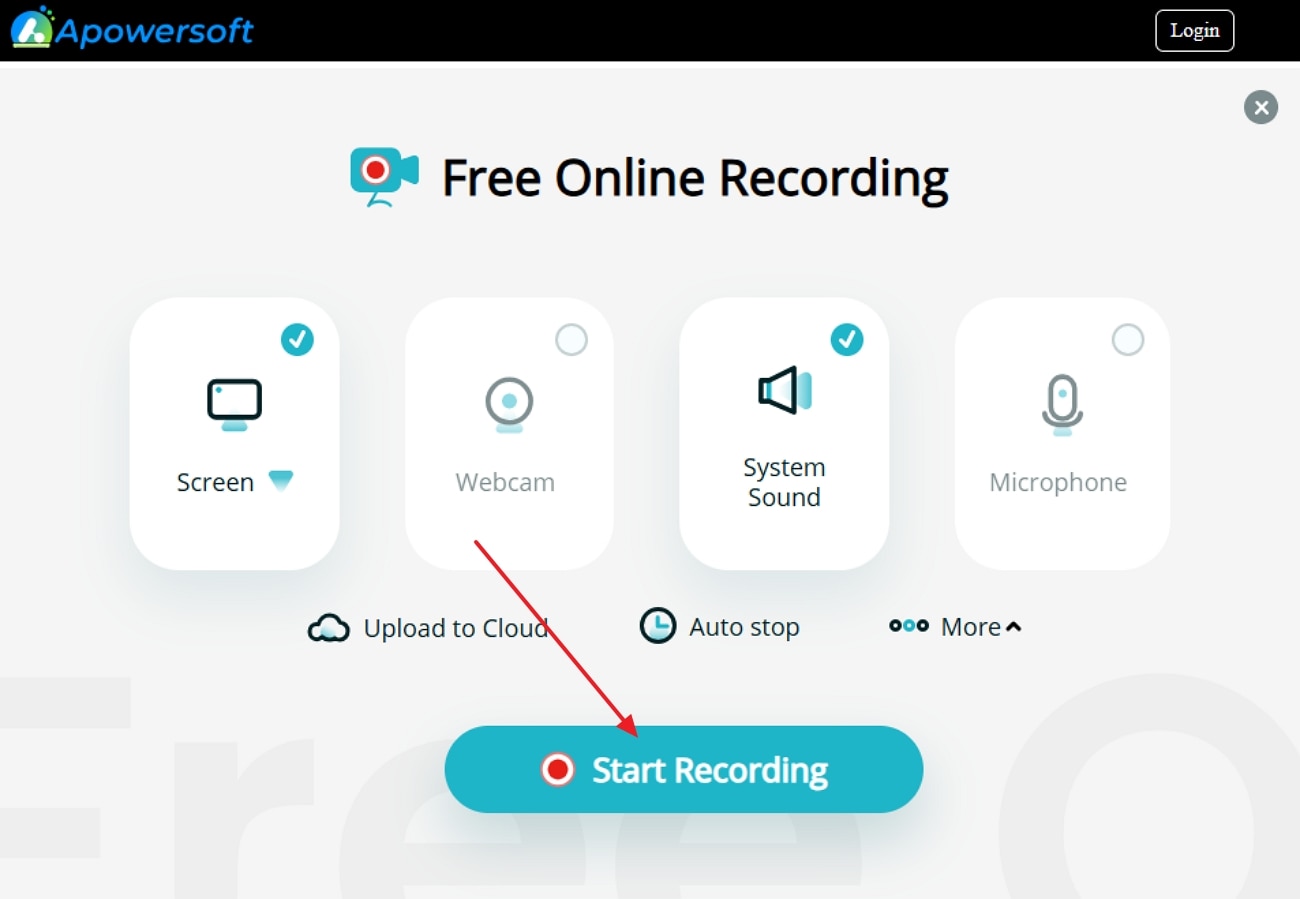
Step 2. Following this, choose the "Start Recording" button to start recording the desired interface.
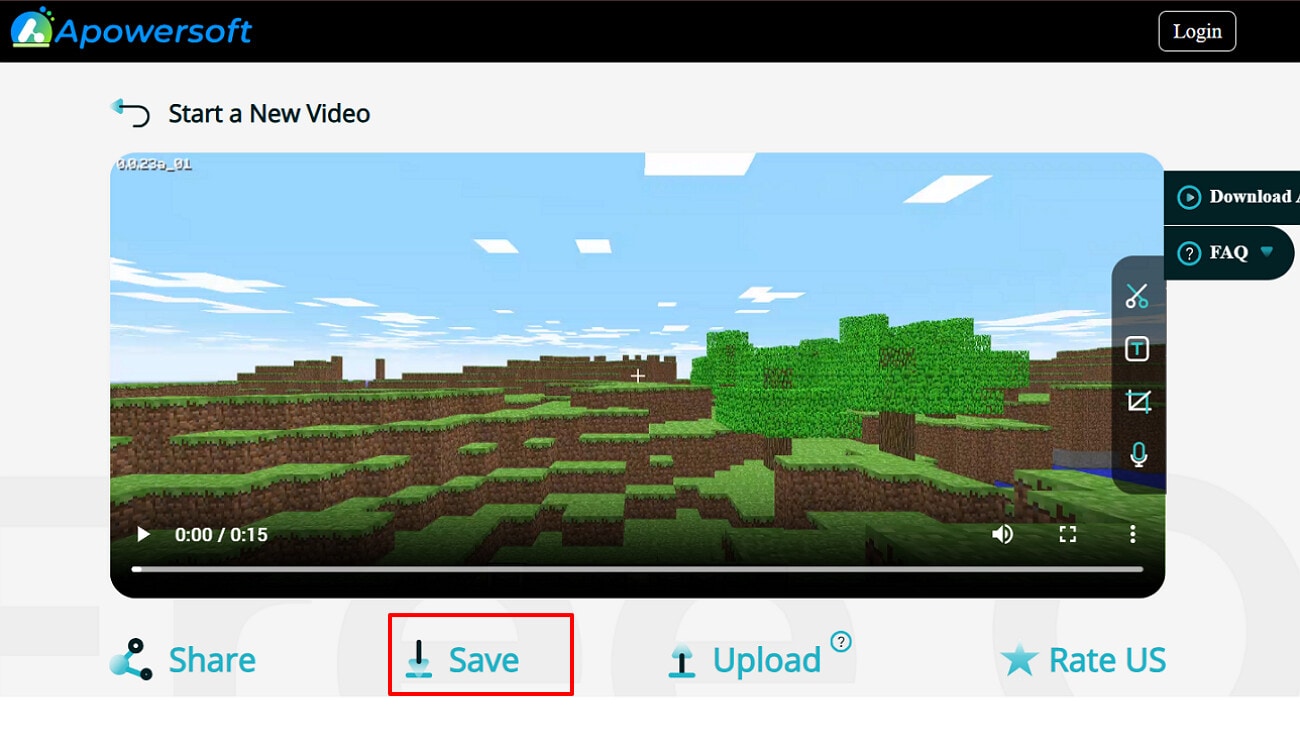
Step 3. As you have recorded the gaming video, hit the "Save" icon to get the video saved to the desired folder.
Key Features
Allows to capture full screen, custom area, browser tab, and webcam.
Saves in its cloud storage so that you can easily access the recorded videos later.
Provides an intuitive interface with a streamlined workflow for beginners.
Part 5. Step-by-Step: How to Screen Record Minecraft on Mac
Besides Windows, you can also screen record your Minecraft game on the Mac operating system with the following built-in tools:
Option 1. Using QuickTime Player (Built-in)
For Mac operating system users, they can opt for the QuickTime player built-in solution. It is a very minimal interface from which you simply choose the "New Screen Recording" option to start the recording. Furthermore, users can even select the entire desktop or a specific window area, depending on their requirements.
Comprehensive Walkthrough of Using the QuickTime Feature
Are you exploring how to record Minecraft on PC? Then follow the detailed guide below to use the built-in feature:
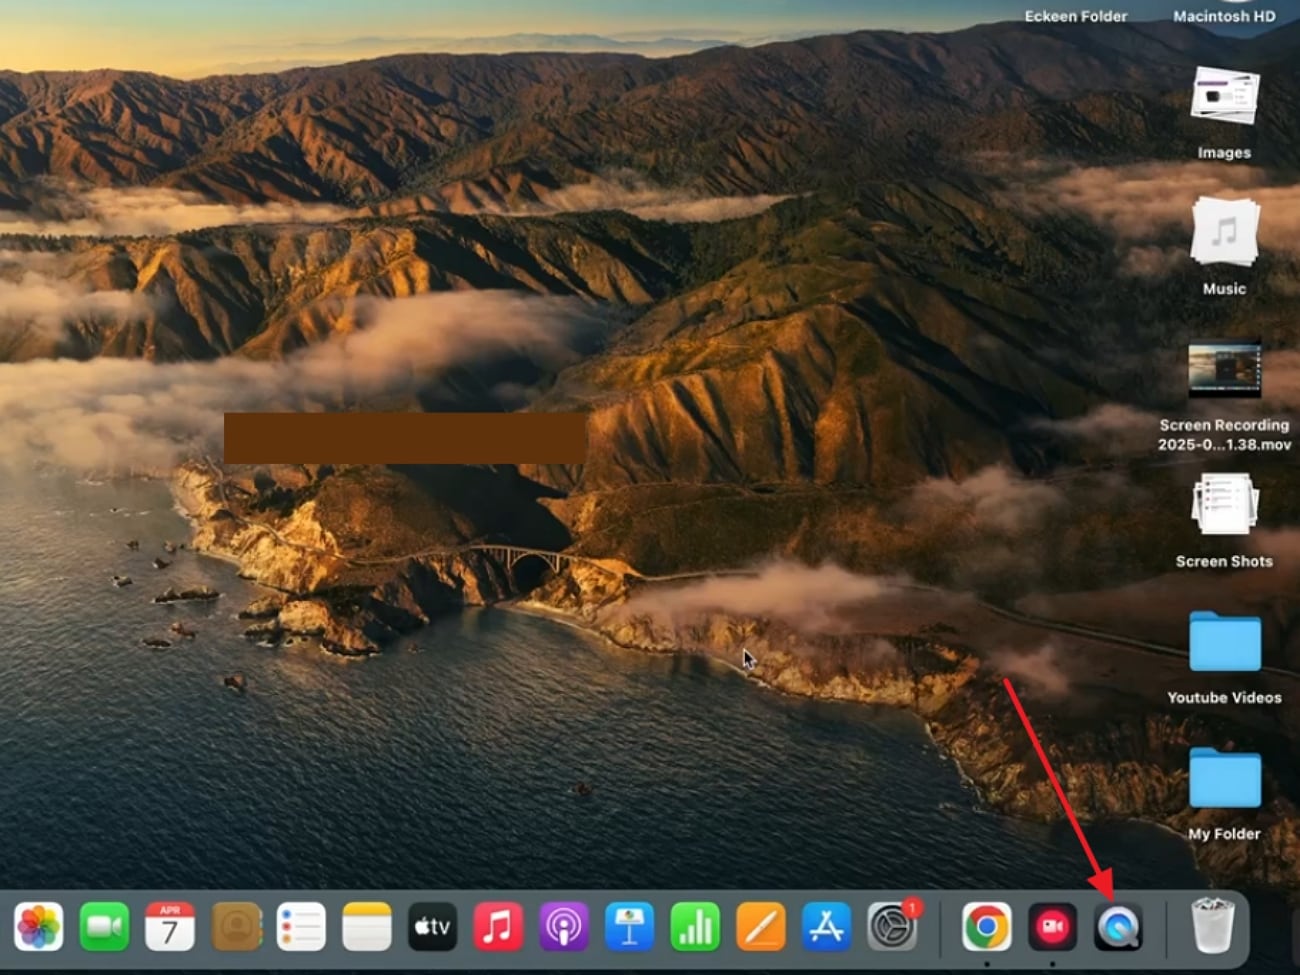
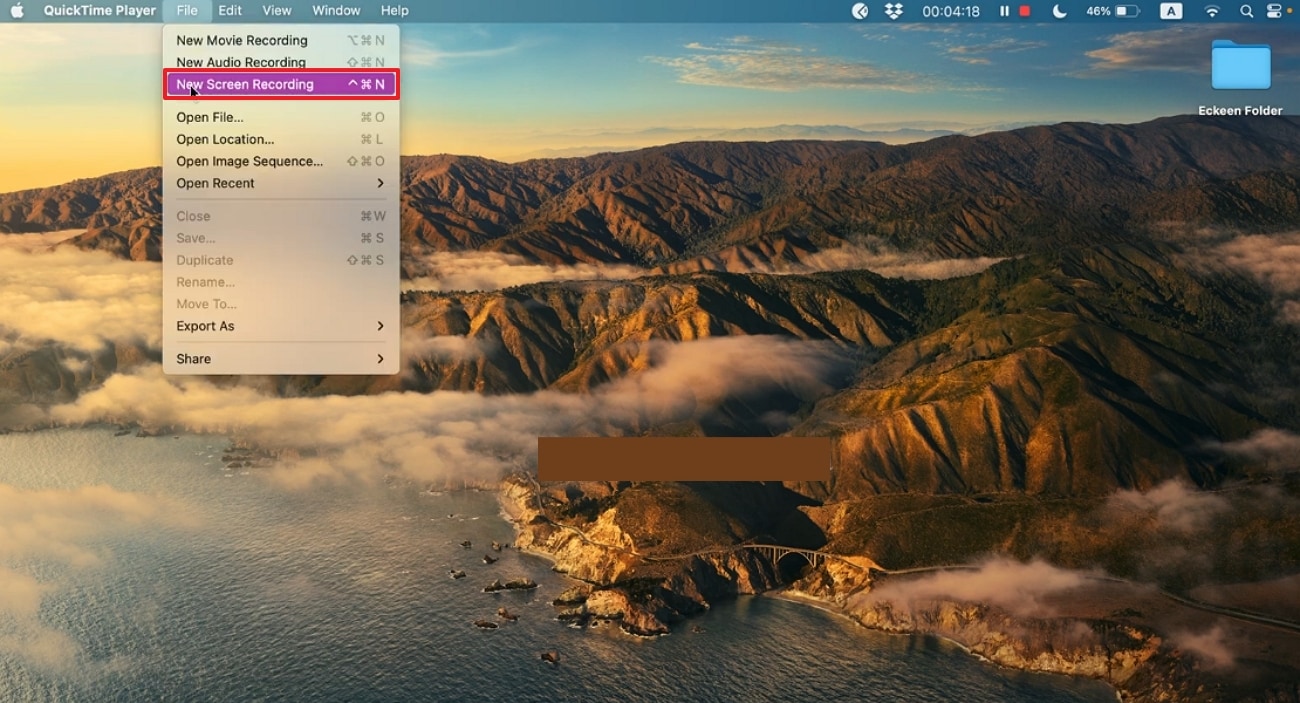
Step 1. Upon entering the Mac interface, click on the “QuickTime” icon available in this interface.
Step 2. Here, choose the "File" menu and select the "New Screen Recording" option to start the recording procedure.
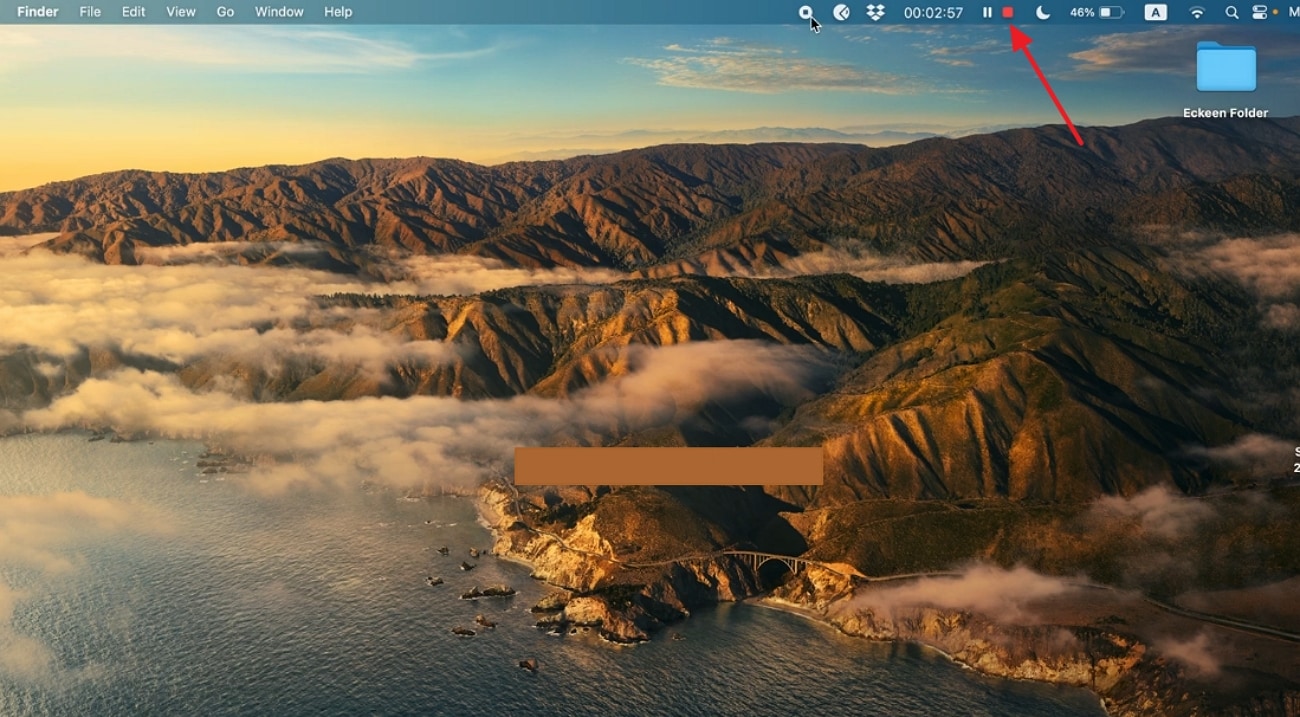
Step 3. At the end, right-click the “QuickTime Player” and choose the “Stop Screen Recording” option.
Key Features
Uses the native macOS system to save videos directly to your chosen folder.
Allows showing the mouse cursor in recordings to show the exact workflow.
Lets you quickly trim, split, and export clips at different qualities.
Option 2. Using the Screenshot Toolbar (macOS Mojave & Later)
Using the macOS Screenshot Toolbar is one of the fastest ways to record Minecraft on a Mac. Users simply press “Shift + Command + 5” to start the recording process. This tool also lets you capture instant screenshots and edit them within the tool. Moreover, it's a Mac built-in tool, which means you don't need to download or buy any third-party app.
In-Depth Guide for Screen Recording on Mac
If you want to use this advanced tool to know how to record Minecraft gameplay, then read the following guide:
Instructions
As you open the desired interface on macOS, press the “Shift+Command+5” key. Following this, choose the “Record” button to start the video recording. Now record your video and hit the “Shift+Command+5” again to stop the recording procedure.

Key Features
Let you choose between full and partial desktop screen recording.
Allows you to choose the desired location to save the screen recordings.
Provides options to adjust settings for various recording scenarios.
Part 6. Easy Ways to Screen Record Minecraft on iPhone and Android
Using easy mobile methods to screen-record Minecraft is beneficial if you only play on your mobile device. Both Android and iPhone provide a built-in screen recorder option. Using this feature, users can directly record long videos for later editing. So, if you are also exploring how to record a video in Minecraft with a mobile phone, then read the following:
Detailed Guide to Screen Record Video with iPhone
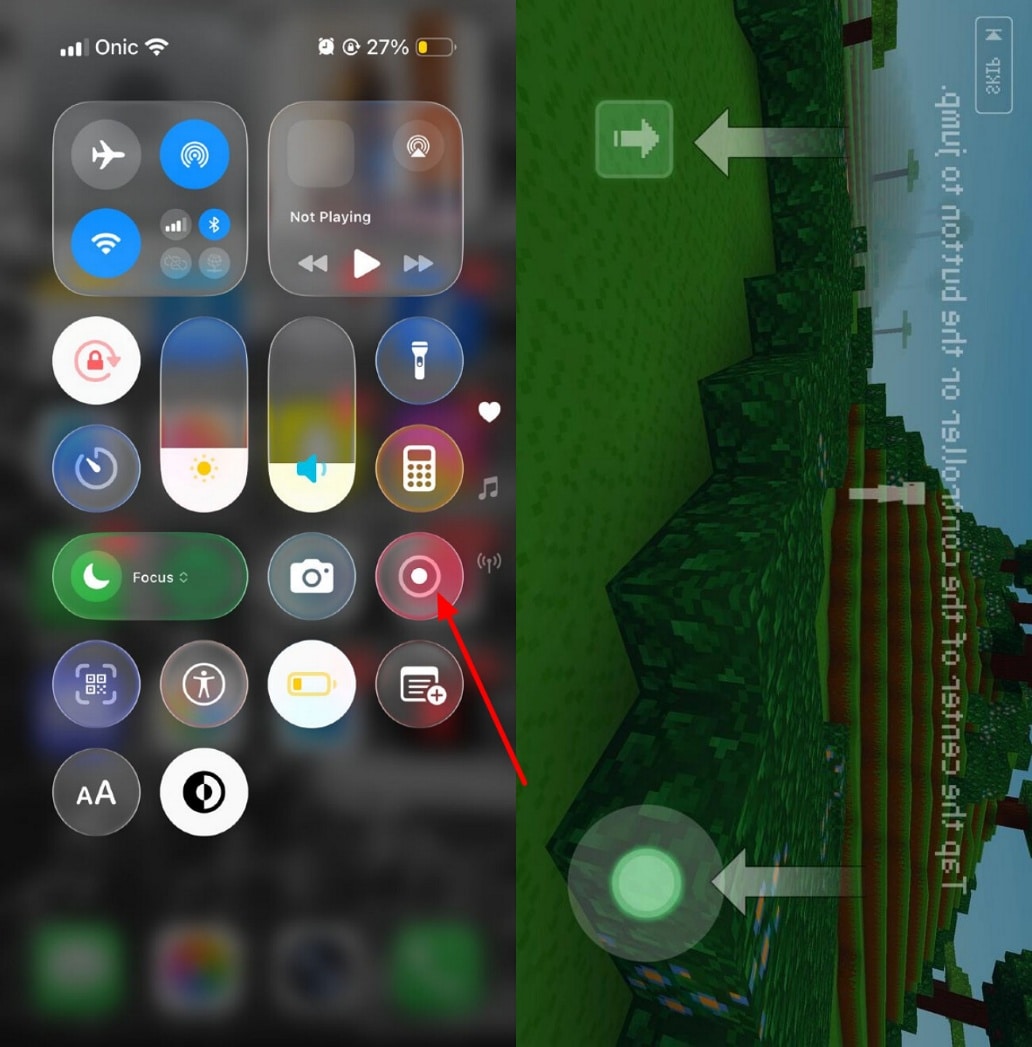
Instructions
Start by opening the iPhone notification bar and tapping the Screen Recorder icon to start the screen recording. Now, open the game to record the visuals, then hit the “Screen Recorder” button again to stop it.
An Extensive Guide on How to Use a Screen Recorder on Android
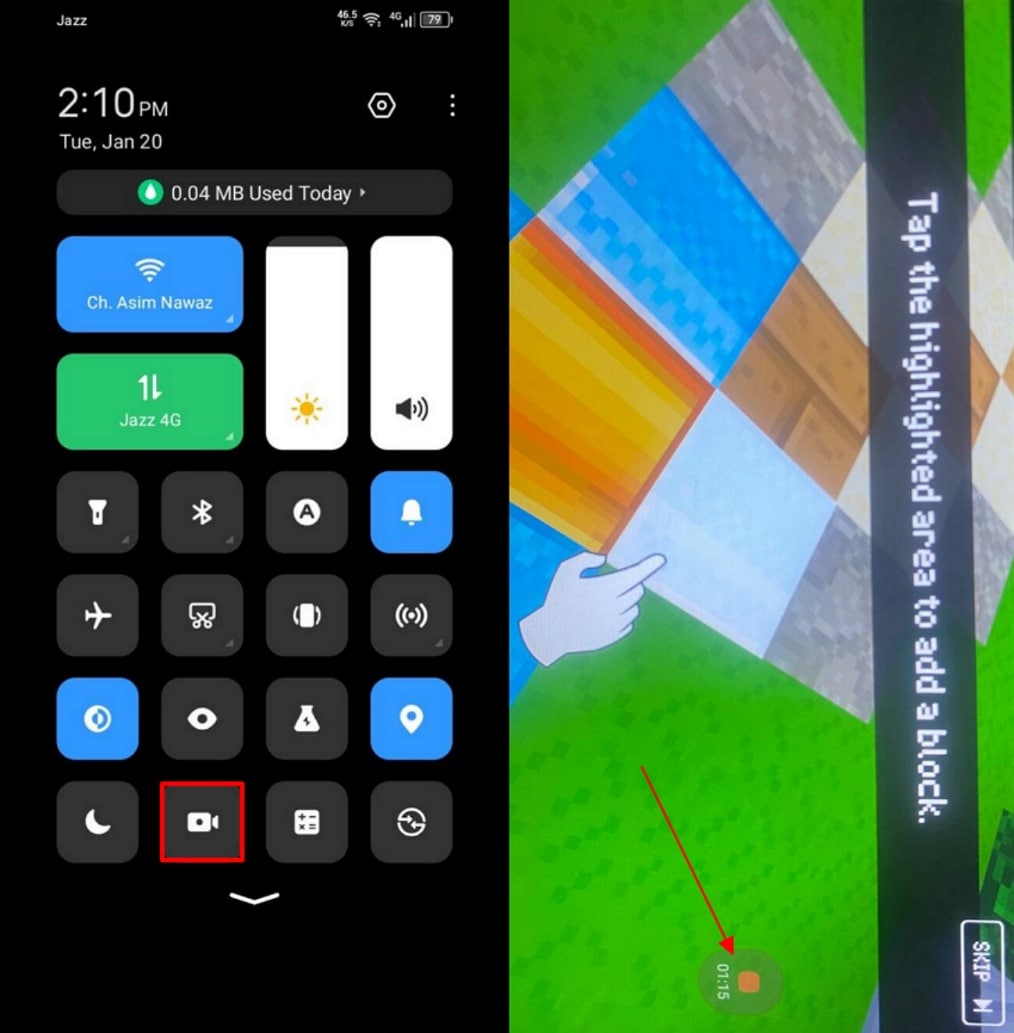
Instructions
After opening the Minecraft game on an Android phone, scroll down the notification bar to select the "Screen Recorder" icon. Afterwards, open the game to record and hit the red icon on the screen to stop the recording procedure.
Part 7. Capture Your Minecraft Adventures: Why Recording Matters
After learning how do you record a Minecraft video let’s explore why recording is considered essential:
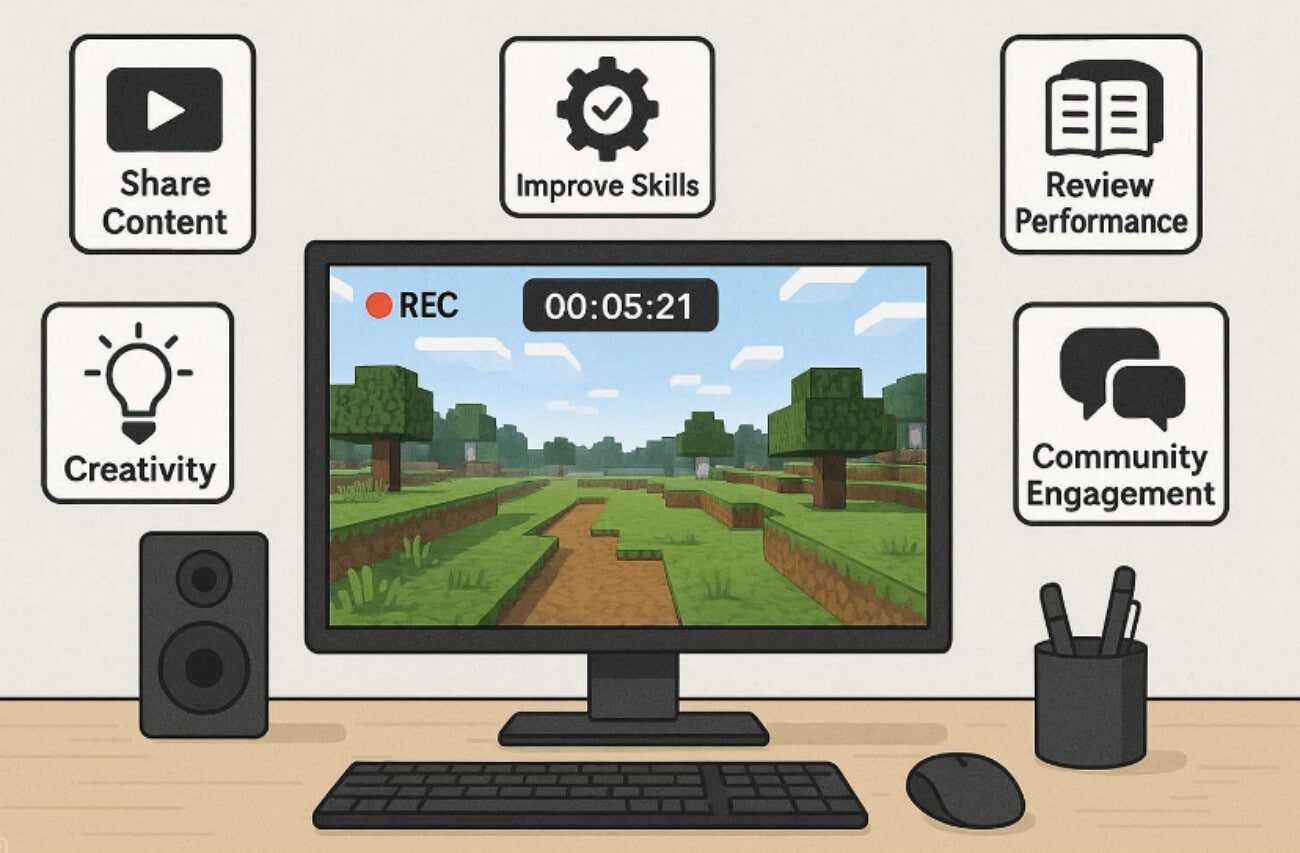
Share Best Moments: Recording lets you capture epic boss fights, clutch PvP wins, crazy Redstone. So, you can easily post them on other streaming platforms with friends and servers.
Creator Identity: Regularly recording and uploading Minecraft turns your casual gameplay into content. It helps you to grow your public account and gain new followers who love games.
Improve Your Skills: Watching your own recordings back makes it easier to spot mistakes in the game. With this move, you can make your games much better and eventually become a Pro.
Create Tutorials: Users can record step-by-step game videos of farms, command blocks, and building techniques. These tutorials are a great way for users to learn game tricks for solving any problems.
Support Education: In classrooms, teachers can show the games to teach coding. It can document progress, demonstrate concepts, and be reused as teaching material or portfolio evidence.
Part 8. 5 Pro Tips for Recording High-Quality Minecraft Videos
Here we have listed some efficient tips that you can consider using in the process of learning how to screen record in Minecraft:
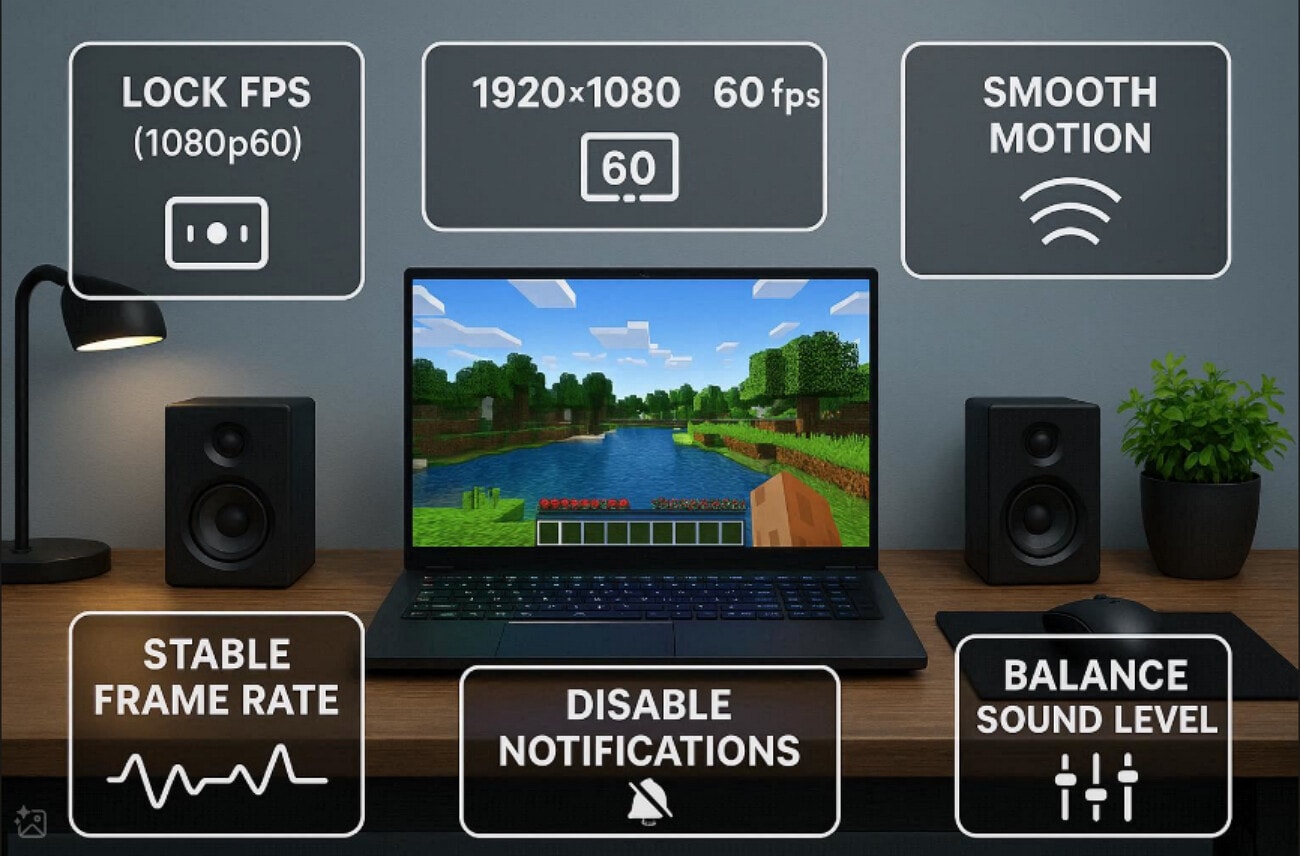
Lock FPS: Aim to record at 1920×1080 resolution with 60 FPS so that every block edge, particle, and camera movement is captured. This is the sweet spot for YouTube and most phones as it keeps file sizes manageable while still feeling very smooth.
Balance Graphics: Before recording, use lower-intensity options such as render distance, simulation distance, and particle count. A slightly lower render distance with a locked, consistent framerate looks far better on video than ultra graphics.
Use Clear Consistent Audio: Use a dedicated microphone or a good headset instead of your laptop mic, then set game audio a bit lower than your voice. In your recorder or editor, normalize or lightly compress your mic track so the volume stays.
Edit to Remove Dead Time: After recording, cut out repetitive mining, long walking segments, AFK time, inventory sorting, and menu pauses. Use jump cuts, speed‑ups, and time-lapses for grindy sections, and add simple captions.
Record Separately for Maximum Control: Record your game footage, microphone audio, and webcam feed (if used) as separate tracks within your recording software. This practice, known as multi-track recording, gives you precise control in editing. You can adjust game audio levels independently of your commentary, clean up microphone pops without affecting the gameplay track, ensuring a polished final product.
Conclusion
In conclusion, users can now easily screen record Minecraft gameplay using a screen recorder. This article covers efficient methods, including desktop, mobile, and online web tools, to know how to record Minecraft. Furthermore, we recommend UniConverter, which lets you instantly record your screen while playing Minecraft.
FAQs
-
1. What is the easiest way to start recording Minecraft as a beginner?
For beginners on Windows, the easiest option is the built-in Xbox Game Bar (press Win + G). On macOS, you can use the Screenshot Toolbar or QuickTime Player by pressing Shift + Command + 5. These tools require no setup and work well for basic gameplay recording. -
2. Which method should I use if I want “YouTuber-level” Minecraft videos?
If you want higher quality, overlays, webcam support, and full audio control, OBS Studio or a dedicated game recorder is the better choice. These tools offer scene layouts, advanced encoding options, and professional workflows commonly used by content creators. -
3. How do I record Minecraft without lag?
To avoid lag, lower Minecraft’s graphics settings so they match your recording resolution. Enable hardware encoding (such as NVENC or AMD VCE) if available, and keep the bitrate reasonable to avoid overloading your CPU. Closing background apps also helps maintain stable performance. -
4. Can I record Minecraft for free, or do I need paid software?
You can record Minecraft completely for free. Built-in tools like Xbox Game Bar (Windows), QuickTime (Mac), and free software like OBS Studio are more than sufficient for most users. Paid software is optional and usually offers extra features such as simpler interfaces, built-in editing tools, or faster export workflows. -
5. What recording settings are best for Minecraft videos?
A common standard is 1920×1080 at 60 FPS for smooth, clear YouTube gameplay. If your PC is less powerful, 720p at 60 FPS or 1080p at 30 FPS often produces smoother results than pushing ultra-high resolutions that cause stuttering.

