
Oculus Quest 2 (now Meta Quest 2) is a VR (Virtual Reality) headset from Reality Labs, initially Oculus. This Android-based VR headset was launched in September 2020 and is connected via Wi-Fi or USB-C. But sometimes, you might want to learn how to record Oculus Quest 2 gameplay and show it to your friends or family. Or maybe you wish to record VR gameplay for Twitch, Vimeo, YouTube, etc. Either way, this is the right tutorial to learn. We’ll learn multiple ways to record VR gameplay on Oculus Quest 2 and transfer it to your PC for further editing.
Part 1: How to record Oculus Quest 2 gameplay?
So, without wasting time, let’s discuss two convenient methods on how to record Oculus Quest 2 gameplay with lossless quality.
Method 1. Record Oculus Quest 2 gameplay with the built-in tool
As expected, Oculus Quest 2 comes with an inbuilt game recording feature. Initially, it could only capture HD videos at 30 fps and 1:1 aspect ratio. But Quest 2 has since been updated to include a 4K game recording at 60 frames per second. Also, the latest update features more frame rate and aspect ratio options. Other unique extras include image stabilization and customizable video bitrate.
Follow these steps to record the Oculus Quest gameplay:
Step $1
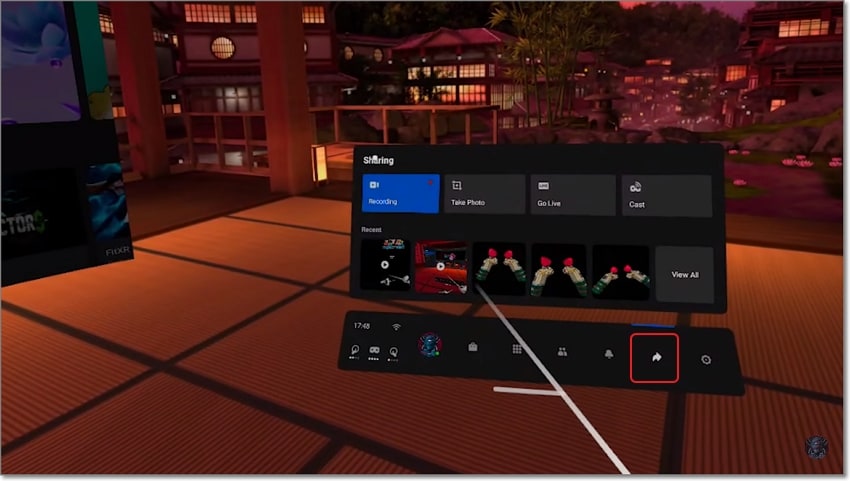
Start your Oculus Quest gameplay, and then press the Oculus button on your right controller to launch the menu bar in the VR room.
Step $2
Next, click the Share icon next to Settings to view more options.
Step $3
Click Record Video, and you’ll see a red dot on the top-right corner of the button. Once you’ve captured enough Oculus Quest 2 gameplay, click the Recording button to finish capturing the video. The video will be saved on the VR headset’s local storage.
Method 2 Record Oculus Quest 2 gameplay with OBS (Open Broadcaster Software)
Recording Oculus Quest 2 gameplay using the inbuilt recording feature is undoubtedly quick and easy. However, this feature is pretty limited. For example, you can’t live stream to platforms like Twitch, YouTube Live, Facebook Live, and more. Also, you may not want to waste time transferring the recorded video to your PC.
For these reasons and more, use a professional desktop program like OBS Studio to capture Oculus Quest 2 gameplay on Windows, Mac, and Linux computers. It’s a free, open-source game recorder that can capture up to 8K game recordings. Also, OBS allows you to create multiple gaming scenes and switch between them seamlessly. And of course, OBS supports live streaming to YouTube, Twitch, Facebook, etc.
Below is how to record VR gameplay on Quest 2 with OBS:
Step $1
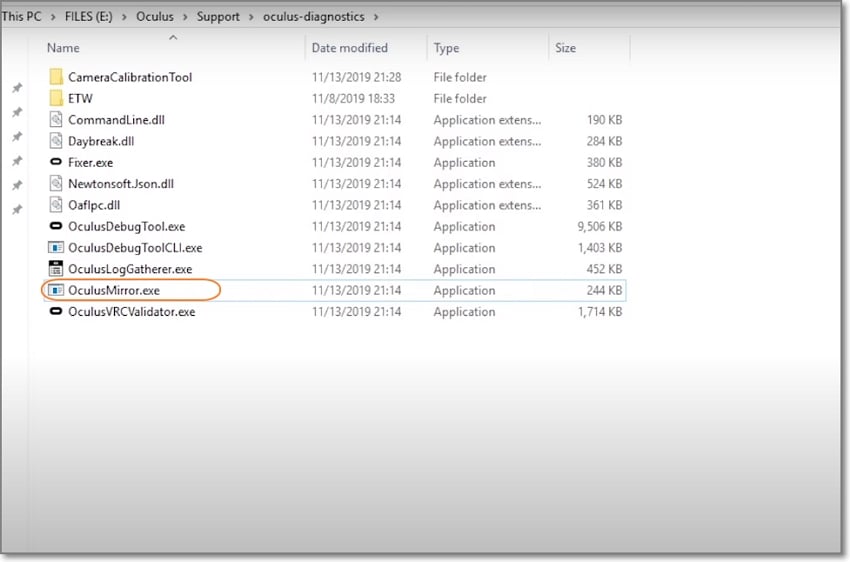
Find the Oculus installation package on your computer drive and click Support > oculus-diagnostics > OculusMirror.exe. You can also create a desktop shortcut for this program.
Step $2
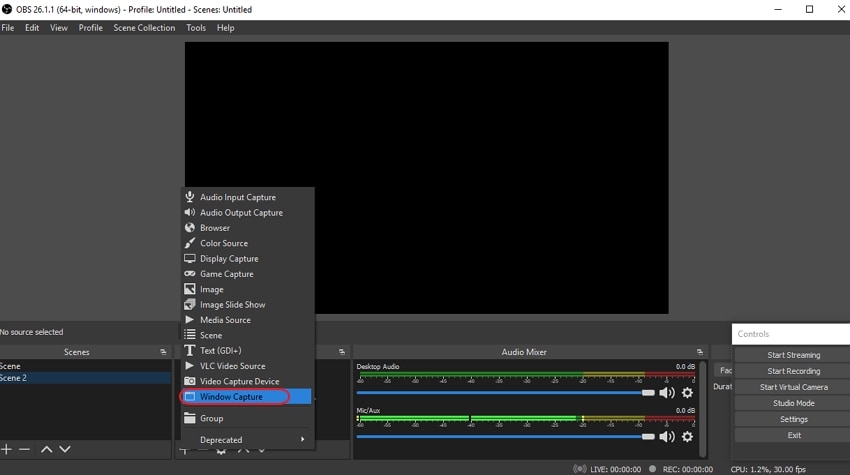
Next, install and run OBS, then start a New Source. The new source will be Windows Capture. Now find the OculusMirror screen and run it on OBS.
Step $3
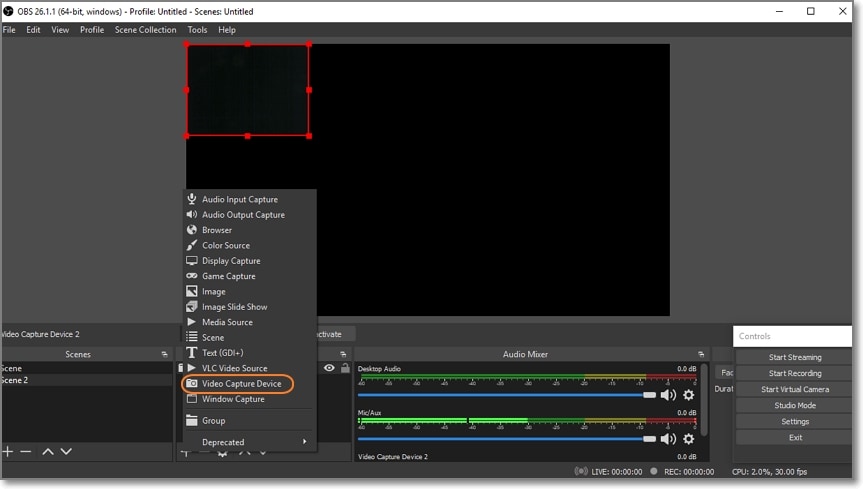
You can also add a webcam overlay to the Oculus Quest 2 video. To do that, tap the New Source icon and add a Video Capture Device. You can then customize the size and positioning of the webcam overlay.
Step $4
Lastly, click Start Recording to capture your Oculus Quest 2 gameplay. Remember that OBS videos are saved in the Video folder by default.
Part 2: How to advance the capture quality of Quest 2 recording
Although the inbuilt Quest 2 game recorder is perfect for capturing quick videos, the quality of the videos can be painfully low. So, if you’re a professional YouTube or vlogger, you may need a third-party screen recorder like OBS. But that’s not the only solution. You can also install SideQuest on Quest 2 and increase the video frame rate and resolution.
Below is how to go about it:
Step $1
Install SideQuest on your PC, then connect Oculus Quest 2 to your computer.
Step $2
Allow your PC permission to access the headset and then unplug it. You’ll see the icon on the top-left corner of the SideQuest app turn green. This means you’re connected.
Step $3
On SideQuest, click Run ADB Commands before clicking the Custom Command option.
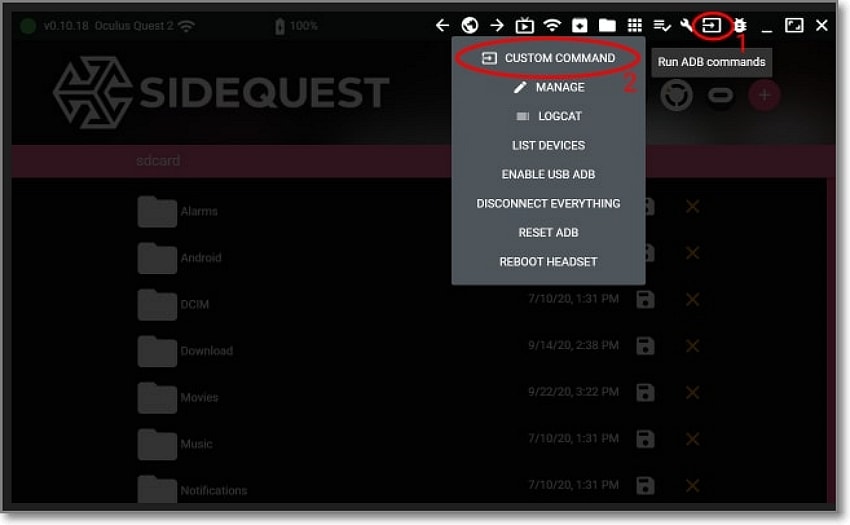
Step $4
Now enter these commands one by one. Remember to click “Run Command” after entering each command.
- adb shell setprop debug.oculus.capture.width 1440
- adb shell setprop debug.oculus.capture.height 1080
- adb shell setprop debug.oculus.fullRateCapture 1
- adb shell setprop debug.oculus.capture.bitrate 30000000
Step $5
After running the commands, unplug the VR headset and record high-quality videos with the built-in recorder.
Remember that you can record up to 4K UHD on Oculus Quest 2 if the device has enough storage. But as you can see in the steps above, we’ve set the video resolution as 1440 x 1080. By default, Quest 2 records videos in 1024 x 1024 resolution. So, avoid setting the resolution too high because that can cause slow game performance while playing and recording. If you want to record a video in 2K or 4K, it’s a good idea to use third-party options like OBS Studio.
Here’s how to increase the resolution:
Step $1
Open SideQuest and tap Run ADB Commands > Custom Commands.
Step $2
Now paste this command: adb shell setprop debug. Oculus.textureWidth 2560 && adb shell setprop debug.oculus.textureHeight 2560
Step $3
You can increase or decrease the resolution, although 2560 x 2560 will give the best performance.
It’s also worth noting that the default Quest 2 frame rate and bitrate are 30 and 5,000,000, respectively. Videos with higher frame rates appear smoother and more incredible. On the other hand, a higher bitrate means more video bits, hence higher resolution and quality. So, you can tweak these settings based on your needs. But don’t push them too high.
Part 3: How to transfer the video from Oculus Quest 2 to PC
You may want to transfer Quest 2 videos to your PC for obvious reasons. For instance, you may want to edit and convert them before sharing them on YouTube, Facebook, Twitch, and other platforms. Or, you may simply want to back them up on your PC or portable drive. Whichever reasons you have, below are the two simple methods to export Quest 2 videos to PC:
Export via USB connection:
Step $1
Plug in the VR headset to your PC using a USB cable. Any USB cable will do in this case.
Step $2
After connecting, fire up your VR headset. Then, you’ll see a prompt asking your PC to see videos inside Quest 2.
Step $3
Once you’ve allowed permission, search for Quest 2 on your computer. Inside the Oculus drive, go to “VideoShots” to view all recorded clips. Now drag and drop the videos onto your desktop.
Export via SideQuest:
Step $1
Open the SideQuest app on your PC and plug in your VR headset using a USB wire.
Step $2
Then, choose “Allow USB debugging” inside the headset.
Step $3
Once SideQuest is connected to Quest 2, connect the headset to your PC and load up SideQuest on the VR headset.
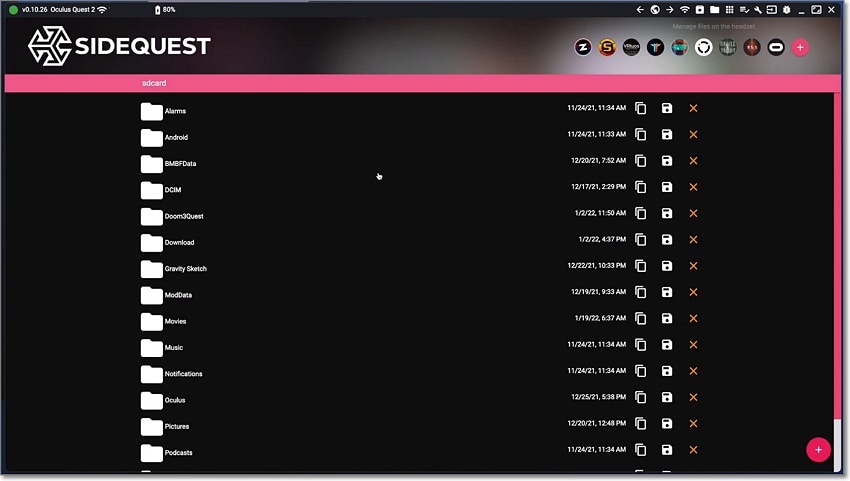
Step $4
Click the Folder icon on the top-right corner and then find the Oculus and VideoShots folders to view the videos. To export the file, click the Save icon and choose a folder path.
Conclusion
And that is how to record Quest 2 gameplay effortlessly. Although OBS Studio has advanced features like 8K support and live streaming to Twitch and YouTube, beginners might be better off using Quest 2 inbuilt recorder. You only need two clicks to record the video. And remember to use SideQuest to adjust the video quality and export videos to your PC for further editing. Have fun!

