
Generally speaking, video files take up more disc space on your Mac than any other File, including documents, music, images, and pictures. While increasing file sizes let us watch amazing videos in the age of 4K screens and smartphone cameras, they consume a lot of computer memory and can be difficult to publish online.
This article will explain how to compress video on Mac efficiently. This is helpful if you need to save space on your computer, upload them to a website, or share them via email.
In this article
- Compress Videos Using Wondershare UniConverter for Mac
- Use The Movavi Converter on A MAC to Compress a Large Video File
- Use iMovie to Compress a Movie
- Compress A Video on a MAC Using VLC
- Use QuickTime Player on a Mac to Compress Video Files
- How Do You Pick the Right Software to Compress the Size of Videos on a Mac?
- Conclusion
Way #1: Compress Videos Using Wondershare UniConverter for Mac
Wondershare UniConverter is a versatile video compression software Mac users can use to minimize video sizes in various formats. For the process, you may add both local files and files from devices. The program supports both single and multiple file compression in output files of excellent quality. You may use the program to video compress your data, so you won't have to worry about running out of storage space.
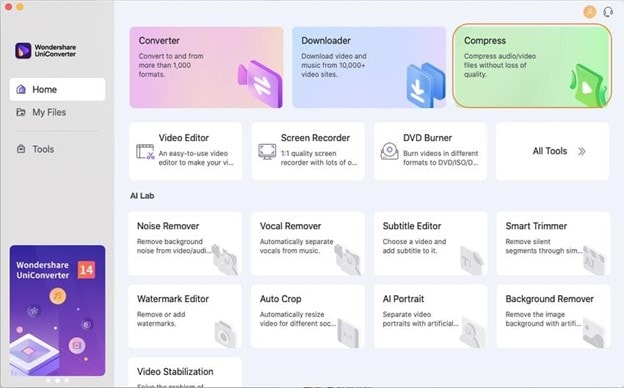
Step1Choose the Option Called “Compress”
On your Mac, Download Download Download, install, and launch Wondershare UniConverter. Next, from the Home interface, choose Compress.
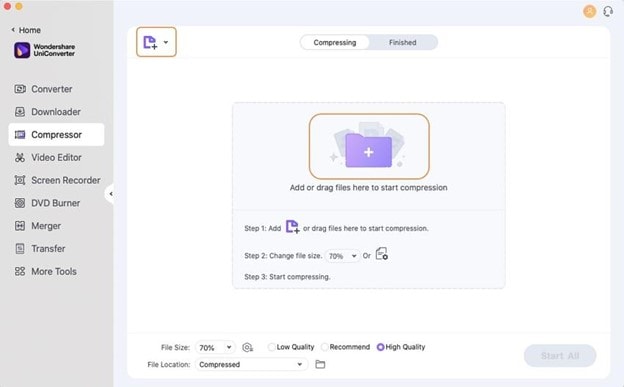
Step2Add Files
To browse and load your system's local files, click the + or the button. The drop-down menu may be expanded, allowing you to add videos from the camera or linked devices. You can drag and drop the files into the interface as an alternative.
Step3Select the File Size or Compression Percentage
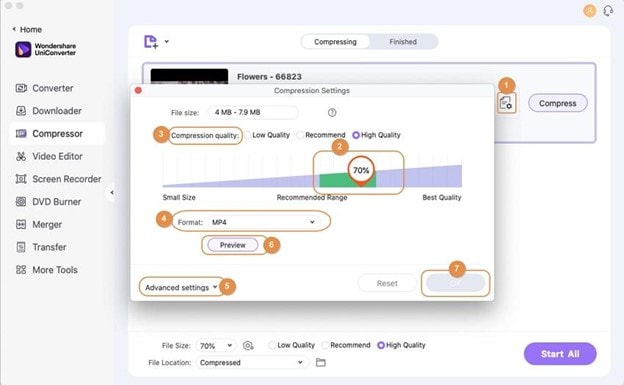
The interface displays the newly uploaded files together with File metadata and a thumbnail picture. Now, choose Reduce File Size from the drop-down menu in the upper-right corner if you want to compress the additional files by shrinking them to a percentage of the original file size.
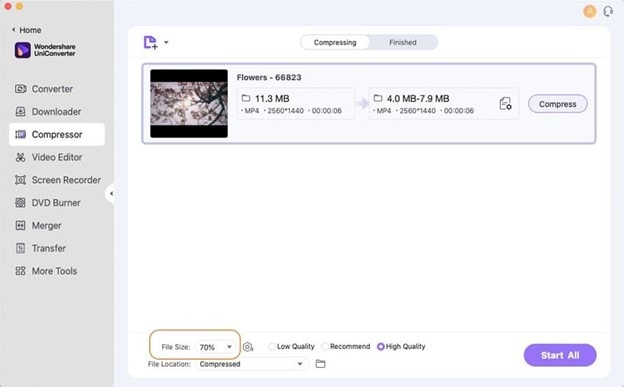
As an alternative, you may choose specific dimensions and other features. For this purpose, a Compression Settings window will pop up when you click the settings button next to the file information. You may choose the desired file size and compression quality using the slider. Additionally, you may choose the export file format. You may change the resolution, bitrate, audio and video encoder, and other settings under the Advanced Settings. The settings will be confirmed by clicking the OK button.
Step4Start Compression
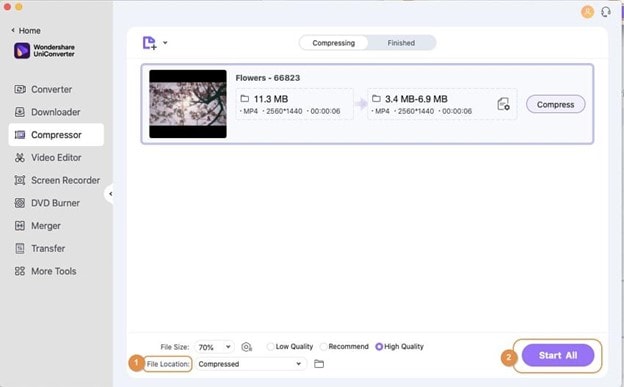
The File Location tab allows you to explore and choose where to keep the compressed files on your system. To start the file compression process for all the uploaded files, click the Start All button in the bottom-right corner.
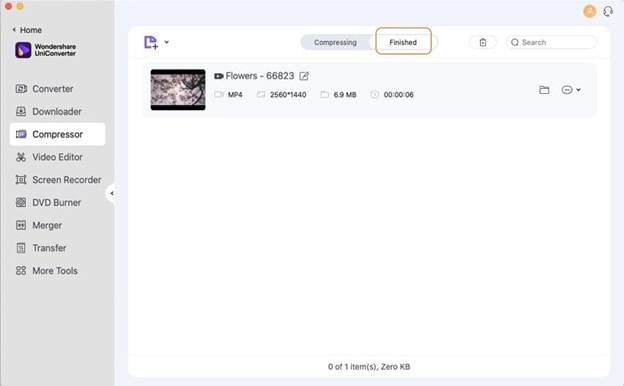
See the interface's compressed videos by selecting the Finished tab.
Way #2: Use the Movavi Converter on a Mac to Compress a Large Video File
A program like Movavi is the solution to compress video on Mac without sacrificing quality. Movavi Video Converter can deal with more than 180 file formats, reducing the size of the original video without sacrificing quality. You also have great control over the video since you may modify it and select the file type and quality for the conversion.
To make a more streamlined and effective file, you may, for instance, cut the beginning and finish of a film. You can decrease the size of a movie on a Mac, even if you decide not to trim it by using another type of File or compression.
Step1Install the Software
Install the Mac version of the Movavi Video Converter after downloading it.
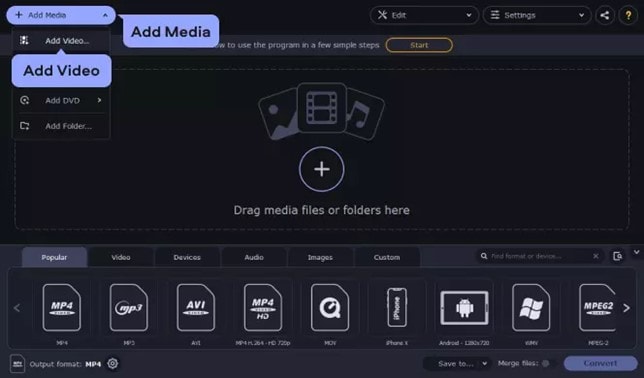
Step2Load the Video
To load the video file, drag and drop it into the window.
Step3Choose Your Preferences
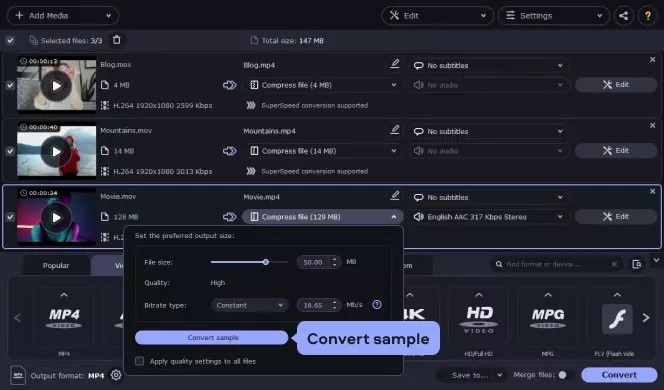
You can reduce video file size Mac effectively by selecting the appropriate settings from a wide range of presets available under the Video menu. You may choose the compression rate, and the program will display the projected file size.
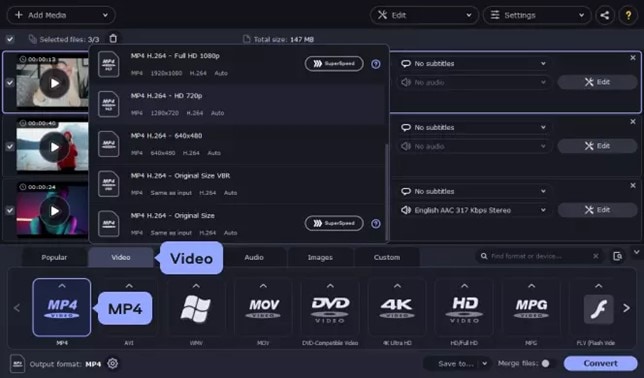
To further minimize the size of the MP4 file on your Mac, click Estimated Output Size and choose the appropriate number.
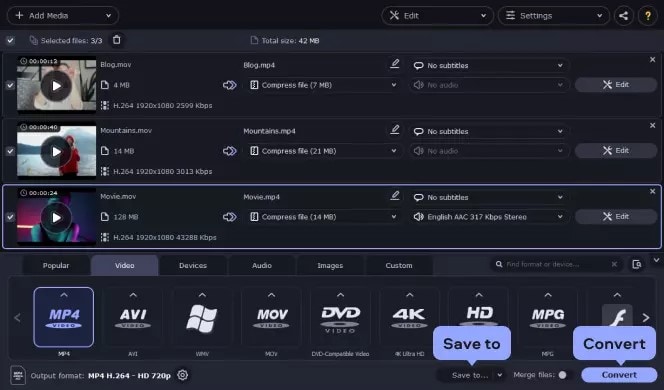
Step4 Compress
After selecting the Convert option on your Mac video converter, a newly compressed file will be sent to the Movavi Library folder or any other default place you have specified.
Way #3: Use Imovie to Compress a Movie
As iMovie comes already installed on your Mac, it can be the first option for anybody searching for a way to reduce the size of a movie on the device. The program is more than just a converter; it's a video editor with plenty of presets that make it easy for anybody to use for video compression.
A significant advantage of iMovie is its role as a built-in Mac OS video compressor that requires no additional installations. It's already installed on your system and could be the default way Macs compress videos. This implies that there are no extra fees associated with the program.
But it's not perfect. The conversion process might be lengthy, and the program isn't the fastest option for compressing video on a Mac. Furthermore, the interface may seem daunting if you have no prior experience with video editing. It is primarily a video editing software solution, after all.
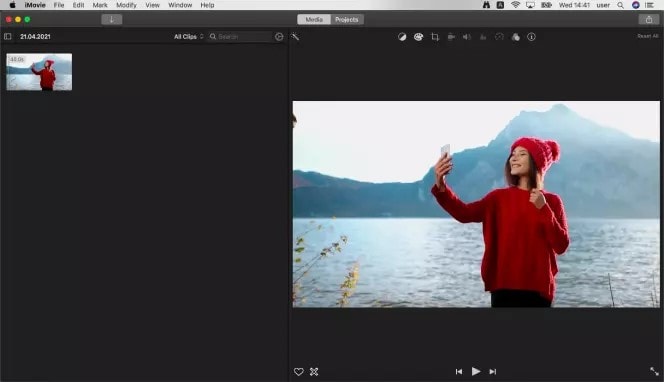
Step1Open and Edit the Video
After importing the video of your choice, if you feel comfortable doing so, you may alter it by trimming and cropping it to make it smaller in file size.
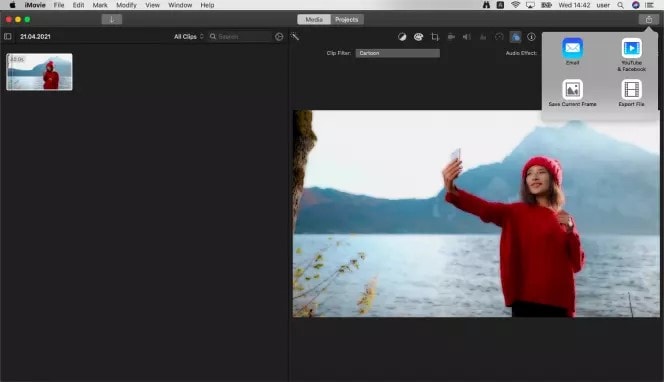
Step2Share the Video
In iMovie, you have to click Share, which essentially means save or convert, but it's called Share since you can share your films on other websites, like YouTube.
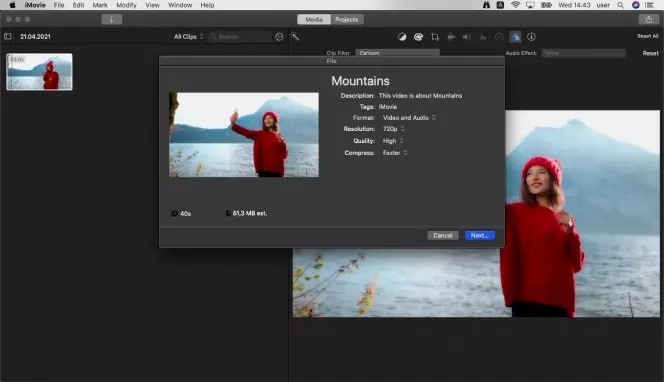
Step3Modify the Settings
On a Mac, you may adjust the Resolution and Quality settings to decrease the MP4 file size or any other common video file format. Before you export, the program will estimate the size of the video file.
Step4Save and Export
When you click Export, choose a location to store the File. This could be on your desktop, but you can transfer the File to an external hard drive or cloud storage, for example, if that's where you want it.
Way #4: Compress a Video on a Mac Using VLC
VLC, a free video compressor Mac users can download and compress movies without losing quality. Since VLC's primary function is to play videos, several users are shocked to hear that it can also be used for compression and conversion.
One of VLC's greatest features is that it can be downloaded for free and performs just as well as a video compressor for Mac or Windows. In addition, it has many settings that remove technical jargon, making it appropriate for users with little to no experience with video files and formats. You may choose a simple profile from settings like "Video for YouTube" to minimize the size of video files on your Mac.
One of the software's drawbacks is that it makes detailed editing more difficult. Above all, it is merely a video player. Moreover, you don't know the exact file size before converting and have less control over the parameters. Using VLC as your free video compression software for Mac, you can compress movies as follows:
Step1Download and Install
Install the VLC Media Player after downloading it. It will not ask for money since it is open-source and free.
Step2Open and Edit the Video
To import the video of your choice, choose File, then Convert/Stream. Navigate to the relevant video and click the Add button.

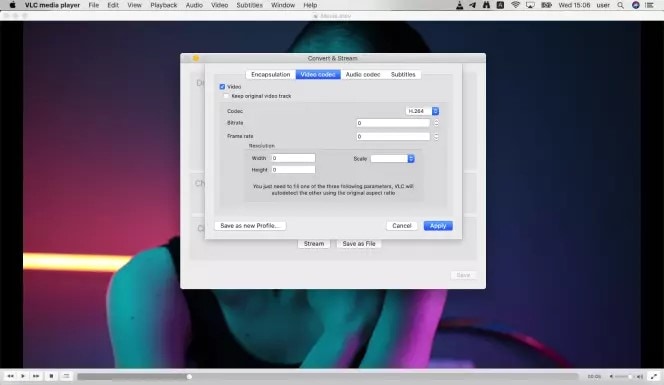
Step3Modify the Settings
Select Customize. To minimize the file size, adjust the Resolution and Quality settings. You may save the File at the appropriate size using VLC's Profile drop-down menu, which offers preset profiles.
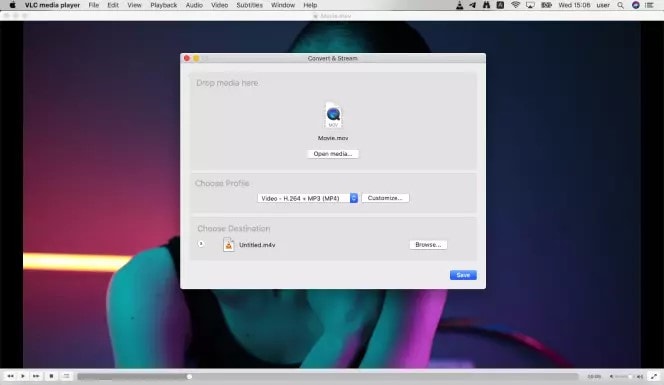
Step4Save After Choosing the Target Folder
Choose the target folder for the exported File when compressing an MP4 file on a Mac or any other file type. After that, you may click Save to start the procedure.
Way #5: Use Quicktime Player on a Mac to Compress Video Files
QuickTime software is also pre-installed on a Mac, and QuickTime Player traditionally allows users to compress films on the Mac. Though it is more of a viewer than an editor, it can compress files, much like VLC.
You may compress MP4 Mac files using QuickTime, which offers basic options for exporting movies to smaller sizes. Compared to other native apps like iMovie, you have fewer options. Here is our tutorial on QuickTime Player video file compression.
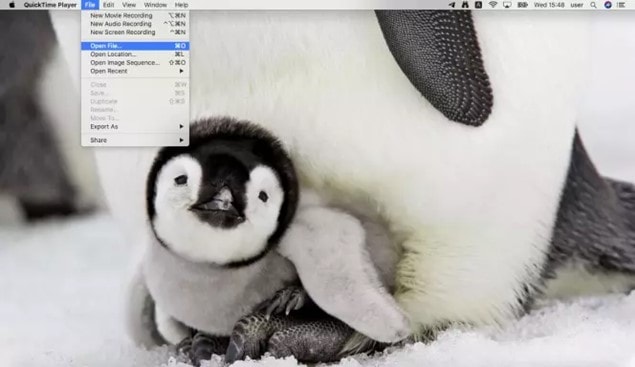
Step1Import Your Video
Choose the Open File option from the File menu, then find the video file you want to compress.
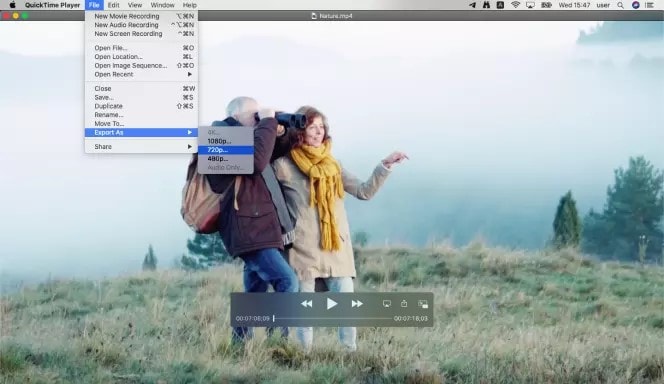
Step2Modify the Export Settings
Make sure to choose the export options before exporting your movie. After making a suitable choice, click Export As.
Step3Save the Result
Use the Save button to save the compressed video file.

-
How Do You Pick the Right Software to Compress the Size of Videos on a Mac?
Conclusion
Compressing videos on a Mac can be done effectively through various approaches and software programs, some of which have specialized features designed for specific needs and levels of competencies. From involving advanced applications like Wondershare UniConverter and Movavi Video Converter, which let the user get comprehensive control and great quality, to using built-in applications like iMovie or QuickTime Player for fast and simple processes, the variants are broad. In addition to this, VLC supplies a user-friendly and flexible solution, which attracts people who are keen on the cost-free variant.
Upon selecting the right video compression software, remember that easy-to-use features, quality, speed, advanced features, and cost will help you determine the best software for your needs. Finally, it all depends on whether you will use it for professional purposes, personal storage, or to share on the internet. Through this thought process, you can keep the quality of your videos high while optimizing the file sizes on your Mac.

