
You've just captured an incredible shot in challenging lighting conditions, but when you zoom in on your computer screen, your heart sinks. Those grainy patterns and colored speckles are scattered across your image, making it look unprofessional and distracting.
The good news is that you no longer have to live with noisy images. Lightroom denoise features can turn your high-ISO photos into clean, professional-looking images, both with AI and manual adjustments.
If you're not familiar with denoising in Lightroom, don't worry. This guide will help you learn how to denoise in Lightroom. We will cover both AI-powered and manual techniques to help you achieve professional results every time.
In this article
- What is Photo Noise and Why Does It Ruin Image Quality?
- Why Creators Use Adobe Lightroom to Denoise Images?
- How to Denoise in Lightroom with AI
- How to Do Manual Noise Reduction in Lightroom
- Lightroom's Limitations for AI-Based Photo Cleanup
- Best AI Alternative to Lightroom for Image Denoising & Enhancement
- Pro Tips for Denoising Without Losing Detail
- FAQs about Lightroom Noise Reduction
Part 1. What is Photo Noise and Why Does It Ruin Image Quality?
Photo noise appears as unwanted grainy or speckled patterns in your images, similar to the grain you'd see in old film photos. It's a random variation in brightness and color that your camera's sensor detects, especially when it's working hard to capture light in challenging conditions.
Here is what causes photo noise in your images:
- High ISO, Low Light, and Underexposure: When you shoot at high ISO settings (like ISO 3200 or higher), your camera amplifies the sensor's signal to brighten the image, but it also amplifies the noise along with it.
- Heat Buildup During Long Exposures: Extended shutter times can cause your camera's sensor to overheat, resulting in additional thermal noise that appears as randomly colored pixels.
- Small Sensor Limitations: Smaller sensors in phones and crop-sensor cameras are more prone to noise because each pixel receives less light.
Understanding the difference between luminance and color noise is crucial. Luminance appears as grainy black and white specks that affect the brightness of pixels, while color noise shows up as random colored dots (usually red, green, or blue) scattered throughout your image.
When noise affects print quality and brand perception, it becomes more than just a technical issue. Noisy images look unprofessional in client work, reduce the perceived value of your photography, and can make large prints appear muddy or unclear. For photographers building their brand, clean images are essential for maintaining credibility.
Part 2. Why Creators Use Adobe Lightroom to Denoise Images?
Lightroom noise reduction is a go-to choice for photographers who want to remove noise without losing image details. The software combines ease of use with powerful AI technology that delivers professional results.
Here's why creators choose Lightroom for denoising:
- It offers both AI and manual noise reduction tools.
- You can preview adjustments in real-time and fine-tune results.
- Lightroom fits into most photographers' editing workflow.
- It supports RAW files, which preserve the highest image quality.
- You can use presets and batch editing for efficiency.
Part 3. How to Denoise in Lightroom with AI
Learning how to denoise in Lightroom with AI is straightforward once you know where to find the tools. Instead of manual Noise Reduction sliders, simply press the “Denoise” button, adjust the “Amount” slider, and click “Enhance.”

How to Remove Noise in Lightroom:
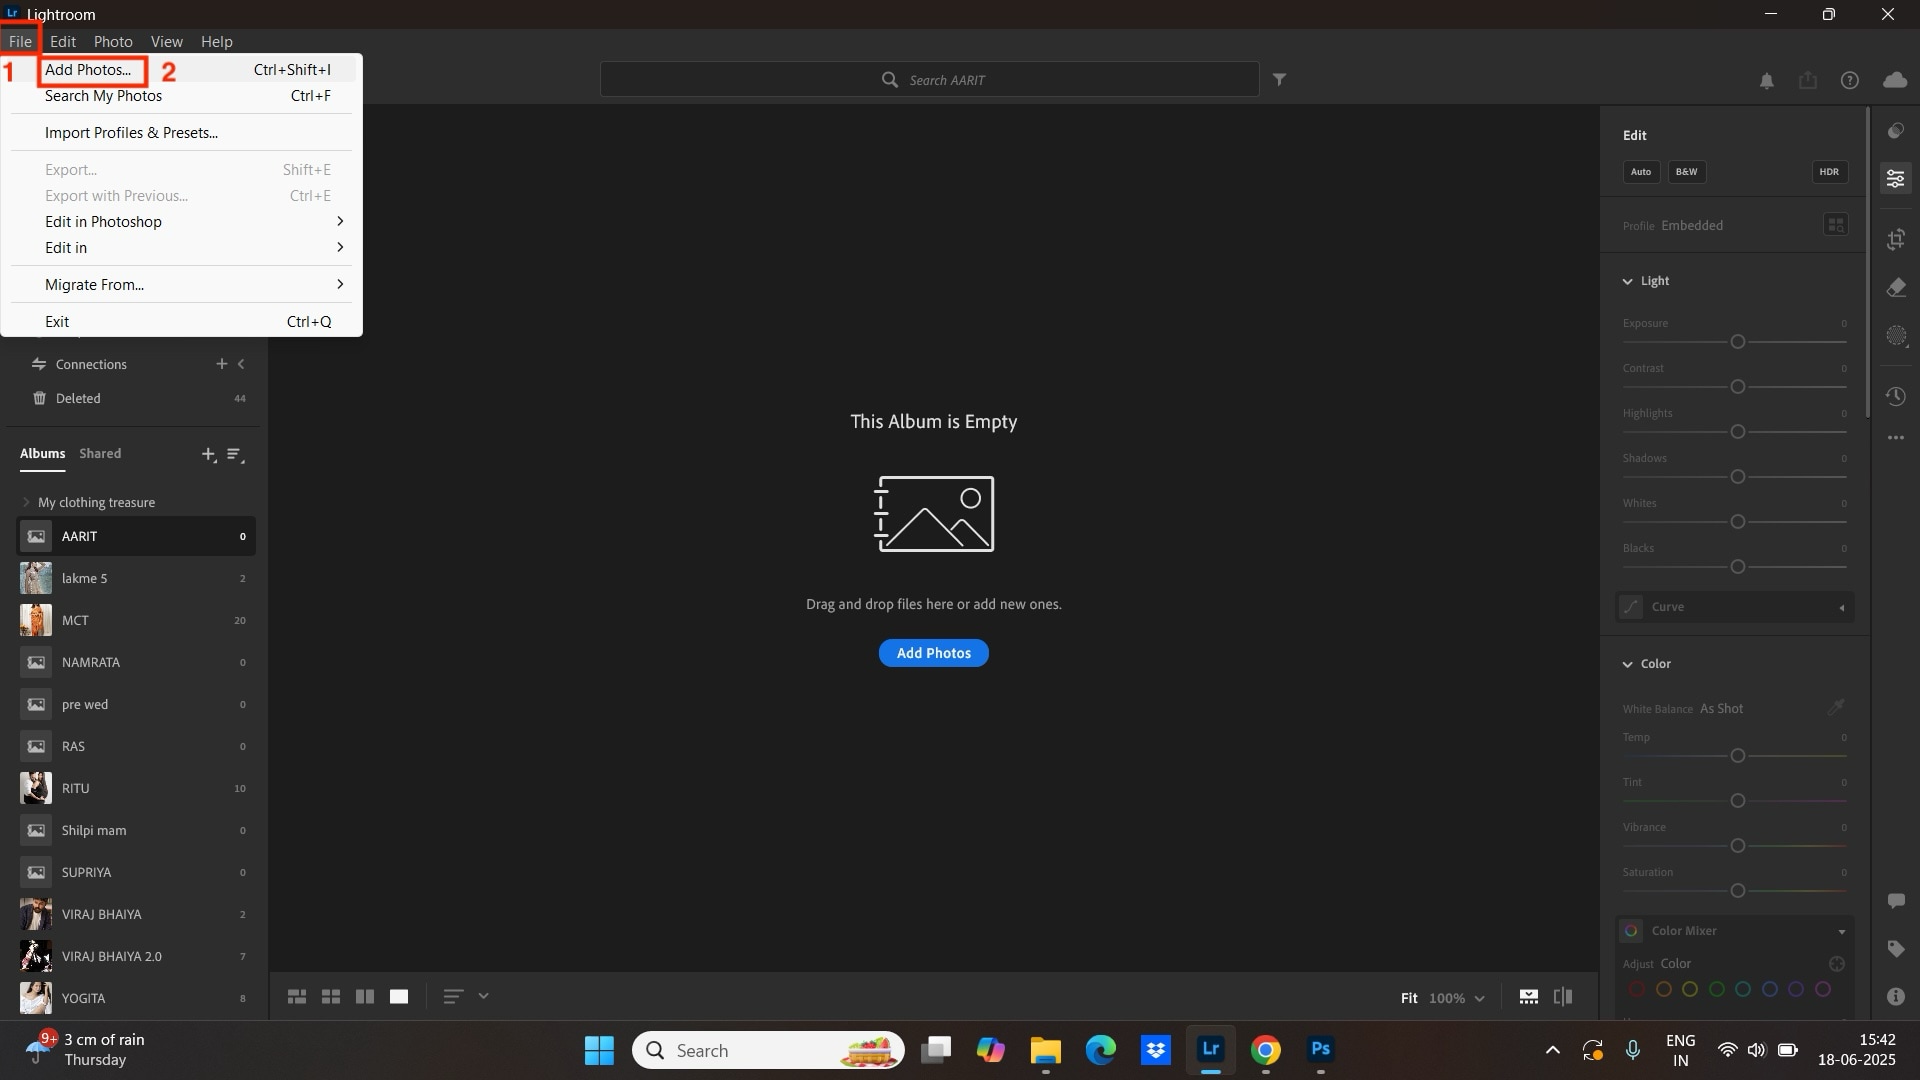
Step 1: Click on “File > Add Photos” and upload a RAW photo in Lightroom Classic or Lightroom version 6.3 or later.
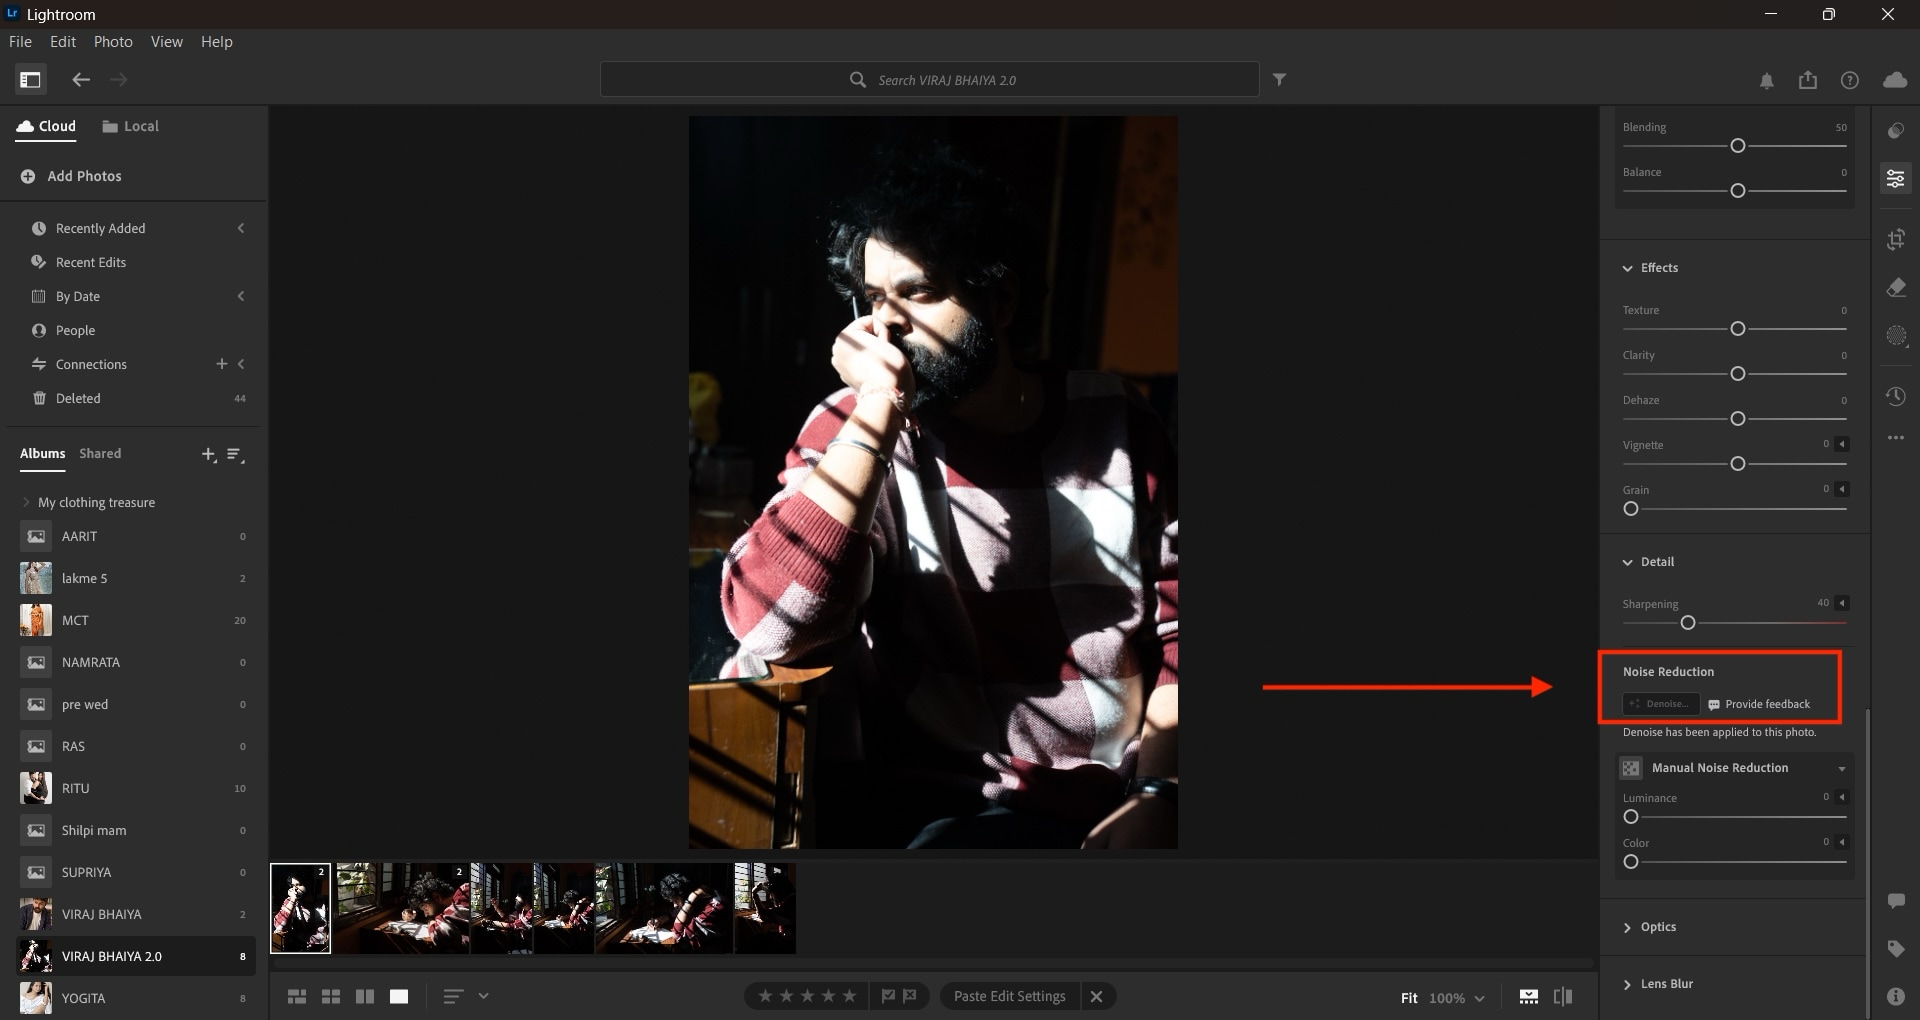
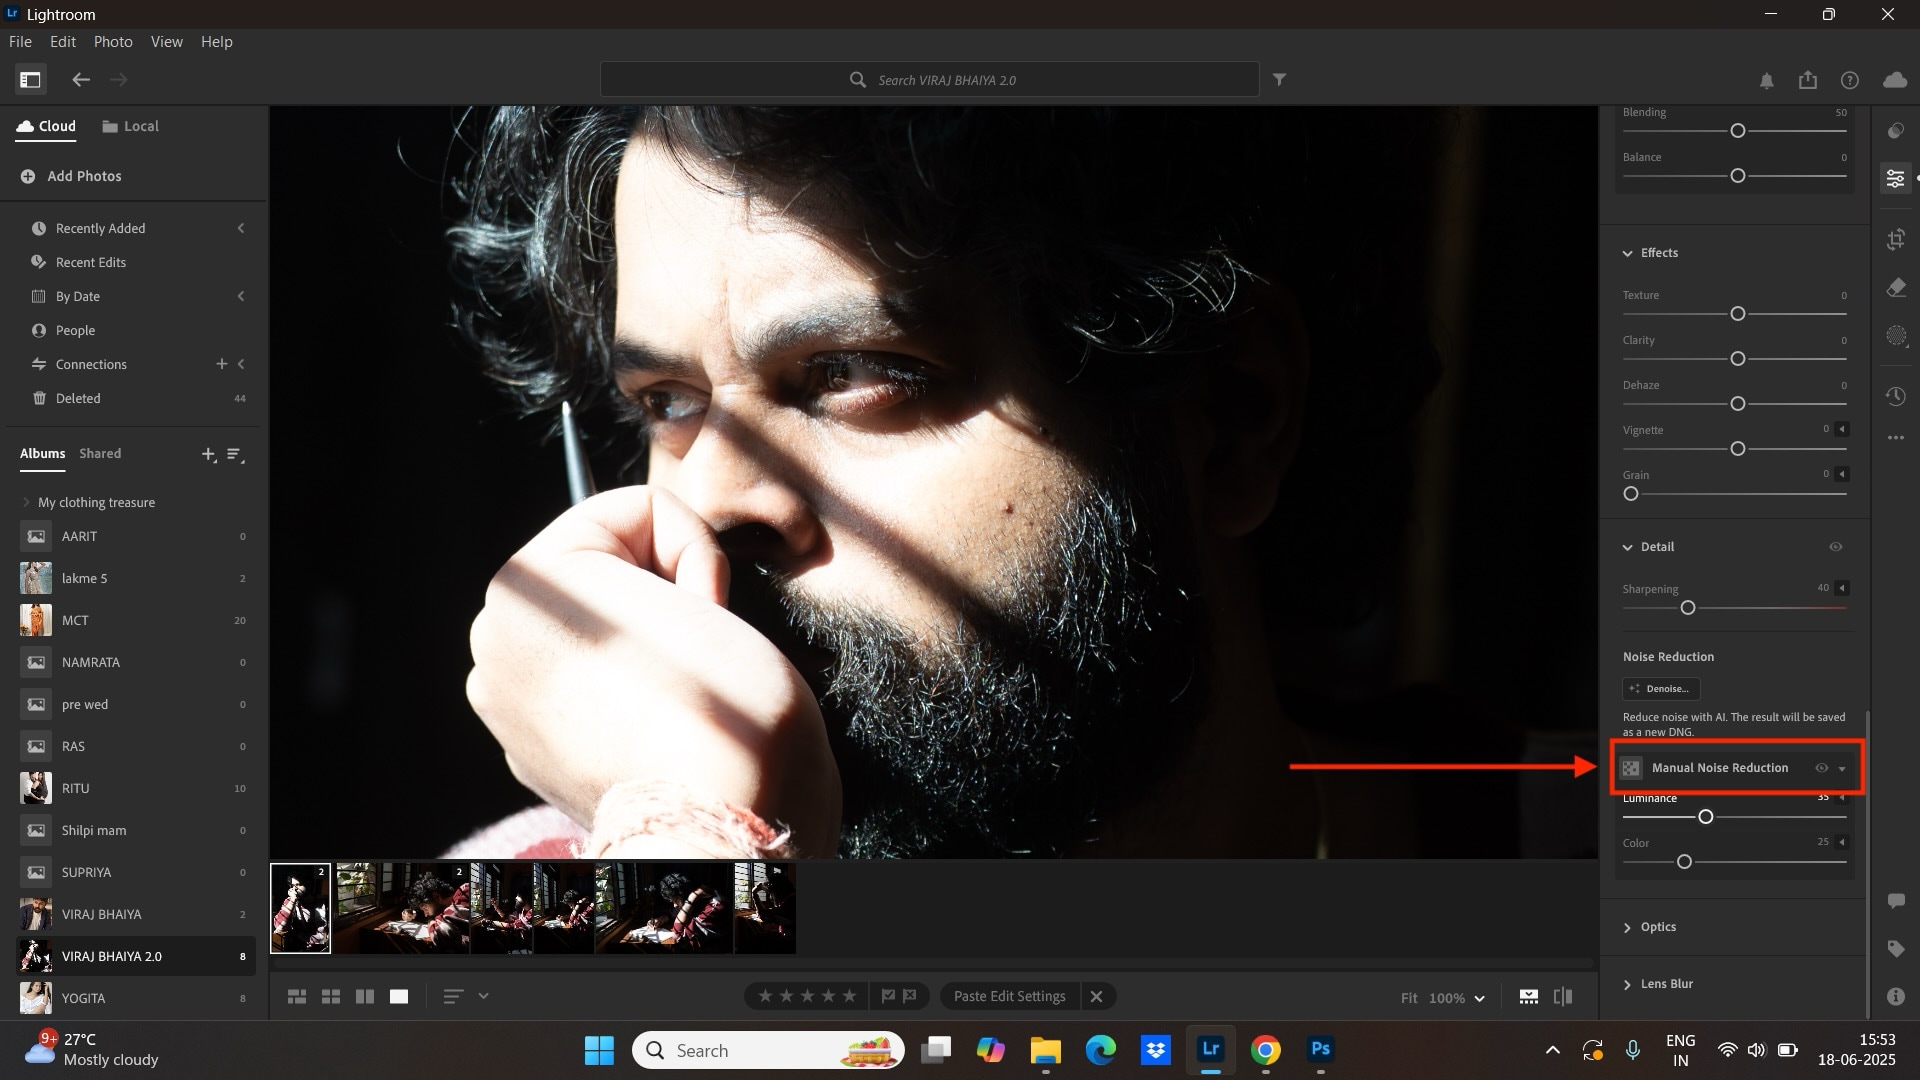
Step 2: Navigate to the "Detail" panel on the right side of your screen; this is where all noise reduction tools are located. Look for the "Denoise" button at the top of the Noise Reduction section and click it.
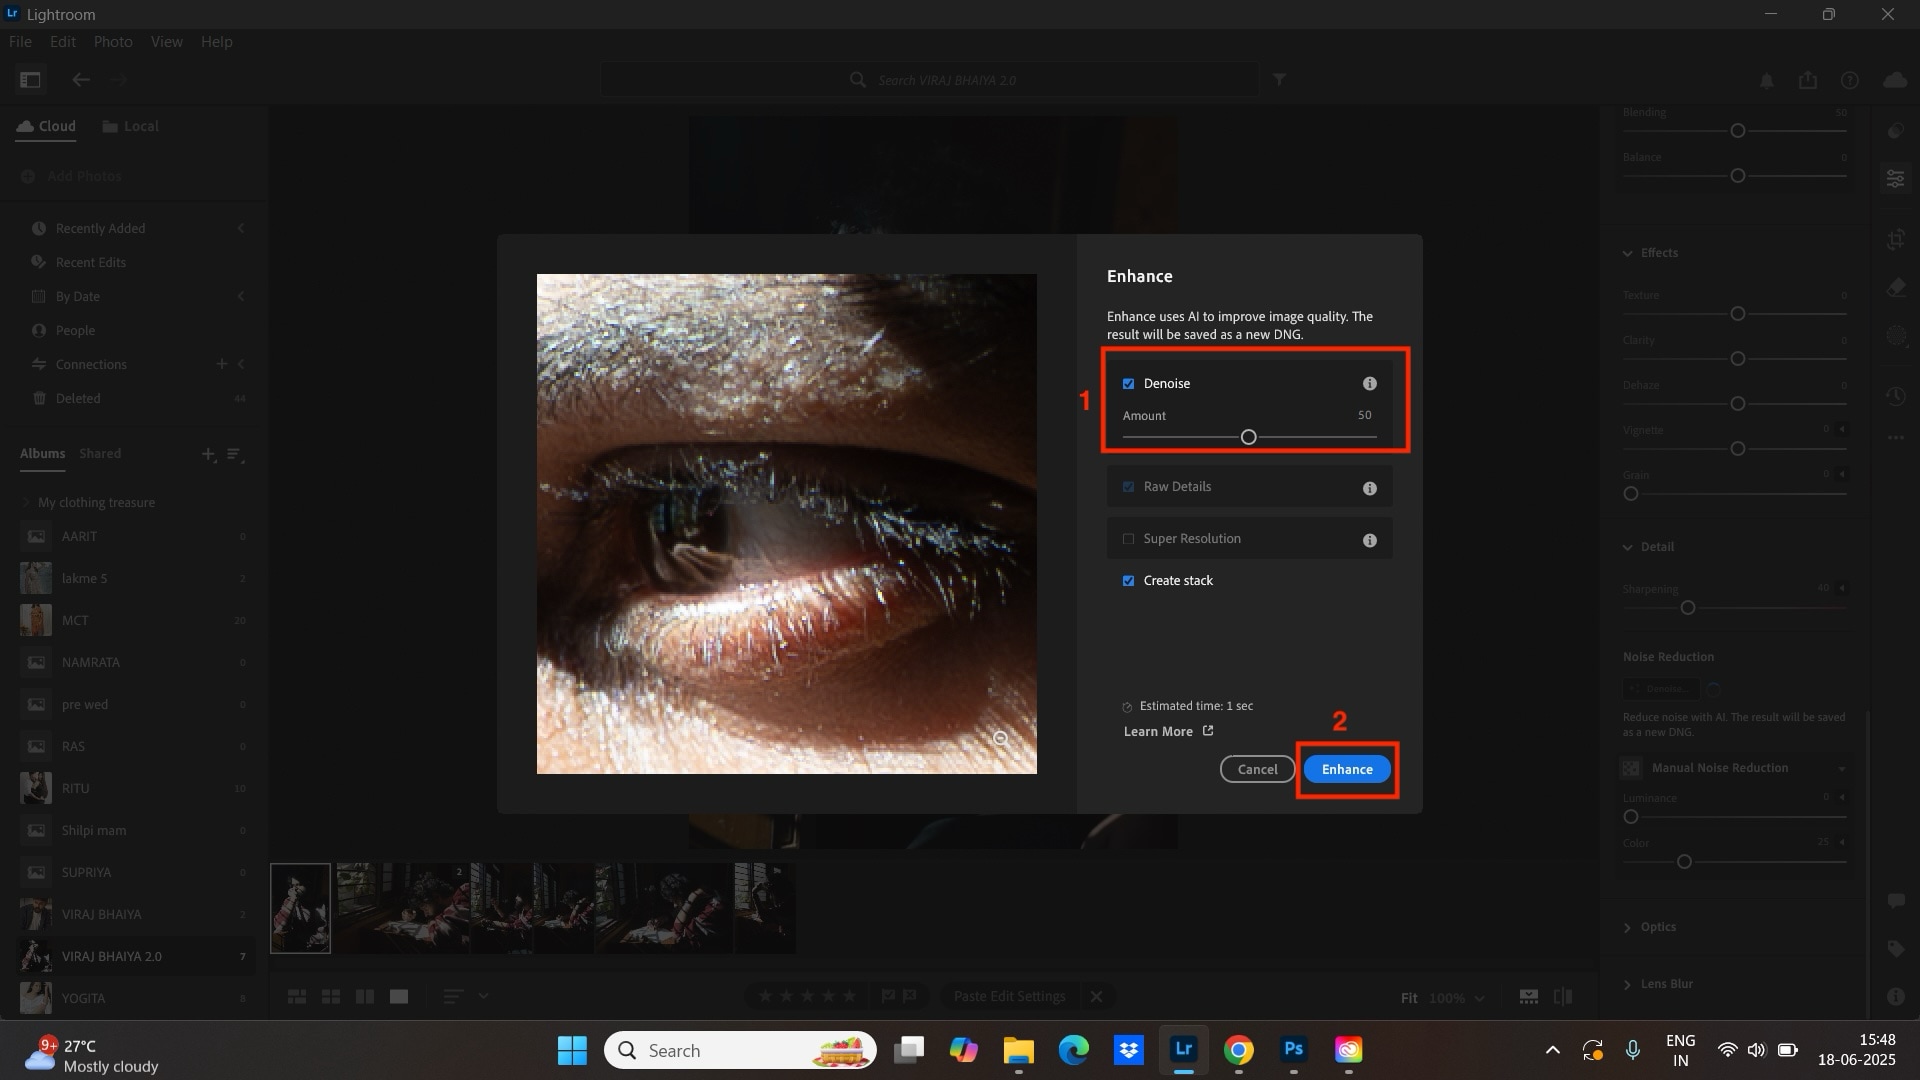
Step 3: Adjust the "Amount Slider" to control the amount of noise removed (default is 50). Click the “Enhance” button to apply the changes.
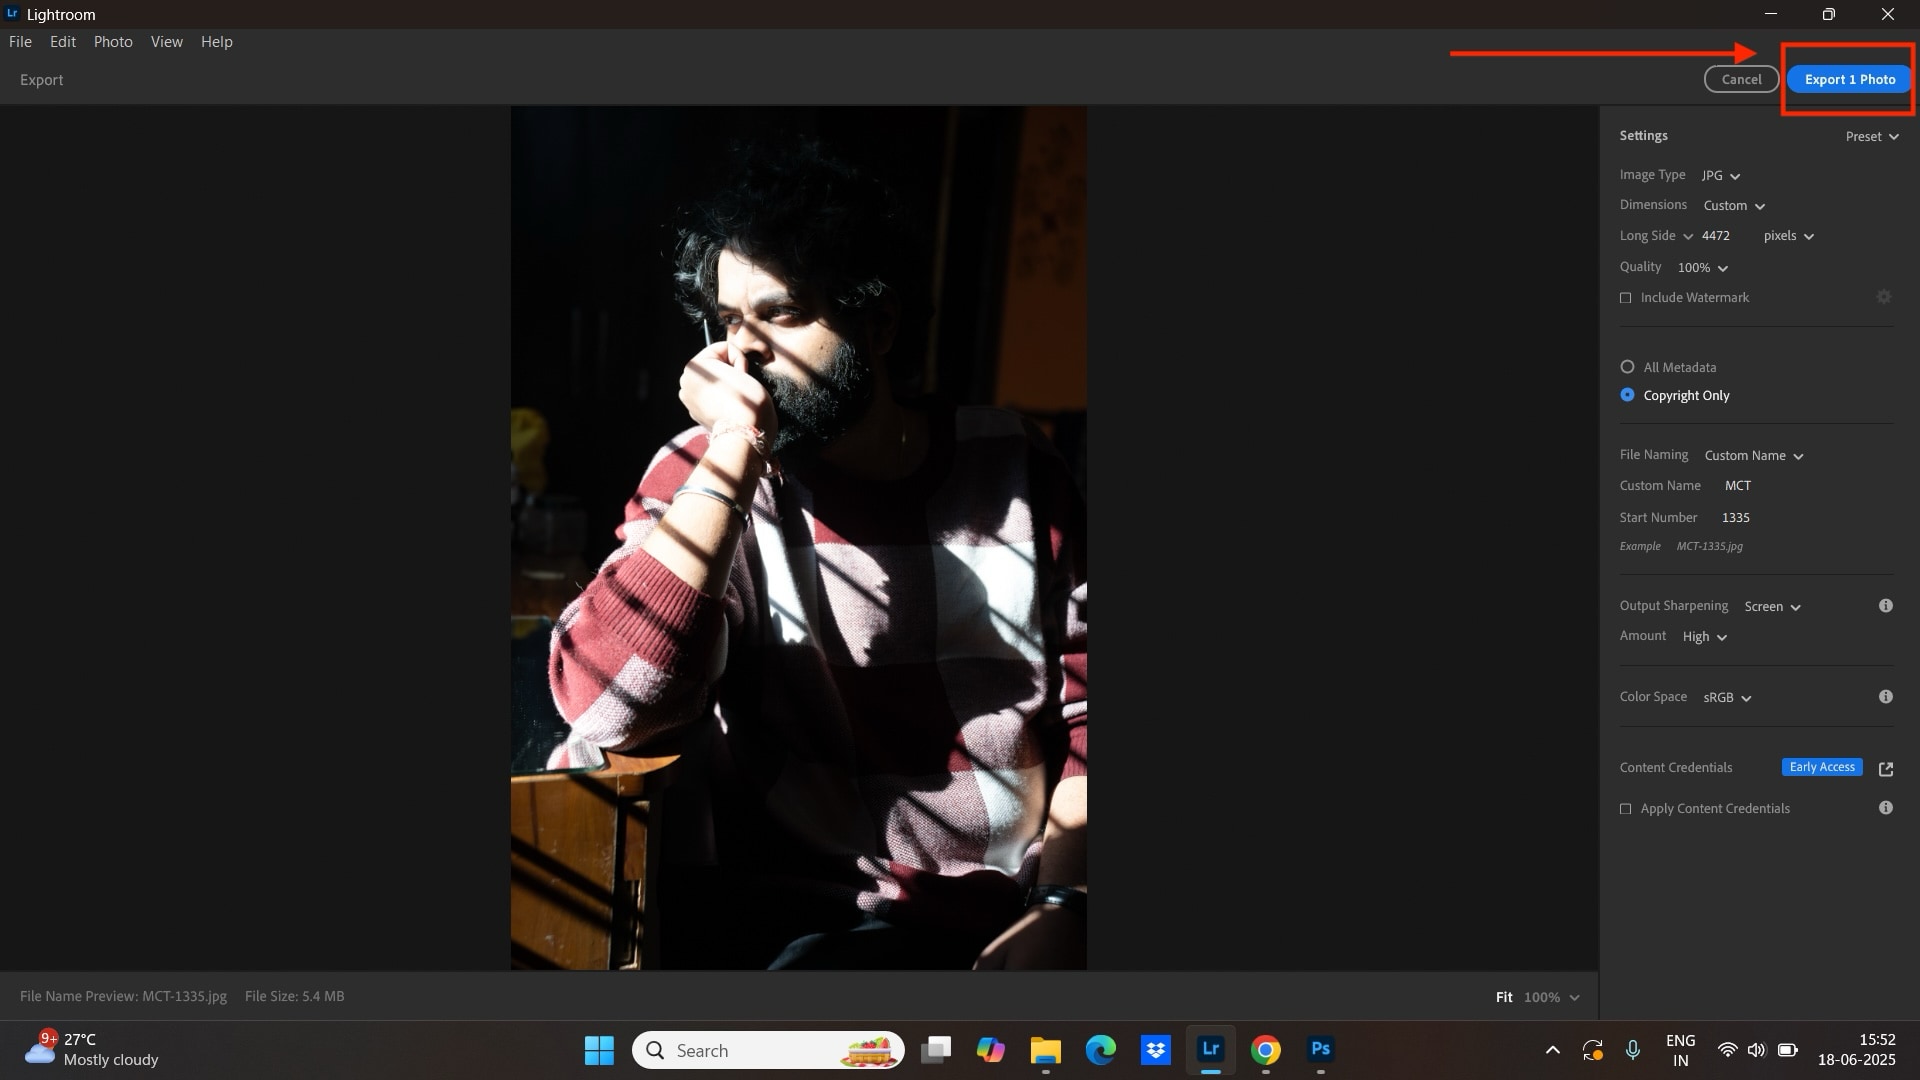
Step 4: Once you're done with all changes, click the download sign at the top right and export the photo.
Part 4. How to Do Manual Noise Reduction in Lightroom
When you need more control over your noise reduction or are working with JPEG files, learning how to reduce noise in Lightroom manually provides precise adjustment capabilities. The manual method utilizes traditional sliders that allow you to fine-tune exactly how much noise reduction is applied.
How to Remove Grain in Lightroom Manually:
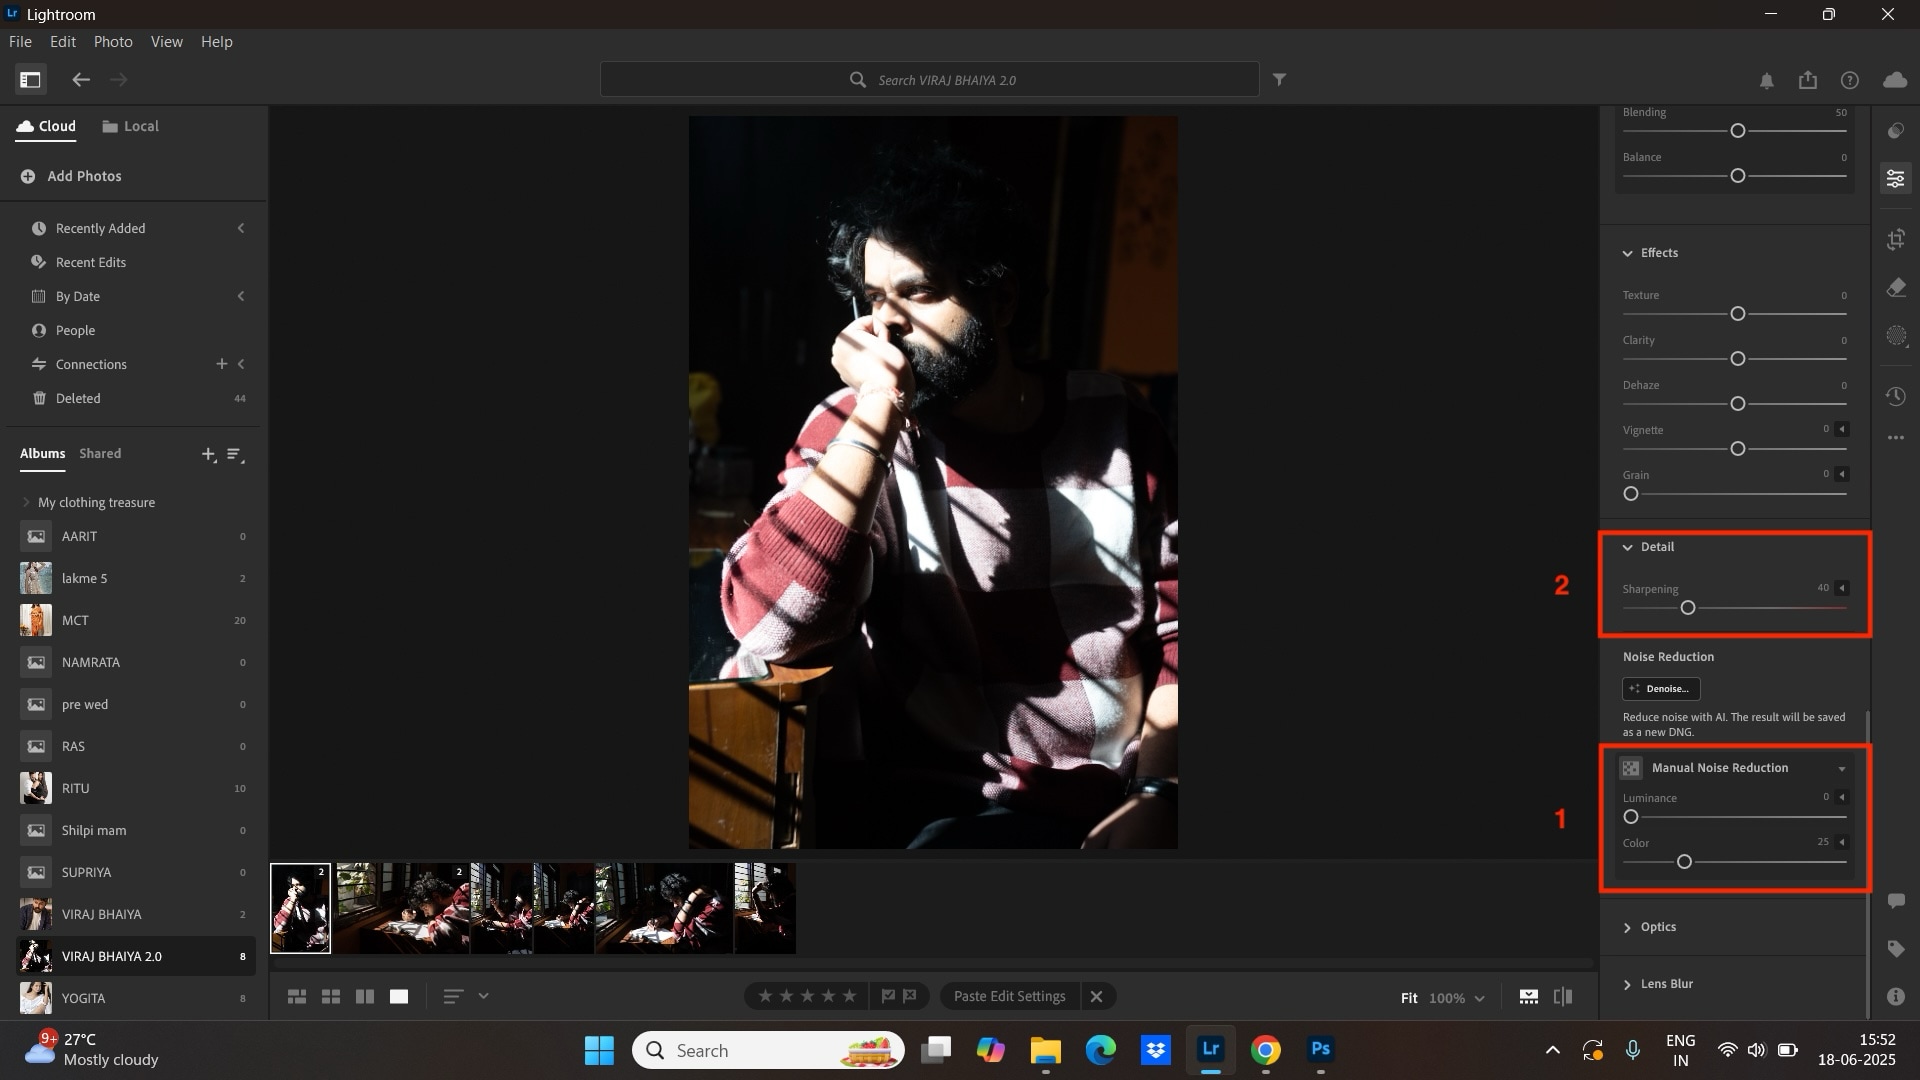
Step 1: Open your photo and go to the “Develop” module. In the “Detail” panel, scroll down to the "Manual Noise Reduction" section below the “Denoise” button.
Step 2: Adjust the Luminance slider until the luminance noise is reduced, starting with values around 20-40, and adjust the “Detail” slider.
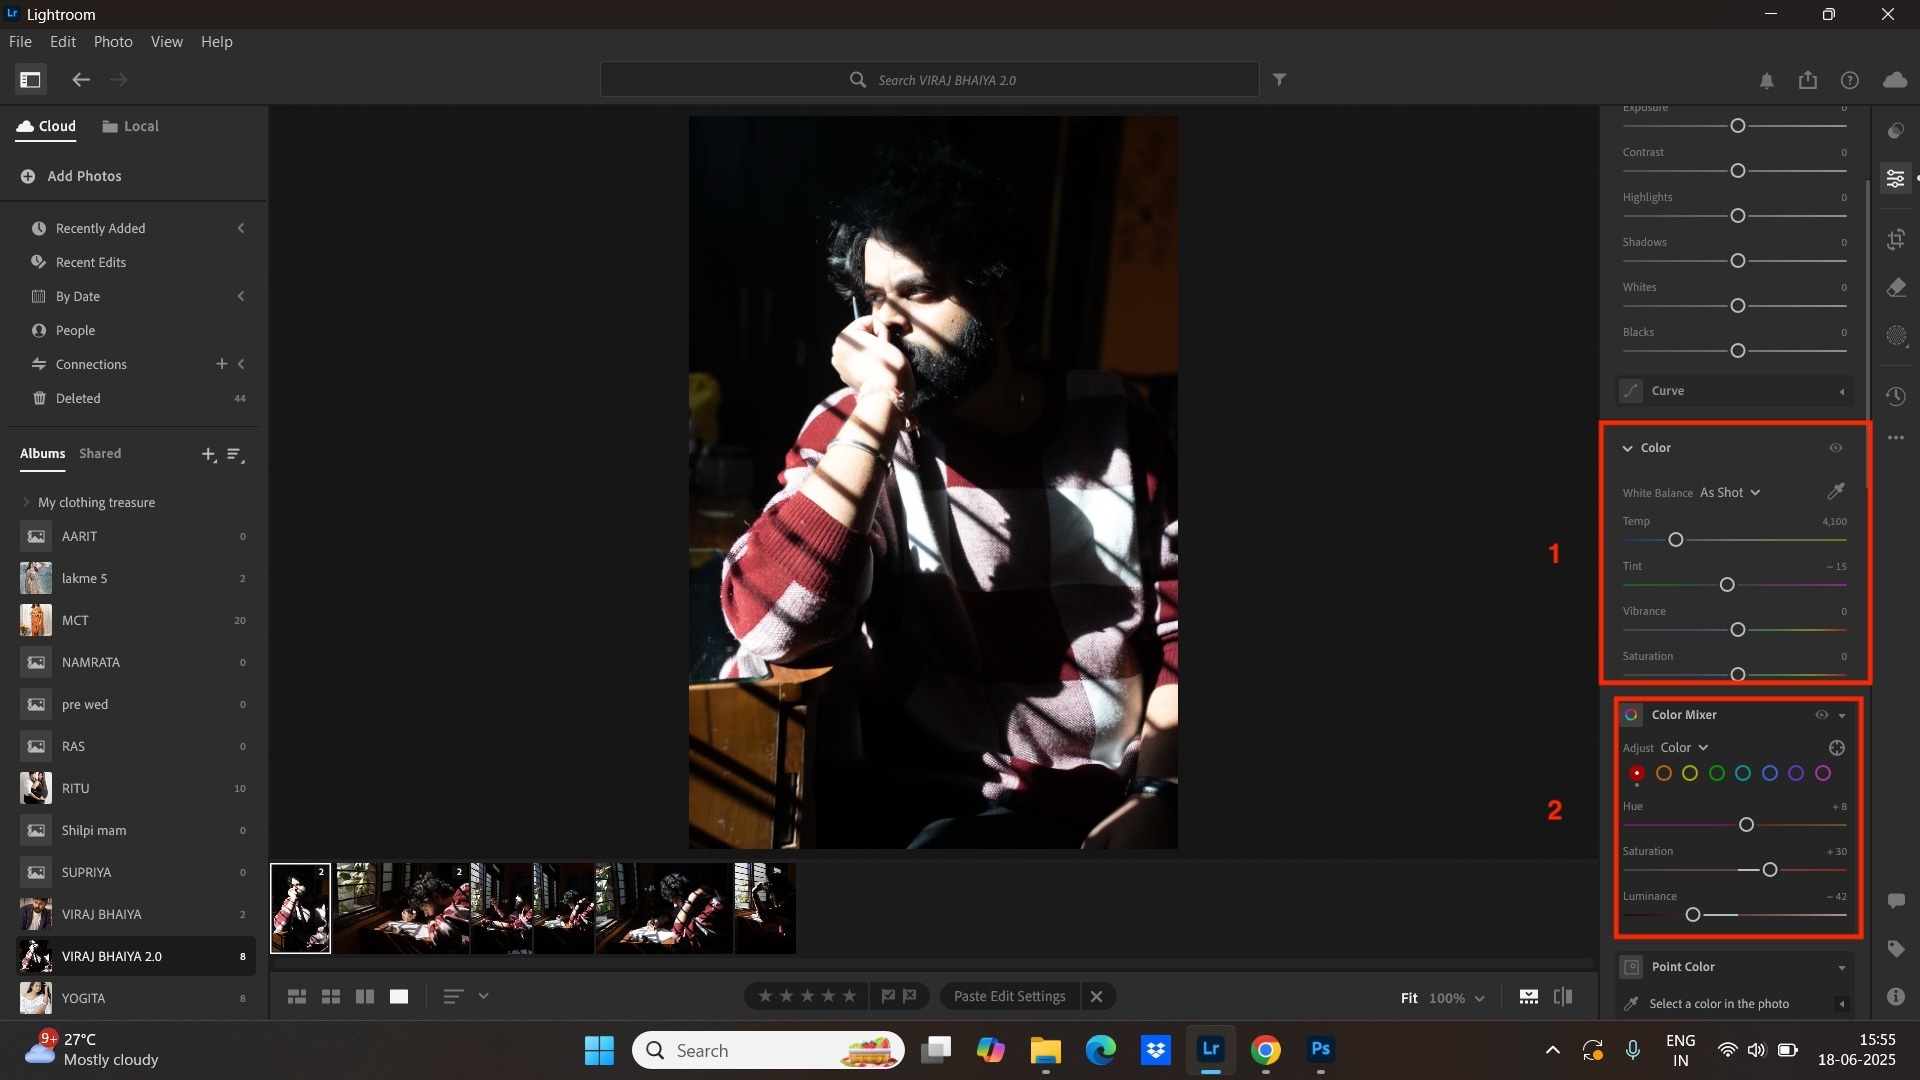
Step 3: Use the "Color Details" and "Color Mixer" sliders to balance noise reduction with color accuracy and download the photo, as detailed in the previous section.
Note: The Lightroom mobile noise reduction automatically denoises the photo using AI. It also offers separate subject enhancement features, allowing you to enhance a subject, clothes, or a specific face feature with a single click.
Part 5. Lightroom's Limitations for AI-Based Photo Cleanup
While Lightroom's AI Denoise is powerful, understanding its limitations helps you know when to use alternative solutions for optimal results.
- RAW-only Support for AI Denoise: The AI denoise feature primarily works with RAW files from supported cameras. This means you can't use this advanced technology on JPEG images or files from unsupported camera models.
- No Batch Processing in AI Mode: Unlike manual noise reduction, you can't apply AI denoise settings to multiple images simultaneously, requiring individual processing for each photo in your workflow.
- Slower Export Times for High-Resolution Files: The AI denoise functionality is highly reliant on powerful "AI-enabled" GPUs, resulting in significantly longer processing times for high-resolution images, especially on older computers.
- Not Ideal for Restoring Old or Compressed Images: AI denoise works best with modern RAW files and struggles with heavily compressed images, scanned photos, or files that have already been processed multiple times.
Part 6. Best AI Alternative to Lightroom for Image Denoising & Enhancement
While Lightroom’s AI Denoise offers professional-level image quality, it only supports the RAW format and lacks batch editing features. If you are a creator or professional photographer working on large projects, finding a better alternative, such as Wondershare UniConverter, can be a more suitable choice.
Wondershare UniConverter
If you want to denoise multiple photos at once and don't have a RAW format, Wondershare UniConverter Image Denoiser can do this for you without requiring any technical knowledge. With one click, it automatically denoises the image, enhancing only the face, upscaling the image, and colorizing it. You can access its comprehensive image features, all in one place, which saves you time and gives high-quality results.

Best Image Noise Reduction Software
Key Features
- It is a comprehensive image editing tool that offers an image background remover, which removes the background with a single click.
- The watermark editor allows you to add and remove watermarks from any image.
- It offers an AI thumbnail maker, which helps you generate YouTube thumbnails with a simple prompt.
- Image converters enable you to convert images in various formats, including JPG, PNG, TIFF, and others.
How to Denoise an Image with Wondershare UniConverter
Here is the step-by-step guide to denoise images in UniConverter with one click:
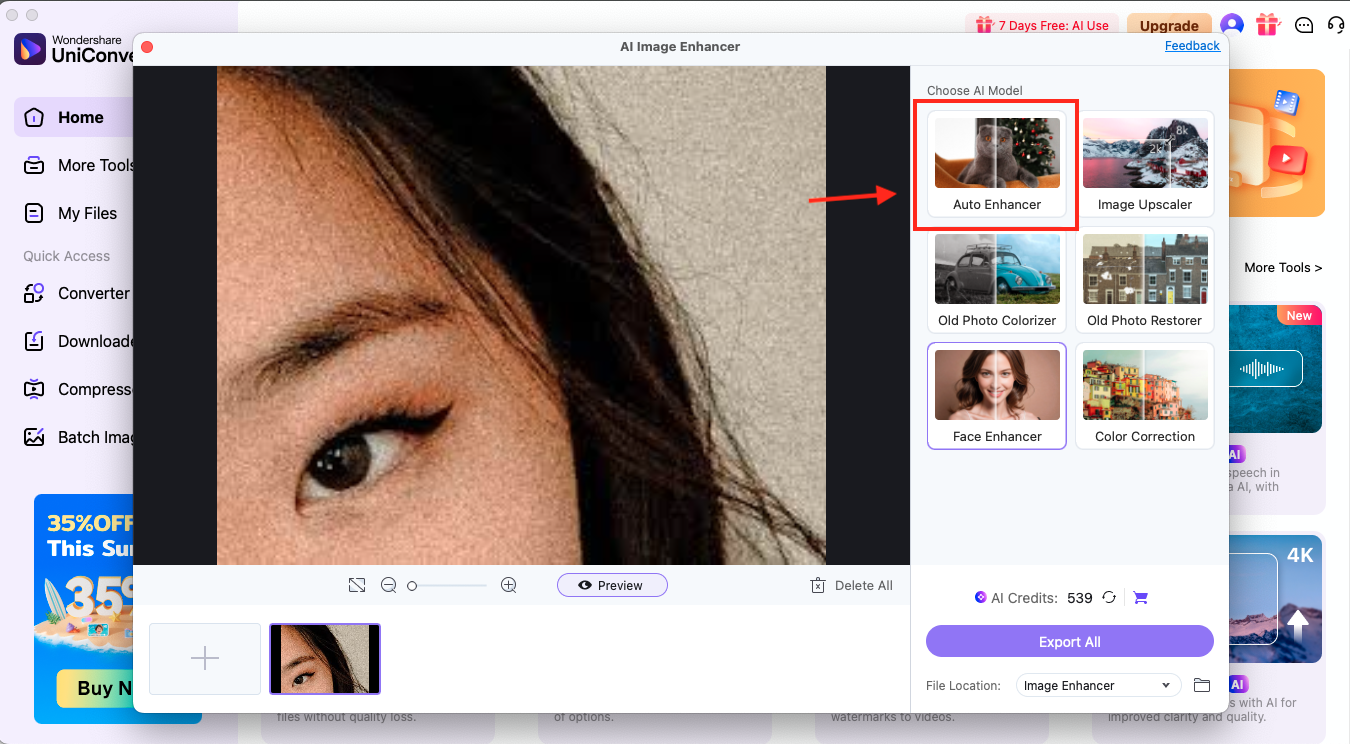
Step 1: On the homepage, navigate to “Image > Image Enhancer.”

Step 2: Click the “+” sign and upload any image that you want to denoise.
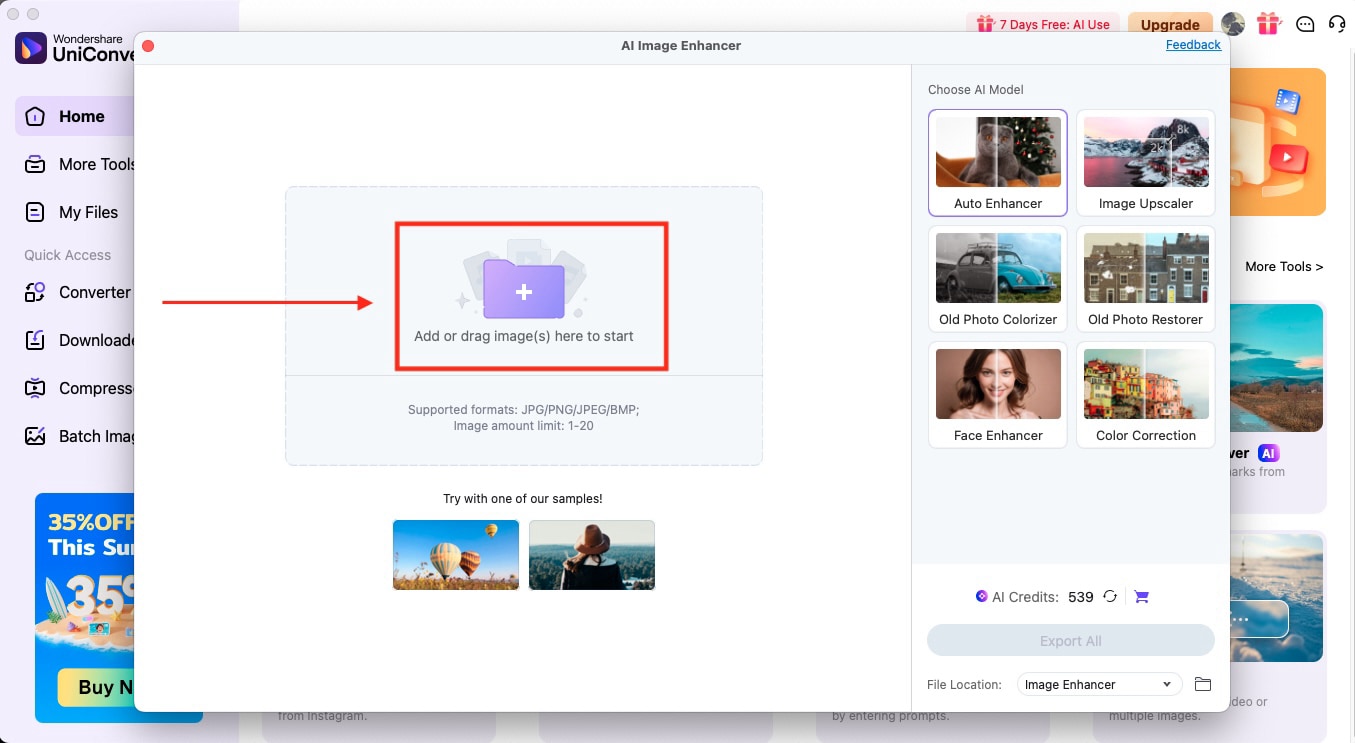
Step 3: Click “Auto Enhancer” to denoise the image.
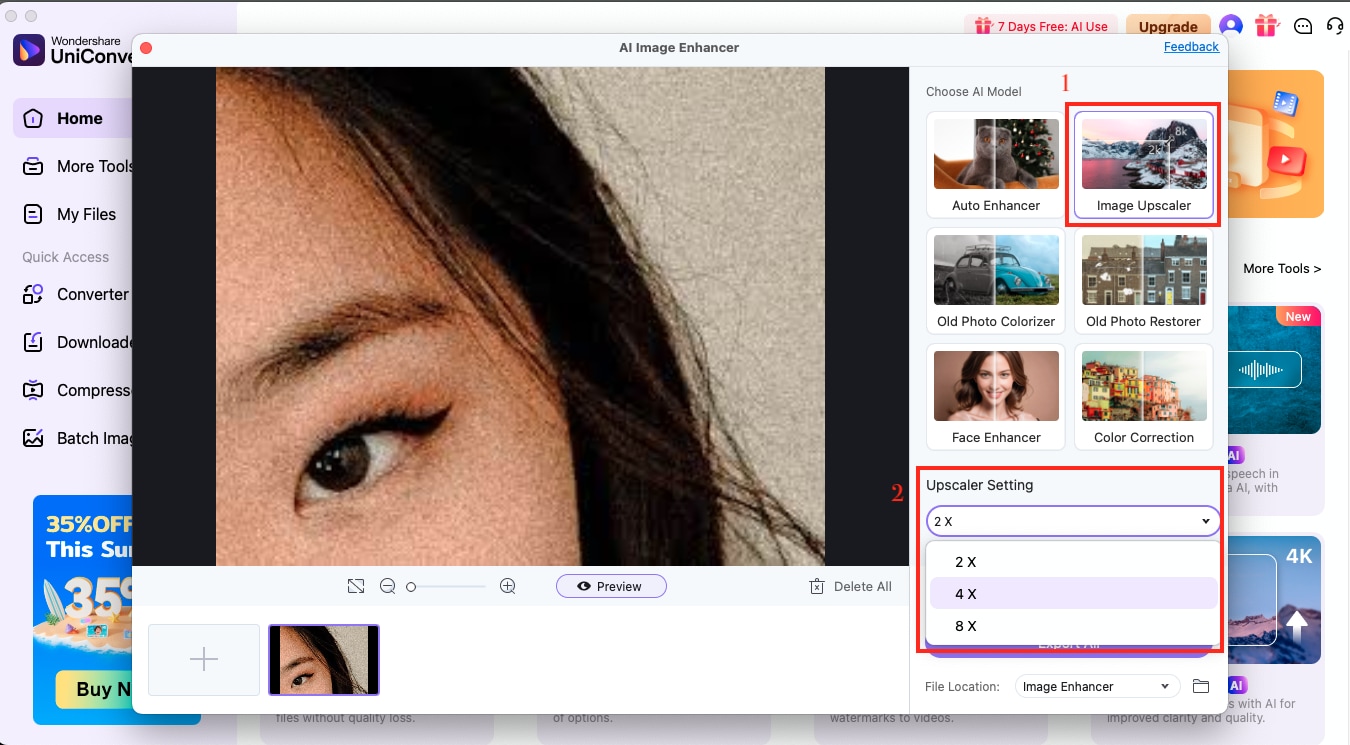
Step 4: After enhancement, click “Image Upscaler” and upscale the image from 2X to 8X.
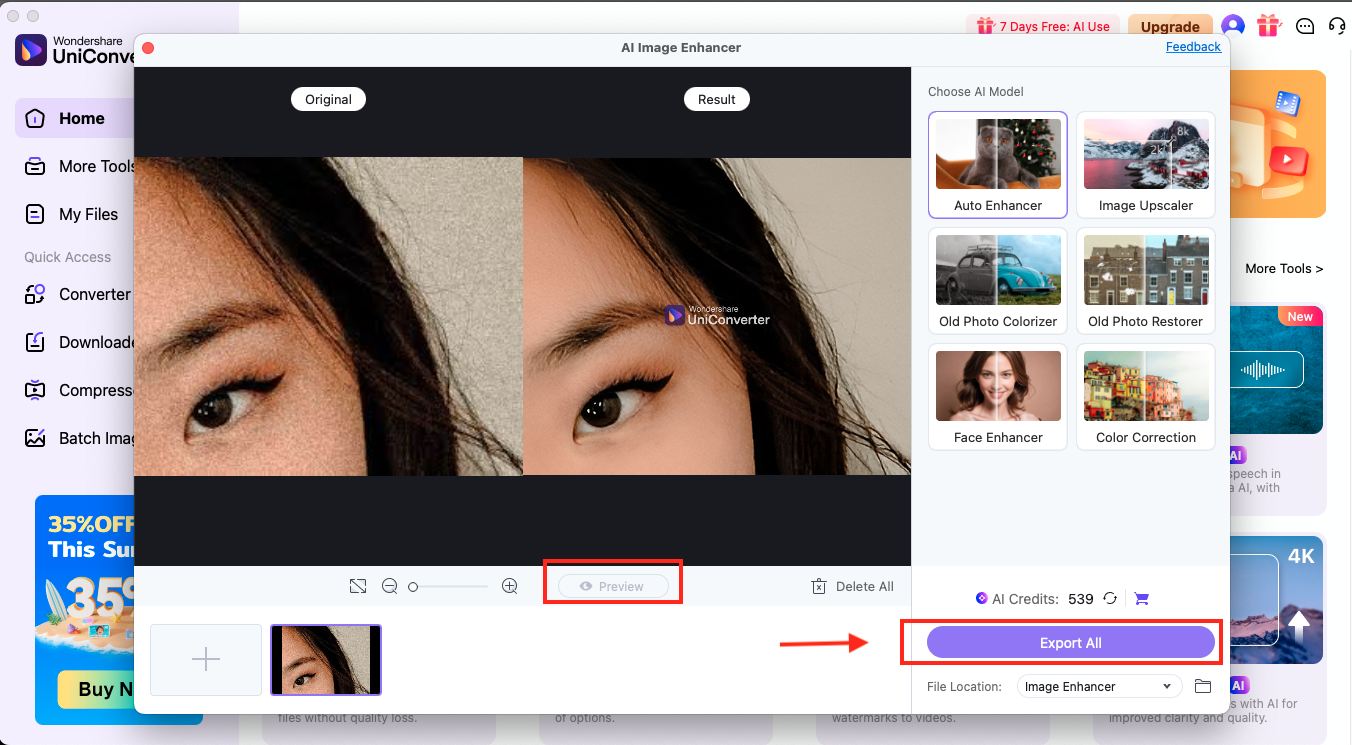
Step 5: Click on “Preview” to view the changes, and then click “Export All” to save the final results.
Best For: Content creators, professional photographers, and daily users.
Part 7. Pro Tips for Denoising Without Losing Detail
The key to successful denoising is removing noise while preserving the important details that make your photos sharp and engaging. Here are some techniques that professional photographers use to achieve the best results. You can consider these tips for better image quality:
- Zoom to 100% view: Always check your noise reduction results at full resolution to see the actual impact on fine details, such as hair, fabric textures, and sharp edges.
- Process Before Other Adjustments: Apply noise reduction early in your editing workflow, before making sharpening or contrast adjustments, to minimize the amplification of remaining noise.
- Use Masking for Selective Noise Reduction: Apply stronger noise reduction to smooth areas, such as skies, while preserving detail in textured areas using Lightroom's masking tools.
- Balance Luminance and Color Settings: Start with luminance noise reduction, then add color noise reduction only if necessary. Over-processing color noise can create an unnatural, plastic appearance.
- Check Shadow and Highlight Areas Separately: Noise often appears differently in dark and bright areas, so examine both regions and consider using graduated filters for targeted adjustments.
- Compare with Original Frequently: Toggle the before/after view regularly to ensure you're improving the image rather than over-processing it
- Export Test Prints: What looks good on screen doesn't always translate to print, so test your noise reduction settings with small prints before committing to large formats.
Conclusion
Learning how to denoise in Lightroom lets you clean up grainy photos using both AI and manual methods. While Lightroom's AI Denoise works well for RAW files, it has limitations, including the absence of batch processing and slower performance on older computers.
For creators handling large projects or working with multiple file formats, UniConverter offers a practical alternative with batch processing capabilities and support for JPEGs. Whether you stick with Lightroom or explore other options, the key is finding the right balance between noise reduction and detail preservation. Try UniConverter today and see how easily you can denoise and upscale multiple images at once!

