

Removing the Bandicam watermark can greatly improve the professionalism of your screen recordings. Bandicam’s free version applies a logo watermark, which can be distracting or reduce viewer trust. Fortunately, numerous free and paid tools exist, allowing users to eliminate or mask the watermark before or after purchasing the software
However, many users still wonder how to remove the Bandicam watermark using advanced tools. This guide will cover 3 easy methods that enable creators to achieve clean, polished videos, regardless of their budget or software experience.
In this article
- Does Bandicam Have a Watermark?
- Remove Bandicam Watermark Without Buying by Cropping Videos: Free Video Editor
- Remove Bandicam Watermark Without Buying With Free Watermark Remover
- Qualified Bandicam Alternative Without Watermark
- Comparison Table of The Discussed Watermark-Free Tools
- Things to Know Before Removing a Watermark Using Cracked Bandicam
- Conclusion
- FAQs
Part 1. Does Bandicam Have a Watermark?
Bandicam is a widely used, user-friendly screen recording software for Windows that offers high-quality capture of screens and webcams. The free version of Bandicam allows users to utilize these powerful features, but it places a visible watermark at the top of every recorded video. Furthermore, it limits recording sessions to 10 minutes within the free version.
To officially remove the Bandicam watermark and unlock unlimited recording time, users need to purchase and register a Bandicam license. Upgrading to the paid version is recommended, as it not only removes the watermark but also provides access to advanced features, including scheduled recording, chroma key effects, and unlimited recording time.

Easy to Use Bandicam Watermark Remover
Part 2. Remove Bandicam Watermark Without Buying by Cropping Videos: Free Video Editor
Suppose you recorded a video of your lecture via Bandicam, but it included a watermark because of the free version. Being a student, you don't want to invest in its premium version. For quick solutions, a free video editor can allow you to make simple edits using a cropping tool.
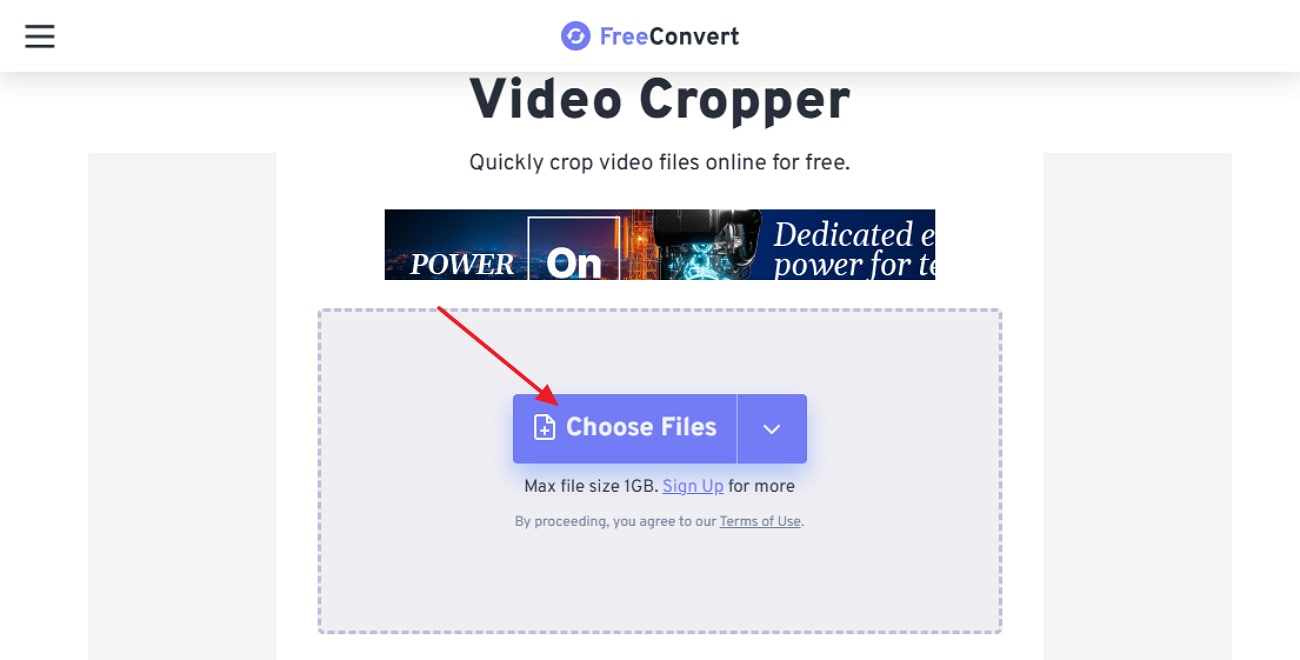
Fulfilling the requirement, FreeConvert, a free video editor, allows you to upload a video via your device, Google Drive, or even a URL. Now, if you want to remove the Bandicam watermark, follow the given guide:
Step 1. Upon accessing the FreeConvert tool, click the “Choose Files” button to select the video from your device.
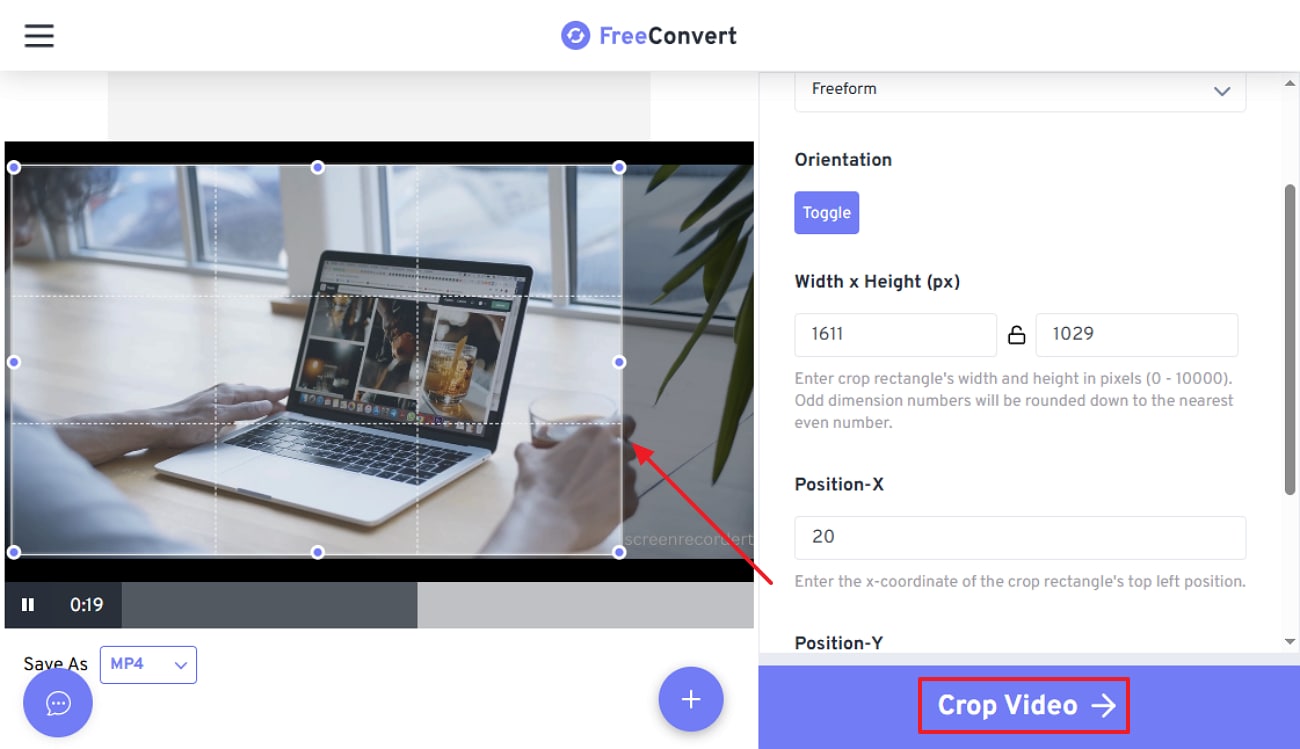
Step 2. Here, drag the "Cropping Square" to extract the watermark out of the frame using your mouse and then tap on the "Crop Video" button.
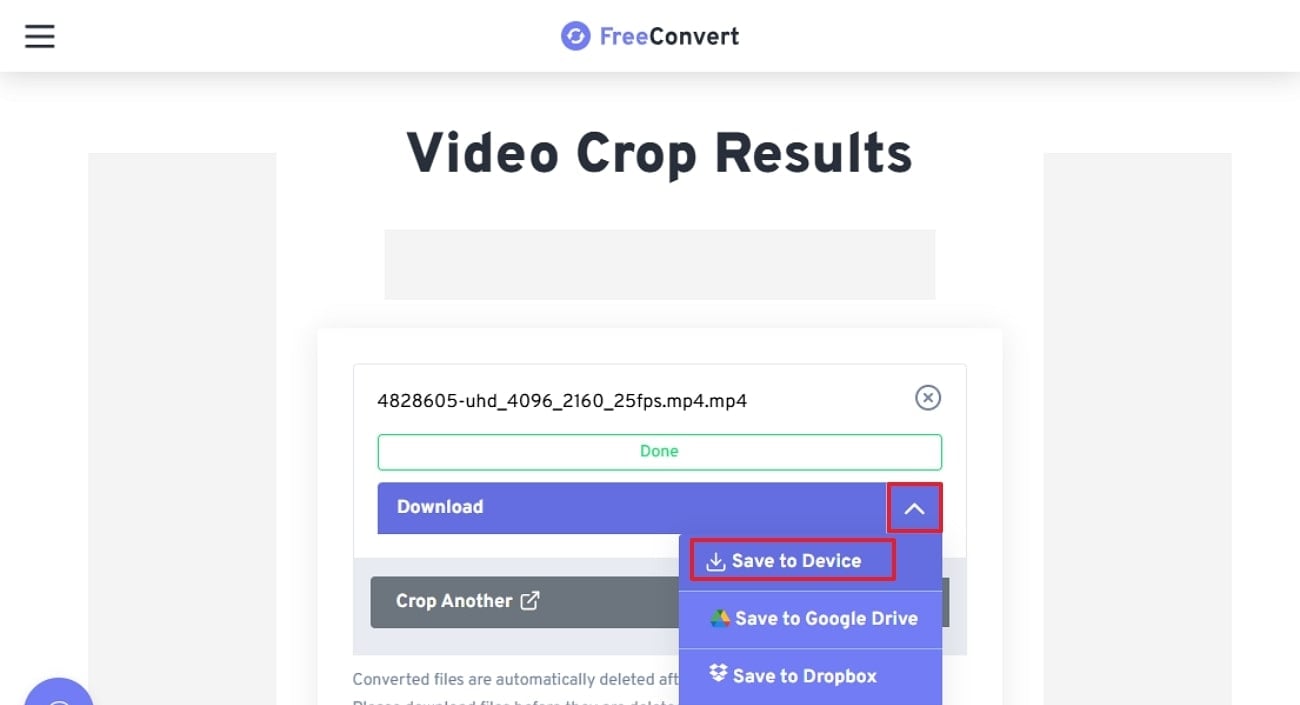
Step 3. Finally, your video is cropped, click on the "Save to Device" button to get it rendered to the device.
Part 3. Remove Bandicam Watermark Without Buying With Free Watermark Remover
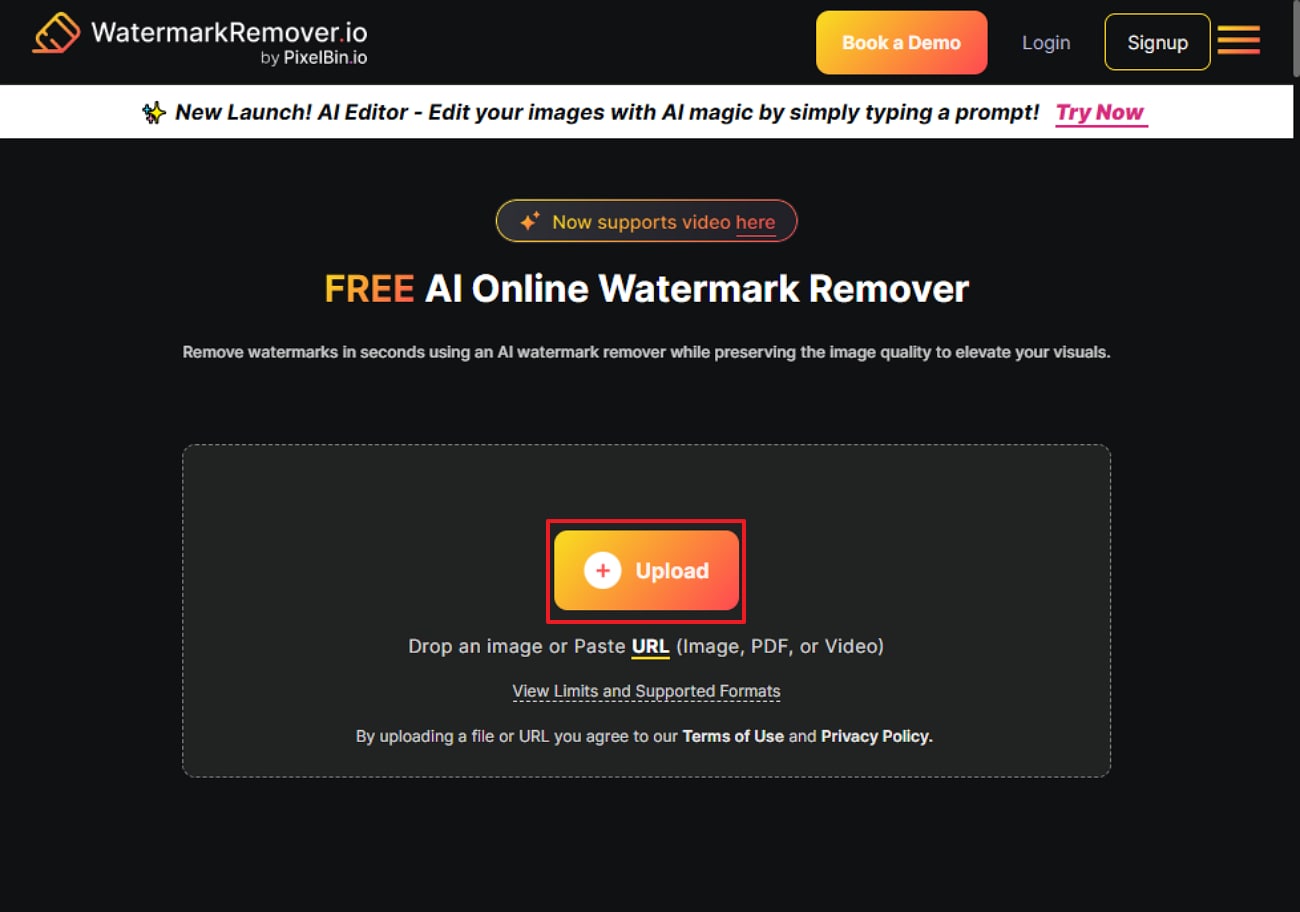
In addition to the above-discussed tool, you can also consider using an online watermark remover like WatermarkRemover.io. This tool is powered by AI, which automatically detects and removes watermarks, logos, timestamps, and overlays with no manual tracing.
Furthermore, it ensures safe, private processing for all files and is trusted by a wider audience. This tool is an ideal option for beginners who want quick watermark remove, so let's go through its detailed guide:
Step 1. Initiate by clicking on the “Upload” button to input the desired watermark video in this tool.
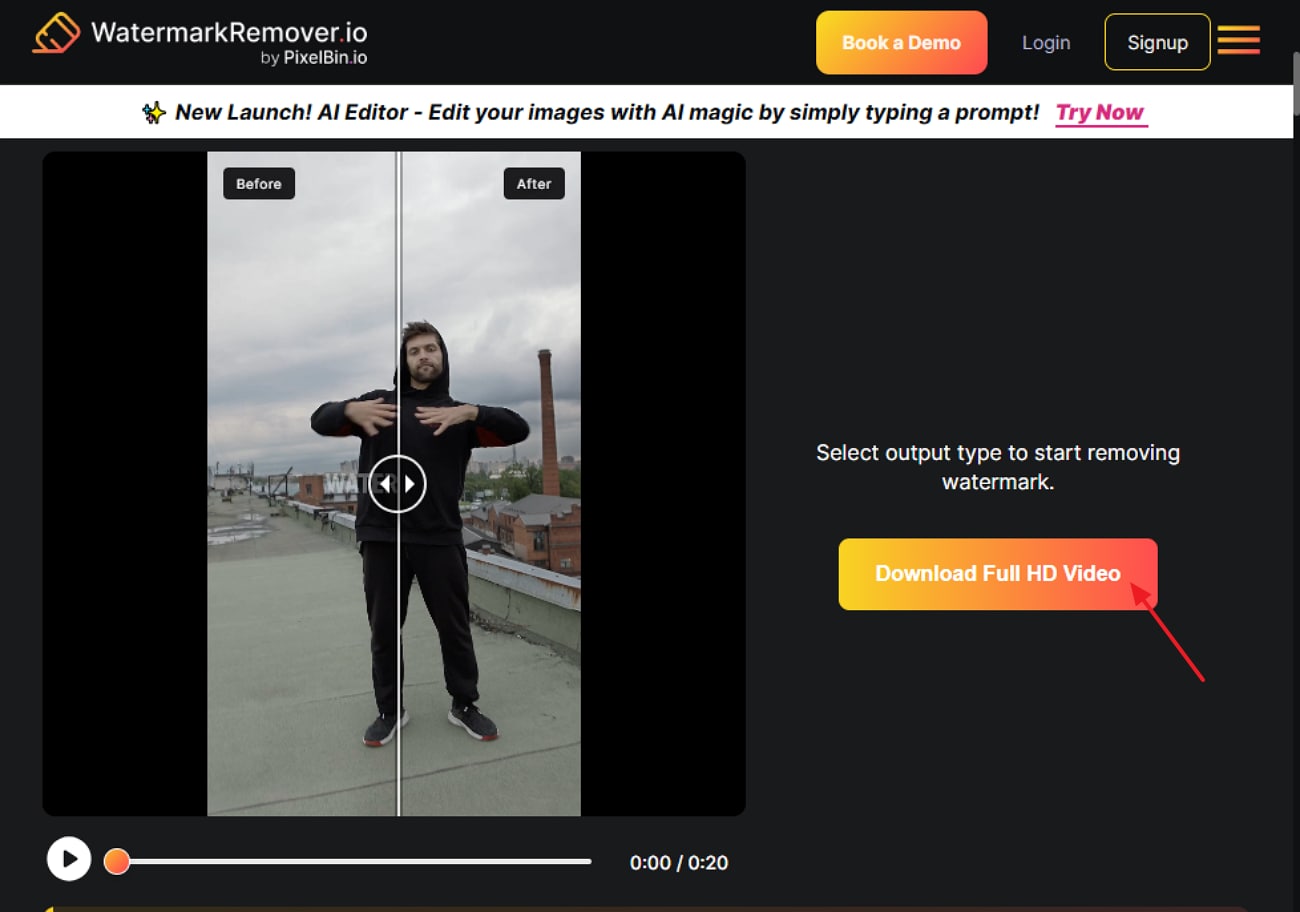
Step 2. As you insert the video, it will automatically remove the watermark. Click on the “Download Full HD” video button to get it saved to the device
Part 4. Qualified Bandicam Alternative Without Watermark
Bandicam is a good screen recording option; however, it lacks in offering the best quality in the market. Apart from its paid subscription requirements, users generally do not feel comfortable in using this tool because of its outdated interface. Amidst such requirements, there exists another ideal option that caters to the requirements of both beginners and professionals. UniConverter fills in the gap by offering customizable screen recording facilities to its users.
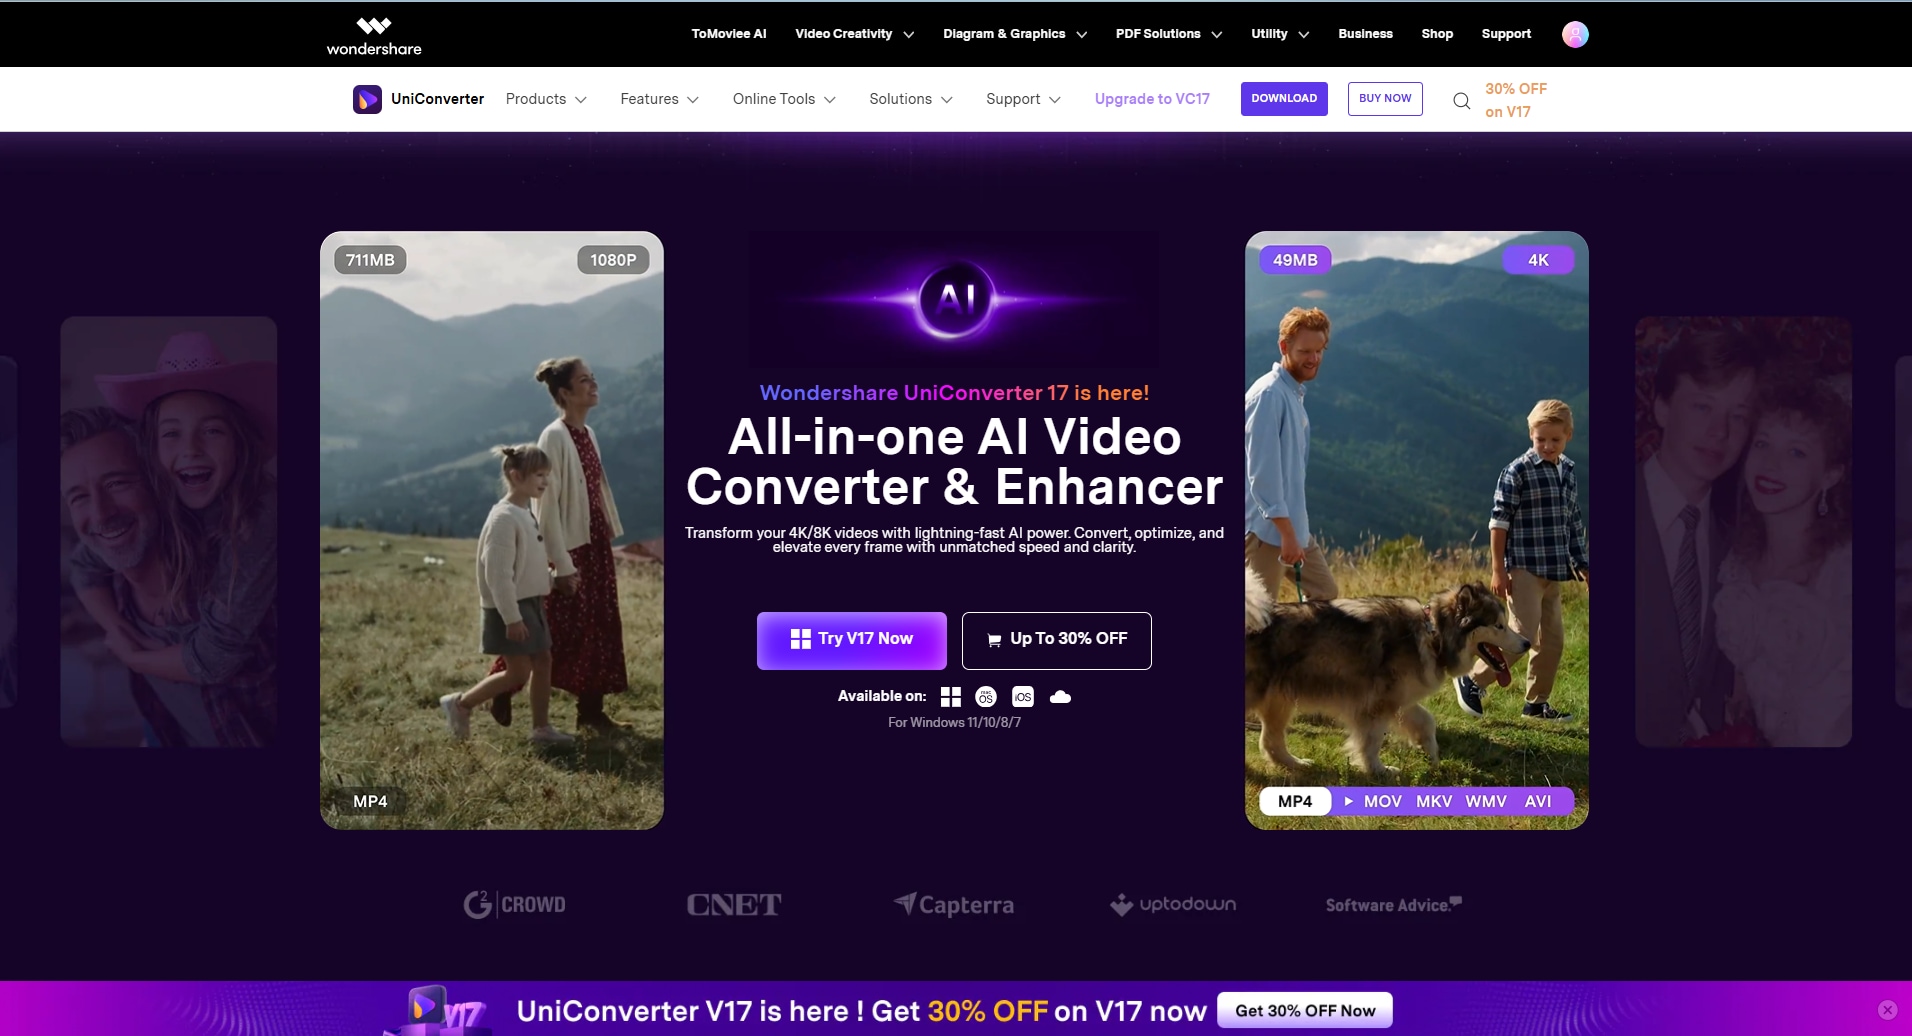
While offering customizable screen ratios, you can easily shift between full screen recording or specific area recording, giving you the option of defining different frame sizes. Furthermore, it provides multiple audio support by capturing system sound and microphone input, perfect for narrated videos. After recording video, users can also trim, crop, add subtitles, and enhance their videos within the same platform for a seamless workflow.
Here comes a simple steps guide to illustrate how to batch remove watermark in UniConverter:
Step 1. Open UniConvereter
Launch UniConverter and click watermark remover.
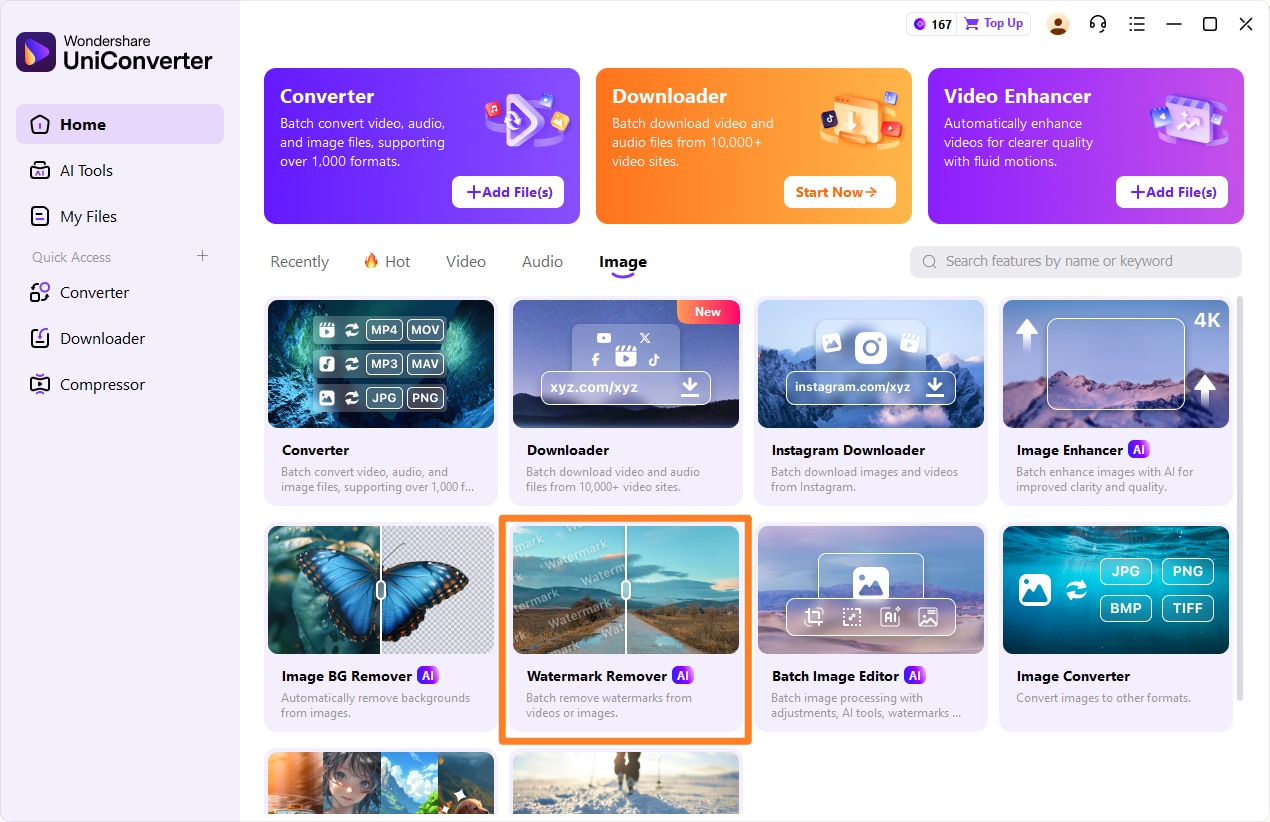
Step 2. Upload photo or video
Upload photo or video with watermark to be removed, you can batch upload mutiple videos or photos at once for batch process.
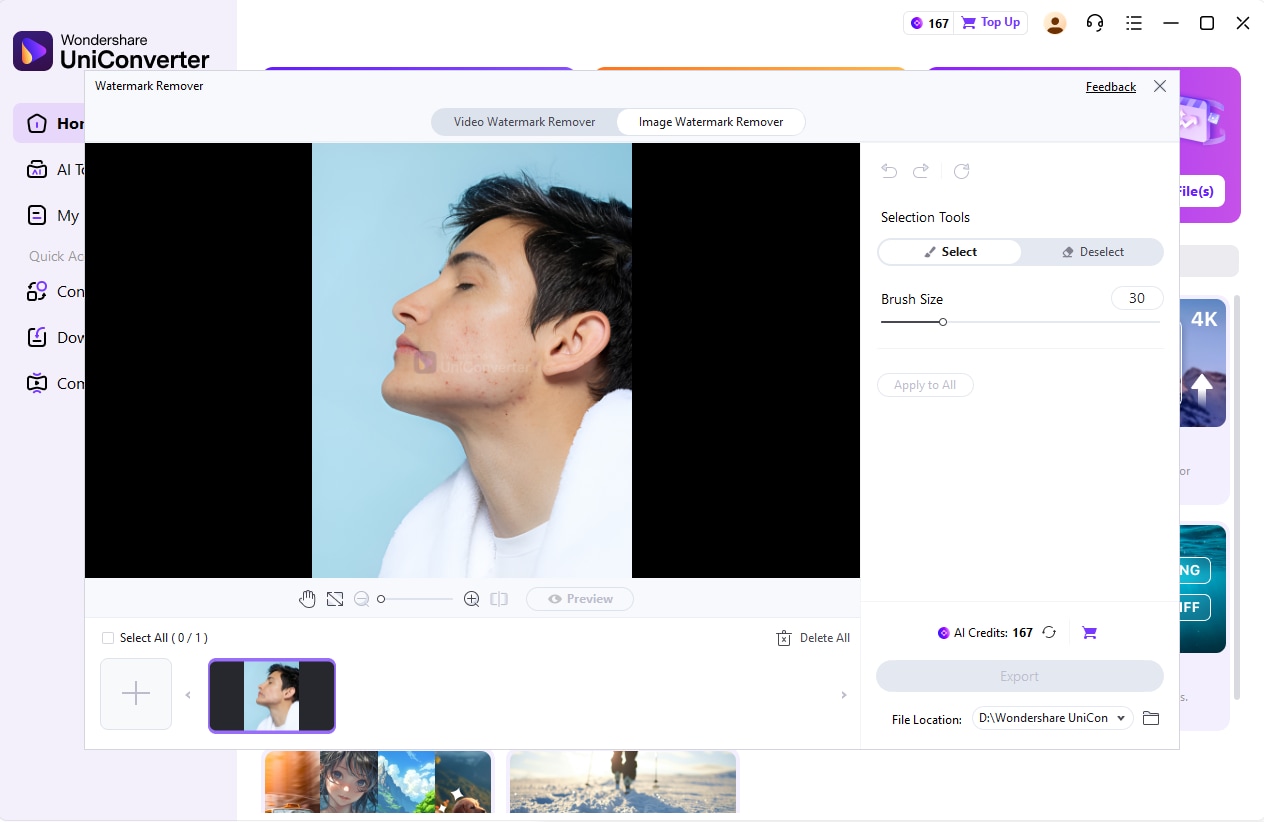
Step 3. Brush the Watermark
Choose the watermark area you need to remove, you can ajust the brush size and pick different selection tools based on your actucal demand.

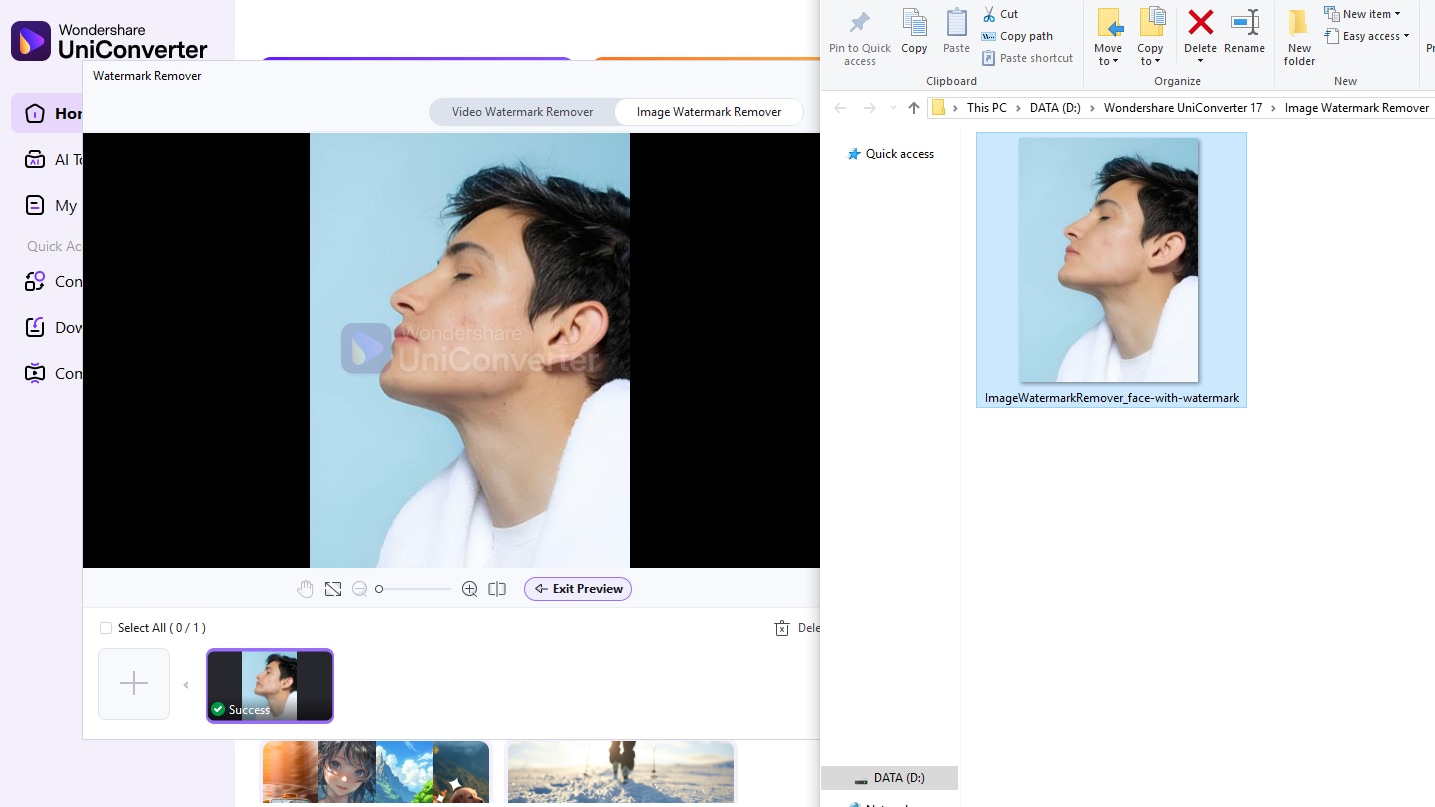
Step 4. Preview and Export
After confirming the preview effect, you can cick export to get the clear image or video without watermark. You can also extend the usage of watermark remover to remove other elements in photos or videos except from watermark. Blemishes on faces, dirt or scratches on images, and even photobomber can also be easily removed from photos.
Part 5.Comparison Table of The Discussed Watermark-Free Tools
Here we have provided a quick breakdown of the above-discussed tools in a comparison table for easier selection:
| Features | UniConverter Watermark Remover | WatermarkRemover.io | FreeConvert Online Video Cropper |
|---|---|---|---|
| Watermark-Free Output | Yes (with subscription) | Yes | Yes (free) |
| Editing Functions | Trim, crop, annotate, subtitle, convert | Remove watermark, logo, timestamp, overlays | Crop only, aspect ratio options |
| Security & Privacy | Local save, cloud-safe, user data protected | AI processes privately, no installation; trusted by millions | 256-bit SSL encryption, auto-deletion |
| Platform Type | Desktop / Offline | Online | Online |
| Subscription Requirement | Required for watermark-free use | Free basic use, premium for bulk/batch processing | Free basic use, premium for advanced |
| Extra Features | Real-time annotation, multi-audio, post-edit suite | AI detection, bulk/batch removal (premium), no manual tracing needed | Fast crop, simple UI |
| Maximum Video Length | Unlimited with subscription | Depends on browser & file size; premium for large files | Limited by browser & size; premium for large files |
| Batch Processing | Yes, process multiple videos at once | Yes, with the premium plan | No, only single file cropping |
After comparing all the tools, we found Wondershare UniConverter to be the best. This tool excels in unlimited video length, batch processing, and professional editing tool, outsmarting the likes of tools like FreeConvert and WatermarkRemover.io. Furthermore, it provides an intuitive interface, making it an ideal option to cater to both professionals and beginners.
Easy to Use Bandicam Watermark Remover
Part 6. Things to Know Before Removing a Watermark Using Cracked Bandicam
To avoid buying, many users download Bandicam crack no watermark, but it does come with the issues listed below:
No Customer Support: Cracked versions are unofficial and do not receive technical support, leaving users vulnerable to problems and missing out on improved features.
High Malware and Virus: Cracked Bandicam files often contain viruses or trojans, which can steal personal data, damage files, or even take over your computer.
Legitimacy and Legal Issues: Downloading and using cracked software is illegal, so users may face fines, lawsuits, or criminal charges.
No Security or Privacy: Cracked programs often disable security checks and make your system easily accessible to hacking, phishing, and data breaches, which is alarming.
System Instability: Operating system errors, crashes, or data loss are common due to corrupted or outdated cracked Bandicam copies.
Dangerous “Phone Home” Tracking: Some cracked software secretly "phones home" and reveals your IP address and system details for potential legal follow-up.
Conclusion
Summing up, now users don't have to worry about removing Bandicam watermarks from videos. In this guide, we have provided you with the best web-based tools to remove watermarks along with their stepwise guides. Furthermore, if you want an advanced alternative to Bandicam, we recommend using UniConverter Watermark Remover, which provides watermark-free video within its subscription plan.
FAQ
-
1. What is an AI meeting summary tool?
An AI meeting summary tool uses artificial intelligence to automatically transcribe, summarize, and highlight key points from meetings, saving time and improving accuracy. -
2. How accurate are AI meeting summaries?
Accuracy varies by tool, but leading solutions like Wondershare UniConverter provide precise transcriptions and summaries using advanced AI algorithms to ensure important discussions are reliably captured. -
3. Can AI meeting summarizers integrate with video conferencing platforms?
Many tools, including Wondershare UniConverter, offer integrations with popular platforms such as Zoom or Google Meet to seamlessly join meetings and auto-generate transcripts and summaries. -
4. Is my data secure when using AI meeting summary tools?
Reputable tools like Wondershare UniConverter adhere to top security standards like GDPR and SOC 2, protecting your meeting content from unauthorized access.

