
Extracting sound from video allows repurposing of content into various other formats. Content creators extract for their podcasts, while marketers extract for product publicity on platforms. In this regard, Adobe Premiere Pro is a common platform that is being used. Whether you need to extract sound from a single clip or a whole video, Adobe offers many editing and extracting tools.
Educationists extract audio from video Premiere Pro to use it to facilitate learning. It’s crucial in legal settings to provide documentation of legal cases. So, this guide will cover methods for effective audio extraction after considering its wider use cases. Read by the end and learn how to extract audio from video in Premiere Pro along with an alternative.
In this article
Part I. How To Extract Audio from Video?
The first and most common way to extract audio is through Adobe Premiere Pro. It offers an audio extractor that can separate soundtracks from video footage. Apart from extracting, you can edit audio clips from video files of any format, such as MP4, AVI, and FLV. This platform enables you to extract audio from video Premiere Pro with three methods discussed ahead.
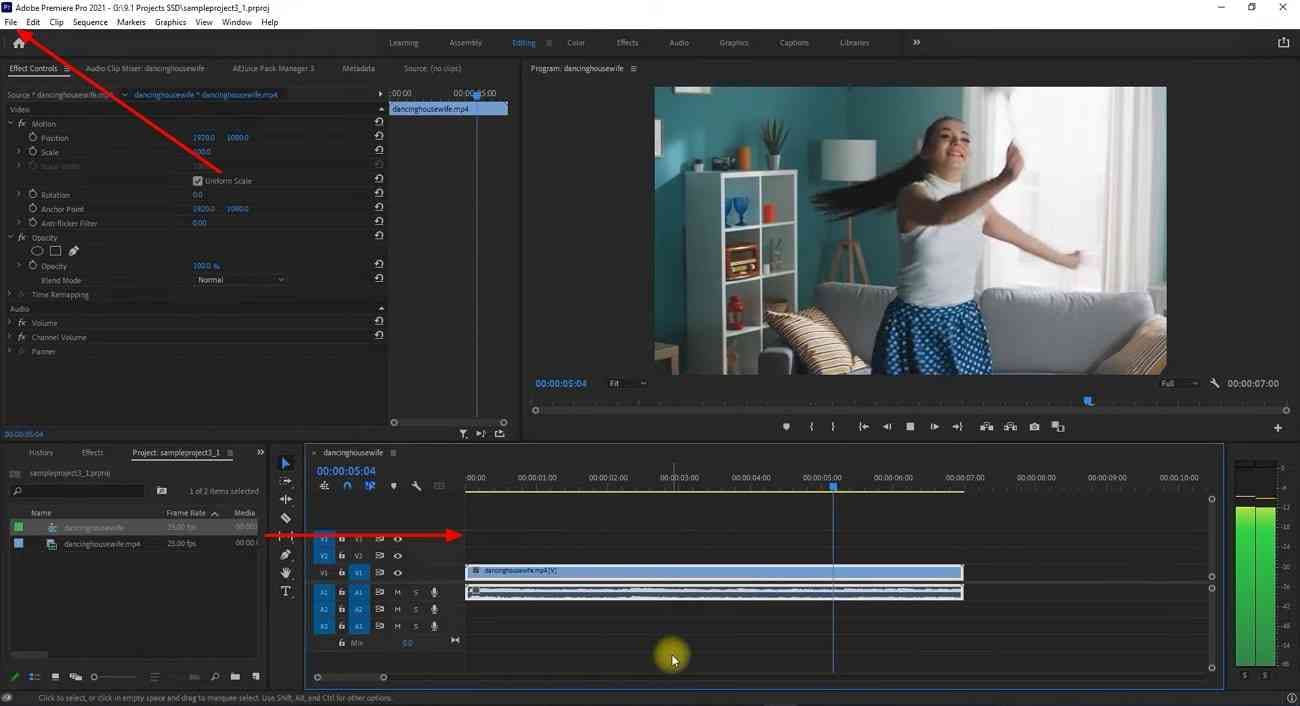
Set Up and Import Media
Before you jump into the methods, set up Adobe Premier Pro in your system. For this, launch Adobe in your system and access the main screen. To import the video, click the “File” option and pick “Import from Media Browser.” Later, right-click on the intended file from the media browser and click “Import.” Now, drag the file into the project panel and afterward drag it to the timeline panel.
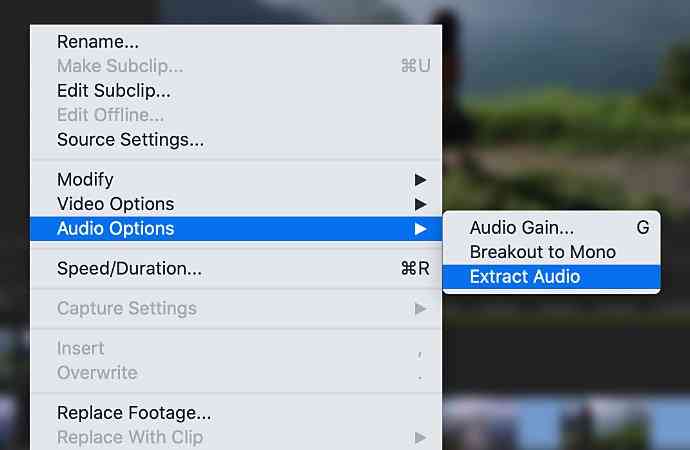
Method 1. Directly Extract Audio
From the project panel, select the clip and right-click on it to get an extended list. Place your cursor on "Audio Option" and click the "Extract Audio" option from the options that appear. This way, Adobe will generate a separate audio file and add “Extracted” to that file name.
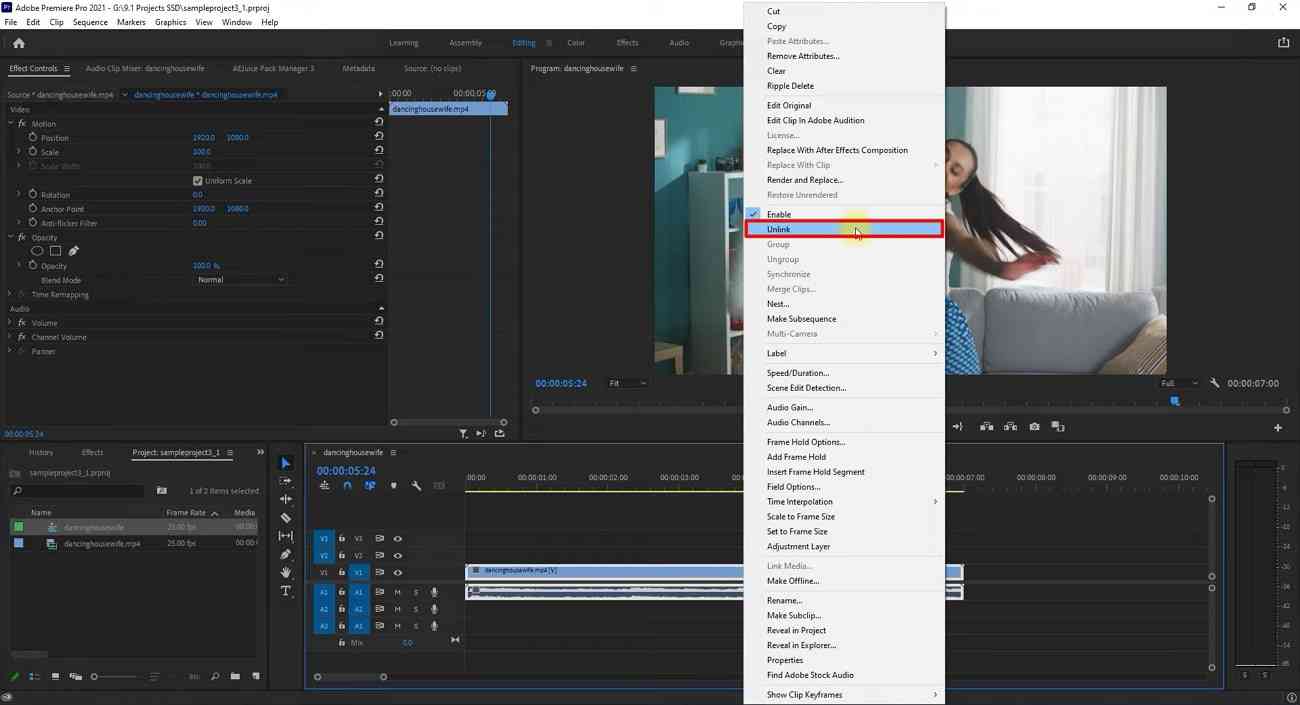
Method 2. Unlink Audio and Video
Bring your media file to the timeline panel of Adobe Premiere Pro to begin the extraction. Now, right-click on the audio and hit the "Unlink" option from the list. This way, you can move audio and video independently. As they are both separated, you can delete the video and export only the audio file.
Method 3. Export Audio Only
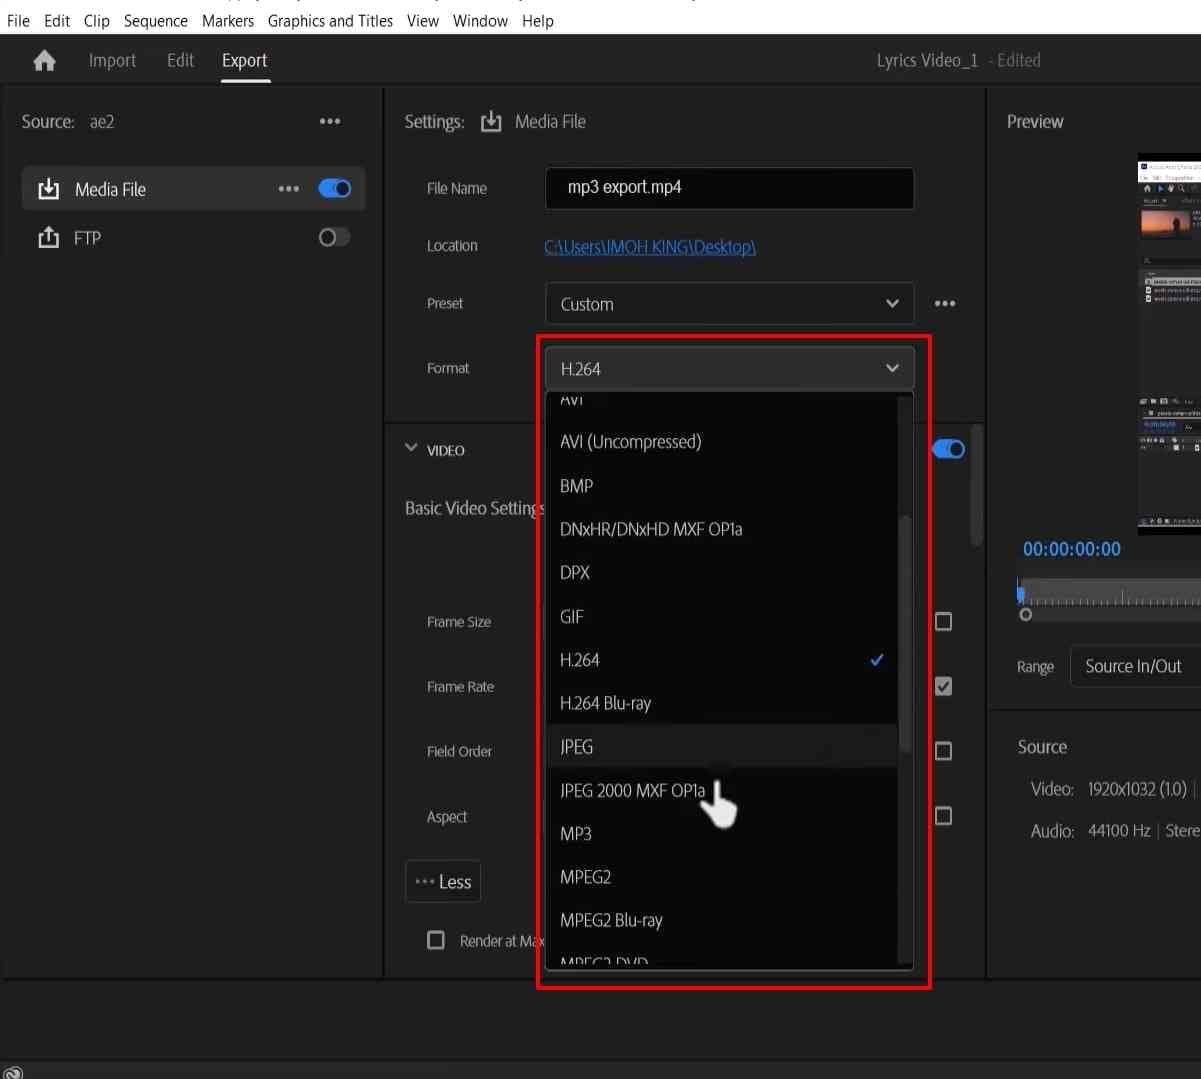
Step 1: Import your video in Adobe and perform necessary edits if required. Then, go to the top left corner and choose the “File” option. From the extended menu of “File,” look for the “Export” option to tap on the “Media.”
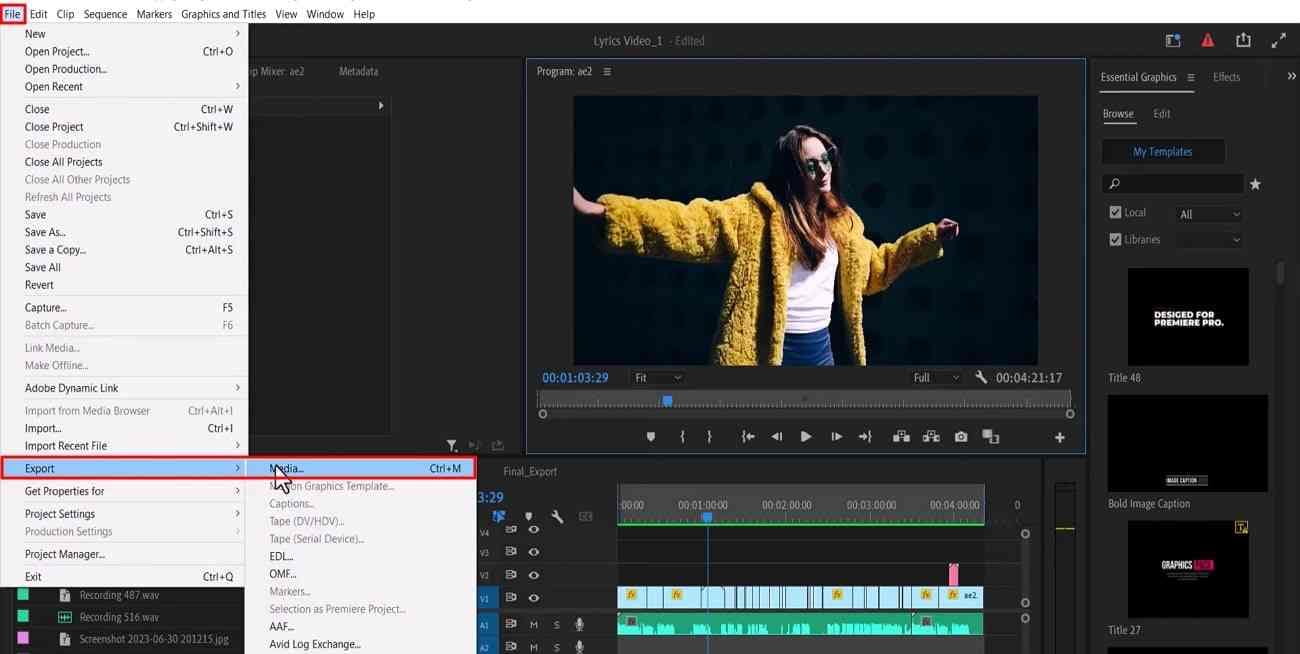
Step 2: After tapping “Media,” you will get an “Export” window. There, assign a suitable name in the “File Name” section and move to the “Format” option. Extend the list of “Format” and scroll to hit the “MP3” option. Press "Export" to extract your sound from the video file.
Part II. Extract Audio from Video With the Best Alternative to Premiere Pro
Adobe Premiere Pro seems a difficult platform for beginners in the editing field. Thus, if you lack technical knowledge, you can go for Wondershare UniConverter. It’s an easy-to-use platform that offers intelligent conversion features with an accelerated GPU. Before moving on to how it can perform audio extraction, let’s learn about its key features:
- UniConverter supports over 1000 video and audio formats for conversion. Besides, it retains the original quality while converting and supports 4K, 8K, and HDR quality videos.
- If you have a tight deadline, it can convert multiple files simultaneously. With its Batch Video Converter, you can import folders to process and download together.
- This software is expert in converting tailored media formats for different devices. Among them include a series of Apple, Android, Samsung, Huawei, and game consoles.
- Before sound extraction, it allows you to cut, trim, and crop the video. Moreover, you can change the audio speed, bitrate, and even sample rates.
By now, you have sufficient knowledge of how differently you can extract audio video Premiere Pro. Let’s delve into the straightforward way of sound extraction in UniConverter:
step1Get UniConverter and Begin the Extraction with Converter
To begin the process, install UniConverter on your device and ensure you get the latest version.
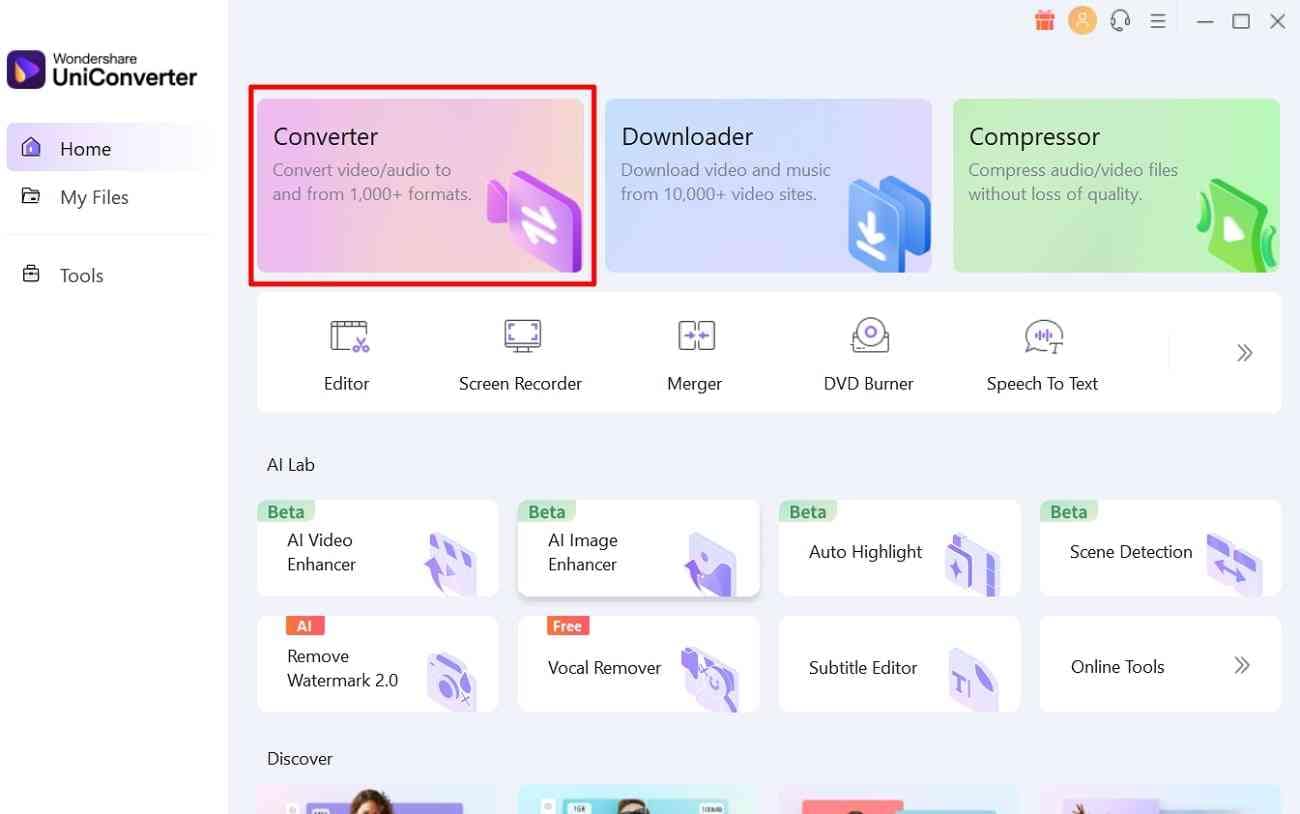
Afterward, launch it and enter its home screen to access the “Converter” option. After finding the “Converter” option, tap on it and navigate to another window.
step2Import the Video File to Proceed
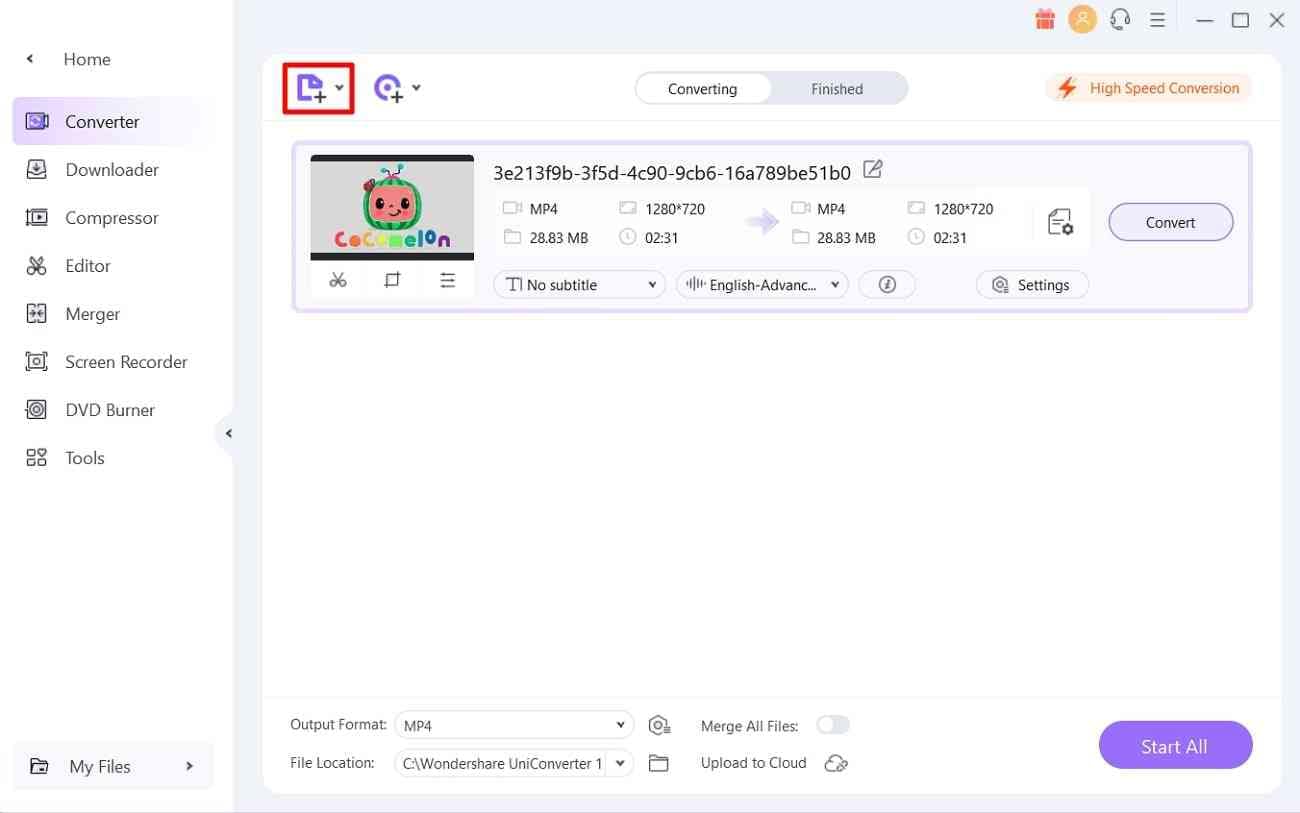
Now, move to the top-left side and choose the “Add Files” icon. Then, browse the video you wanted to extract and click the “Open” button.
step3Adjust the Output Format to Extract Audio
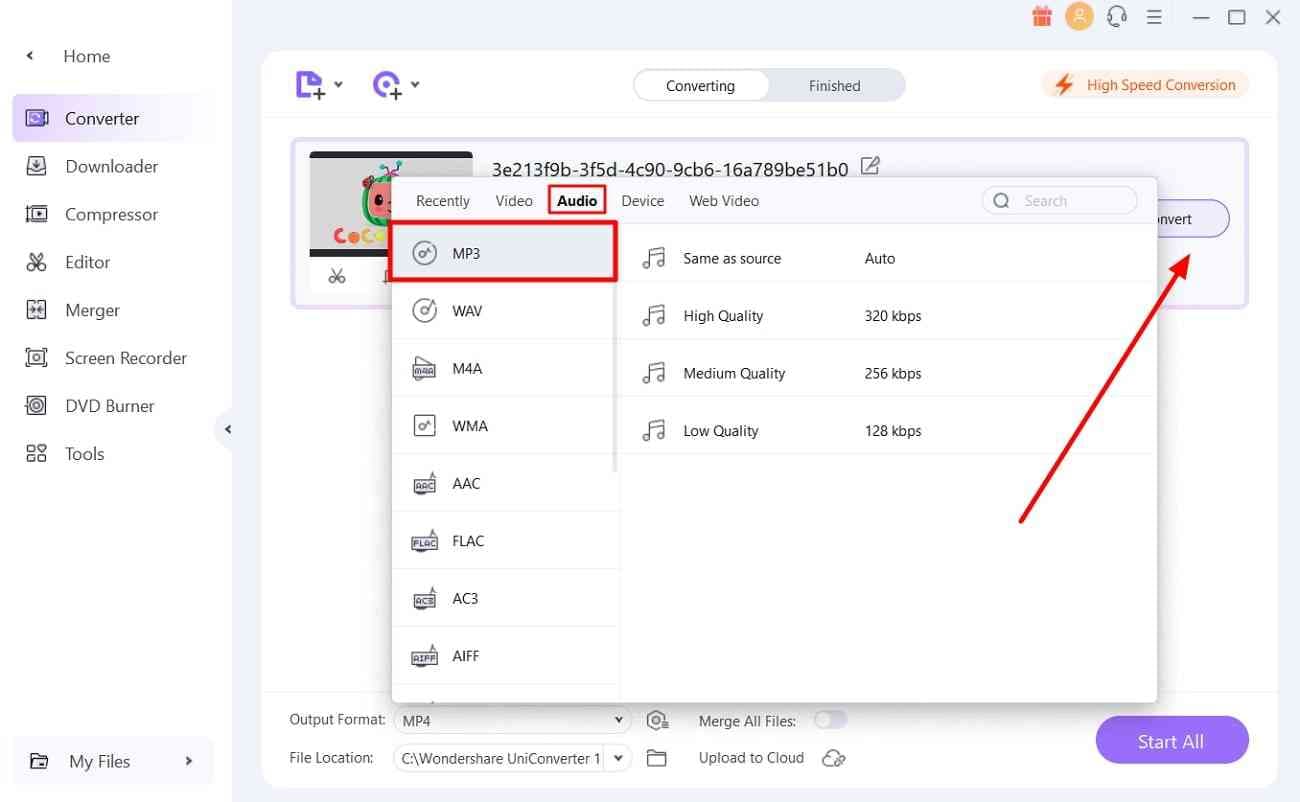
Once you import the video, you will find the “Output Format” icon before the “Convert” button. Tap on it to get an extended menu, and select the “Audio” option. Next, pick an output format from the left and select the output quality.
step4Make Final Moves for Conversion and Save the File
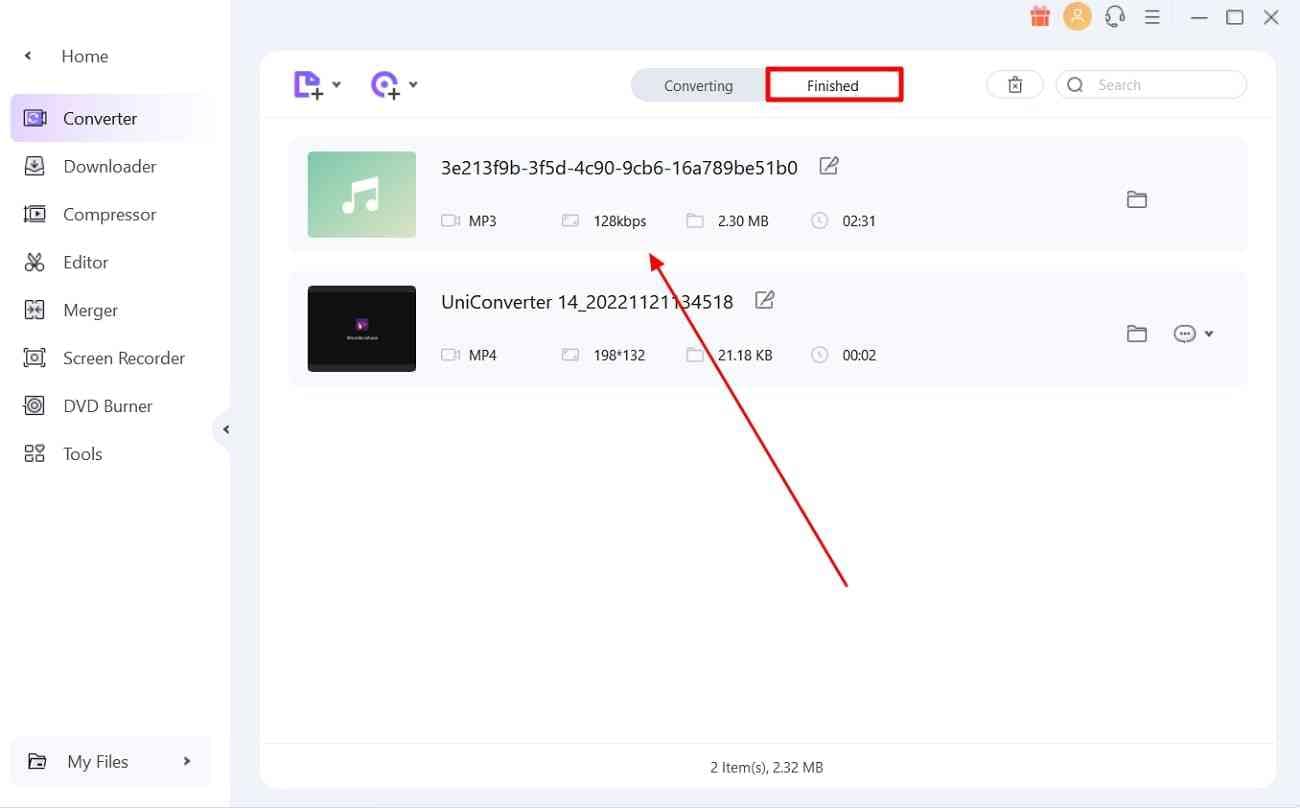
After setting the output, hit the “Convert” button to initiate the conversion. When the process is completed, you will find the results in the "Finished" section. In addition, the output will automatically transfer into your system.
Bonus Tip. How to Extract Frames from Video In Premiere Pro?
After repurposing the extracted sound in a podcast or anywhere else, you might need an image. For this purpose, users look for a captivating frame from the video. To address their concerns, Adobe allows you to extract frames from Video Premiere Pro. If you also want to extract one, let us simplify this process for you in the given stepwise method.
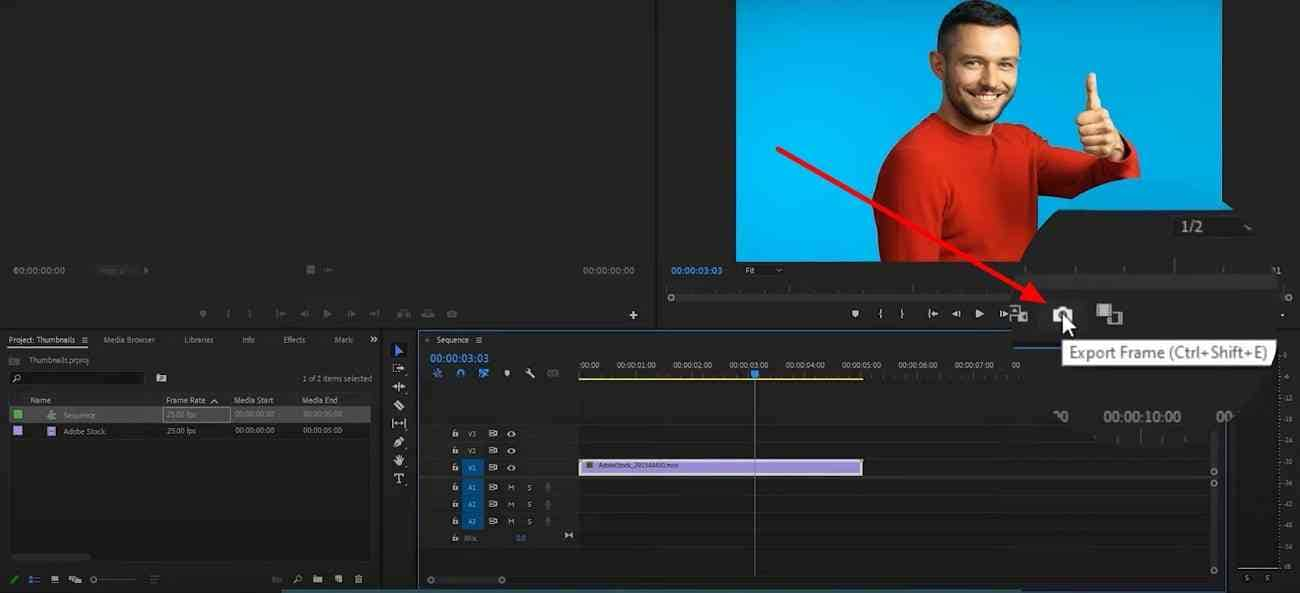
Step 1. Access the main interface of Adobe Premiere Pro and import your video. Choose the frame you find captivating and place your playhead there. Afterward, move your cursor to the “Export Frame” camera icon and tap on it.
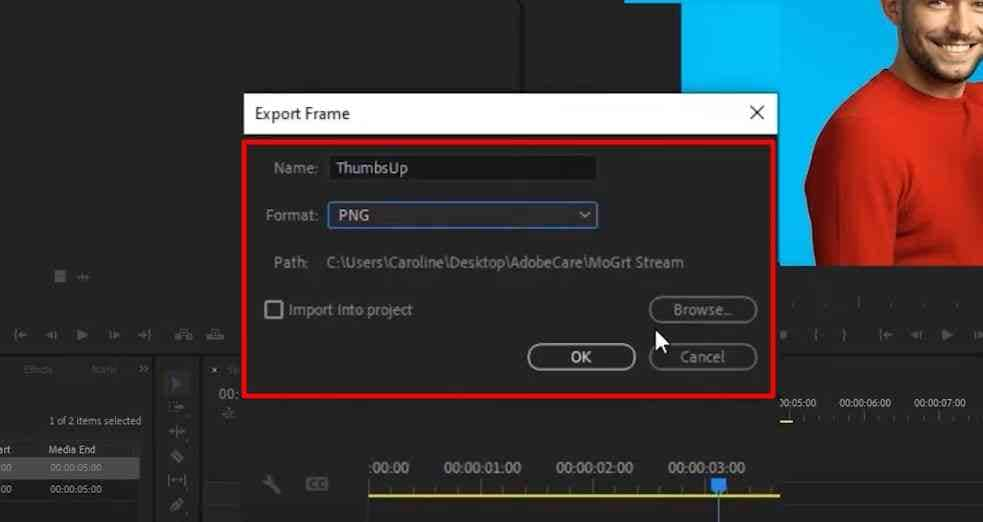
Step 2. As you choose the “Export Frame,” you will enter into another screen. There, you have to review the captured frame and adjust its format, path, and name. Upon making the adjustments, you can hit the “OK” button, and Premier Pro will export the frame.
Note: Premiere Pro will not automatically show the "Export Frame" icon. So, you must add it from the Editor button before moving to the actual process.

