Twitter, a famous social platform has a feature named "Twitter Spaces" which helps people to have a live audio chat with people around the world. There are several reasons for recording Twitter Spaces on desktop. Hosts can upload them as a link via a tweet for the people who couldn't join the live. By recording spaces, you can re-watch it and also show it to others. Many people don't know how to join Twitter Spaces. Again doesn't have any idea about how to record Twitter Spaces on PC. In this article, we are describing the ways and also introducing you to some third-party tools to help you.
Part 1. How to Join Spaces on Twitter
Twitter Spaces is an amazing way to have an audio-based chat with your Twitter followers. As we know, currently Twitter Spaces is available on Android and iOS only. So here we are giving you the steps of how to join Spaces on Twitter on the Android phone –
Step 1: At first, you need to open the Twitter app on your phone.
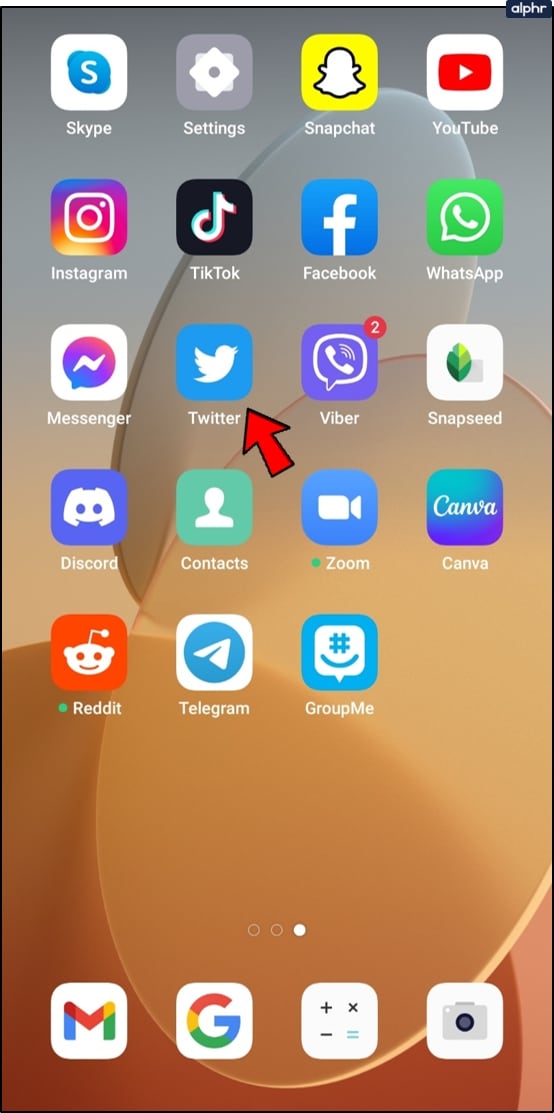
N.B: Try updating Twitter, if you don't see any Spaces to join.
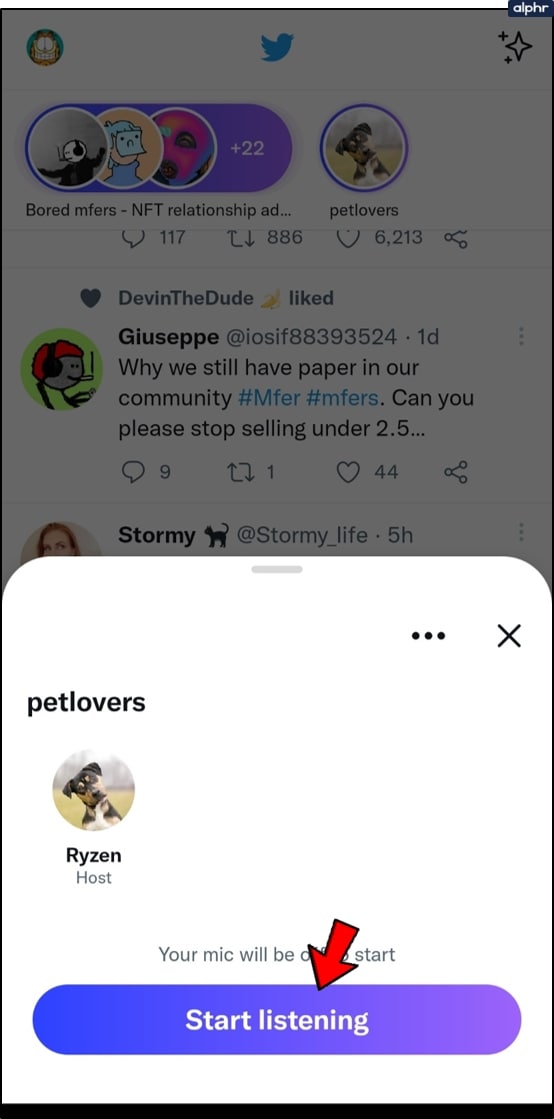
Step 2: At the top of the screen, the Spaces available for you to join will appear in the Fleets section. To see the host and participants, tap on a Space.

Just tap on the link if you've received a DM with the link to join a Space.
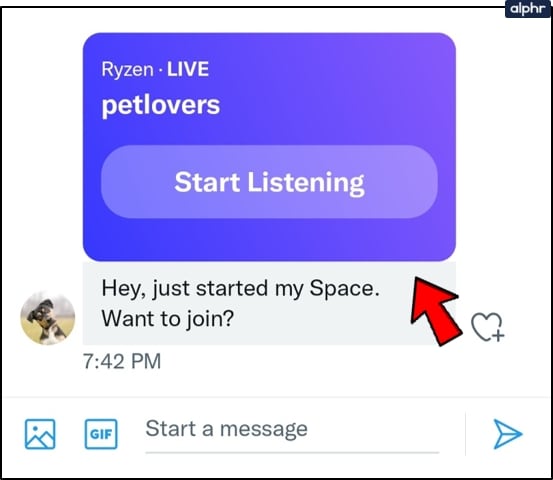
Step 3: Click on the "Start Listening" found at the bottom of the member's list to join the Space. As a listener, you will automatically join the Space.
Step 4: Tap on the "Request" button found at the bottom to ask for approval to join the conversation. Unmute your microphone by tapping on it once when you're ready to speak after being approved.
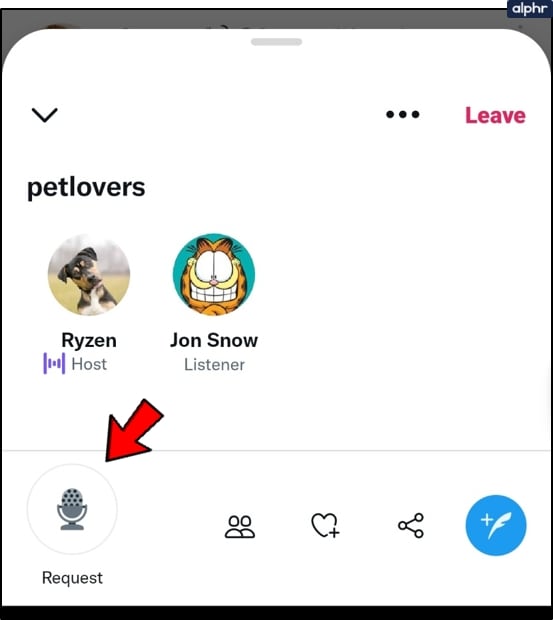
Your Twitter profile will display with "Speaker" underneath it if you're permitted to speak.
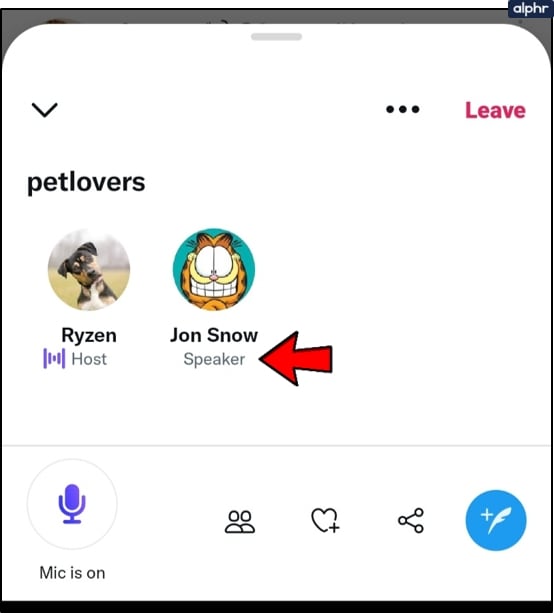
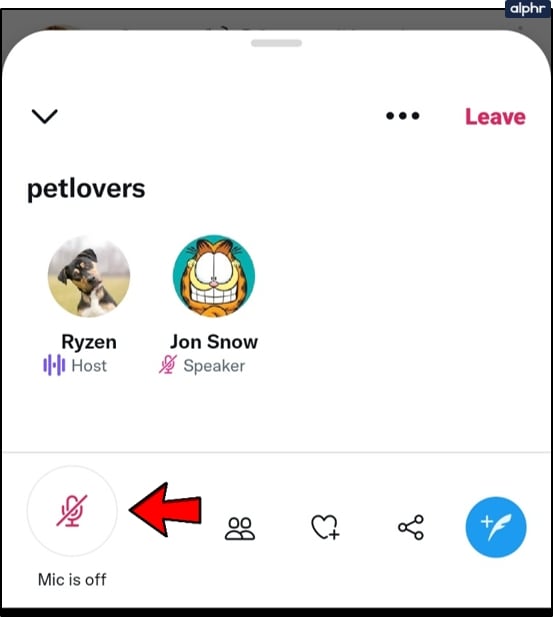
To switch your audio on or off, tap on the microphone icon found at the bottom left screen.
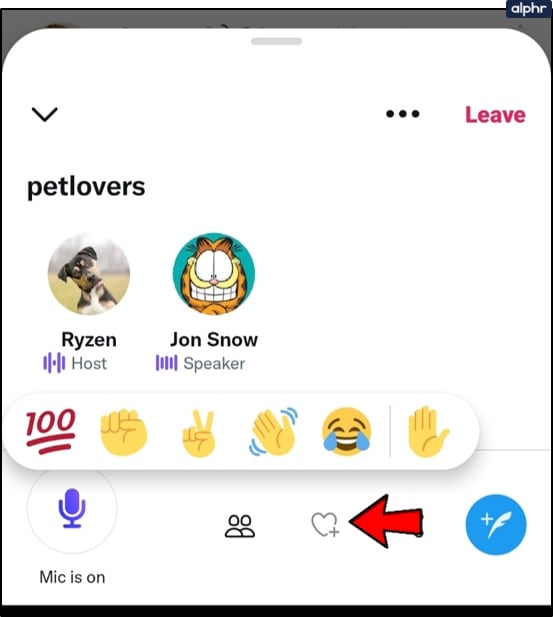
Tap on the heart icon with the plus sign found at the bottom-right of the space to show agree/disagreement reactions to what's being said.
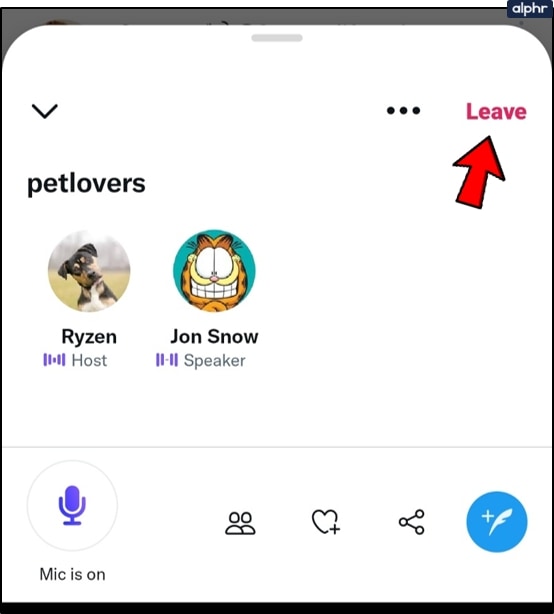
Tap on "Leave" found at the top right-hand corner to leave the space and return to your Twitter timeline.
Part 2. 7 best audio recorders help you to record Twitter Spaces on desktop
Several ways are available on the internet to record Twitter Spaces. But to make your work easy and fast, we are suggesting the best ways here in this article. One of the best ways is to use a third-party tool. Among the great number of third-party apps, we are introducing you to 7 best audio recorders that will help you to record Twitter Spaces on desktop –
1. Wondershare UniConverter
If you want to record audio on your computer then Wondershare UniConverter is one of the best audio recorders and editors for Windows and Mac. Users can record any particular app while using other apps in this software. This application is easy to use unlike most audio recorders out there. Without any ambient or system noises, users can capture their voices. By using the system mic or a connected mic, you can record audio and export them as WAV, MP4 or MP3 files. This program allows the users to record all system sounds from media players, VoIP apps, podcasts, YouTube and more. You can download this application for free and also can upgrade for only $39.99 per year.
Features:
- Lossless sounds can be recorded from Zoom, Skype, media players and more.
- Output formats can be set as M4A, WAV or MP3.
- The conversion speed is 90X faster than other programs.
- By using the system microphone or a connected mic, you can record audio or personal voice.
Pros
For clear audio output, you can disable all system sounds.
You can export the recorded audio to MP4, MP3 or WAV format.
Allows you to convert and edit sounds with lossless quality.
Cons
A little bit expensive to upgrade.
Wondershare UniConverter — All-in-one Video Toolbox for Windows and Mac.
Edit videos on Mac by trimming, cropping, adding effects, and subtitles.
Converter videos to any format at 90X faster speed.
Compress your video or audio files without quality loss.
Excellent smart trimmer for cutting and splitting videos automatically.
Nice AI-enabled subtitle editor for adding subtitles to your tutorial videos automatically.
Download any online video for teaching from more than 10,000 platforms and sites.
2. Leawo Music Recorder
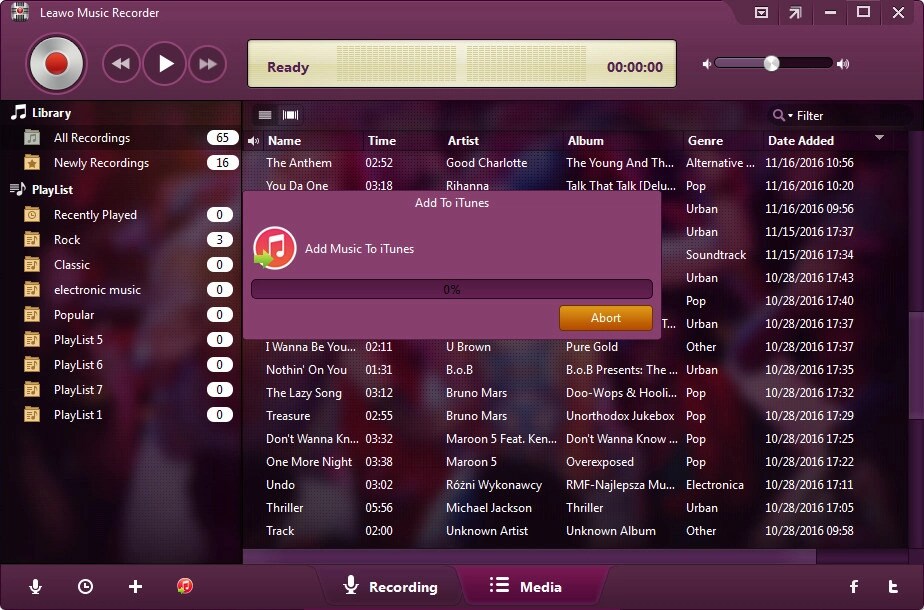
Leawo Music Recorder is another program for Windows and Mac that helps you to record the music or audio from computer audio as well as input audio. Various capabilities like task scheduler and album cover finder are consisted by this tool. Various music sources like YouTube, AOL Music and many more are supported. Through the Mic or other built-in input audio stream, you can record the music. You can download this application for free and also can buy it for $19.99/year or $29.99/lifetime.
Features:
- According to preset time duration, it supports automatic splitting of the songs.
- To set the start time and duration for recording, it has an advanced task scheduler.
- Provides automatic music functions like adding & completing music information.
Pros
You can record various audio files in MP3 or WAV format.
Allows you to set the recording file parameters including audio codec, audio format, bit rate and sample rate.
Cons
Have file limitation over 3 minutes.
Automatic song detection is not 100%.
3. Audacity
Despite being open source and free to use, Audacity is amazing audio recording software that provides tons of features to its users. All operating systems like Windows, Mac or Linux are compatible with this tool. This program doesn't assault its users with unnecessary graphics and outlandish aesthetics because it has a very clean interface. It is phenomenal concerning the features it offers despite being simple in its looks. To enable recording, you can easily set up external equipment, after that use the software to record, edit and mix audio to your satisfaction. While also having access to frequency analyses, you can also use the tool to adjust treble and bass.

Features:
- Ad-free and also provides hassle-free work.
- Easy audio editing and recording.
- Supports multitrack editing.
Pros
Up to 32-Abit sound quality is supported.
A simple but powerful user interface is provided.
Cons
A bit outdated user interface.
The noise reduction tool needs an update.
4. WavePad
WavePad is very high on the list as far as intuitive voice recording software goes. It packs within itself a slew of advanced features that rightfully earns it a place on this list though it has a clean and basic UI. To record audio, mix it, edit silences and eliminate background noise, you can use Wavepad. Users can remove and configure tools within the software at the user convenience because this tool has a very customizable toolbar. To enhance the quality of your recording, WavePad also comes with a plethora of filters and effects that can be used manually or automatically. This program can be installed on Windows, Mac, Android and iOS. You can download it for free and also can get a commercial license for $250.

Features:
- Multiple audio editing capabilities are offered.
- More than 50 audio formats are supported.
- Save your time and energy by allowing batch processing.
Pros
The quality of the end product is very high.
Numerous audio and music effects such as normalize, amplify and equalize are supported by this tool.
Cons
For multitrack recording, you'll need a software extension.
Top-quality work is not offered by the MP3 editor of this program.
5. Ocenaudio
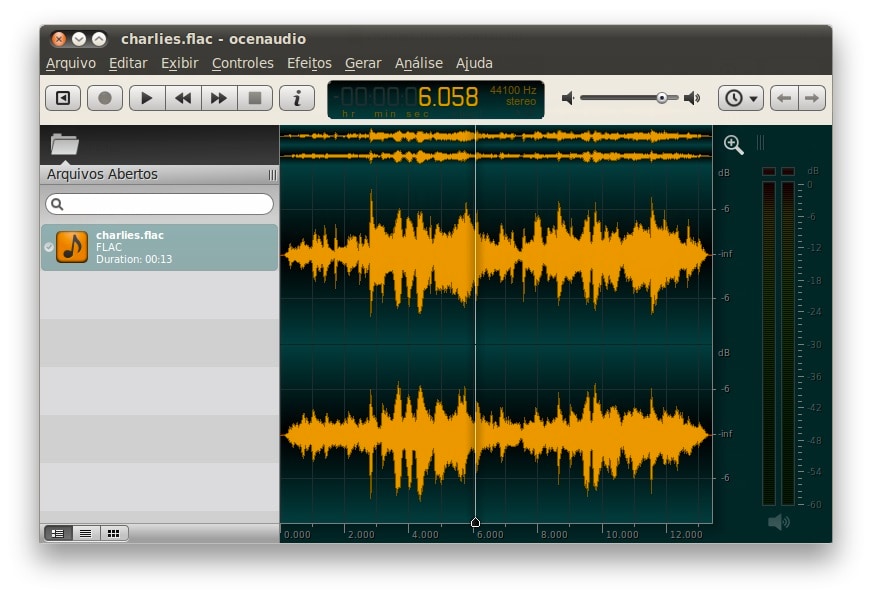
One of those smart editing software, Ocenaudio completely shoulders the responsibility of audio recording and editing. For users who want a much more automated response from their editing tools, it is a tool that begs attention from them. It works primarily as a fine and strong editor but it is a great audio recorder. Many advanced features of this tool are wrapped in a fantastic-looking user interface that is easy to operate. While the editing is still in progress, users can implement a ton of audio and preview them in real-time. This program allows users to select multiple different parts of the same audio to edit, listen or apply effects on. Today this tool is in wide use as one of the best cross-platform audio editors. Without any hassle, this free tool works well on Windows, Mac and Linux.
Features:
- To allow you to add various effects to the audio, it supports VST plugins.
- When you make any changes, it gives a real-time preview of sounds.
- For quick and excellent editing, it supports multi-selection.
Pros
You will be able to use auto trim and voice recording controls.
Audio files have no length limitation.
Cons
Cannot load files directly from a CD.
The work rate is slow because cannot be opened on multiple screens.
6. QuickTime
For Mac, QuickTime is essentially a video editing tool that permits its users to record the ongoing audio and video for extra convenience. You have to navigate to the "Files" tab on your screen for recording and to begin, choose "new audio recording". To capture audio and video on an iOS device as well, this tool also works phenomenally. With the help of QuickTime's robust editing features, you can proceed to edit, trim or split your recorded audio conveniently after recording. You can install this tool on your device for free.

Features:
- Along with the audio, record the computer screen.
- Right from the moment they are booted, it can mirror the iPhone/iPad display on Mac.
- Supports recording footage from the webcam.
Pros
The interface is quite easy-to-use for everyone.
Doesn't require any payment.
Cons
Provides low-quality sound recording.
Functionality is poor.
7. Adobe Audition
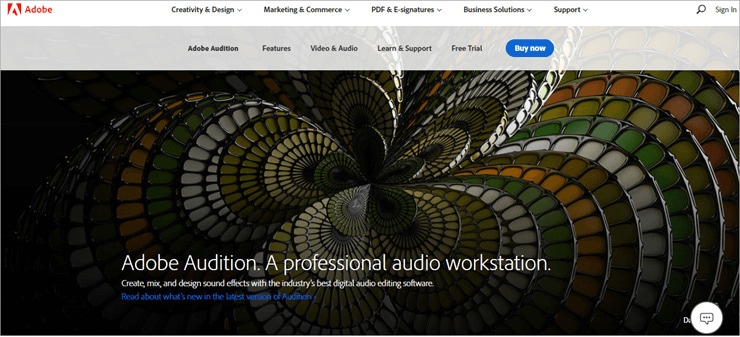
Adobe Audition is another one of the best audio recorders and it's often recommended by professional sound engineers. Users can record, edit, mix and restore audio to serve a variety of purposes with the features of this tool. The multi-track display and waveform feature is the reason for which this software is known. Users can interrogate multiple audio clips in one file, repair audio breaks and create audio files in multiple formats. While mixing audio for podcasts, this tool is ideal. You can download this program for free and also can upgrade it for $20.99 per month. Users of Windows and Mac can easily use this program.
Features:
- It has multitrack, wave editing and audio restoration tools to give you the best results.
- To get the best oomph effect to the audio, the essential sound panel has been integrated with the program.
- To make it sound professional, the music clips can be integrated into the audio recording.
Pros
You can create awesome products by using this platform.
With perfection, the audio break can be repaired.
Cons
All users cannot afford it at all because it is expensive.
This tool requires time to learn and the interface is high-tech in nature.
Part 3. The easy way to record Twitter spaces on desktop
Wondershare UniConverter is a powerful audio recorder that will help you to record high-quality videos without any background noise. To record the system audio, you don't need to hold up a mic on your computer. You can easily install this tool rather than hold a mic. While recording you can choose the input microphone, output speaker and target format in this beautiful software. With the help of the rich features of this program, users can edit their recorded audio.
Steps to record Twitter Spaces on Desktop:
Step 1 Open the audio recorder
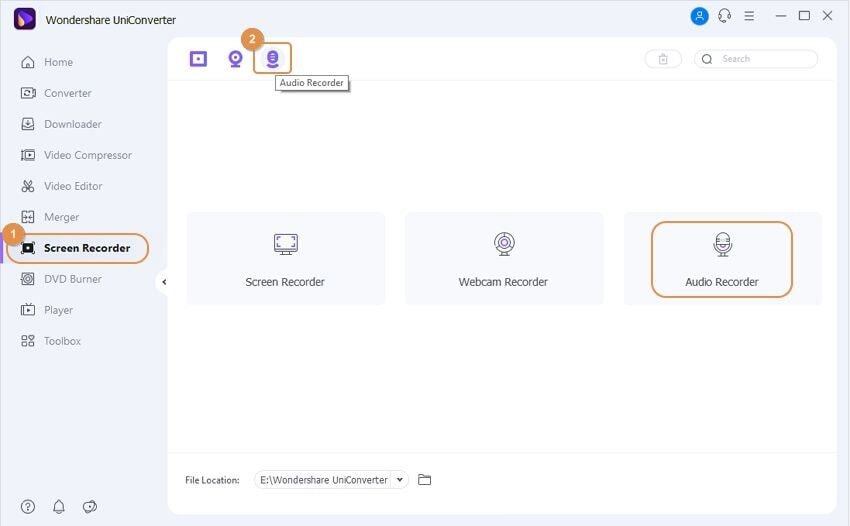
First, you have to download and install Wondershare UniConverter on your desktop. Then from the left pane, click on the "Screen Recorder" tab. Tap on the "Audio Recorder" option in the centre of the pane from the available options and automatically the function will launch.
Step 2 Set the recording preferences
You can connect an output speaker or headphones and from the speaker list, you can choose it. Click on the "Microphone" menu to proceed and connect an independent mic or choose your computer's internal mic and select it. After that go to the "Format" list and to export your recorded audio, set it to WAV, MP3 or M4A format. If you want to mute everything, click on the Speaker and Microphone icons.
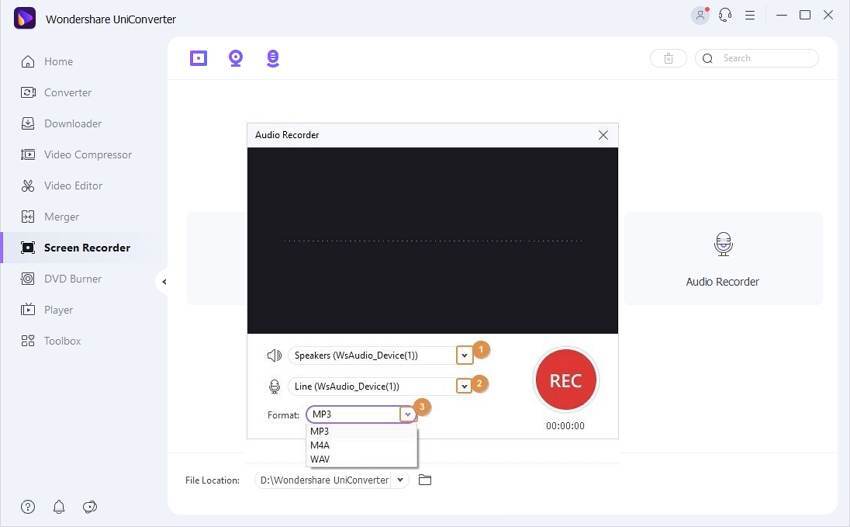
N.B: This program will automatically recognize the microphone in the Microphone option if your microphone is connected via Bluetooth.
Step 3 Begin and finish the recording
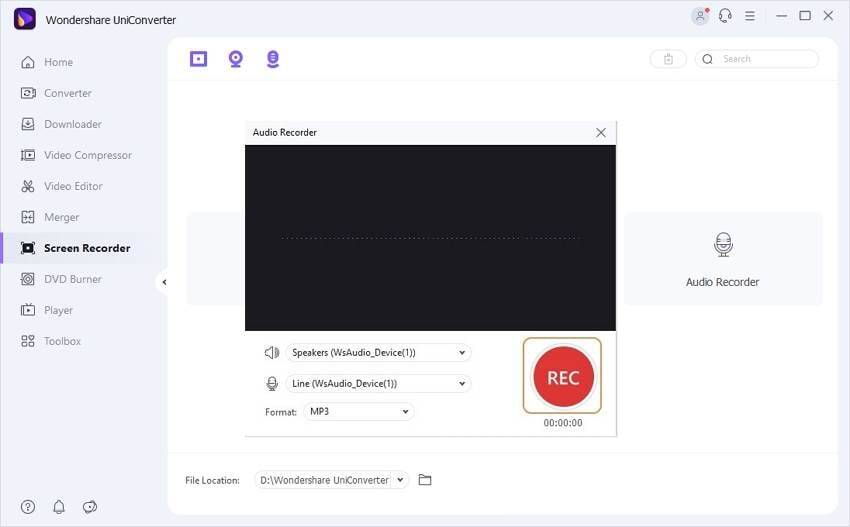
To start recording your voice on a PC, tap on the "REC" button. Press the "Stop" button if you are done recording and after that close the Audio Recorder tool. To preview your recorded audio, hit the "Open" button.
Conclusion:
Twitter Spaces are popular among Twitter users. For various purposes, you might fall in need of recording a Twitter Spaces. In this article, we have suggested to you how to record Twitter Spaces on desktop. Among all the ways, we would highly recommend you to use Wondershare UniConverter because of its excellent features. You can also record the webcam and screen in this program. It gives you the fastest conversion speed and supports recording any app while using other apps.


