
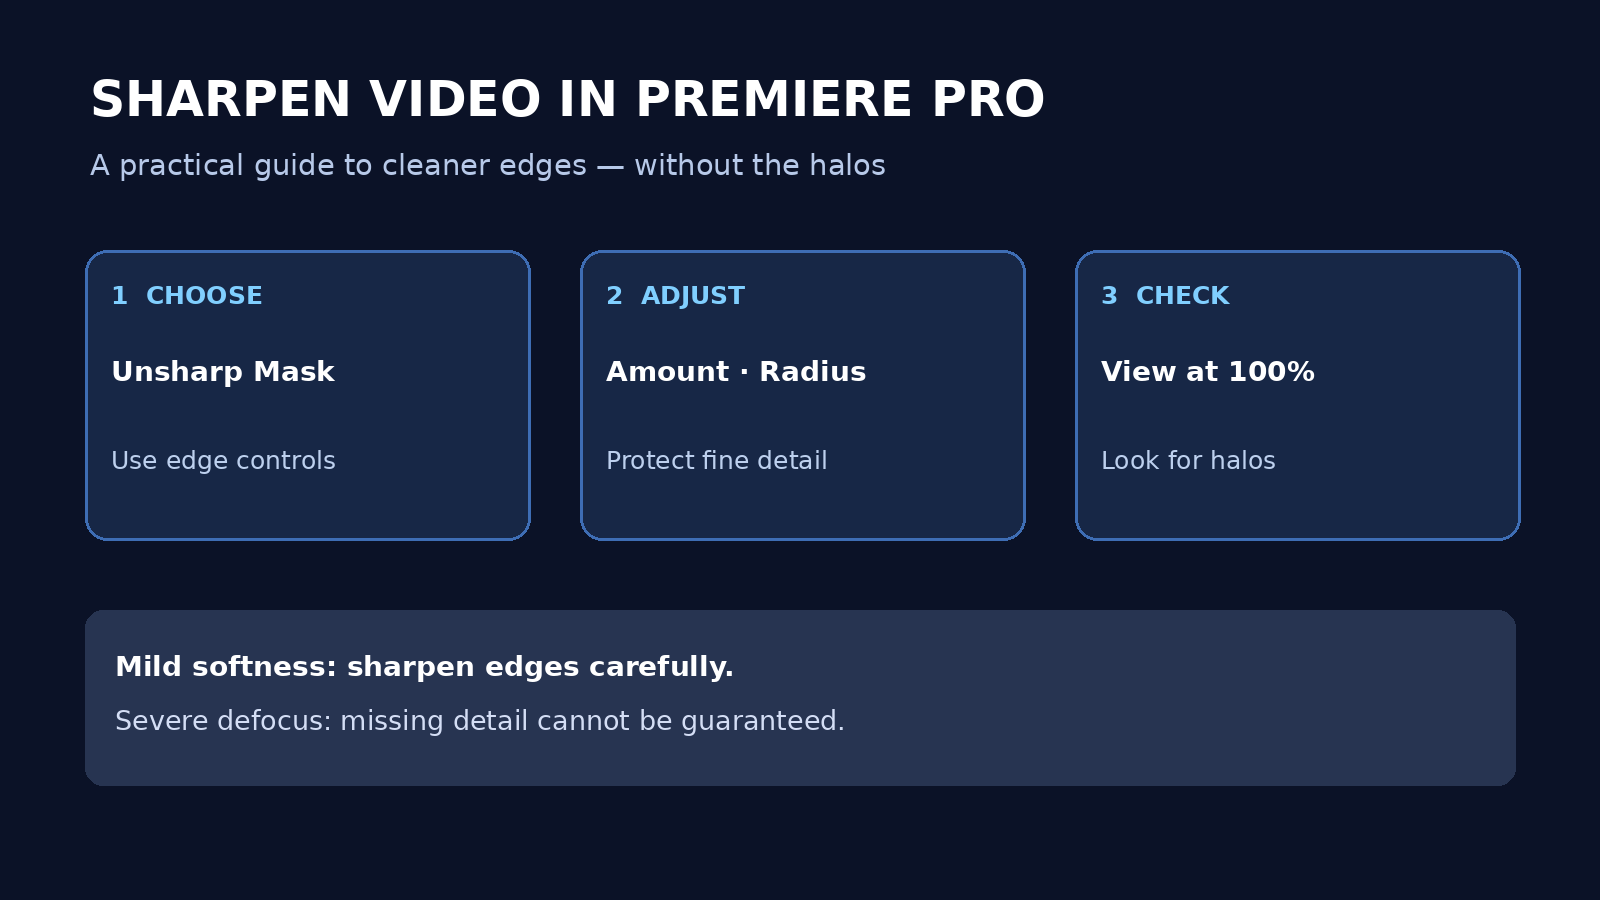
Quick List: How to Sharpen Video in Premiere Pro
- Before You Sharpen: Identify What Makes the Video Look Soft
- Which Sharpening Tool Should You Use in Premiere Pro?
- How to Sharpen Video in Premiere Pro with Unsharp Mask
- How to Adjust Amount, Radius, and Threshold
- How to Check for Halos and Over-Sharpening
- How to Enhance a Soft Video with UniConverter Video Enhancer
- Troubleshooting: Why Your Sharpened Video Still Looks Blurry
- FAQ
Before You Sharpen: Identify What Makes the Video Look Soft
Sharpening makes existing edges more distinct by increasing local contrast. First identify the source problem: a stronger filter applied to compression blocks or missing detail can make the defect more visible.
| What you see | Check first | Next action |
|---|---|---|
| Mildly soft edges | Compare the original at full viewing size. | Try a restrained sharpening effect. |
| Blocks around text or edges | Compare with a less-compressed source. | Use the cleaner source if available; avoid emphasizing blocks. |
| Grain in shadows | Inspect a dark area while playing the clip. | Protect noise with Threshold; assess whether denoising is needed. |
| Subject is out of focus | Check whether fine details exist in the original. | Try a different take or a carefully reviewed AI preview; no method can guarantee the missing real detail. |
Which Sharpening Tool Should You Use in Premiere Pro?
Premiere Pro includes several ways to make edges appear clearer. The right choice depends on whether you want a quick adjustment or separate edge controls.
| Tool | Best use | Controls and caution |
|---|---|---|
| Unsharp Mask | Fine-tune a soft clip | Amount, Radius and Threshold; excessive settings create halos or reveal noise. |
| Sharpen effect | Quick edge enhancement | A simpler effect; judge the result rather than assuming higher is better. |
| Lumetri Color → Creative → Sharpen | Adjust sharpness while color grading | Adobe documents an edge-definition slider; return it to zero to disable that adjustment. |
Adobe describes both Sharpen and Unsharp Mask and its Lumetri Creative controls.
How to Sharpen Video in Premiere Pro with Unsharp Mask
Use this method when the original still contains the details you want to emphasize. The following Premiere workflow uses Unsharp Mask; keep a copy of the original media.
- Step 1: Select the clip. Open your project, place the video in a sequence and select the clip in the timeline. Confirm that the intended clip is highlighted.
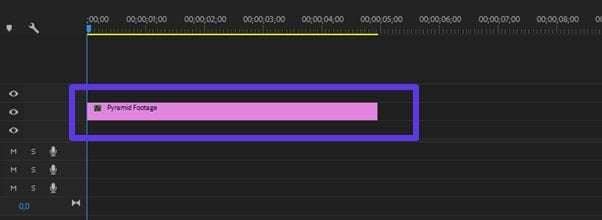
Video clip on the Premiere Pro timeline. - Step 2: Find Unsharp Mask. Open the Effects panel and search for Unsharp Mask. Confirm that the video effect appears in the results.
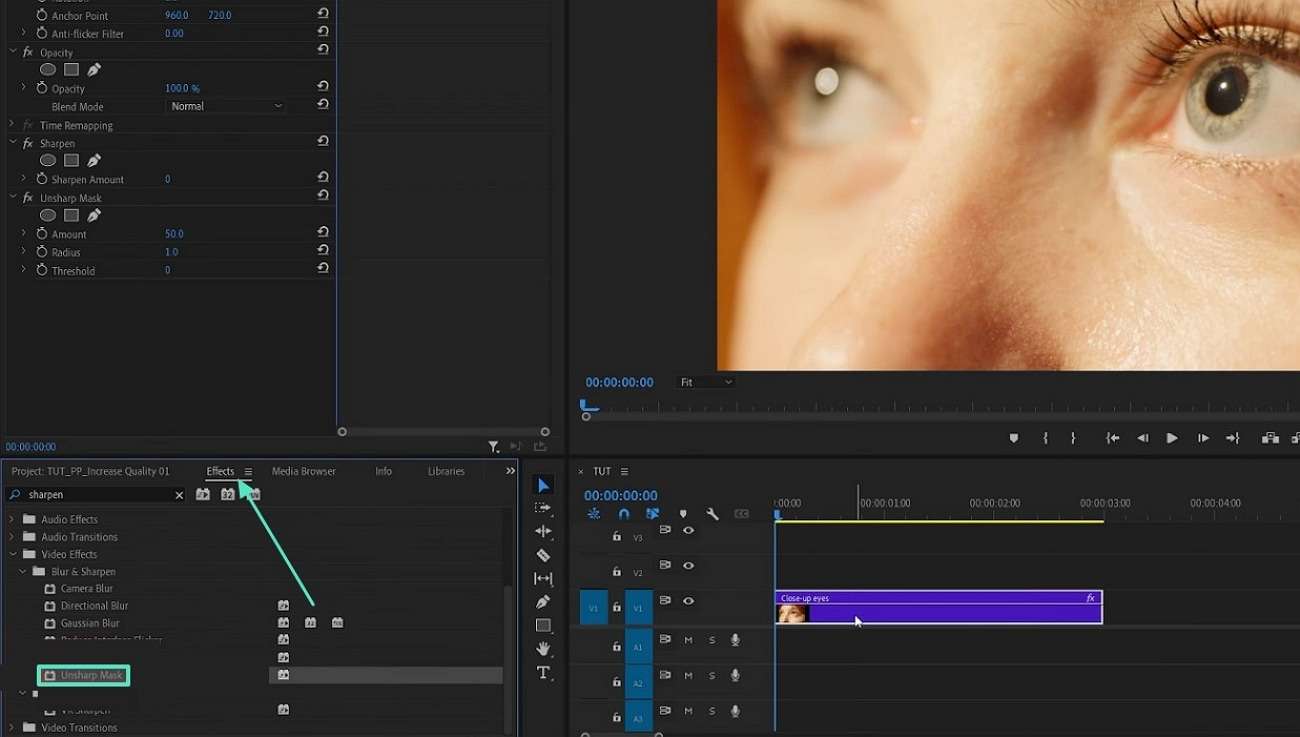
Unsharp Mask in the Effects panel. - Step 3: Apply the effect. Drag Unsharp Mask onto the selected timeline clip. Open Effect Controls for that clip and confirm that the effect is listed.
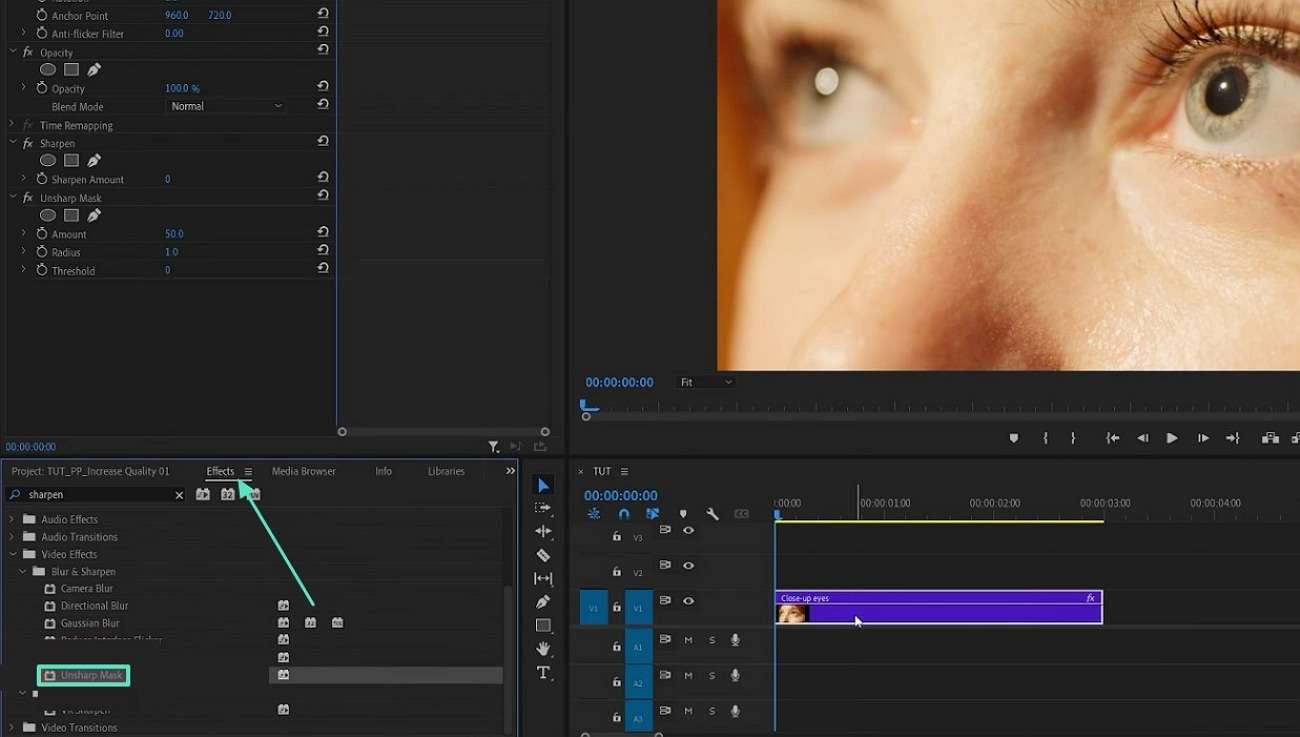
The Unsharp Mask effect appears in Effect Controls after it is applied. - Step 4: Adjust the controls. Expand Unsharp Mask. Increase Amount gradually, keep Radius restrained, and adjust Threshold while monitoring detail and noise. Confirm that edges look clearer without an obvious outline.
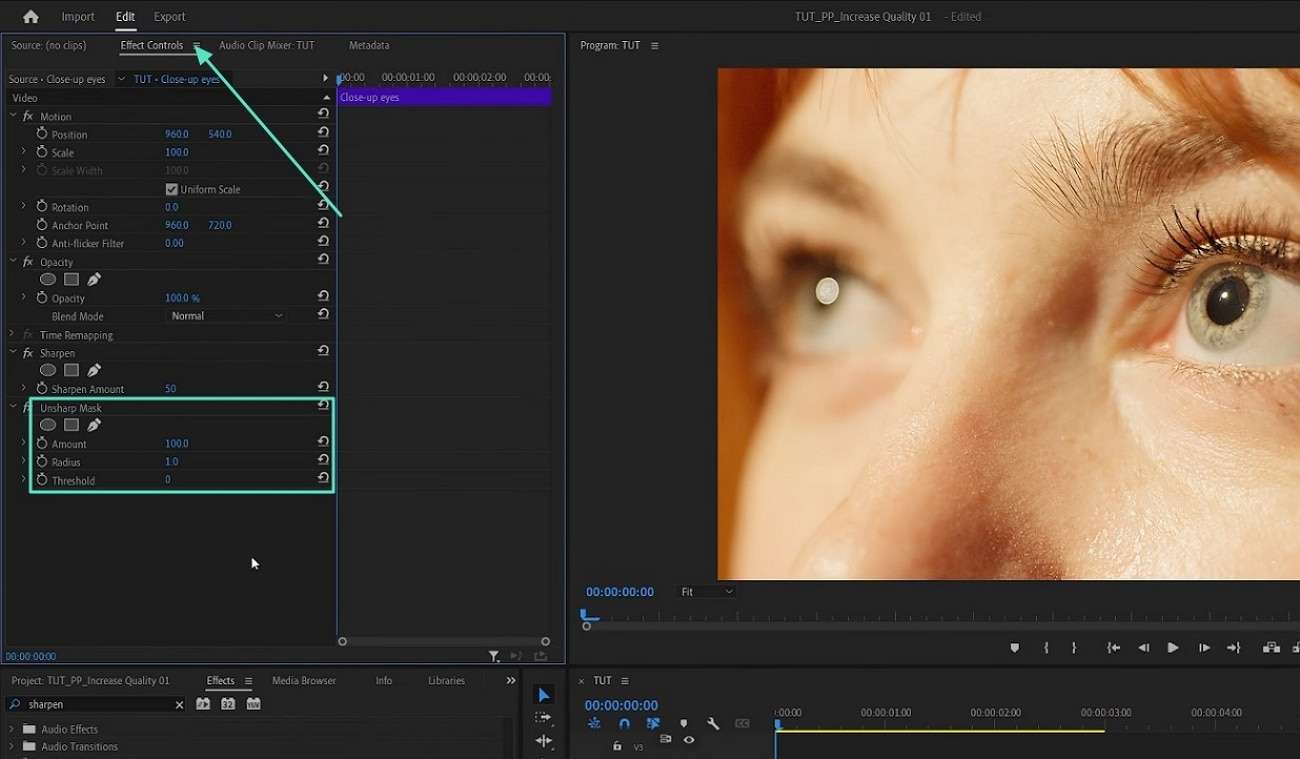
Adjust Amount, Radius, and Threshold in Effect Controls; the displayed values are an example. - Step 5: Compare and export. Compare the effect on and off at 100% magnification and play a moving section. Reduce the adjustment if outlines or grain become distracting, then export the sequence and check the finished file.
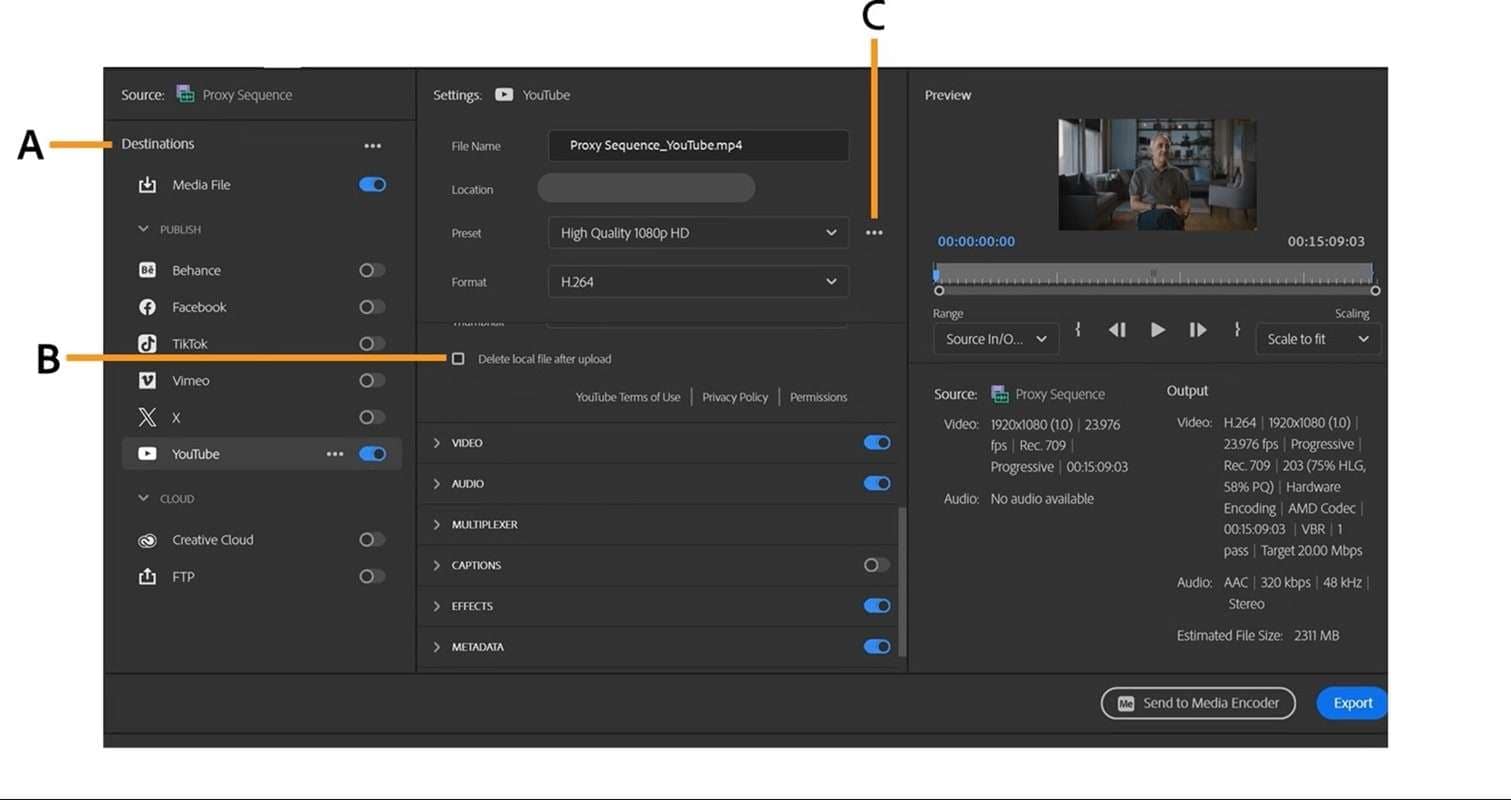
After checking your image in the Program Monitor, use the export workspace to save the sequence.
Adobe explains how to apply effects to a clip. For a broader introduction to editing, read our Premiere Pro beginner’s guide.
How to Adjust Amount, Radius, and Threshold
Change one control at a time. This makes it easier to identify which adjustment introduced an unwanted outline or amplified grain.
| Control | What it changes | How to evaluate |
|---|---|---|
| Amount | Strength of the edge contrast adjustment. | Increase gradually; reduce it when edges look outlined. |
| Radius | How far around the edge the adjustment extends. | Inspect thin text and hair; a broad outline is a reason to reduce it. |
| Threshold | The difference required before adjacent pixels are affected. | Check shadows and skin; a very low threshold can emphasize noise. |
Starting point: Apply a modest Amount and a small Radius, then tune Threshold while watching the source. A numerical preset cannot predict the amount of noise, resolution or defocus in your clip.
How to Check for Halos and Over-Sharpening
- Set the Program Monitor to 100%. Inspect high-contrast edges rather than judging only from a fitted preview.
- Compare the effect on and off. Look around titles, hair, building edges and faces for bright or dark outlines.
- Play a moving section. Watch for flicker and exaggerated texture, especially in shadows.
- Back off the adjustment. Reduce Amount or Radius if outlines distract from the scene; then check the exported result.
How to Enhance a Soft Video with UniConverter Video Enhancer
If sharpening brings out compression artifacts or the clip needs broader quality enhancement, try UniConverter’s desktop Video Enhancer on a copy. For mild softness, Premiere’s native effects may be enough; UniConverter is useful when you want to compare an AI-enhanced preview before returning the result to your edit. AI-generated detail is an interpretation, not proof of what the camera captured.
- Open Video Enhancer. On Windows, launch UniConverter 18 and choose Enhance & Clean Up → Video Enhancer from Home.
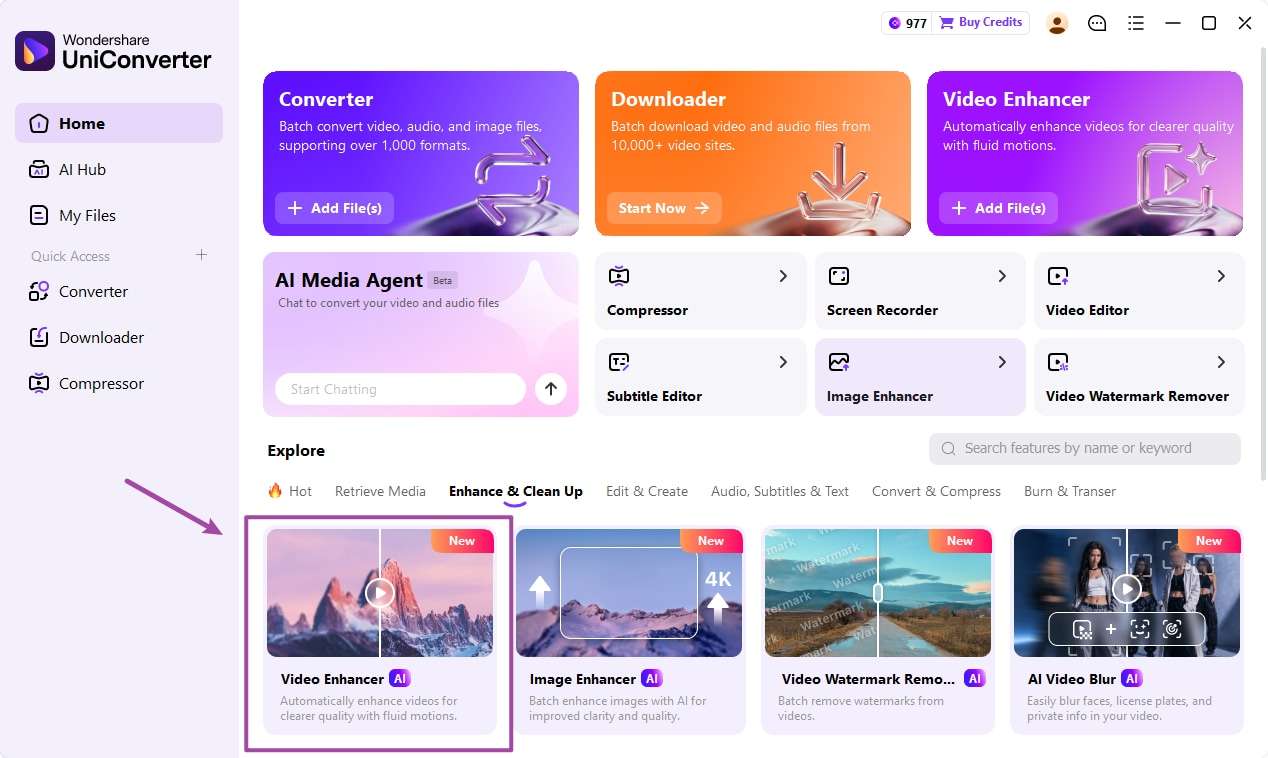
Open Video Enhancer from the UniConverter 18 Windows home screen. - Choose a model and add the clip. Under Enhancement & Upscaling, select Quality Enhancement → Ultra (Gen AI), then choose Add Video.
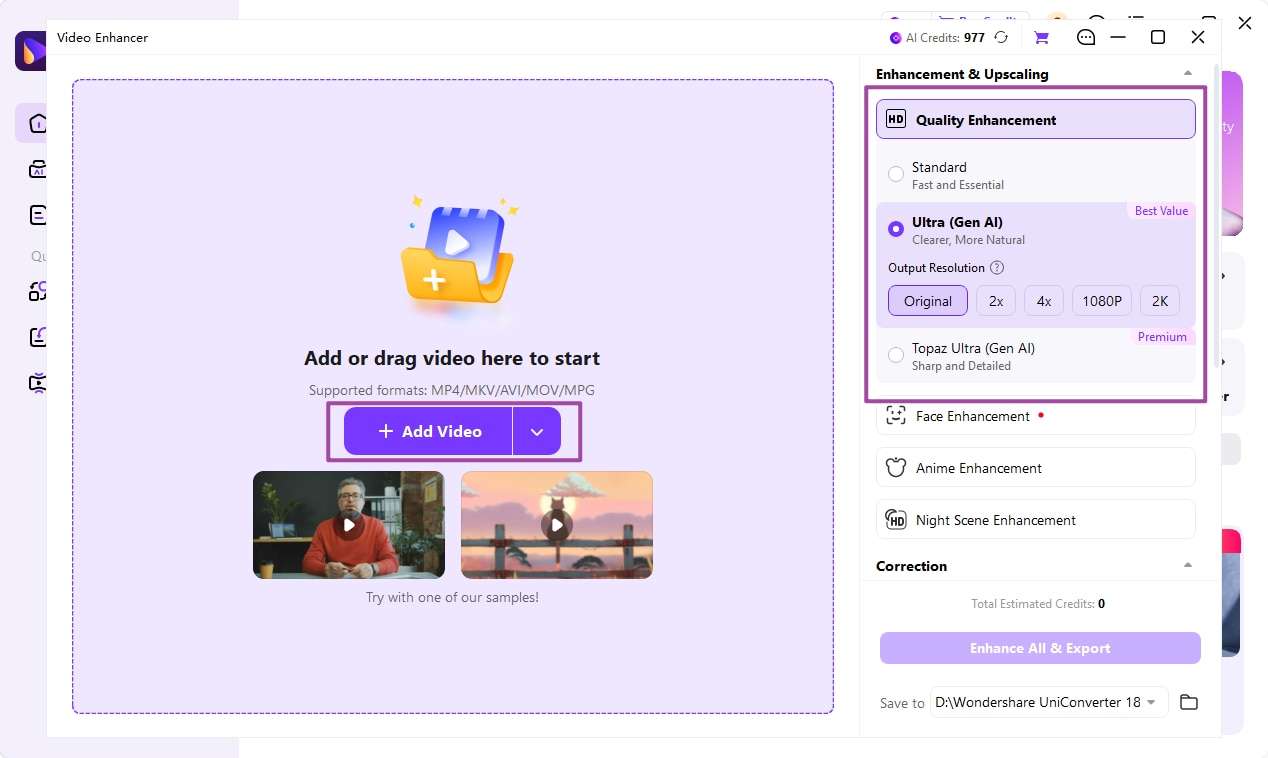
Select Quality Enhancement and Ultra (Gen AI), then add the source video. - Set the output and preview. Select an available Output Resolution; choose Original if you do not need a larger frame. Click Preview (3 s).
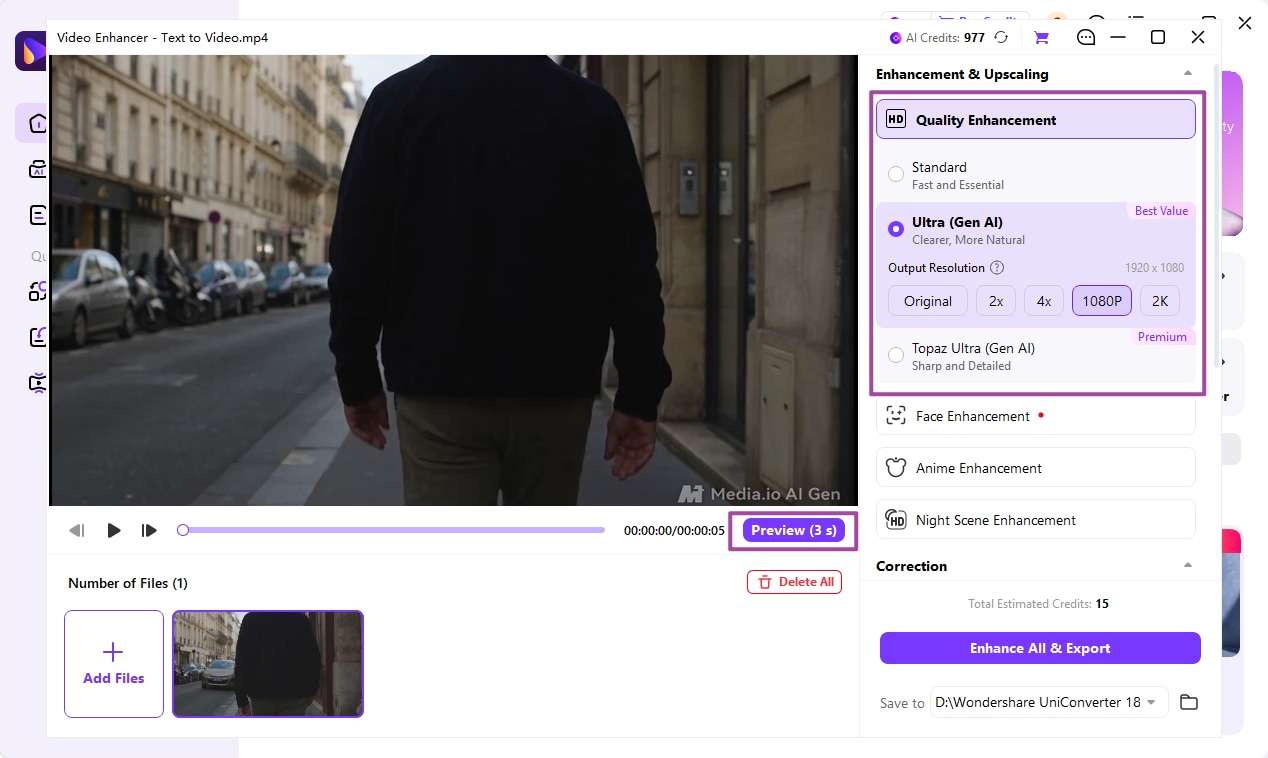
Choose an output resolution and generate a short preview. - Compare the result. View Original and Result. Check faces, text, noise and moving edges for invented or overly smooth detail.
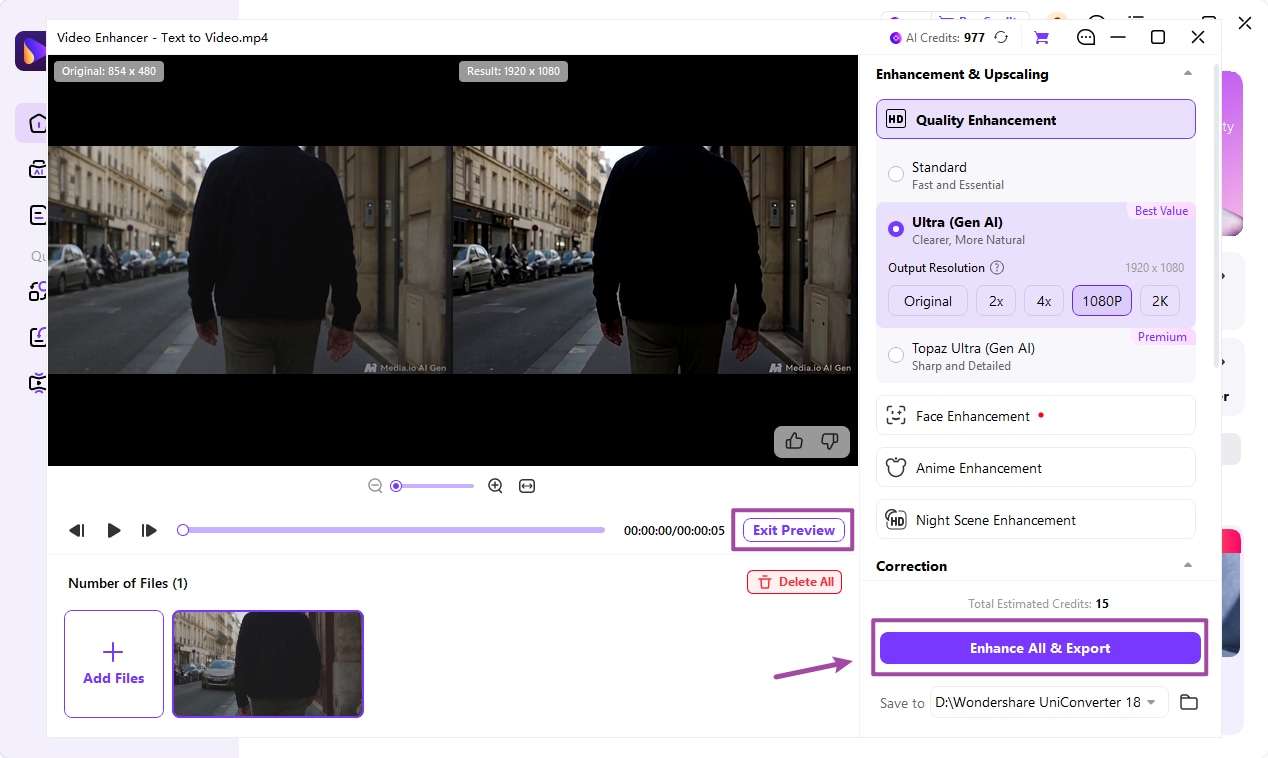
Compare the original and enhanced preview before exporting. - Export and inspect. Choose Save to, click Enhance All & Export, and confirm the task. Check playback and bring the output into Premiere if it meets your needs.
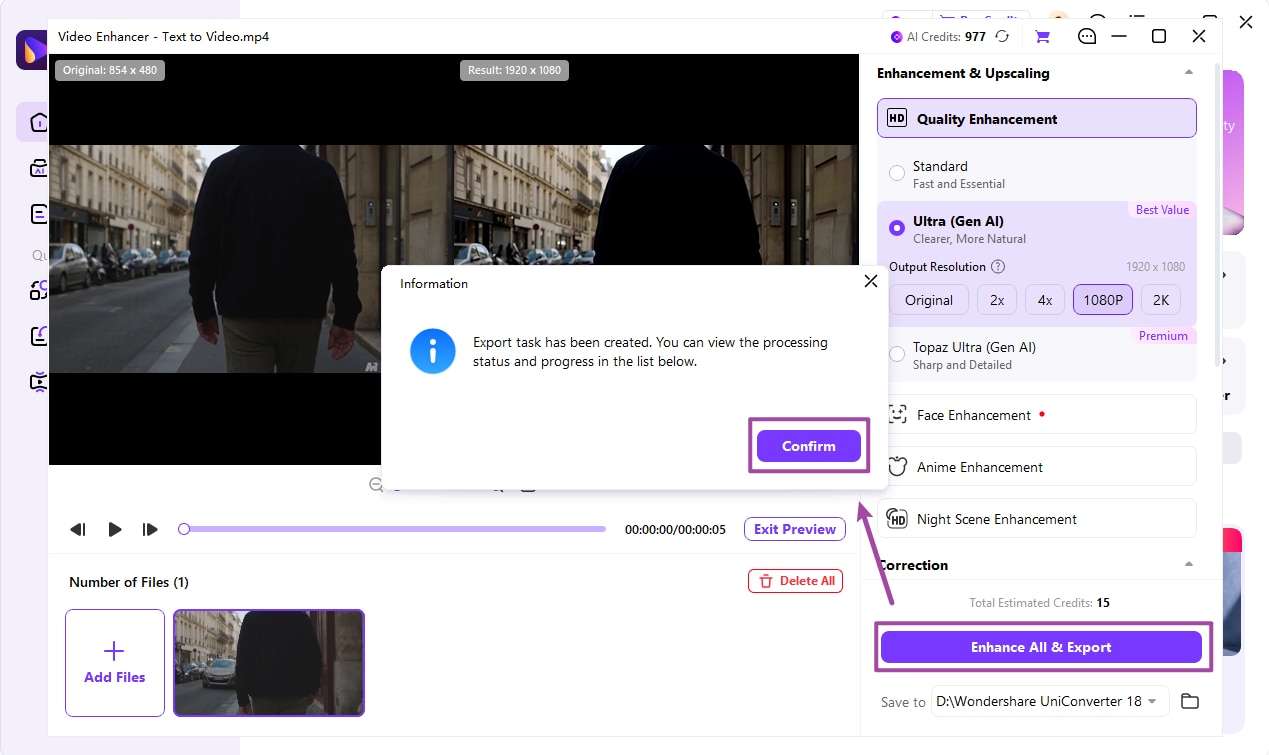
Confirm the export task and check the resulting file before continuing your edit.
The official Windows guide documents these settings and preview steps. Check the current preview and export terms in the application.
Visit this page on your computer to download UniConverter for Windows or Mac.
For other sources of softness, see how to unblur a video and how to make a video clearer.
Troubleshooting: Why Your Sharpened Video Still Looks Blurry
| Symptom | How to check | Immediate action |
|---|---|---|
| White or dark outlines | Compare a high-contrast edge at 100%. | Lower Amount or Radius and compare again. |
| Noise is stronger | Watch shadows with the effect on and off. | Raise Threshold cautiously or address the noise before sharpening. |
| Compression blocks stand out | Compare with the original or a higher-quality copy. | Use the cleaner source and reduce the effect. |
| Face remains out of focus | Inspect the original for actual facial detail. | Try a better take or an AI preview; reject invented detail that changes identity. |
When not to choose UniConverter: If Premiere’s subtle edge correction already meets the brief, stay in the editor. If accurate evidence or facial identity is essential and the source lacks the necessary detail, use an original or replacement recording rather than relying on generated reconstruction.
FAQ
-
What are the best tools for sharpening videos in Adobe Premiere Pro?
Unsharp Mask offers Amount, Radius, and Threshold controls. The Sharpen effect is a simpler choice, while Lumetri Color’s Sharpen control is useful during color grading. Choose by the control you need, then check edges for artifacts.
-
How do I sharpen a video in Premiere Pro?
Search for Unsharp Mask in the Effects panel, apply it to a selected timeline clip, and adjust its controls in Effect Controls. Compare the result at 100% and export after checking for halos and noise.
-
What do Amount, Radius, and Threshold do?
Amount controls sharpening strength; Radius controls how far the adjustment extends around an edge; Threshold determines the contrast difference needed for sharpening to apply.
-
What are the best Unsharp Mask settings?
There is no universal best setting. Start with a restrained effect, increase one control at a time, and inspect high-contrast edges and noise at 100%. Settings from other tutorials are examples, not guaranteed settings for your footage.
-
Can Premiere Pro fix an out-of-focus video?
Sharpening can increase edge contrast, but it cannot guarantee recovery of details that were not recorded. For severe defocus, try a preview of an enhancement tool or use a sharper original or replacement shot.
-
Why does my video have a white outline after sharpening?
A bright or dark halo along an edge is a sign of excessive edge contrast. Lower Amount or Radius, compare with the original, and review the moving result.
-
Can I sharpen a video without increasing its resolution?
Yes. Premiere’s sharpening effects change edge contrast without requiring you to change the sequence resolution. In UniConverter, the official Windows guide lists Original as an output-resolution choice for Ultra (Gen AI).