

To make a blurry video clearer, get the best original first, identify the cause, and apply the matching adjustment. A compressed copy, noisy night recording, low-resolution frame, and badly focused shot need different fixes. AI enhancement can improve appearance, but it cannot reliably recreate every detail that was never recorded.
Use the guide below to choose a phone, browser, or desktop workflow. Compare a short sample at the same display size, keep your original, and stop when added sharpening or generated textures make the result less believable.
Blurry videos can result from compression, improper focus, unstable shooting, or platform re-encoding during sharing and downloads. Identifying the cause is the first step to effective repair.
- On Windows or Mac, desktop Video Enhancer provides model selection and batch workflows; full export or advanced models can require a license or AI credits.
- On iPhone, start with the original and Photos adjustments. On Android, use restrained manual editing or a compatible browser tool for a short clip.
- For online work, distinguish a free preview from a finished download. Flixier supports AI enhancement and 4K upscaling, but full enhanced export requires a plan.
Choose the method by the cause of softness and your file/device constraints, not by a promise that every blurry video can be restored.
In this article
- Part 1. Why Videos Look Blurry
- Part 2. How to Unblur a Video on iPhone/Android/Windows/Mac
- Part 3. How to Fix Blurry Videos Sent to Me on iPhone
- Part 4. How to Make a Blurry Video Clear on Android
- Part 5. How to Unblur a Video Online Free
- Can You Really Unblur a Video?
- Bonus Tips to Prevent Videos from Blurring
- FAQs about Unblurring Videos
Part 1. Identifying the Reasons for Blurry Videos
Play the original at its native size and compare it with the blurry version. If only the sent or exported copy is soft, reacquire or re-export the source before using enhancement. If the original is soft too, use the symptom checks below:
| What you observe | First check | Next action |
|---|---|---|
| Original clear, received copy soft | Compare file dimensions and the original recording | Ask for the original before enhancing |
| Square blocks or low resolution | Compare at native size | Use a better source, then preview quality enhancement or upscaling |
| Dark grainy footage | Check exposure and noise separately | Adjust lighting modestly and compare a denoise/quality model |
| Soft focus or motion trails in the original | Inspect a paused frame and a moving scene | Test a short AI preview; re-record if essential detail remains missing |
- If you have recorded a video in low resolution, it will get blurred when displayed on larger screens.
- Videos sent through messaging apps are often compressed, significantly impacting video quality.
- When streaming videos online, your videos may appear blurry if the internet slows down.
- If you have recorded your device’s screen in low-resolution settings, they might be blurry.
- Sometimes, video edited via CapCut or such apps may appear blurred because export settings are not configured correctly.
- When your camera fails to focus while capturing, the results might be blurry and out-of-focus.
Part 2. How to Unblur a Video on iPhone/Android/Windows/Mac (for Videos Sent or Downloaded)
For Windows or Mac, use UniConverter desktop Video Enhancer after obtaining the best source file. iPhone users can request the original by AirDrop or transfer a saved original to the computer; Android users can transfer their original recording with their usual file-sharing method. You do not need to log into another person’s account.
Choose enhancement according to the issue, then judge a sample rather than expecting automatic full restoration. Quality enhancement targets perceived clarity; Frame Interpolation targets motion continuity. Missing facial or text detail can be replaced with plausible generated detail, which is not proof of the original scene.

Best Video Blur Remover
How to Enhance an Original Video on Windows or Mac
Step 1. Obtain the Best Original File
Save the camera original on your computer. For nearby Apple devices, the sender can use Photos → Share → Options and AirDrop. Current avoids format conversion; All Photos Data includes the original plus editing history and metadata when sharing through AirDrop. Keep your own Apple account signed in.
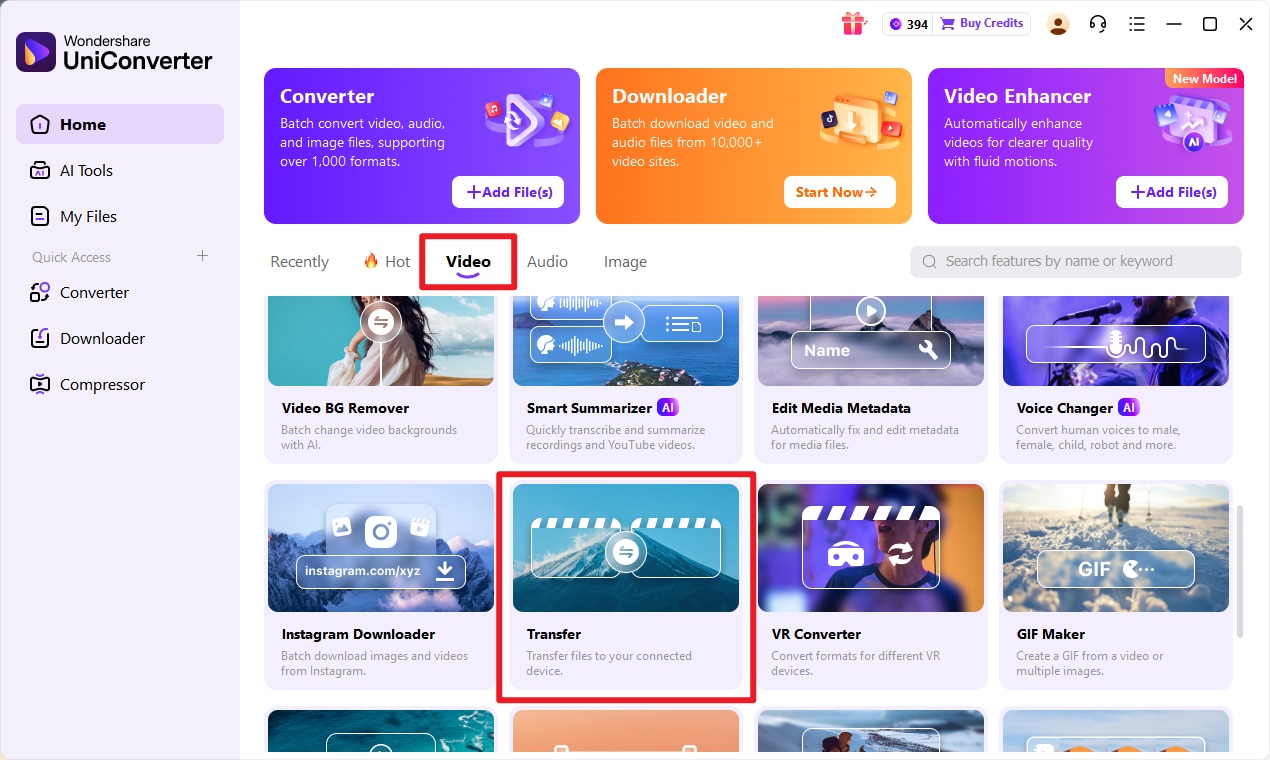
Step 2. Open Video Enhancer
From UniConverter Home, choose Enhance & Clean Up → Video Enhancer on Windows or Mac.
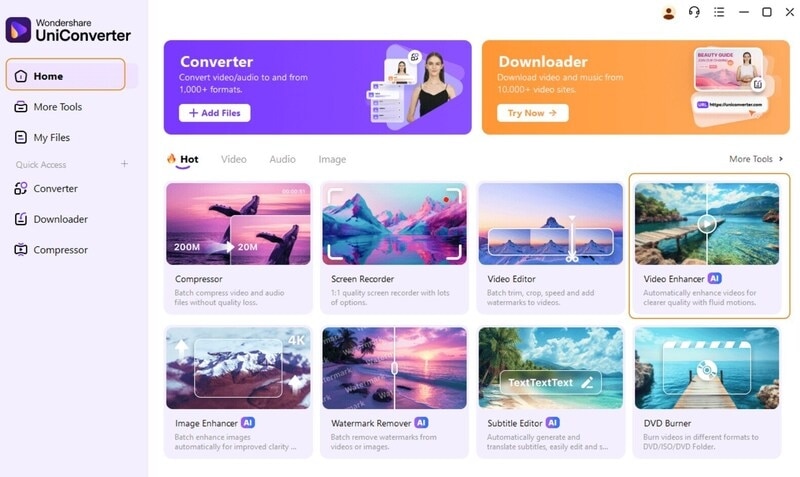
Step 3. Import and Choose Quality Enhancement
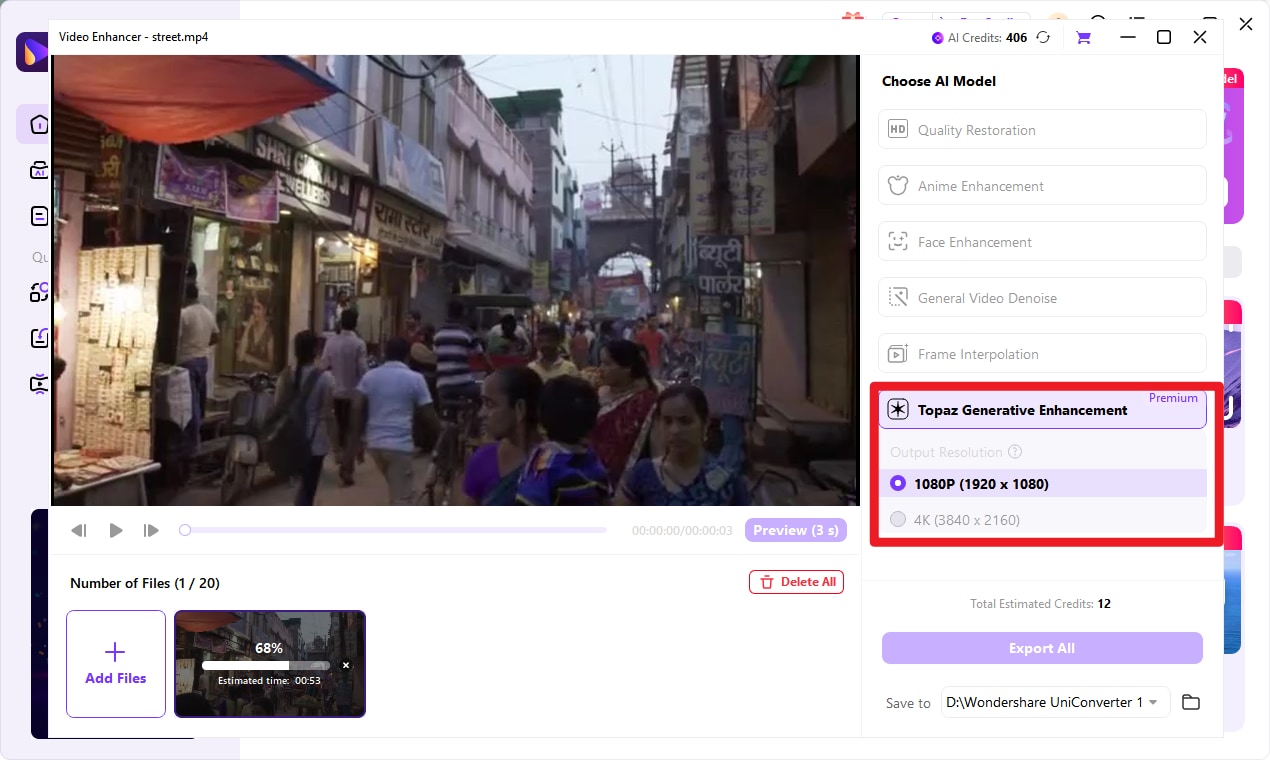
Use Add Video on Windows or Add Files on Mac. Choose Quality Enhancement → Ultra (Gen AI) and start with Original output to compare clarity without enlarging the frame. Select a supported resolution only when you also need a larger output.
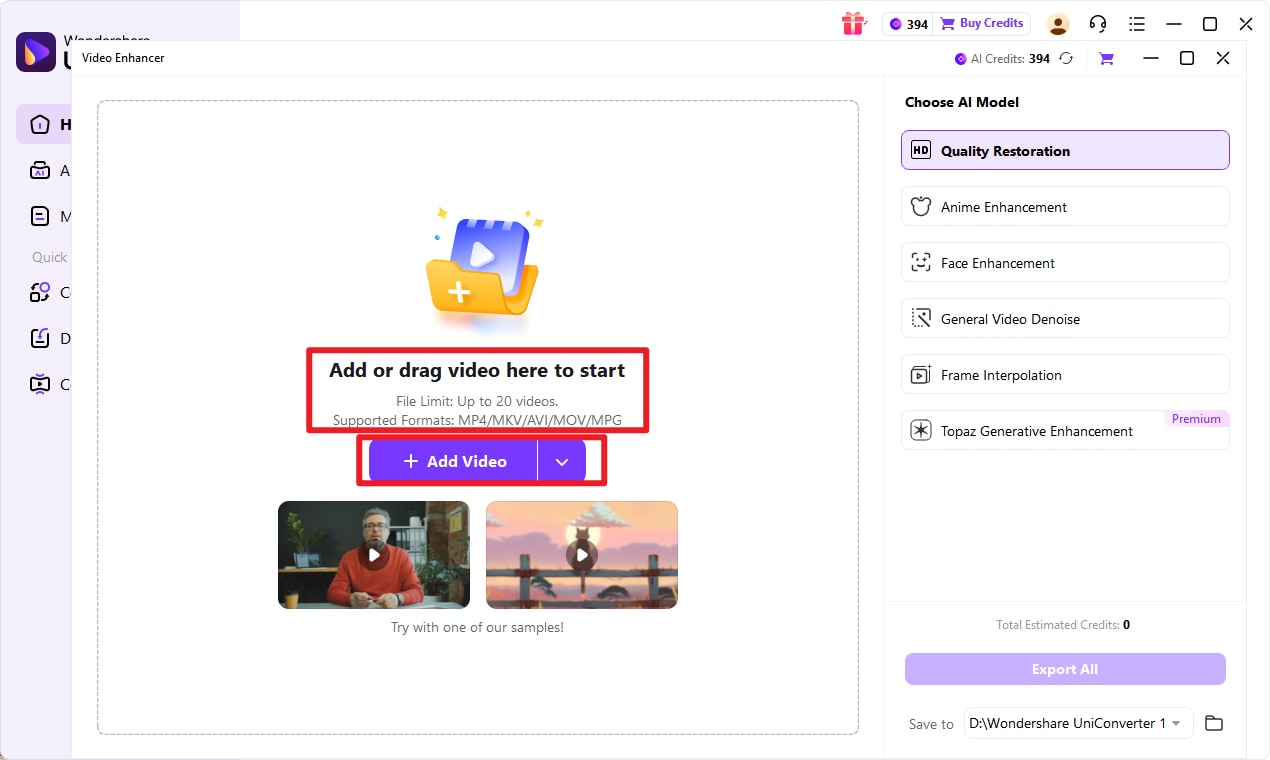
Step 4. Preview, Compare, and Export
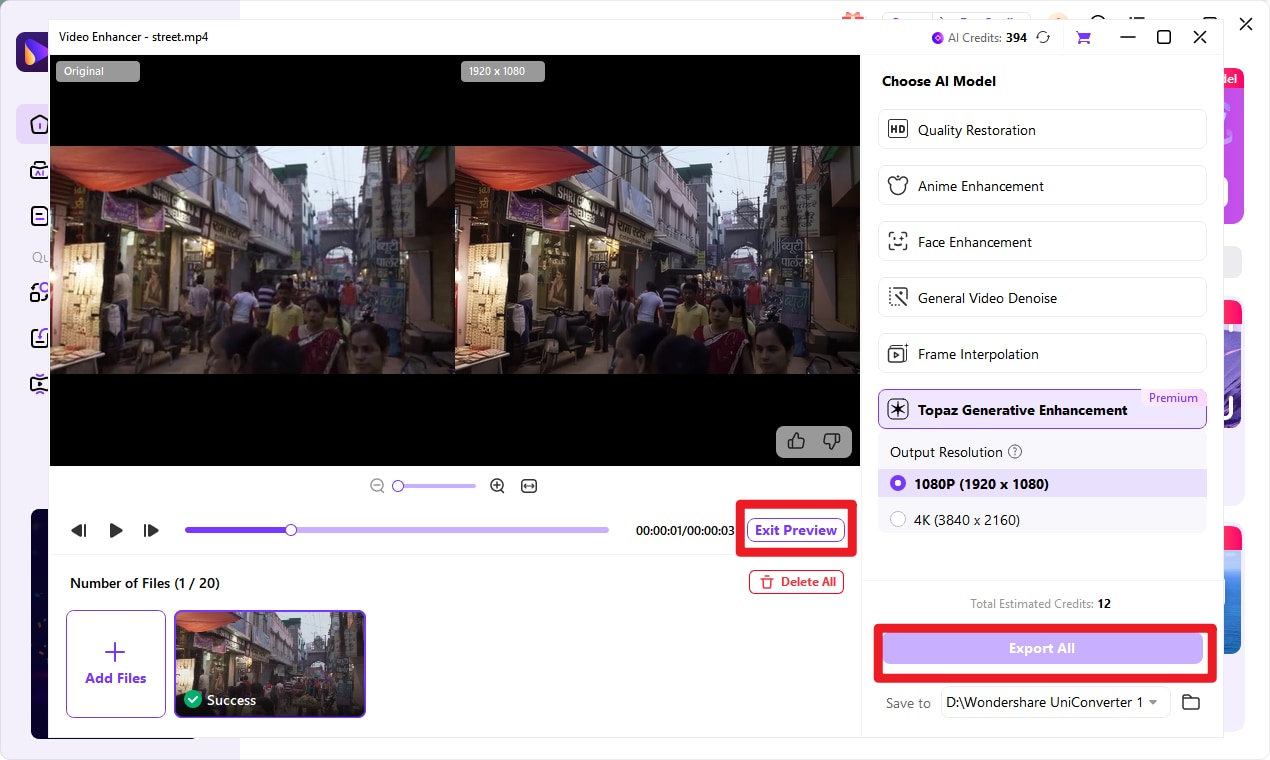
Click Preview (3 s) and compare Original and Result. Check faces, text, compression blocks, and motion for artifacts. If acceptable, set Save to, check the model/license and estimated AI credits, then use Enhance All & Export. Frame interpolation does not erase motion trails inside an original frame.
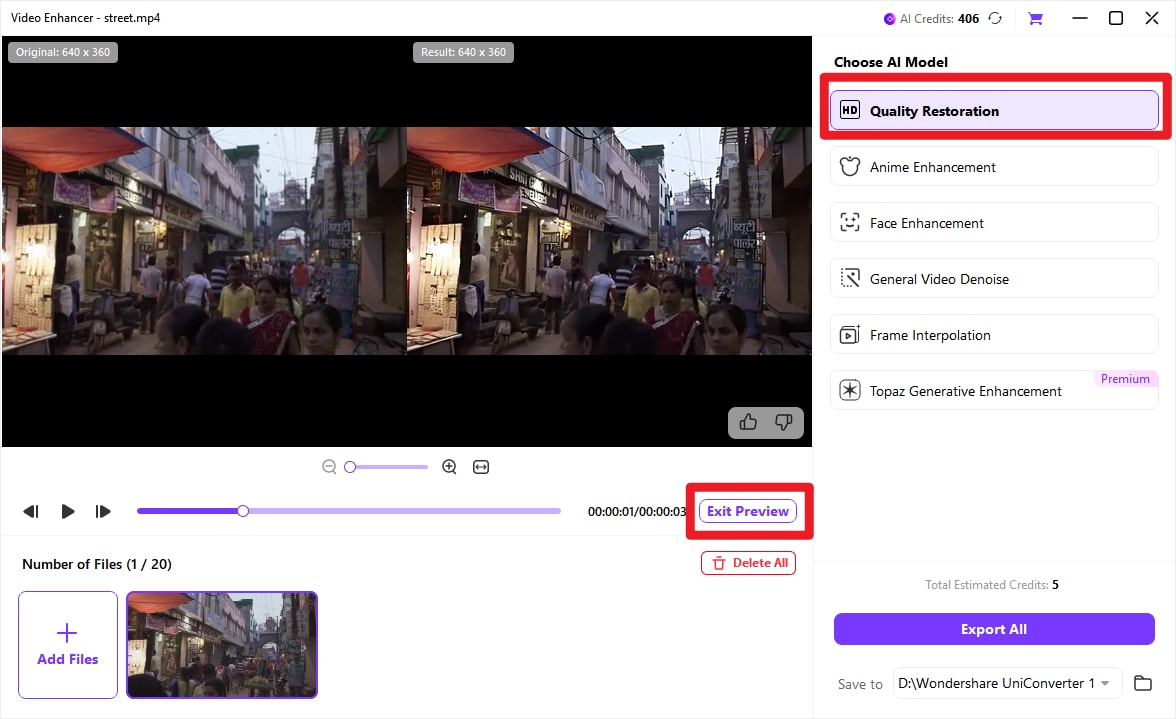
Model choice: Face, Anime, Night Scene, and other quality options address different footage. Topaz Ultra (Gen AI) is another desktop choice; generated detail still needs comparison with the source. Use a gentler result if faces or lettering change.
 *Note:
For a video already on Windows or Mac, import the original directly. For phone clips, transfer the original first. This desktop workflow is separate from the limited online Quality Restoration tool.
Part 3. How to Fix Blurry Videos Sent to Me iPhone
If a received iPhone video is blurry, compare it with the sender’s original. Request that original first; phone adjustments can improve contrast or perceived sharpness, but cannot restore all detail removed from a compressed copy.
1. How to Unblur a Video on iPhone With VN App
VN is an optional timeline editor for clips that need manual adjustment. Use a light correction rather than a fixed maximum noise-reduction setting. Raising output resolution or FPS does not recreate the missing detail of a blurry source.
Step 1. Create a project in VN and import your best source video. Keep a copy of the original before editing.

Step 2. Use the available adjustment controls to compare a modest correction with the original. If a noise-reduction or sharpness control is present in your version, increase it gradually; stop if skin becomes waxy, text breaks up, or halos appear.

Step 3. Review the preview in motion and export a short sample at appropriate source-based dimensions and frame rate. Do not enable HDR or higher FPS solely to repair blur. Check the exported colors, audio, and detail before a full export.

2. Improve Perceived Clarity in iPhone Photos
Open the original in Photos and use Edit → Adjust. Modest exposure, contrast, and detail changes can make a dull clip easier to see. These adjustments improve appearance; they do not guarantee restoration of severe focus or motion blur.
Method 1: Using Noise Reduction and Sharpness Features
Step 1. Open the video in Photos, tap Edit, then Adjust. Work from the original when available.

Step 2. Compare a small exposure or contrast adjustment. Use Sharpness or Noise Reduction if available for the clip in your version, checking skin and edges rather than pushing every control to maximum.

Step 3. Tap the adjustment button to compare with the original, review the full clip, then tap Done. Use Cancel or Discard Changes if it looks worse. Keep the original; an edited shared export is not automatically lossless.

Method 2: Check the Original Download and Playback
Play the full downloaded original and compare the same paused frame with the received copy. Muting audio, scrubbing, or changing screen brightness does not repair the encoded image. If the original is clear, share it again with appropriate original-file options instead of sharpening the low-quality copy.

3. Ask the Sender for the Original
For nearby Apple devices, ask the sender to open Photos, select the video, and use Share → Options. Current prevents format conversion, and All Photos Data includes the original plus edit history and metadata through AirDrop. Accept the transfer using your own device and account.
For a remote sender, request an original-file download using their normal file-sharing service. Download it to your own account or device and compare it before editing. You do not need to sign out of your Apple account or obtain the sender’s password.

4. Separate Storage Problems from Image Quality
Low storage can obstruct downloads or exporting, but freeing space does not reverse blur already encoded in a video. Confirm that you have the complete original file before treating the issue as image damage.
Step 1. If a transfer or export reports insufficient space, make room for that operation and retry saving the original. Avoid deleting the only source copy.

Step 2. Play the saved file and compare its dimensions and image with the source. Clearing Safari history is not a video-enhancement method; use an original-file transfer or a suitable image adjustment instead.

Part 4. How to Make a Blurry Video Clear on Android
For Android clips, start with the camera original. A manual editor can improve exposure and edge contrast; a compatible online tool can offer an AI preview. Neither makes a low-quality sent copy equivalent to its missing original.
1. InShot
InShot is available on Android as well as iPhone. Use it for modest image adjustments and export control, rather than expecting a sharpness slider to reconstruct missing source detail.
Step 1. Import the original into InShot and open the available Filter/Adjust controls for your version.

Step 2. Increase sharpness or contrast gradually where those controls are available. Compare at the same display size and reduce the adjustment if noise or halos become distracting.

Step 3. Save a short sample using suitable resolution and frame rate, then inspect it. App features and watermark removal can involve paid options; check the finished-export conditions before a long job.

2. Videoleap
Videoleap is another editing option. A contrast change can make a flat image easier to see but does not reliably remove focus blur. Use controls available in your installed version and check any export or subscription conditions.
Step 1. Create a project and import your original clip. Keep the source file before making adjustments.

Step 2. Compare a restrained brightness or contrast adjustment. Reject settings that clip highlights or exaggerate noise.

Step 3. Export a sample with appropriate dimensions and frame rate. Increasing FPS does not remove blur inside the existing frames; review the complete result before paying for or exporting a longer clip.

Part 5. Fix Blurry Videos Online Free
Online tools differ: Flixier offers actual AI enhancement, while brightness and contrast editors address appearance. UniConverter online offers limited free Quality Restoration for one MP4 up to 100 MB. Check file support and full-download conditions; “free preview” does not mean unrestricted free export.
1. Flixier
Flixier’s AI video enhancer supports upscaling to 4K and four presets: High Quality, Pro Detail, Natural Look, and Fast Real-Time. Upload and preview are free; full enhanced export requires a Flixier plan.
Step 1. Open Flixier’s video enhancer and upload your original video. Choose an enhancement preset that fits the clip rather than starting by removing a Blur effect.

Step 2. Compare the enhanced preview, especially halos and fine textures. Natural Look favors a restrained result; Pro Detail emphasizes edges. Export the full enhanced video under the required plan. Setting an editor’s Blur slider to zero only removes that applied effect; it cannot undo blur baked into the uploaded file.

2. Kapwing
Kapwing’s adjustment tools can change brightness, contrast, saturation, or an applied blur effect. They are useful for mild appearance corrections, but resetting Blur does not recover detail lost before upload. Check the current plan’s resolution, duration, and watermark conditions.
Step 1. To begin the process, select the “Click To Upload” tile from the homepage of the tool and add your desired video or paste its online link.

Step 2. Adjust contrast and saturation modestly and compare with the original. If your project has an added blur effect, remove that effect; do not treat its removal as reversal of camera or compression blur.

Step 3. Use the project’s export controls, review the current free-plan restrictions, and inspect the downloaded sample before exporting more footage.

3. Clideo
Clideo Adjust Video provides brightness, contrast, and saturation controls. This can make a dull image more visible, but it is not a guarantee of AI deblurring or pixel recovery.
Step 1. Add the original to Clideo Adjust Video using its file picker.

Step 2. Change brightness, contrast, and saturation gradually, preview the image, then export using the available plan. Check watermark and download conditions. Avoid clipping highlights or expecting contrast alone to restore focus.

Best Way to Fix a Blurry Video Based on Your Situation
| Your problem | Best first action | Works on | Expected result | Free? |
|---|---|---|---|---|
| Received copy looks blurry | Ask for the original; compare before enhancing | iPhone / Android / computer | Original can avoid the copy’s losses | Transfer conditions vary |
| Clear original, blurry export | Re-export from the source with suitable dimensions and encoding | Phone / computer | Avoid further export loss; not recovery from the copy | Editor conditions vary |
| Old or low-resolution footage | Preview quality enhancement and an appropriate output size | Windows / Mac | Depends on remaining source detail | Trial / paid models |
| Quick browser enhancement | Compare an AI preview; check full-export conditions | Browser | Quality improvement varies by clip | Limits or plan apply |
| Edit directly on iPhone | Use original plus Photos adjustments first | iPhone | Appearance correction; not complete restoration | Photos included |
| Edit directly on Android | Use a restrained manual adjustment or compatible online preview | Android | Appearance correction; inspect halos and noise | App/service limits vary |
| Severe focus or motion blur | Test a short preview; re-record essential unreadable detail | Any source; desktop testing | Lost details may remain unrecoverable | No guaranteed repair |
Bonus Tips to Prevent Videos from Blurring
- Export from the best source: use dimensions and encoding settings appropriate for your destination, avoid repeated re-encoding, and inspect the saved sample. A higher bitrate does not recover detail already lost in the source.
- Keep a sharp source: focus on the subject, use adequate light, and keep the camera stable. More output pixels cannot compensate for severe blur captured during recording.
- Match frame rate to the action: a higher frame rate can change motion sampling, but shutter/exposure time and lighting also affect motion blur. Selecting 60 fps or using interpolation is not a universal cure for blurry frames.
- Check framing before the main take: make a short test recording and inspect focus and motion at your planned zoom level. If important detail is soft, adjust framing, light, or camera stability and record another sample.
Can You Really Unblur a Video?
If you are wondering whether it is truly possible to unblur a video, the short answer is: yes, but only to a certain extent. The final result depends on why the video looks blurry in the first place. In many cases, modern AI tools and manual adjustments can improve video sharpness, clarity, and overall visual quality. However, not every blurry video can be restored perfectly.
For mild compression, low contrast, noise, or soft details, a better original, restrained adjustment, or suitable quality-enhancement model can improve appearance. Upscaling addresses dimensions and frame interpolation addresses motion continuity; neither guarantees recovery of missing detail.
That said, some types of blur are much harder to fix. If a video is severely out of focus, heavily motion-blurred, or recorded in very low resolution, the missing details may not be recoverable. AI can enhance edges and improve perceived sharpness, but it cannot always reconstruct details that were never captured by the camera in the first place.
To help you understand what to expect, here is a simple breakdown of what can and cannot usually be improved:
| Type of blur | Can it improve? | What to check |
|---|---|---|
| Mild compression softness | Sometimes | Prefer the original; compare enhancement for remaining blocks |
| Low contrast or washed-out video | Appearance can improve | Adjust exposure/contrast; avoid clipped highlights |
| Noise or grain in dark footage | Appearance can improve | Compare denoising for texture loss |
| Low-resolution old video | Limited by source detail | Check the transfer, dimensions, and generated textures |
| Severe out-of-focus blur | Limited | Reject invented detail; re-record essential content |
| Heavy motion blur | Limited | Interpolation does not erase blur within source frames |
In other words, if your goal is to fix a blurry video caused by compression, poor export quality, or minor softness, there is a good chance you can make it look better. But if the blur comes from extreme camera shake or incorrect focus during recording, enhancement tools may only improve the video partially.
Tip: If the original file is available, always try to get the highest-quality version before editing. Starting with the original video gives you a much better chance of restoring clarity successfully.
Conclusion
Start with the best original and match the correction to the cause. Photos or a manual editor can improve appearance, while a desktop or hosted AI enhancer offers a model preview for soft detail. Inspect the saved result, check export conditions, and keep the original. Re-record essential detail when enhancement cannot make it reliably readable.
FAQs about Unblurring Videos
Will unblurring always restore the original quality?
No. Enhancement can improve perceived sharpness or reduce noise, but it cannot reliably recover details absent from the source. Severe defocus, motion blur, and repeated compression limit results. Preview faces, lettering, and moving edges and keep the original.
How do I fix a blurry video someone sent to my iPhone?
Ask for the original first. For nearby Apple devices, the sender can use Photos → Share → Options and AirDrop; Current avoids format conversion, and All Photos Data includes the original plus edit history and metadata through AirDrop. Keep your own Apple account. Compare the saved original, then use Photos adjustments or desktop enhancement if needed.
Can I fix a blurry video online for free on Android?
Try a supported short MP4 in UniConverter’s online Quality Restoration tool; the stated file limit is one MP4 up to 100 MB and free use is limited. Check your browser, the current allowance, and finished-download conditions. Flixier offers free AI previews but requires a plan for full enhanced export. Use a transferred original on desktop if phone processing is unsuitable.
Can more sharpness or a higher FPS make blur worse?
Yes. Strong sharpening can emphasize grain, blocks, and halos, while interpolation can introduce motion artifacts. Higher FPS does not erase blur within the source frames. Compare at the same size, reduce the adjustment, and choose the least aggressive acceptable result.
What prevents a video from becoming blurry again?
Keep the original, avoid repeated re-encoding, and choose export settings appropriate for the source and destination. Check the downloaded or uploaded result as well as the editor preview. Focus, adequate light, and stable capture matter before recording; a resolution or frame-rate label alone does not guarantee clarity.