

If you have ever played an old DVD, a camcorder recording, or broadcast footage on a modern screen, you might have noticed strange horizontal lines tearing across the image. These visual glitches, often described as combing artifacts or jagged edges, are a telltale sign of interlaced video struggling to display on today's progressive-scan monitors.
The fix is to deinterlace videos. It is the process of converting interlaced footage into smooth, progressive video that looks sharp on LCD, OLED, and LED displays, as well as smartphones and streaming platforms.
In this guide, you will learn exactly what causes interlacing issues, the difference between interlaced and progressive video, and five proven methods to deinterlace your footage.
- Interlacing Issue: Interlaced video splits frames into fields, causing jagged edges and motion artifacts on modern screens.
- Why It Matters: Modern devices use progressive scanning, so interlaced footage often appears distorted or low-quality.
- Solution Methods: Tools like HandBrake, VLC, Premiere Pro, and FFmpeg can deinterlace video for smoother playback.
- Efficient Solution: Wondershare UniConverter enhances video quality with AI tools while simplifying conversion and editing workflows.
In this article
Part 1: What Is Video Interlacing and Why Does It Cause Problems?
Video interlacing is a technique used in early analog television to display motion smoothly while using less bandwidth. Instead of showing a full frame at once, interlaced video splits each frame into two fields: one with the odd-numbered lines and the other with the even-numbered lines. These fields are shown rapidly one after the other, creating the illusion of a complete image.
The video interlacing method worked well for older CRT televisions because their screens blended the two fields together. However, modern displays like LCD, OLED, and smartphone screens use progressive scanning, meaning they show every line of a frame at the same time.
Why Interlaced Video Causes Problems:
Comb Artifacts: Fast-moving objects can show jagged or comb-like edges.
Motion Mismatch: The two fields are captured at slightly different moments, which can distort movement.
Lower Visual Clarity: Interlaced footage can appear softer on modern screens.
Compatibility Issues: Many editing tools and streaming platforms prefer progressive video formats.
Common interlaced video formats include 1080i and 480i, often found in older broadcasts, DVDs, and camcorder footage.
Part 2: Which Deinterlacing Method Should You Choose?
The right tool depends on your technical comfort level, budget, and what you plan to do with the footage after deinterlacing. Here is a quick comparison to help you decide.
| Tool | Price | Skill Level | Changes Apply to Exports File | Speed | Quality |
| HandBrake | Free | Beginner | Yes | Fast | Good |
| VLC | Free | Beginner | No | Real-time | Moderate |
| Premiere Pro | PaidMonthly: $34.49/monthAnnual, billed monthly: $22.99/monthAnnual prepaid: $263.88/year | Intermediate | Yes | Moderate | High |
| DaVinci Resolve | Free Paid: $295.00 | Intermediate | Yes | Moderate | High |
| FFmpeg | Free | Advanced | Yes | Very Fast | High |
Part 3: 5 Methods to Deinterlace Video Like a Professional
You can deinterlace video using different tools depending on whether you want a quick playback fix or a permanent conversion. Here are five effective methods both beginners and professionals can use:
How to Deinterlace Video with HandBrake (Free, Open Source)
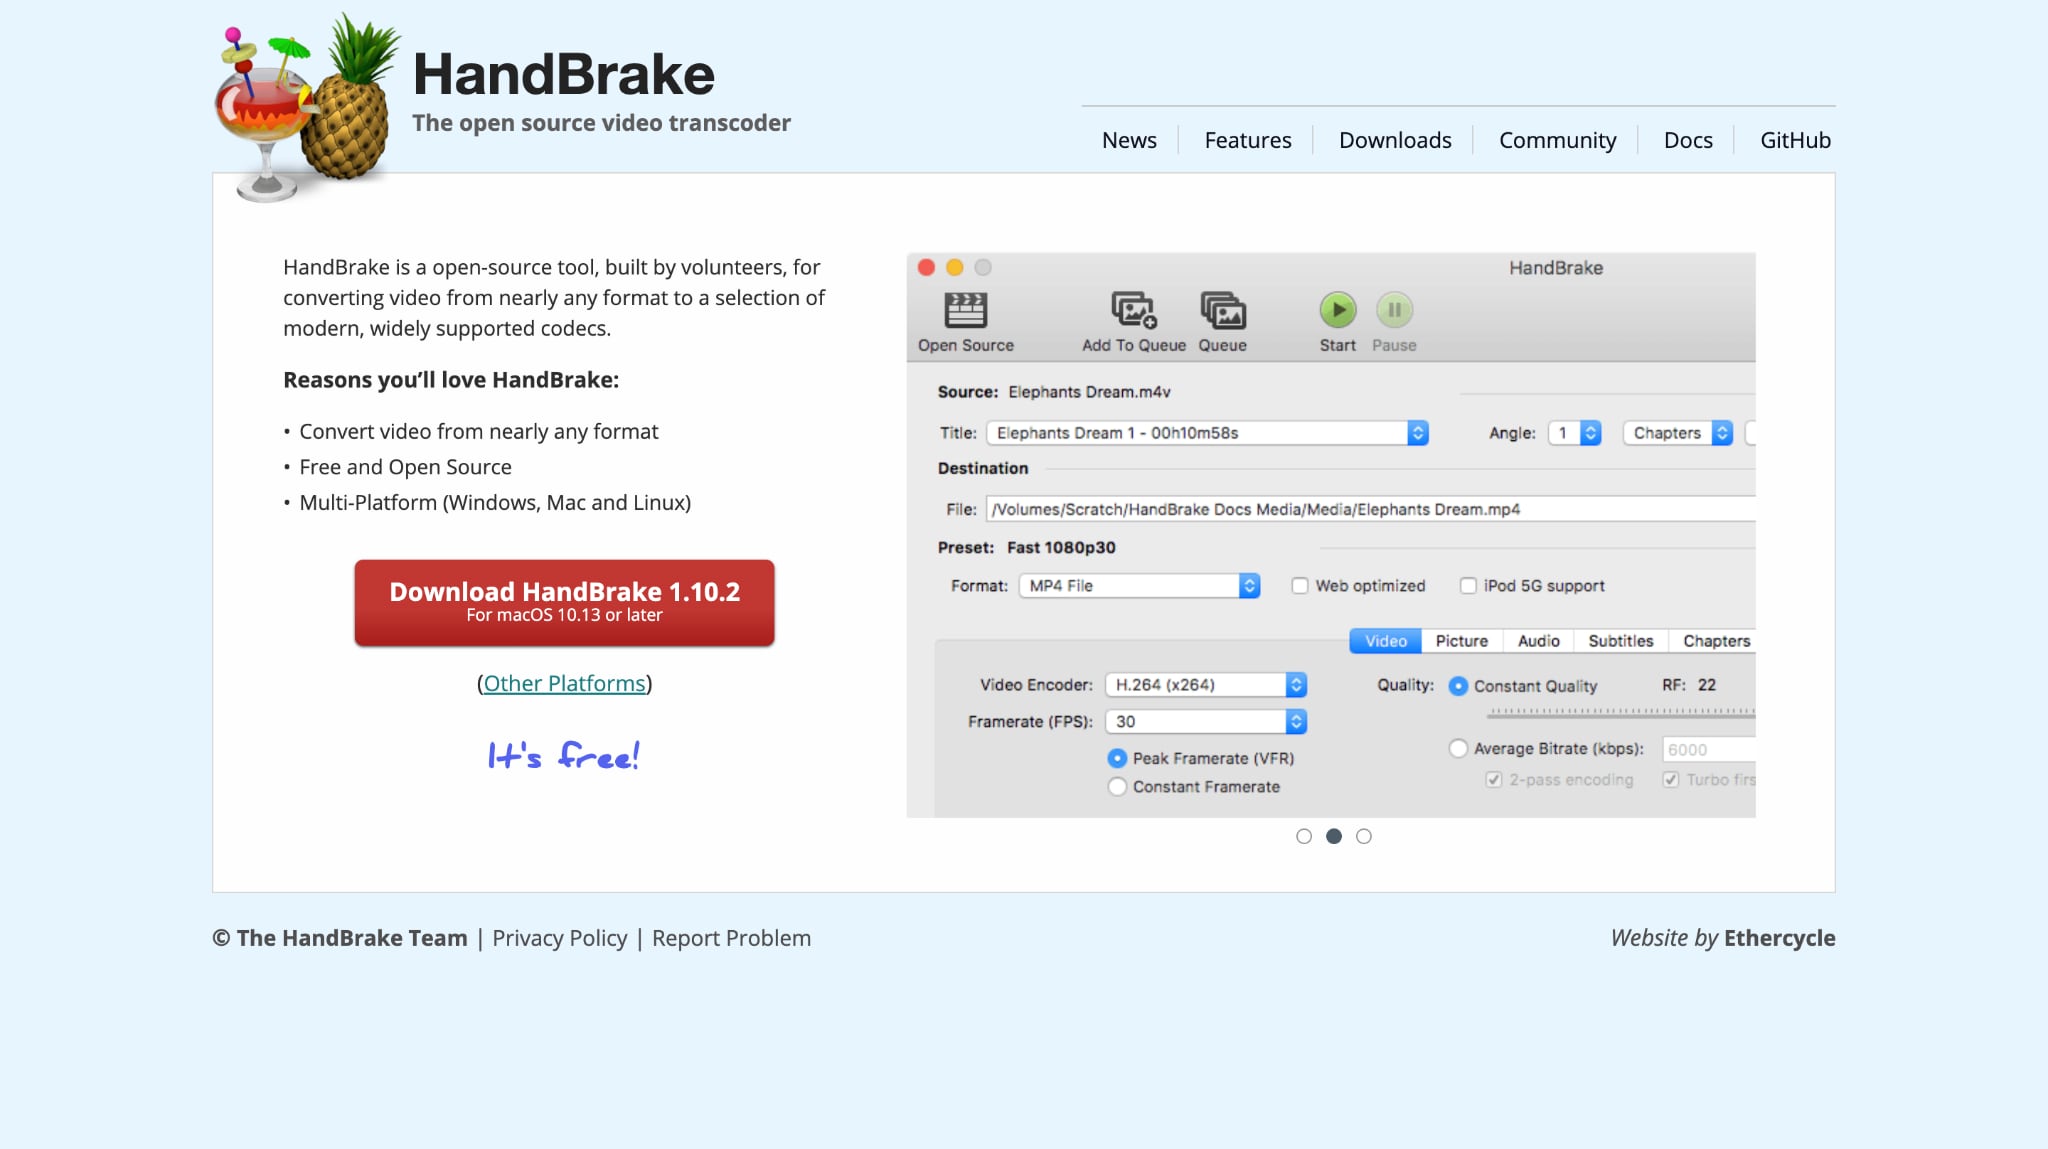
HandBrake is one of the most widely used free video transcoders available for Windows, macOS, and Linux. It supports multiple deinterlacing filters and is ideal for those who want a permanent, exported fix for their interlaced footage without spending a dime. Its intuitive interface makes it easy for beginners to apply professional-quality filters, and it also handles batch conversions efficiently for larger video libraries.
How to use Deinterlace Software
Follow these simple steps to deinterlace the video with HandBrake:
Step 1: Download and install HandBrake. Click "Open Source" or drag your interlaced video file into the HandBrake window.
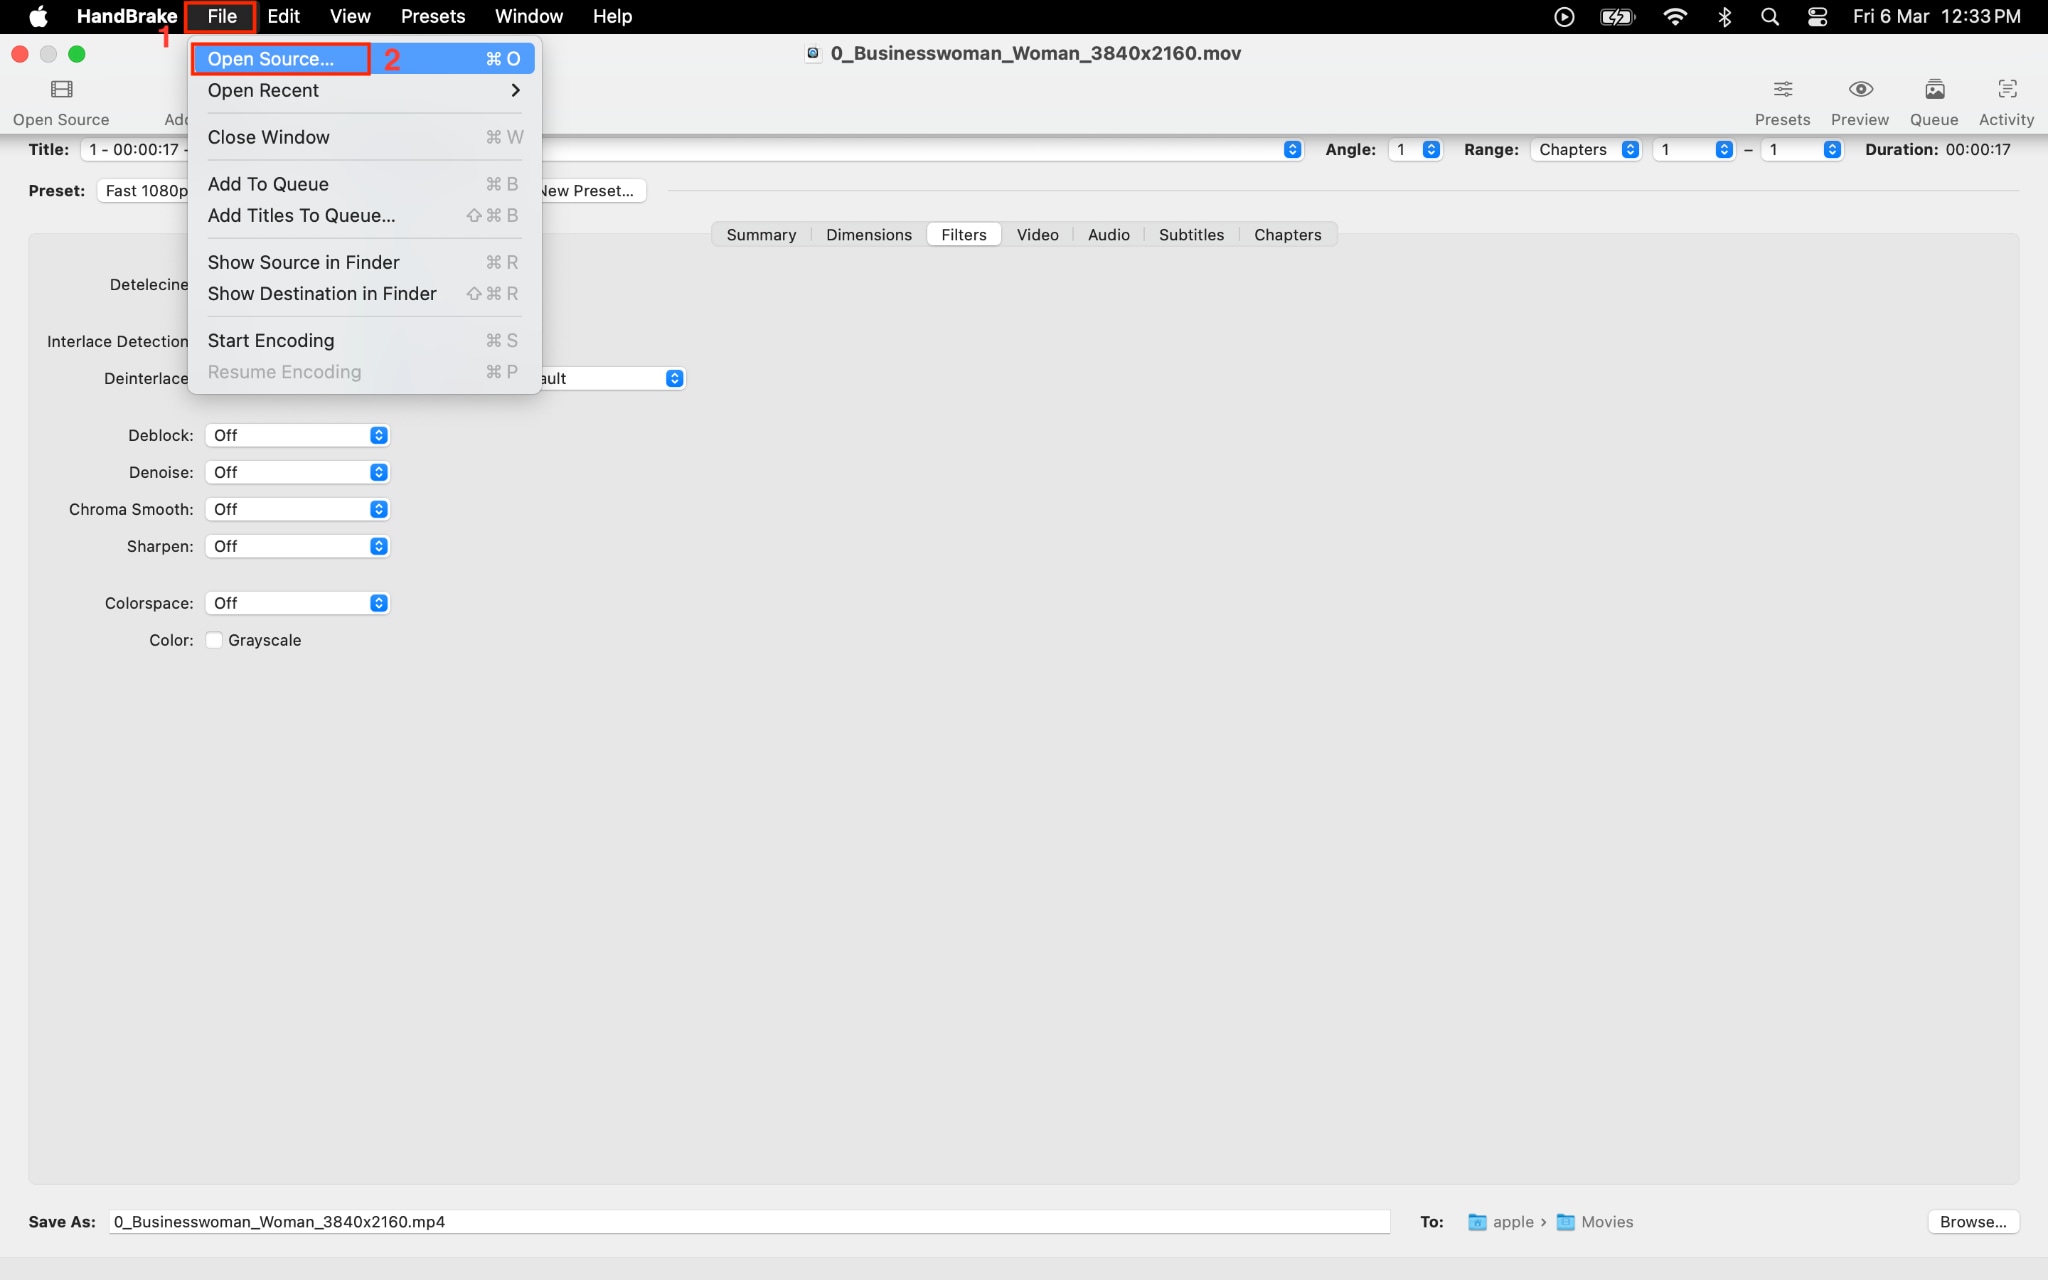
Step 3: Navigate to the "Filters" tab in the output settings panel.
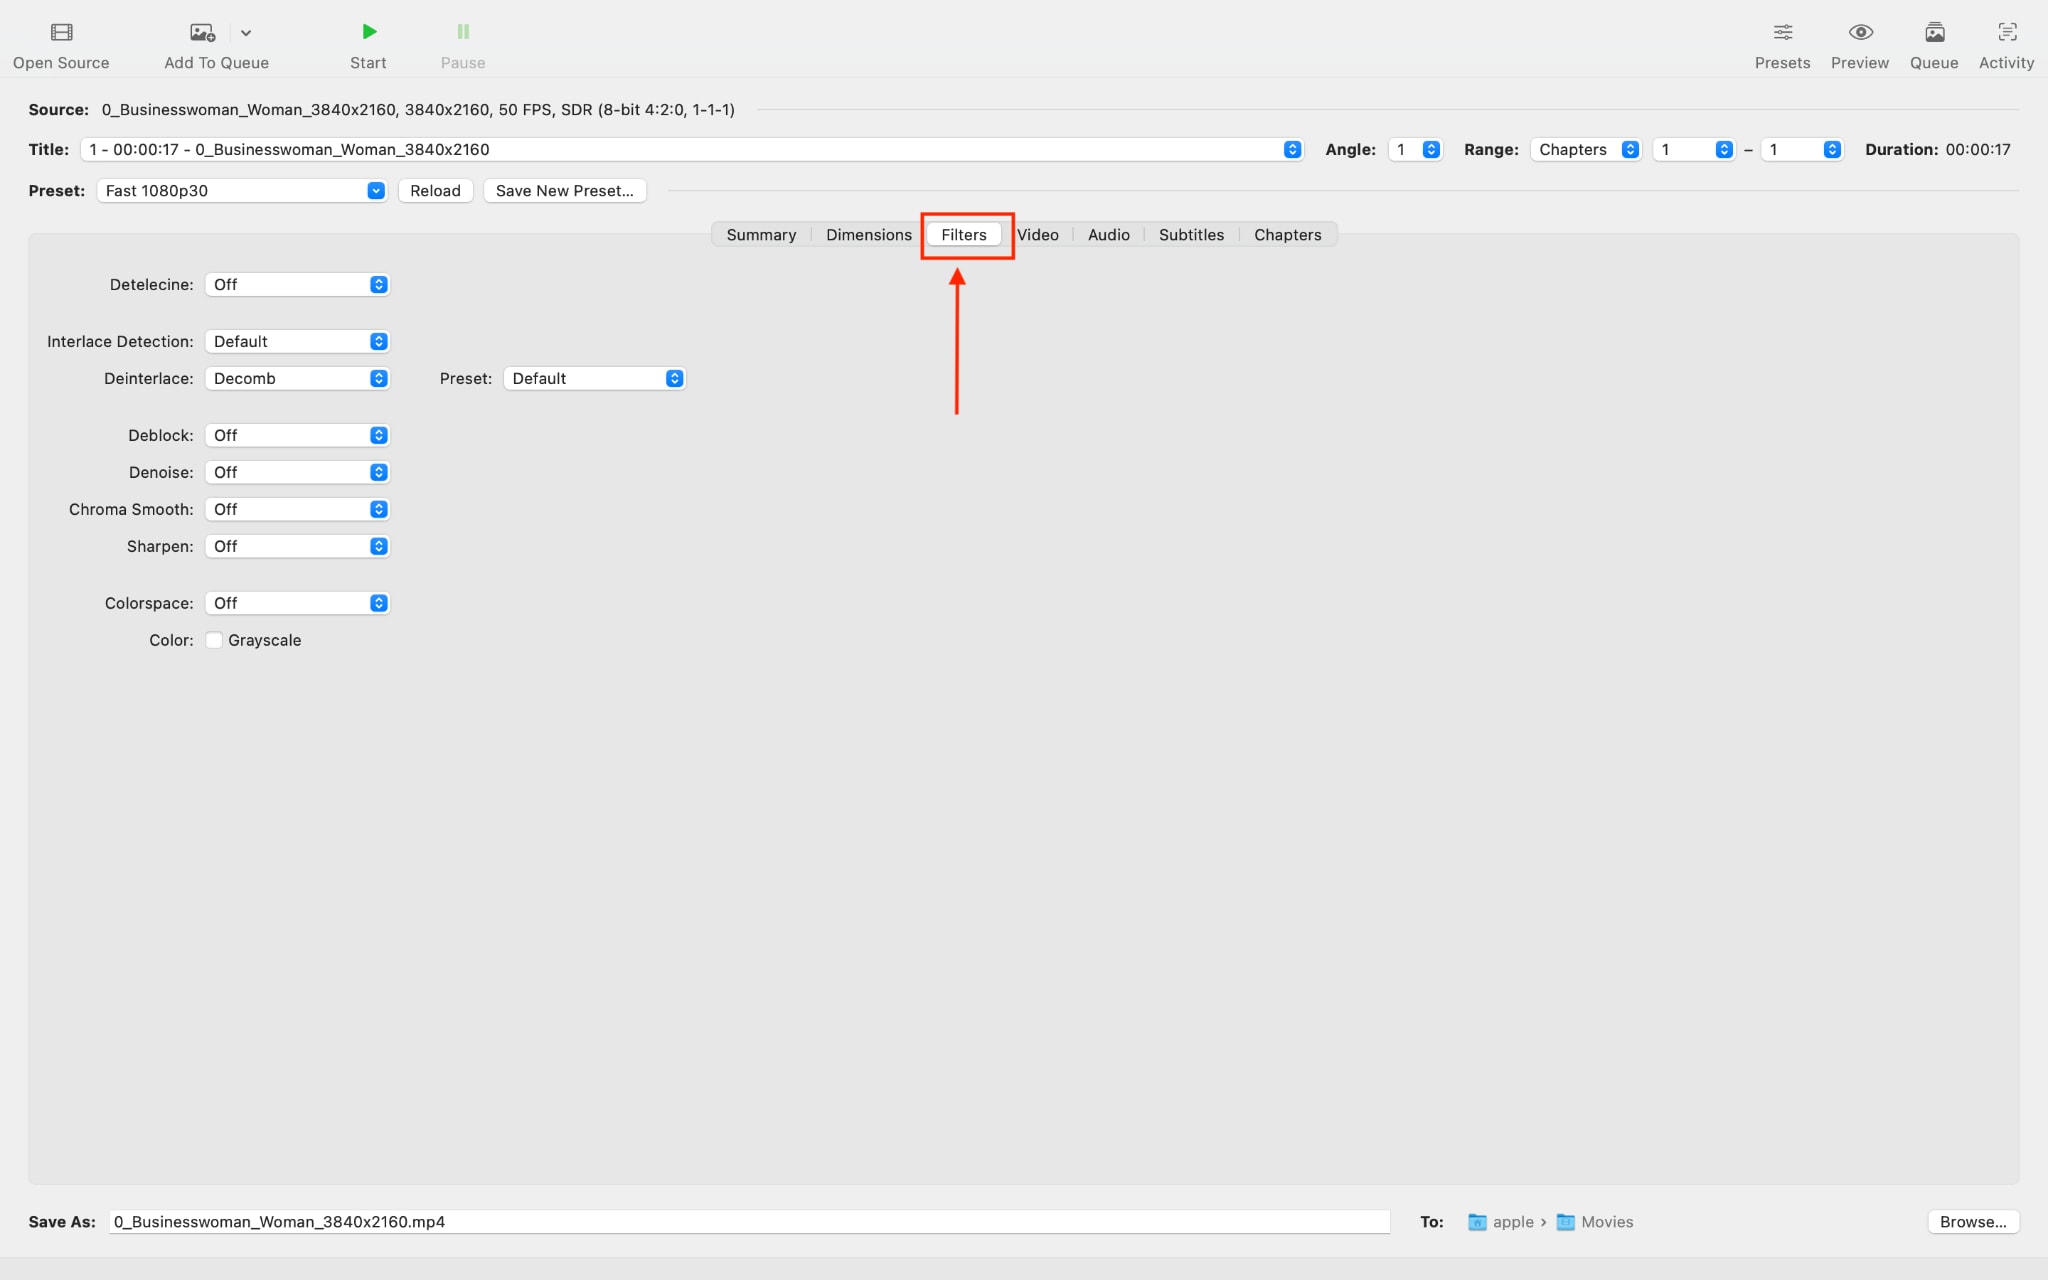
Step 4: Locate the "Deinterlace" dropdown. You will see two primary options:
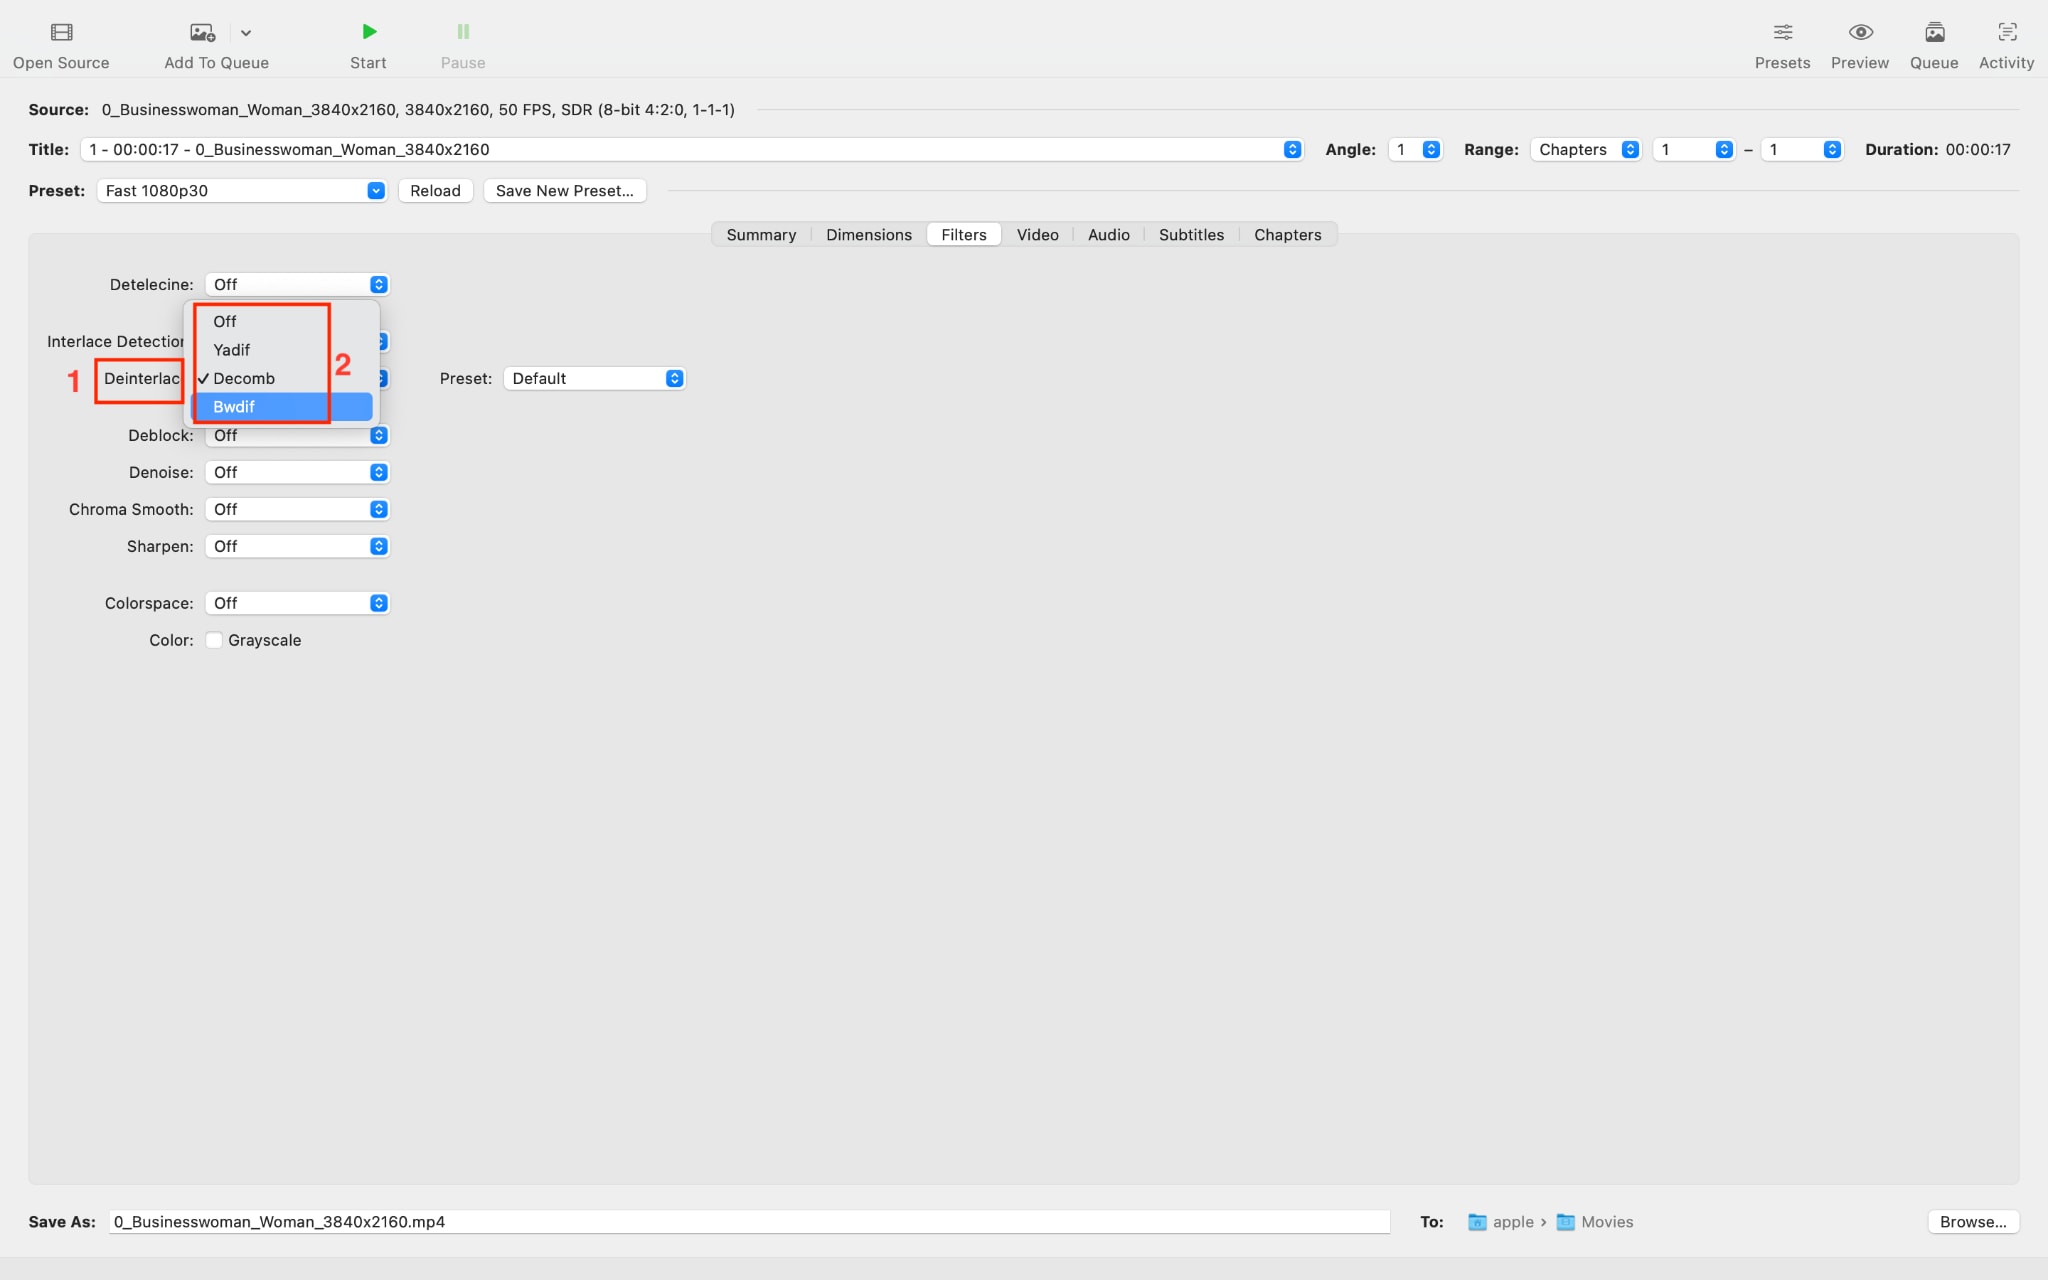
Yadif (Yet Another DeInterlacing Filter): A fast, reliable algorithm that works well for most footage. Choose Yadif if processing speed is a priority.
Decomb: An intelligent filter that detects interlaced frames and only processes them, leaving progressive frames untouched. Decomb is the safer option for mixed-content sources.
Step 6: Click the "Start Encode" button in the top menu and let HandBrake process your video.
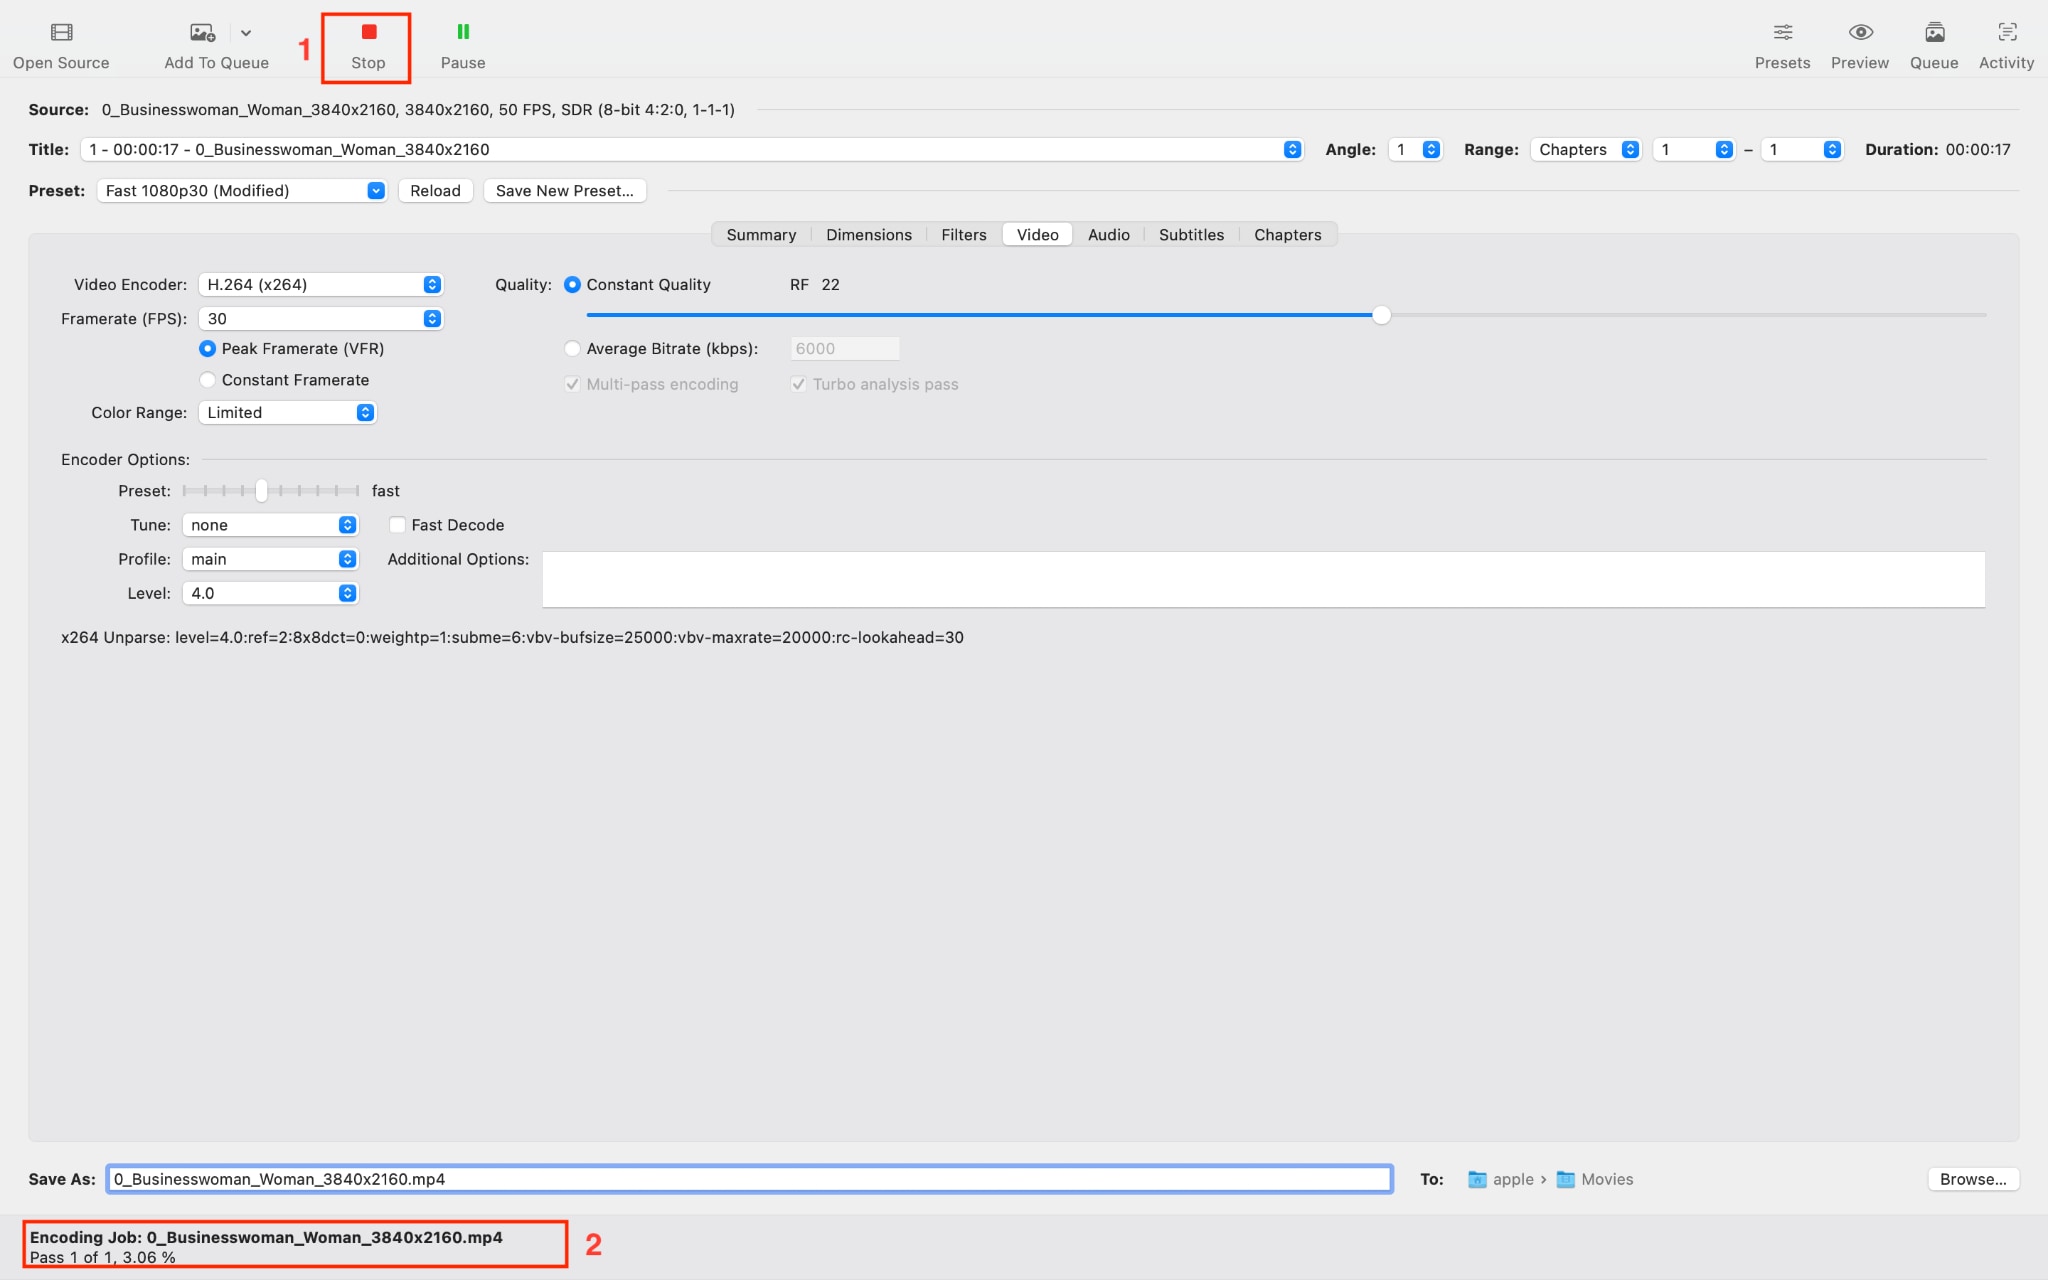
Best for: Batch conversions, budget-conscious users, and anyone who needs a permanently deinterlaced export file.
How to Deinterlace Video with VLC (Free, Playback Only)
VLC Media Player is an open-source, cross-platform media player that includes built-in deinterlacing. It is the quickest solution if you simply need to watch interlaced content without the combing artifacts. However, it is important to note that VLC's deinterlace function only applies during playback. It does not modify or export the original file.
How to Deinterlace Video on VLC
By following these steps, you can deinterlace the video during playback:
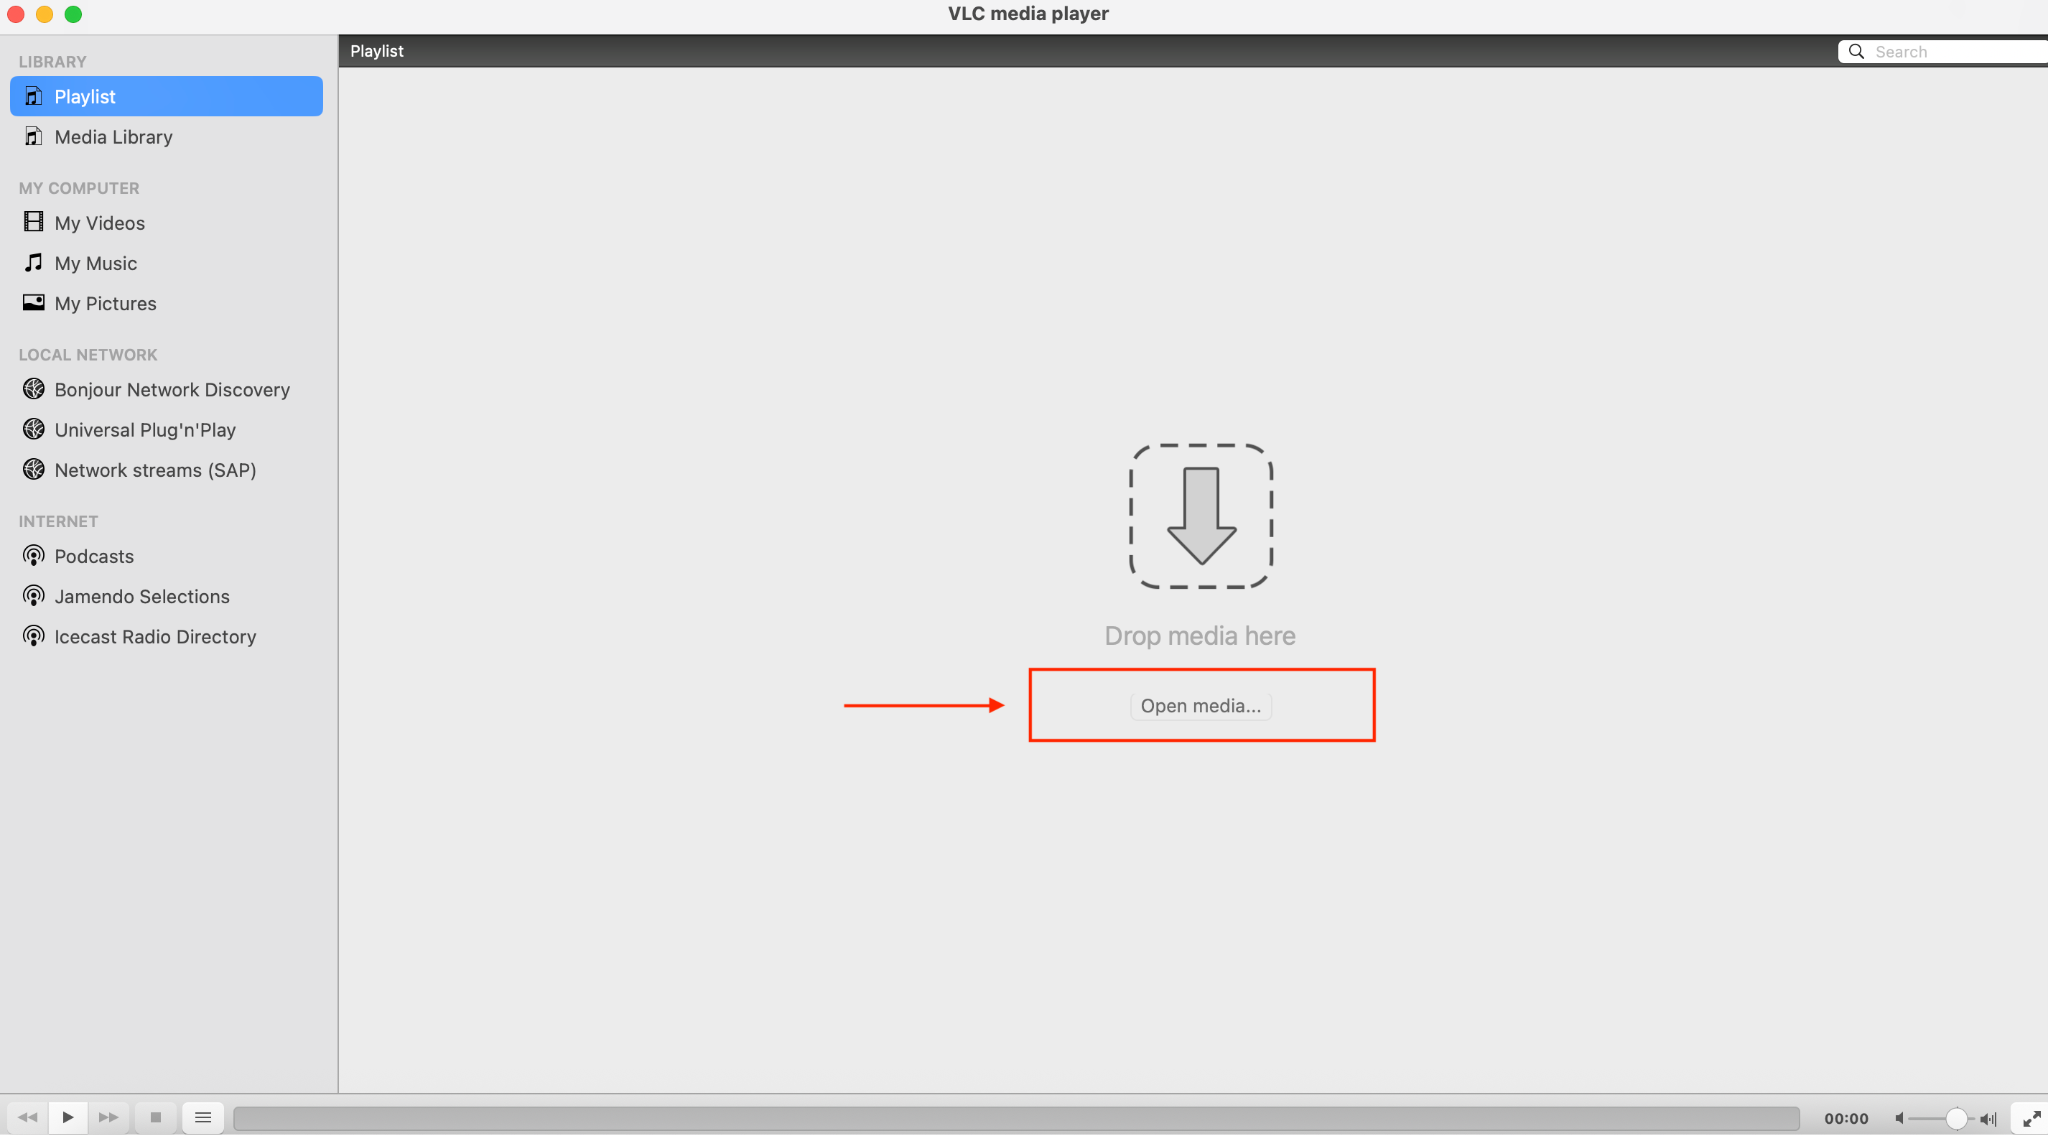
Step 1: Open VLC Media Player and load your interlaced video via Open Media > File.
Step 2: While the video is playing, go to Video > Deinterlace in the top menu bar. Select "On" or "Automatic" to enable the deinterlace filter.
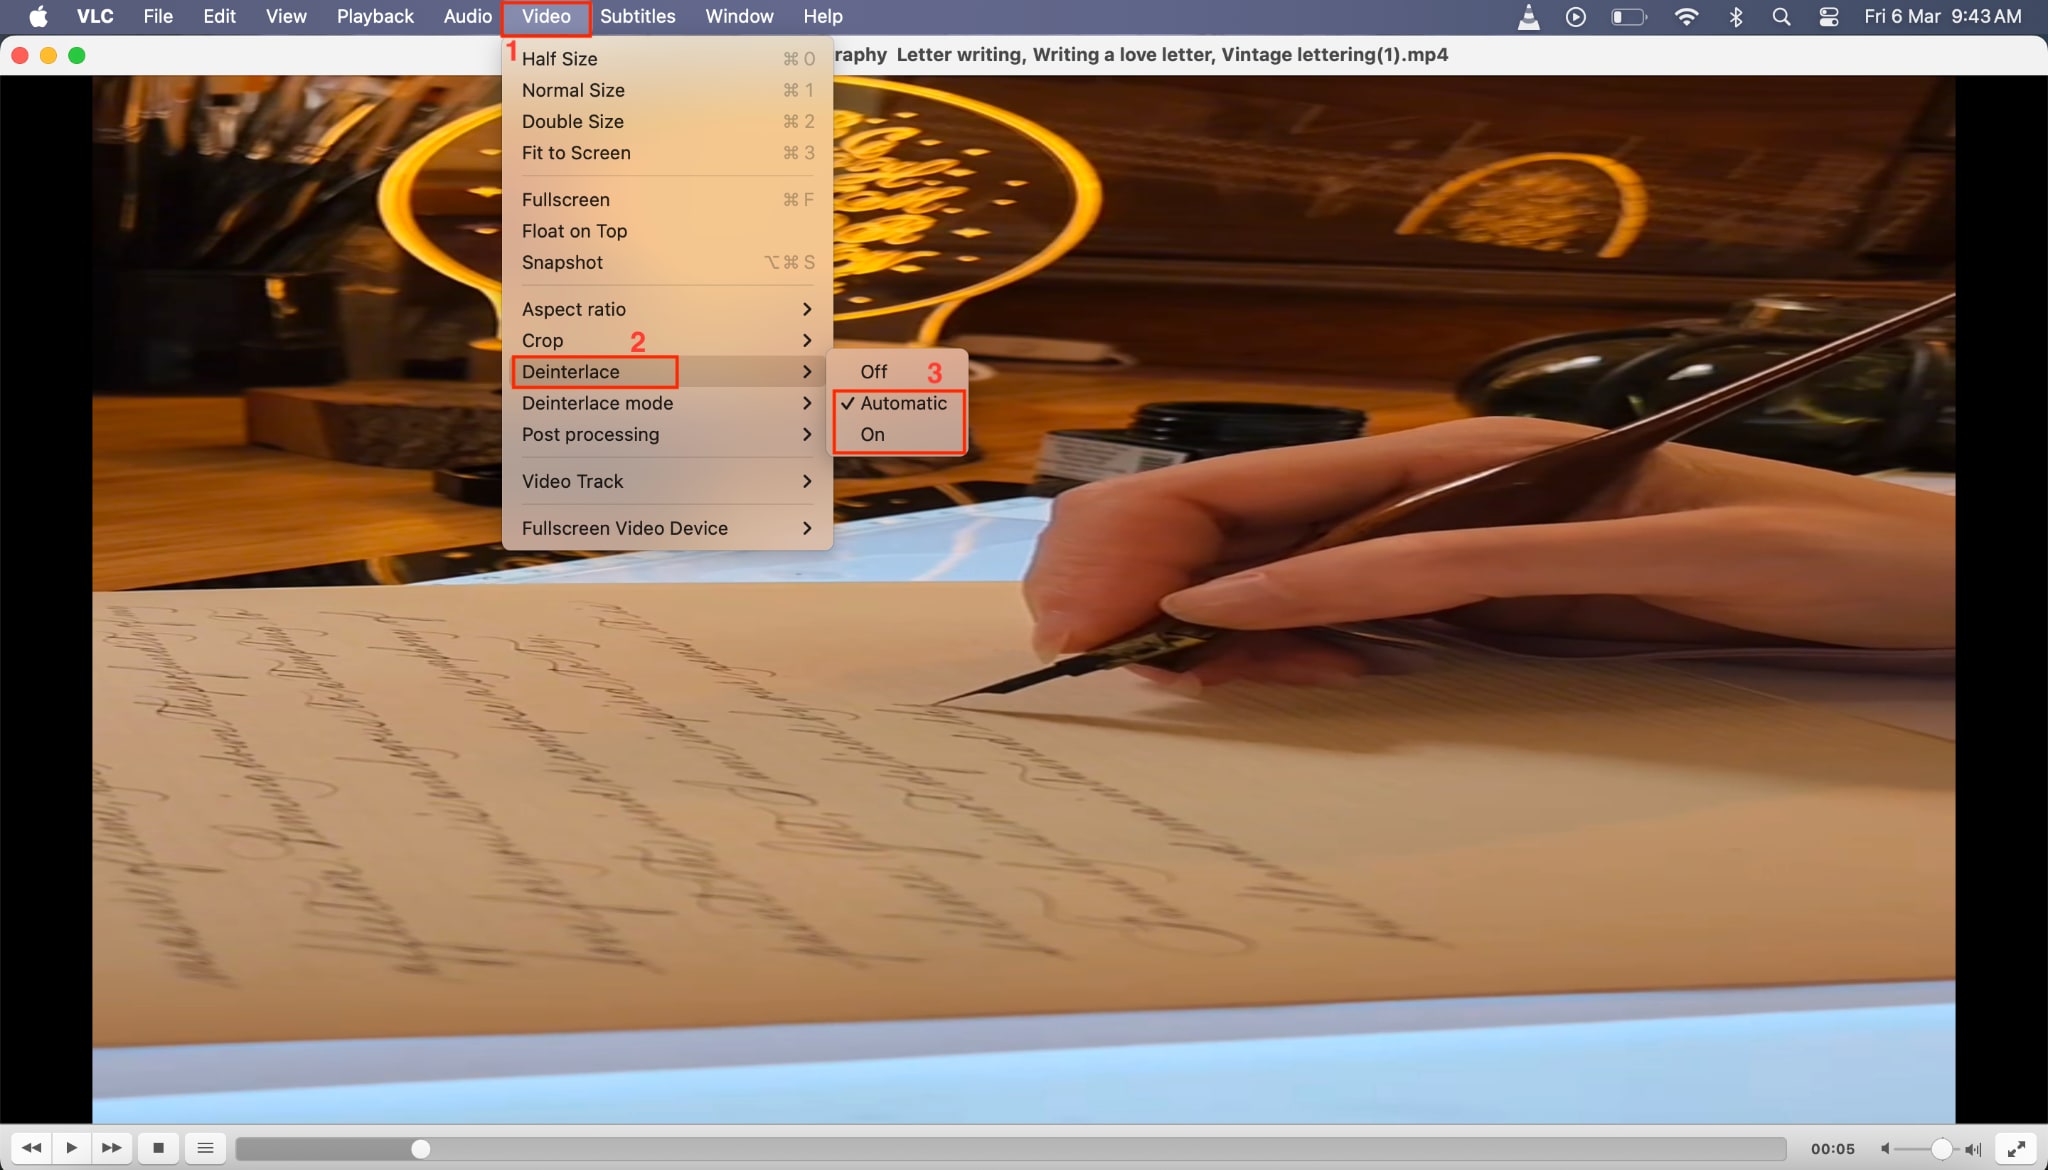
Step 3: If the default mode does not produce satisfactory results, go to Video > Deinterlace > Mode and try options such as Yadif, Blend, or Discard.
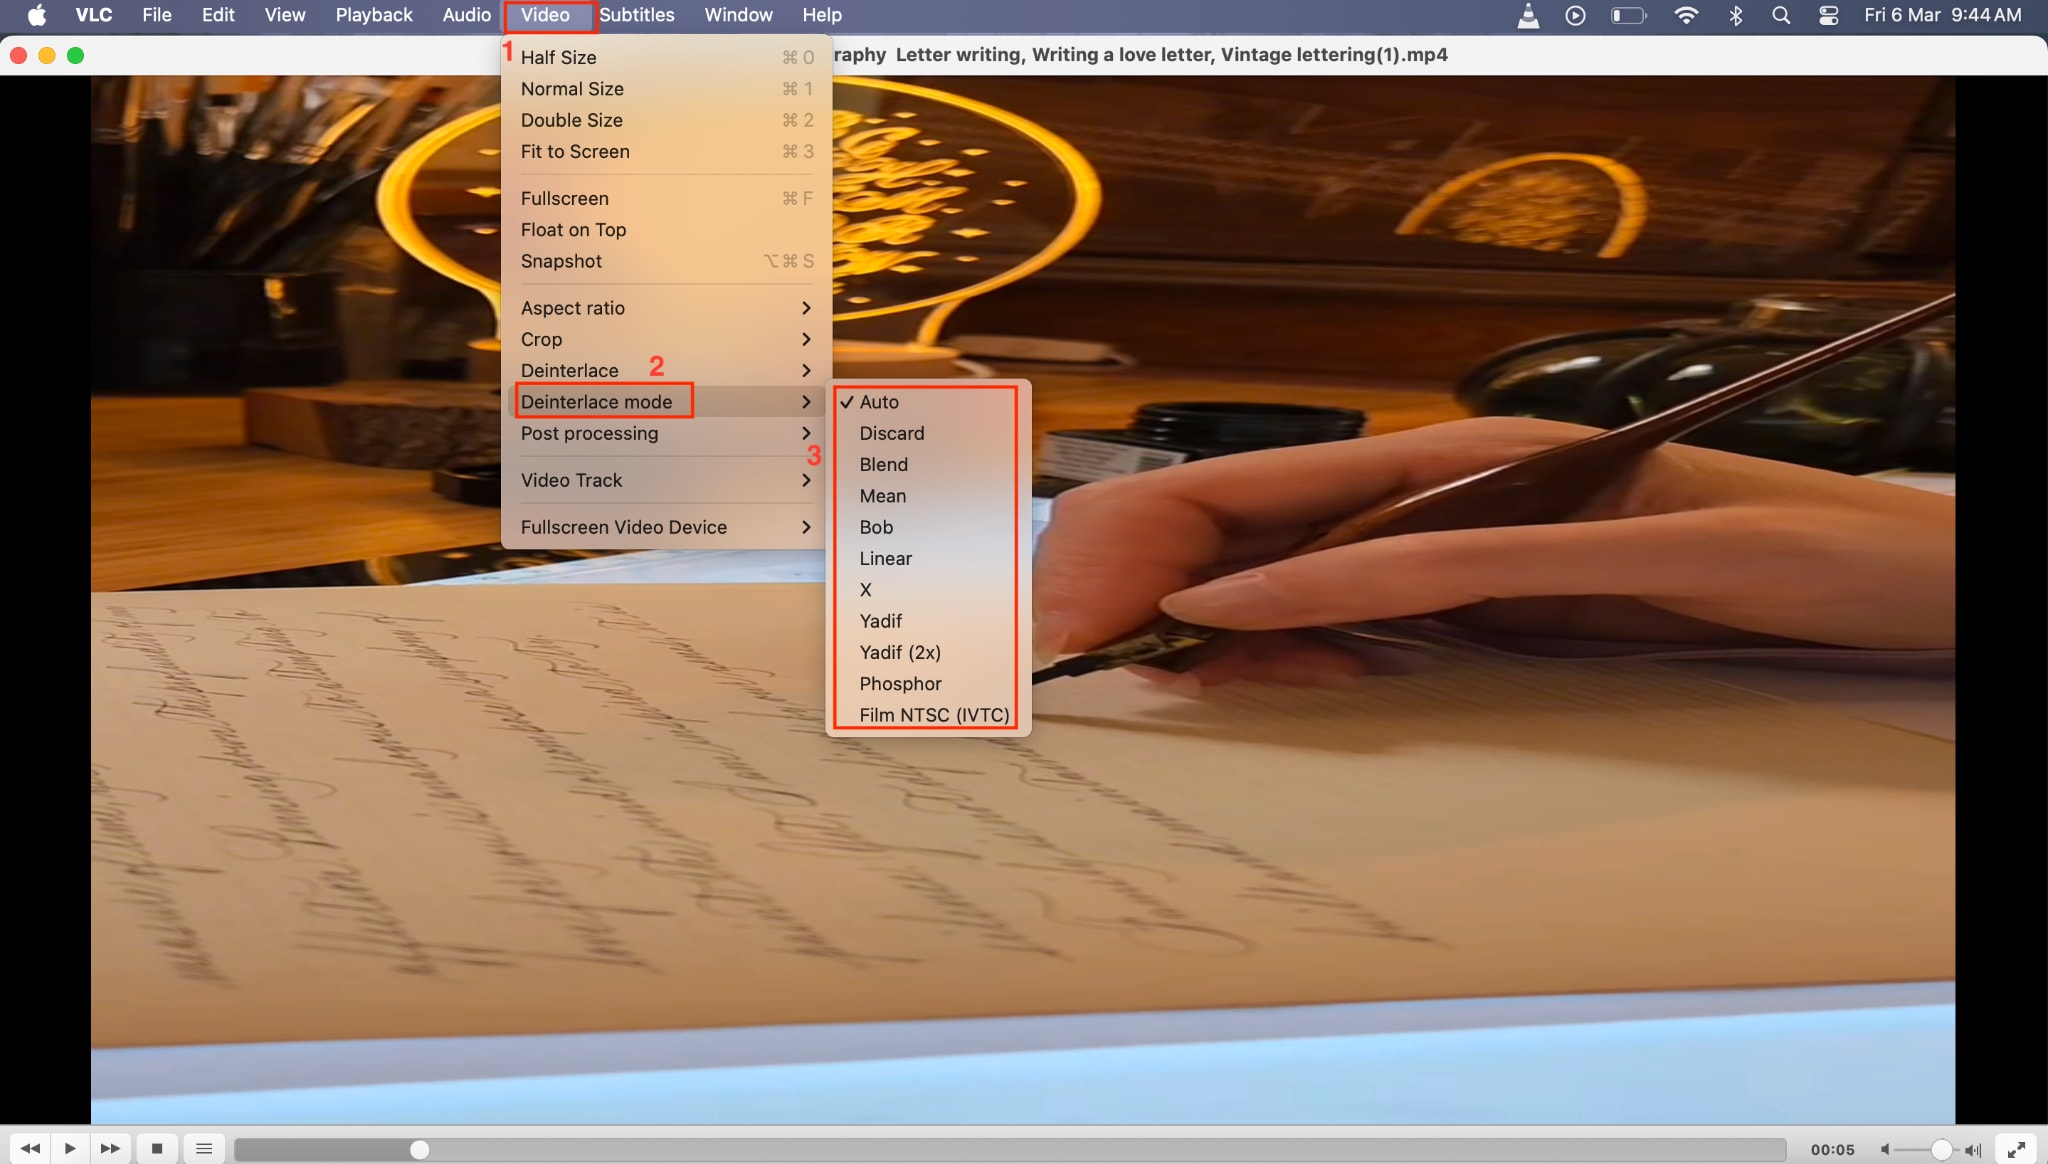
Best for: Quick playback fixes, casual viewers, and situations where you do not need an exported deinterlaced file.
How to Deinterlace Video with Adobe Premiere Pro (Professional)
Adobe Premiere Pro provides professional-grade deinterlacing through its Field Options menu. It is the go-to choice for editors already working within the Adobe Creative Cloud ecosystem, especially when the deinterlaced footage needs to be integrated into a larger editing timeline.
Deinterlacing in Premiere Pro ensures smooth, progressive video output while preserving motion quality, making it ideal for high-end post-production workflows. With precise control over field order and processing options, editors can achieve clean results even with challenging interlaced footage.
How to do Deinterlacing in Premiere Pro
Follow the step-by-step guide below to deinterlace the video:
Step 1: Import your interlaced footage into your Premiere Pro project and drag it onto the timeline.
Step 2: Right-click on the clip in the timeline and select "Field Options" from the context menu.
Step 3: In the Field Options dialog, choose the processing method that suits your footage:
Flicker Removal: Reduces flickering caused by thin horizontal lines.
Always Deinterlace: Forces Premiere Pro to deinterlace every frame, which is the most reliable option for fully interlaced content.
Step 4: Preview the result in the Program Monitor. If needed, fine-tune by adjusting the field order (Upper First or Lower First) based on your source format.
Step 5: Export the project using your preferred settings. Deinterlacing will be applied during rendering.
Best for: Professional editors, post-production workflows, and projects that require frame-level control.
How to Deinterlace Video with DaVinci Resolve (Free/Pro)
DaVinci Resolve by Blackmagic Design is a powerful, all-in-one post-production suite that combines editing, color grading, visual effects, and audio post. Its free version includes robust deinterlacing capabilities. Deinterlacing in DaVinci Resolve converts interlaced footage into smooth, progressive video while preserving sharpness and color accuracy. With precise field processing and timeline control, it's ideal for both detailed editing and final output for modern screens.
How to Use Deinterlacing in DaVinci Resolve
Here is the step-by-step guide to deinterlacing videos for professional output:
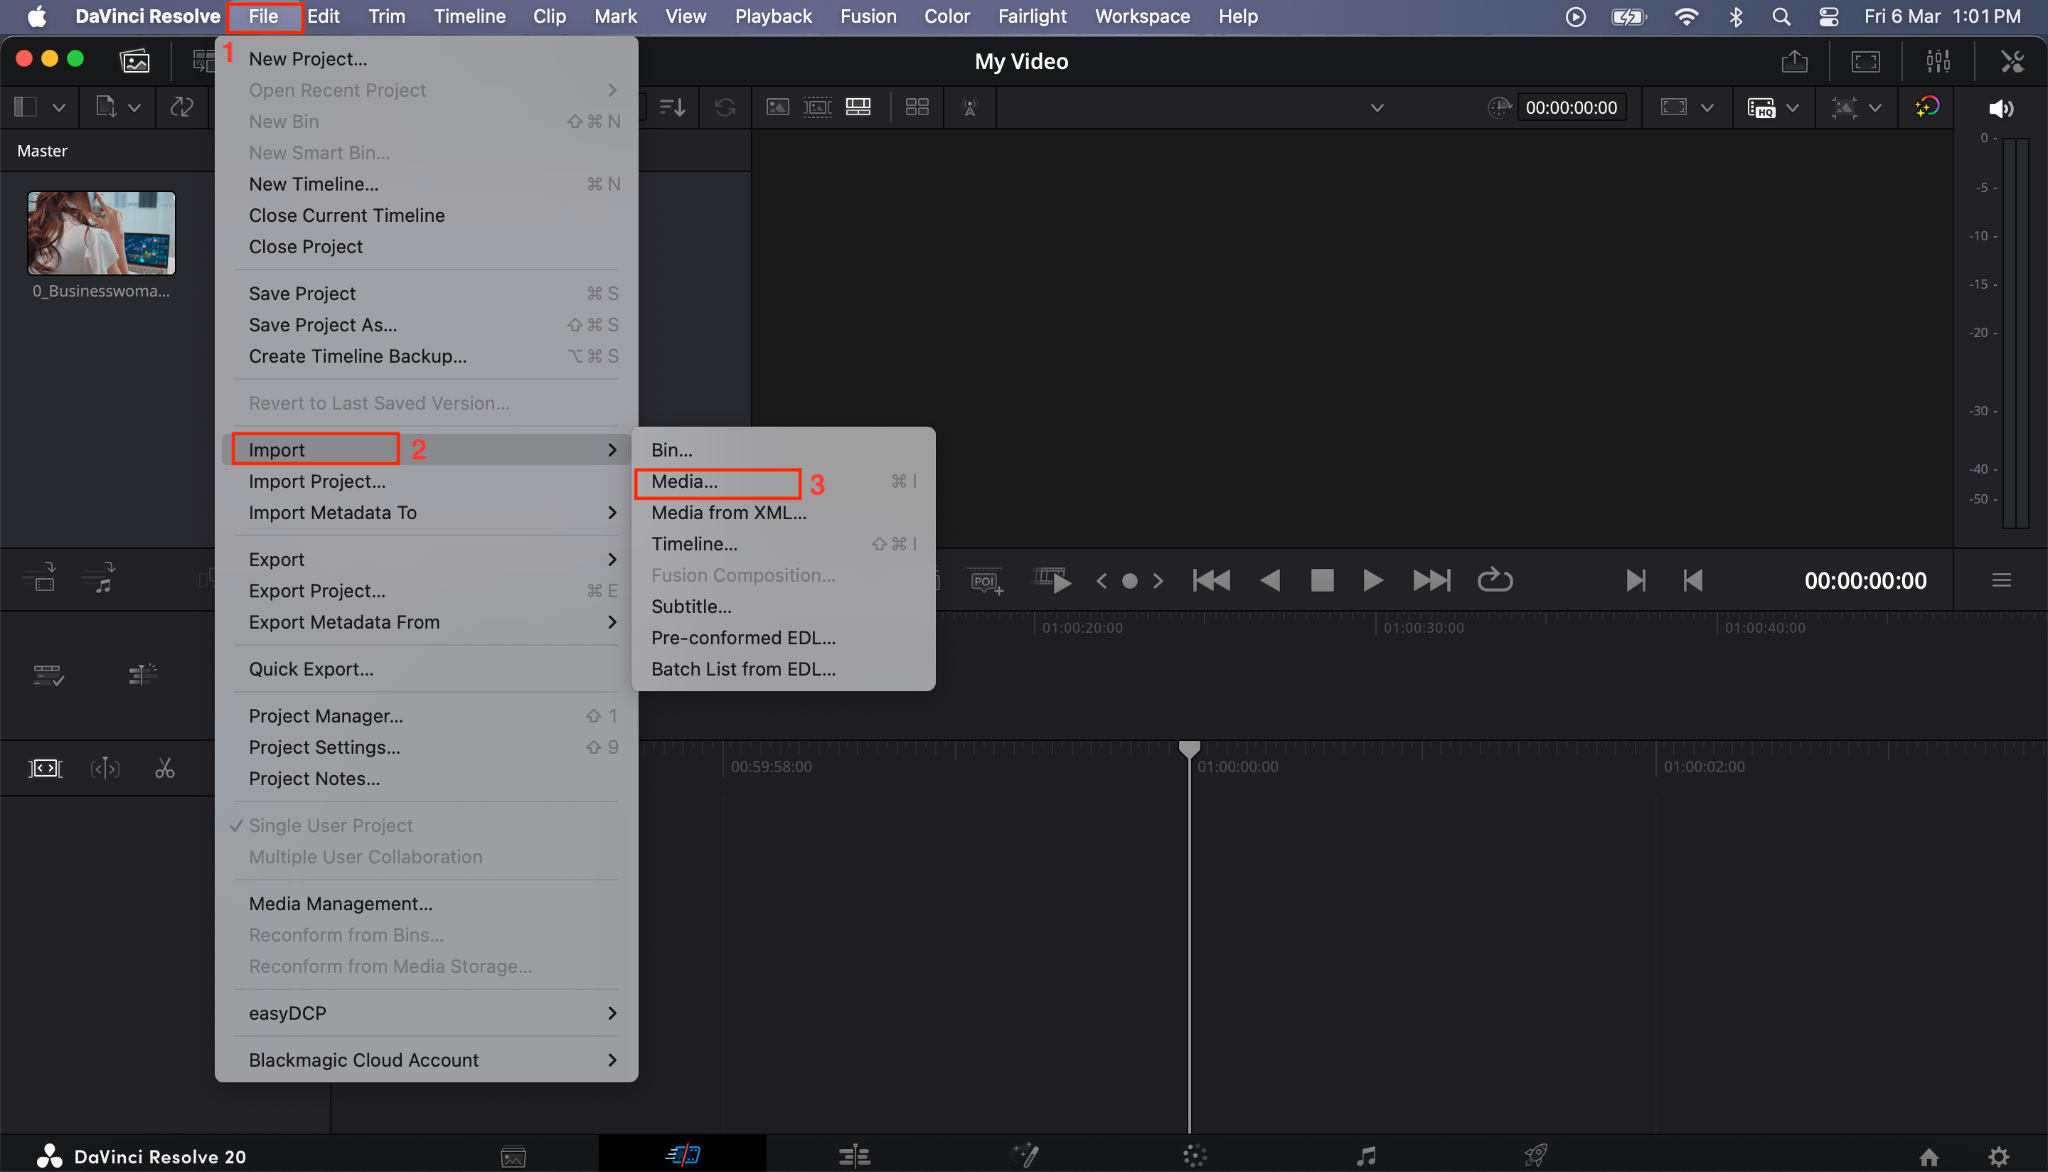
Step 1: Launch DaVinci Resolve, navigate to File > New Project, and create the project; you can change the location of the media file while naming the project.
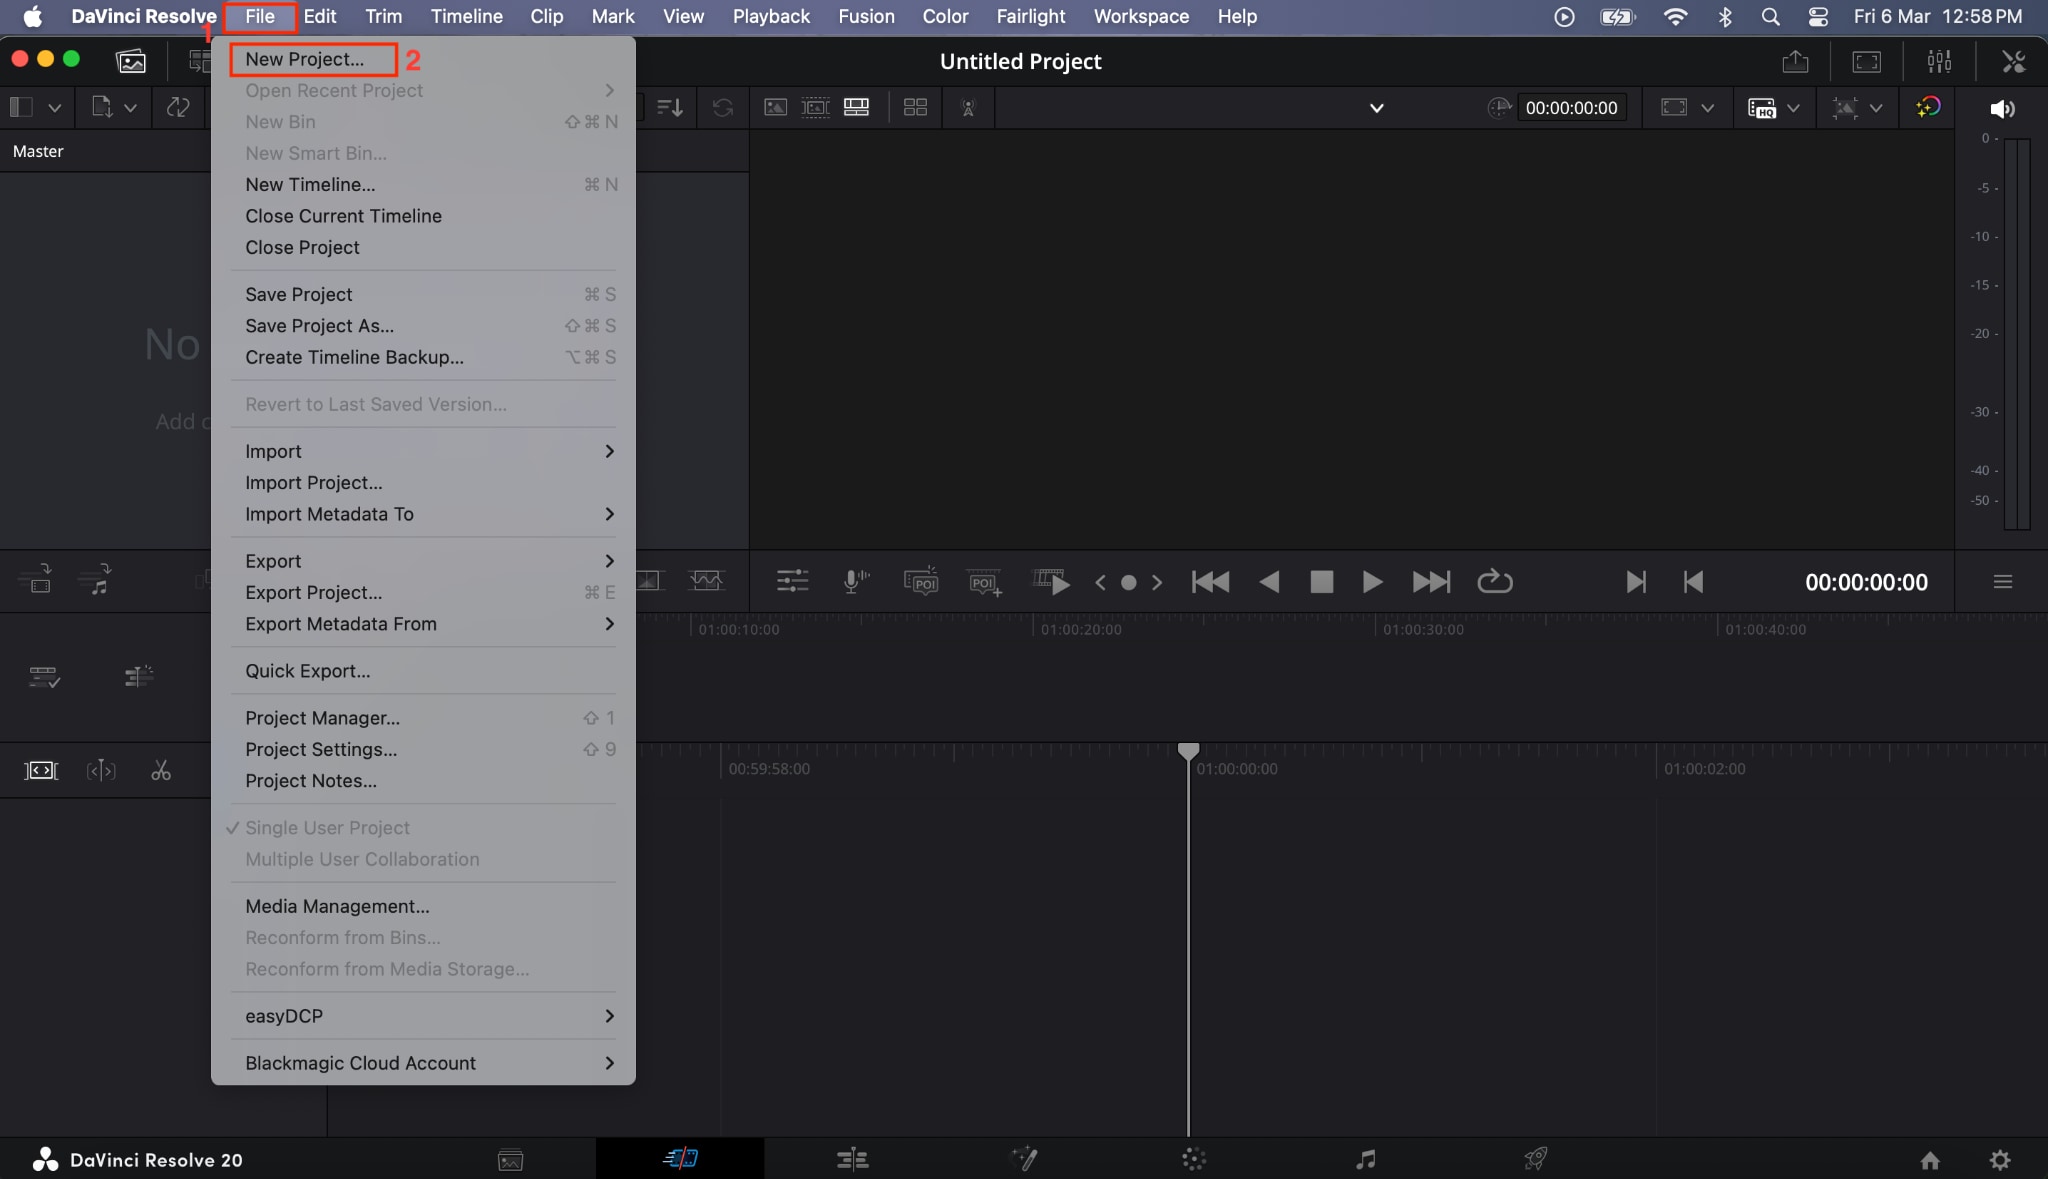
Step 2: Click “File” in the menu and navigate to Import > Media to upload the video.
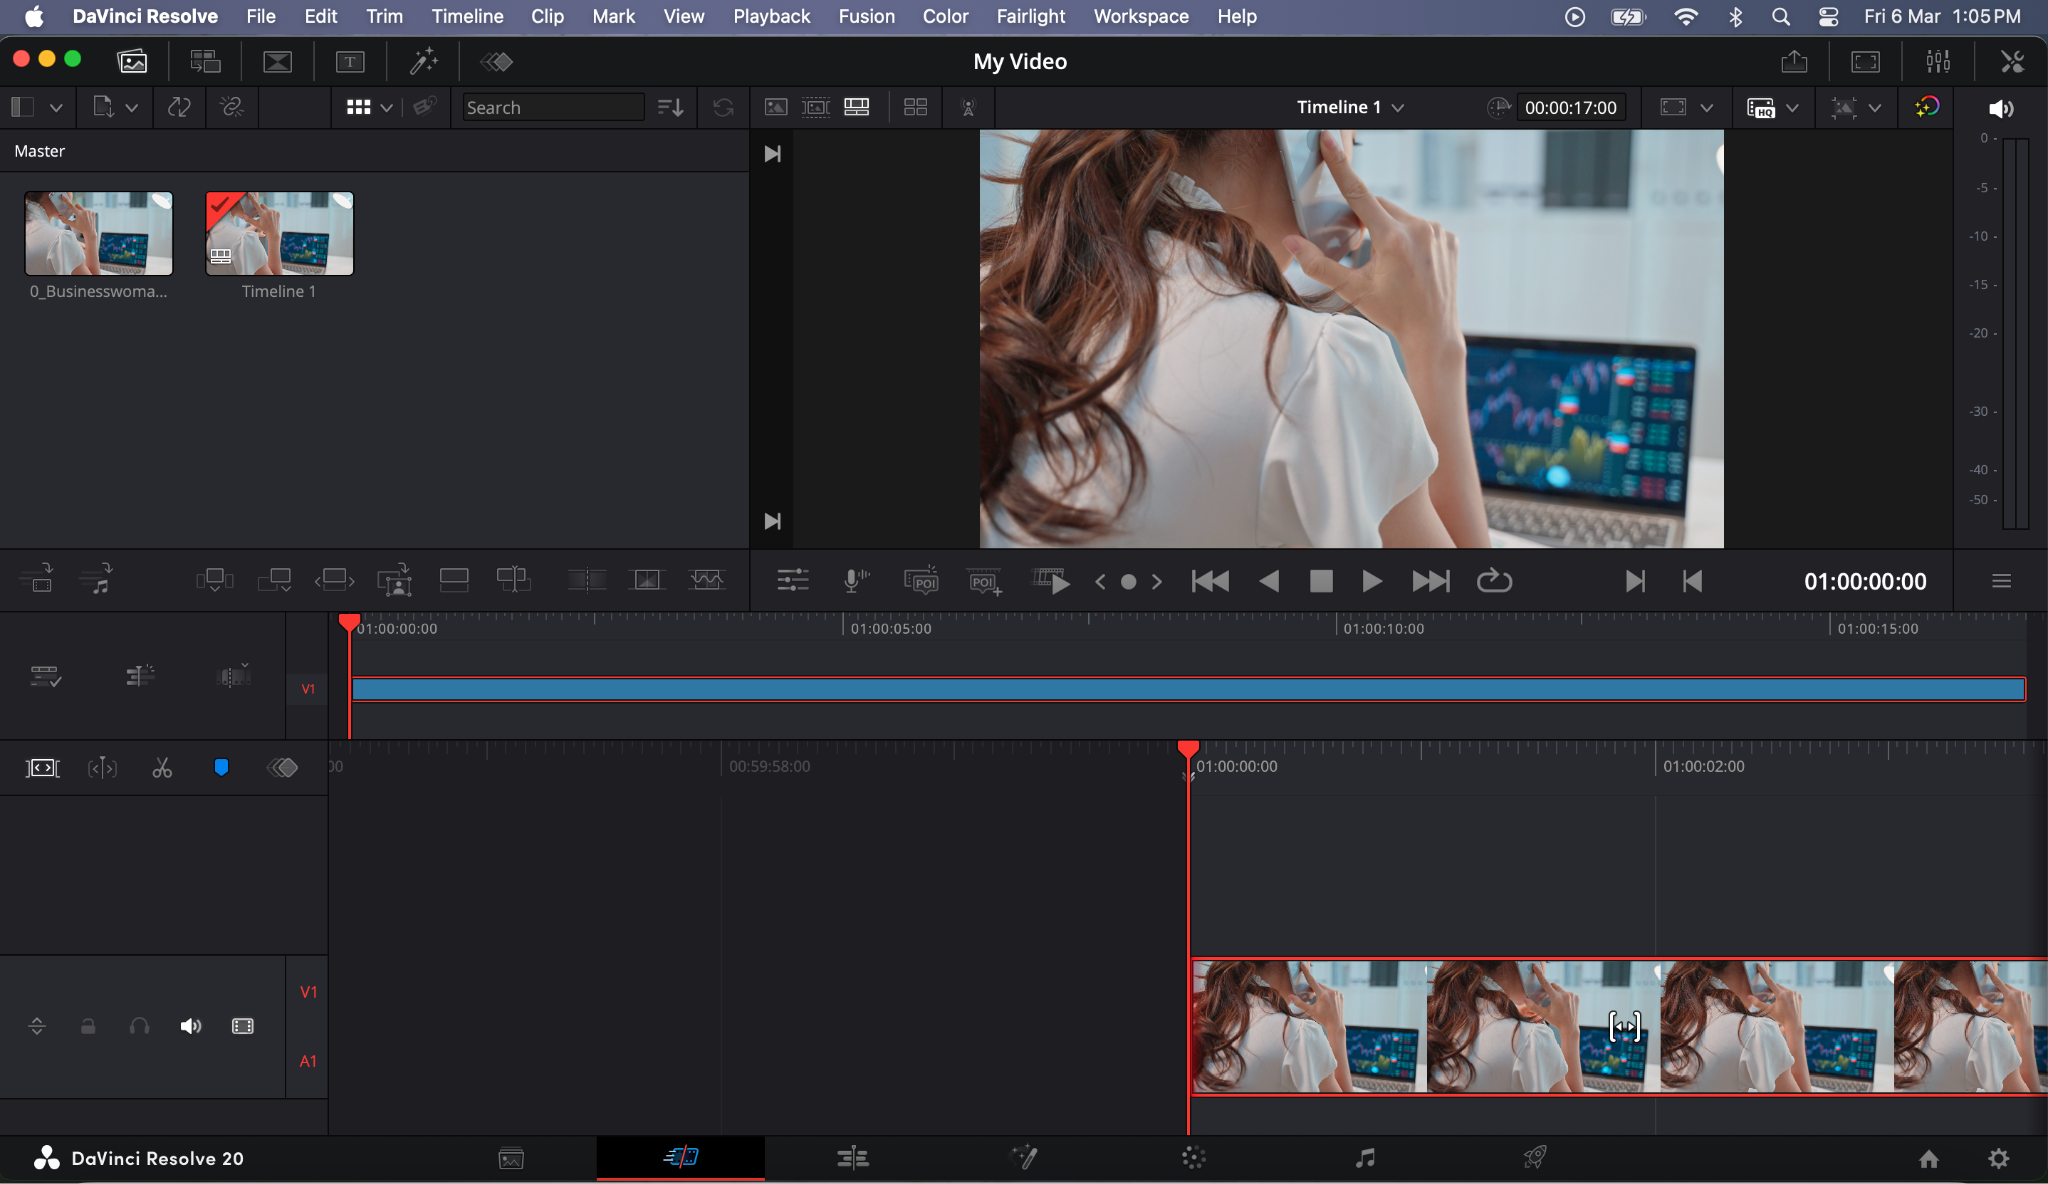
Step 2: Drag the clip onto the timeline in the Edit page.
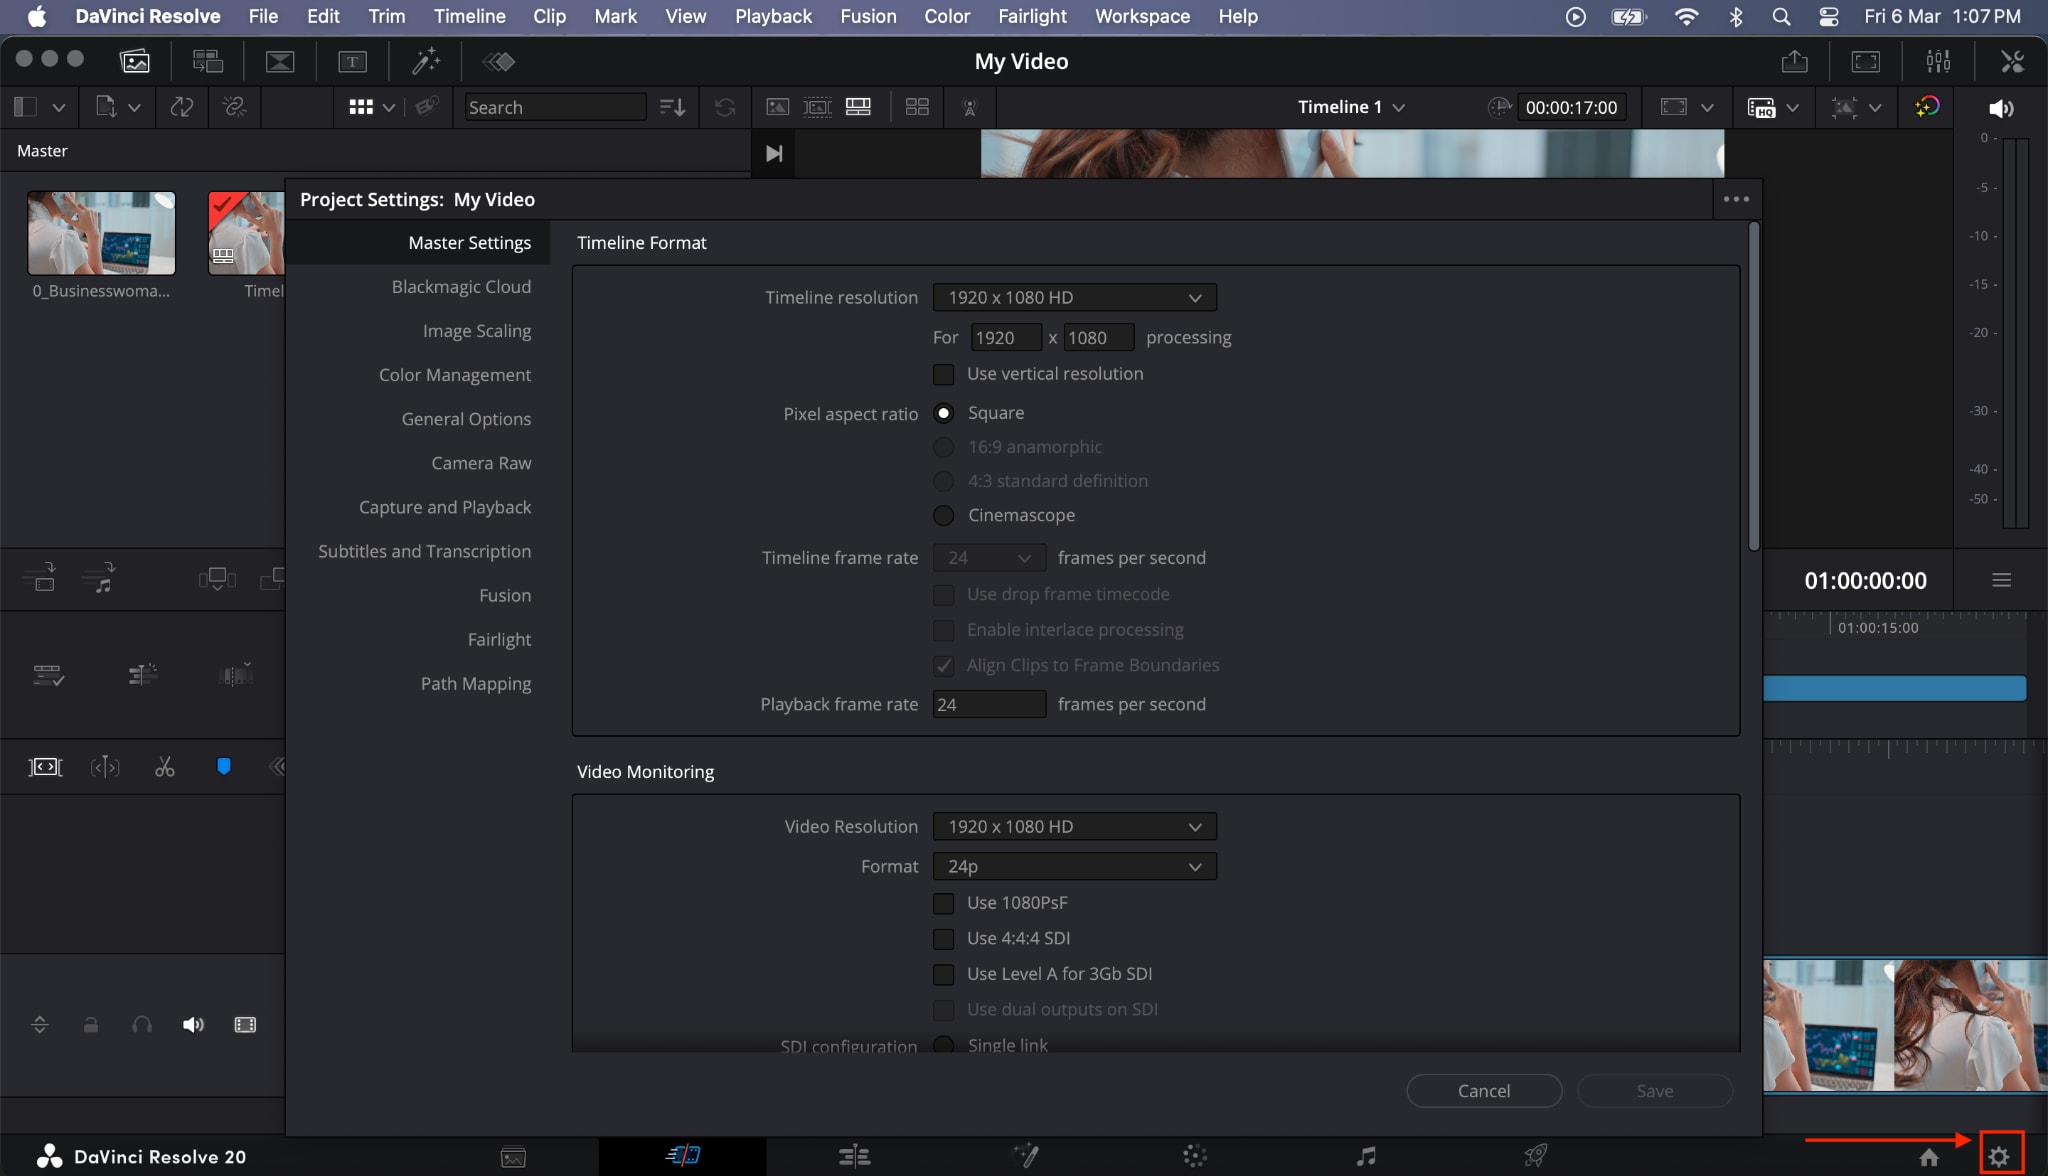
Step 3: Another way is to click "File > Project Settings > Master Settings," or click the "Project Settings" icon in the lower right corner.
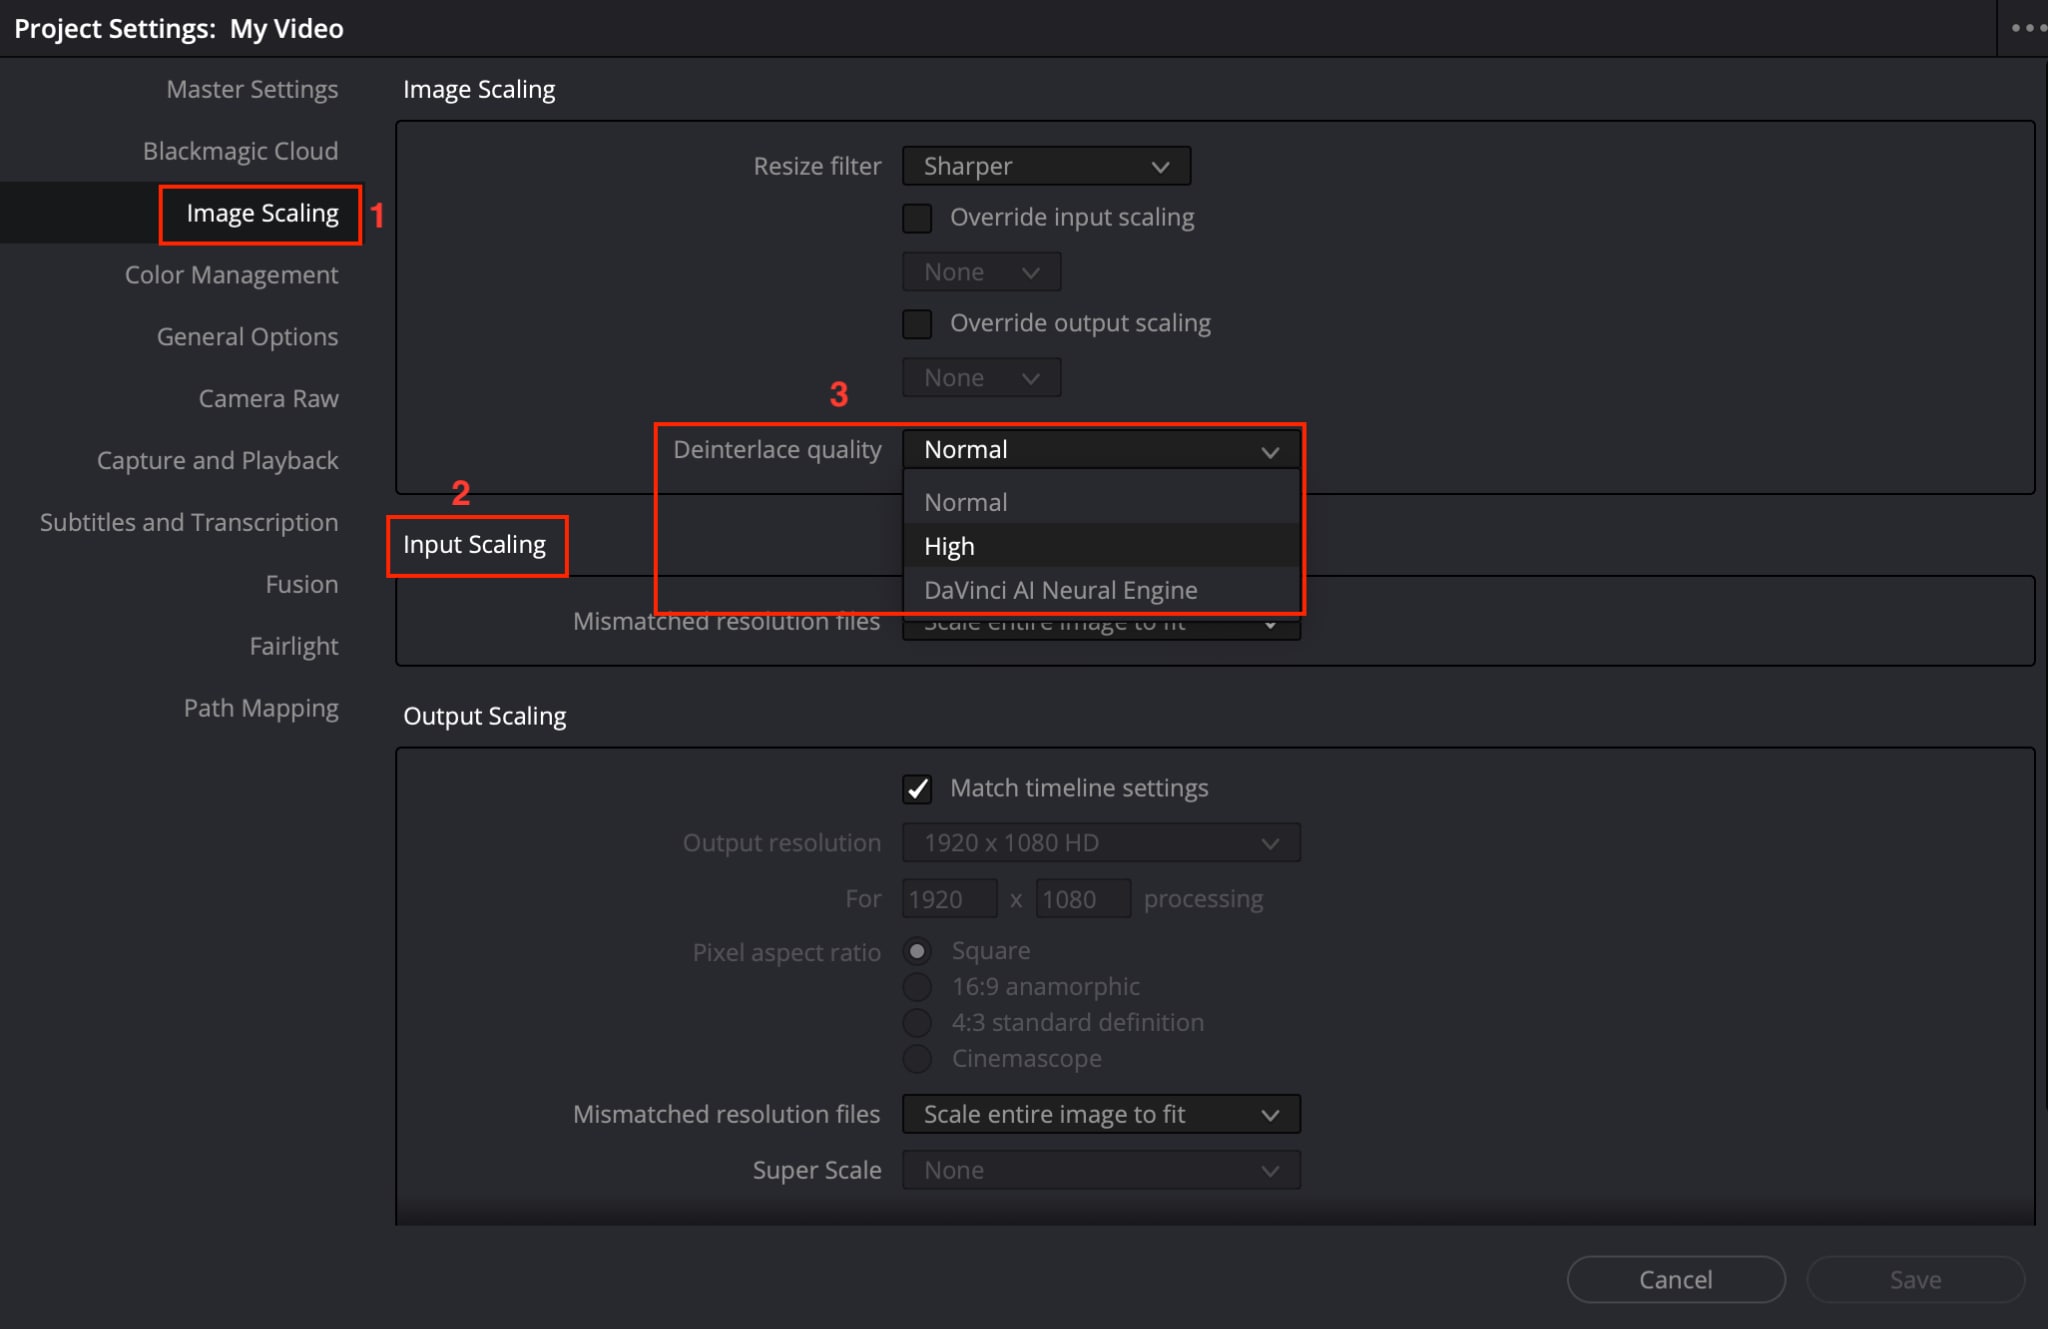
Step 4: Go to "Image Scaling" and set the deinterlacing quality to High for free users; if you have a paid plan, choose DaVinci Neural Engine.
Step 5: Click the rocket-shaped Deliver icon. The Render Settings panel will open on the left side, where you can choose export format, resolution, and other settings. Click Add to Render Queue. On the right side, click Render All to export your deinterlaced video.

Best for: Users who need deinterlacing combined with color grading, VFX, or comprehensive editing within a single application.
How to Deinterlace Video with FFmpeg (Free, Command Line)
FFmpeg is a free, open-source command-line tool that handles virtually every imaginable video and audio processing task. For technically inclined users, it offers the fastest and most flexible path to deinterlacing, including the ability to automate batch processing through scripts. Deinterlacing in FFmpeg lets you apply advanced filters like Yadif and Bwdif to create smooth, progressive video while maintaining clarity. With its scripting capabilities, you can batch-process multiple files at once.
How to Deinterlace Videos for Free
Follow these steps and deinterlace videos on a command-based tool:
Step 1: Install FFmpeg on your system. It is available for Windows, macOS, and Linux. (Through Terminal)
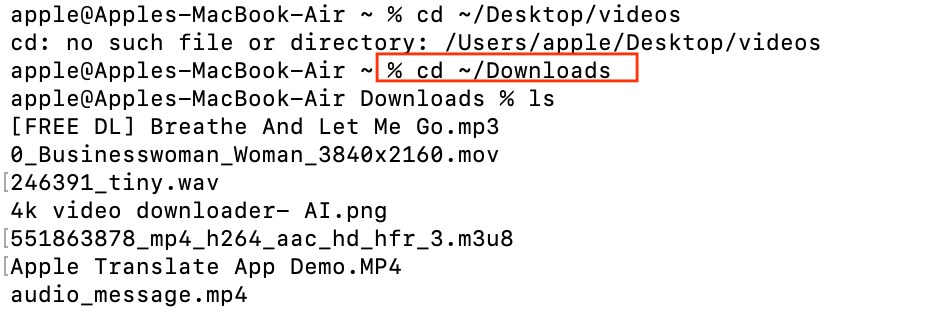
Step 2: Open your terminal or command prompt and navigate to the directory containing your interlaced video. Type these commands and press “Enter.” If your videos are desktop, then use this command for Mac: cd ~/Desktop/videos
For Windows
cd C:\Users\YourName\Desktop\videos
If videos are in the Download folder on your Mac, then provide this command:“cd ~/Downloads”
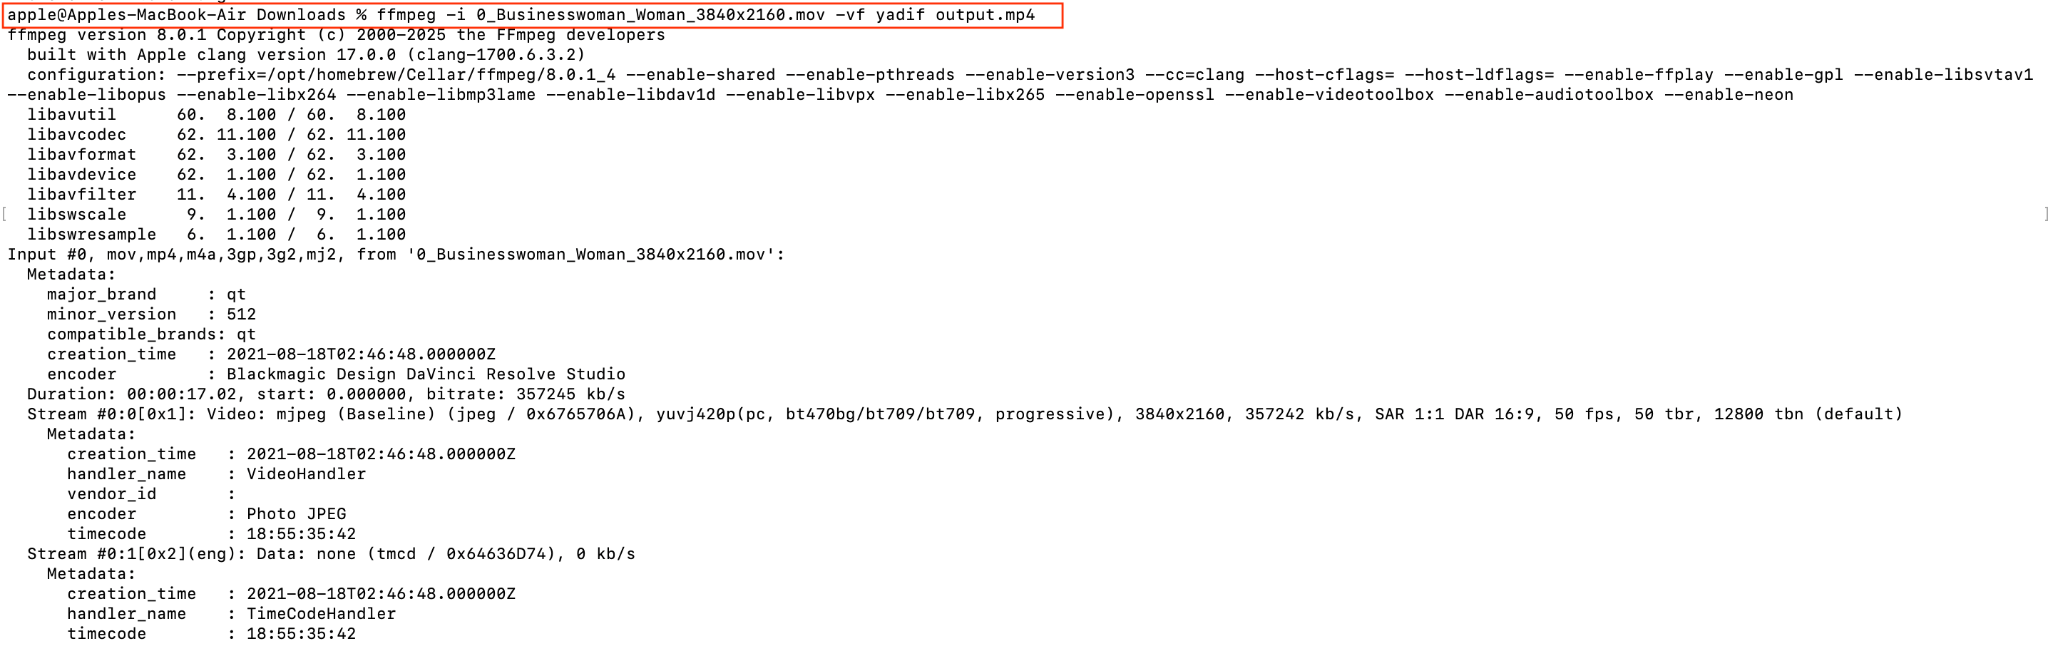
Step 3: Run the following command using the Yadif filter: ffmpeg -i input.mp4 -vf yadif output.mp4
For example: ffmpeg -i interlaced_video.mp4 -vf yadif fixed_video.mp4
Step 5: If your file name contains spaces, then use quotes around the file name. For example:ffmpeg -i "my video file.mp4" -vf yadif output.mp4
Step 6: After giving the command, you will get the results like this: “[out#0/mp4 @ 0x6000000e8240]
” And you can see the final file in your download folder.

Best for: Technical users, developers, automation workflows, and anyone processing large volumes of footage.
Part 4: One-Click Video Enhancement Tool for Beginners and Professionals
Deinterlacing addresses one specific visual issue, but older or archived footage often comes with a bundle of quality problems. Noise, low resolution, shaky frames, and overall softness tend to accompany interlaced content, especially footage from VHS tapes, DV camcorders, or early digital broadcasts.
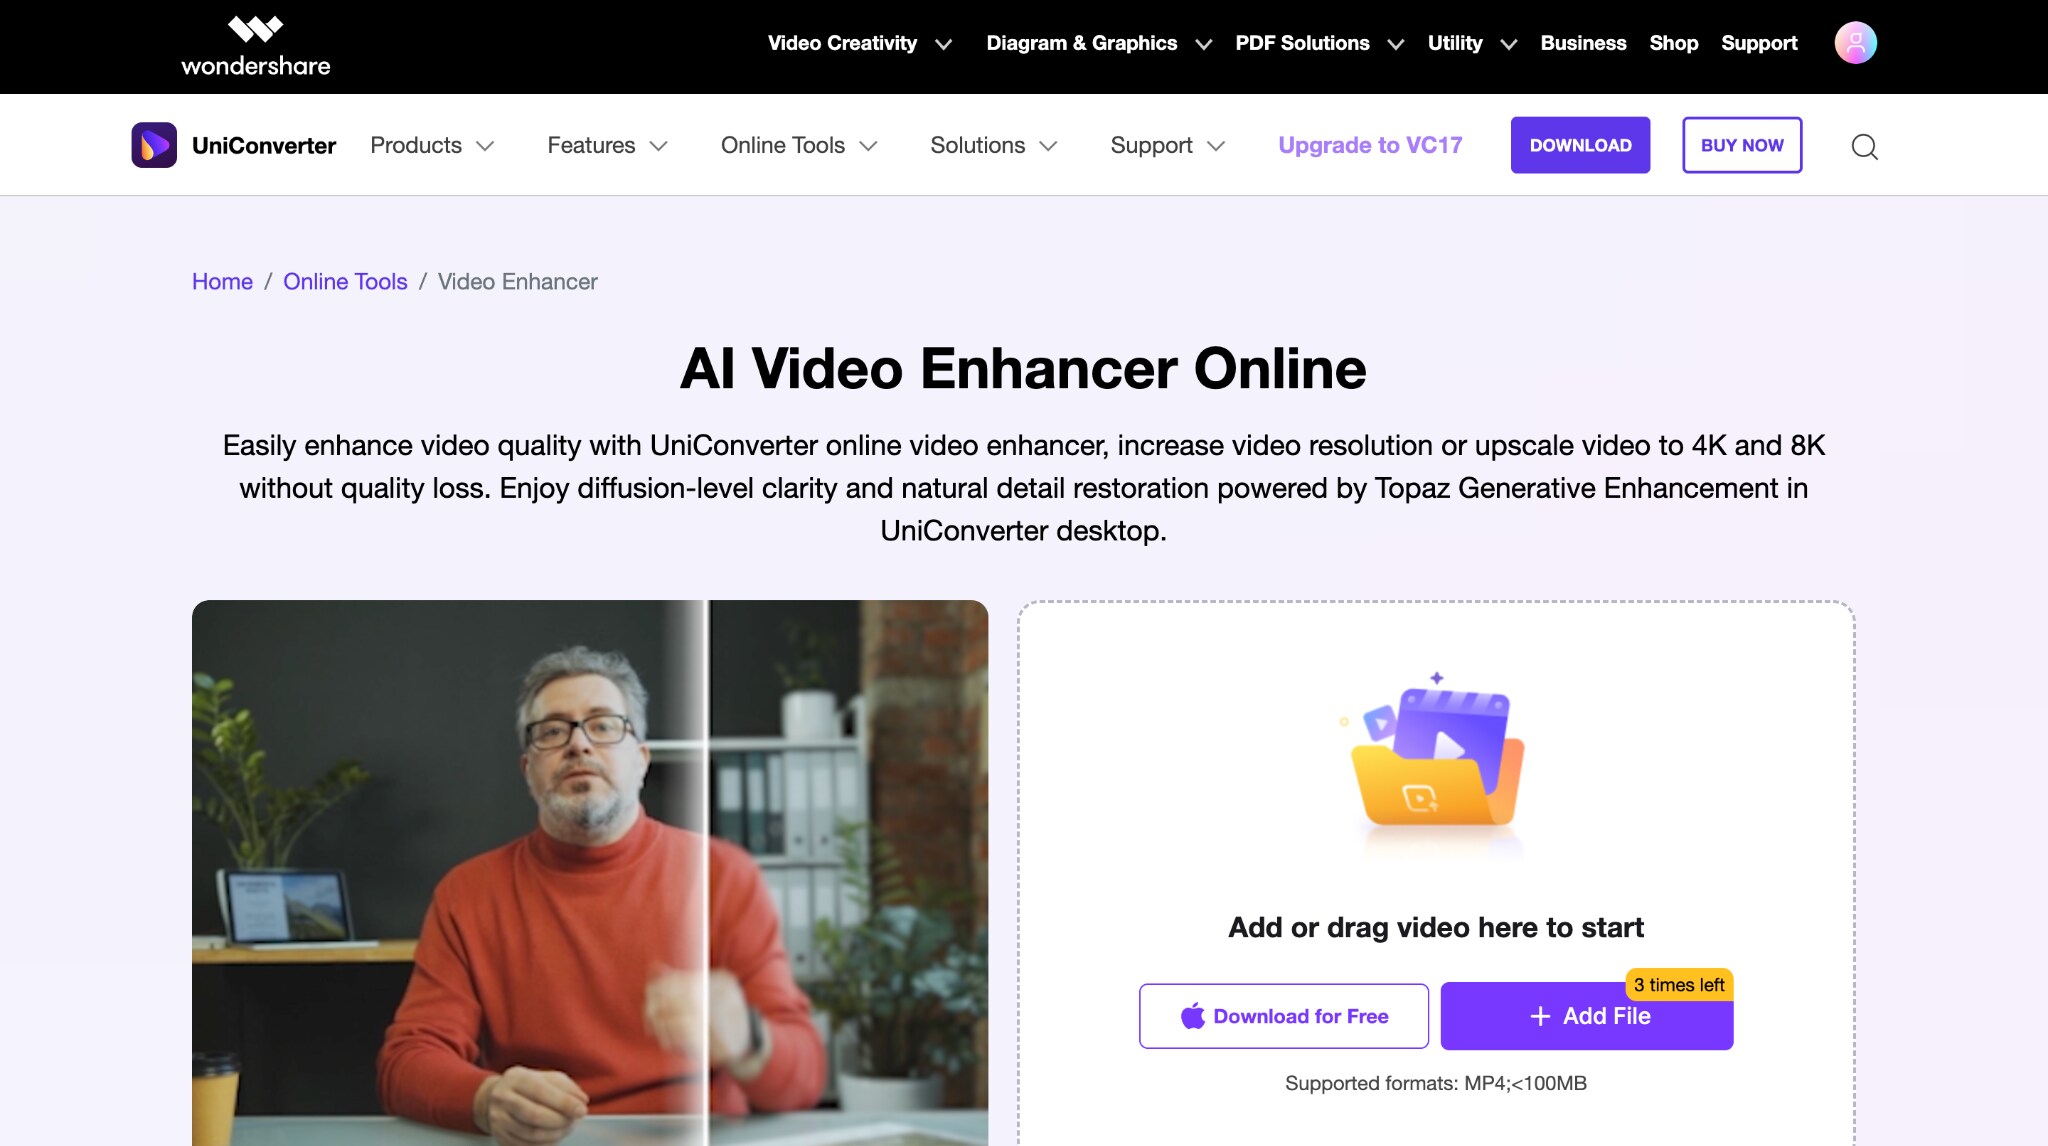
If you are looking for a streamlined way to improve overall video quality after deinterlacing, Wondershare UniConverter is worth considering. It is an all-in-one editing tool for video, audio, and images. To deinterlace the video, you can use Wondershare UniConverter's AI-powered enhancement features, including video upscaling, noise reduction, and resolution boosting, in a clean, beginner-friendly interface. It also offers a free online video enhancer for a quick fix.
UniConverter is particularly useful when your workflow involves converting, compressing, or enhancing video, as well as deinterlacing. Rather than jumping between multiple applications, you can handle format conversion, AI-based quality enhancement, and basic editing within a single tool.
Key Features of Wondershare UniConverter
- AI Video Enhancer for upscaling and clarity improvement support for 1000+ video and audio formats.
- Batch processing for large volumes of footage saves your time.
- A video converter lets you convert video formats, so you do not need to think twice before playing a video on your device.
- If you want to break your longer videos into shorts for social media, a video trimmer will do it precisely.
- With unblur video AI, you can fix blurry videos with one click.
For those who have just deinterlaced their footage using one of the methods above and want to take the output quality a step further, UniConverter offers a practical next step without the steep learning curve of professional editing suites.
Steps Guide of Using UniConverter to Enhance Videos
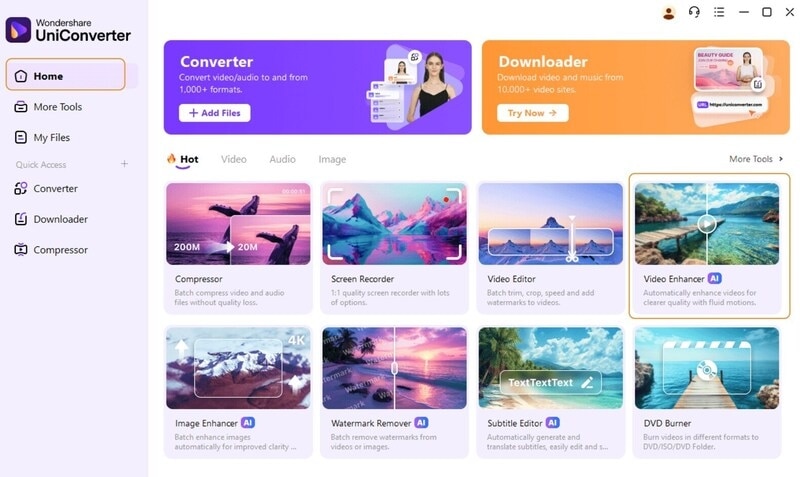
Step 1 Launch Wondershare UniConverter and Choose AI Video Enhancer
After installing UniConverter, open the program on your computer. On the homepage, you’ll find several featured tools. Navigate to the “Hot” section and click on AI Video Enhancer to get started.
Step 2 Import Your Video Files
Next, add the videos you want to enhance. You can either drag and drop your files directly into the interface or click the “+” button in the center to browse and select files from your computer.
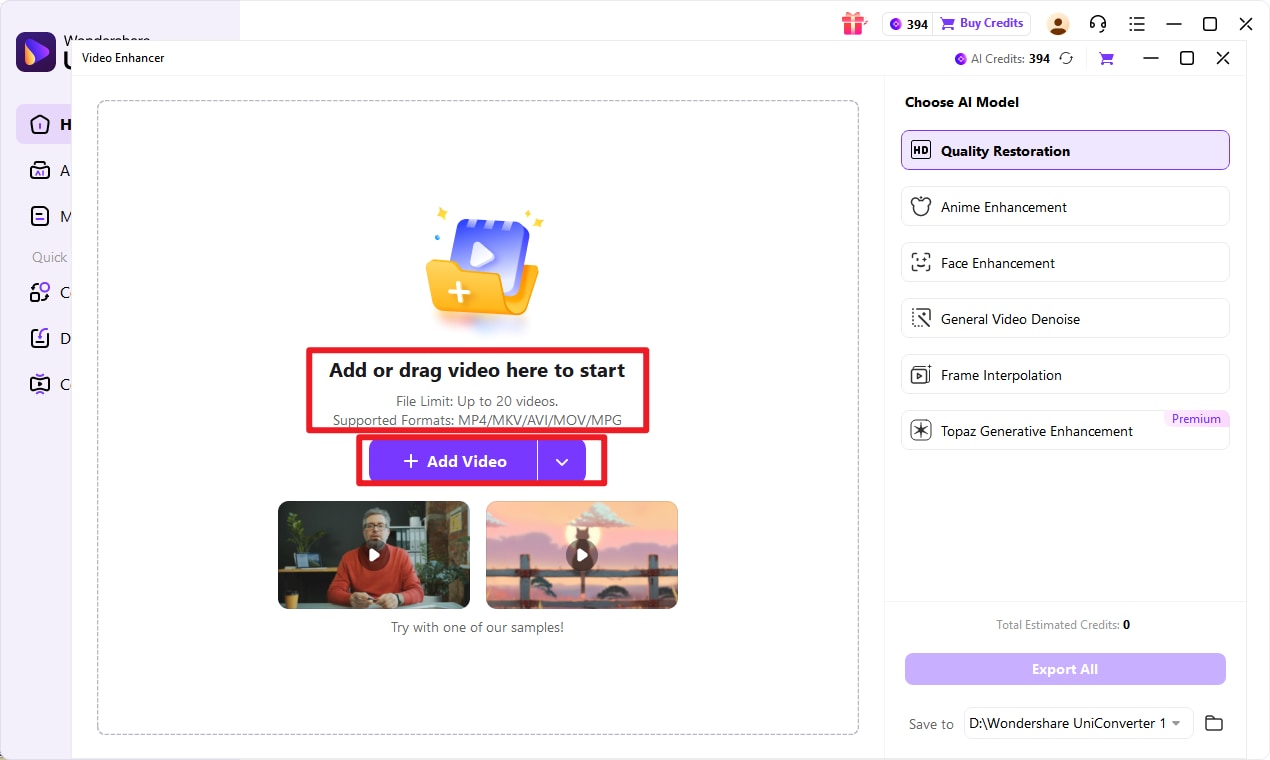
Step 3 Choose an AI Enhancement Model
UniConverter offers multiple AI models designed for different enhancement needs, like video enhancement, anme enhancement, face enhancement, etc. You can select the model that best fits your needs. For most users, Video Enhancement is a great starting option.
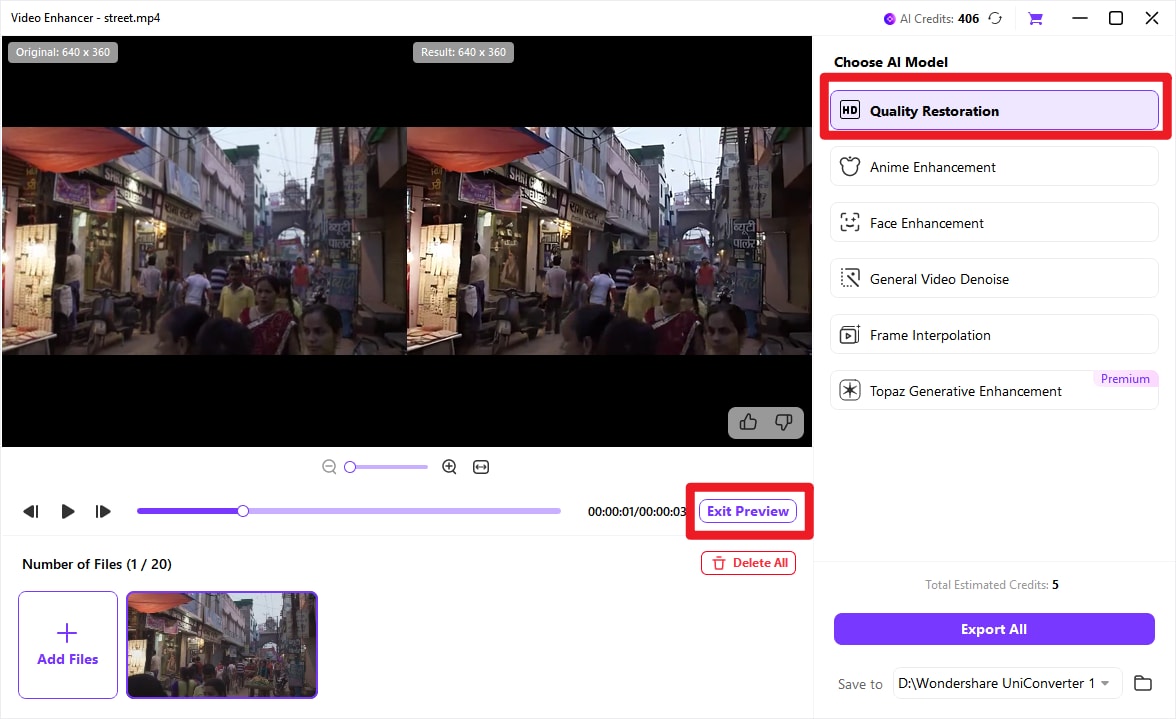
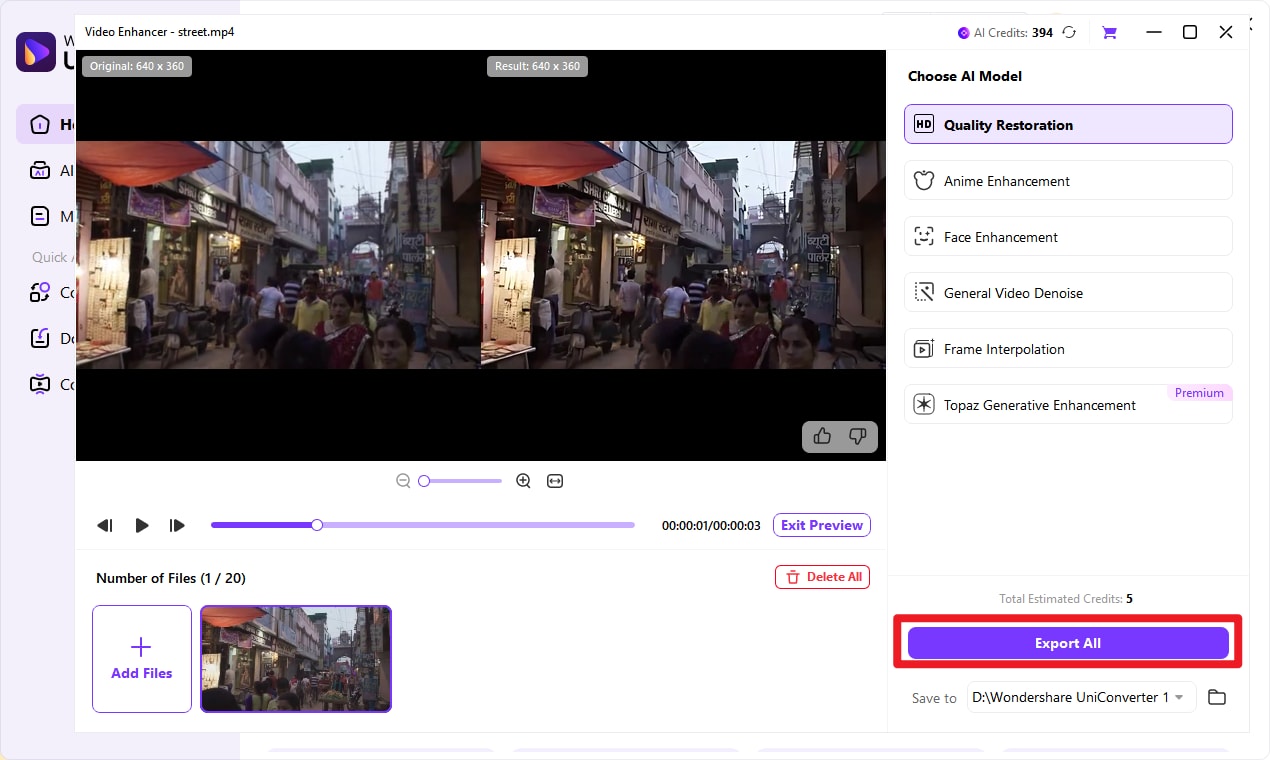
Step 4 Preview and Export the Enhanced Video
Click “Preview” to check the results before finalizing. Once satisfied, click “Export” to process your video.
Keep in mind that longer videos will take more time to enhance. After the process is complete, your upgraded video will automatically open in a new window.

Advanced Video Enhancer for Professional Results
Part 5: Interlaced vs. Progressive Video: What's the Difference?
The key difference is how each format displays video frames. Interlaced video splits a frame into two fields captured at slightly different moments, while progressive video displays the entire frame at once as a single image.
Interlaced formats such as 1080i or 480i were designed for older broadcast systems like NTSC and PAL to save bandwidth. Progressive formats like 1080p, 720p, and 4K capture and display every line in one pass, which is why they are now the standard for modern devices, streaming platforms, and video production.
| Feature | Interlaced Video | Progressive Video |
| Frame Structure | Split into two fields (odd and even lines) | Full frame displayed at once |
| Capturing Timing | Fields recorded at slightly different moments | Entire frame captured at the same moment |
| Common Formats | 480i, 1080i | 720p, 1080p, 4K |
| Motion Quality | Can produce combing artifacts during movement | Smooth and clear motion |
| Use Case | Older broadcast television systems | Modern streaming, editing, and displays |
Without proper processing, interlaced footage can show jagged motion artifacts on modern progressive displays. Deinterlacing video converts those fields into full progressive frames, making the video suitable for today's screens and platforms. In the next section, you will learn 5 methods to deinterlace video like a pro.
Conclusion
Interlaced video may have served analog TV well, but it causes combing artifacts and jagged edges on modern screens. To ensure smooth, progressive playback, it's essential to deinterlace video using the right method for your needs.
Whether you choose free deinterlace video tools to deinterlace videos like HandBrake and VLC, professional editors like Premiere Pro or DaVinci Resolve, or advanced command-line processing with FFmpeg, each approach restores clarity and motion quality. With these steps, even older footage can look crisp on today's devices.
FAQs
-
1. Does deinterlacing improve video quality?
Deinterlacing removes artifacts such as combing, flickering, and jagged edges from interlaced footage, improving playback on modern displays. However, it does not increase the original resolution or detail. -
2. Is 1080i interlaced or progressive?
1080i is interlaced. The “i” stands for interlaced, meaning each frame is split into two fields. In contrast, 1080p is progressive and displays full frames. -
3. Can I deinterlace video on a Mac?
Yes. Many video tools support deinterlacing on macOS, including both free and professional applications designed for editing and conversion. -
4. Is 4K progressive or interlaced?
Most modern 4K content is progressive (2160p), displaying full frames for smoother motion and better clarity. Interlaced 4K formats are rare today. -
5. Which deinterlacing method is best for old VHS or camcorder footage?
For older footage, software-based deinterlacing combined with enhancement features like noise reduction and color correction can significantly improve visual quality on modern screens.

