

Flickering footage can ruin an otherwise great video. Those sudden brightness shifts between frames make clips look unstable and distracting, especially in timelapse shots, slow motion footage, or videos recorded under LED lighting. If you are working in deflicker Premiere Pro workflows, you have probably noticed that fixing this issue is not always straightforward.
While Premiere Pro includes a few tools to help reduce flicker, they often require manual adjustments and some trial and error. This guide explains how to deflicker Premiere Pro footage using built-in methods, along with three easier alternatives that can save time and produce more consistent results.
In this Article
Part 1: What Causes Video Flicker?
Video flicker usually happens when your camera settings fall out of sync with the lighting conditions during recording. When the camera captures frames at a rate that does not match the light's frequency, brightness can fluctuate between frames. Some of the common reasons are:
Shutter Speed and Lighting Frequency Mismatch: Artificial lights, such as LEDs and fluorescent bulbs, pulse at specific frequencies (typically 50Hz or 60Hz). When the camera shutter speed does not align with that cycle, flicker appears in the footage.
Time-Lapse Exposure Variations: In time-lapse photography, lighting conditions change gradually. Small exposure differences between frames can cause noticeable flickering when played together.
High Frame Rate Slow-Motion Recording: Shooting at very high frame rates can exaggerate tiny brightness shifts that would normally go unnoticed, making flicker more visible.
Mixed Lighting Environments: Using different types of light sources together, such as LEDs and fluorescent bulbs, can result in inconsistent brightness patterns that cause flicker.
Low-Quality LED Panels or Indoor Lighting: Cheaper LED lights often have unstable refresh rates, which cameras can easily capture as flickering in the final footage.
Part 2: How to Deflicker Video in Premiere Pro?
Deflicker in Premiere Pro works with different methods, each suited to a different type of problem. None of the deflicker methods are one-click solutions, and results will vary depending on the nature and severity of the flicker in your footage.
Three Methods to Deflicker Videos in Premiere Pro

Method 1: Using the Anti-Flicker Filter
Premiere Pro has a built-in Anti-Flicker Filter tucked inside the Motion controls. It was originally designed to reduce flickering on interlaced displays, but it can also help with certain types of light flicker in your footage.
Step 1: Navigate to the Adobe Premiere Pro homepage and click "New Project." Choose a location to save the project, enter a project name, and click "Create" to open the editing workspace.
Step 2: Import your footage by going to the top menu and clicking "File," then selecting "Import." Locate your video file on your computer, select it, and click "Open." The file will appear inside the Project panel. Drag the imported clip from the "Project panel" to the "Timeline panel" at the bottom of the screen. This places the footage onto the editing timeline so it can be modified.
Step 3: Select the timeline, then locate the "Effect Controls" panel near the upper-left corner of the interface. If it is not visible, go to the top menu and click "Window," then select "Effect Controls" to open the panel. Inside the Effect Controls panel, find the "Motion" section. Click the small arrow next to Motion to expand its settings and reveal additional controls.
Step 4: Scroll within the Motion controls until you find the "Anti-Flicker Filter" parameter. This control is designed to reduce flickering artifacts that appear in interlaced or unstable footage. Increase the "Anti-Flicker Filter" value slowly by dragging the slider to the right. Start with a small adjustment and gradually increase the strength until the flicker becomes less noticeable.
Step 5: Move the "playhead" along the timeline and press the spacebar to preview the clip. If the flicker persists, increase the filter value slightly until you achieve a smoother result, then save the file.
Keep in mind that the Anti-Flicker Filter works by slightly blurring the image. For sharp, high-contrast footage, you may need to push the slider higher, which means accepting more softness in your output.
Method 2: Lumetri Color Panel Adjustments
When flicker manifests as fluctuating brightness rather than fine-line shimmer, the Lumetri Color panel offers a workaround. The idea is to manually smooth out the exposure shifts that cause the flickering appearance.
Step 1: Open your project in Adobe Premiere Pro and ensure your video clip is already placed on the timeline. Click the clip in the timeline to make it active. This ensures that any color adjustments will be applied to the selected footage.
Step 2: Navigate to the "workspace bar" at the top of the interface and click "Color." This switches Premiere Pro into the color correction workspace and opens the "Lumetri Color Panel." If the Lumetri panel does not appear automatically, go to the top menu and click "Window," then select "Lumetri Color" to display it.
Step 3: Inside the Lumetri Color panel, locate the "Basic Correction" section and click the arrow next to it to expand the available controls. Adjust the "Exposure" slider slightly to stabilize overall brightness if the clip appears to brighten and darken between frames.
Step 4: Adjust the "Highlights" slider to reduce bright flicker spikes, and the "Shadows" slider to smooth darker variations that may occur between frames. Play the video using the spacebar to preview the changes and save the file.
The Lumetri Color method is more of a manual color correction approach than a dedicated deflicker tool. It works best for mild flicker caused by gradual lighting shifts, such as clouds passing over outdoor time-lapse shots. For aggressive LED-induced flicker, the results tend to be inconsistent.
Method 3: Frame Stacking Trick (No Plugin)
Frame Stacking Trick is a clever workaround that blends adjacent frames together to average out brightness differences. It requires no plugins and works entirely within Premiere Pro.
Step 1: Open your project in Adobe Premiere Pro and ensure the clip you want to fix is already placed on the timeline.
Step 2: Select the clip in the timeline by clicking on it. Once selected, hold the Alt key (Windows) or Option key (Mac), then drag the clip upward to duplicate it on the video track above. After duplicating the clip, position the copied clip directly above the original so both layers align perfectly in the timeline.
Step 3: Select the clip on the upper track and open the "Effect Controls" panel. Locate the "Opacity" section within the controls. Reduce the Opacity value to 50 percent. This blends the top layer with the original clip beneath, allowing the two frames to visually combine. Zoom into the timeline using the "+ key or zoom slider," then select the top clip and move it forward by 1 frame using Alt + Right Arrow (Windows) or Option + Right Arrow (Mac).
Step 4: Move the playhead to the start and press "Spacebar" to preview the video. The blended frames help smooth brightness changes and reduce flicker.
The Frame Stacking Trick is best suited for static or near-static scenes. If your footage has significant motion, the frame offset will introduce ghosting artifacts that can look worse than the original flicker.
Part 3: Limitations of Deflickering in Premiere Pro
While Adobe Premiere Pro offers a few ways to reduce flicker, none of its built-in tools are designed specifically for modern flicker problems caused by LED lighting, time-lapse exposure shifts, or rolling shutter artifacts. Most of the techniques available in Premiere are workarounds rather than dedicated solutions, so results can vary depending on the type of footage. For simple flicker cases, these methods may help, but more complex lighting issues often require external tools or alternative workflows.
No Dedicated Deflicker Tool: Premiere Pro does not include a purpose-built deflicker feature for light-induced flicker. Editors typically rely on indirect methods rather than a specialized correction tool.
Anti-Flicker Filter Has Limited Scope: The Anti-Flicker Filter was created to reduce flicker caused by interlaced displays. It can soften minor flicker but often struggles with lighting-related flicker in modern footage.
Lumetri Adjustments Are Manual Workarounds: Using the Lumetri Color panel to correct flicker involves manually adjusting exposure, shadows, and highlights. This process can reduce brightness fluctuations, but it requires trial and error and rarely solves severe flicker issues.
Frame Stacking Fails With Motion: The frame stacking technique blends adjacent frames to average brightness changes. However, it quickly becomes ineffective when the clip contains noticeable subject movement or camera motion.
LED Light Flicker Remains Difficult: Footage recorded under LED panels, fluorescent lights, or certain indoor lighting setups often produces rolling bands or pulsing brightness. Premiere's built-in tools generally cannot remove these artifacts cleanly.
Third-Party Plugins Add Extra Cost: Many editors rely on plugins such as Flicker Free or DEFlicker for reliable results. While effective, these solutions add additional cost on top of the existing Adobe subscription.
Part 4: 3 Easier Alternatives to Deflicker Video Without Premiere Pro
If you find the built-in options in Adobe Premiere Pro limiting, several other tools offer faster and more reliable ways to remove flicker. The editors and plugins below provide dedicated deflicker features, ranging from AI-powered one-click fixes to professional-grade correction tools.
1. Davinci Resolve
DaVinci Resolve, a professional-grade video editor by Blackmagic Design, includes a built-in Deflicker OFX plugin on its Color page. Unlike Premiere Pro, this is a dedicated deflicker tool designed specifically to address brightness inconsistencies from timelapse, high frame rate, and artificial lighting scenarios.
The plugin sits in the Effects panel under Resolve FX Revival and offers granular control via the Luma Threshold, Chroma Threshold, and Motion Threshold parameters. You can isolate exactly which types of brightness changes the tool targets, leaving the rest of your footage untouched.
Key Features
Dedicated Deflicker OFX plugin with fine-tuned threshold controls
Available in both the free and Studio versions
A professional color grading suite is built into the same application
Handles timelapse, slow-motion, and LED-induced flicker
2. CapCut

CapCut is a desktop video editor developed by ByteDance that has gained popularity for its straightforward interface and surprisingly capable feature set. It includes a dedicated Remove Flickers option under the Basic tab that uses AI to automatically detect and smooth out flickering frames.
The workflow is about as simple as it gets: import your clip, select it on the timeline, tick the Remove Flickers checkbox, choose a mode (LED or Flashlight), pick a level, and let the software handle the rest. There are no threshold sliders to wrestle with and no multi-step workarounds.
Key Features
AI-powered one-click flicker removal and adjustable intensity levels
Multiple modes for different flicker types (LED, Flashlight)
Full video editing suite with effects, transitions, and audio tools
Available on both Windows and Mac
3. DigitalAnarchy
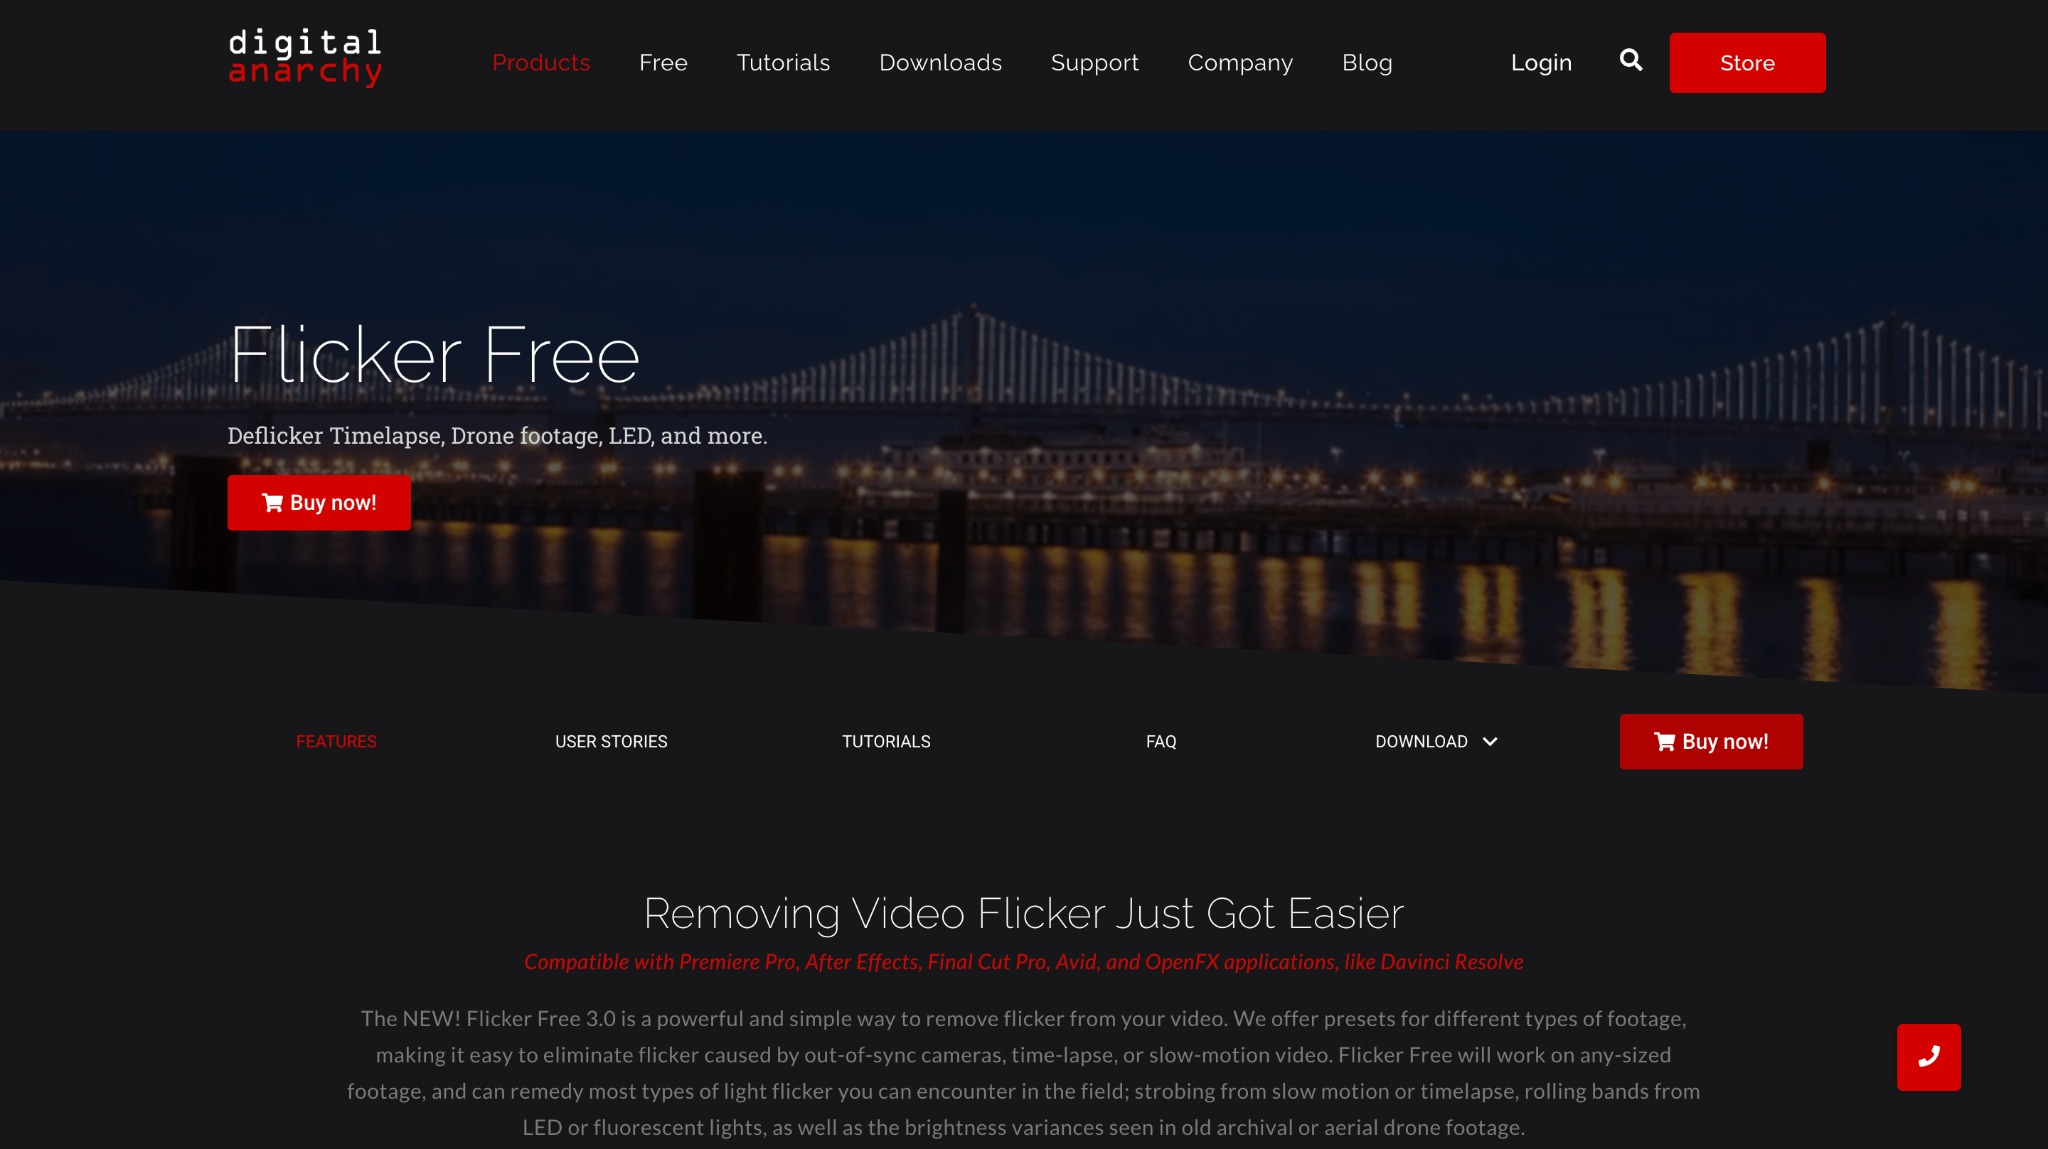
Flicker Free is a dedicated deflickering plugin that has been the go-to solution for professional editors for years. Version 3.0, released in 2025, introduced a new algorithm that can analyze up to 8 seconds of video around a given frame, a massive leap from the 0.9-second window in earlier versions.
What makes Flicker Free stand out is its specialization. Flicker Free does one thing and does it exceptionally well. It ships with presets for common flicker types, including timelapse, slow-motion, rolling bands, and drone footage, so you can get solid results quickly and fine-tune from there.
Key Features
Purpose-built deflicker algorithm with proprietary optical flow motion detection
Presets for timelapse, slow-motion, rolling bands, drone footage, and more
Compatible with Premiere Pro, After Effects, Final Cut Pro, DaVinci Resolve, and Avid
Handles slow-moving LED bands that other tools miss
The table below compares DaVinci Resolve, CapCut Desktop, and Flicker Free against Adobe Premiere Pro across key factors such as ease of use, pricing, and deflicker capabilities.
| Feature | Premiere Pro | DaVinci Resolve | CapCut Desktop | Flicker Free 3.0 |
| Dedicated Deflicker Tool | No | Yes | Yes (AI) | Yes |
| Ease of Use | Complex | Moderate | Very Easy | Easy (presets) |
| Price | Monthly: $34.49/monthAnnual, billed monthly: $22.99/monthAnnual prepaid: $263.88/year | Free / $295 | Free / $9.99/mo | $199 (one-time) |
| Rolling Band Fix | No | Limited | Limited | Yes |
| Best For | Mild flicker | All-in-one editing | Quick fixes | Pro-level flicker |
Part 5: How to Enhance Videos After Deflickering [PC & Mac]?

Deflickering solves the brightness inconsistency, but it does not address other quality issues your footage may have picked up along the way. Noise, softness from the deflicker process itself, and compression artifacts can all linger after the flicker is gone. This is where a dedicated enhancement tool comes in.
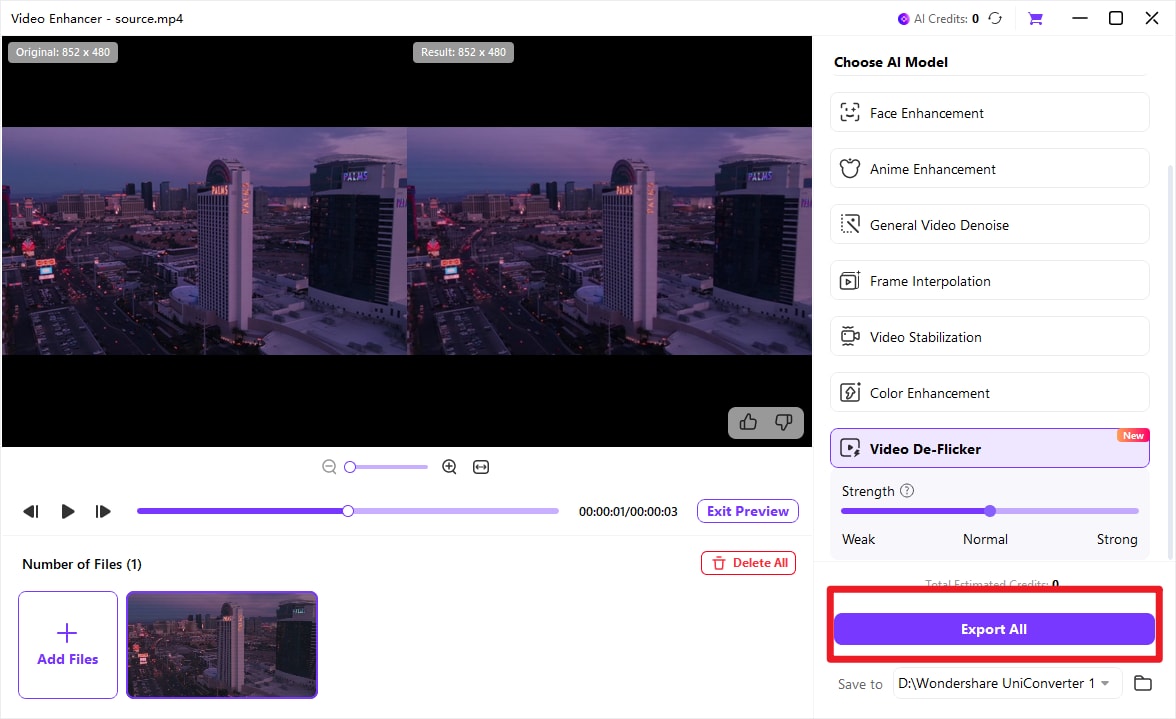
Wondershare UniConverter's AI Video Enhancer can upscale resolution, reduce noise, improve sharpness, and smooth frame rates. It is available on both Windows and Mac, and it enhances images in just a few clicks. UniConverter's AI Enhancer is particularly useful here because, regardless of which tool you use, the deflickering process can sometimes introduce slight softness or leave residual noise.
Beyond video enhancement, UniConverter also supports batch conversion across 1000+ formats, smart compression that preserves quality, AI noise removal for audio, and screen recording at up to 4K 120fps. It is a practical addition to any post-production toolkit.
How to Enhance the Video with Ease in One Click
Follow these steps to enhance the video without any technical difficulties offline:
Step 1: On the desktop, navigate to "Video > Video Enhancer."
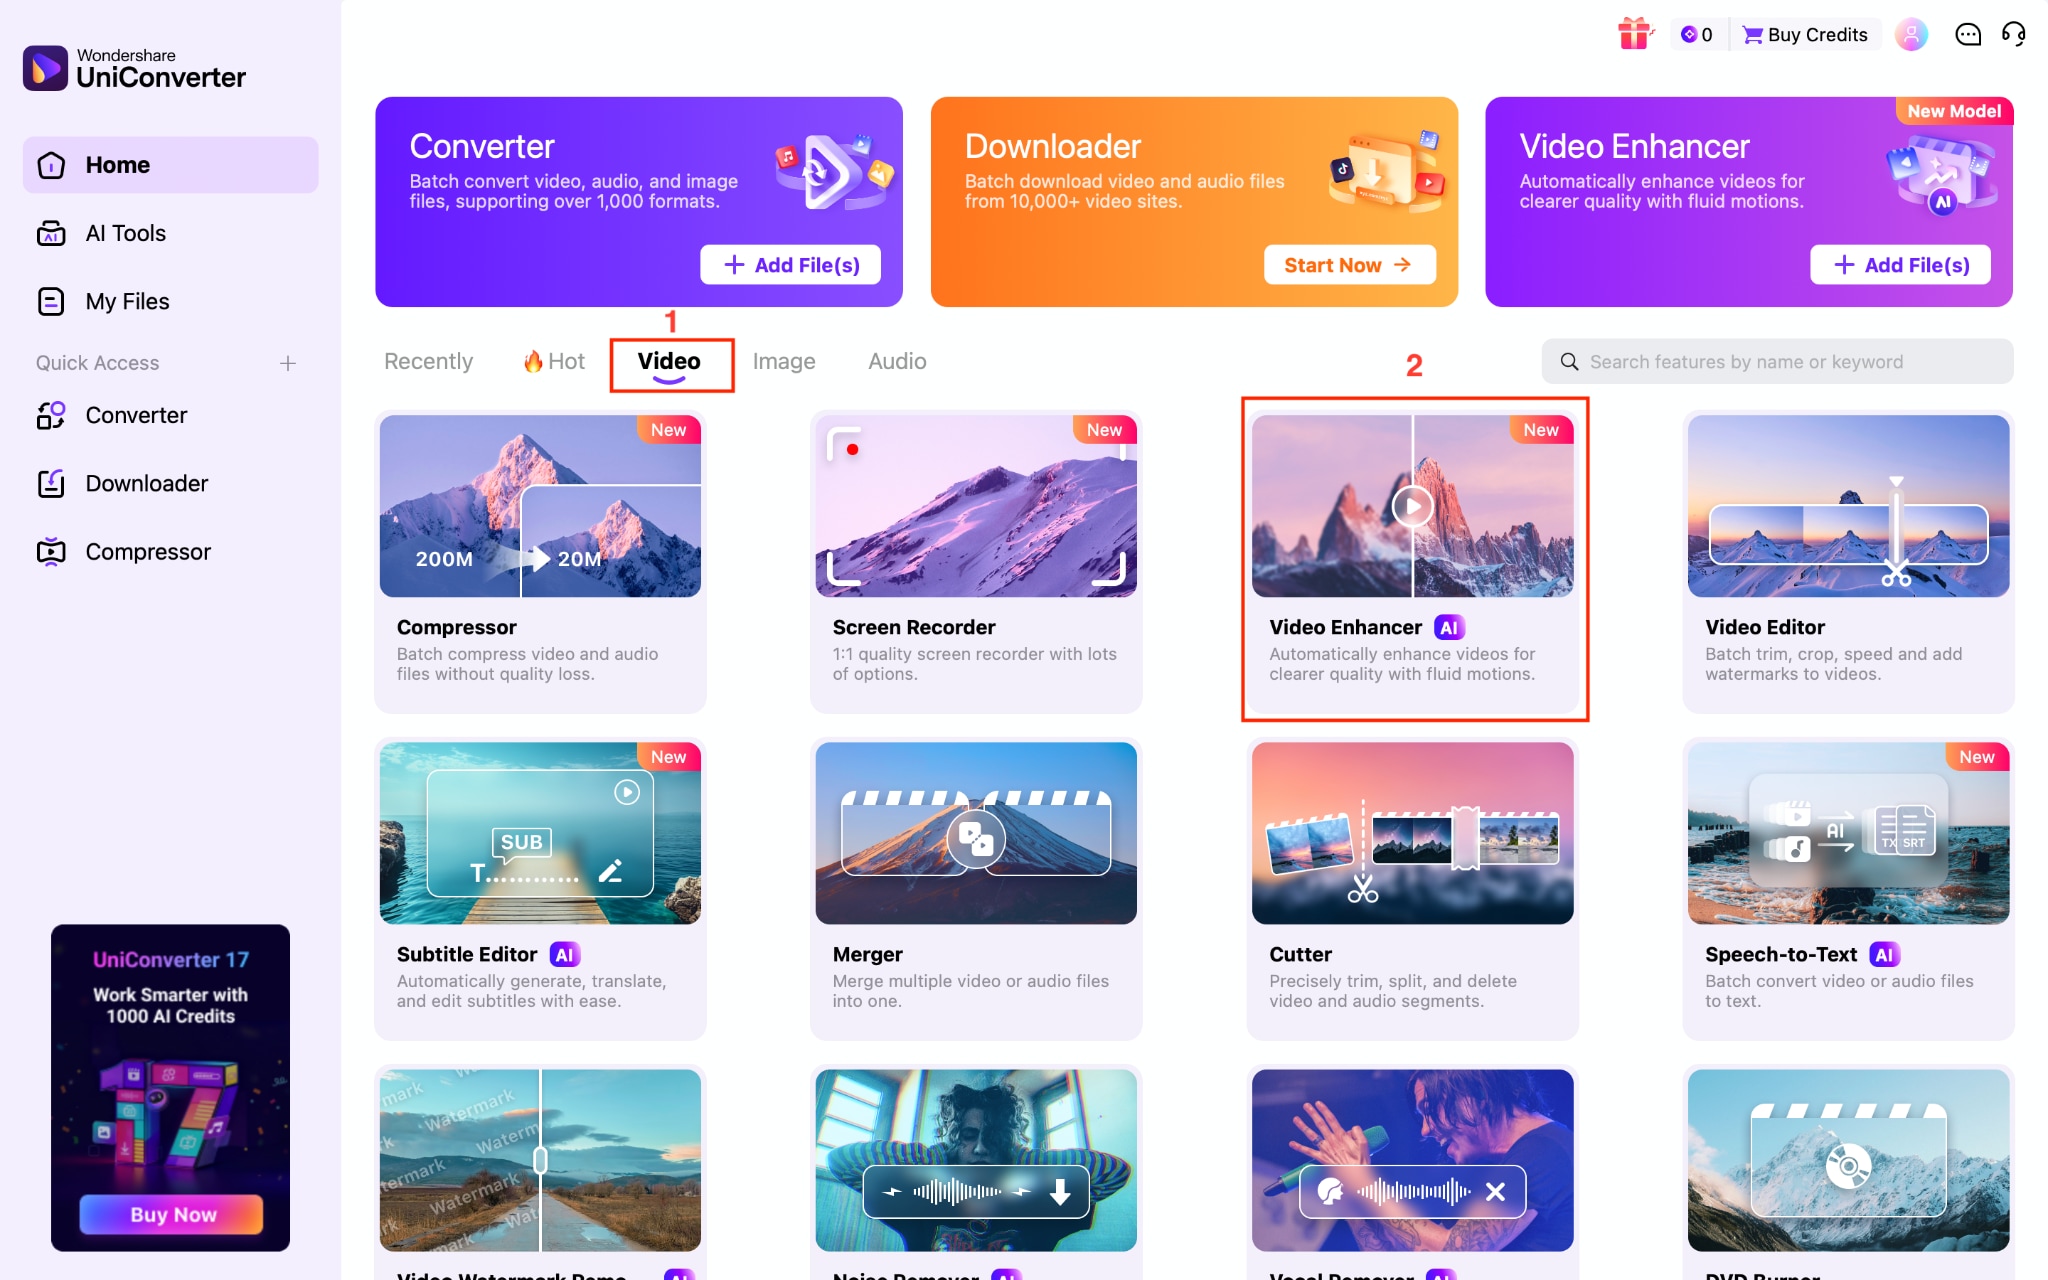
Step 2: Click "Add Video" to upload a file, or click "Add Folder" to upload a folder.
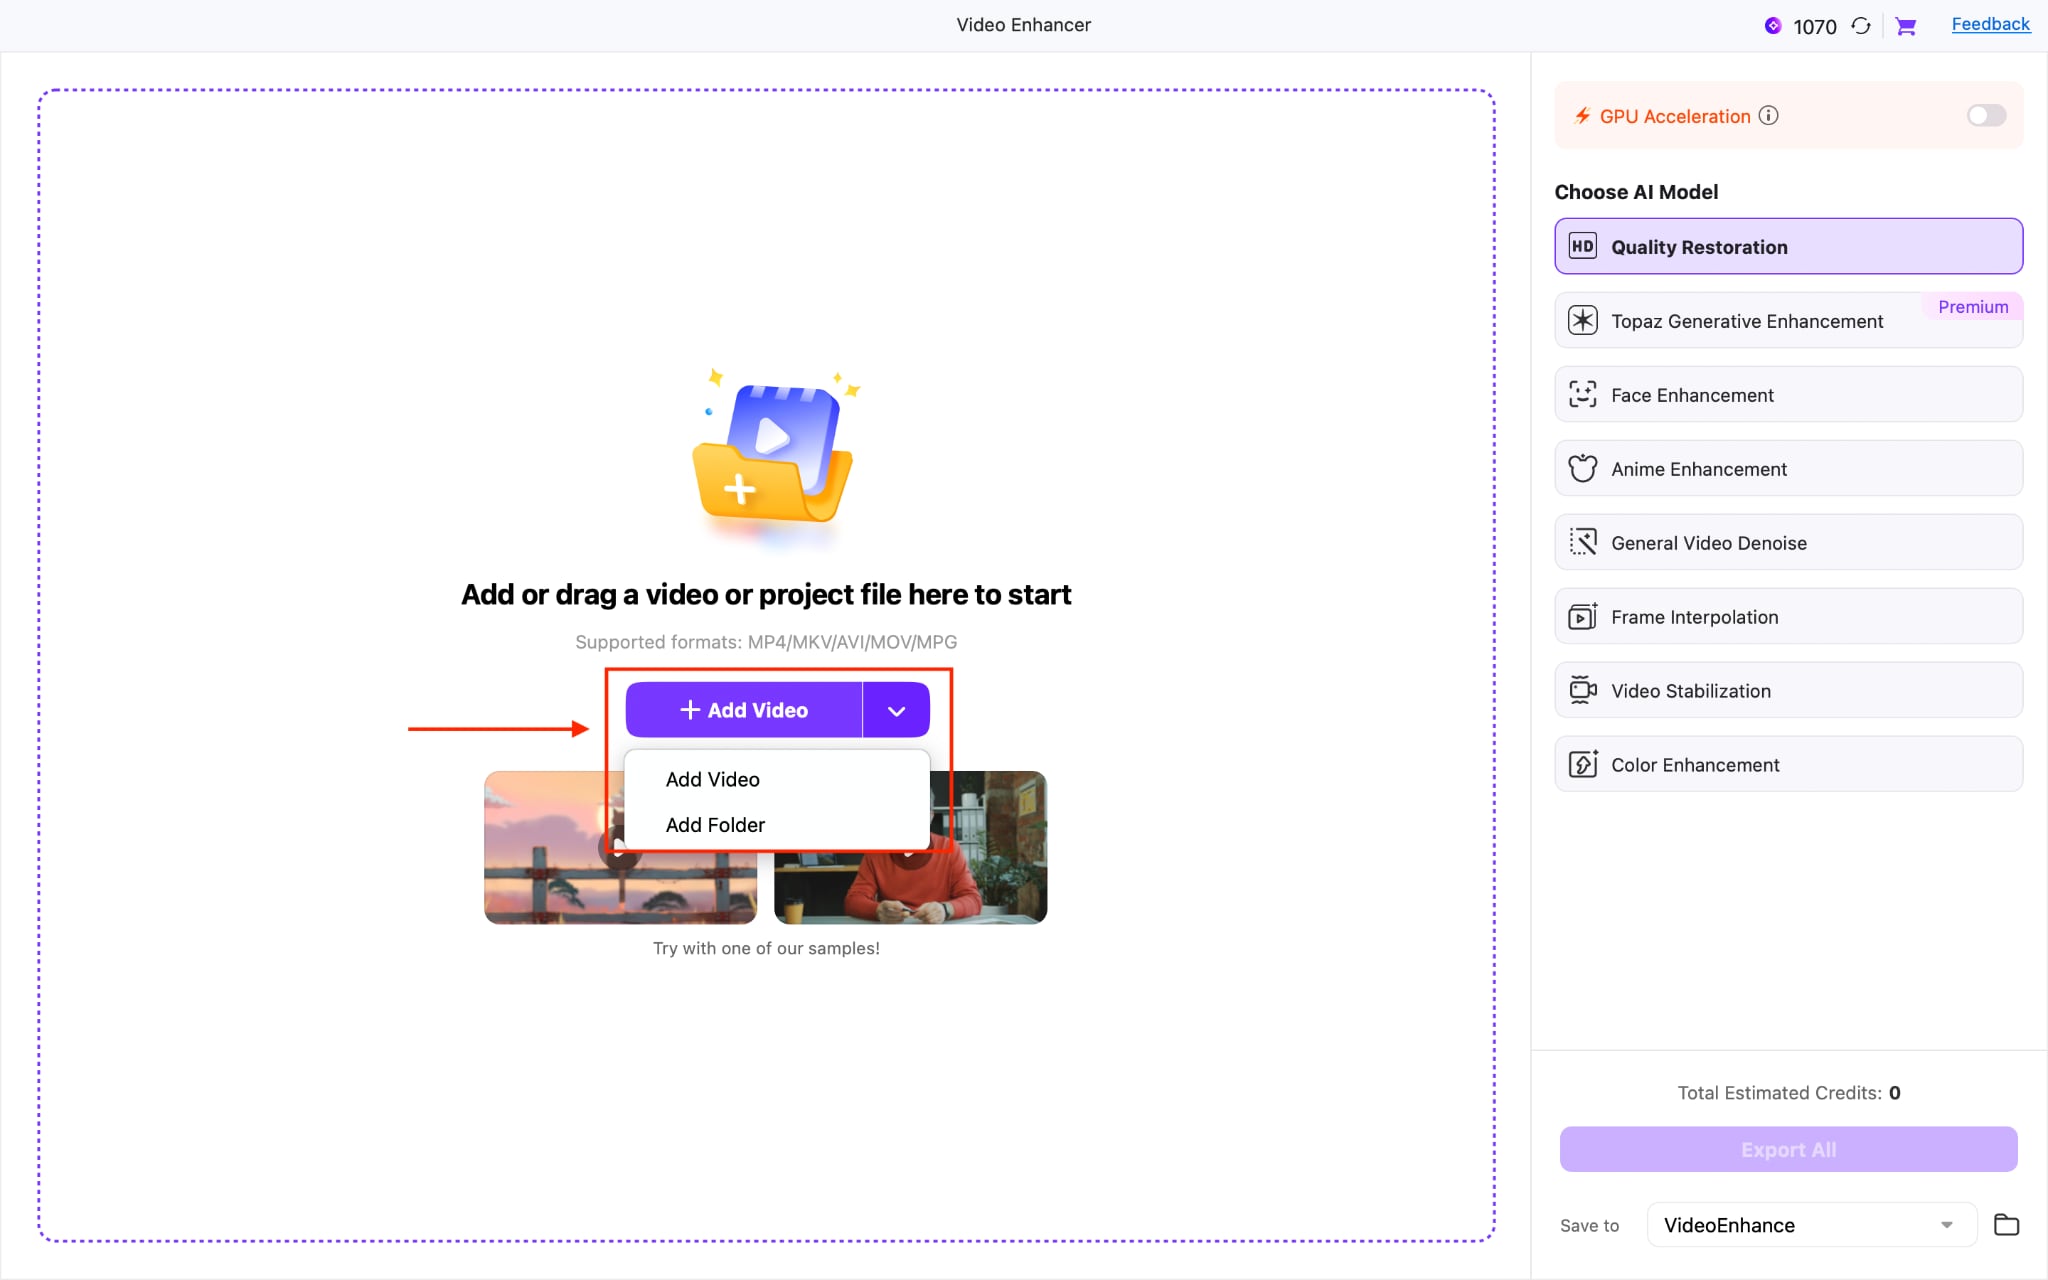
Step 3: Choose the AI Model; you will see various video enhancement options, such as Quality Restoration, Topaz Generative Enhancement, Face Enhancement, Anime Enhancement, and more.
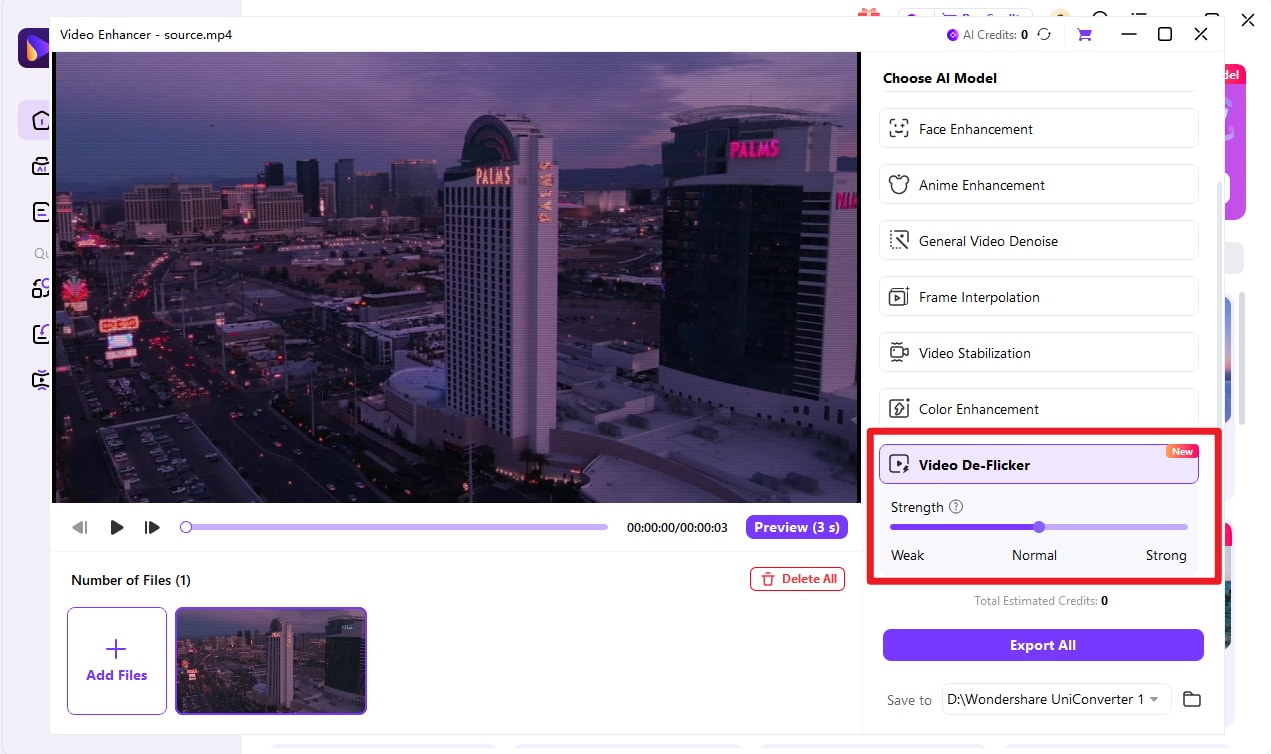
Step 4: Once done, click on "Export All."

Smooth Video Deflicker for Consistent Visual Quality
Part 6: Tips to Prevent Flicker While Shooting
The most reliable way to deal with flicker is to avoid capturing it in the first place. A few adjustments during your shoot can save hours of post-production work:
Match your shutter speed to the local power frequency. Use multiples of 1/50s in 50Hz regions and 1/60s in 60Hz regions to sync with the light cycling.
Avoid mixing light sources. Different lights pulse at different rates. Combining LEDs with fluorescents in the same scene is almost guaranteed to produce flicker.
Shoot test footage before the full take. A 10-second test clip reviewed on your laptop can reveal flicker issues before you commit to an entire shoot.
Use cinema-rated lights when possible. Higher-quality LED panels designed for video work offer higher refresh rates and are far less likely to cause flicker.
Check your camera's anti-flicker setting. Many modern cameras have a built-in anti-flicker mode that automatically adjusts the shutter timing. Enable it when shooting under artificial lighting.
Conclusion
Deflickering in Adobe Premiere Pro is possible, but most of its built-in methods are workarounds rather than true deflicker solutions. Tools like the Anti-Flicker Filter, Lumetri adjustments, and frame stacking can reduce mild flicker, yet they often struggle with complex issues such as LED banding or strong brightness fluctuations.
For faster, more reliable results, many editors turn to alternatives such as DaVinci Resolve, CapCut Desktop, or Flicker Free. After removing flicker, running the footage through Wondershare UniConverter's AI Video Enhancer can further improve clarity and polish. Still, the best solution is prevention; proper lighting and camera settings during filming will always produce the cleanest results.
FAQs
-
1. Does Premiere Pro have a built-in deflicker tool?
Yes. Premiere Pro includes an Anti-Flicker Filter under the Motion controls in the Effect Controls panel. It was originally designed for interlaced footage and can reduce certain types of flicker, but it is less powerful than dedicated deflicker tools. -
2. Can I deflicker video for free?
Yes. DaVinci Resolve’s free version includes a Deflicker OFX plugin that handles common flicker issues. You can also use manual techniques in Premiere Pro without additional cost if you already have an Adobe subscription. -
3. Why does my video flicker under LED lights?
LED lights flicker at frequencies tied to the local power supply (50Hz or 60Hz). If your camera’s shutter speed or frame rate is not synchronized with this frequency, brightness variations between frames can create visible flicker. -
4. Will deflickering reduce my video quality?
Some deflicker methods may introduce slight softness or artifacts. For example, filters may blur frames, and frame-stacking techniques can cause ghosting in motion scenes. Post-processing with enhancement tools can help restore sharpness. -
5. What is the best deflicker plugin for Premiere Pro?
Flicker Free by Digital Anarchy is widely considered one of the best dedicated deflicker plugins. It offers advanced algorithms for handling LED flicker and high frame rate footage and supports multiple professional editing platforms.

