

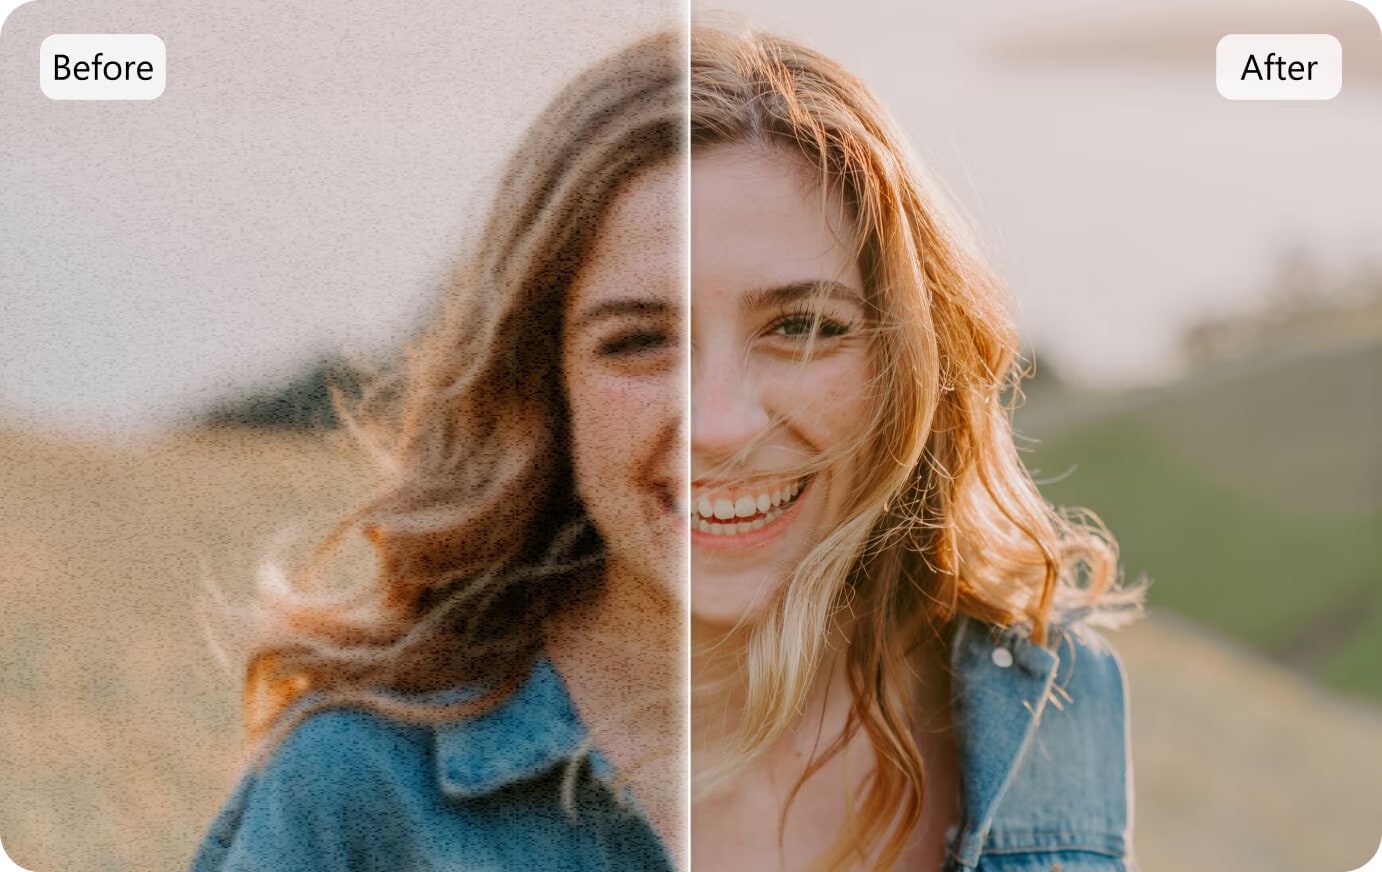
Blurry night shots. Grainy memories. Distracting flicker and pixelated mess. If you've ever tried to fix noisy footage, you know how frustrating it can be—especially when precious moments or professional projects end up looking rough and unwatchable. That's where modern tools to denoise video come in—powerful, AI-driven solutions that clean up your footage without killing the detail, color, or mood.
In this guide, we'll break down common video noise problems, compare the best tools like UniConverter and Veed.io, and show you exactly how to clean your clips—whether you're editing on a desktop or right in your browser.
Table of Contents:
Part 1. Types of Problems Video Denoisers Can Help Fix
Whether you're touching up old home videos, polishing YouTube content, or delivering polished client work, the right denoiser video tool can make your footage look clean and professional—no steep learning curve required.
Here are the most common video issues—and how the right AI video denoiser can fix them:
1. Sensor Noise (Grainy Footage)
Have you noticed those distracting speckles in dark scenes or older camera footage? That's sensor noise—and it's one of the most common problems in low-light shooting.
Fix it with: A reliable AI video denoiser like Neat Video that reduces grain without sacrificing fine detail.
2. Motion Artifacts (Blurry or Ghost Trails)
Fast camera pans or quick subject movements can leave behind blur streaks or ghost-like trails. These motion artifacts are especially distracting in action shots.
Fix it with: Tools like Premiere video denoiser plugins, which sharpen motion and restore definition.
3. Compression Artifacts (Blocky Pixels & Color Banding)
Over-compressed footage or repeated exports often lead to compression artifacts—blockiness, washed-out details, or banding in gradients.
Fix it with: Advanced video denoiser tools that intelligently reconstruct clean visuals from degraded frames.
4. Flickering Frames (Random Brightness or Color Shifts)
Even great footage can be ruined by flickering—those sudden brightness or color changes that disrupt the flow.
Fix it with: Frame-by-frame AI denoise video software that smooths inconsistencies and enhances visual stability.
5. Overall Noisy or Messy Visuals
Sometimes it's a mix of all the above—low-res files, old clips, or just shaky mobile footage.
Fix it with: A budget-friendly video denoiser free tool that improves quality without needing pro-level skills.
Pro Tip: You don't need expensive software to get professional results. Many denoise for video solutions are browser-based or free to start—perfect for creators on a budget or just beginning.
The takeaway? Whatever your project or skill level, the right denoiser video tool can dramatically level up your content—making it cleaner, clearer, and far more watchable.

Super Easy to Use Batch Video Denoiser
Part 2. Batch Denoise Video with UniConverter
When you're dealing with multiple noisy videos—be it old camcorder footage, compressed clips, or shaky travel logs—manually fixing each one can be exhausting. That's where Wondershare UniConverter's AI Video Denoiser steps in. With its batch-processing feature, UniConverter lets you denoise video files in one go, saving time while preserving quality.
Whether you're cleaning up sensor grain, motion blur, or compression artifacts, UniConverter's AI denoise video technology uses frame-by-frame analysis to smooth out distortions without making the video look overly processed. Unlike complex tools such as Neat Video Denoiser, UniConverter offers a more beginner-friendly and cost-effective solution—perfect for creators, educators, or anyone restoring memories.
Best For:
- Cleaning up multiple noisy recordings at once
- Creators looking for a video denoiser free with high-quality output
- Users wanting an easy alternative to Premiere video denoiser or plugin-based workflows
How to Batch Denoise Videos in UniConverter
Step 1: Open UniConverter and Load Your Videos
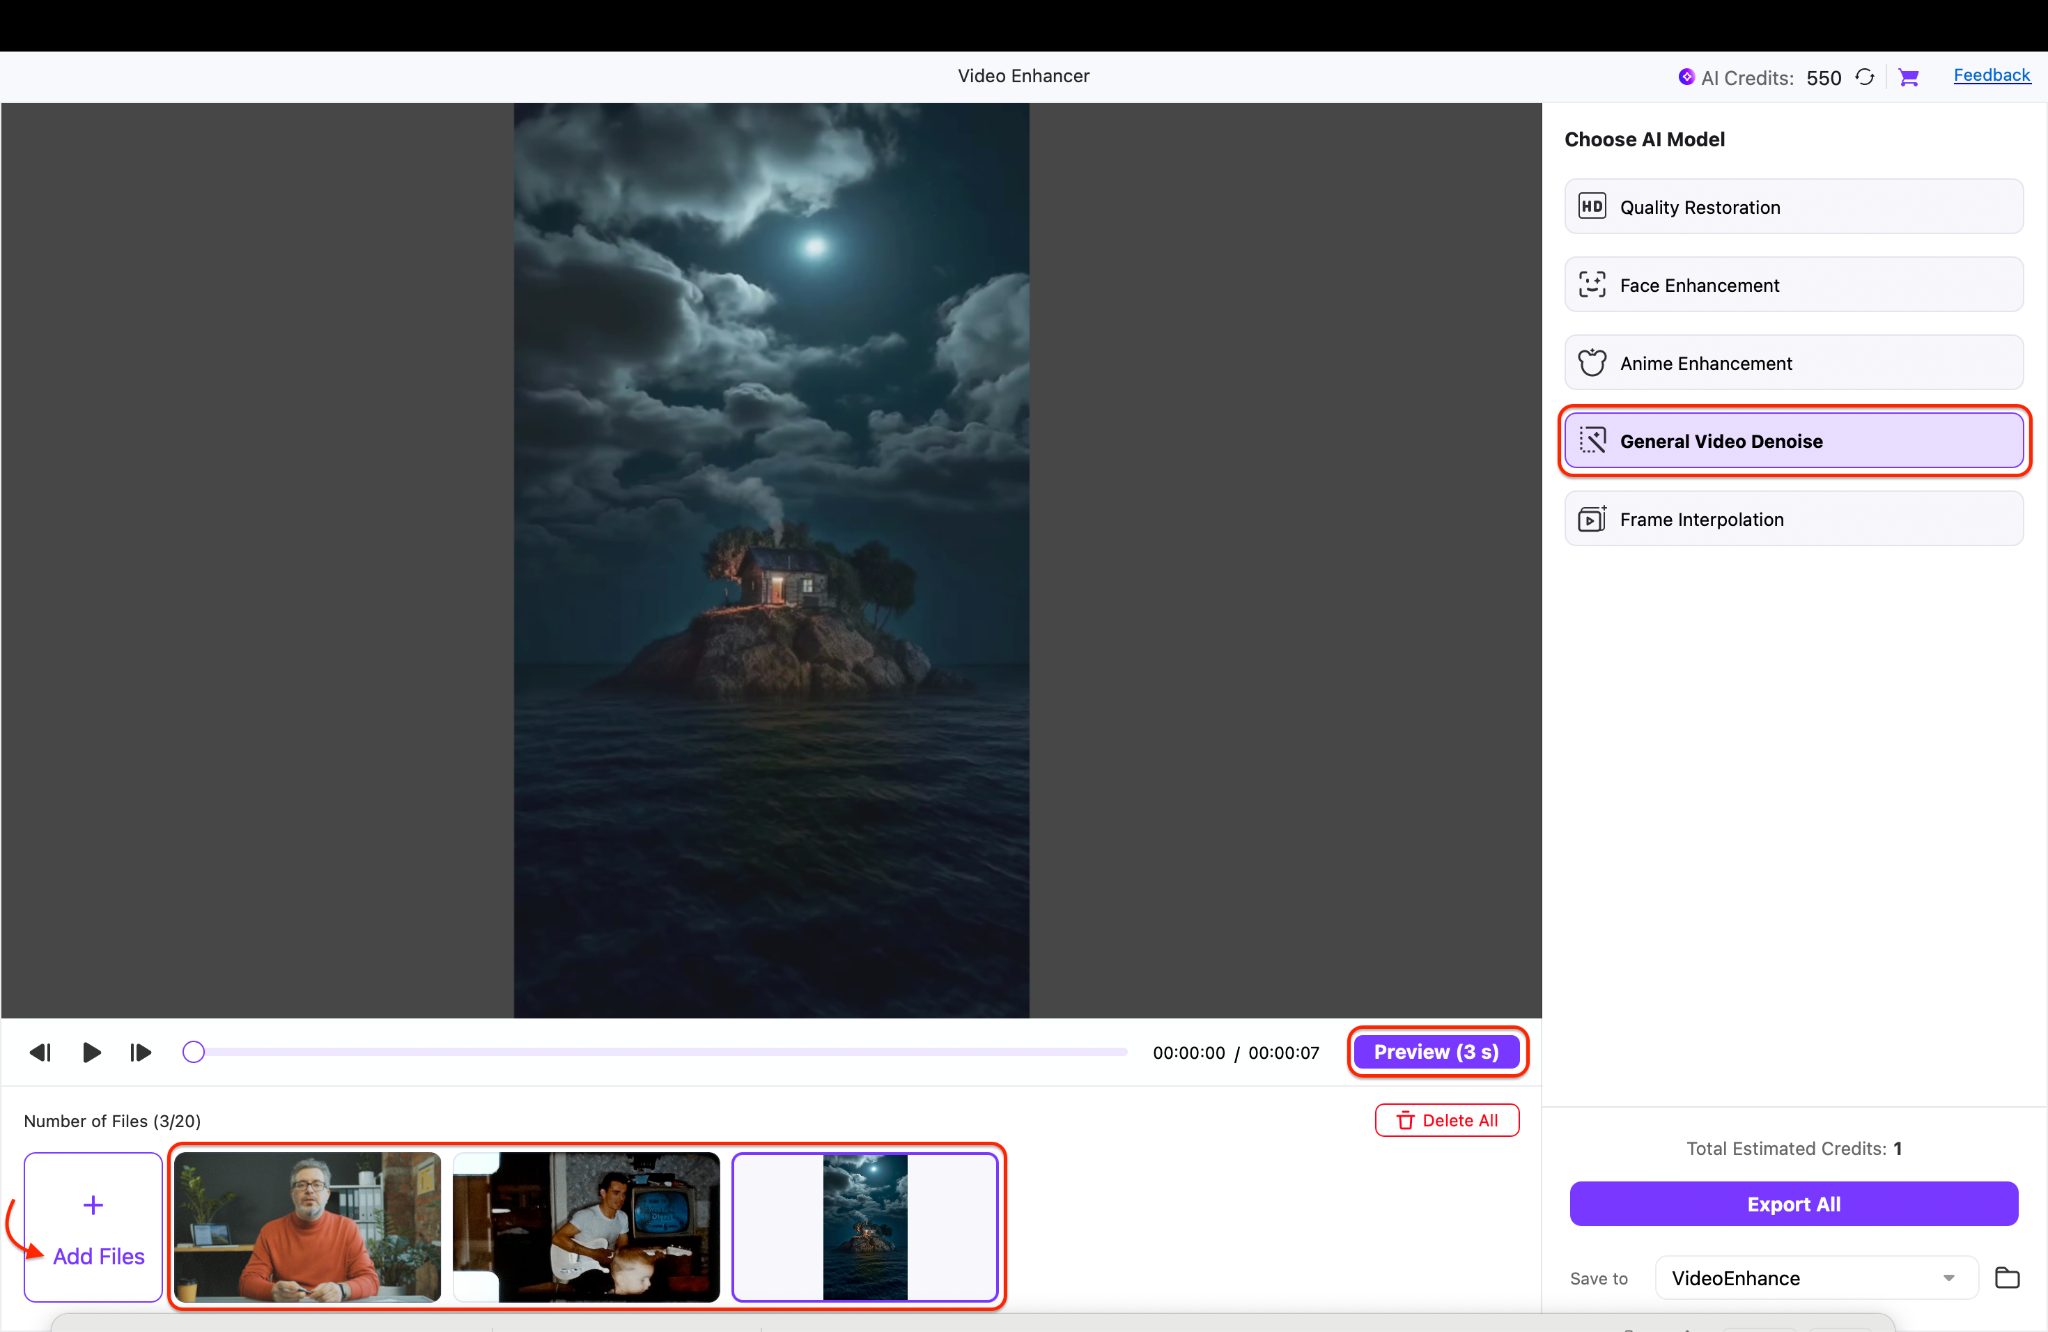
Launch Wondershare UniConverter on your desktop and go to the More Tools tab. From the list of Video tools, choose AI Video Enhancer to begin cleaning up your footage. Click + Add Video to upload all the noisy clips you wish to improve. You can even drag and drop multiple videos at once for seamless batch uploading.
Whether you're dealing with low-light grain or smartphone artifacts, UniConverter handles it all efficiently.

Step 2: Customize Denoise Settings and Preview
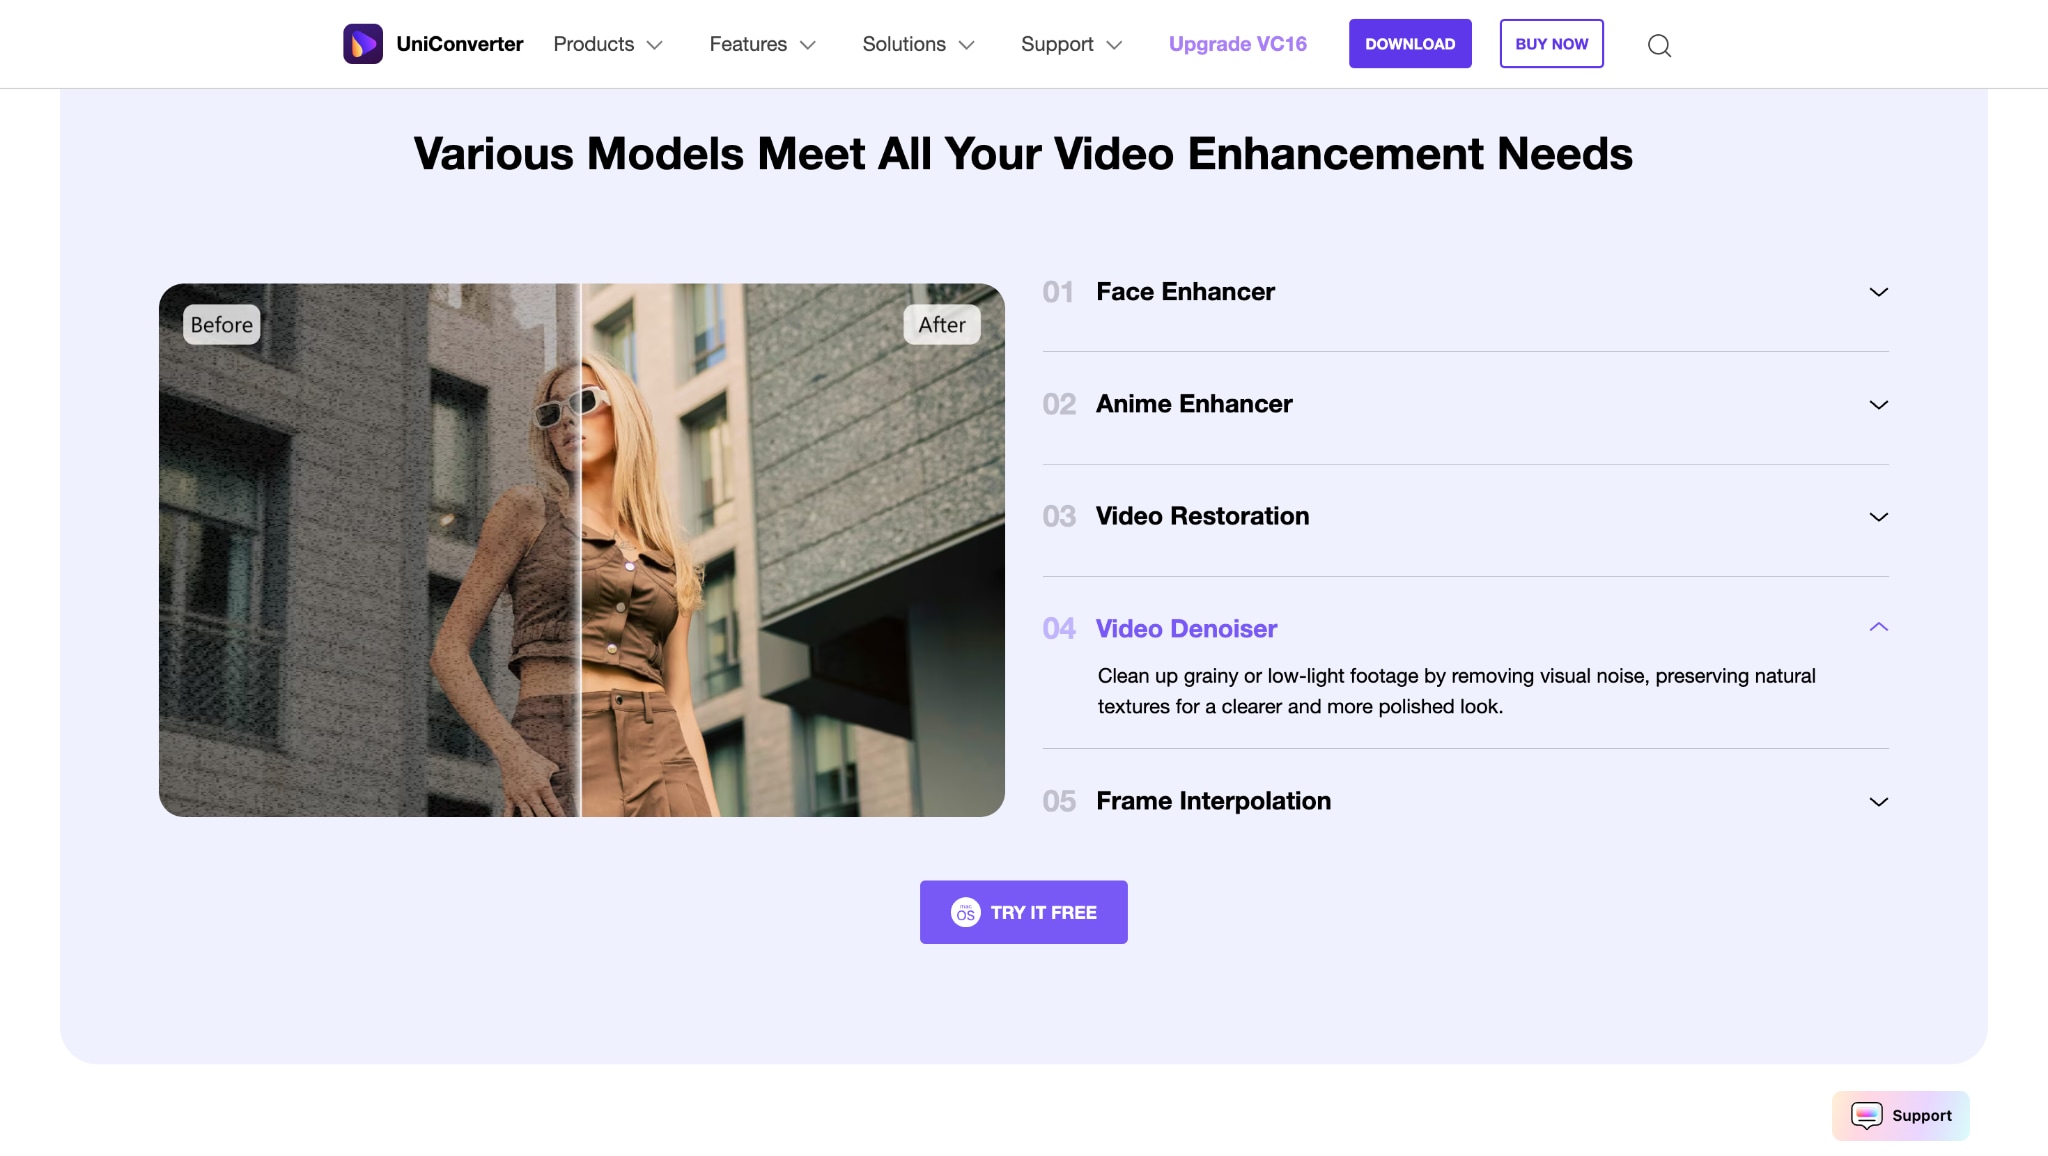
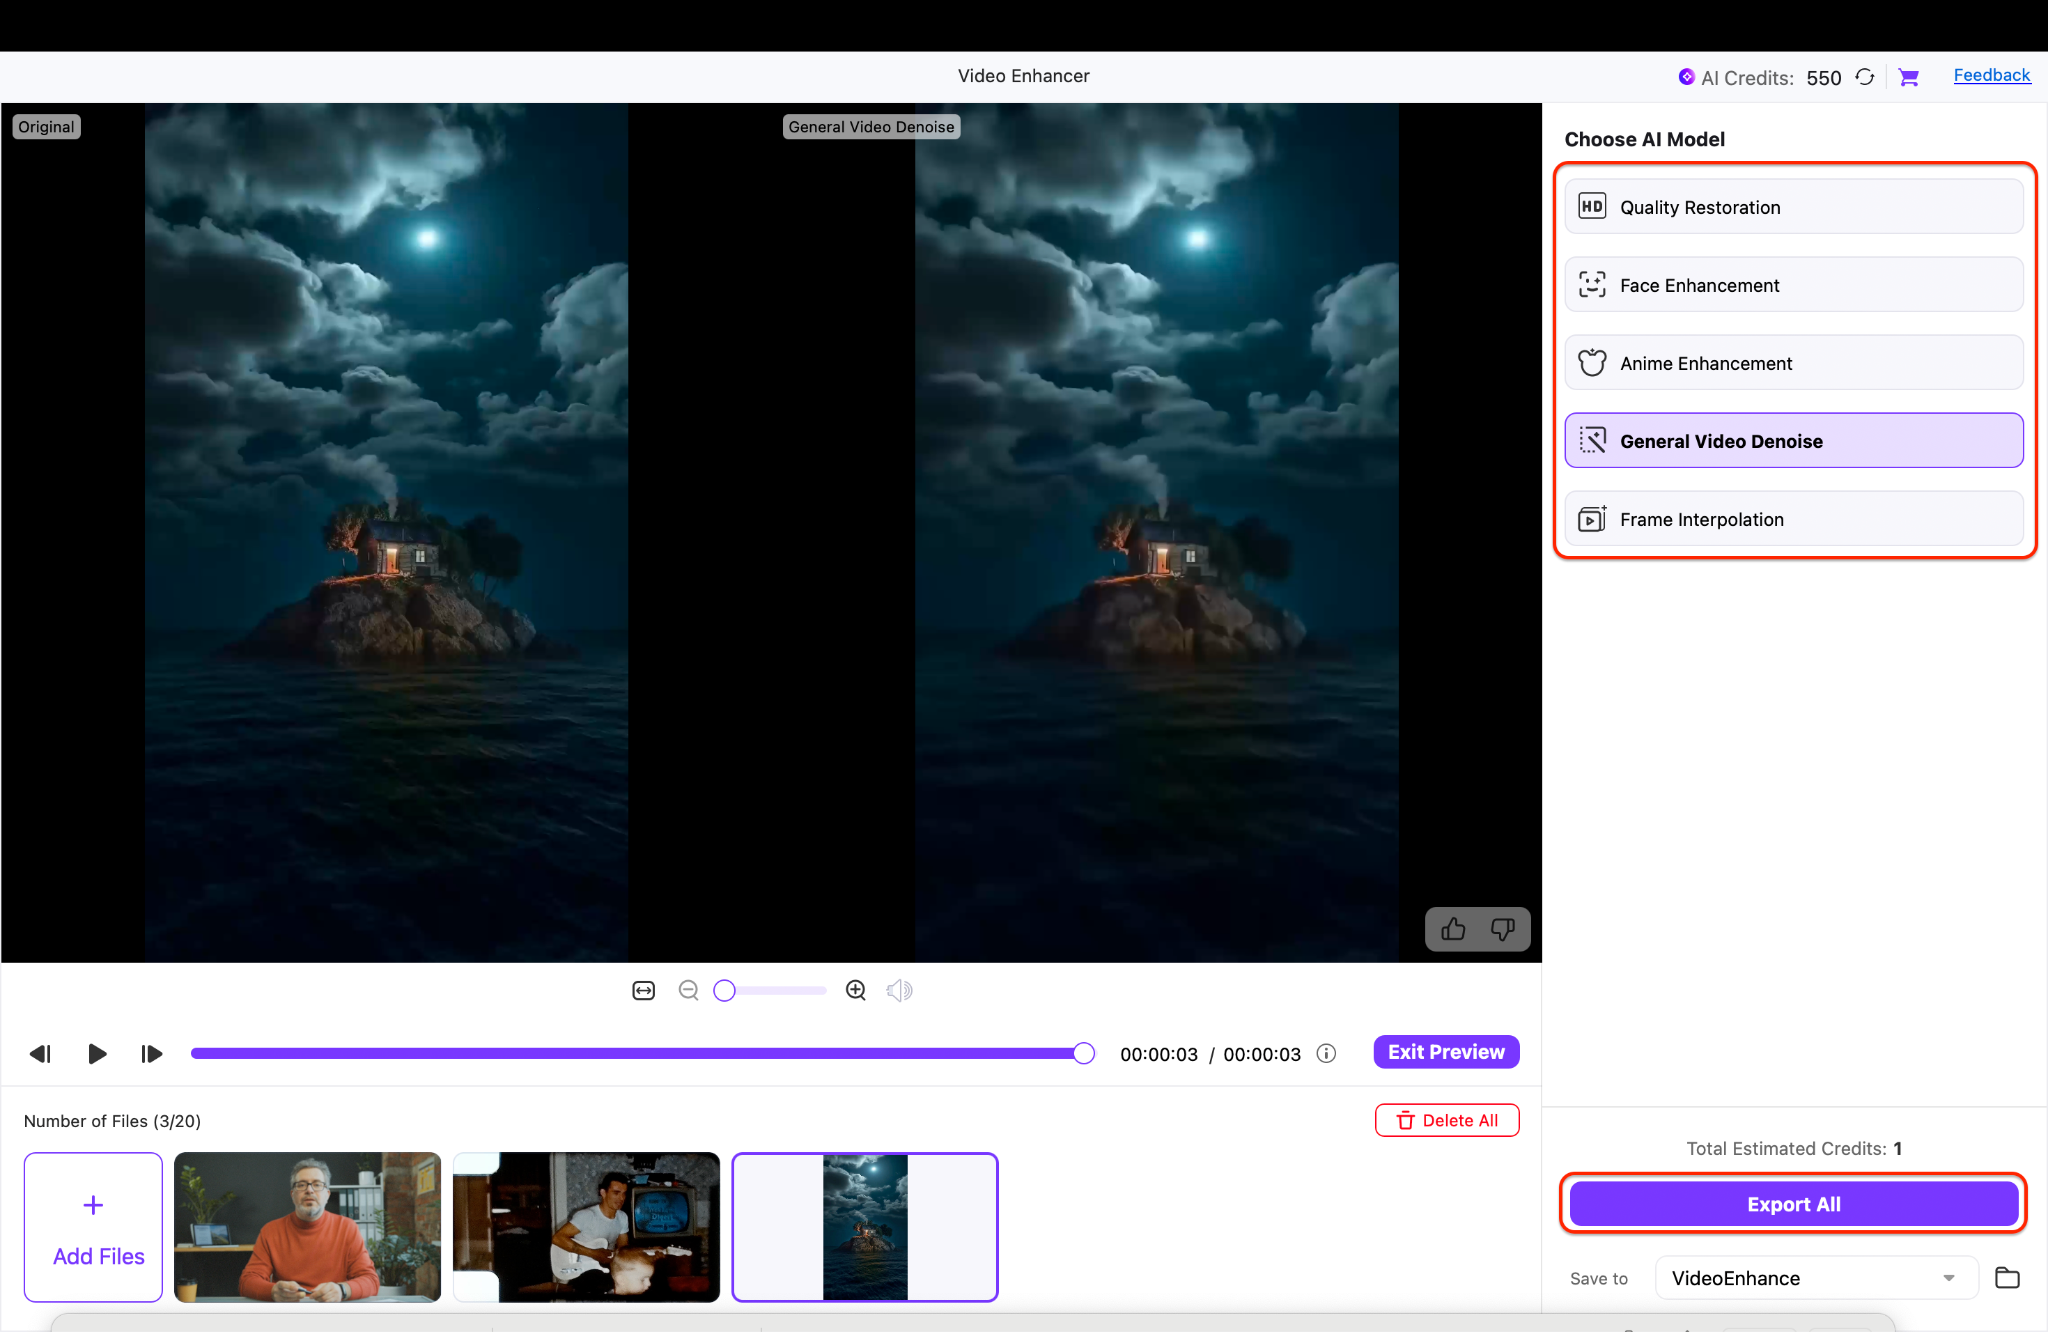
Once your video is uploaded, choose General Video Denoise from the filter options. Then click Preview (3s) to view a real-time, side-by-side comparison of your original and denoised frames—giving you a clear look before finalizing the export.
Step 3: Choose Output and Start Batch Denoising
Now, select your output folder by clicking on the Save to dropdown menu. Click Export All to batch-process the videos using UniConverter's powerful AI video denoiser engine. You can also check and go for other AI models inside the Choose AI Model tab according to your video suitability.
You can monitor progress with the live status bar, and once done, all clips will be export-ready—perfect for YouTube, presentations, or archival use.
For those searching for the best video denoiser that combines power and simplicity, UniConverter is a top-tier option. It may not replace tools like Neat Video Denoiser for professionals, but it's ideal for users who need fast, clean, and automatic results.
The Final Result Looks Like:
Part 3. Denoise Video with TensorPix
TensorPix is a cloud-based AI video denoiser tool designed for high-quality noise removal without the need for heavy editing software. Unlike traditional plugins such as Neat Video Denoiser or built-in options like Premiere video denoiser, TensorPix uses advanced neural networks to intelligently denoise video while preserving fine detail and motion clarity.
It's built for creators, editors, and professionals who want to AI denoise video in just a few clicks—no installations, no timeline scrubbing, no tech headaches.

Best For:
- Professionals needing sharp, frame-by-frame denoiser video results
- Creators handling old, grainy, or low-light footage
- Users who want a cloud-based alternative to the best video denoiser software
How to Denoise for Video with TensorPix
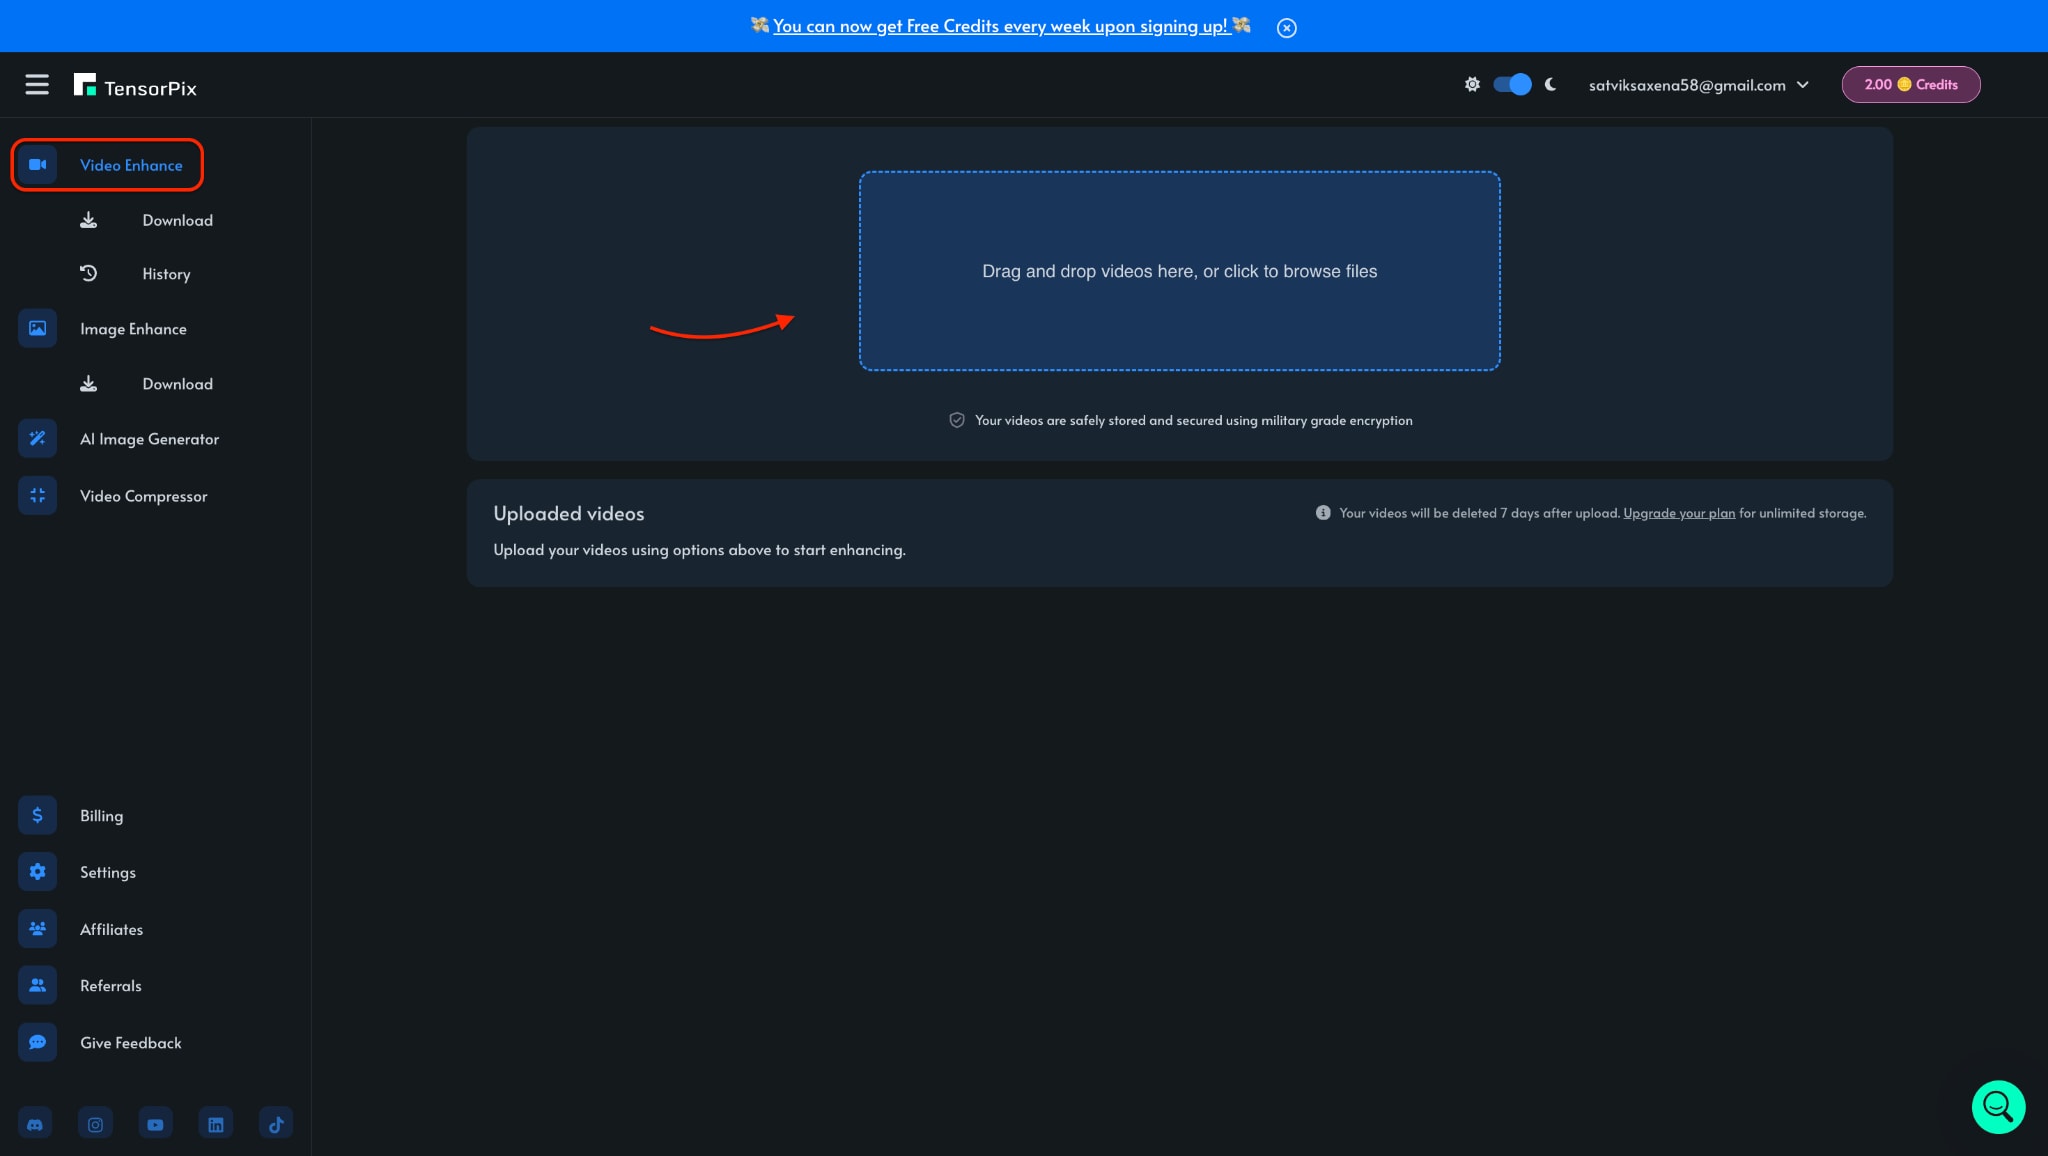
Step 1: Upload Your Video to TensorPix
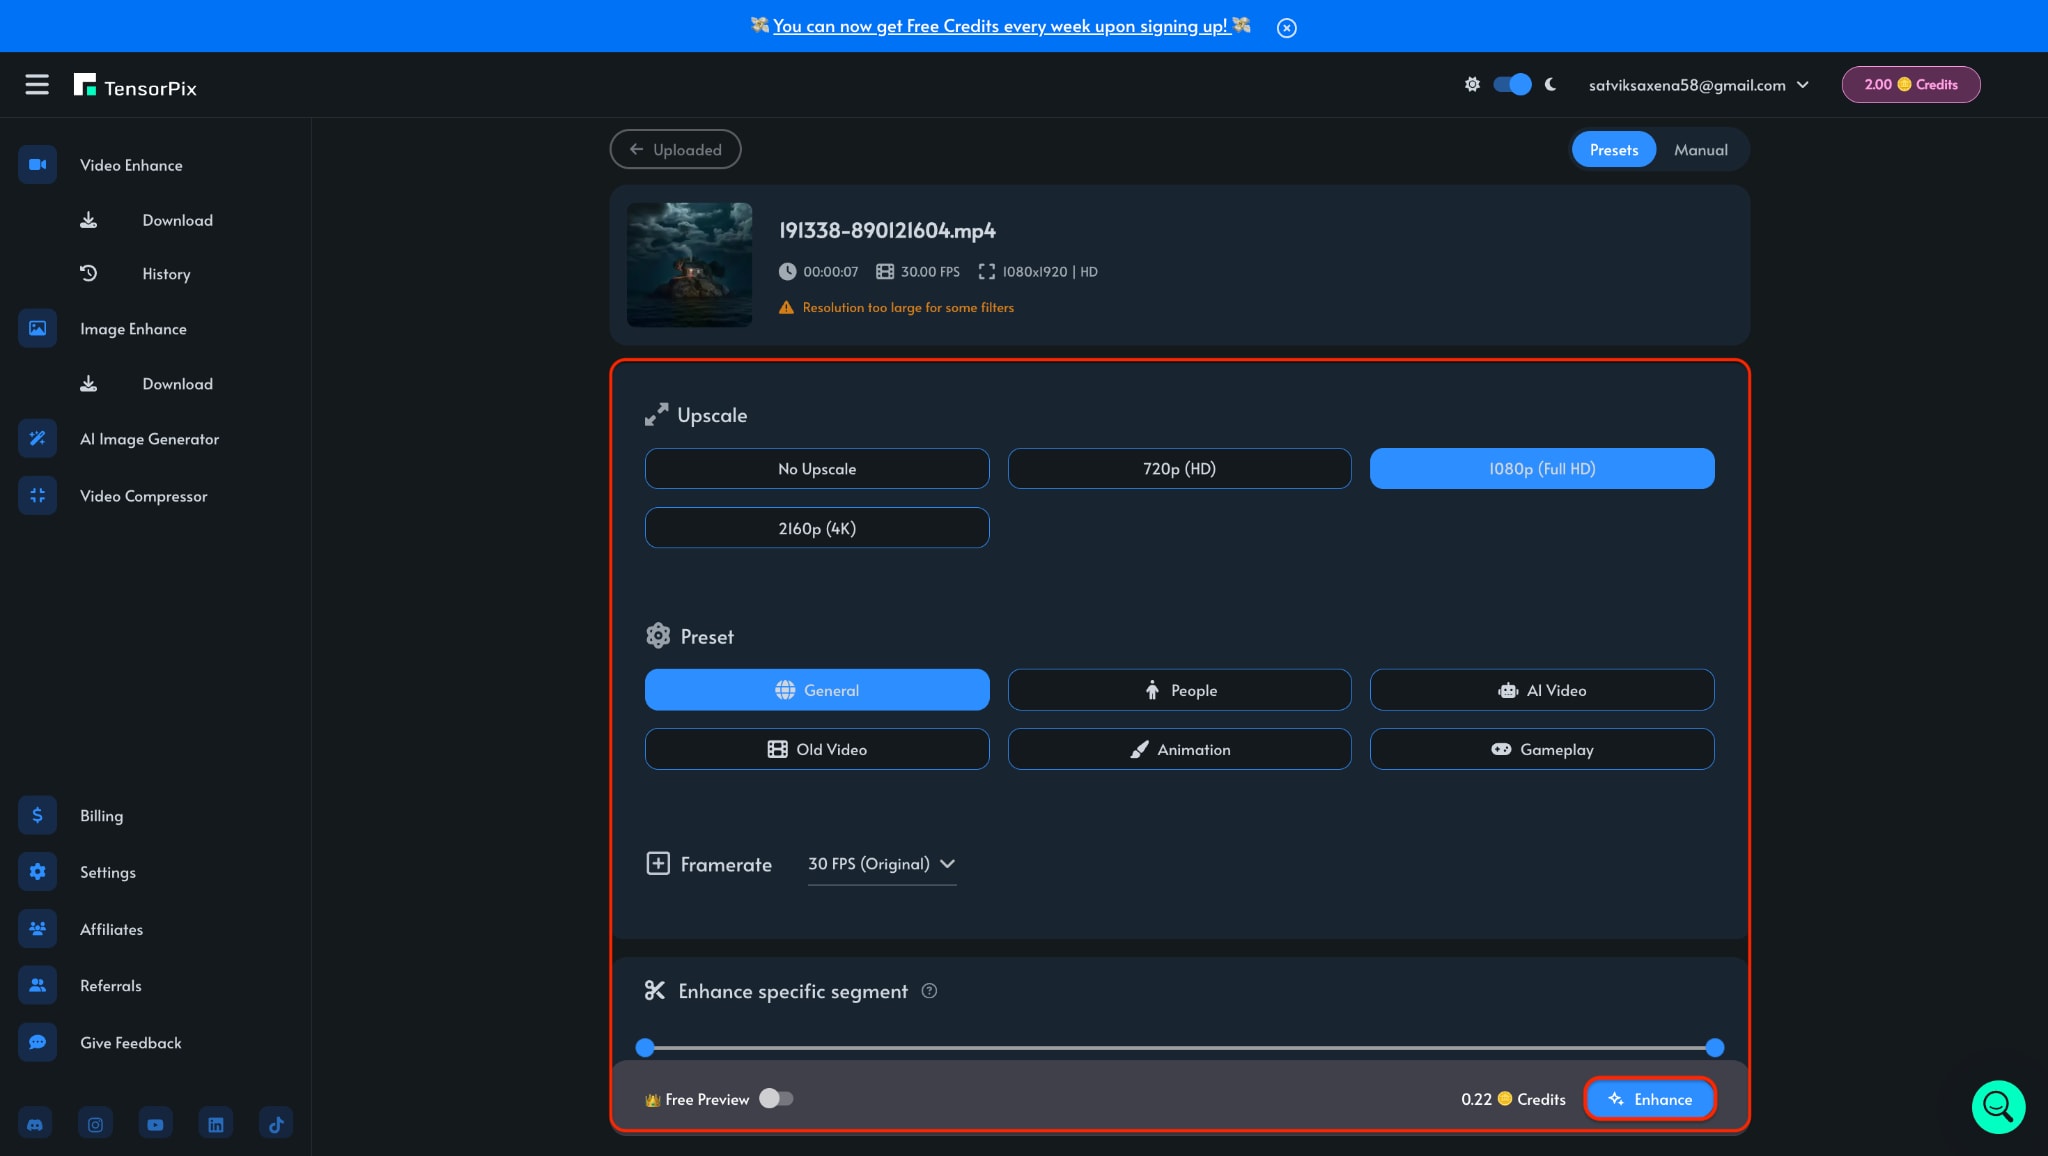
Step 2: Select Denoising Settings
Step 3: Process and Download
Click Enhance to start processing and let TensorPix apply its AI denoise video engine to upgrade the video quality and reduce the graininess. Once complete, preview the cleaned footage and download it. Even at the free tier, you'll get results that rival many video denoiser free apps, especially for problematic or older clips.
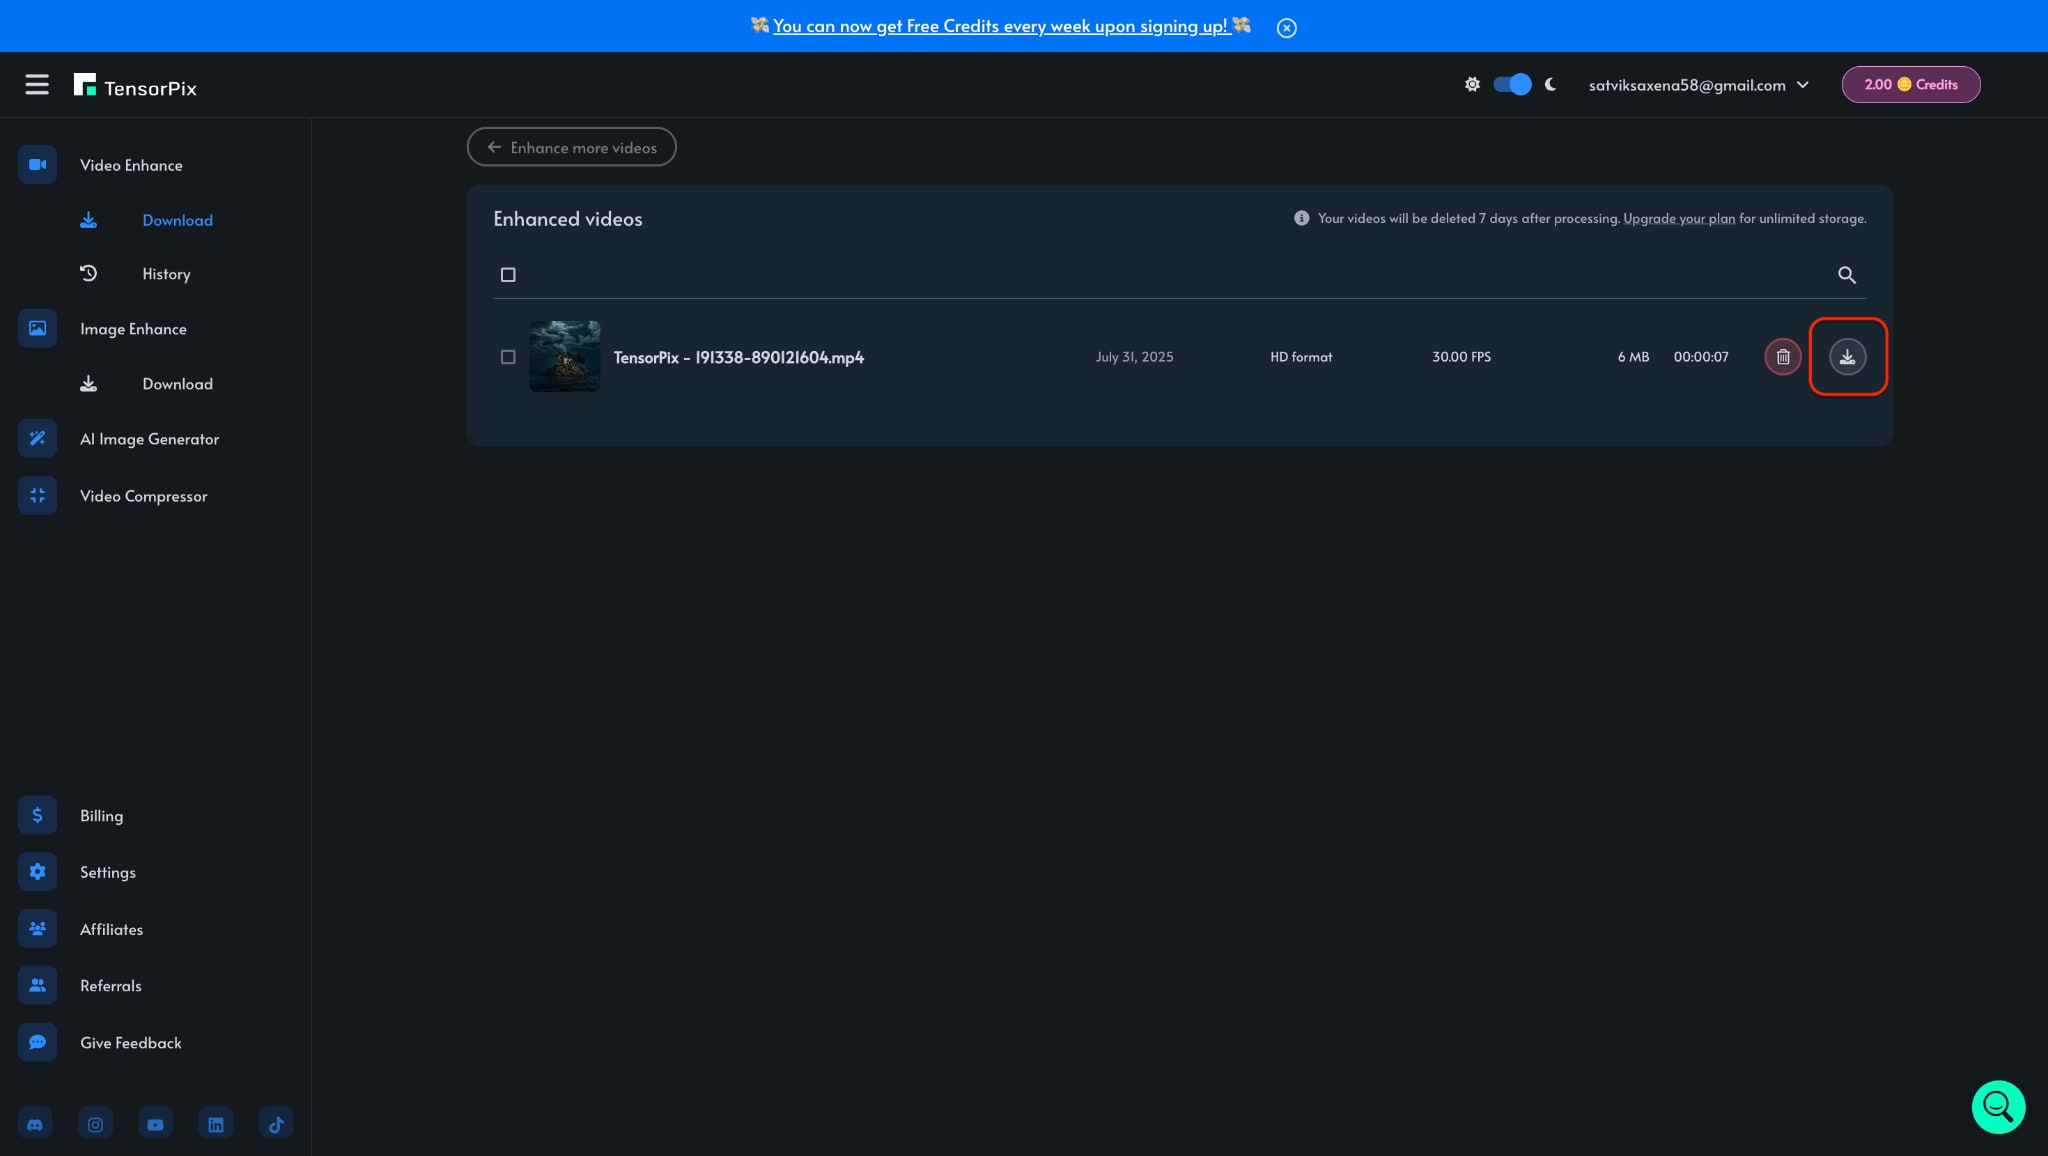
Note: In Free tier, there is no preview but you can download your enhanced video with some free credits.
The Final Result Looks Like:
Part 4. Denoise Video with CapCut
CapCut, a popular all-in-one video editor, isn't just for trendy TikToks and YouTube Shorts—it also features surprisingly practical noise reduction tools. If you're working on social content, quick vlogs, or even older clips plagued by grain, CapCut lets you denoise video while still offering robust editing flexibility. With its clean interface and AI-enhanced filters, it serves as a friendly alternative to complex setups like Premiere video denoiser or plugin-based tools such as Neat Video Denoiser.

Whether you're on desktop or mobile, CapCut's noise reduction feature is intuitive and accessible. It doesn't require deep technical expertise, yet it still delivers quality that rivals many video denoiser free tools. While it may not offer dedicated AI video denoiser engines like UniConverter or Media.io, it cleverly combines smart filters and brightness correction to achieve clean, professional-looking output.
Best For:
- Social media creators and vloggers need fast fixes.
- Users seeking to denoise footage without third-party plugins
- Beginners wanting an alternative to the best video denoiser software
How to Denoise Video in CapCut
Step 1: Import Video and Add to Timeline
Launch CapCut and click New Project to get started. Choose the aspect ratio and then hit the Click to upload option to upload your noisy footage, then drag it into the timeline. This layout allows you to apply adjustments to specific frames or the entire video. It's a great starting point for users looking to denoise for video with creative control.

Step 2: Apply the Denoise Effect or Enhance Filter
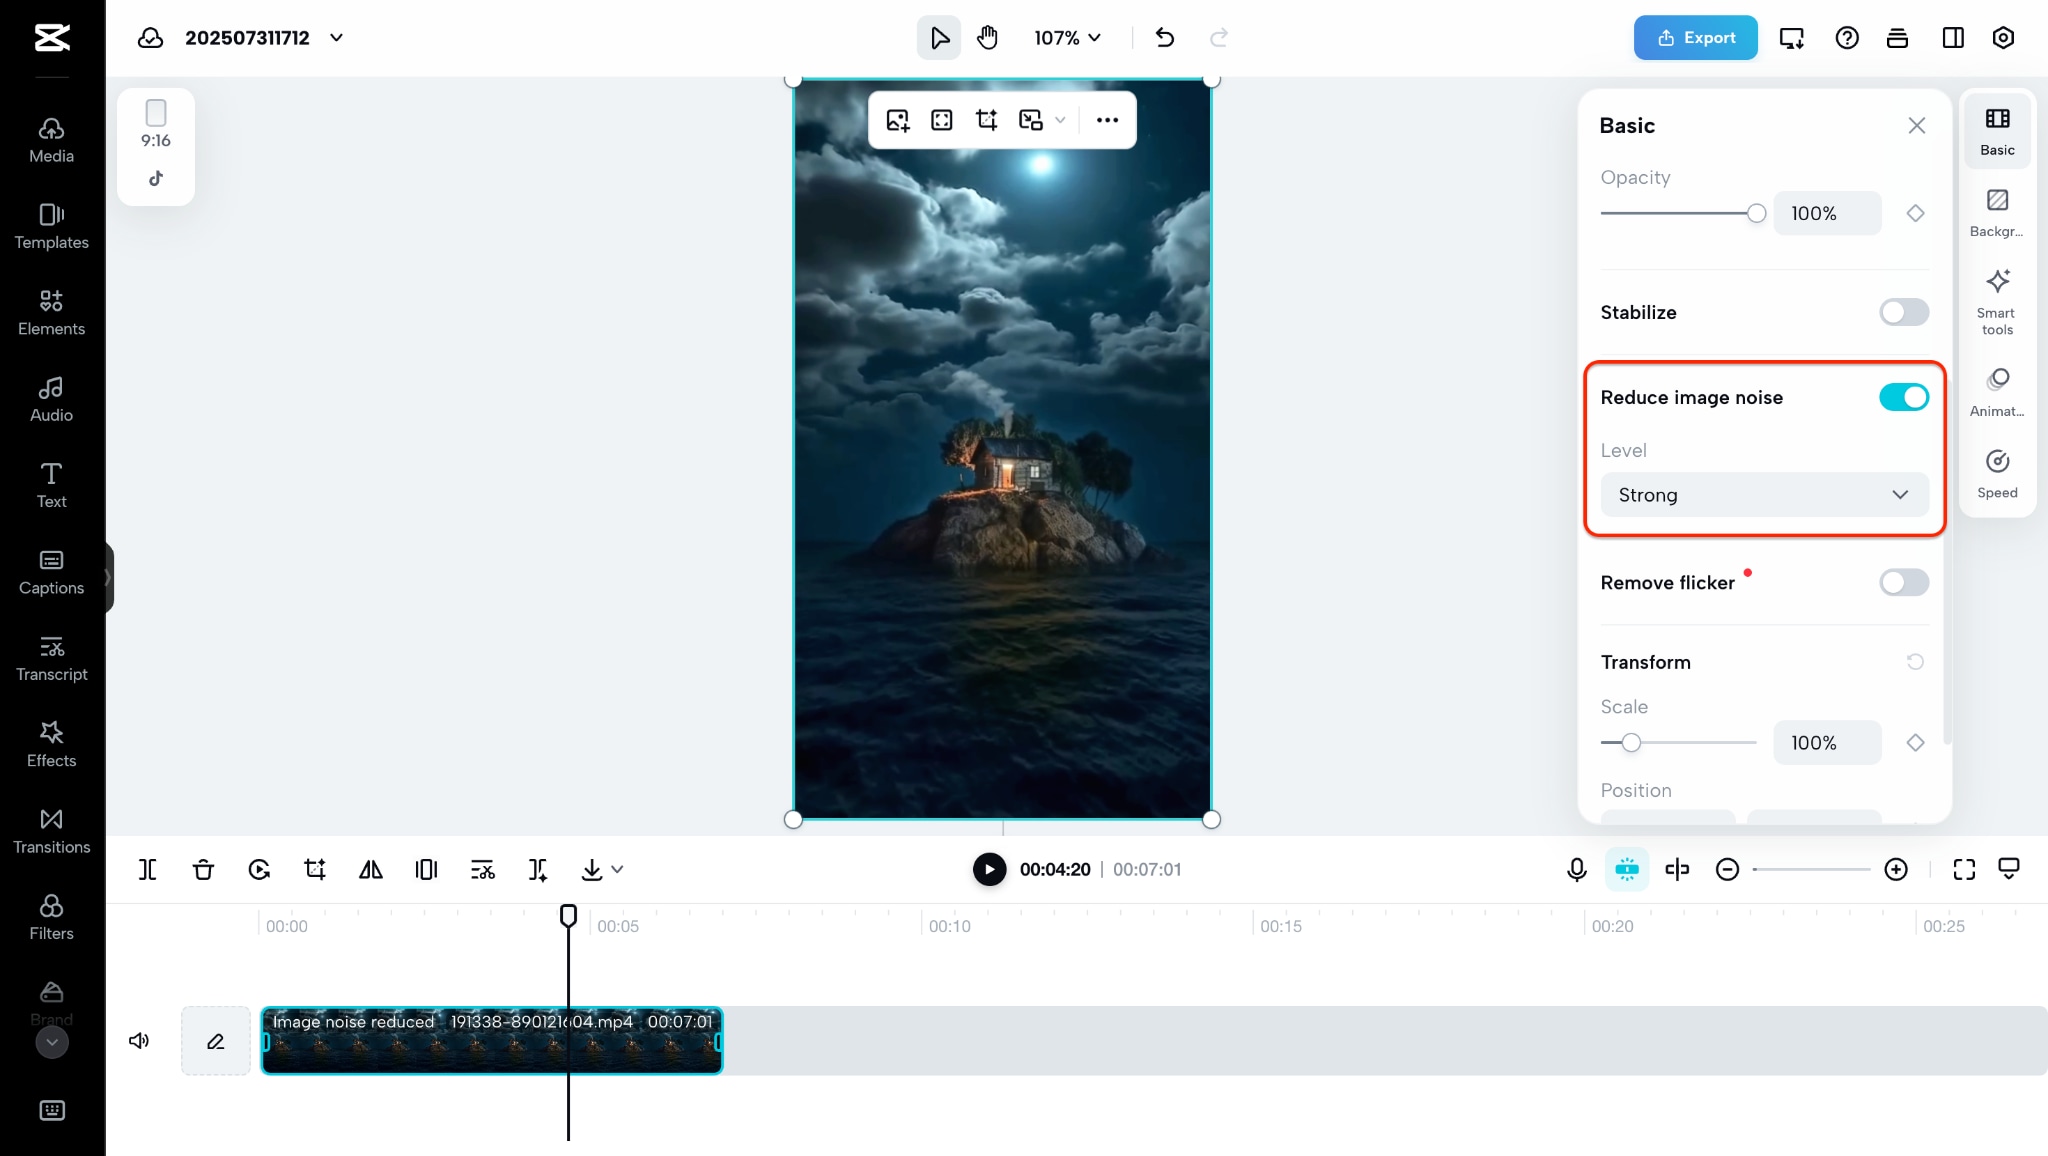
Navigate to the Basic menu and enable Reduce image noise and set its level to strong, and you can also explore Color Adjustment tools. Tweak sliders such as Sharpness, Saturation, Brightness, and Highlight to reduce unwanted visual noise. You can also go for HSL and Curves which unlocks the advance control over your video colorization, correction and quality. While not a traditional AI video denoiser, CapCut simulates many of its effects manually—perfect for those wanting more hands-on control.
Step 3: Preview and Export Your Clean Video
Watch your edited video to evaluate how effectively noise has been reduced. If you're satisfied with the result, click Export, set your desired resolution and format, and save the output. While not as advanced as Neat Video Denoiser or Premiere video denoiser, CapCut remains a smart video denoiser free tool for quick fixes and content-ready results.
The Final Result Looks Like:
div class="col-xl-10 mx-auto mb-5" style="border: 1px solid #dee2e6; max-width: initial; margin-top: 30px;">
Super Easy to Use Batch Video Denoiser
Part 5: Denoise Video with Pollo.ai
Pollo AI is a professional-grade, browser-based platform offering advanced video denoise capabilities via AI. Unlike basic free tools, it uses machine learning to denoise video—removing grain, compression artifacts, and flicker—while preserving sharp detail and motion. Whether you're cleaning up low-light recordings, zoomed-in smartphone clips, or repurposing content for YouTube, Pollo AI delivers quick, high-quality results online.

Best For
- Beginners looking to denoise video easily without software
- Creators restoring old footage or low-light clips
- Content producers needing online batch video denoising
How to Denoise Video with Pollo AI
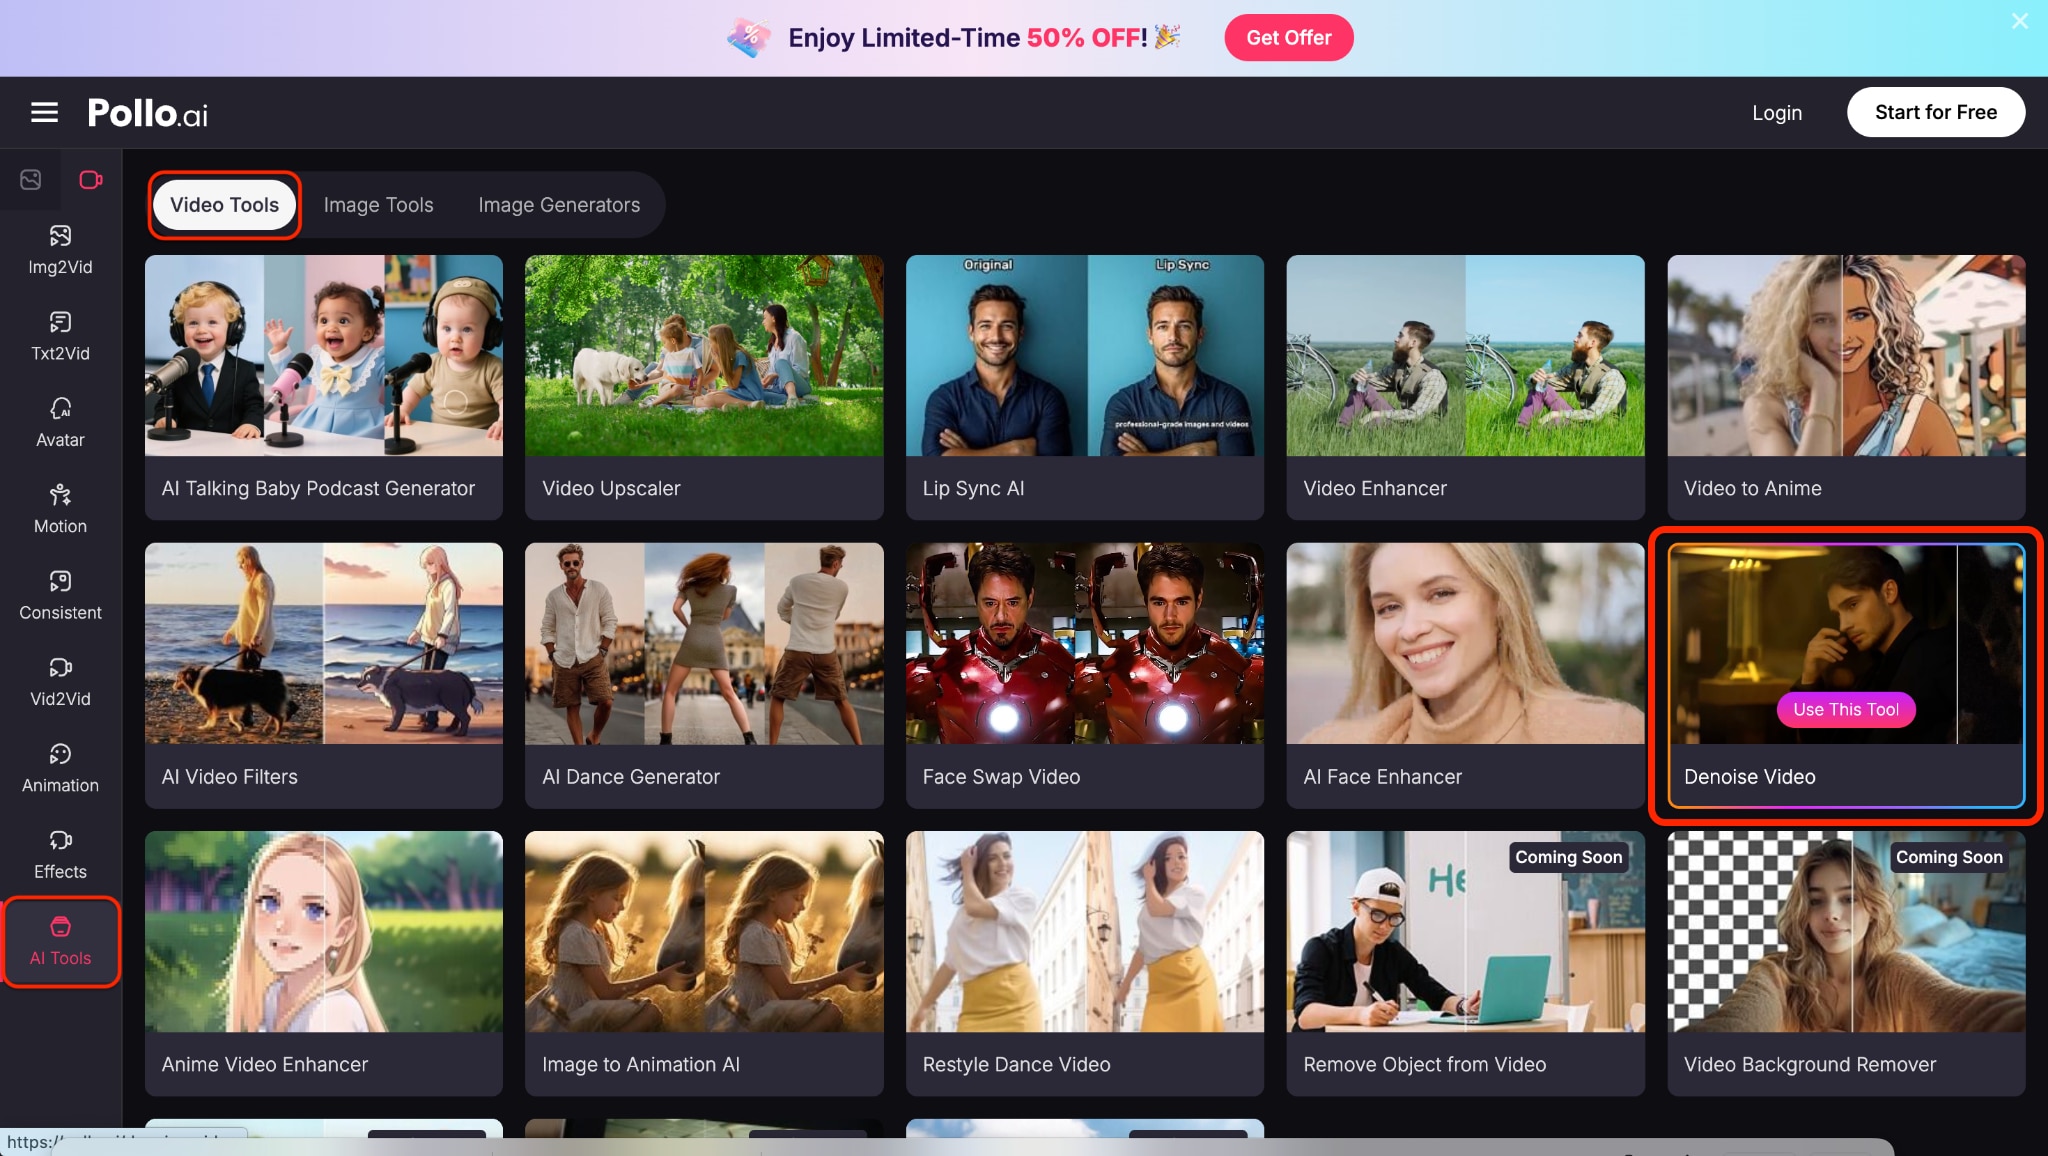
Step 1: Upload your video to Pollo AI
Visit the Pollo AI homepage and register or sign in. Navigate to the Denoise Video tool under "Video Tools." You can upload MP4, MOV, or WEBM files up to 200 MB by drag-and-drop or file chooser. Pollo AI supports formats like AVI and MKV too—perfect for cleaning grainy footage or blurry clips quickly.
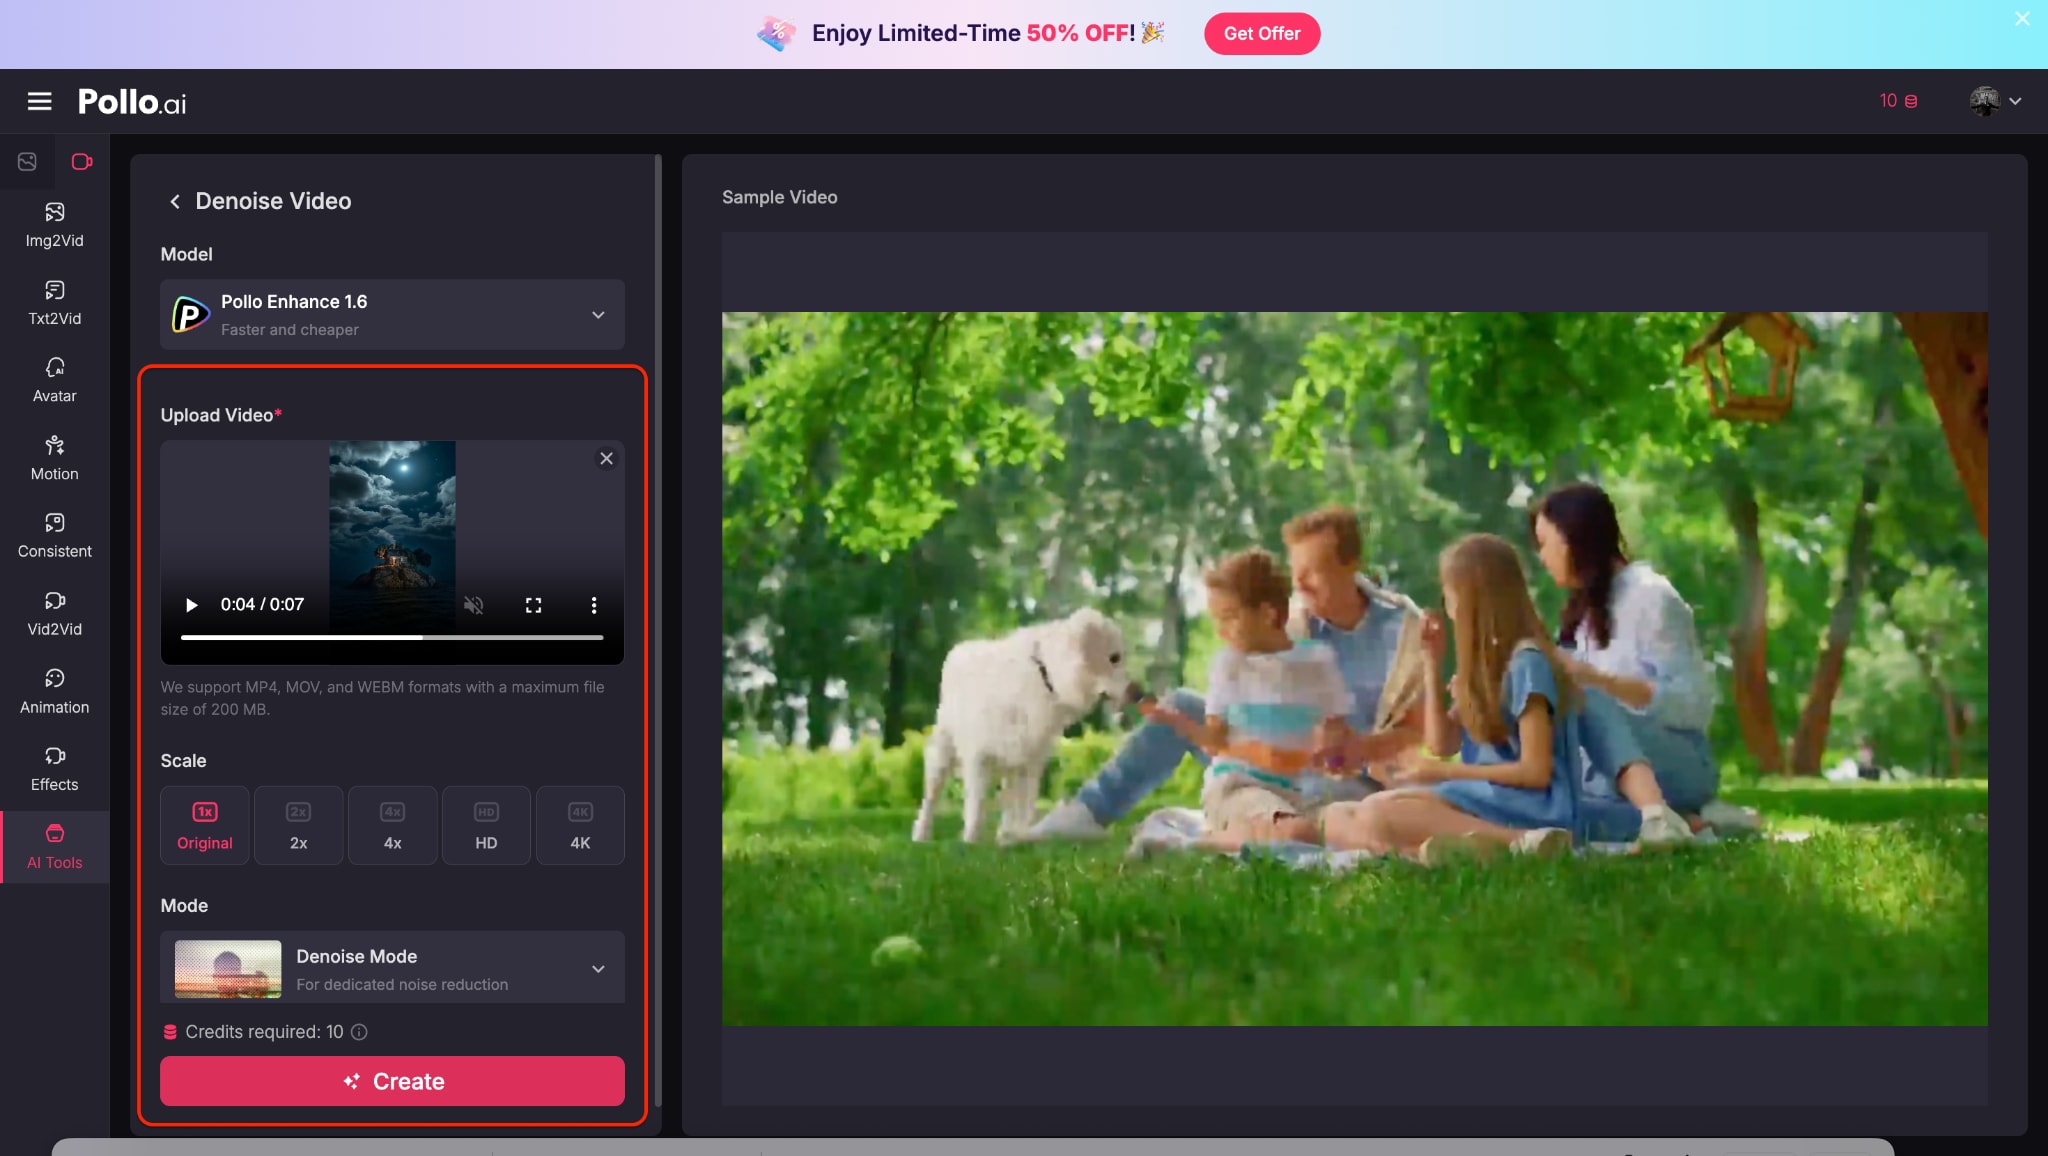
Step 2: Select denoise settings and scale
Choose your output resolution—Original, 2×, 4K—and enable Denoise Mode for targeted cleanup. Pollo AI's AI video denoiser uses smart filters to reduce grain without blurring fine details. Customize strength levels or combine with AI Video Enhancer for extra clarity.
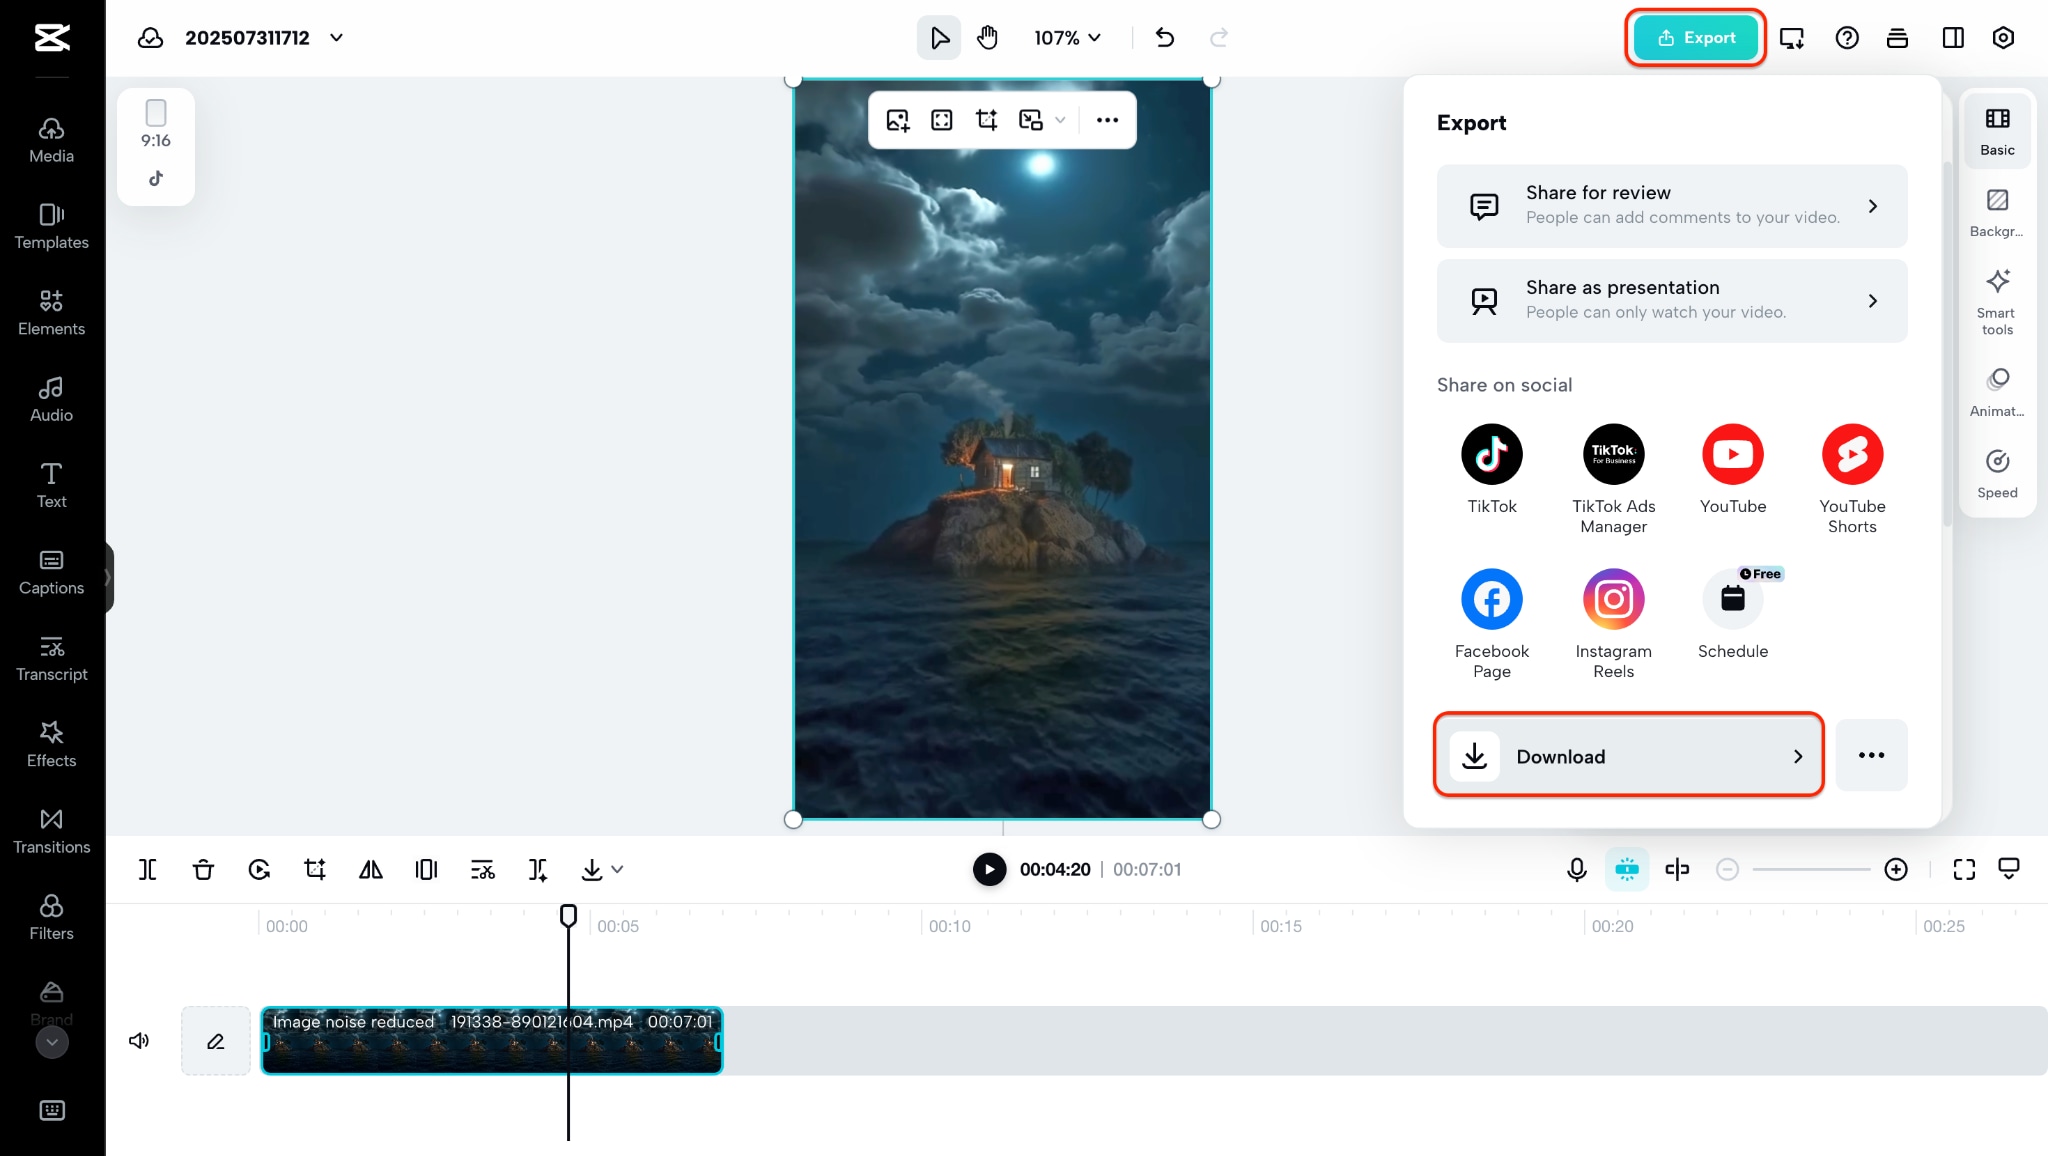
Step 3: Preview and export the final result
It has no side-by-side preview to examine differences in real‑time. Directly, click Create and let the cloud process your clip. After rendering, simply download the denoised video in your desired format or resolution—with watermark in the free tier.

The Final Result Looks Like:
Part 6. Denoise Video with VEED.io
VEED.io is best known for its sleek interface and creator-focused video tools—but it also offers a built-in AI video denoiser that's perfect for quick video cleanup. Whether you're fixing grainy webcam footage, low-light clips, or social media content, VEED.io gives you the power to denoise video directly in your browser without installing anything.
Unlike complex plugins like Neat Video Denoiser or editor-specific tools like Premiere video denoiser, VEED focuses on simplicity and accessibility. The platform automatically applies smart enhancement filters that reduce grain, flicker, and background noise in a single click. It's an excellent video denoiser free option for creators, marketers, and anyone looking to clean up video quickly and easily.

Suppose you need a browser-based solution that balances speed, usability, and result quality. In that case, VEED.io is among the best video denoiser tools online—especially when you're working with short-form or social content.
Best For:
Social media editors and content creators on the go
Anyone seeking a denoise for video tool that's online and simple
Beginners or marketers needing fast, clean video results
How to Denoise Video in VEED.io
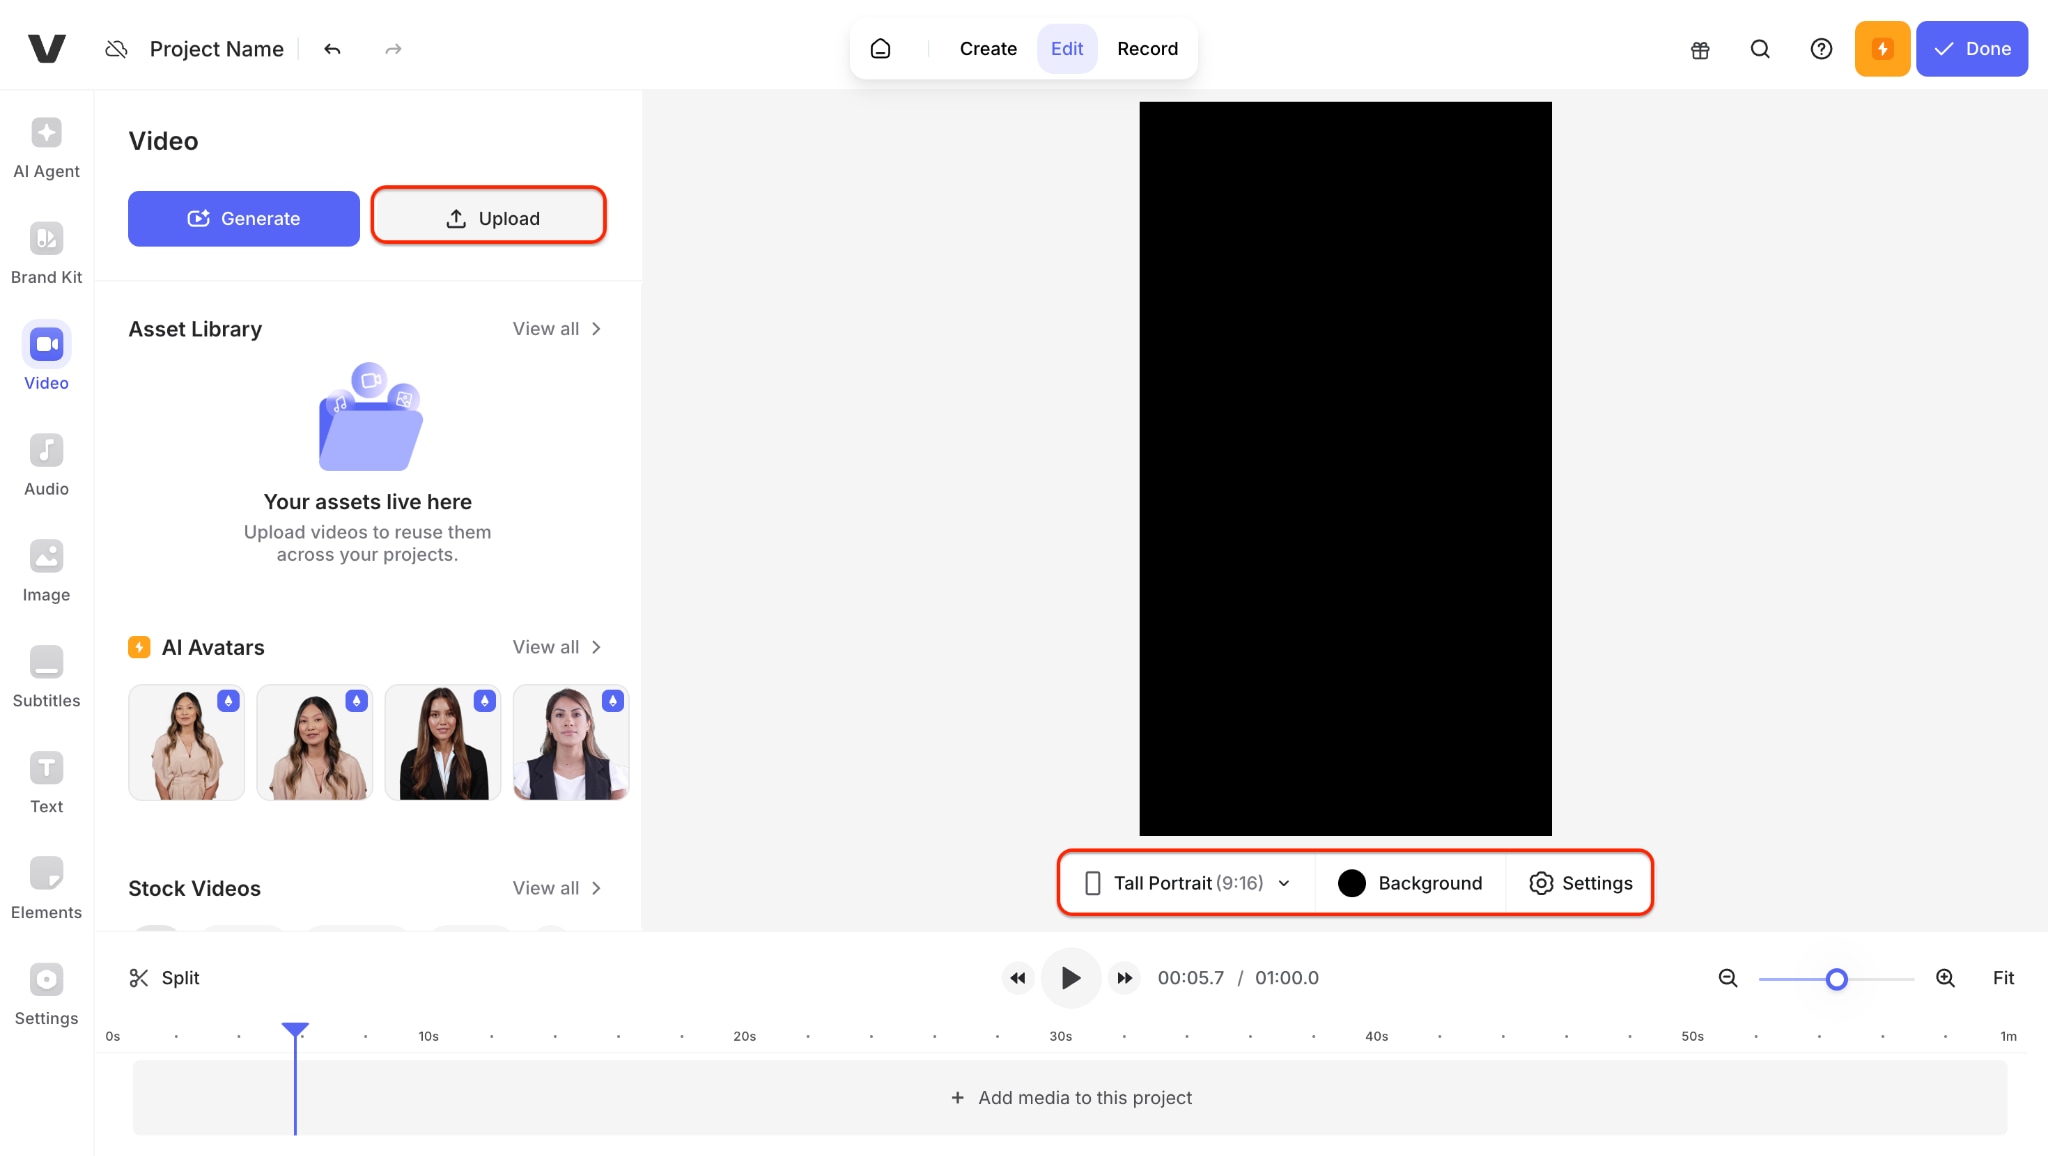
Step 1: Upload Your Video on VEED.io
Head over to VEED.io and click Create Project to open the video editor. Upload your noisy clip by dragging and dropping it into the timeline. VEED supports most formats, so whether it's old camcorder footage or mobile video, you're good to go. This is the first step toward using a fast, browser-based denoiser video tool.
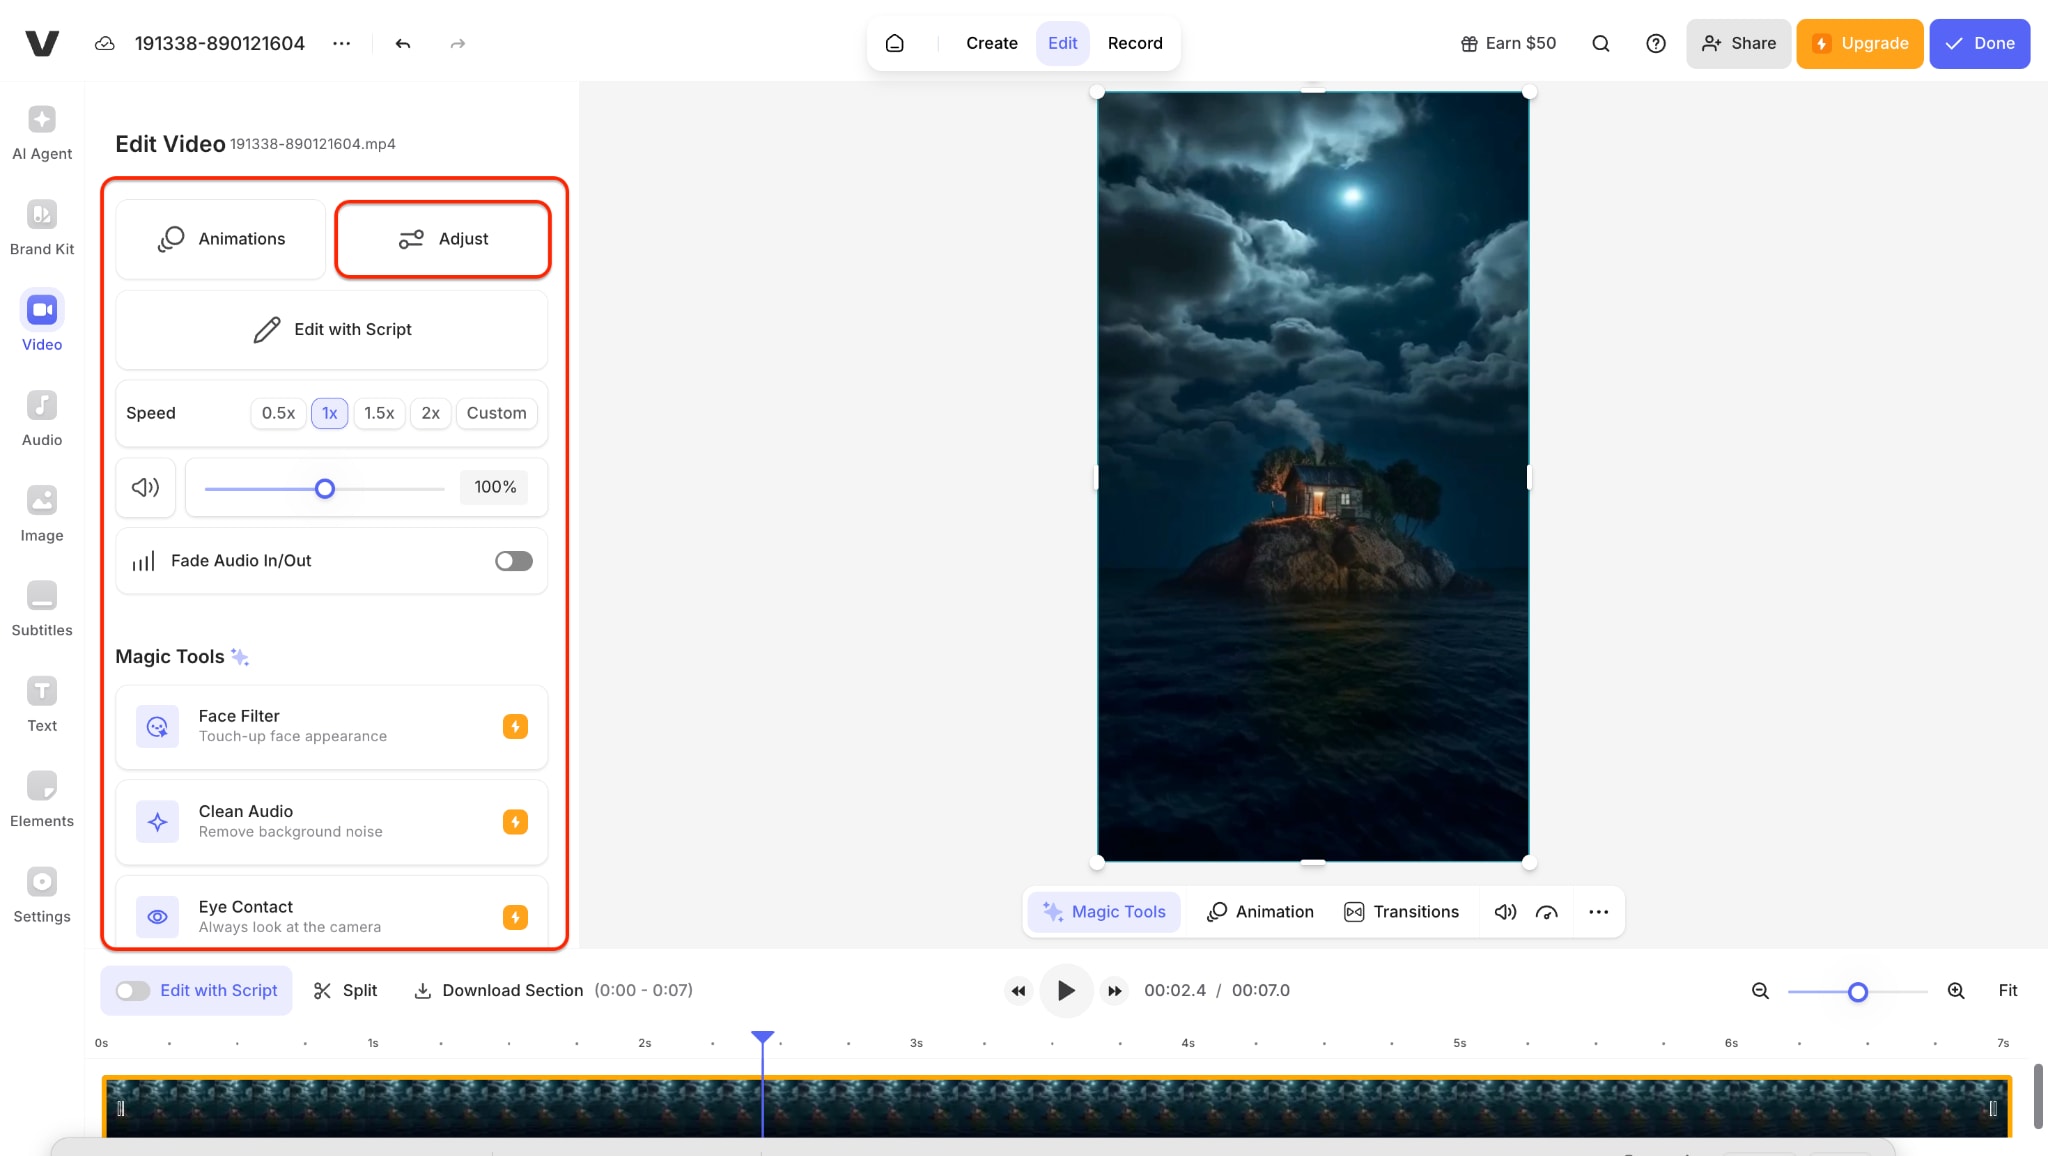
Step 2: Apply Auto Enhancement and Noise Reduction
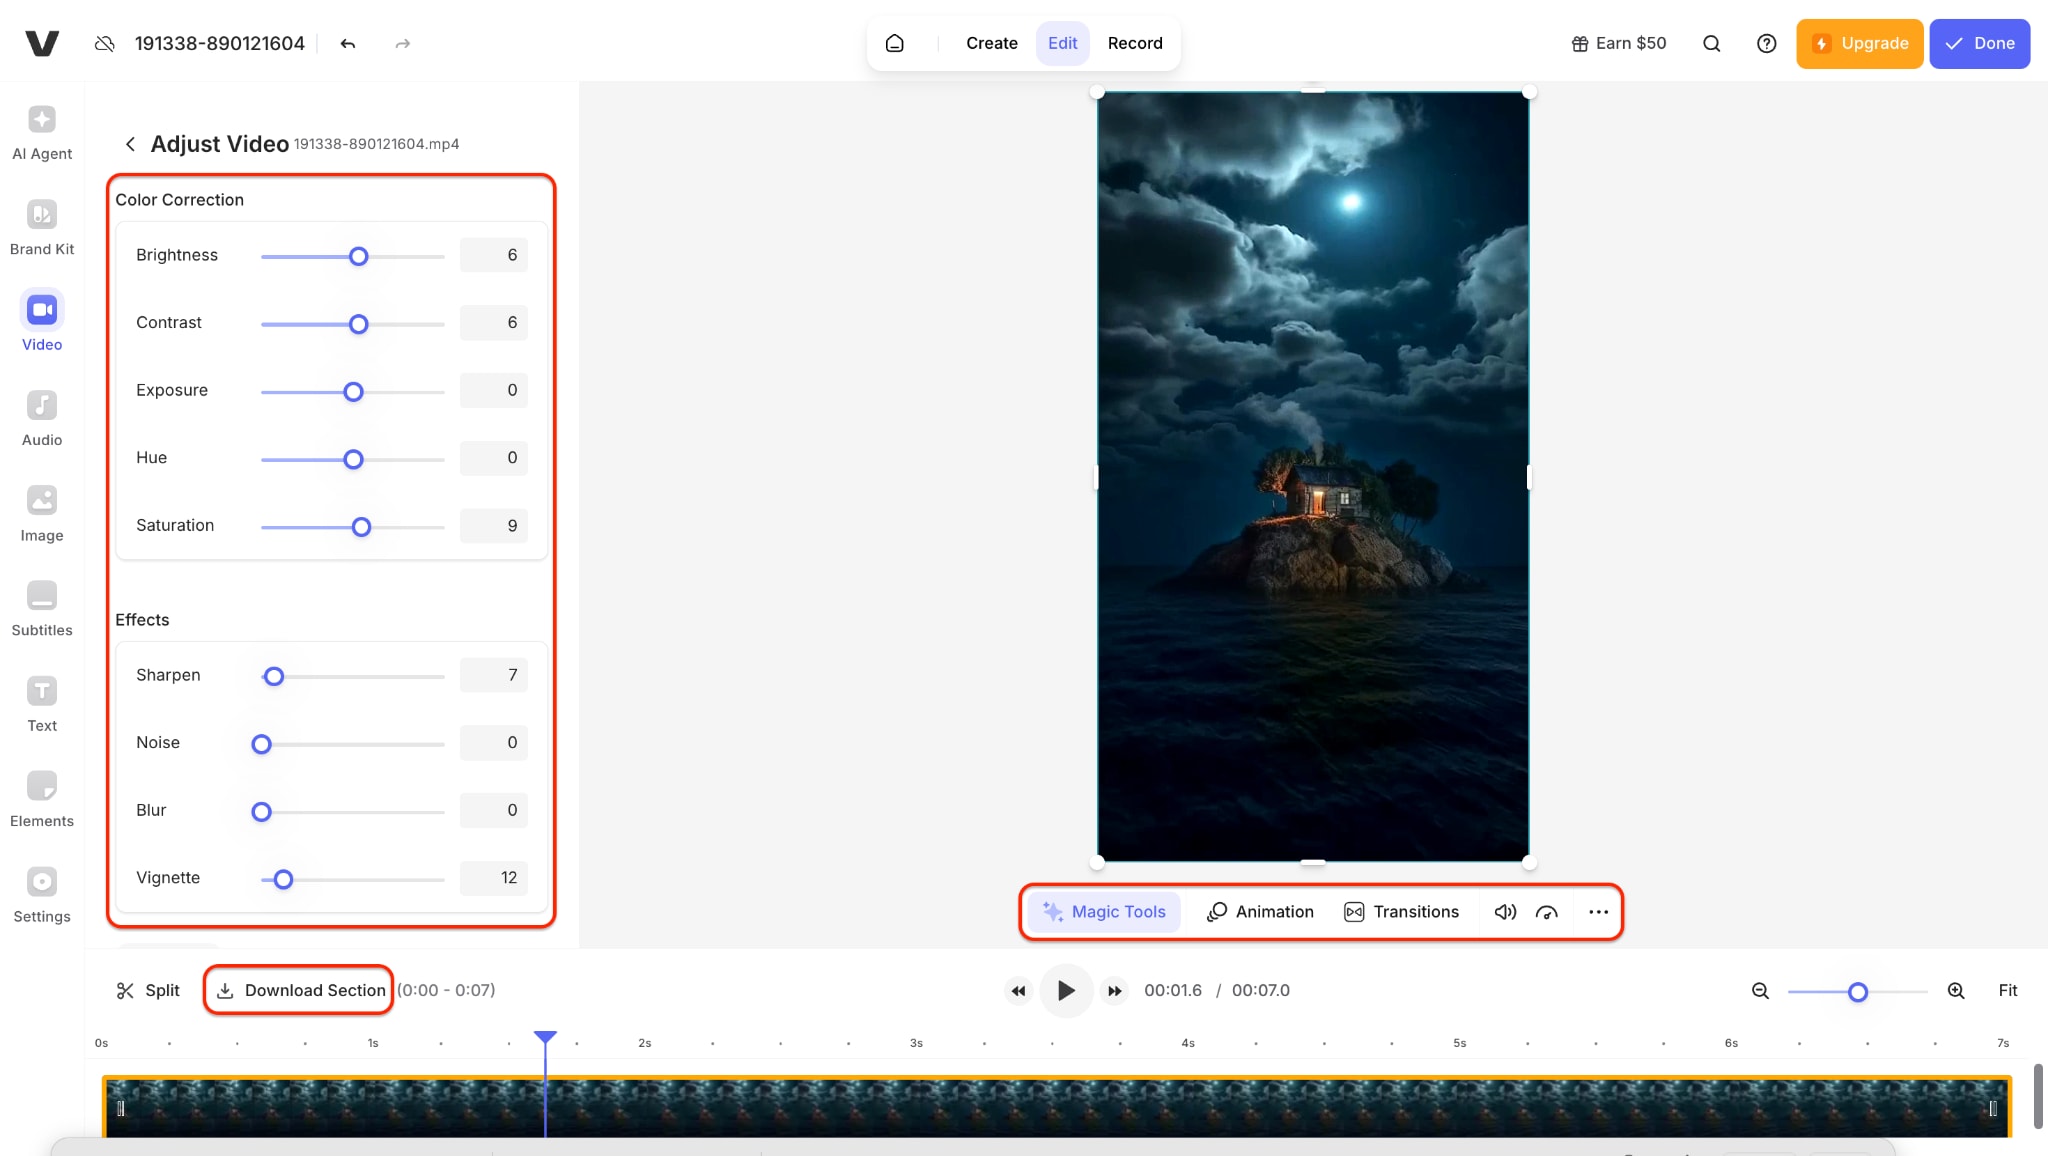
Once your clip is on the timeline, go to the Adjust panel from the left toolbar. Apply smart filters such as Noise Reduction, Brightness, and Contrast—these work together like an AI video denoiser to clean up grain and lighting issues. You don't need technical knowledge; VEED handles the AI denoise video process behind the scenes, giving you instant previews.
Step 3: Preview the Results and Export Clean Video
Play back your footage and observe how much clearer it looks after applying the enhancements. If the output meets your expectations, click the Download Section to download the final version. VEED offers smooth rendering and fast export times—making it a powerful video denoiser free alternative to advanced tools like Neat Video Denoiser or Premiere video denoiser.
The Final Result Looks Like:
Final Thought
Whether you're cleaning up grainy home videos or low-light pro footage, AI video denoisers can transform your results. Tools like UniConverter, CapCut, TensorPix, Pollo.ai, and Veed.io make noise reduction simple and accessible—no editing expertise required. After testing all five, UniConverter stands out for its balance of quality, ease of use, and advanced features.
It offers the most powerful AI video denoiser, intuitive batch support, and consistently high-quality output. It's the perfect choice for creators, marketers, and professionals who need clean visuals without compromising detail. Try UniConverter now and restore your videos to their best version.
Super Easy to Use Batch Video Denoiser
FAQs
-
1. How does UniConverter's AI video denoiser work?
It uses advanced AI to detect and eliminate visual noise from your footage while preserving sharpness and color detail during the process. -
2. Can UniConverter denoise multiple videos at once?
Yes, it supports batch processing to clean several clips simultaneously, saving time and ensuring consistent quality across all files. -
3. What export formats does UniConverter support after denoising?
You can export your denoised videos in MP4, MOV, MKV, and more. The tool ensures high-quality output without compression loss. -
4. Does Veed.io require installation for denoising videos?
No, Veed.io is an online tool that works entirely in your browser. You can upload, denoise, and download without installing anything.

