

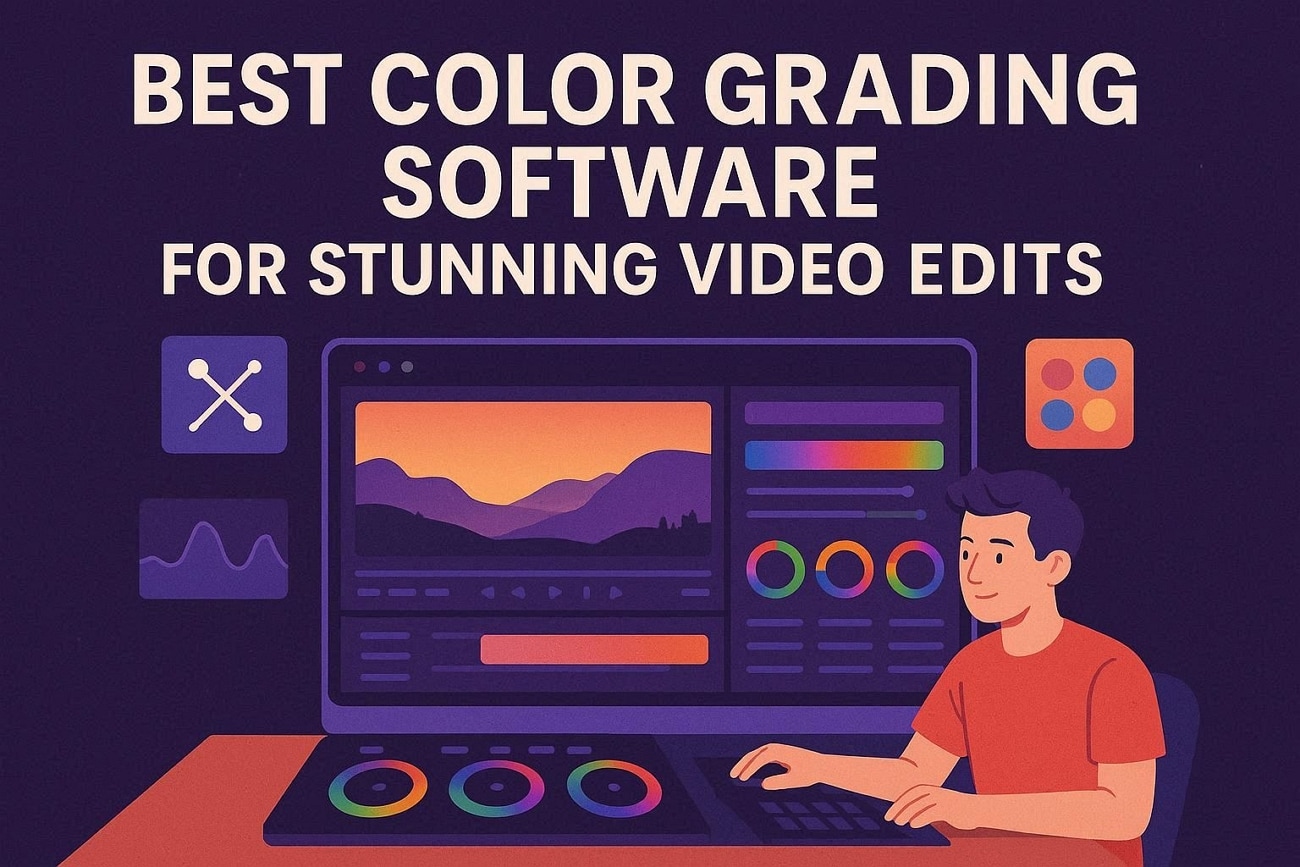
Good video editing needs more than clean cuts and smooth scene changes today. Colour also shapes mood, improves clarity, and gives footage a stronger look. That is why many creators now focus on better visual tone. The right color grading software can make that process much easier.
This guide explains color grading in a simple but still professional way. Furthermore, beginners can learn key tools without feeling lost or overwhelmed too quickly. Experienced editors can also improve workflow and build more consistent results. From small fixes to rich cinematic looks, each section stays practical.
In this article
- What Is Color Grading Software and Why Does It Matter
- Key Features to Look for in Color Grading Software
- 4 Popular Color Grading Programs for Beginners and Experts
- UniConverter: The Perfect Color Enhancement Option For Improving Video Colors
- 6 Essential Tips to Use Color Grading Software for Better Video Results
- Conclusion
- Frequently Asked Questions
Key Takeaways
[Visual Quality Needs] Color grading enhances mood, clarity, and consistency, making videos more cinematic and visually engaging.
[Feature Requirements] Key tools like color wheels, LUTs, scopes, and batch matching improve accuracy and workflow efficiency.
[Tool Options] Software like DaVinci Resolve, Adobe Premiere Pro, and Final Cut Pro offer advanced control but require higher learning effort.
[Efficient Workflow] Wondershare UniConverter enables quick AI-based color enhancement, batch processing, and easy editing for consistent results.
Part 1. What Is Color Grading Software and Why Does It Matter
Color grading software is used to adjust how video footage looks after editing. It helps change tones, improve balance, shape lighting, and create a specific visual style. Editors use it to make scenes feel warmer, darker, cleaner, softer, or more cinematic, depending on the story they want viewers to experience.
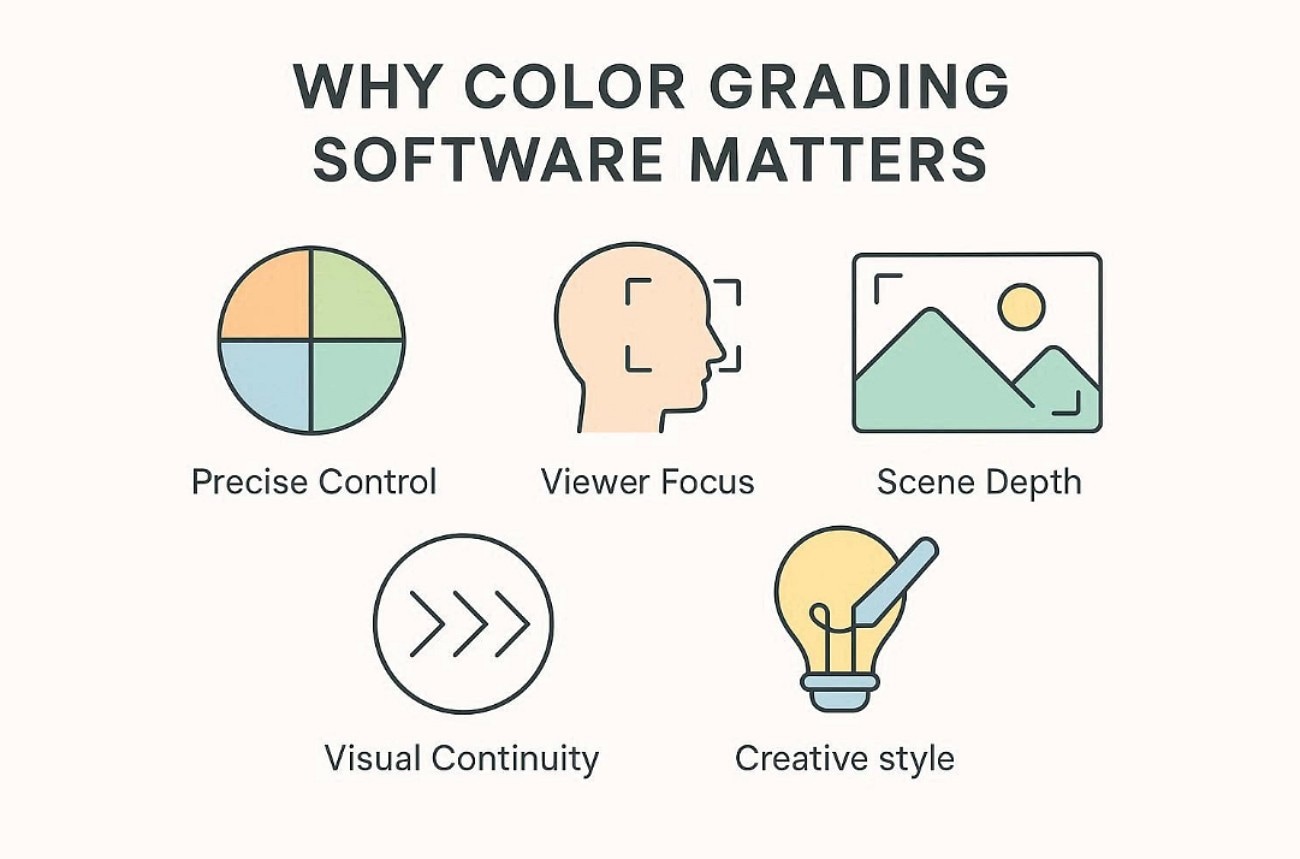
Why Color Grading Software Matters
Editors adjust shadows, highlights, contrast, saturation, and skin tones with much better visual accuracy.
Strong grading helps direct attention toward subjects, details, and important areas within each scene.
Better colour separation makes footage feel richer, clearer, and more visually layered on screen.
It keeps multiple shots looking balanced, matched, and consistent throughout the full video.
Editors can shape a unique visual identity that supports the project's intended tone.
Difference Between Color Correction and Grading
| Aspect | Color Correction | Color Grading |
| Main Goal | Fixes footage so it looks natural, balanced, and technically accurate. | Style footage to create a mood, tone, or cinematic visual identity. |
| Focus | Exposure, white balance, contrast, shadows, and basic colour balance adjustments. | Creative colour choices, visual mood, depth, and overall artistic appearance. |
| When It Happens | Usually comes first before any creative visual styling begins. | Comes after the correction once the footage looks clean and consistent. |
| Purpose | Makes clips from different shots match properly and look realistic. | Gives the final video a distinct and polished visual style. |
| Result | The footage looks clean, accurate, and ready for further editing work. | Footage looks expressive, dramatic, warm, cool, or brand-specific. |
| Example | Fixing a blue tint or dark clip from poor camera settings. | Adding a golden sunset tone or a dark cinematic atmosphere. |
Role in Professional Video Production
In professional video production, visuals must feel clear, polished, and emotionally consistent. That is where video grading software becomes important for serious editing work. It helps match shots, refine tones, improve skin balance, and guide mood. This also gives films, ads, and branded videos a more finished look.
Part 2. Key Features to Look for in Color Grading Software
The right features of color grading software can shape both your workflow and final results. Thus, below are the features one should look into in color grading software:
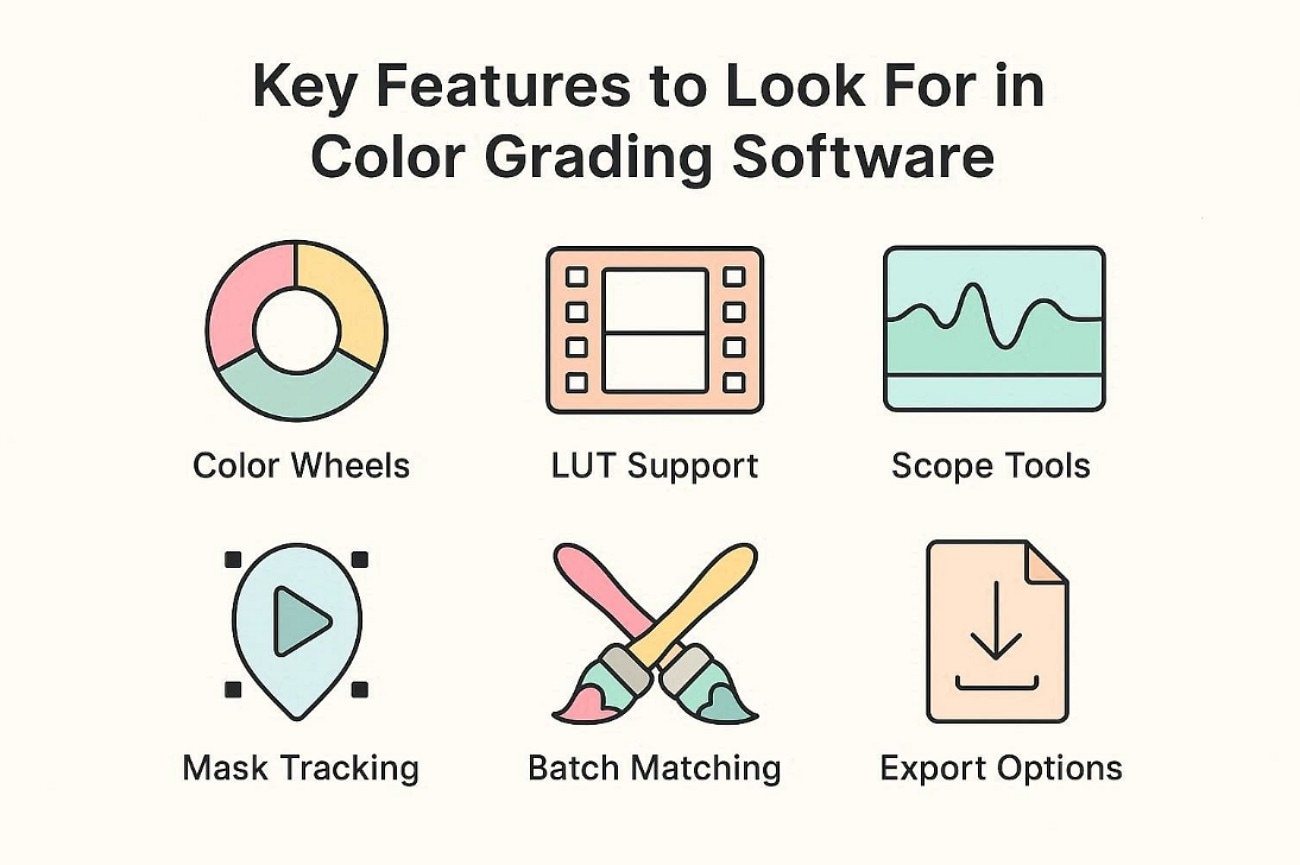
Color Wheels: With color wheels, editors fine-tune shadows, midtones, and highlights more naturally. This gives a better balance while shaping the mood across different scenes carefully.
LUT Support: For faster styling, LUT support applies preset looks with just a click. It also helps keep multiple clips visually consistent throughout larger editing projects.
Scope Tools: Unlike normal preview screens, scope tools show colour and exposure data clearly. This helps editors correct footage with confidence and much better technical accuracy.
Mask Tracking: When one area needs separate edits, mask tracking becomes especially useful here. It follows subjects smoothly and supports targeted adjustments during moving shots precisely.
Batch Matching: In bigger projects, batch matching saves time across similar clips quickly. It balances repeated shots more efficiently and reduces manual correction work later.
Export Options: At the final stage, export options protect video quality across platforms. They help creators deliver polished results for clients, web, and broadcast use.
Part 3. 4 Popular Color Grading Programs for Beginners and Experts
Now that the key features are clear, the next step is choosing wisely. Here are 4 popular color grading programs for both beginners and experts.
1. UniConverter
UniConverter Video Color Enhancer is an efficient color grading software designed to elevate the visual appeal of your videos with minimal effort. It offers intelligent color correction tools that automatically adjust brightness, contrast, saturation, and white balance to achieve professional-looking results. Whether you're enhancing dull footage or creating a specific mood, UniConverter ensures consistent and vibrant colors across all clips. Its intuitive interface makes it easy for beginners, while advanced controls provide flexibility for precise adjustments. With support for high-resolution videos and batch processing, UniConverter is an ideal choice for anyone looking to perform fast, reliable, and high-quality video color grading. Apart from video color enhancement, it also supports photo colorizing and photo color correction or saturation adjustment.
A tool like UniConverter fits well into that kind of everyday creative workflow. Its Video Editor lets users apply effects quickly, while AI Image Enhancer improves colour correction and image clarity. It also includes an Old Photo Colorizer for bringing aged pictures to life and an AI Video Enhancer for restoring weaker footage quality.
Key Features
All-in-One Access: Combines multiple enhancement features together, making editing faster, simpler, and easier for everyday users.
Effect Presets: Offers ready-made visual effects that help users stylise clips quickly without advanced editing experience.
Quality Restoration: Repairs low-quality footage so older videos appear smoother, clearer, and more watchable overall.
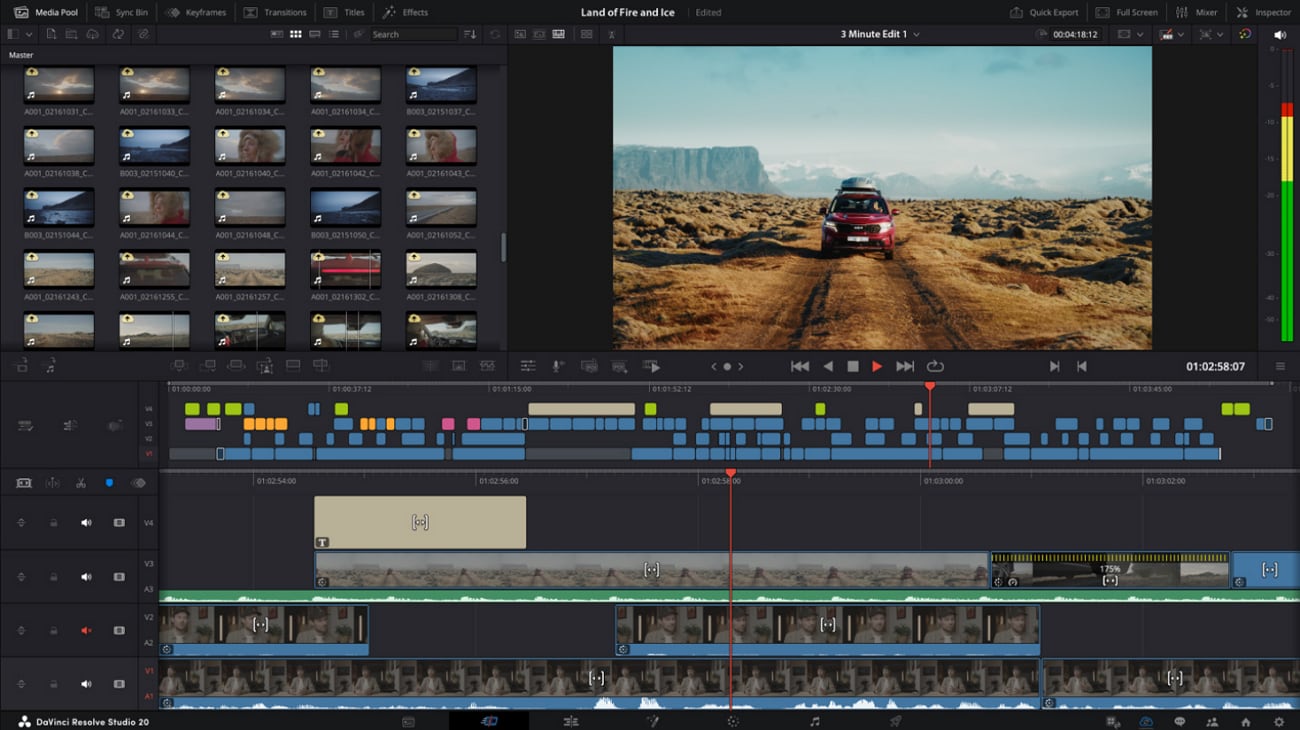
2. DaVinci Resolve
For users who want deeper control, this tool takes a more advanced path. DaVinci Resolve is widely trusted for serious editing, correction, and finishing work across many project types. Unlike simpler film grading software, it offers stronger manual precision, professional scopes, and detailed tools that help editors shape cleaner, richer, and more cinematic visuals.
Key Features
Gives accurate exposure and colour readings for more precise grading decisions.
Lets editors build layered adjustments with greater flexibility and cleaner control.
Includes detailed correction tools for cinematic finishing and advanced visual styling.
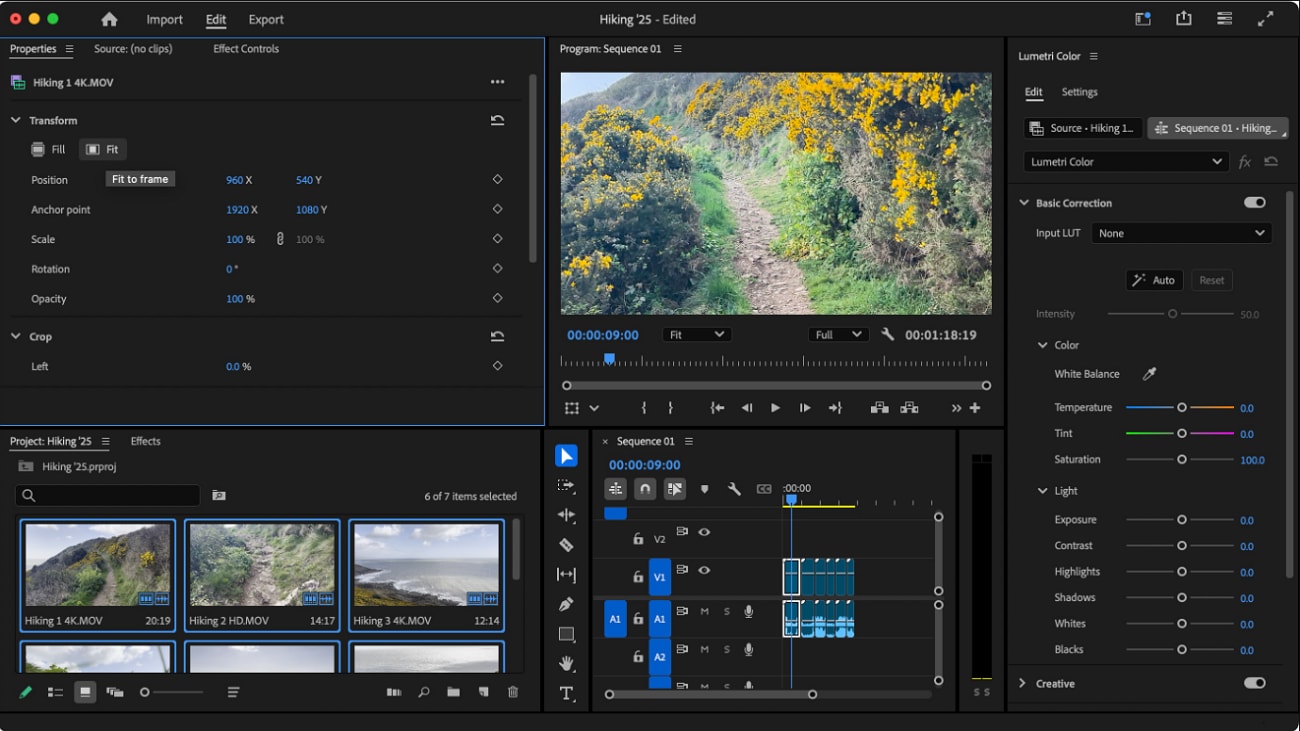
3. Adobe Premiere Pro
Many editors want a familiar workspace that still offers strong visual control. Adobe Premiere Pro fits that need by combining editing speed with flexible colour tools inside one professional timeline. Among popular color grading Premiere Pro workflows, it stands out for smooth integration, practical controls, and a setup that suits both content creators and experienced video editors.
Key Features
Built-in Lumetri Color panel gives fast access to practical grading controls.
Supports adjustment layers for applying colour changes across multiple clips together.
Includes selective colour tools for refining tones in targeted image areas.
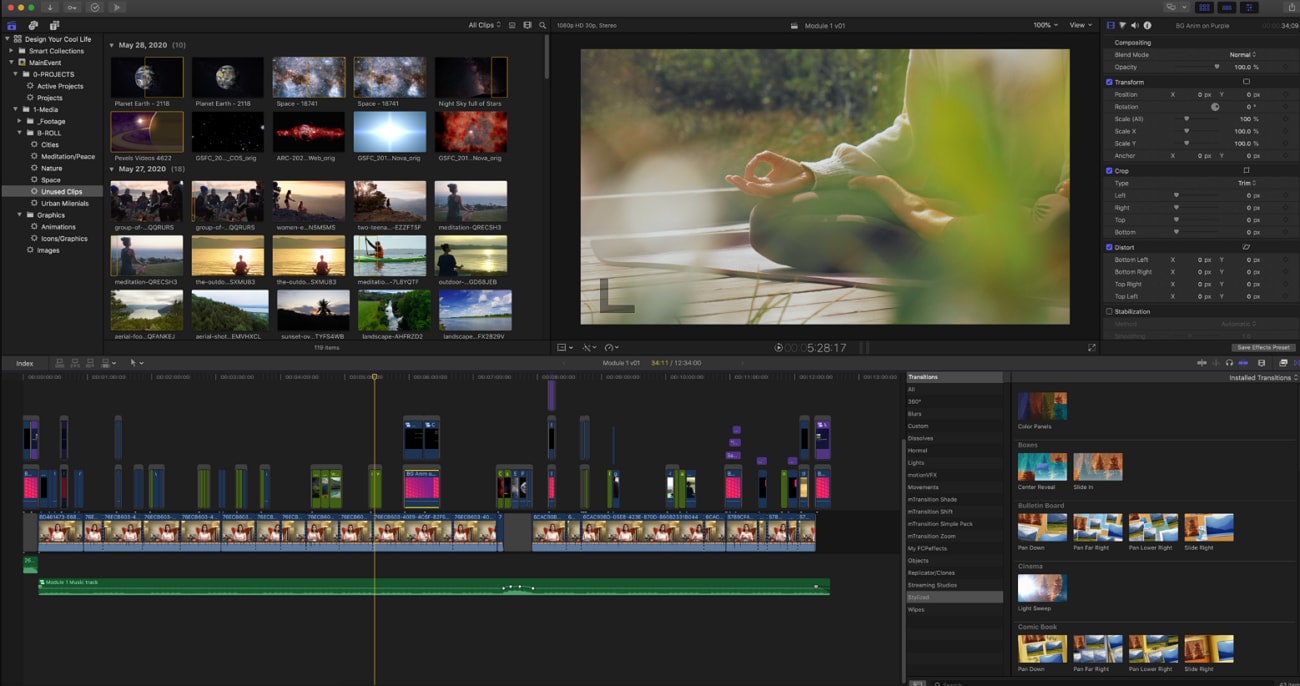
4. Final Cut Pro
For Mac users who want speed, polish, and smooth performance, this tool stands out. Final Cut Pro offers a clean editing experience with strong built-in colour controls, making it a solid choice for modern creators. Compared with many video grading software options, it feels fast, refined, and especially well-suited to Apple-based workflows.
Key Features
Uses object tracking to follow moving subjects for more targeted visual adjustments.
Supports multi-cam editing with many synced angles for more complex productions.
Includes magnetic timeline editing for faster arrangement and smoother clip management.
Since each option is clear, a side-by-side view is more helpful. The comparison table below makes these tools easier to evaluate quickly for you:
| Tool | Skill Level | Workflow Style | AI Help | Manual Control | Platform | Limitation | Best Use |
| UniConverter | Beginner | Simple and quick | Strong | Basic | Windows / Mac | Needs installation | Fast everyday edits |
| DaVinci Resolve | Advanced | Deep and technical | Limited | Very strong | Windows / Mac | Demands better hardware | Films and pro finishing |
| Adobe Premiere Pro | Intermediate | Flexible and familiar | Moderate | Strong | Windows / Mac | Ongoing subscription | Content and commercial work |
| Final Cut Pro | Intermediate | Fast and streamlined | Moderate | Strong | Mac only | Mac-only access | Apple-based editing |
Part 4. UniConverter: The Perfect Color Enhancement Option For Improving Video Colors
For many users, the best tool is not always the most complex. It is the one that saves time, improves visuals, and keeps editing simple from start to finish. That is why UniConverter stands out for creators who want practical results without a steep learning curve or a heavily technical workflow.
Using UniConverter Color Grading Software for Quick Video Enhancements
To understand a video's real value, it helps in understanding that video enhancement is necessary. Here is how UniConverter handles quick visual enhancements, as shown in the steps below:
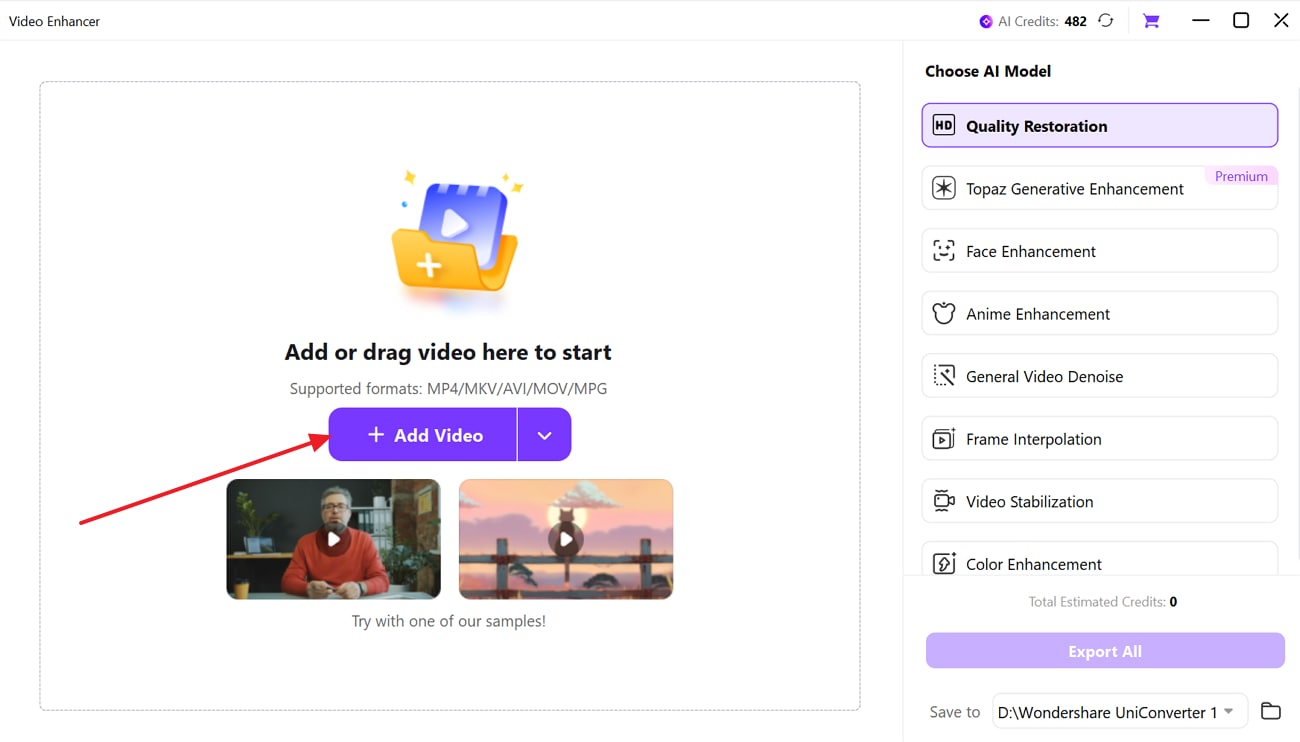
Step 1. Access the Video Enhancer to Proceed
Firstly, navigate to the "Video Enhancer" from the main interface. This opens the AI enhancement workspace for improving weak or low-quality clips.
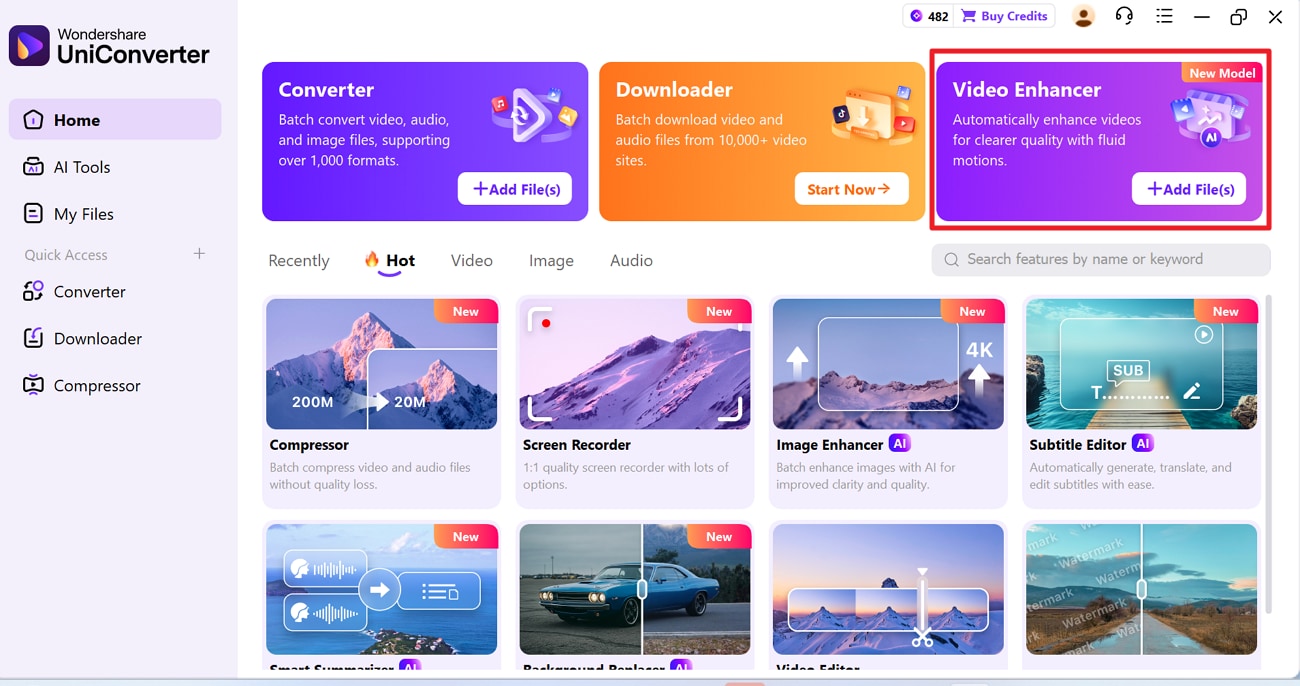
Step 2. Add the Video to Video Enhancer
Here, click the "Add Video" button inside the "Video Enhancer" window. You can also drag and drop your video file into the upload area.
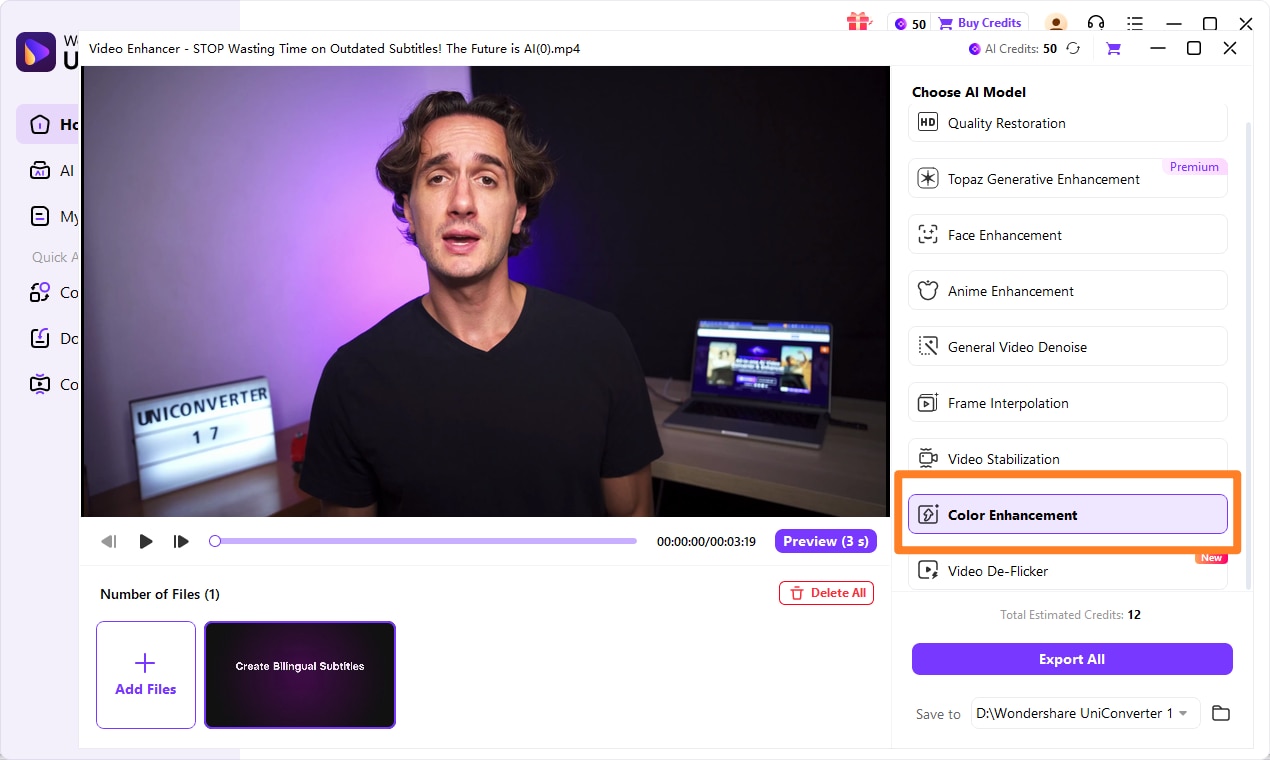
Step 3. Choose AI Mode for Video Enhancement
From the right panel, select "Quality Restoration" as the AI model. Then click "Preview" to compare the original clip with the improved version.
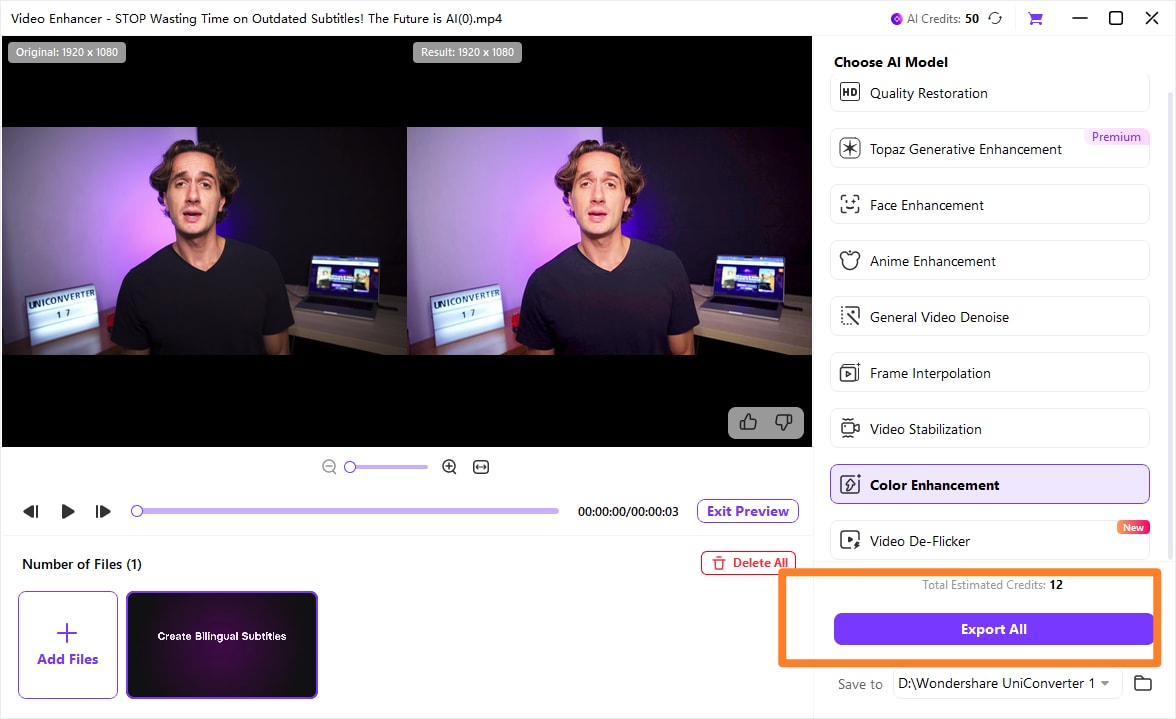
Step 4. Export the Enhanced Video to Your Device
Once the preview looks right, choose the save location at the bottom. After that, press "Export All" to save the enhanced video to your device.

Batch Video Color Enhancer for Faster Workflow
Part 5. 6 Essential Tips to Use Color Grading Software for Better Video Results
Before chasing dramatic looks, it helps to build smarter grading habits first. These practical tips make color grading software more useful for better video results.
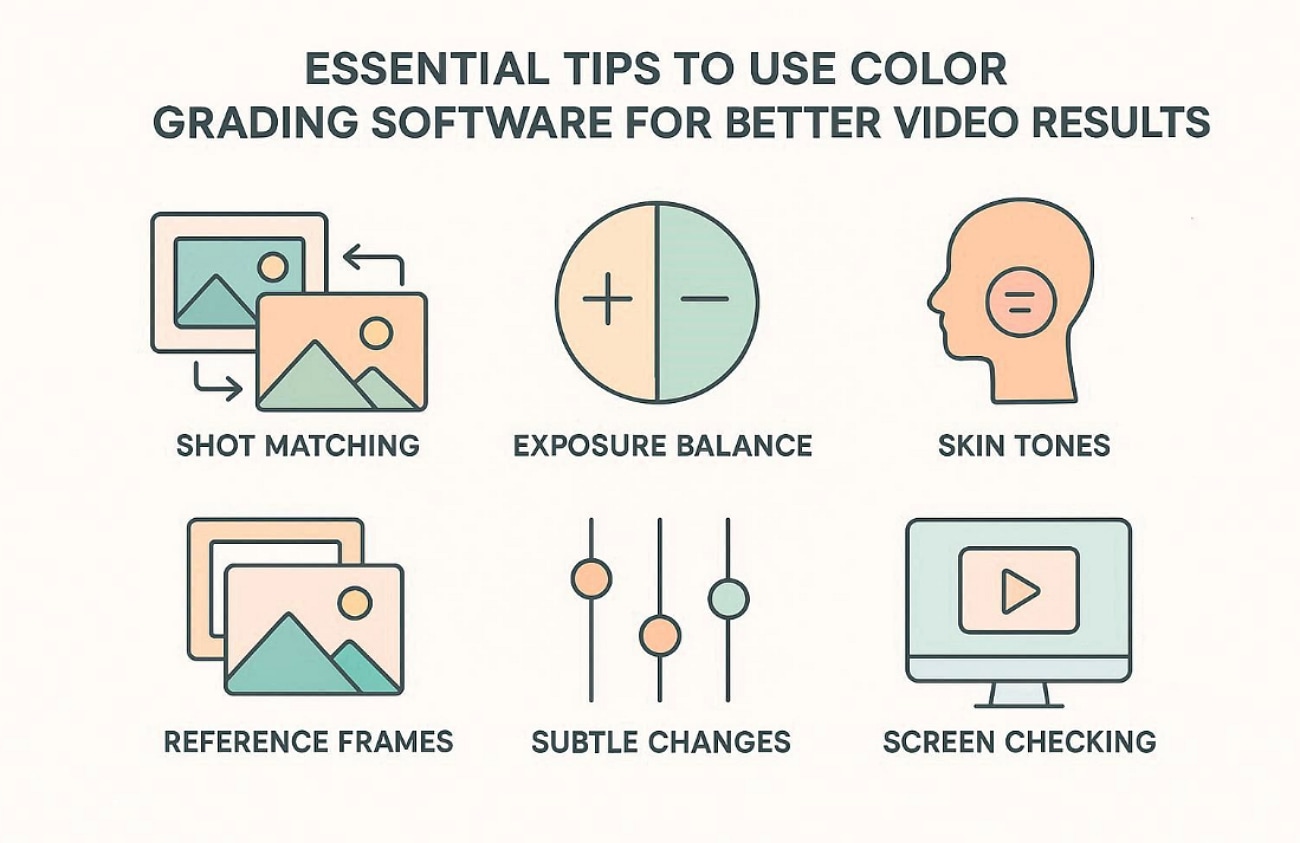
Shot Matching: Match colours across clips before building any creative style choices later today. This keeps scenes consistent and makes the final video feel smoother overall.
Exposure Balance: Fix exposure first so highlights and shadows stay controlled throughout grading work. Balanced brightness gives colours more room to look natural and clean later.
Skin Tones: Watch skin tones carefully because viewers notice unnatural faces immediately in videos. Natural faces help interviews, ads, and portraits feel more trustworthy onscreen overall.
Reference Frames: Save a reference frame to compare colour decisions during longer edits easily. This helps you avoid drift when grading scenes over several sessions daily.
Subtle Changes: Make small adjustments instead of pushing every slider too far at once. Gentle changes usually protect detail and keep footage believable and polished longer.
Screen Checking: Preview exports on different screens before final delivery begins for better accuracy. This reveals colour shifts that may look different across phones and monitors.
Conclusion
To conclude, choosing the right color grading software depends on your skill level, workflow, and creative goals. Some tools offer deep control, while others focus on speed and simplicity for daily projects. For users who want faster enhancement, practical features, and easier results in one place, UniConverter feels like a smart and natural choice overall.
Frequently Asked Questions
-
What is the difference between color correction and color grading?
Color correction fixes exposure, white balance, contrast, and tones for natural-looking footage. Color grading adds style, mood, and a stronger cinematic feel afterward. -
Which color grading software is best for beginners today?
Beginners usually prefer tools that feel simple, quick, and easier to learn. UniConverter works well because it combines helpful AI tools with practical editing features. -
What can UniConverter do for quick video and image enhancement?
UniConverter can improve colours, restore weak footage, and enhance image clarity quickly. It also includes tools like Old Photo Colorizer for older black-and-white pictures. -
Can color grading software improve old or low-quality footage?
Yes, some tools improve weak footage by fixing tone, sharpness, and colour balance. AI-powered features can also help restore older visuals with cleaner final results. -
Is DaVinci Resolve better than Adobe Premiere Pro for grading?
DaVinci Resolve offers deeper control and stronger tools for advanced colour finishing. Adobe Premiere Pro feels better for users wanting editing and grading together.

