

In designing, the term photo color correction holds massive importance because it adjusts colors to ensure accuracy and consistency. This involves fixing exposure and color tones to match how the human eye would perceive the scene in real life. For industries like photography and film-making, color correction is an important asset to deliver high-quality visuals.
But how to do photo color correction? For better learning, read the following article and explore the best tool to color correct images.
In this article
Part 1. What is Color Correction for Photos
While editing personal photos or professional shots, knowing the key aspects of color correction can make a significant difference. Below is the list of some fundamentals you should know in order to color correct photo:
- White Balance Adjustment: This guarantees that the colors in a photo appear as they should while preventing unwanted color casts from occurring due to lighting conditions. It also maintains natural tones and brings back accurate color representation in the photos.
- Modifying Exposure and Contrast: Proper exposure adjustment brightens or darkens an image to correct the lighting issues. While, contrast adjustment helps in defining the difference between lighting and shadows while making photos pop.
- Controlling Saturation and Vibrance: Where saturation boosts the intensity of colors in a picture, over-saturating can make it look unnatural. On the other hand, vibrance is a more refined adjustment because it increases the intensity of less prominent colors.
- Adjustment of Hues, Tint, and Temperature: Hues help in shifting colors along the spectrum, and tint balances green or magenta tones in the image. Whereas alteration in temperature improves the warmth or coolness in the pictures.
Part 2. The Best Tool to Color Correct Image/Photo [One-Click]
Moving on, let us jump into discussing the best photo color correction tool, which is UniConverter. With the help of its Image Enhancer feature, you get the ability to revive your images seamlessly. Whether you're working on an old photo or are trying to add colors to a black-and-white picture, you can use this image editor on your device with ease.
With only minimal effort, you can apply the Color Correction AI Model to your picture. The AI image enhancer of UniConverter supports multiple file formats to give you the flexibility to work with different files. It also looks into the brightness of the image, resulting in a bright and more realistic result.

Best AI Photo Color Correction Tool
Other Key Features
- Batch Processing Feature: Users get the ability to work on multiple images in one go. This helps them speed up their workflow and maintain high efficiency.
- Preview Results: With the help of the preview feature, you can view the results the tool generates once the Color Correction AI model is applied.
- Enhance Face to Clear Flaws: To further enhance your image, you can pick the Enhance Face feature to clear up any facial flaw. UniConverter ensures you achieve a precise and professional image for further use.
Guide to Color Correct Image/Photo at UniConverter
To add to the above discussion, here are the steps you need to follow in order to utilize the AI image color correction tool.
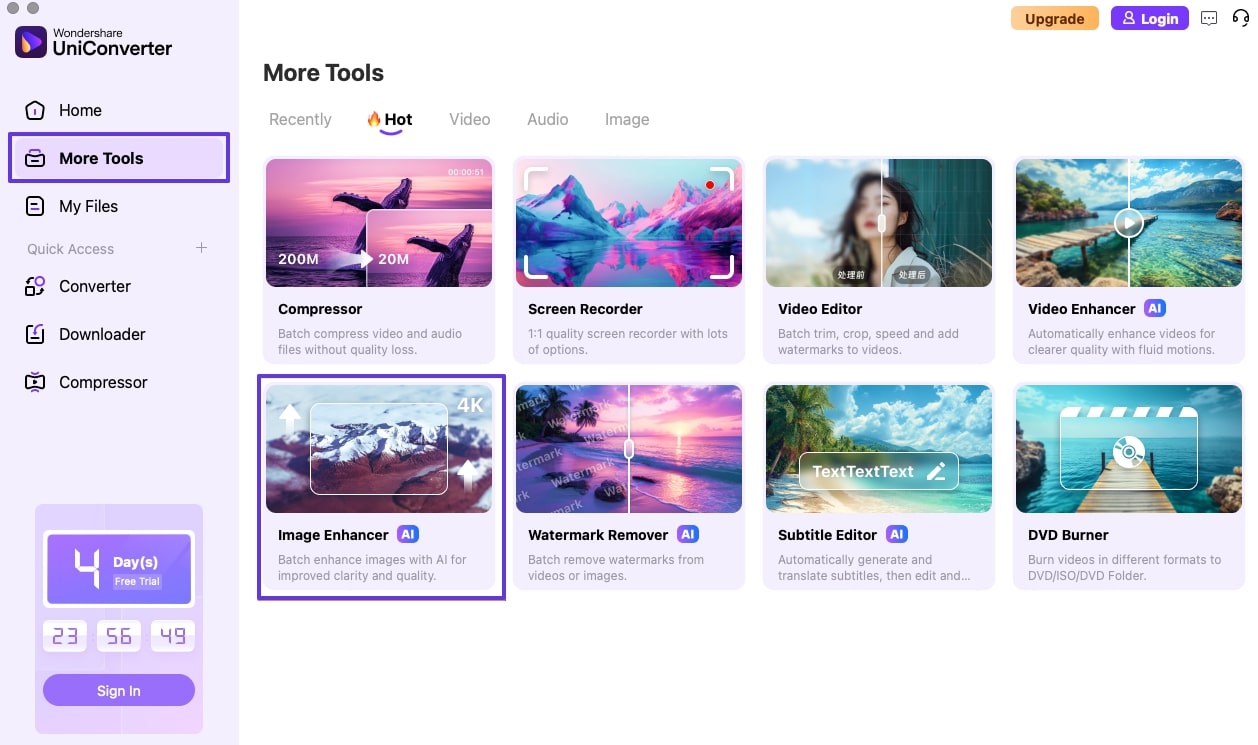
Step 1. Install UniConverter and Pick the Image Enhancer Tool
To initiate enhancing the color of your images, install the latest version of UniConverter on your device. Then, navigate to "More Tools" from the sidebar and pick the "Image Enhancer" tool to move to the next step.
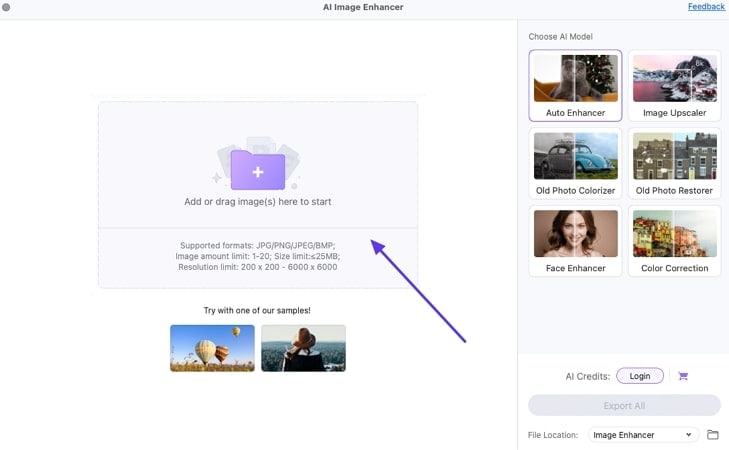
Step 2. Add Images to Start the Process
Upon entering AI Image Enhancer, click on the “Add or Drag Images Here to Start” tab to add the images you want to work with.
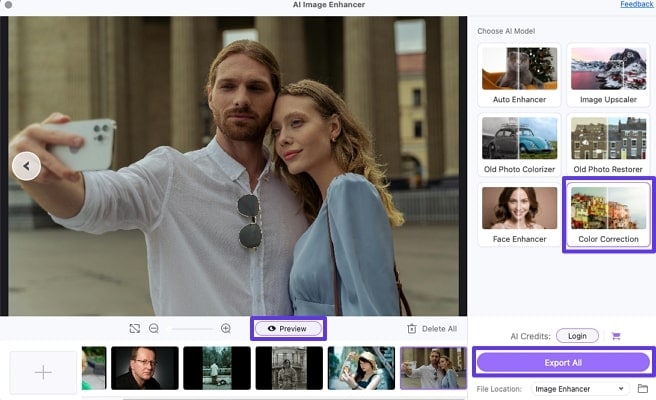
Step 3. Apply Color Correction AI Model and Export Results
At the editing interface, choose “Color Correction” from under the list of AI Models. To apply the effect, hit the “Preview” button and tap on the “Export All” button. Finally, save the images to your device for future use.
Part 3. 5 Photo Color Correction Online Tools To Consider
There are several photo color correction online tools that adjust your pictures, enhance their vibrancy and visual appeal. The following section will discuss some of the best editing software to help you achieve color correction seamlessly:
1. Fotor
Starting with the versatile tool, Fotor allows you to make basic adjustments to the picture, such as brightness and saturation. By using contrast, users can enhance the vibrancy of colors in their images. Moreover, this tool enables users to correct the colors of more than one photo at once, which saves time and effort.
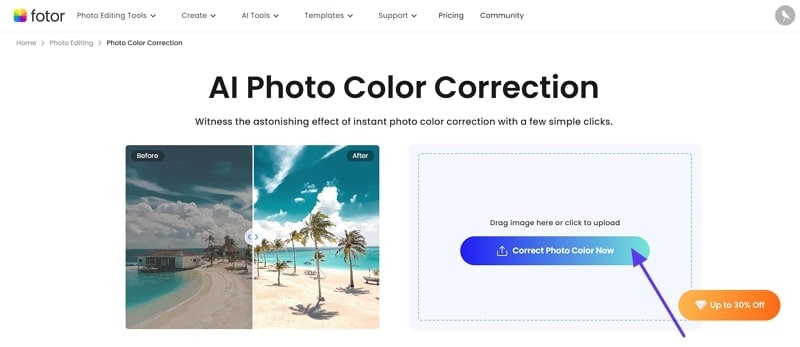
Apart from this, with AI photo color correction, you can modify the hue and temperature of the pictures which helps in achieving the perfect shade balance. Thus, if you want to learn how to correct the color of your faded pictures using this tool, follow the given guidelines:
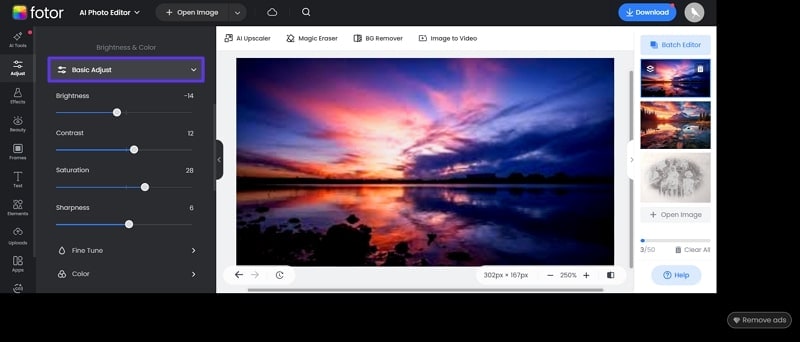
Step 1. From the main interface, press the "Correct Photo Color Now” button to upload your target picture from your PC.
Step 2. Next, from the “Basic Adjust” section, change the Brightness, Contrast, and Saturation with the help of the slider.
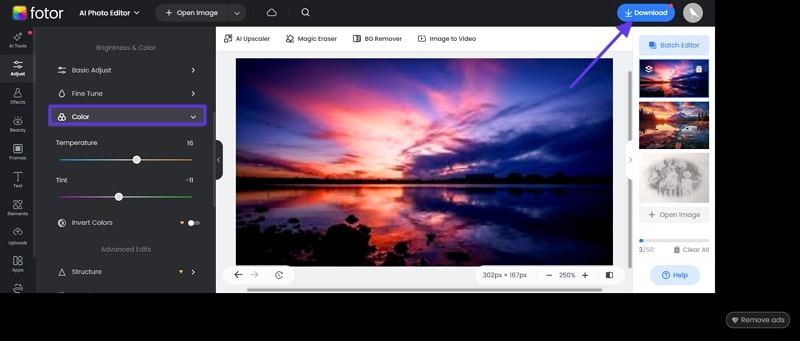
Step 3. Afterward, choose the “Color” tool and refine the “Temperature” and “Tint.” Once you are satisfied with the results hit the “Download” button from the top right corner of the screen.
2. Cutout.Pro
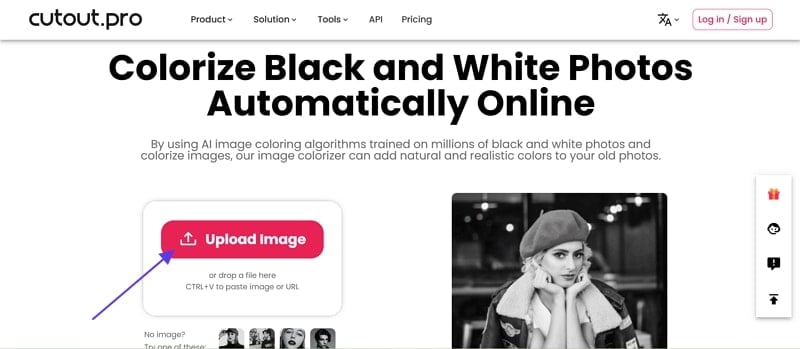
By leveraging the power of AI, this image color correction tool uses an image coloring algorithm to colorize faded images. Users just have to upload their target picture, and this tool automatically detects the faded part and adds a vibrant color without needing any effort.
Moreover, you can see the before and after results of colorized images to check whether the tool is worth considering. It facilitates users in choosing the resolution of the photo from 500x500 to 1280x1280 according to their preference. After knowing these features, follow these steps to learn to restore the vibrant color of your faded images:
Step 1. Search the tool and press the “Upload Image” button from its main window.
Step 2. The AI technology automatically adds colors to the picture, and from the right side of the screen, press the "Free Download" button to save it.
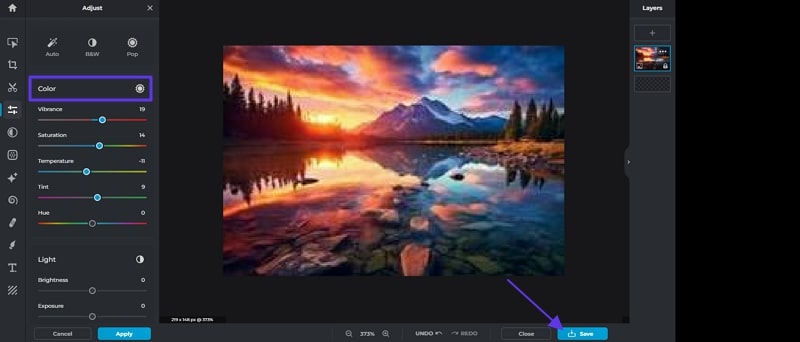
3. Pixlr
If you are looking for an auto color correction online free tool, Pixlr is perfect for you as its available functions automatically colorize the picture. Apart from this, you can manually change the Vibrance and Saturation of the images. It allows you to modify the Tint and Hue of the photos and instantly adds shade, which makes them look more vibrant.
In addition, users can adjust the exposure and contrast of the picture, which also helps in creating a more balanced look. Hence, to ensure your pictures look vibrant and full of life, follow these steps to correct their color:
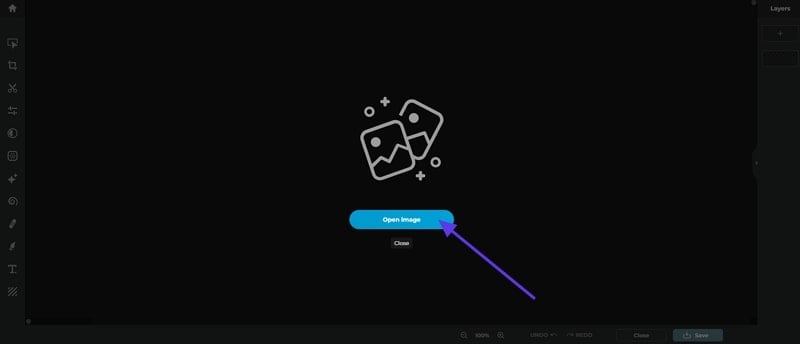
Step 1. Search the tool and press the “Open Image” button to upload the targeted fade picture from your device.
Step 2. Upon uploading, adjust the Vibrance Saturation, Temperature, and Hue using a toolbar from the “Color” section. Once you are satisfied with the results, press the “Save” button to download the colorized image on your device.
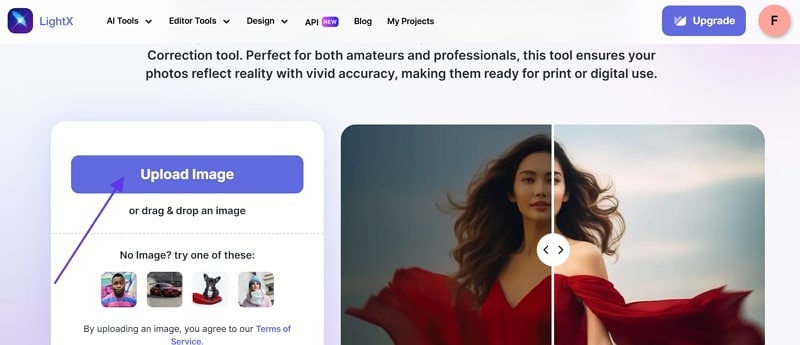
4. LightX
If you have a picture with a faded background, you can use this tool that allows you to adjust the color of the background and foreground separately. You can use raw images for color correction, and this editing software fine-tunes every detail and adds balanced vibrancy to images. Moreover, it enables users to adjust the contrast and brightness of the image with the help of a toolbar.
By using the Colorize tool, highlight the specific area you want to modify, and it automatically changes its color. The given steps will help those who want to enhance their faded image and make them look fresh and vibrant again:
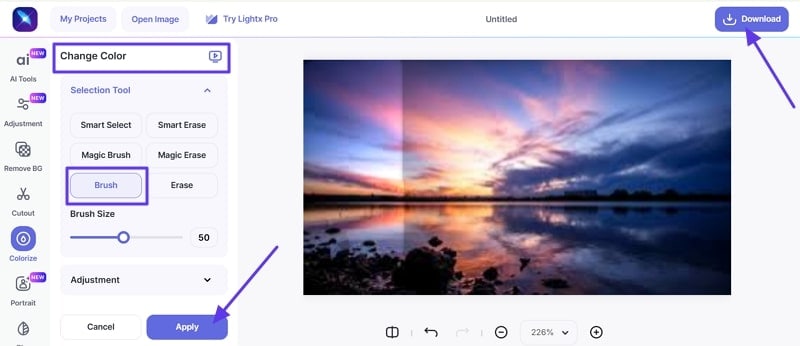
Step 1. Open the LightX tool and press the “Upload Image” button to import the raw or faded picture from your device.
Step 2. Afterward, under the “Change Color” section, select the “Brush” tool and highlight the area where you want to adjust the colors. Move ahead, hit the "Apply" button to modify the changes, and then press the "Download" button from the top right corner of the screen.
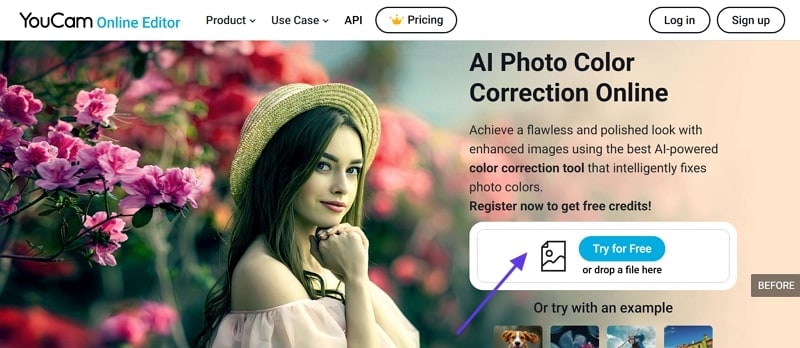
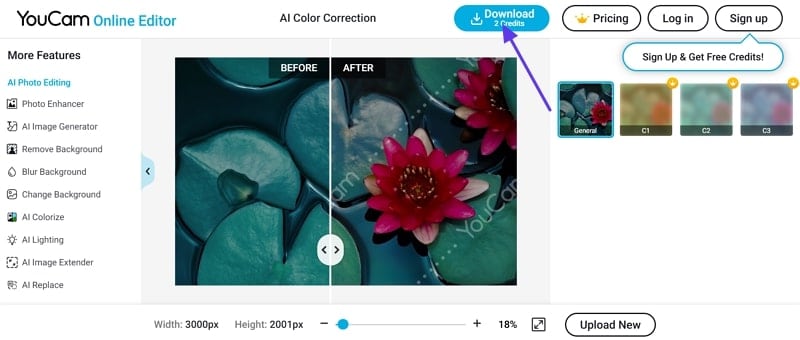
5. YouCam Online Editor
The last tool that color corrects old photos is YouCam Online Editor, which adjusts the color of images by using advanced AI technology. Users just have to search the tool and upload the target picture, and this editor analyzes the image and automatically fixes its colors. It allows you to choose from 4 different colorized picture options such as General, C1, C2, and more.
Before downloading the image, you can see the before and after results as well to see if it's worth considering. So, if you are wondering how to use this tool, here is a brief stepwise guide given below:
Step 1. After searching and opening the tool, press the “Try For Free” button to upload your target image.
Step 2. The tool instantly colorizes the picture and shows the before and after results of the picture. There, preview the image, and once you are satisfied, hit the “Download” button to save the photo.
Part 4. Common Issues Involving Photo Auto Color Correction
Building upon the discussion, while photo color correction online free tools offer convenience, they don’t always deliver perfect results. That is why we compiled a list of common issues below that might arise when using these color correction tools:
- Overexposed / Underexposed Picture: When images are too bright (overexposed), their details might get lost while making the photo look washed out. Whereas, an underexposed photo can appear too dark, hiding important details in the shadows.
- Removing Color Cast: Incorrect white balance settings or different lighting conditions can make an image over-tinted. Here, using an auto color correction may not always detect and fix these color shifts properly.
- Altering Skin Tone: Modifying the skin tones can be challenging, as color correction tools don’t always differentiate between skin and other areas. This can result in overly warm, cool, and unnatural skin tones looking too red or pale.
- Corrected Washed Out Colors: Color correction tools at times push colors too far in either direction while making them too vibrant or dull. These issues can be noticeable in landscapes, portraits, or product photography, where color accuracy is essential.
FAQs about AI Photo Color Correction
1. Why is white balance important in color correction?
White balance is an important step in color-correct photos because it ensures that the colors appear natural. By adjusting the white balance, users can neutralize the unwanted tons and make whites appear truly white to maintain accuracy.
2. How can I color-correct an overexposed or underexposed photo?
To correct an overexposed or underexposed photo, try modifying the exposure and brightness first. After that, lower highlights to recover details in bright areas and lift shadows to reveal details. In the end. Increasing contrast can help in adding depth to an image.
3. What is the most accurate and fastest way to color-correct a photo?
The fastest and most accurate way to color-correct a photo depends on the tool you choose and the adjustment requirement. For a balance of speed and accuracy, an AI-powered online tool like Wondershare UniConverter is suggested to help enhance images with a click.
Conclusion
In conclusion, to color correct images, adjusting the white balance, exposure, and saturation are important key elements to consider. While color correction tools offer quick fixes, manual modification often requires greater accuracy and creative control. For this, Wondershare UniConverter is the only solution to enhance images in minutes. Its color correction features allow users to address all these adjustments with just a single click.

