

Nothing is more frustrating than capturing what should be a perfect moment, only to find your image lacks that crisp, professional look you were after. The good news is that you no longer have to settle for soft, unfocused photos.
This guide will walk you through four practical methods on how to sharpen the image in Photoshop, and also show you an even easier alternative that can fix multiple photos at once. Let's turn those disappointing shots into images you'll be proud to show off.
Part 1. What Might Influence the Sharpness of Photos
Having an understanding of what causes blurry photos is essential before learning how to sharpen the image in Photoshop. Here are several factors in photography that can result in images lacking the crisp detail you need:
- Poor Focusing: If your camera's autofocus system fails to lock onto your subject properly, you will end up with soft and unfocused images. This can occur in low-light conditions when photographing non-contrasting subjects, such as solid-colored walls, or when dealing with highly repetitive patterns.
- Camera Shake or Low Shutter Speed: If you handhold the camera at a slow shutter speed, even tiny hand movements can blur the entire photo. A general rule of thumb is to use a shutter speed that is at least equal to the focal length of the lens. You can also use a tripod or increase the shutter speed to prevent this kind of blur.
- Subject Movement: Fast-moving subjects need a higher shutter speed to stay sharp. For example, photographing fast-moving objects like running people or birds often requires a speed of 1/1500 or more to freeze motion. If the subject moves during a long exposure, it will blur even if the camera is steady.
- Shallow Depth of Field: If you are shooting with very wide apertures of low f-numbers like f/1.8 or f/2.2, you create an extremely shallow depth of field. While this can be artistic, it means only a tiny portion of your image will be in sharp focus, and anything outside that zone will appear blurred.
Part 2. How to Sharpen Images with Photoshop [Sharpen Filter]
The smart sharpen filter is one of the most effective ways to learn how to sharpen photos in Photoshop. This option offers superior edge detection and control compared to older sharpening methods.
Step 1
Open the image in Photoshop, create a layer, and navigate to "Filter> Sharpen > "Smart Sharpen" or "Unsharp Mask."
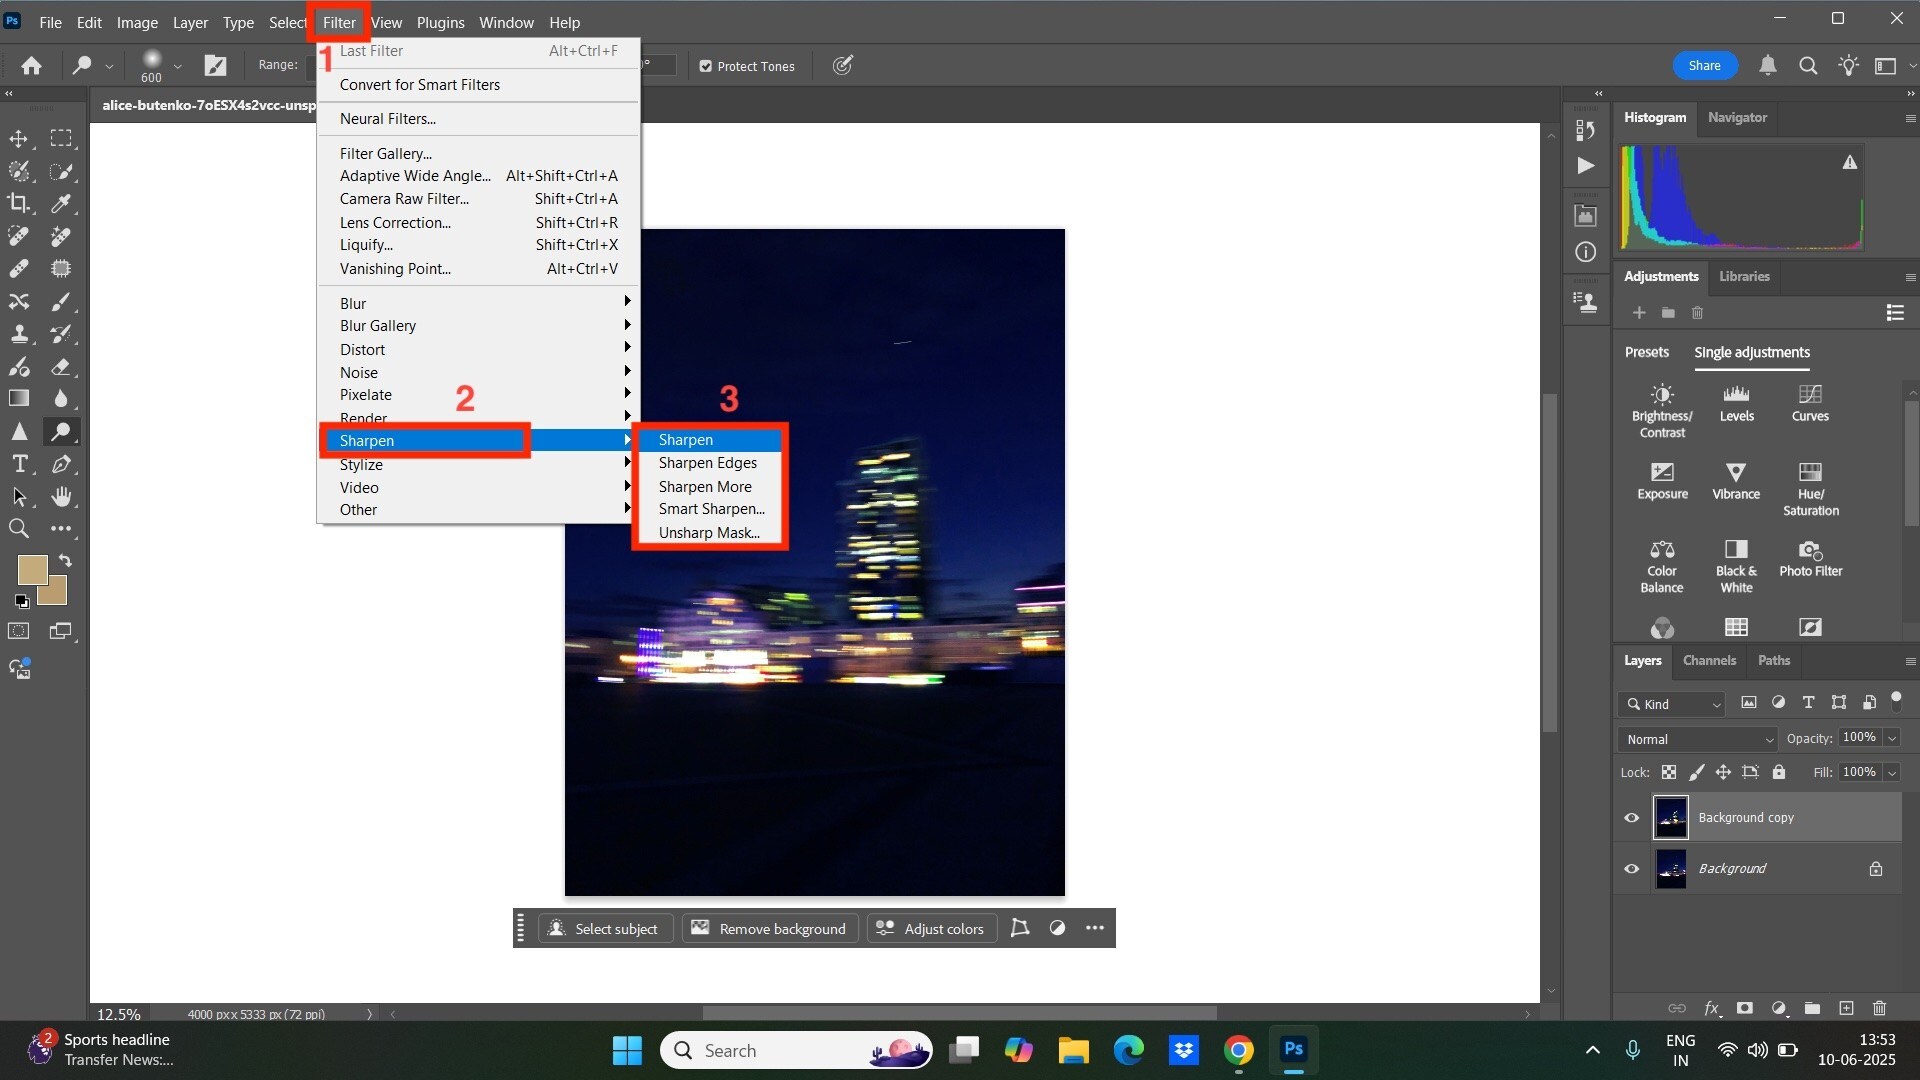
Step 2
After clicking the "Unsharp Mask" option, a small tab will appear on the screen. You can adjust the radius, amount, and threshold, then click "OK."
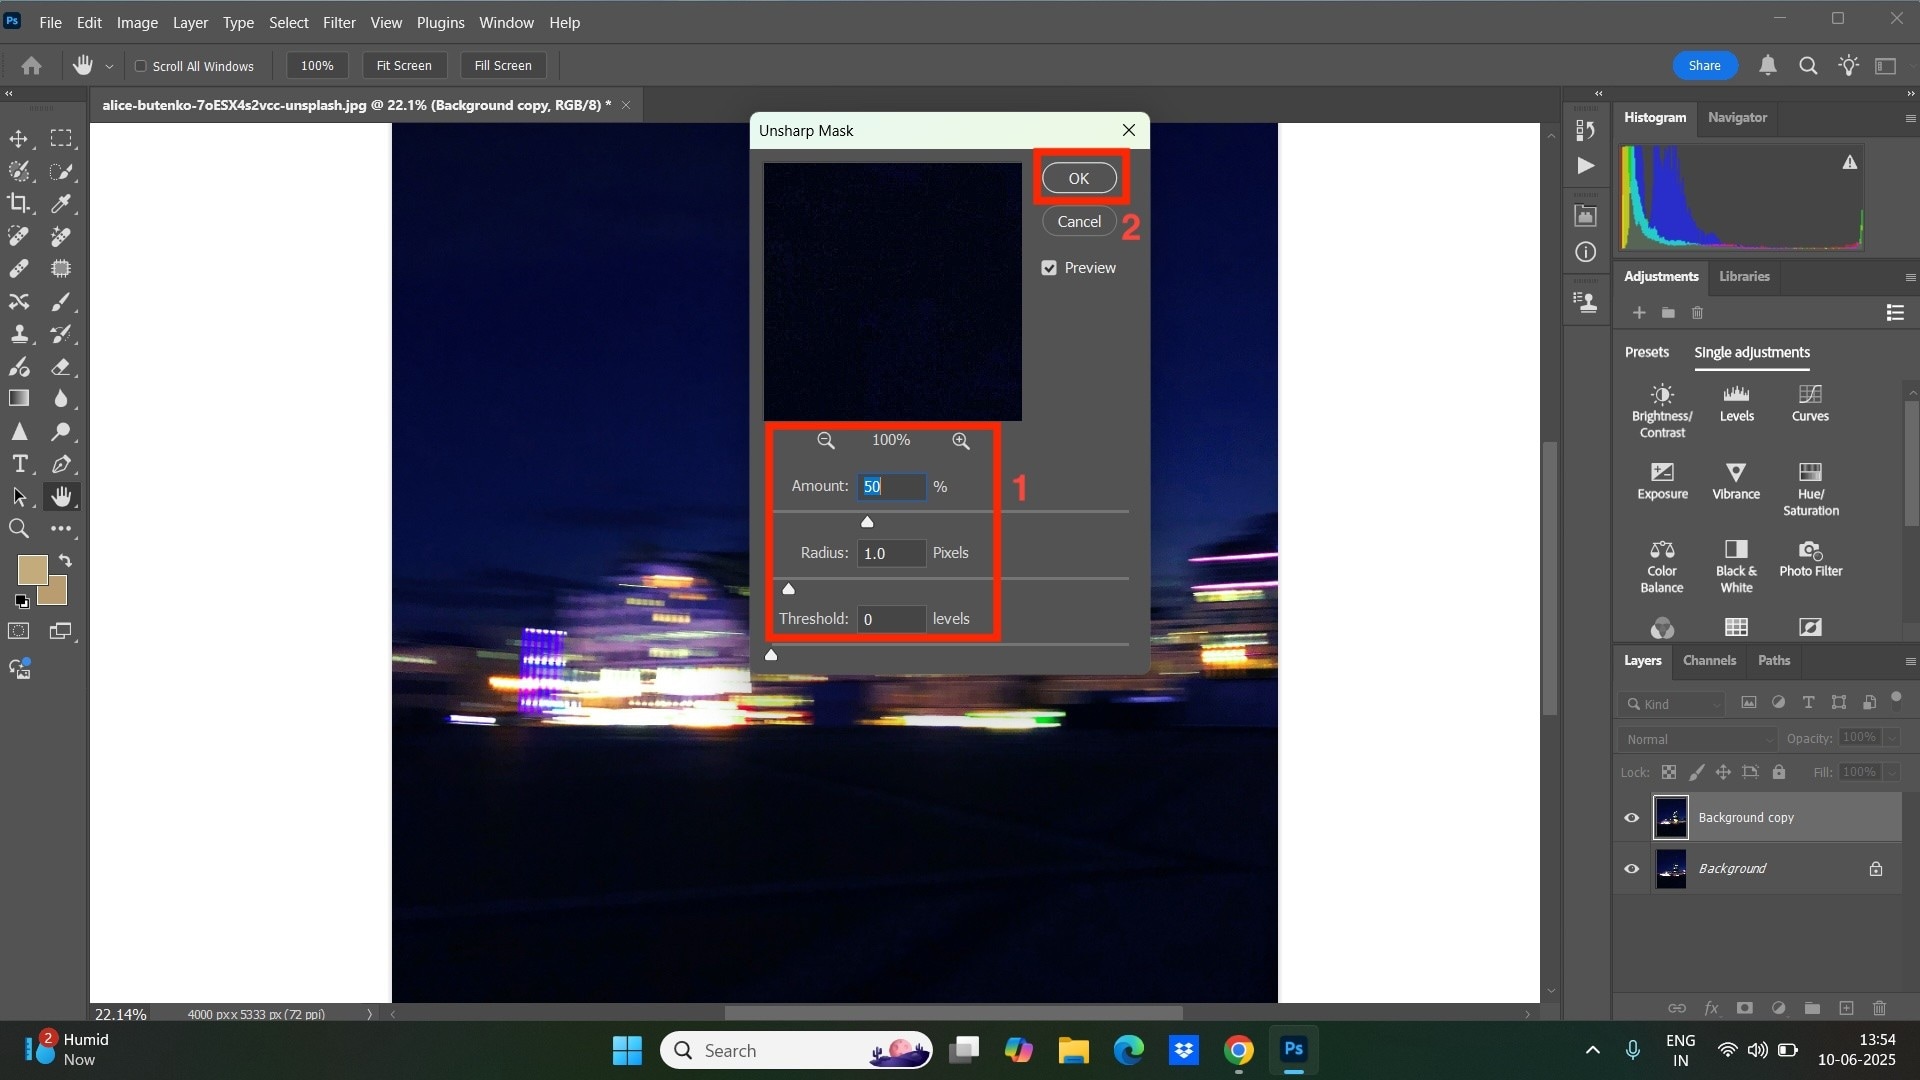
Step 3
You can also add color balance, filters, brightness, and more. Once done, navigate to "File > Export as" to save the enhanced image.
Part 3. How to Sharpen Images with Photoshop [Camera Raw Filter]
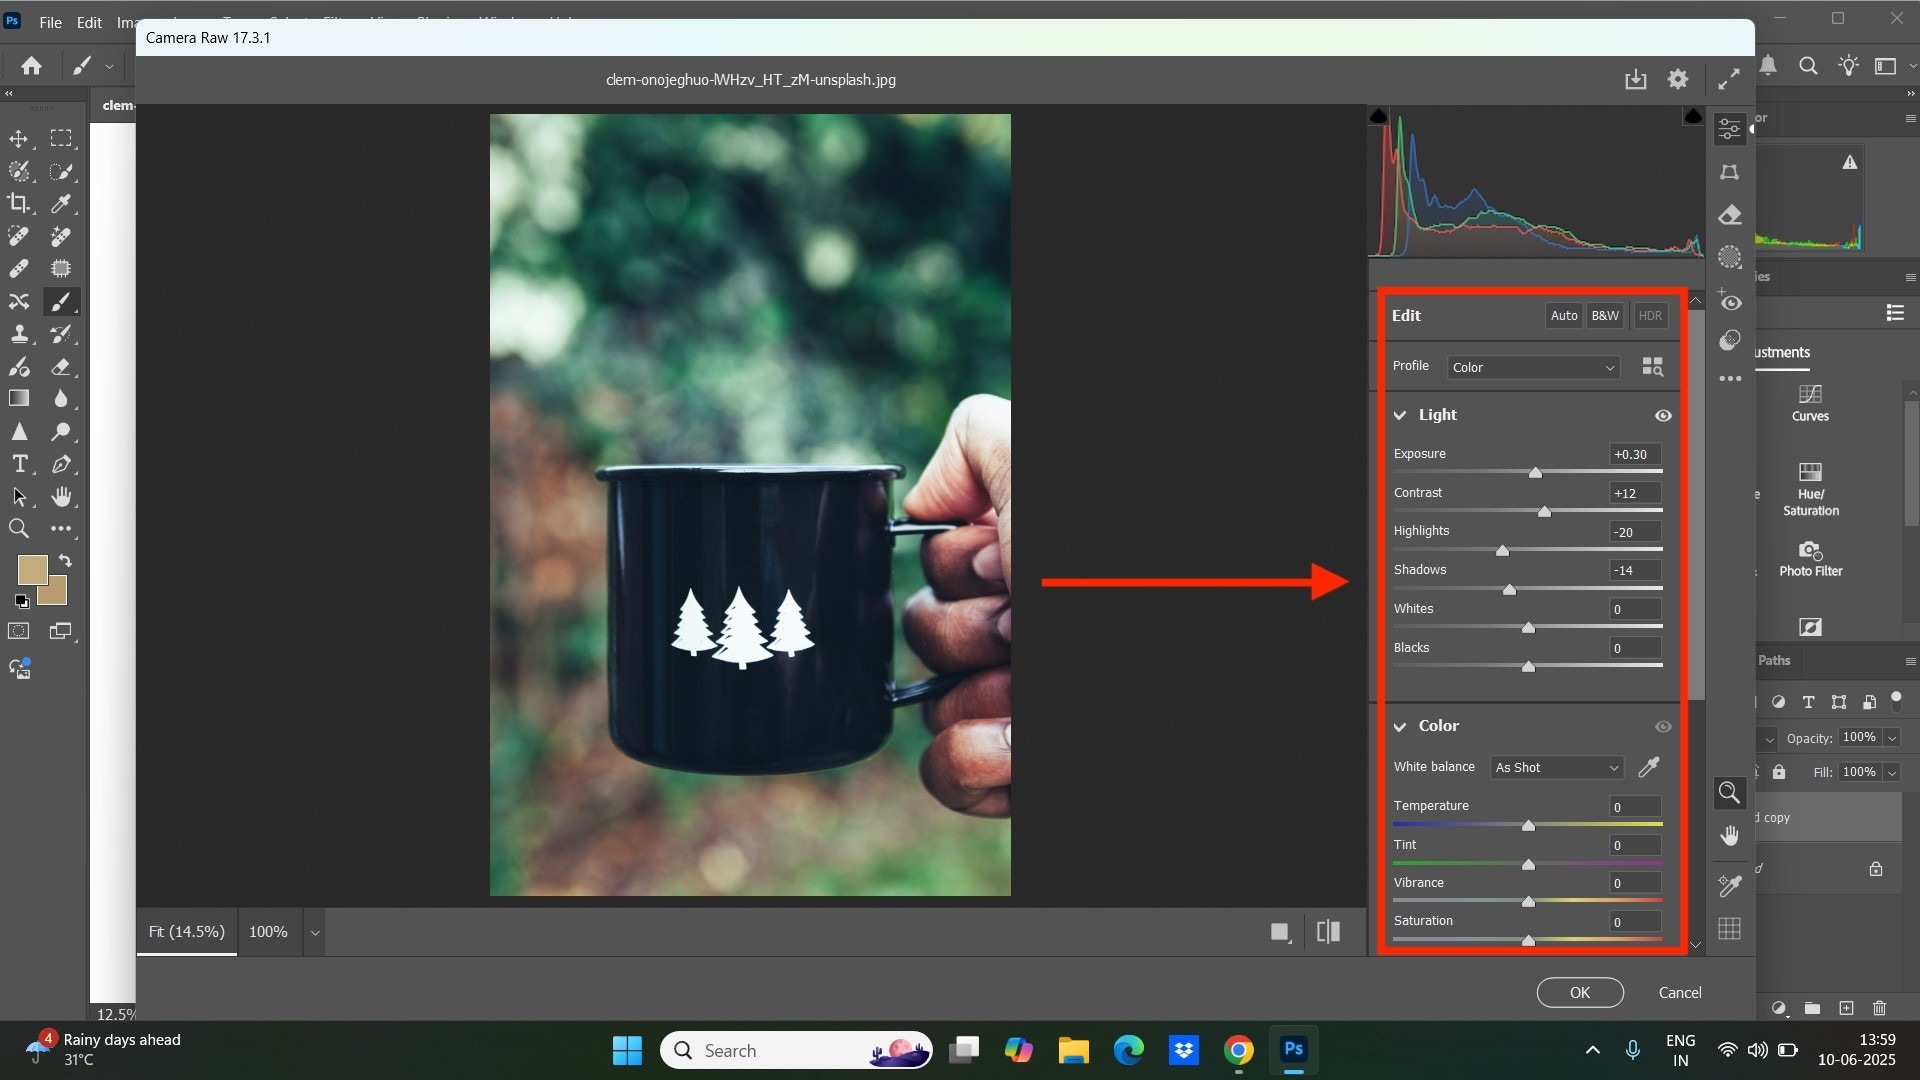
When you learn how to sharpen images in Photoshop, the Camera Raw filter will impress with its high-quality results, providing professional-grade sharpening controls. This method provides precise control over various aspects of sharpening.
Step 1
Open the image you want to sharpen in Photoshop and create a new layer. Right-click on the layer and select "Convert to Smart Object." Navigate to the "Filter > Camera Raw Filter" option.
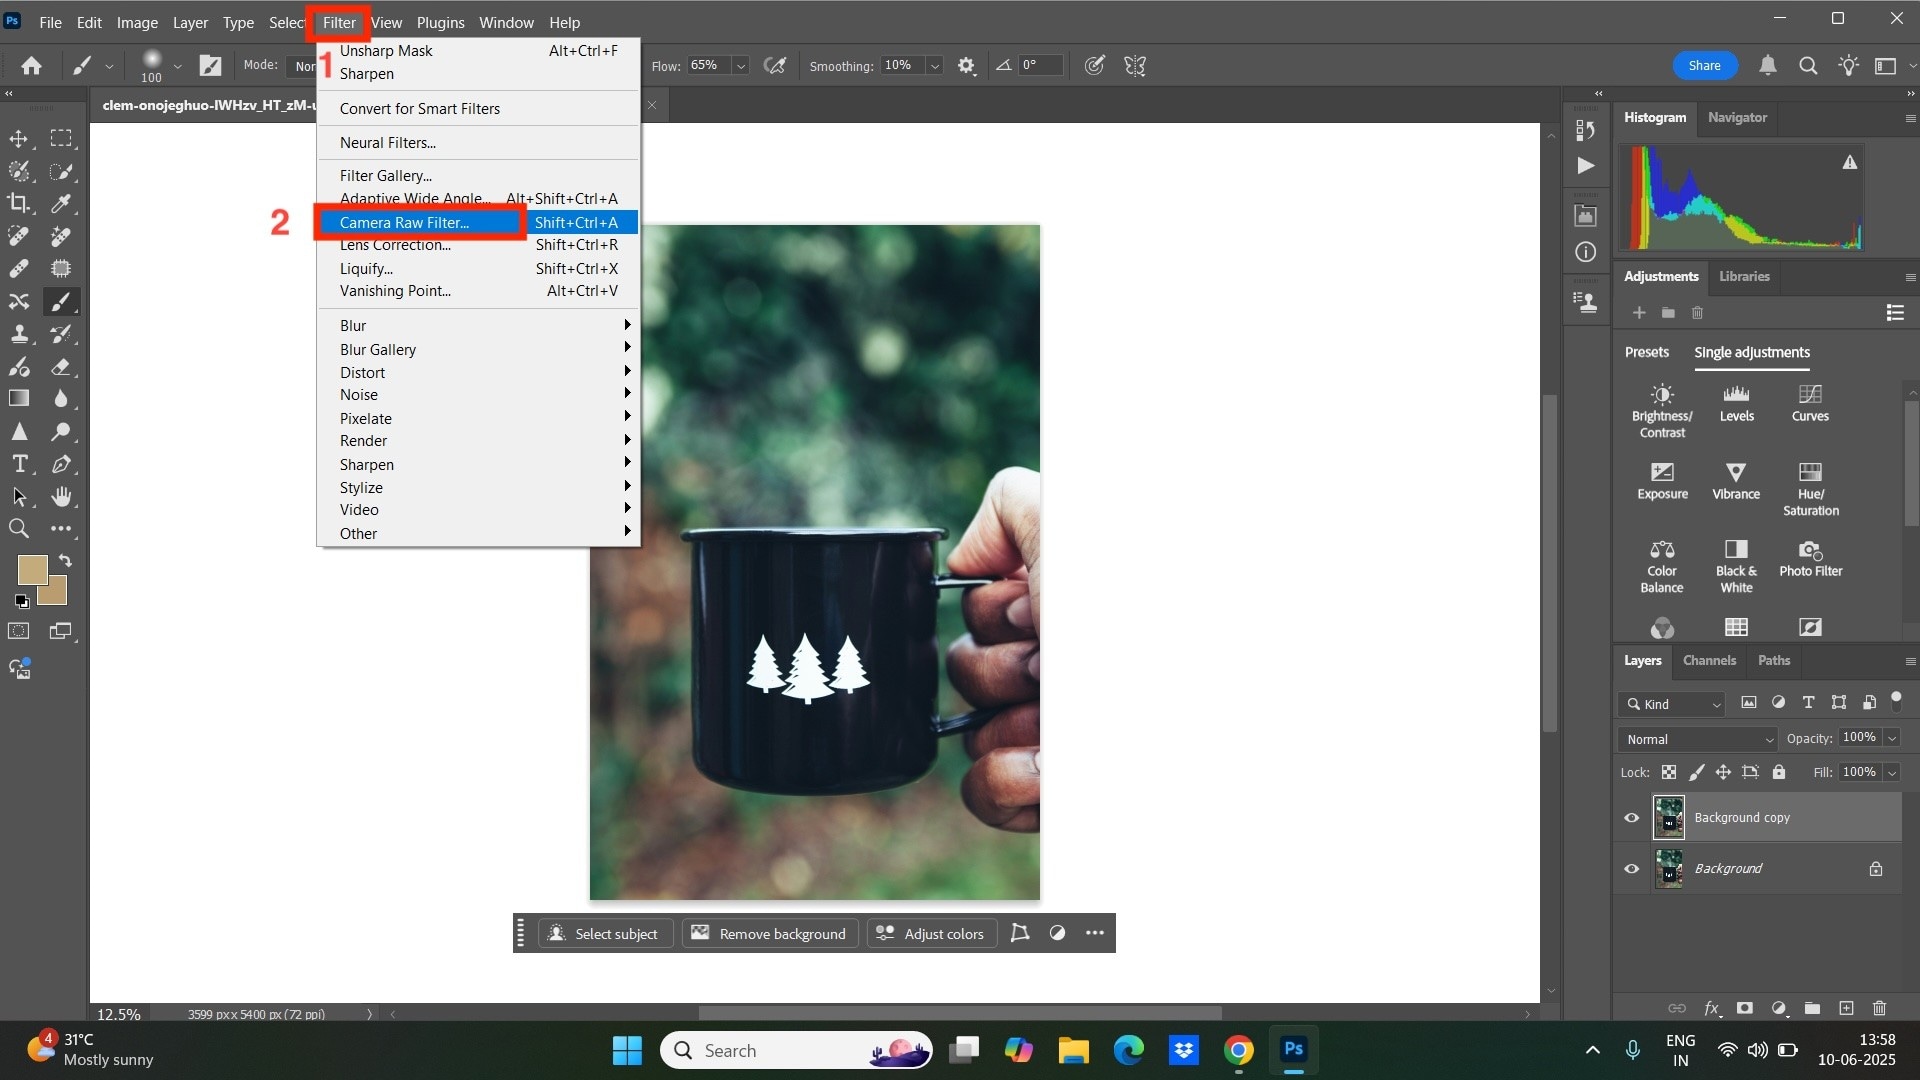
Step 2
After enabling the Camera Raw filter, a tab appears on the right side of your screen with multiple light and color adjustment options. From here, you can adjust the sharpening parameters. You can also select the "Brush Tool" from the left menu to paint specific areas more intensely.
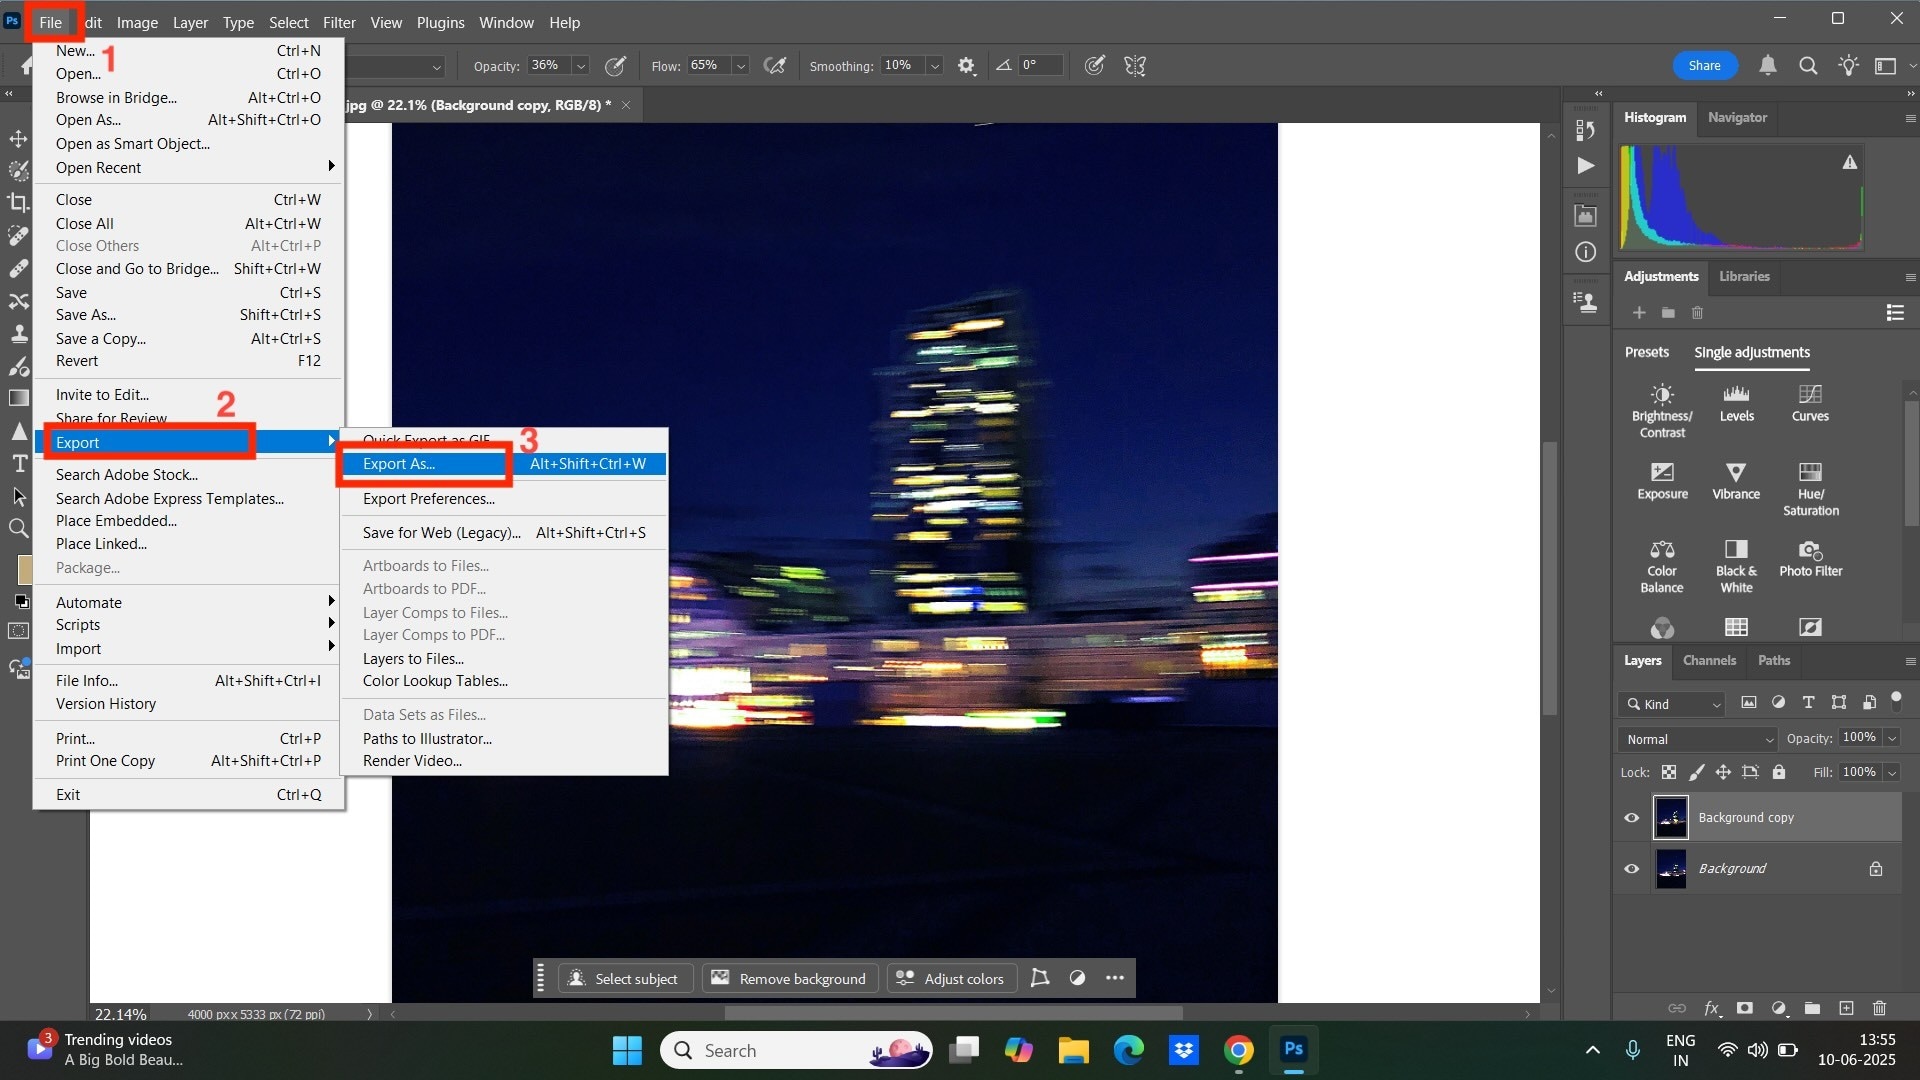
Step 2
Once done, click the "File" option from the top menu bar and choose the "Export As" option to save the final image.
Part 4. How to Sharpen Images with Photoshop with the Sharpen Tool
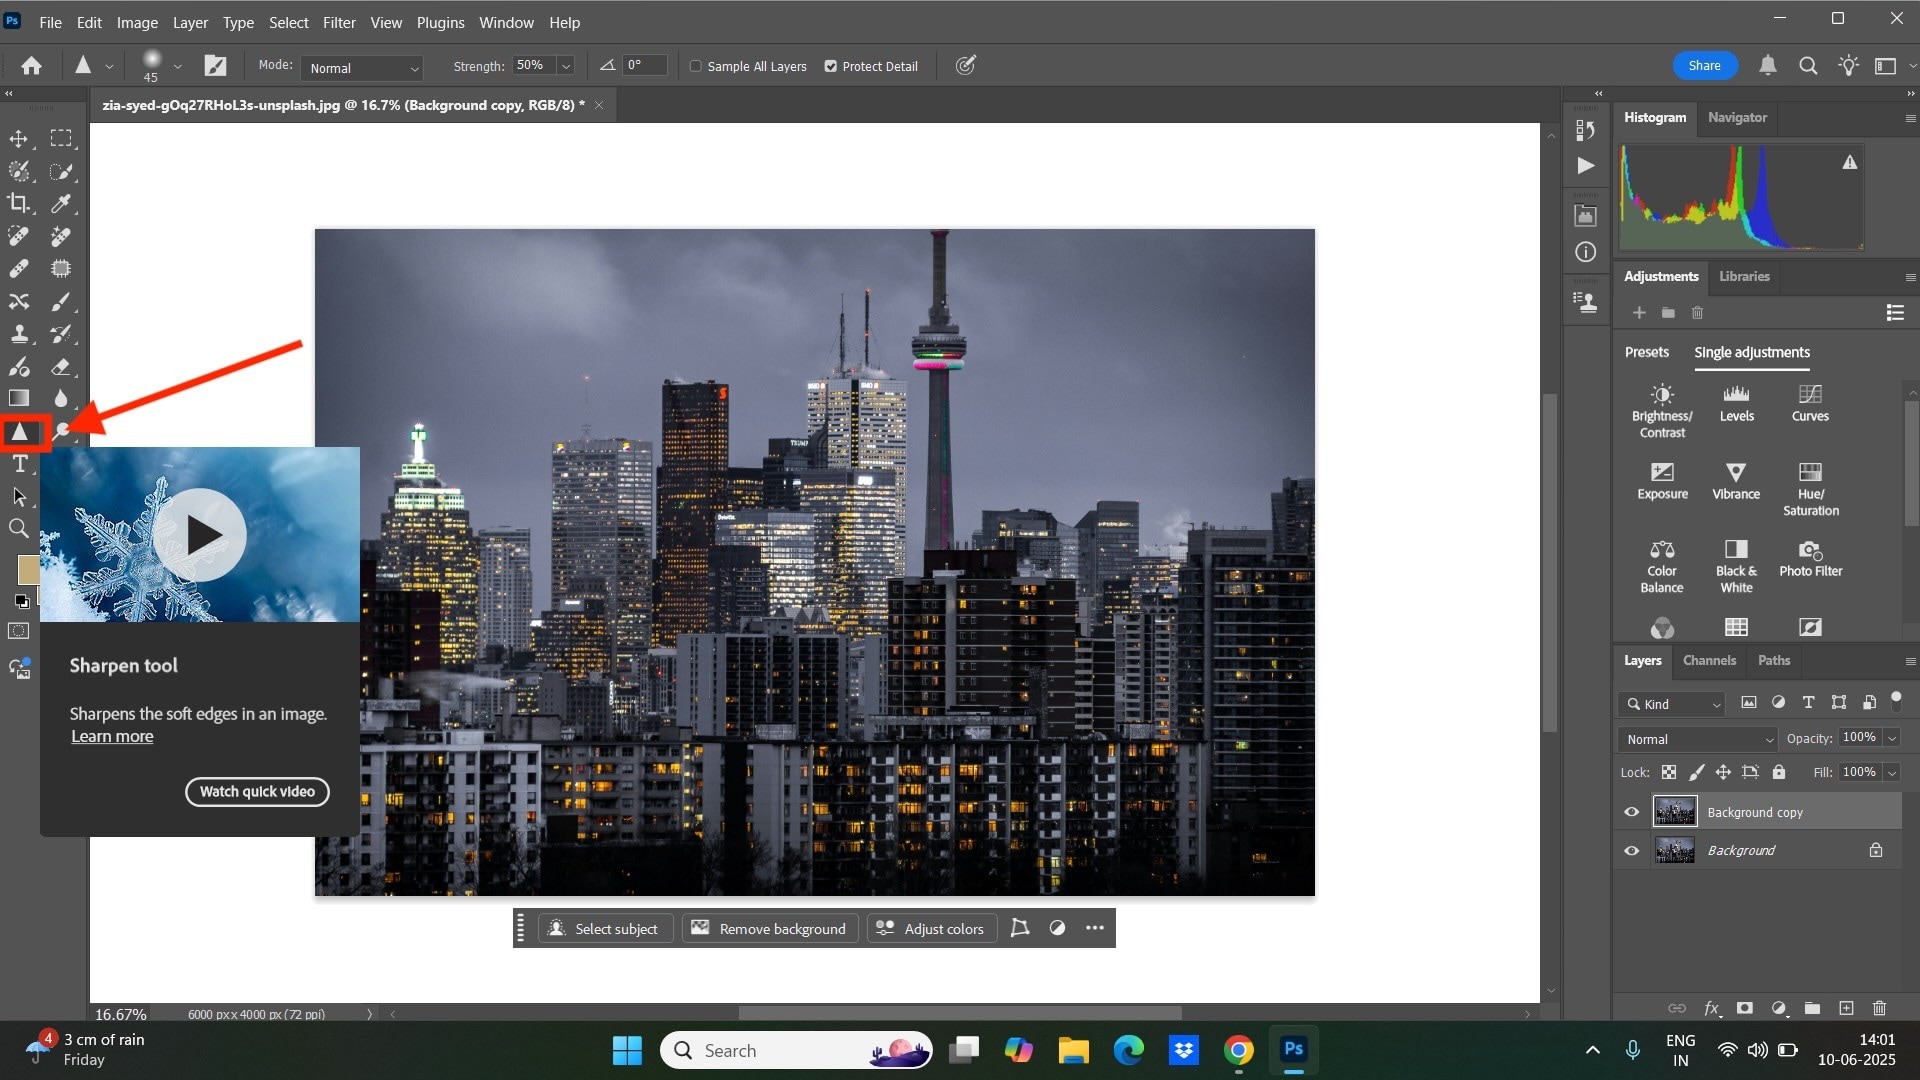
Learning how to sharpen an image in Photoshop also involves using another tool: the Sharpen Tool. The Sharpen Tool offers direct, brush-based control. Here is a step-by-step guide to precisely sharpening your image.
Step 1
Open Photoshop and add an image to create a layer. Look in the left toolbar for the "Triangle" icon to access the Sharpen Tool. When you enable the tool, a circle will appear on the image. Increase its size to sharpen the entire image or keep it small if needed for a specific portion.
Step 2
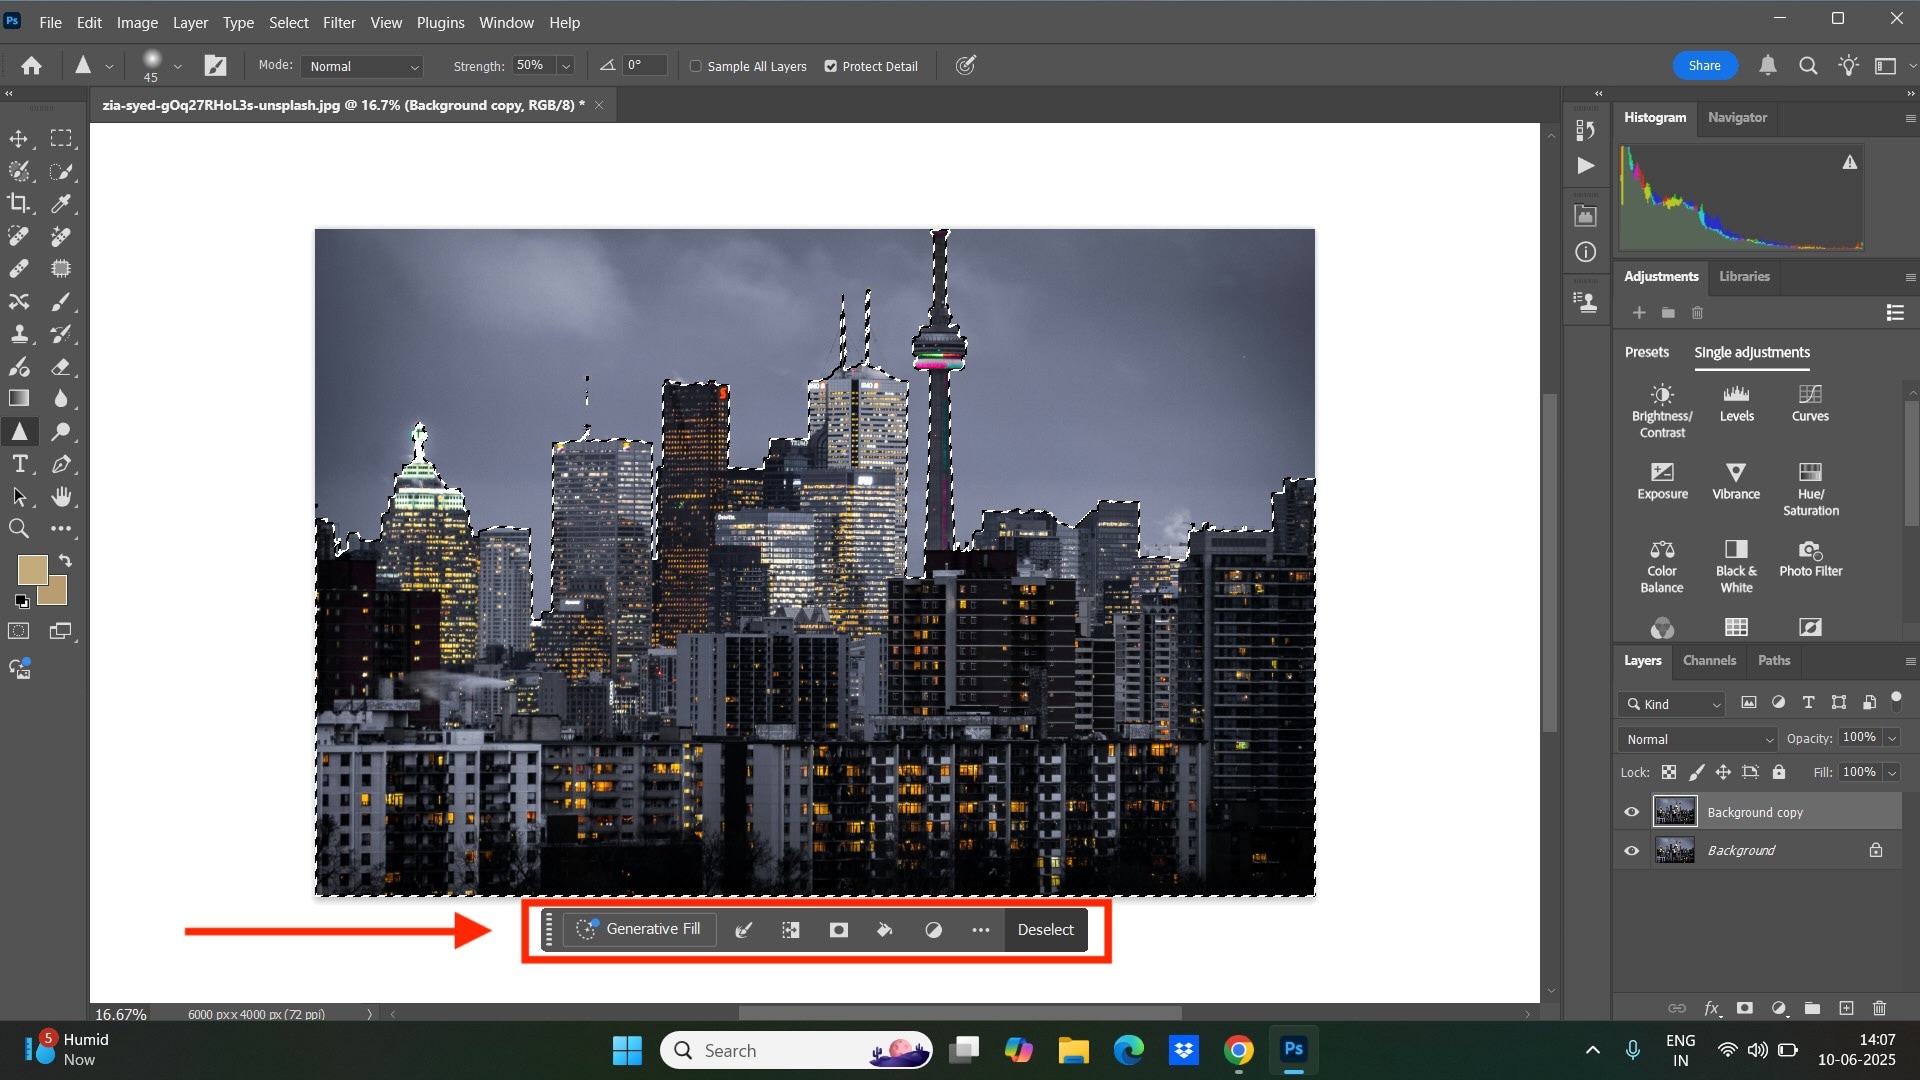
You can also select the "Specific Subject" under the image to fill the color, remove a part, "Remover Background," or "Adjust Colors" to make more changes according to your needs.
Step 3
Once you have the final enhanced image, head to "File > Export As" to save the final results to your desktop.
Part 5. How to Batch Sharpen Images [Easiest Method]
Learning how to sharpen a picture in Photoshop is essential, but its complexity level might not suit everyone, as it requires some experience to use it effectively. What if you had an easy-to-use tool to enhance image quality with just one click? Wondershare UniConverter's AI image enhancer is precisely what you're looking for. It is not only limited to enhancement; it can upscale your image, colorize, color correct, and restore your old blurry photos. Additionally, it allows you to enhance the quality of your face and make it ready for posting on social media.

Key Features
- It offers an image background remover to remove or add a new background to your previously clicked images.
- It lets you convert your image into PNG, JPG, and more formats with Image Converter.
- It offers an AI Watermark Remover and allows you to add personalized watermarks to your images.
- With its AI Thumbnail Maker, you can generate personalized thumbnails by simply entering a prompt.
How to Batch Sharpen the Image Using Wondershare UniConverter:
Here is the step-by-step guide to enhance the image quality of multiple images at once:
Step 1
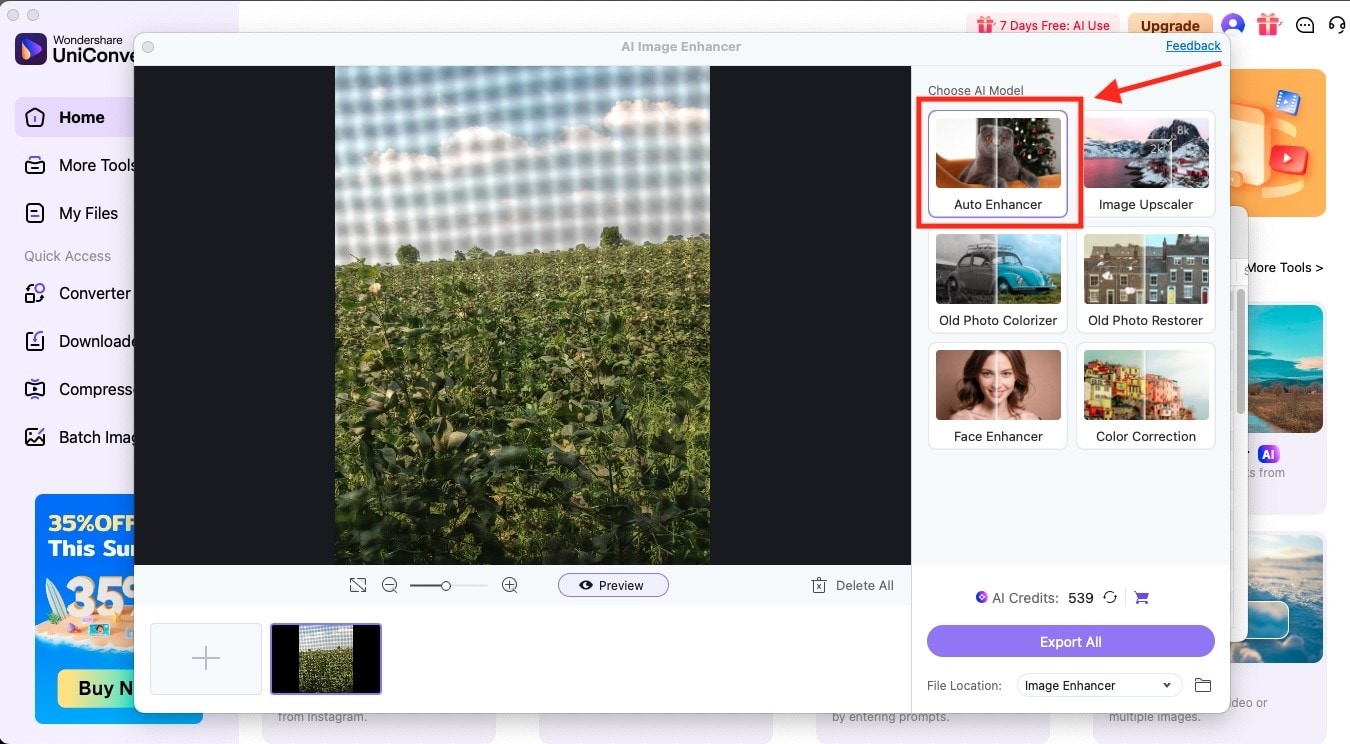
On the homepage, you will see four options: Hot, Video, Audio, and Image. Navigate to "Image" and click "Image Enhancer."

Step 2
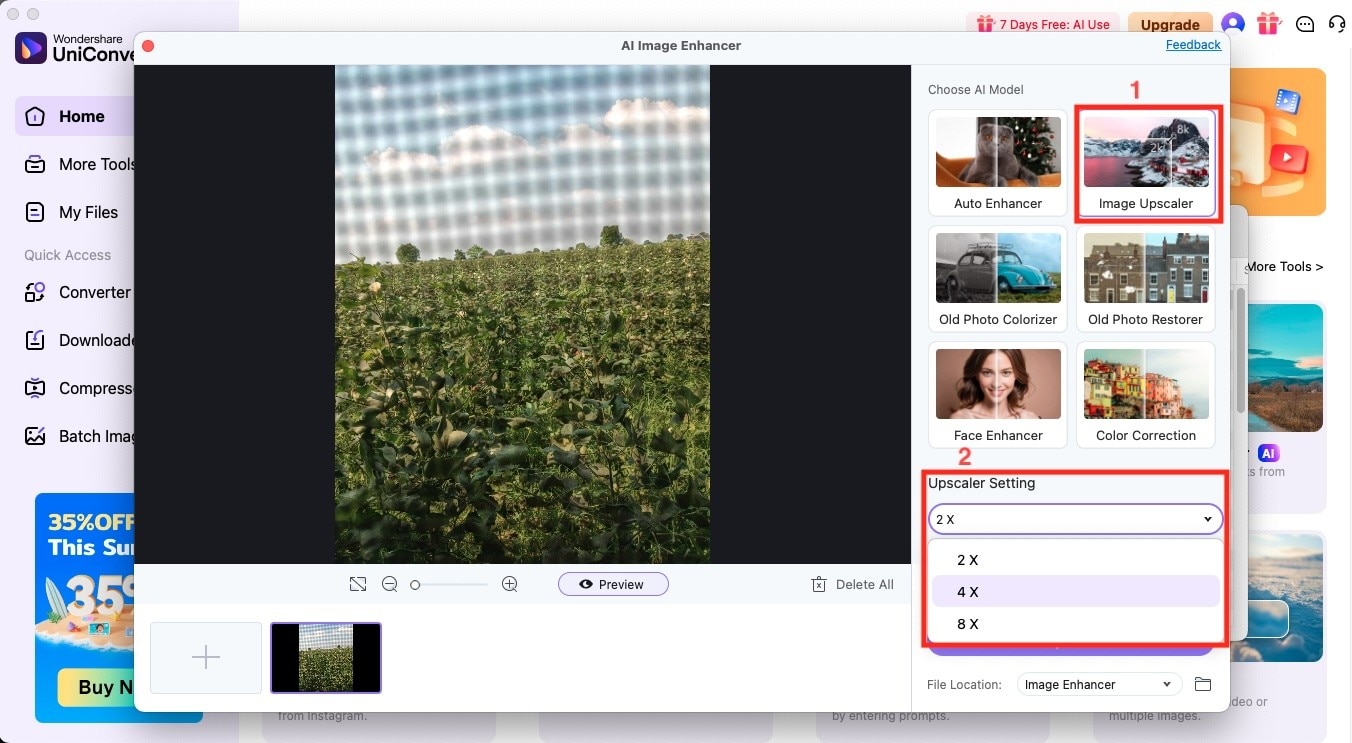
Upload your image or add multiple photos at once. Here, you will find various options, including auto enhancer, image upscaler, face enhancer, old photo colorizer, and more. Click "Auto Enhancer," and this process will take a maximum of 20-25 seconds.
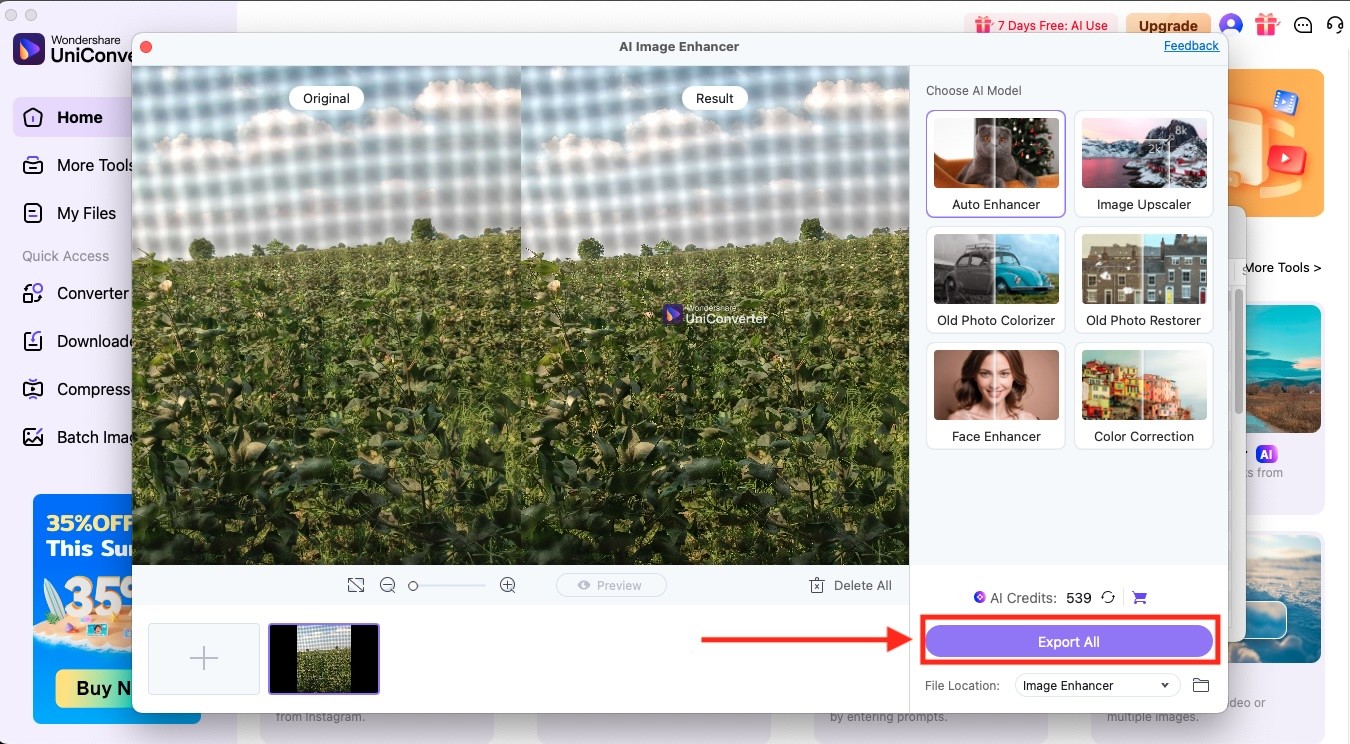
Step 3
You can view your uploaded image and results in the preview. If desired, you can also use the "Image Upscaler" to enhance the overall quality from 2x to 8x.
Step 4
Once you are satisfied with the results, click the "Export All" button to save your images.
Part 6. To Sum Up
Now you know exactly how to sharpen the image in Photoshop using four different methods, from basic sharpening filters to advanced Camera Raw adjustments. Each technique has its place, and you can choose the one that best suits your skill level and specific needs.
If you're looking for something simpler, though, Wondershare UniConverter's AI image enhancer takes all the guesswork out of the process. You can sharpen multiple photos in seconds without any technical knowledge, plus get bonus features like upscaling and background removal. Try Wondershare UniConverter' today and see the difference professional-quality sharpening can make in just one click.
FAQs
-
1. Why doesn't sharpening fix a very blurry or out-of-focus photo?
Sharpening only boosts edge contrast, so it can't bring back details that weren't captured clearly. If your photo is seriously out of focus or shaky, sharpening will only help a little and might even create weird halos around objects. -
2. What's the difference between Smart Sharpen and Unsharp Mask?
Smart Sharpen gives you way more control; you can adjust how it affects shadows and highlights, as well as choose different blur types. Unsharp Mask is more straightforward. Both do the same basic thing, though: make edges pop more. -
3. How can I sharpen only part of an image?
You can sharpen only part of an image by selecting the specific area you want to sharpen and then applying a sharpening filter to that section. You can also use the Sharpen tool to paint directly on the areas that need sharpening. -
4. Why does sharpening sometimes make noise or "halos" appear?
Too much sharpening amplifies everything, including noise, and creates those bright outlines around the edges. Keep your settings moderate, and consider reducing noise first so the sharpening doesn't make grainy areas look even worse.

