

CapCut has revolutionized mobile and desktop video editing, offering powerful features that were once reserved for expensive, high-end software. But just as you put the finishing touches on your masterpiece, you export it and find a distracting logo at the end or even overlaid on your template. A watermark can instantly make a polished video look unprofessional.
If you're wondering how to get rid of the CapCut watermark, you're in the right place. This guide explores four foolproof methods, from simple free tricks within the app itself to powerful AI-driven software. We will provide a step-by-step breakdown for each CapCut logo remover technique, helping you create clean, professional-looking content for 2025 and beyond.
Table of Contents
Does CapCut Add Watermark When Exporting Videos?
It depends on your version and how you use the app. Many users ask how to remove watermark in CapCut, and the good news is, it's often optional and surprisingly easy to remove the CapCut watermark for free.
Here's the breakdown of how CapCut handles watermarks in 2025:
- Free Version (Mobile & Desktop): CapCut can add watermarks to exported videos, but in most cases, this is optional and completely removable without paying.
- Two Types of Watermarks:
- Ending Watermark: This is the most common one. It's not a permanent logo on your whole video but a separate 3-5 second clip featuring the CapCut logo that gets attached to the end of your project.
- Template Watermark: This watermark does appear overlaid on your video. It typically happens when you use one of CapCut's pre-designed, premium, or trending templates. The template creator or CapCut may require you to "Export without watermark" (which might involve watching an ad) or upgrade to Pro.
How to Export Videos WITHOUT Watermark (The Official Free Way)
You don't need a third-party watermark remover for CapCut for the ending clip. This is the simplest answer to how to remove watermark on CapCut: you do it right inside the app before exporting.
Delete the Ending Clip: When you finish your edit, scroll all the way to the end of your timeline. You will see a separate black clip with the CapCut logo. Tap on this clip to select it, and then tap the "Delete" (trash can) icon. It's that simple. Now, when you export, the video will end on your last clip.
Use the "Export without watermark" Button: When using some mobile templates, you'll see an export option that says "Export without watermark." Tapping this often requires you to watch a short ad, but it will process and save the video to your device logo-free.
Important Updates (2024-2025)
According to recent user reports and app updates, CapCut's policies are evolving:
Some users report that newer updates add the ending watermark clip by default, making the CapCut remove watermark process an extra step you must remember every time.
In some regions, CapCut has tested a limit where free users get a specific number of free watermark-free exports (e.g., 7 per month) before being prompted to upgrade.
The CapCut Pro subscription remains the easiest official method, providing unlimited watermark-free exports and unlocking all premium features, templates, and effects.
But what if you used a template and still got a watermark, or you already exported the video? The following methods will show you how to remove the CapCut watermark after it's already been saved.
Method 1 - Use an Older Version of CapCut (The APK Method)
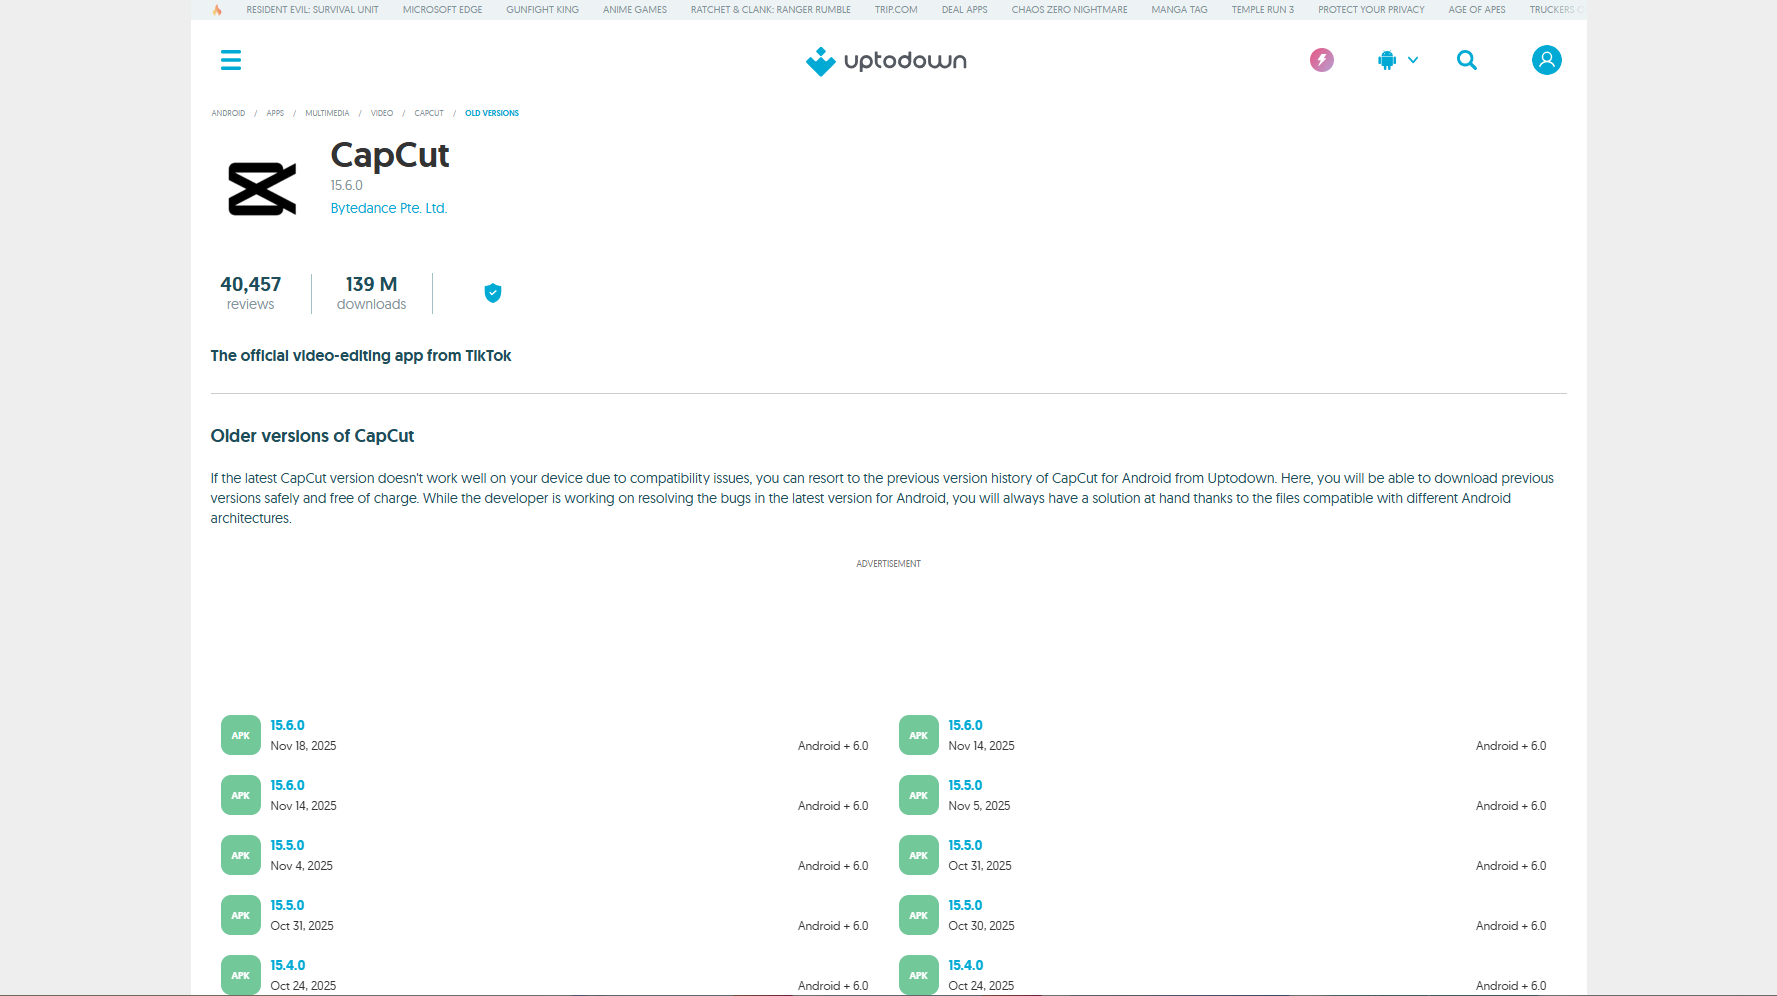
This method for how to remove CapCut logo from video is for Android users only and involves sideloading an older "APK" (Android Application Package) file of CapCut from a time before the current watermark policies were as aggressively implemented.
How it Works: You find a trusted source for old software versions, download the installer file for an older CapCut build (e.g., from late 2022 or early 2023), and install it on your Android device. This version may not have the Pro templates or the default ending clip, allowing for clean exports.
Step-by-Step Guide:
Step 1: Prepare Your Device
First, you must uninstall the official CapCut version from your Android phone. Next, navigate to your phone's Settings > Security and find the "Install unknown apps" permission for your web browser. Enable this setting to allow the installation, but be aware that this is a security risk.
Step 2: Download the Older APK
Use your browser to navigate to a reputable APK repository, such as APKMirror. Search for "CapCut" and browse the version history to find an older build from before the watermark policies were strict. Download this .apk file directly to your phone's "Downloads" folder.
Step 3: Install and Edit
Open your "Downloads" folder and tap the .apk file you just saved to begin the installation. Grant the permissions requested and open the newly installed older version of CapCut. You can now edit your video, and you will hopefully find that the watermark is not automatically added upon export.
Pros & Cons:

Easy to Use CapCut Watermark Remover
Method 2: Crop out a CapCut watermark in the corner
This is the most common and low-tech solution for how to remove watermark from CapCut after you've already exported the file. If the CapCut watermark is small and fixed in a corner (which is familiar with template watermarks), you can cut that part of the video frame off.
How it Works: You export your video with the watermark. Then, you re-import it into a new project (either in CapCut itself, your phone's default gallery app, or any video editor) and use the "Crop" tool to physically zoom in and change the video's frame, effectively leaving the watermark on the "cutting room floor."
Crop a CapCut watermark step by step:
Step 1: Import the Watermarked Video
Open your preferred video editor, which can be CapCut itself or your phone's default Gallery/Photos app. Start a new project and import the video file you have already saved, which contains the CapCut watermark. The clip will now appear in your new project's timeline, ready for editing.
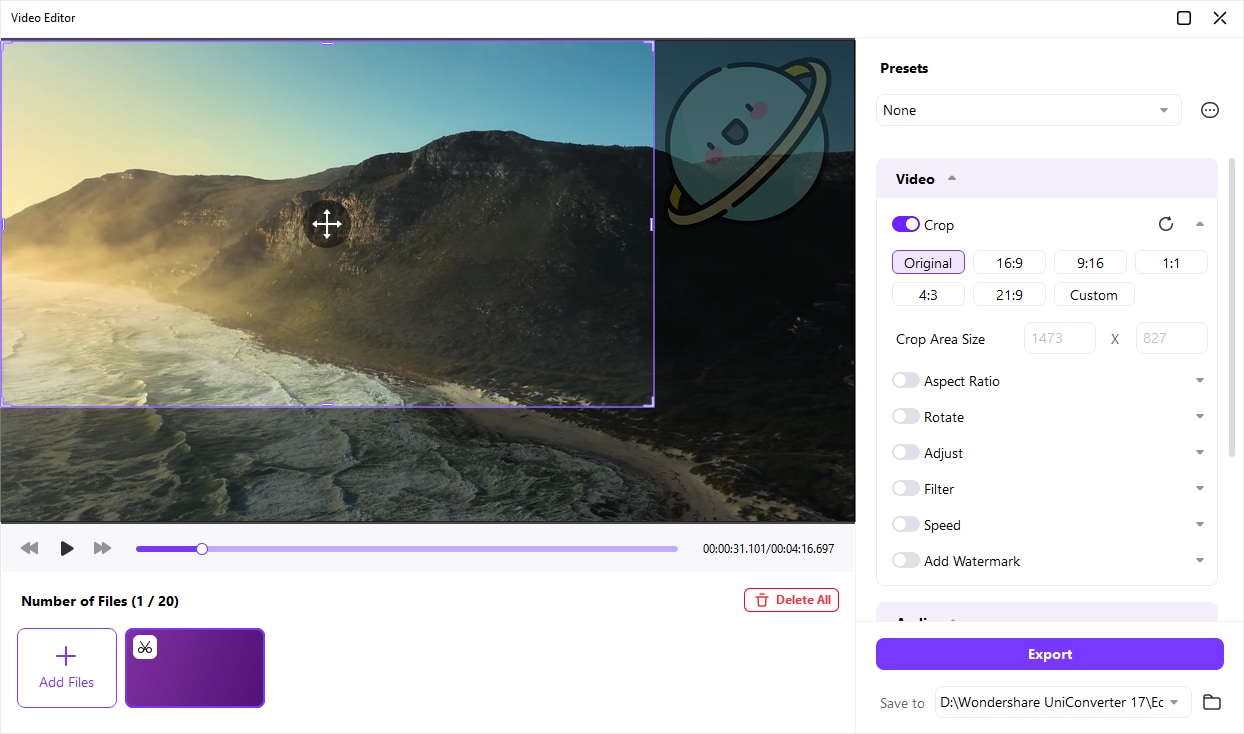
Step 2: Find and Use the Crop Tool
Tap the video clip on the timeline to select it and bring up the editing options. Find the "Edit" menu (it often looks like a crop icon) and then select the "Crop" function. A resizable bounding box will appear over your video preview, showing the current frame.
Step 3: Adjust Frame and Export
Click and drag the corners or sides of the crop box inward to reframe the video, making sure the watermark is left outside the new box. Once you are satisfied that the logo is cut out, apply the crop. Export this new, slightly zoomed-in video to save the final watermark-free version to your device.
Pros & Cons:
Method 3: Use an online CapCut watermark remover
How it Works: If cropping won't work, your next thought for how to remove watermark CapCut might be a dedicated CapCut watermark remover online. These are web-based tools that allow you to upload a video and attempt to remove a logo without the need to install software. A popular example is Fotor's Free Online Video Watermark Remover, which uses an AI process to analyze and erase the selected area.

Step-by-Step Guide:
Step 1: Upload Your Video
Navigate to the Fotor Video Watermark Remover website using your web browser. Drag and drop your exported CapCut video directly onto the web page, or click the "Upload Video" button to select the file from your computer. Your video will then be processed and loaded into the online editor.
Step 2: Select the Watermark Area
Once your video appears in the preview window, use the provided "brush" tool. Click and drag over the CapCut watermark to highlight the area you want to remove. Ensure the red-masked area completely covers the logo.
Step 3: Process and Download
After selecting the watermark, click the "Apply" or "Remove" button. The online tool will process the video, using its AI to "fill in" the area where the logo used to be. Once it's finished, a "Download" button will appear, allowing you to save the new video file, which may have a slight blur in the removed spot.
Pros & Cons:
Method 4 - Use a Dedicated Tool (Wondershare UniConverter)
This is the professional method. Instead of relying on a risky APK, ruining your shot with cropping, or using a low-quality online tool, you use a dedicated, powerful desktop application designed for this exact task. Our top recommendation for this is Wondershare UniConverter.
How it Works: UniConverter is a complete video toolbox for Windows and Mac. It's not just a watermark remover CapCut tool; it's also a converter, compressor, editor, and more. Its "Watermark Editor" uses advanced, AI-powered algorithms. Instead of just blurring the area, it analyzes the surrounding frames and pixels to intelligently re-create the background behind the logo, resulting in a virtually seamless and invisible removal.
Step-by-Step Guide:
Step 1: Go to the Watermark Remover
After downloading and installing Wondershare UniConverter, launch the application on your Mac or Windows PC. From the main Home dashboard, navigate to the "Hot" tools section. Click on the Watermark Remover tool to open the dedicated window.

Step 2: Import Video and Select Watermark
Click "+ Add File(s)" (or drag and drop) to import your saved CapCut video. Click the "Select Area" button, which will place a box on your video; drag this box over the CapCut logo and resize it to fit perfectly. On the right-hand panel, select an "AI Model" (such as "Basic" or "Quality") for the removal.
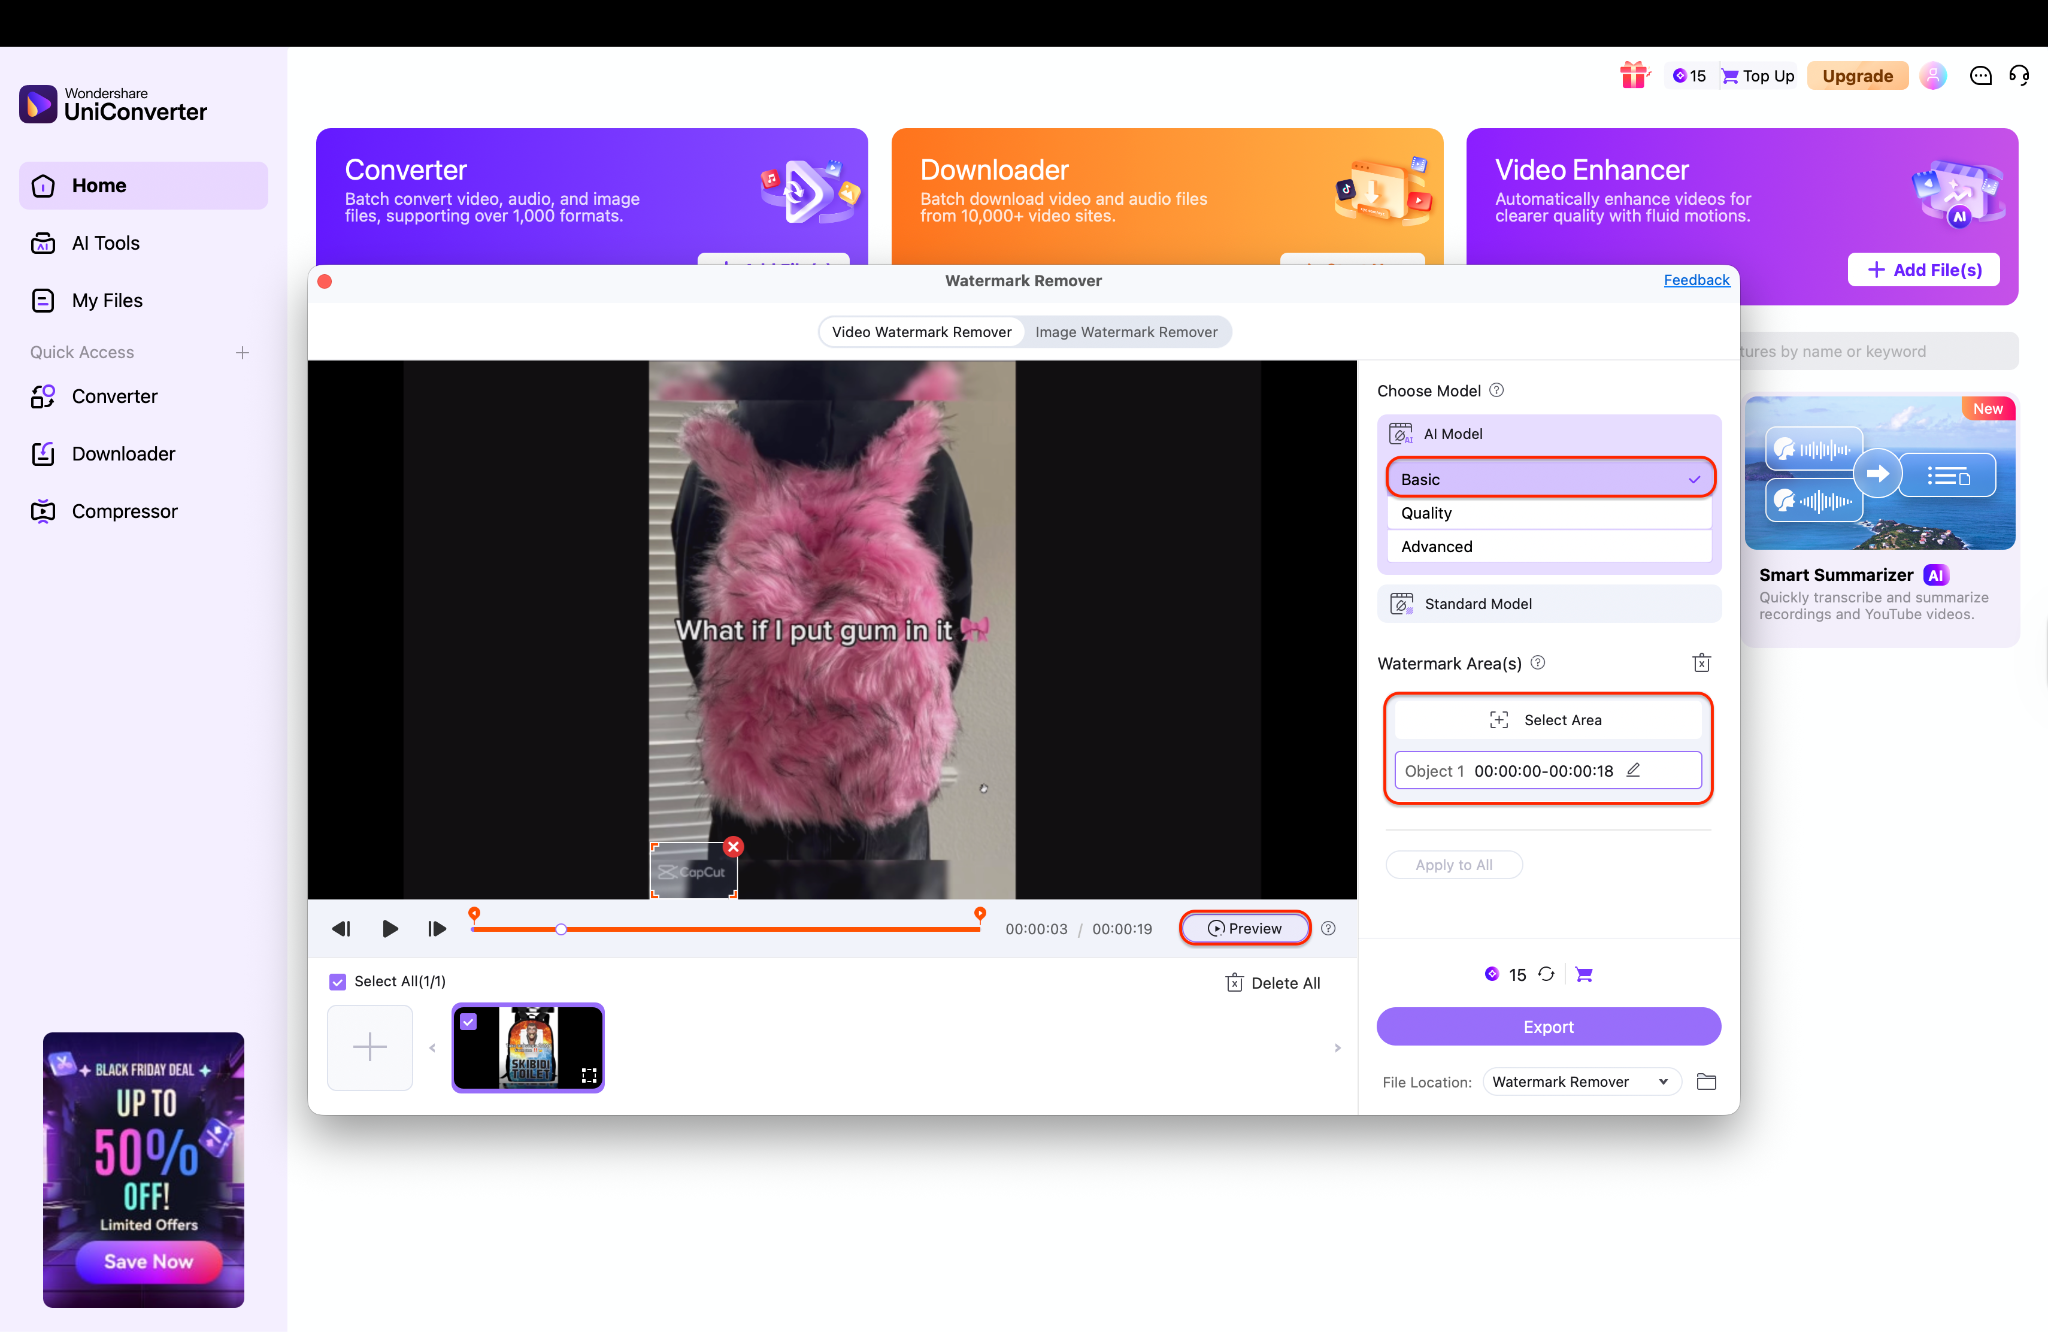
A Pro's Note on Choosing Your AI Model:
Basic: Select this for the fastest processing. It is highly effective for small, simple watermarks on uncomplicated backgrounds.
Quality: This is the recommended all-rounder. It intelligently balances processing speed with a high-quality removal, making it ideal for larger or more noticeable watermarks.
Advanced: Select this option for the most demanding tasks. If your watermark is large, semi-transparent, or set over a complex and detailed background, this model provides the most seamless and superior-quality removal.
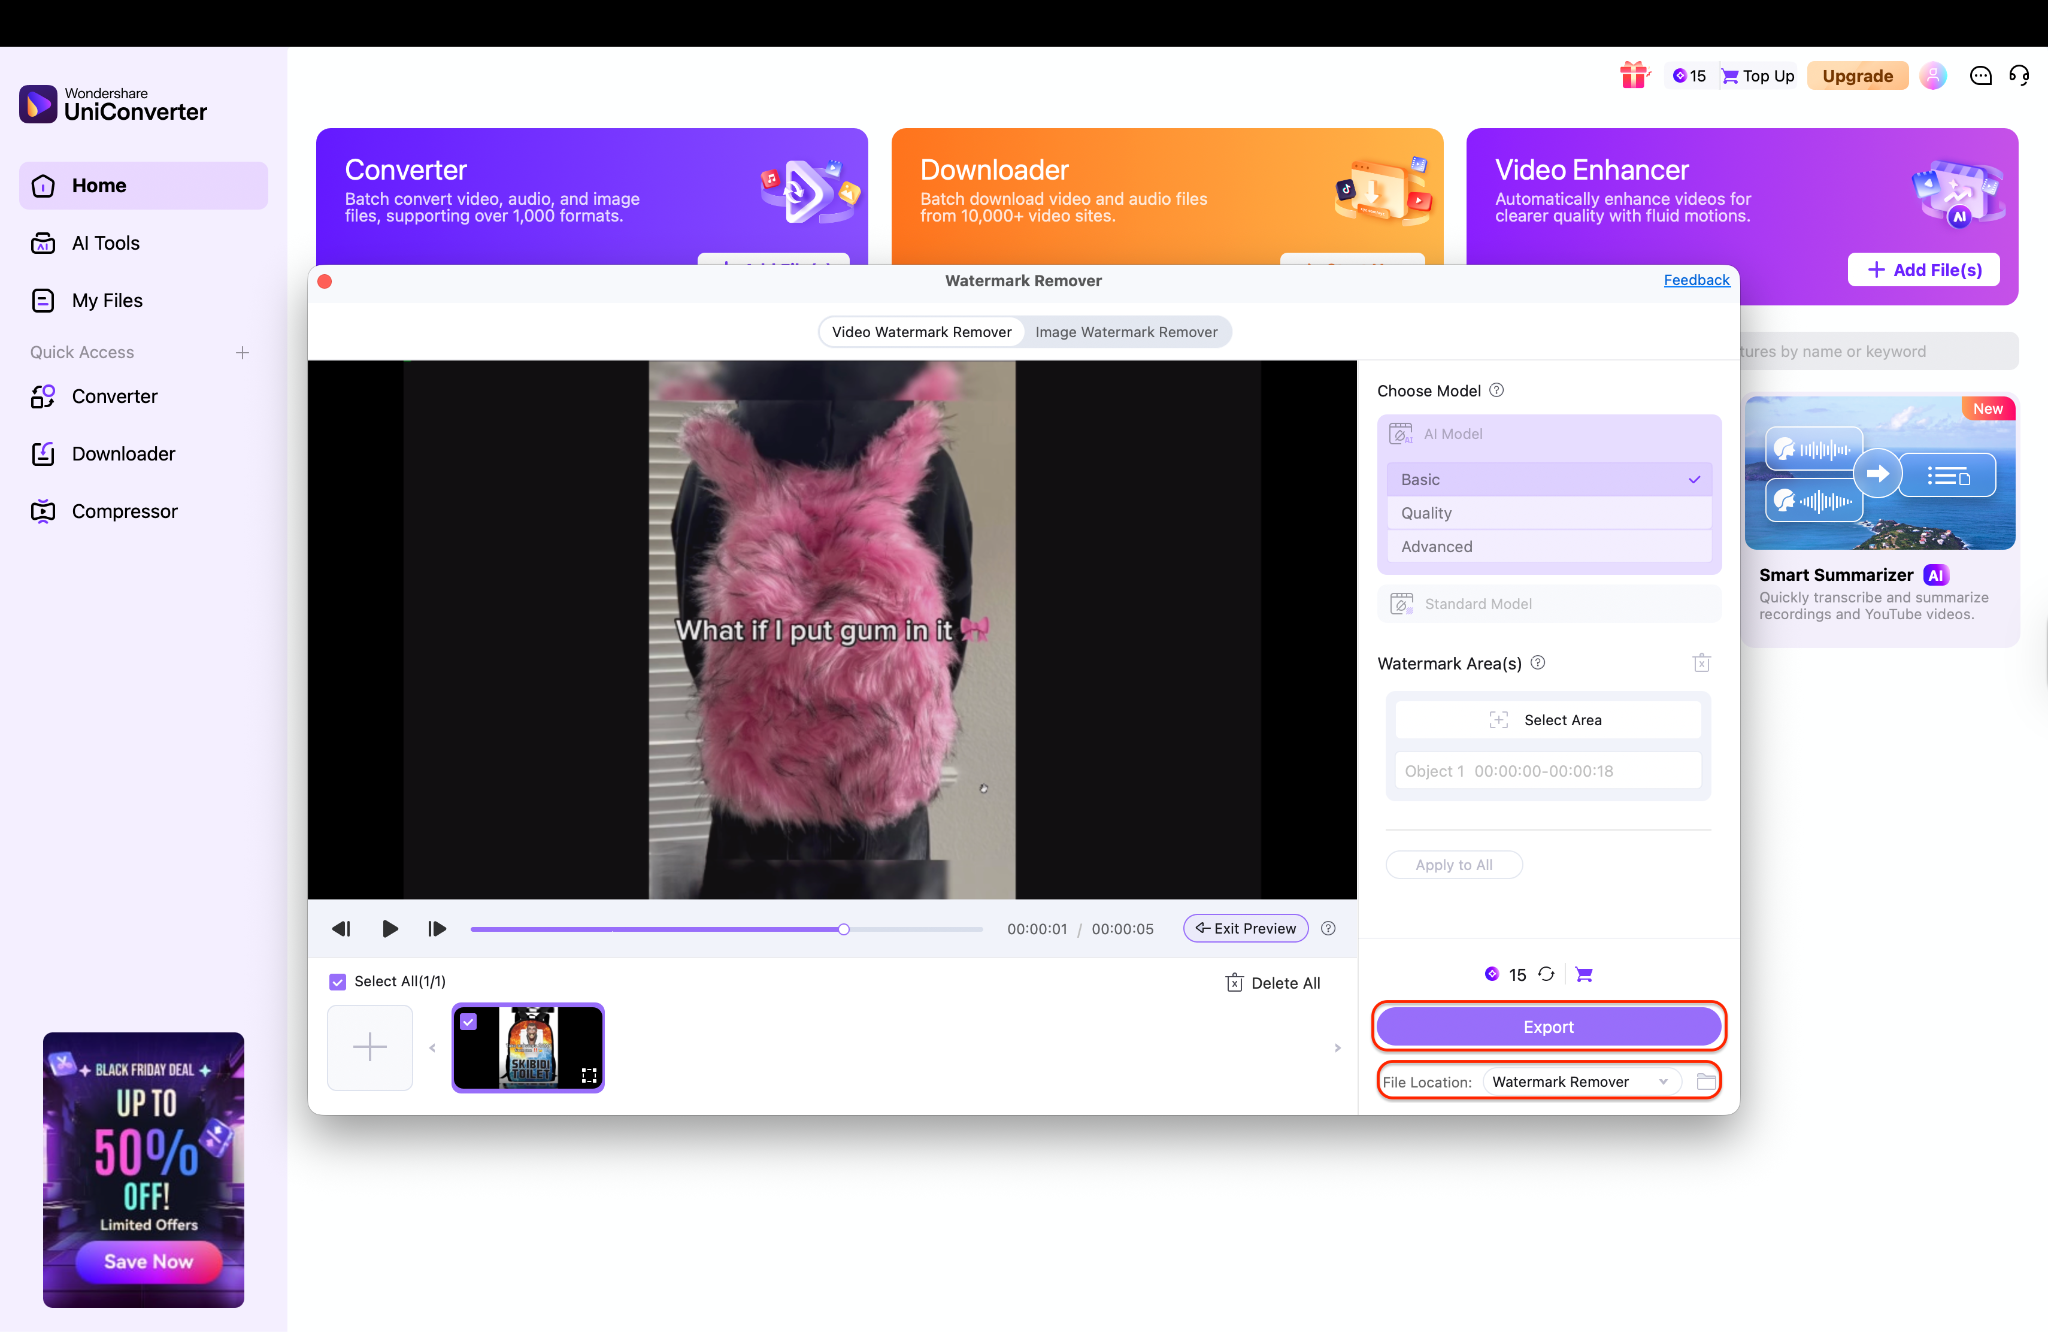
Step 3: Preview and Export Your Clean Video
Click the "Preview" button to let the AI process the selection and show you a preview of the clean result. Once you are happy with the removal, set your "File Location" at the bottom to choose where you want to save the new video. Click the purple "Export" button to process and save the final, high-quality, watermark-free video to your computer.
Pros & Cons:
Easy to Use CapCut Watermark Remover
Conclusion
While CapCut is a fantastic editor, its watermark is a professional drawback. The easiest free fix is deleting the end clip, but this doesn't work for templates. Cropping ruins your video's framing, and online tools are often low-quality and insecure.
If you are serious about your content and need a reliable solution for how to remove the CapCut watermark cleanly every time, a dedicated tool is the only answer. We overwhelmingly recommend Wondershare UniConverter for its fast, AI-powered, and high-quality removal.
FAQs
-
1. How can I remove the CapCut watermark for free?
The 100% free and official way is to look for the separate "ending clip" with the CapCut logo at the very end of your video timeline. Tap to select this clip and then press "Delete." When you export, the logo clip will be gone. -
2. Why does CapCut still add a watermark even if I delete the end clip?
You are likely using a "Pro" template or a premium feature/effect. These templates are designed to place a persistent watermark on the video itself. To remove this, you must either subscribe to CapCut Pro or use one of the removal methods (like cropping or UniConverter) after you export. -
3. Can I remove the CapCut watermark on an iPhone?
Yes. You can delete the ending clip (Method 1), crop the exported video in your Photos app (Method 2), or use a tool like UniConverter on your Mac (Method 4) by transferring the video file. The only method that doesn't work on iPhone is the APK method. -
4. Is it safe to use a "CapCut watermark remover online"?
It can be very risky. Free online sites often have major privacy concerns (they keep your video), strict file size limits, and produce a very low-quality result (a blurry spot). A trusted, secure desktop tool is always a safer and better-quality option. -
5. What is the best way to remove a CapCut template watermark?
The best way is to use a high-quality AI-powered remover like Wondershare UniConverter. Cropping (Method 2) will ruin the framing and visual appeal of the template. UniConverter's Watermark Editor (Method 4) can remove the logo while keeping the entire video frame and quality intact. -
6. How to remove TikTok watermark in CapCut?
While CapCut is a powerful editor, its primary 'remove watermark' feature is for its own ending logo. To remove TikTok watermark in CapCut, you would need to use Method 2 (Cropping) to cut the TikTok logo out of the frame. A more effective solution for TikTok videos is often a dedicated TikTok watermark remover tool before you even import it into CapCut.

