

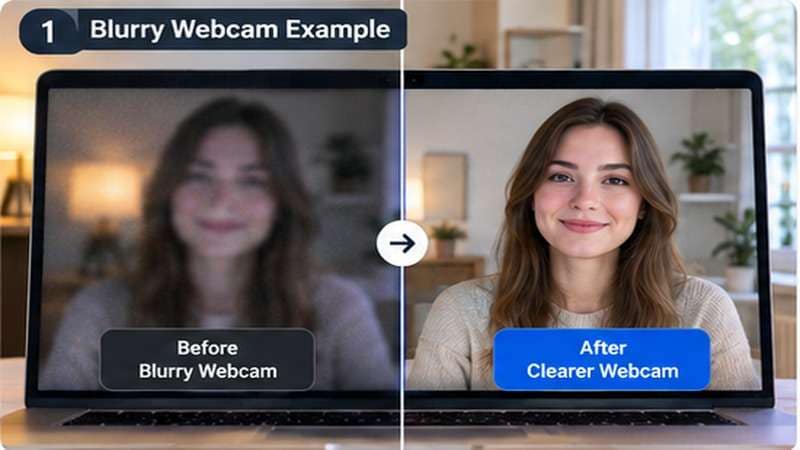
A webcam can look blurry for a boring reason: a fingerprint on the lens. It can also look blurry because the room is too dark, autofocus locked onto the wall behind you, a meeting app is reducing video quality, or the camera hardware has simply reached its limit.
The useful question is not just “How do I sharpen my webcam?” but where the quality is being lost. Fix the live camera first. If the webcam looks fine now but a meeting, presentation, or talking-head recording you already saved is still soft or grainy, treat that file as a separate post-processing problem.
In this article
Part 1. Why Is My Webcam Blurry?
A blurry webcam usually has one dominant cause rather than five. Start with the simple physical checks before changing a stack of software settings.
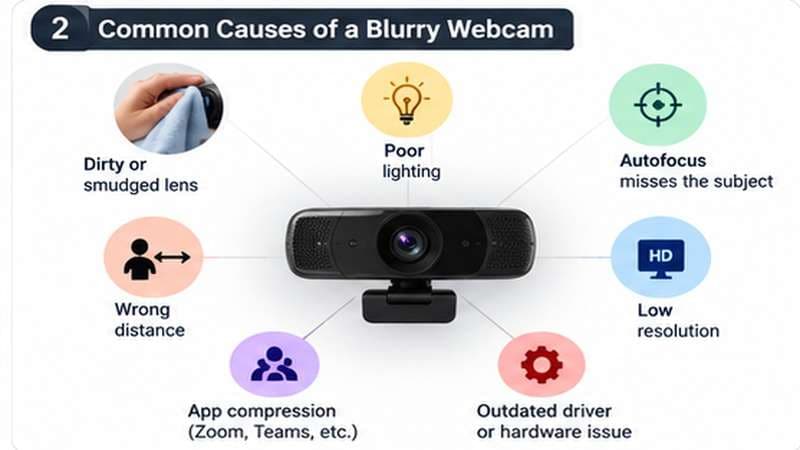
1. The lens is dirty or smudged
Fingerprints, dust, oil, or residue sit between the subject and the sensor. A smeared lens scatters light and can make the entire image look hazy even in a bright room. Wipe the lens gently with a clean microfiber cloth before changing anything else.
2. The room is too dark
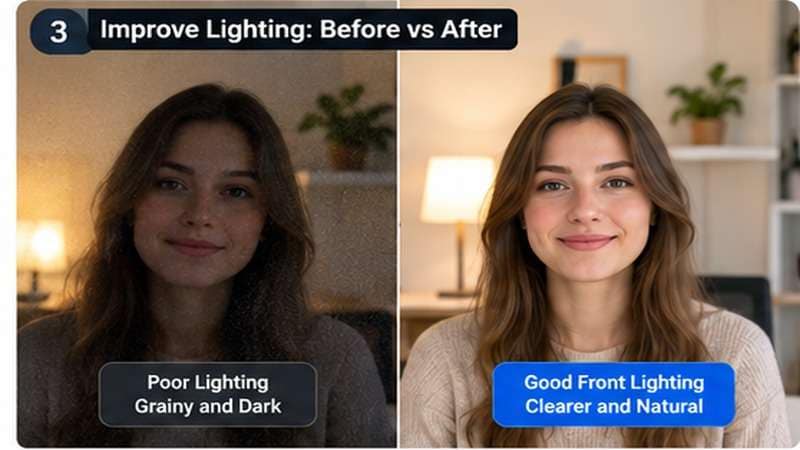
Low light creates more than a dark picture. A webcam may increase sensor gain, making grain more visible, or use a longer exposure that turns normal head and hand movements into soft-looking motion. That is why users often describe the same low-light picture as both blurry and grainy.
3. Autofocus is focusing on the wrong thing
Autofocus webcams can lock onto a wall, microphone, hand, or another object closer to the lens. If something behind you looks sharp while your face is soft, or the picture keeps shifting between clear and fuzzy, focus is a stronger suspect than resolution.
4. You are outside the useful focus distance
Every webcam has a range where it focuses cleanly. Move slightly closer or farther away and give the camera a moment to settle. There is no universal “best distance,” so do not assume a number recommended for one webcam model applies to another.
5. The resolution is set too low
Camera capability and app settings are separate things. A webcam may support a higher resolution than the application is actually using. Check the camera preview first, then review the video-quality settings inside the app where the problem appears.
6. The video-call app is reducing quality
A picture that looks sharp locally can look blocky or soft inside a call. Video-call apps may change transmitted quality because of their current settings, compression, or network conditions. If the native preview is clear, buying a new webcam may not address the real cause.
7. Digital zoom is magnifying a low-detail image
Digital zoom crops the frame and stretches the remaining pixels. It gets you closer and costs sharpness. A soft face simply becomes a bigger soft face.
8. The camera driver or software is causing trouble
On Windows, camera-driver problems can interfere with the way the webcam behaves. If the image remains poor across applications, check the current camera driver and the webcam manufacturer's support page before assuming the sensor itself has failed.
9. The webcam hardware has reached its limit
Laptop cameras typically have compact sensors and lenses. A scratched cover, damaged focus mechanism, or low-detail built-in webcam can set a hard ceiling on image quality. No setting can fully replace optical detail the camera never captured.
10. The recording is already blurry
Sometimes the webcam is fine now, but a file you saved earlier still carries the blur, grain, or noise from the moment it was captured. Changing camera settings cannot retroactively rewrite that footage. That is where post-record enhancement becomes relevant.
| What you see | Most likely cause | Best first fix |
| Entire image looks hazy | Dirty lens or protective cover | Clean the lens |
| Face looks grainy in a dark room | Poor lighting | Add front lighting |
| Camera keeps shifting focus | Autofocus issue | Adjust focus or distance |
| Native camera preview is clear but a call is blurry | App settings, compression, or connection | Check the video-call app |
| Webcam looks bad in every app | Lens, driver, settings, or hardware | Test each source-level cause |
| Saved webcam recording is blurry | The defect is already in the footage | Consider video enhancement |
Part 2. How to Fix a Blurry Webcam
Work from the cheapest and most likely fixes toward the more specific ones. Stop when the picture looks right rather than changing every setting at once.
Fix 1. Clean the Webcam Lens
Use a dry microfiber cloth and gentle strokes. Do not spray water or cleaner directly onto the webcam, since liquid can seep around the bezel. Reopen the camera preview afterward and compare the result.
Fix 2. Improve the Lighting
Lighting can change webcam quality more than many software settings. Face a window during the day, or place a soft light in front of you at about eye level. Avoid a bright window or lamp directly behind you: the camera may expose for the background and leave your face dark and noisy.
Fix 3. Check Focus and Camera Distance
If the webcam has autofocus, sit centered in frame and give the lens a moment to settle. If the manufacturer's utility provides manual focus, adjust it while watching your normal seated position. With a fixed-focus webcam, changing your distance may be more useful than hunting for a focus control that does not exist.
Fix 4. Check Webcam Resolution
Compare the quality options available in the native camera preview, the webcam manufacturer's utility, and the app you actually use. These controls can differ. Choose an appropriate higher-quality option when both the camera and the application support it.
Fix 5. Test the Webcam in Its Native Camera App
This is one of the fastest ways to isolate the problem. Open the native camera preview and look at your face, hair, clothing edges, and background.
If the picture is clear there but blurry in Zoom, Teams, Discord, or another video-call app, the webcam hardware is probably not the main problem. If it is blurry everywhere, go back to the lens, lighting, focus, driver, and hardware checks.

Fix 6. Check the Video-Call App
If the problem only appears inside one app, review that app's current video-quality settings and your connection. Enable a higher-quality setting if one is available. Avoid relying on a fixed resolution or feature name because these controls can change by app, plan, platform, and version.
Fix 7. Check or Reinstall the Webcam Driver on Windows
If the webcam remains poor across applications, check the camera under Device Manager and review the current driver status. If Windows does not resolve the issue, check the webcam manufacturer's current support page for model-specific drivers or utilities.
Fix 8. Avoid Excessive Digital Zoom
If the image is already soft, software zoom will not add new detail. Return the webcam to its normal field of view and compare. If the picture becomes noticeably cleaner, magnification was part of the problem.
Fix 9. Rule Out a Hardware Problem
If possible, test an external webcam on another USB port or computer. A lens that is scratched, a focus mechanism that is failing, or a very low-detail camera may remain soft even under good lighting. Software cannot solve the root cause of damaged hardware.
Fix 10. Enhance an Already-Recorded Blurry Webcam Video
If the live webcam now looks fine but a saved recording is still blurry, grainy, or noisy, the quality problem is baked into the file. Re-recording may not be possible for a meeting, presentation, interview, or one-time event. In that case, diagnose the recorded defect instead of continuing to change webcam settings.
| Recorded-video symptom | Better enhancement direction | Important limit |
| Mild overall softness | Video Restoration or another general enhancement model | Severe missed focus may not be recoverable |
| Grain in a dark webcam recording | Video Denoiser on Desktop | Too much denoise can remove fine texture |
| The face is the main soft area | Face Enhancer on Desktop | Results depend on how much facial information was captured |
| Dark and noisy footage | Choose the model that matches the dominant defect, such as Denoise or Night Scene Enhancement | Do not assume one model fixes every defect at once |

Part 3. Which Fix Should You Try First?
The location and timing of the blur usually tell you more than the word “blurry” itself.
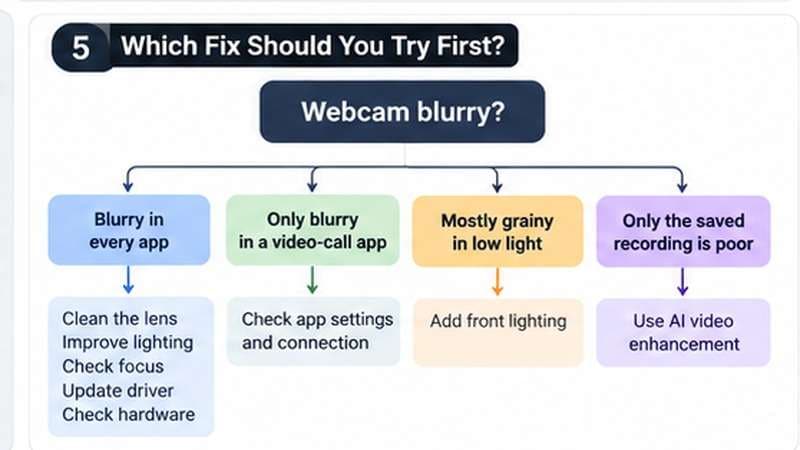
- Blurry in every app: clean the lens, improve lighting, check focus and distance, then review the driver and hardware.
- Blurry only in Zoom, Teams, or another call app: check the app's current video settings and connection before changing the webcam.
- Grainy mainly at night: fix the lighting first; the visible “blur” may actually be noise and motion smear.
- Focus keeps changing: troubleshoot autofocus behavior and camera distance.
- Only the saved recording looks poor: stop changing webcam settings and work on the recorded file instead.
- The camera is physically damaged: repair or replacement addresses the root cause; enhancement can only work on footage that was already captured.
Part 4. How to Improve an Already-Recorded Blurry Webcam Video
If the webcam is blurry during a live call, fix the camera, lighting, focus, driver, or app first. If the recording has already been saved and the footage itself looks soft, grainy, noisy, or low quality, Wondershare UniConverter AI Video Enhancer is designed for the post-recording side of the problem.
The browser version and Desktop version should not be treated as identical tools. The online AI Video Enhancer currently uses Video Restoration, also called Quality Restoration, as its lightweight restoration path. UniConverter Desktop provides the broader enhancement set, including models for faces, denoise, low-light footage, motion, and more specific quality problems.
Online or Desktop: Which Should You Use?
| Your situation | Online AI Video Enhancer | UniConverter Desktop |
| You want a quick browser-based restoration test | Use Video Restoration / Quality Restoration | Works too, but Desktop is not necessary for a quick first check |
| The recording has a specific defect such as face softness, visible grain, or difficult low light | Quality Restoration only | Better fit because more specialized enhancement models are available |
| You regularly process webcam recordings | Light single-video workflow | Better suited to repeated work, multiple files, and folder import |
| You want the main UniConverter workflow | Low-friction online entry | Primary recommendation |
How to Enhance a Blurry Webcam Recording with UniConverter Desktop
Step 1. Open AI Video Enhancer and add the recording
Launch UniConverter and open AI Video Enhancer. Add the saved webcam video. Desktop also supports adding multiple files or a folder when you have a series of recordings to work through.
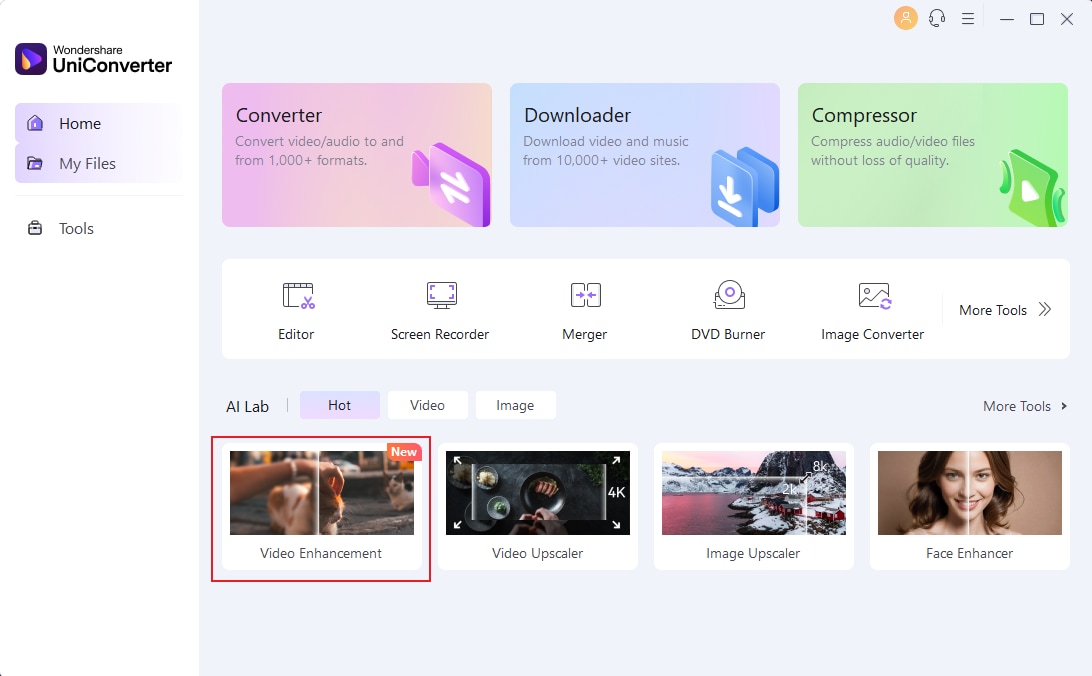
Step 2. Choose the model that matches the visible defect
Do not treat every blurry recording as the same problem. For general quality loss, start with Video Restoration or the general enhancement option shown in the current build. For visible grain or compression noise, use Video Denoiser. If the face itself is the weak area, Face Enhancer is the more targeted choice. Dark webcam footage may also benefit from Night Scene Enhancement when low light is the dominant problem.
More aggressive generative enhancement is not automatically better. Match the model to the defect rather than stacking unrelated corrections.
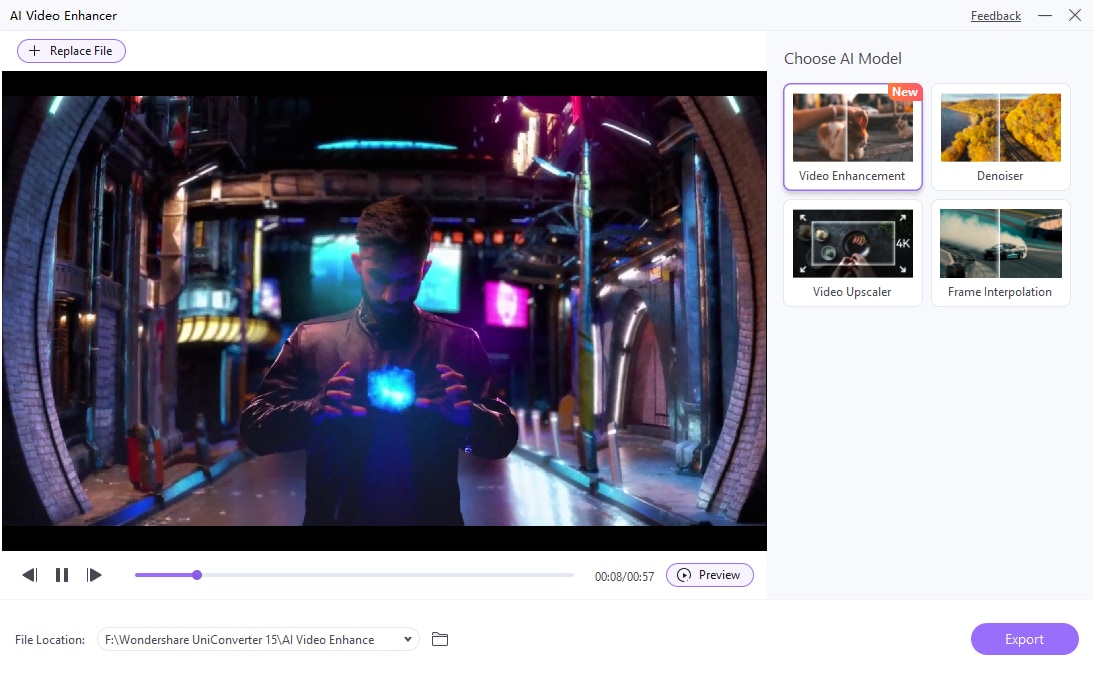
Step 3. Preview a representative section
Preview a section that contains the face, hair, glasses, text, and darker areas of the frame. Those details make it easier to spot oversharpening, plastic-looking skin, halos, or excessive denoise before processing the whole recording.
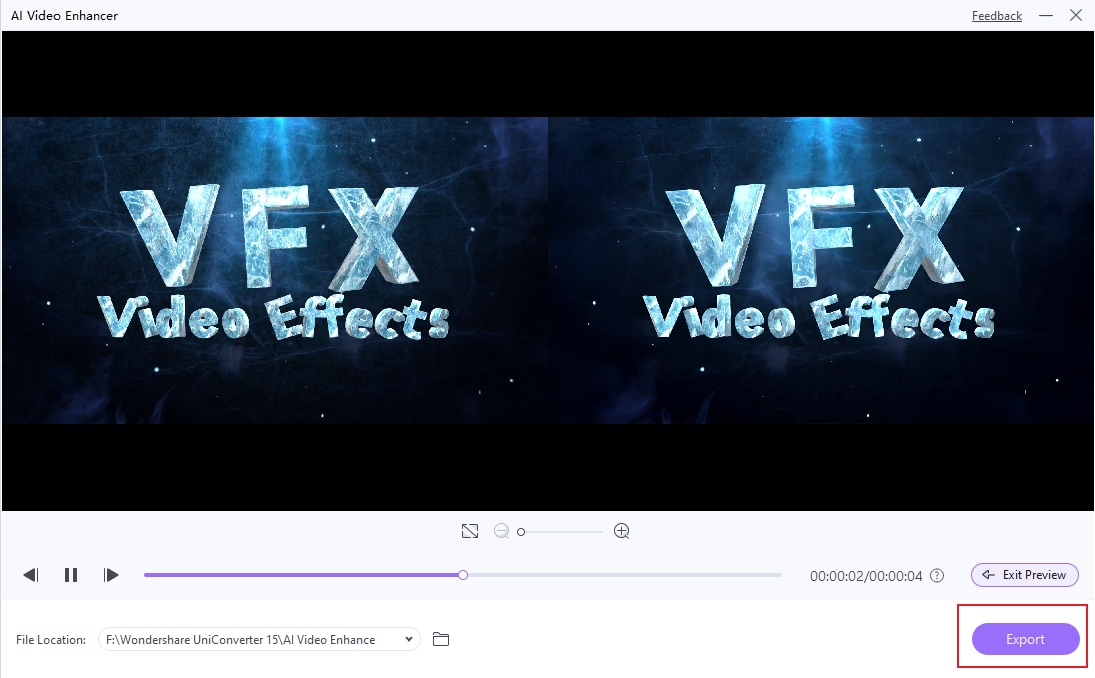
Step 4. Export only after the preview looks natural
When the preview improves the problem without creating distracting artifacts, process and export the recording. Keep the original file until you have reviewed the finished output from beginning to end.
Part 5. Check the Enhanced Result Before You Finish
Do not judge a webcam enhancement from one paused frame. Watch a short representative section in motion and check whether the result still looks believable.
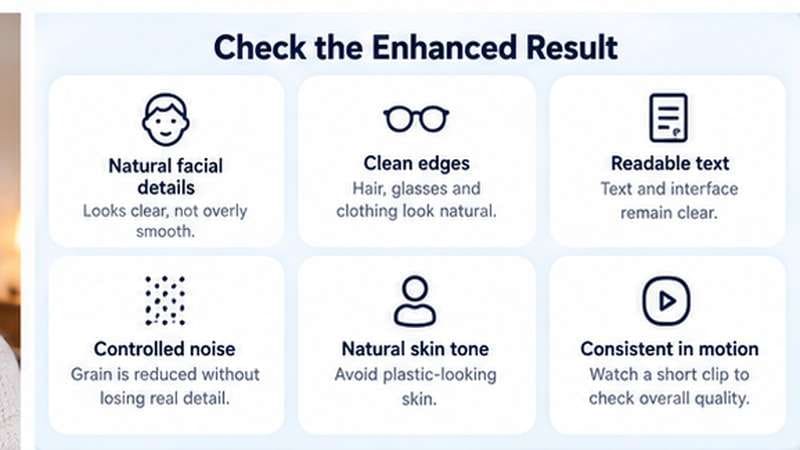
- Face: Does skin still look natural rather than waxy or artificially smooth?
- Hair and glasses: Check edges for halos or crunchy sharpening.
- Noise: Make sure grain is reduced without wiping out useful texture.
- Text: Look at slides, signs, or interface text for strange reconstructed edges.
- Motion: Watch head turns and hand movement instead of judging only a still frame.
If one area looks worse after enhancement, go back to the source and try a less aggressive or more suitable model. The original recording should remain your reference.
Conclusion
A blurry webcam is best fixed at the source whenever possible. Clean the lens, improve the light, check focus and distance, compare the native camera preview with the app where the blur appears, and review the driver or hardware before assuming you need enhancement software.
If the call is over and the blur is already part of the saved recording, the problem changes. Camera settings cannot rewrite the original capture, but video enhancement may improve visible clarity, noise, low-light quality, or facial detail. Use the online Quality Restoration path for a quick browser-based check; choose UniConverter Desktop when you need the broader enhancement workflow.