Have you ever recorded a video but were unable to share it because the file size was too large for social media or email? You’re not alone. Even though high-quality videos are great, their size can be a burden. This is where free video compression software comes in. It has tools that can shrink a video’s size and maintain a noticeable quality. So you can share them anywhere you want.
But with so many options, finding the right one can be frustrating. This is why we are here to ease your search. Whether you are a casual editor or a content creator, these recommended software are valuable solutions for you. So, keep reading to learn about free compression tools that deliver impressive results with minimal quality loss.
-
How to choose the best free video compression software?
In this article
Part 1: Best free video compressors for Windows
Now that we've explored how to choose free video compression software, let's go deep into the best options available to Windows users.
1. UniConverter - Top of the list of free video compression software
Wondershare UniConverter is the ultimate tool for Windows users. By functioning as a complete video suite, this software goes beyond simple compression. UniConverter is excellent at reducing the size of videos without sacrificing quality. With its smooth and simple controls, its interface is incredibly user-friendly, even for beginners. In addition, it provides multiple customization features and AI tools, solving all your video editing needs under a single interface.
How to compress a video on Windows using UniConverter?
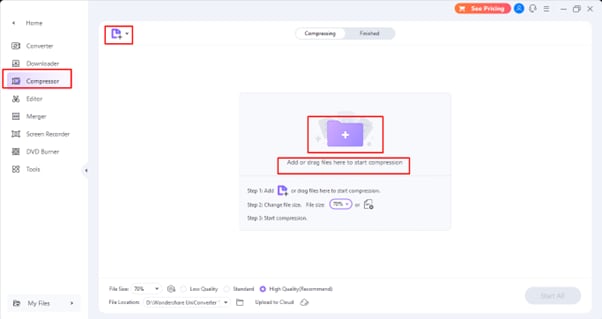
Step 1 Install and upload videos
First, Download Download DownloadUniCoverter for Windows and install it. Then, sign up if you want to have complete access to the free features. Open the platform; inside the interface, you will see options like ‘converter,’ ‘downloader,’ and ‘compressor.’ Click on the last one and upload your file through the ‘+’ icon. You can also use the drag-and-drop option for this purpose as well.
Step 2 Customise the settings for compression
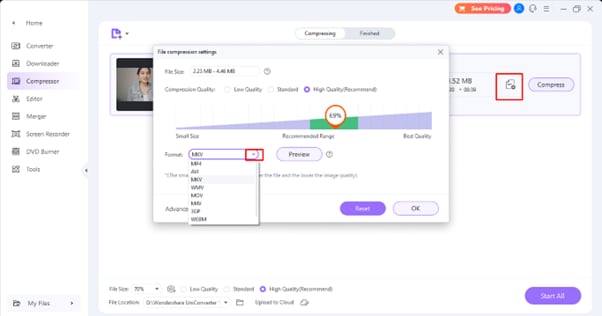
In the next step, you can customize the settings as UniConverter gives you complete control. Click the setting icon just beside the compression button. You can now choose how much you want to shrink the video. For instance, you can choose between 19% and 100%. You can also set the output format, whether you want an MKV, MP4, or MOV, etc.
In the advanced setting, you have the flexibility to control the frame rate, bitrate resolution, etc. Before conversion, you can also preview the 20 seconds of video to see how well your final compressed video looks like.
Step 3 Start compressing the video
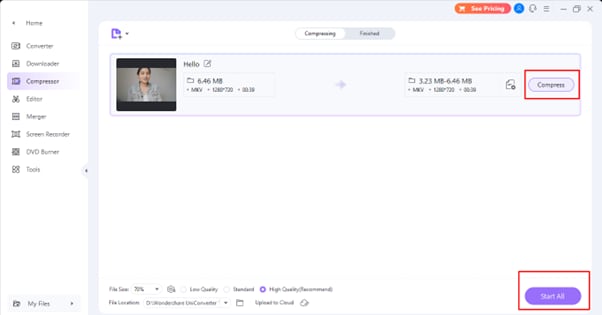
The next step is to initiate the conversion process. Just hit the ‘convert’ button and let UniConverter take care of the rest. If you have uploaded more than one video and converted them at a time, just press “Start All”. However, for this, you have to upgrade to the premium version, which is worth it since you get access to multiple other features without any limitations.
Step 4 Access the compressed file
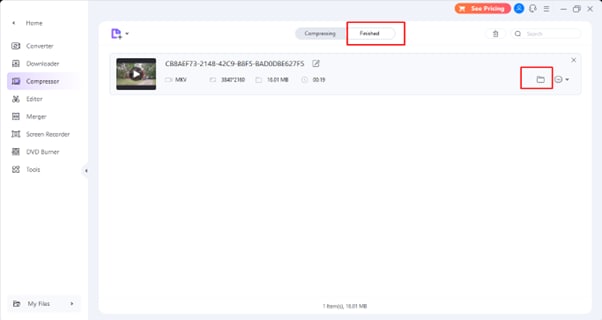
After successful compression, UniConverter will display the completed file in the "finished" tab. You can right-click on the compressed video and choose "open in folder" to locate it on your computer. Now, you're ready to share your content or store it in the cloud without worrying about space limitations.
Additional tips to compress videos on Windows fast with UniConverter
- You can compress several videos at once, and UniConverter will handle all of them at the same time. This saves you a lot of time.
- UniConverter provides conversion presets, which are simple to choose from, and they accelerate the entire process.
- Check if your computer's graphics card can use hardware acceleration. This tech helps UniConverter work faster, especially with big video files, by moving tasks to the graphics card for quicker processing.
- If you want to reduce the size of files, focus on adjusting the bitrate or resolution. It is generally not necessary to change other parameters, such as frame rate, in order to achieve faster processing times.
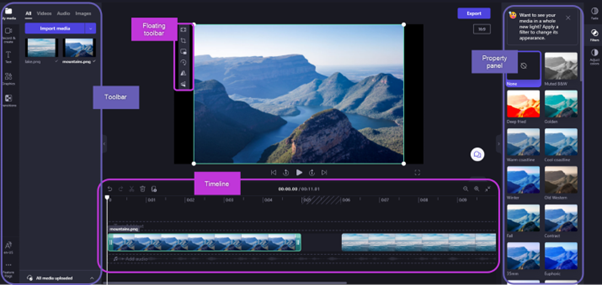
2. Clipchamp
Clipchamp is another free video compression software, offering video editing and compression tools. With Clipchamp, users can trim, crop, and adjust their videos, add audio or visual effects, and compress the file size. Whether you need to create a quick video for social media or prepare a professional presentation, Clipchamp can help you.
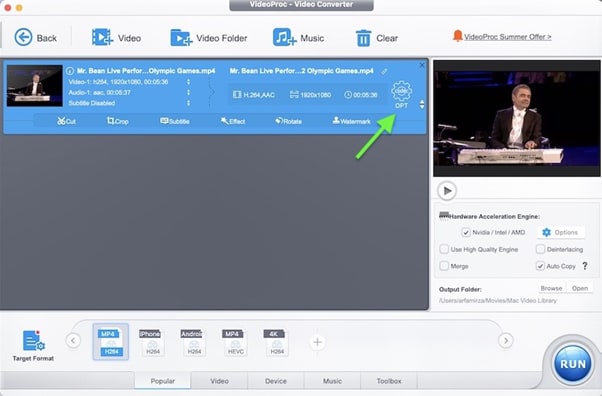
3. VideoProc
VideoProc is another free video compression software if you are looking for a feature-rich platform with fast processing. This software supports multiple video formats and has editing features in addition to compression.
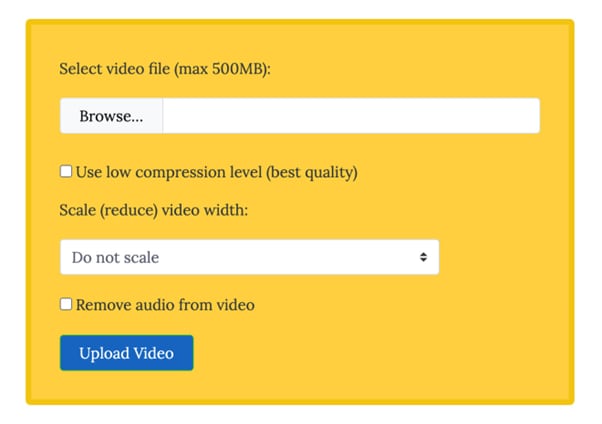
4. VideoSmaller
VideoSmaller is an excellent choice for users looking for a lightweight and simple compressor. This is a great option for people who value simplicity because it is a free video compressor software for PC and provides easy navigation through its interface.
Part 2: Best free video compressors for Mac
If you are a Mac user, then check out the following section for the top 5 free video compressors designed to reduce those heavy files on your Mac.
1. UniConverter - The most reliable video compressor for Mac
We have looked at a lot of options, but Wondershare UniConverter is the best free video compression software available. Not only does it perform exceptionally well on Windows, but the Mac version provides such a great experience, which is modified for Apple users as well. UniConverter is a useful tool for managing large video libraries on your Mac because it allows you to significantly reduce video file size without sacrificing quality.
How to compress a video on a Mac using UniConverter?
Step 1 Upload files from your Mac device
Head over to the Wondershare UniConverter website and download the Mac version download the Mac version download the Mac version of the software. Follow the on-screen instructions for a smooth installation process.
Launch UniConverter on your Mac and navigate to the "compressor" section. Click the "add files" button to browse your Mac and select the video you want to compress. Or, for a faster method of adding your videos, utilise the drag-and-drop feature.
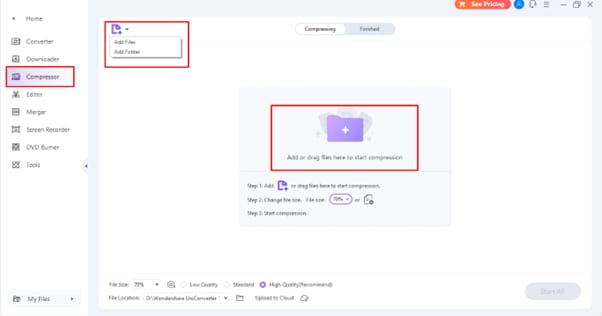
Step 2 Select your desired compression settings
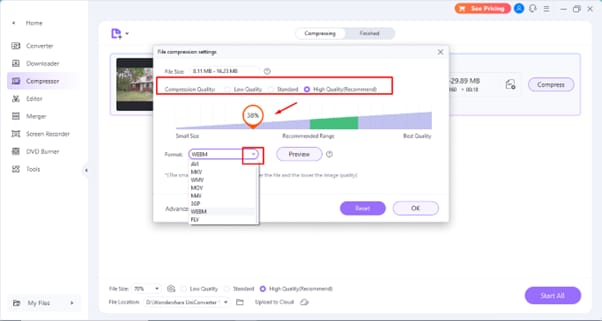
Next, you can tailor the compression to your needs! Choose a percentage to decide how much you need to compress (50% or more). You can go further and try out different resolutions, formats, bitrate and frame rates. Choose the quality you need, from high to low.
Step 3 Compress the video
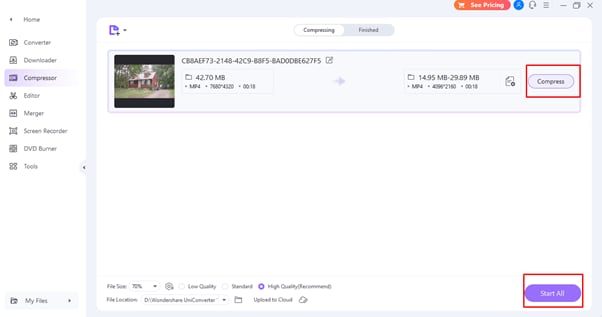
Once you're happy with your settings, click the "Start All" button in the bottom right corner. UniConverter will work its magic, shrinking your video file size while maintaining quality on your Mac.
Step 4 Locate the file or store it in the cloud
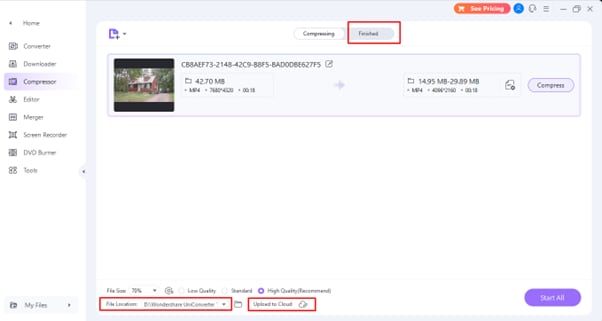
Once UniConverter finishes compressing your file, you'll see it in the "finished" section. Right-click on the compressed video and select "open in folder" to find it on your Mac. Also, you can upload the compressed video directly to different cloud storage platforms for sharing or easy access.
2. QuickTime
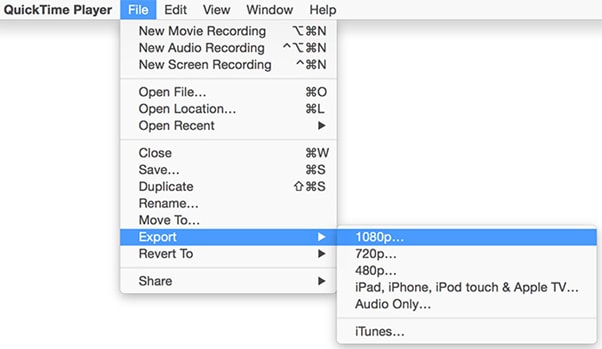
Even though it is not specifically for compressing videos, Mac users have a useful tool already installed: QuickTime Player. It lets you do simple video edits and, of course, compress videos, too.
3. Zamzar
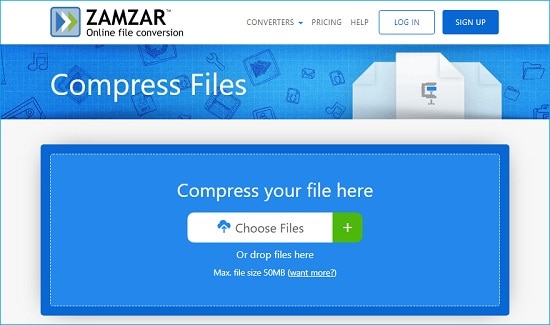
Zamzar is another free video compressor for Mac that provides cloud-based services and allows you to convert a wide range of files effortlessly and without any installation requirements. Zamzar not only enables you to compress videos but also offers a host of other features that make file conversion a breeze.
4. Handbrake
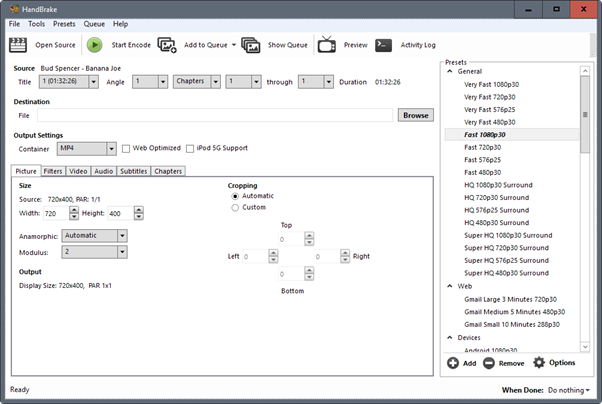
Mac users who want a free option with many features can try Handbrake. It is open-source and has a bunch of tools beyond just compressing videos. It also comes with various encoding options and format conversions.
5. Aiseesoft Video Converter Ultimate
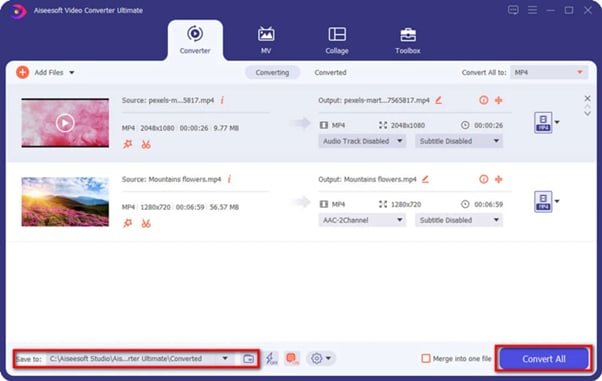
If you are looking for a better alternative than other platforms, then try Aiseesoft Video Converter Ultimate, which has strong yet accessible editing elements. You can compress not only your heavy files but also crop, trim, and remove watermarks.
Part 3: Conclusion
Large video files can be a pain to store and share. Thankfully, UniCoverter is there to help as a free video compression software. It has top-grade features and gives you complete access to each tool. Furthermore, it can handle multiple files for compression and supports over 1000 output formats.
So, UniConverter will consistently impress you with its ease of use. It offers a fantastic mix of features for both Windows and Mac, making it the champion of video compressor high quality. So, next time a video is too big, download UniConverter and experience a smooth conversion process.


