

Maintaining high-quality visuals for video content creation is essential for many users. However, even the best footage can sometimes suffer from blurriness that can ruin their aesthetics. It can happen due to camera shake, poor focus, or low resolution, to name a few reasons. Regarding how to remove blur from videos, advanced tools are available to help you rescue your content.
This article introduces 9 top-notch tools explicitly designed to remove blurriness from videos. It aims to help you enhance clarity and ensure your content looks its best.
Removing blur from videos depends largely on the source of the blur and the level of control you need.
- For desktop users, tools like Wondershare UniConverter, VideoProc, and Adobe Premiere provide more reliable blur repair and clarity enhancement.
- For online solutions, platforms such as Fotor, Kapwing, and Flixier can help reduce mild blur quickly, though output quality and file limits may apply.
- For mobile editing, apps like YouCam Video, VivaCut, and ShotCut are suitable for short clips and basic blur or censor adjustments.
In this article
Part 1. Why Do Videos Get Blurry?
It is essential to understand why it happens in the first place to select the appropriate tools to fix the footage. Pinpointing the root causes can help you avoid future problems and aid in learning how to remove a blur from a video:
- Unsteady hands or movement while filming can result in shaky footage that causes parts of the video to appear blurred.
- The subject or scene may appear out of focus if the camera's focus isn't set correctly, leading to a blurry image.
- Videos shot in low resolution or later upscaled may lose clarity, resulting in a blurry appearance.
- Insufficient or uneven lighting can cause the camera to struggle with capturing details, leading to blurriness.
- Rapid movements by the subject or the camera can create motion blur to make parts of the video look unclear.
Part 2. How To Remove a Blur From a Video on PC (Windows/Mac)
In this part, we start by finding the right video editors for desktop computers to resolve the issue of how to remove blur in video. The tools discussed below will help you deal with slight motion blur or more significant focus issues:
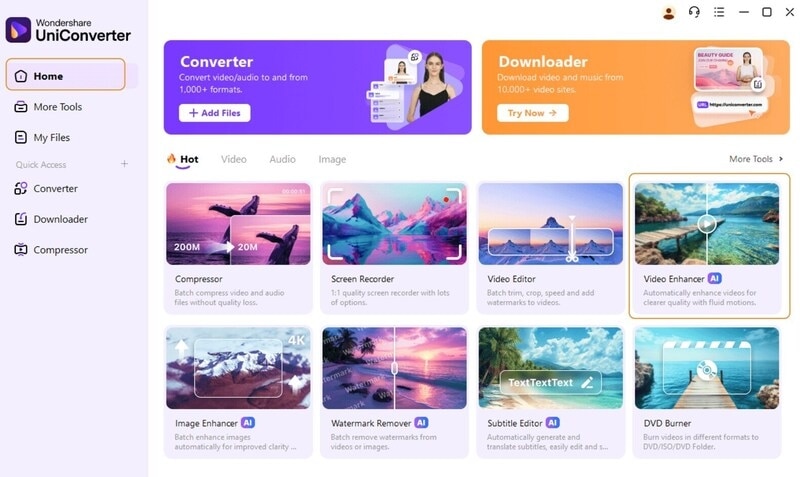
1. Wondershare UniConverter
It is a versatile multimedia tool that offers a wide range of features, including removing blur from videos. While primarily known for its video conversion capabilities, it also provides comprehensive video editing tools to enhance the quality of your footage. UniConverter has a sharpening tool designed to reduce blur and improve video clarity. In addition to removing blur, this software can trim videos, remove watermark, remove backgrounds, and much more.

Best Video Blur Remover
Step-By-Step Guide To Remove Video Blur with UniConverter
Step 1. Launch UniConverter to Access AI Video Enhancer
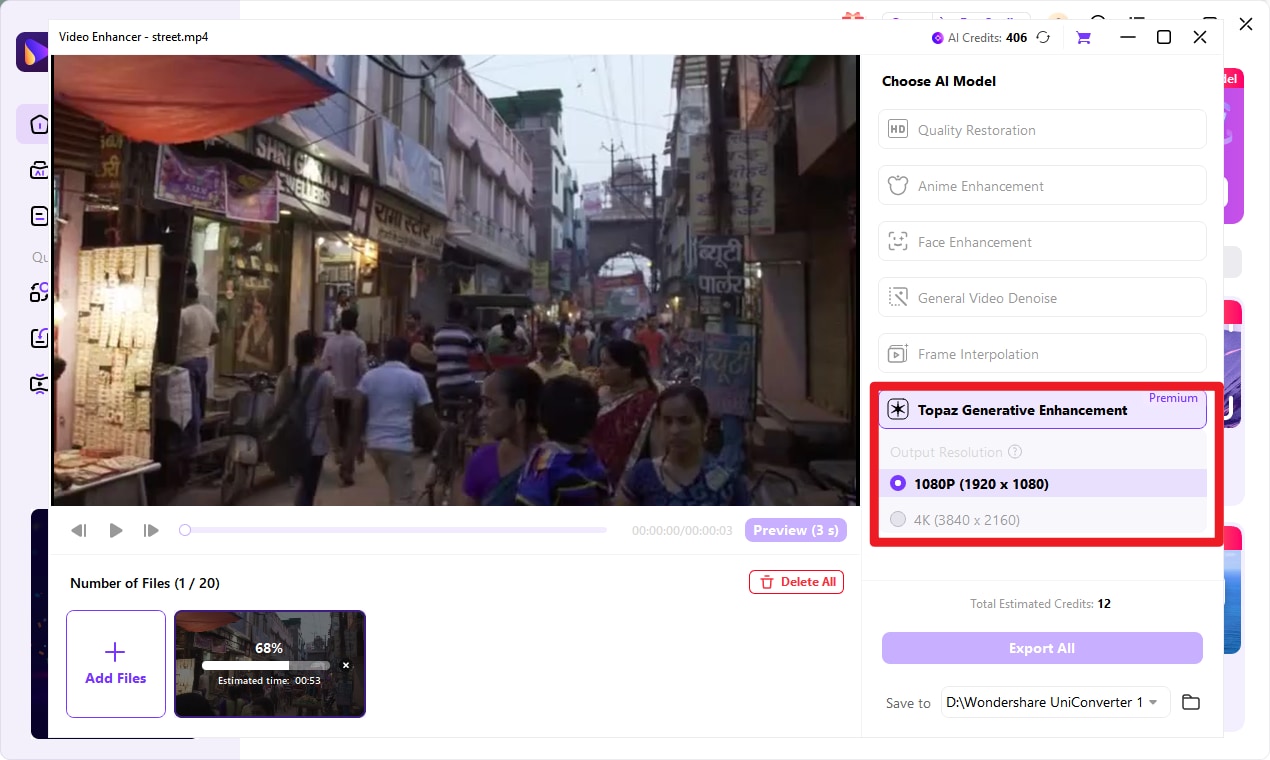
To commence the operation, install and launch the latest version of this software on your desktop and access the “AI Tools” tab. As it is located on the left side, access “AI Video Enhancer” from the available options. Now, you need to add the targeted blurred video and select an AI model for enhancement.
Step 2. Upload Your Video to be Processed
Click the '+Add Video' button to batch upload your videos to be processed.
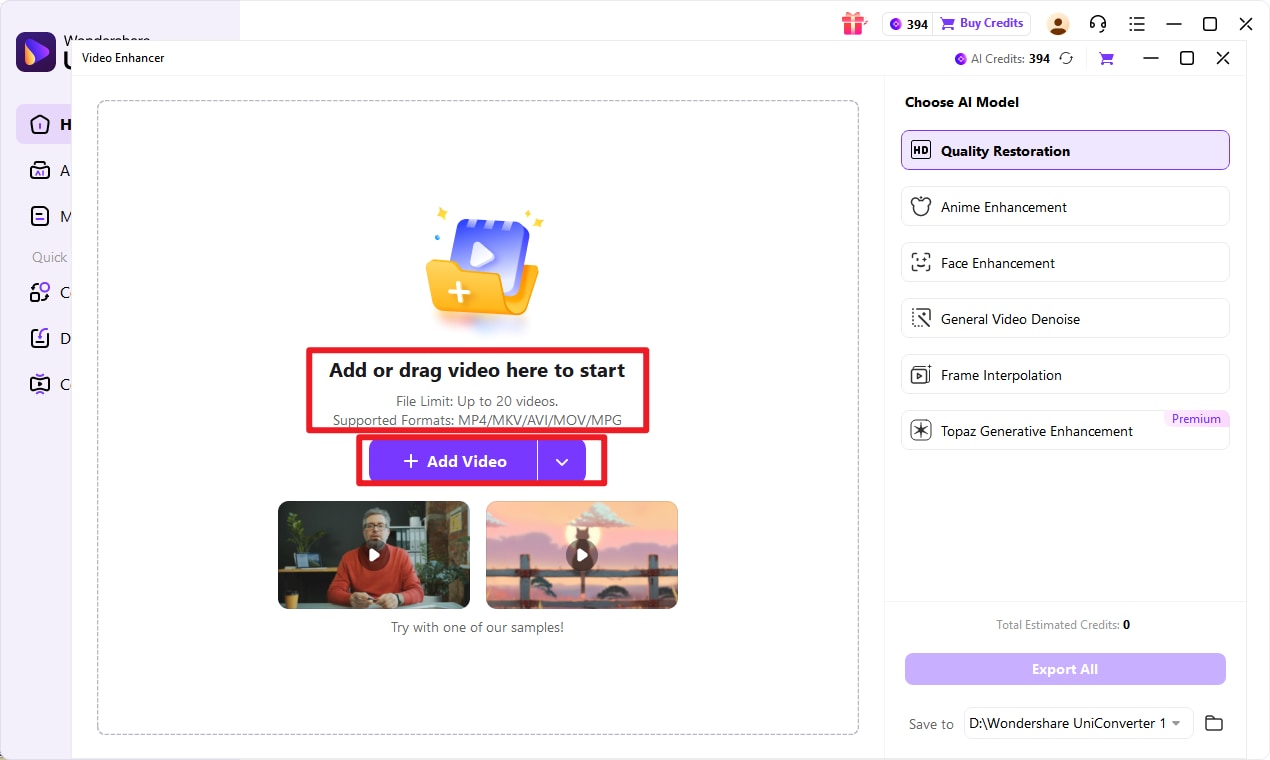
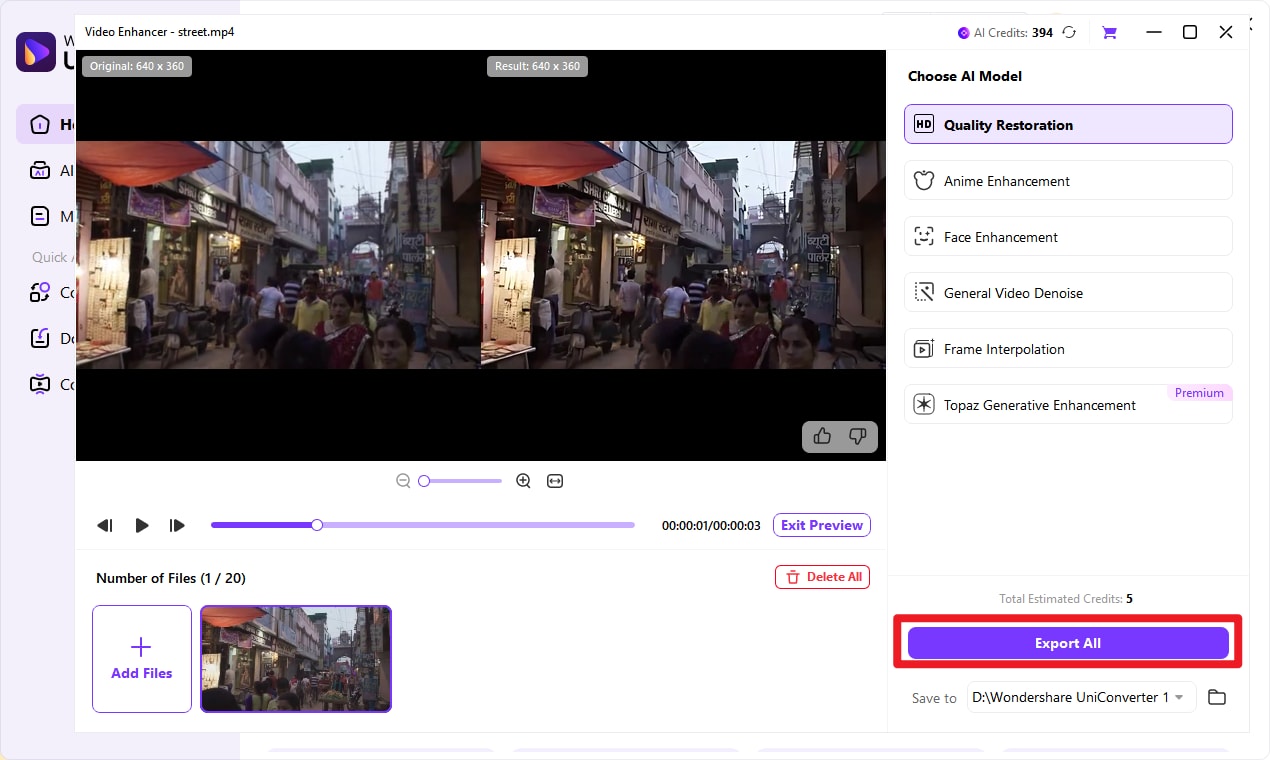
Step 3. Employ the Desired AI Model To Remove Blur
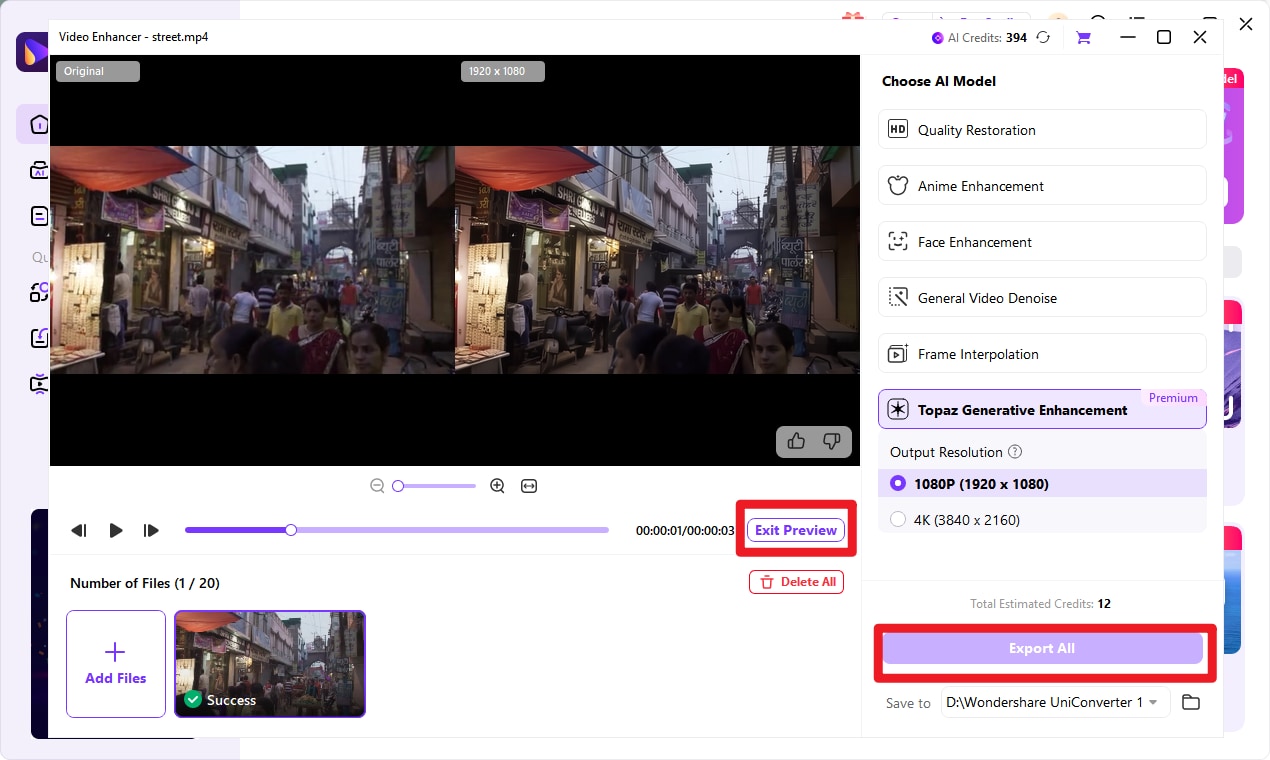
There are three options available for the AI model, and you can view the effect of each one by tapping “preview.”
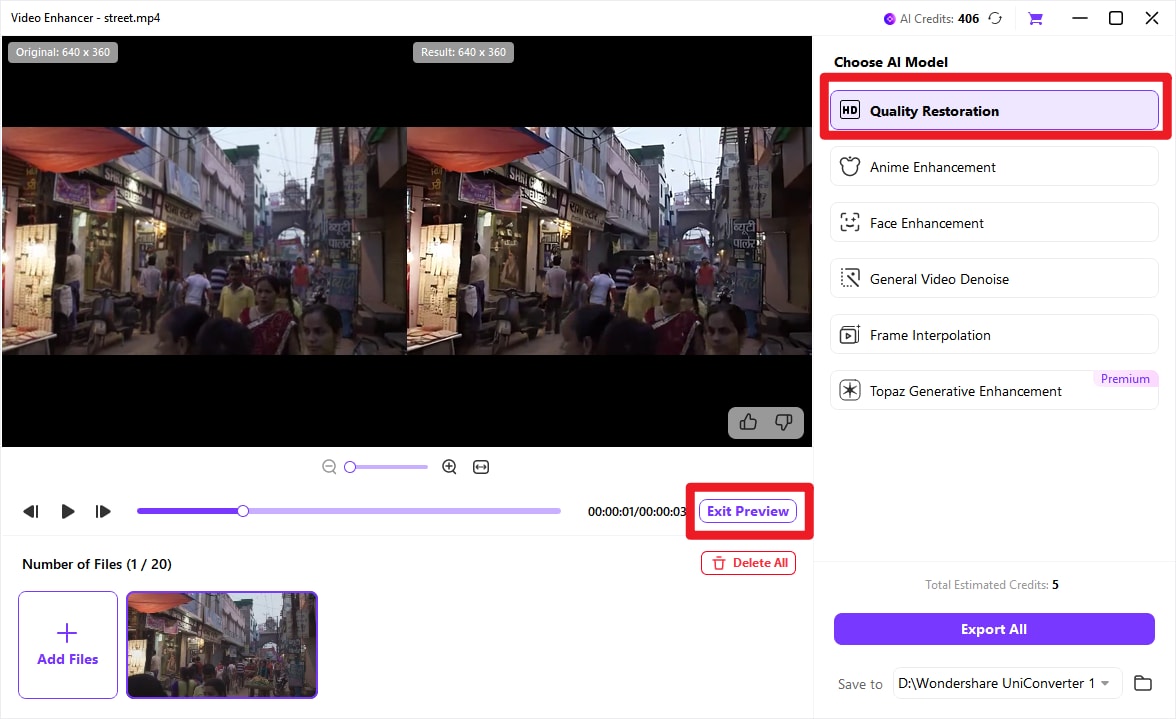
Step 4. Employ the Desired AI Model To Remove Blur
Once you have selected an option, hit “Export” to let the program remove the blur effects from the clip. The new blur-free video will be saved into the defined file location on your system.
Tips : You can also choose Topaz Genenerative Enhancement model which has integrated Topaz video enhancer API, which offers a more versatile and more professinal visual effect.
The Topaz engine in UniConverter specifically sharpens blurry details and corrects dull, washed-out colors. It's a direct solution for making your videos look crisper and more vibrant. Test it on your most challenging clips and observe the clear improvement in definition and color accuracy for yourself.
2. VideoProc
Offering a comprehensive suite of video editing features, it is another excellent tool for removing blur from videos. This AI-powered video editor includes robust tools for reducing blur, stabilizing shaky footage, and enhancing video quality. Due to its hardware acceleration technology, complex tasks like deblurring and stabilizing can be done with minimal lag.
Step-By-Step Guide To Use VideoProc for Removing Blur from Video
Step 1. Within the VideoProc main interface, click "Super Resolution" and utilize the "Add Media" button on the following screen to import the targeted video. Afterward, choose the AI model from the right side tab and select the “Enhance Video/Image” checkbox.

Step 2. Define the options for the output tab and click the “Run” button from the lower right corner. Lastly, wait for the unblur procedure to complete and access the file in the output folder after completion.

3. Adobe Premiere
Premiere offers advanced tools for everything from basic editing to complex visual effects, including the ability to remove blur from videos. While it costs a lot, users can manually adjust sharpness levels and apply sophisticated effects to reduce motion blur.
Easy Guide To Blur Removal From Videos With Premiere Pro
Step 1. In Premiere Pro, simply drag and drop your blurry video onto the timeline to create a new sequence for you to start editing. Now, select the video in your timeline and open the "Color" panel from the top toolbar.

Step 2. Within this panel, slightly increase the "Exposure" and "Contrast" settings to help reduce the blurriness to some extent. If it doesn't help, move to the "Effects" panel to expand the "Video Effects" and "Blur & Sharpen" folders.

Step 3. Here, locate the "Unsharp Mask" effect and drag it onto the blurry video clip in your timeline. Afterward, access the "Effect Controls" panel to find and utilize the three options "Amount," "Radius," and "Threshold" to unblur the video.

Part 3. How To Remove Blur From Video Online Free
Consider using online tools to remove blur effects from videos to avoid the hassle of installing software. Thus, we’ll find some well-known tools to learn how to remove blur from video online:
1. Fotor
Fotor is a renowned video editor that features smart AI features to improve the quality and resolution of videos without requiring manual effort. Its AI-based enhancer tool will smartly enhance the video's brightness, contrast, and saturation to remove blurriness.
Steps To Remove Video Blur With Fotor
Step 1. To renounce the blur effect from the video, launch Fotor on your browser and access “AI Video Enhancer” through “AI Tools.” Click on “Upload Video” to import the blurred clip and activate the “Enhancer” and Upsacler” toggle.

Step 2. Now, hit the “Generate Preview” button to get a display of your original and enhanced clips to compare the outcomes. When satisfied, click on the given ”Download Preview” or “Download full HD video” option to save it.

2. Kapwing
To cater to your creative side, Kapwing allows you to personalize the opacity, brightness, contrast, and blur effects to refine the quality of the output. You can also insert subtitles in the video to improve content engagement by accessing the subtitle tool from the toolbar.
Guide To Reducing Video Blur With Kapwing
Step 1. After accessing the Kapwing website, click “View All” from the “Tools” menu to launch the “Video Clearer” tool in the new tab. Here, tap “Upload video” to access the video editing workspace and add your blurred video by clicking “Click to upload.”

Step 2. You can personalize the metrics ranging from “Opacity” to “Blur” to remove all the blurriness from your clip. As you are done, hit the “Export Project” button and move on to download the new file after deciding the format, resolution, and compression level.

3. Flixier
This web tool is an innovative online video editing platform known for its speed and versatility. Allowing lightning-fast processing, it provides AI features such as a video generator, video trimmer, and video enhancer.
Detailed Steps to Video Enhancement With Flixier
Step 1. Access the “Video Enhancer” tool from the “Tools” tab in the Flixier web tool and tap “Choose Video” to open the editing workshop. Utilize “Click to Upload” and “Import All” to add the video you want to unblur.

Step 2. Following that, access the “Color” tab from the right-hand panel and employ “Filters” and “Basic Color Adjustments” to remove blur from the clip. Lastly, you can save the video back to your computer through “Export and Download.”

Part 4. How To Remove Censor From Video on Mobile
Smartphones are the most used devices nowadays, with powerful apps for video editing on the go. To help you learn how to remove censors from video, discussed below are the top three mobile video editors:
1. YouCam Video [iOS | Android]
It is a comprehensive mobile app designed for video editing and enhancement and is available on both iOS and Android platforms. YouCam Video offers a range of features aimed at improving video quality and adding creative effects, making it a versatile tool.
Simple Steps To Remove Video Blur With YouCam Video App
Step 1. After launching the app, tap the big “+” icon in the center of the bottom bar to import your blurred video. You can name the new editing project and select the preferred aspect ratio for the clip.

Step 2. From the bottom toolbar, navigate to “Adjust” and find the “Sharpen” option here. To remove the blurriness from the clip, select the sharpness level and hit “Apply” to “Export” it with the desired resolution.

2. VivaCut [iOS | Android]
It is designed to cater to users who seek professional-grade video editing capabilities on their mobile devices. With its range of features, VivaCut makes it easy to perform advanced edits, including removing or modifying censor bars and other obstructions in videos.
Guide To Adapting to Video Enhancement With VivaCut
Step 1. Begin by tapping “Create” from the top of the screen after launching the VivaCut app. Now, add the video you want to unblur from the mobile and access the “Adjust” option from the bottom toolbar.

Step 2. Here, you can access options such as “Sharpen,” “Contrast,” and “Saturation” to remove blurriness from the clip. When done, press “Export” from the top right corner and choose the resolution and frame rate to get the blur-free video.

3. ShotCut [Android]
Known for its ease of use and wide range of features, ShotCut allows you to perform various video editing tasks. Despite being a mobile app, it provides powerful editing capabilities that can compete with some desktop software.
Guide to Video Blur With ShotCut
Step 1. As you open the ShotCut app, press “Create” to add the targeted video from the smartphone and select “Edit.” Now, locate the “Enhance” option from the bottom toolbar and tap it to turn it on.

Step 2. This should remove most blur effects from the clip, but you can also utilize the “Adjust” option to enhance the video further. After removing the blurriness, tap “Export” to save the clip to your mobile device, along with options for social media sharing.

Conclusion
In summary, finding out how to remove blur from videos is a task that can be simply managed with the right tools. The variety of tools discussed in this article offers different strengths, from desktop solutions to mobile apps and online platforms. UniConverter stands out as a top recommendation among all we've explored due to its comprehensive feature set and high-quality output.
AI Tool to Remove Blur From a Video
FAQs about Removing Video Blur
-
1. Can I remove blur from a video without losing quality?
Yes. Advanced video editing tools like UniConverter or Adobe Premiere offer sharpening filters and AI-based enhancement features that can improve clarity while preserving overall video quality when used properly. -
2. How can I prevent my videos from getting blurry?
Ensure proper camera focus during recording, use a tripod or stabilizer to reduce camera shake, and record at a high resolution. Using optimal compression and export settings during editing also helps maintain clarity. -
3. What is the best tool for removing blur from a video?
UniConverter is highly recommended for video blur removal due to its powerful AI enhancement tools, high-quality output, and ease of use. It is suitable for both beginners and professionals on Windows and Mac. -
4. Are free blur-removal tools safe?
Many free tools are safe if downloaded from official websites or trusted platforms. Users should avoid cracked software, which may contain malware or adware. Secure local tools like UniConverter are among the safest options. -
5. Will unblurring add artifacts to my video?
Yes. Over-aggressive sharpening can introduce artifacts such as noise, halos around edges, or unnatural textures. Using moderate settings and previewing results helps balance improved clarity with natural-looking quality.

