Removing objects from video content can be a game-changer for content creators, professionals, or casual editors. Whether it's removing an unwanted person, object, or element that disrupts your scene, having the right tools makes all the difference. In this guide, we'll show you how to remove objects from video using easy, powerful tools—helping you achieve clean, professional-looking videos with minimal effort.
In this article
Part 1: Why Remove Objects from Video?
Removing objects from videos serves several important purposes:
- Maintaining visual consistency: Distractions like unwanted objects or people can take away from the focus of your video.
- Enhancing storytelling: By eliminating unwanted elements, you can keep your viewers immersed in the narrative you want to convey.
- Professionalism in content creation: Clean, polished videos are essential for professional content, whether for business or personal projects.
Now that we understand the importance of object removal in videos, let's dive into the best offline tools for precise results.

Part 2: 3 Offline Video Object Removers for Precise Results
1. UniConverter: Object Remover for Clean Video Editing
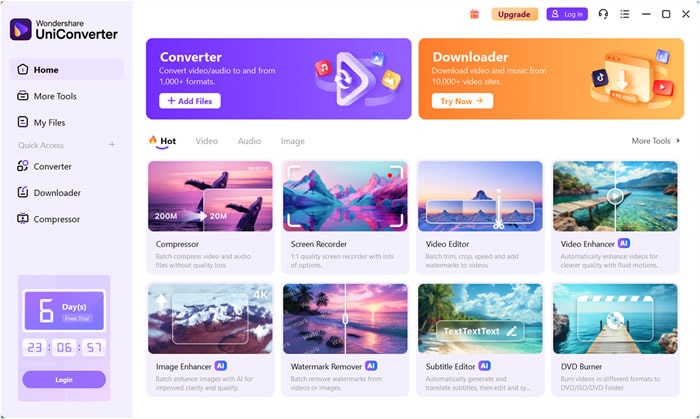
UniConverter is an all-in-one professional video editor that simplifies complex editing tasks, including object removal. The latest version, UniConverter 16, enhances object removal capabilities using advanced AI algorithms. This allows the software to automatically detect and erase unwanted objects from videos, ensuring clean and polished results. Whether you're removing background clutter, blurring faces for privacy, or eliminating objects that detract from the visual appeal, UniConverter 16 offers seamless results with minimal effort.
Key features:
- AI-powered object removal: UniConverter's AI automatically detects and erases objects without requiring manual effort, ensuring a clean background fill.
- Multiple video format support: Supports a wide range of video formats, ensuring compatibility across projects, including MP4, MOV, and MKV formats with H.264 and H.265 encoding.
- Batch processing: Remove objects from multiple videos simultaneously, saving time on bulk edits, with support for processing up to 20 files at once through GPU acceleration.
- High-quality output: Ensures that videos are exported without any loss in quality, providing professional-grade results. It also supports 4K/8K HDR high-definition video output.
- Professional conversion: Supports lossless conversion of 8K HD video in MOV/MKV/WEBM formats.
- Robust video editor: In addition to object removal, UniConverter offers editing features like trimming, cropping, and adding watermarks. You can also save preset parameters.
Step-by-step guide to remove objects from video using UniConverter:
Step 1: Upload your video
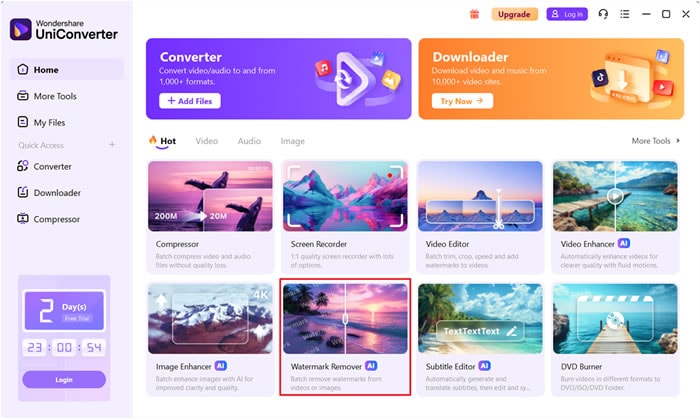
Open UniConverter and navigate to "Watermark Remover" under the "More Tools" section. Click the "+ Add Files" button to upload the video you want to remove the object within.
Step 2: Select the object to remove
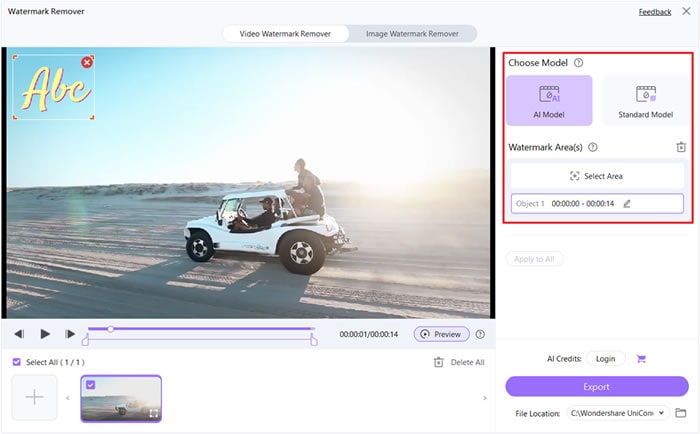
In the editing interface, choose "AI model" to remove the object clearly. Then, use the "Select Area" tool to highlight the object you want to erase. You can also click and customize the duration, where the removed object last.
Step 3: Preview and export
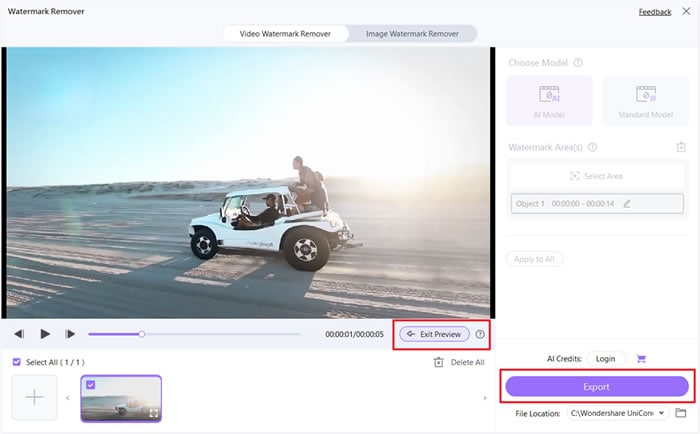
Once you finish the removal, click to preview the video and save it if you are satisfied. Or, you can directly tap "Export" to download the edited work instantly.
2. Premiere Pro
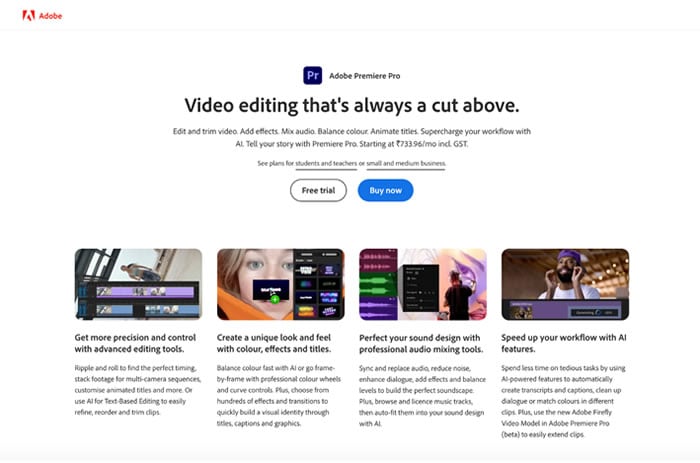
Premiere Pro by Adobe is a leading professional video editing tool that offers a wide range of advanced features, including object removal. It is widely used in the film and content creation industries due to its robust capabilities. With powerful tools like Content-Aware Fill and advanced masking, Premiere Pro allows you to remove objects from video with precision. Whether you're editing for social media, film production, or commercial use, Premiere Pro delivers top-tier results.
Key features:
- Content-Aware Fill: Automatically detects and removes objects by filling in the background naturally, making the edit seamless.
- Advanced masking tools: Offers precision with custom masks that allow you to isolate and remove specific objects in your video.
- Motion tracking: Tracks moving objects, allowing you to remove them from videos while maintaining consistency in dynamic scenes.
- High-quality exports: Export videos in high resolution, up to 8K, ensuring professional-level output.
- Integration with Adobe Creative Cloud: Easily combine work with other Adobe apps like After Effects and Photoshop for a more comprehensive editing experience.
Step-by-step guide to remove objects from video using Premiere Pro:
Step 1: Import your video
Open Premiere Pro and import the video file you want to edit. Drag the video to the timeline.
Step 2: Create a mask around the object
Use the Pen Tool or other masking tools to create a precise mask around the object you want to remove. This step isolates the object from the rest of the scene.
Step 3: Apply Content-Aware Fill
Navigate to the Content-Aware Fill feature. This will automatically remove the object and intelligently fill in the background, making the removal seamless.
Step 4: Preview and export
Review the edited video to ensure the object removal is smooth and clean. Once satisfied, export the video in your preferred format and resolution.
3. Wipit
WipIt is a quick and efficient tool that allows users to erase objects from video with minimal hassle. Its AI-powered features simplify the process, making it a perfect choice for users who need fast results without the complexity of professional-grade software. WipIt's intuitive interface ensures that even beginners can remove unwanted objects or people from videos with ease, delivering clean results in just a few steps.

Key features:
- AI-powered object removal: Detects and removes objects automatically, ensuring smooth edits with minimal user input.
- Real-time preview: Instantly view changes as you edit, ensuring that objects are removed cleanly before exporting.
- Beginner-friendly interface: WipIt's simple and straightforward interface allows users of any skill level to quickly edit videos.
- Supports multiple video formats: Compatible with popular formats like MP4, AVI, and MOV, making it versatile for different projects.
- Cloud storage: Offers cloud-based storage for edited videos, allowing easy access and sharing from any device.
Step-by-step guide to remove objects from video using WipIt:
Step 1: Upload your video
Log into WipIt and upload the video file. You can drag and drop your video directly into the editor from your device or cloud storage.
Step 2: Highlight the object to remove
Use WipIt's object remover tool to highlight the object you wish to remove. The AI will analyze the scene and intelligently erase the selected object.
Step 3: Preview your edit
Use the real-time preview feature to see the results. Ensure that the object has been fully removed and the background remains consistent.
Step 4: Export your video
Once you're happy with the result, export the video in the format and resolution you prefer. You can save it locally or directly to WipIt's cloud storage for easy access.
Part 3: 3 Online Video Object Removers for Quick Edits
1. Adobe After Effects: Advanced Object Remover for Professionals
A top choice among professionals, Adobe After Effects offers robust tools to remove unwanted objects from video seamlessly. Its standout Content-Aware Fill feature intelligently erases objects while filling in the background, making it perfect for high-quality, polished results. Whether you're dealing with moving objects or static scenes, After Effects provides precise control over object removal in your video projects.
Key features:
- Content-Aware Fill: Automatically erases objects while seamlessly filling in backgrounds for a natural look.
- Advanced compositing: Ideal for combining layers and adding effects after object removal to enhance visual storytelling.
- Motion tracking: Tracks and removes moving objects with precision across different video frames.
- Supports high-res formats: Export videos in resolutions up to 8K, ensuring high-quality output.
- Customizable masking tools: Offers advanced masking options to help isolate and erase complex objects in video scenes.
3-Step Guide to Remove Objects from Video Using Adobe After Effects
Step 1: Import your video
Open Adobe After Effects and import the video file by dragging it into the Project panel. Once imported, drag the video onto the timeline for editing.
Step 2: Create a mask and use Content-Aware Fill
Select the Pen Tool to create a mask around the object you want to remove. After drawing the mask, go to the "Content-Aware Fill" panel (if it's not visible, enable it by navigating to "Window" > "Content-Aware Fill"). In the panel, choose the "Object" Fill Method and click "Generate Fill Layer." After Effects will automatically analyze the video, remove the object, and fill the background.
Step 3: Preview and export
Once the fill process is complete, preview the video to check the results and ensure the object has been removed cleanly. When you're satisfied with the outcome, navigate to "File" > "Export" to save the video in your preferred format and resolution.
2. Movavi Video Editor: Simple Object Removal for Beginners
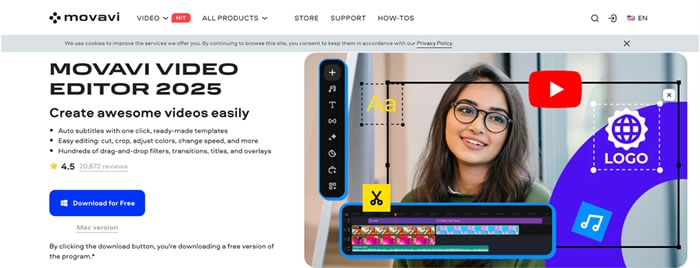
Movavi Video Editor offers a beginner-friendly solution for users who want to erase objects from video effortlessly. With its intuitive interface and basic editing tools, Movavi makes it easy for new users to clean up their footage by removing unwanted elements. Whether you're editing home videos or preparing content for social media, Movavi's simple object removal tool ensures quick and effective results without overwhelming the user.
Key features:
- Object eraser tool: Allows users to easily erase objects from video clips with just a few clicks.
- Intuitive interface: Simple layout and tools designed specifically for beginners.
- Multiple video effects: Includes transitions, filters, and effects to enhance your video after object removal.
- Support for popular formats: Export videos in common formats like MP4, AVI, MOV, and more.
- Fast processing: Quick rendering ensures that you can edit and export videos in no time.
3-Step Guide to Remove Objects from Video Using Movavi Video Editor
Step 1: Import your video
Launch Movavi Video Editor and click on "Add Files" to import the video you want to edit. Drag the video onto the timeline to begin the editing process.
Step 2: Use the object eraser tool
Select the "Object Removal" tool from the editing options. Highlight the object you want to remove by dragging over it with the eraser tool. Movavi will automatically erase the object, blending the background to create a seamless result.
Step 3: Preview and export
Preview your edited video to ensure the object has been removed as desired. Once you're satisfied, click on "Export" to save the video in your preferred format, such as MP4, AVI, or MOV.
3. VSDC Free Video Editor: Free Object Removal Tool
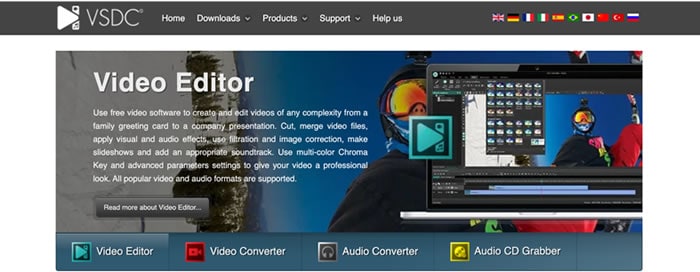
VSDC Free Video Editor is a versatile, no-cost software offering a simple tool to remove things from video. Ideal for hobbyists and casual creators, it provides essential editing features without the need for a subscription. Whether you're removing unwanted objects from family videos or cleaning up your content for social media, VSDC offers basic but effective video editing capabilities.
Key features:
- Free object remover: Allows users to easily remove objects from videos at no cost.
- Multi-format support: Supports various video formats like MP4, AVI, MOV, and WMV for seamless compatibility.
- Masking tool: Provides a customizable masking tool to isolate and remove specific objects from video footage.
- Non-linear editing: Enables users to edit videos across multiple layers, giving greater control over object removal.
- No watermarks: Unlike some free software, VSDC doesn't add watermarks to exported videos, keeping your final product clean.
3-step guide to remove objects using VSDC Free Video Editor:
Step 1: Import your video
Open VSDC and click on "Import Content" to upload your video file. Drag the video to the timeline to begin editing.
Step 2: Create a mask to select the object
Use the "Mask Tool" to create a mask around the object you want to remove. Adjust the mask size and shape to precisely isolate the object. Then apply the object removal feature, which will erase the selected area.
Step 3: Preview and export
Review your video to ensure the objReview your video to ensure the object has been successfully removed. Once satisfied, export the video in your desired format by selecting "Export Project."ect has been successfully removed. Once satisfied, export the video in your desired format by selecting "Export Project."
Part 4: 2 Mobile Video Object Removers for iOS/Android Devices
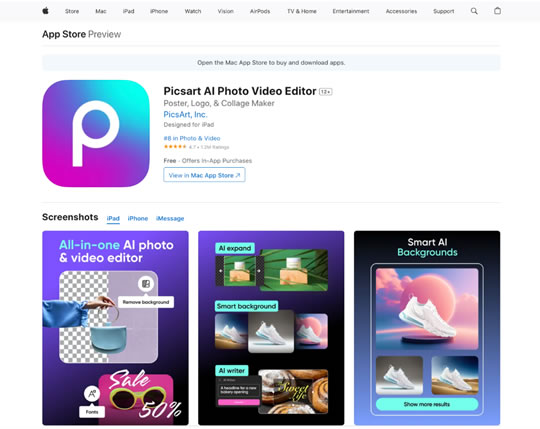
1. iOS: Picsart
Picsart is a popular mobile editing app known for its wide range of photo and video editing tools, including the ability to remove objects from video. With its user-friendly interface and AI-powered features, Picsart makes it easy to erase unwanted elements from your videos, whether it's people, objects, or distractions. It's ideal for users who want quick and simple video editing on their iOS devices.
Key features:
- AI-powered object removal: Automatically detects and erases unwanted objects from videos, making the editing process quick and easy.
- Intuitive interface: User-friendly design allows both beginners and experienced users to edit videos effortlessly.
- Multi-layer editing: Supports advanced editing with layers, giving users more control over object removal and other effects.
- Wide format support: Picsart allows you to export videos in various formats, ensuring compatibility across devices and platforms.
- Additional editing tools: In addition to object removal, users can trim, add filters, text, and stickers to videos for a personalized touch.
Step-by-Step Guide to Remove Objects from Video Using Picsart:
Step 1: Upload your video
Open the Picsart app and tap on the "+" button to upload the video from which you want to remove objects.
Step 2: Use the object removal tool
Select the "Object Removal" tool from the editing menu. Highlight the object you want to erase, and Picsart's AI will automatically detect and remove it.
Step 3: Preview and export
After removing the object, preview your video to ensure the edit is smooth. Once you're satisfied, export the video by tapping on the "Export" button and saving it in your desired format.
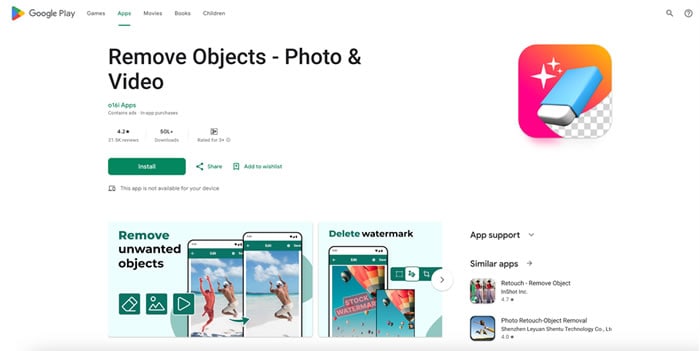
2. Android: Remove Objects – Photo & Video
Remove Objects – Photo & Video is a dedicated Android app that allows users to quickly remove unwanted objects from video and images with ease. This lightweight tool provides a simple yet effective way to erase distractions or unwanted elements from your videos, making it a handy option for users looking to edit videos on the go. Its intuitive interface makes it accessible even for beginners, and it works well for casual video edits on mobile devices.
Key features:
- Object removal tool: Easily erase objects or people from videos using a simple selection tool.
- Fast processing: The app delivers quick object removal without lag, making the editing process efficient.
- Multi-purpose: Works for both videos and images, offering flexibility in editing.
- Touch-based editing: Highlight and remove objects with a touch, making it simple to edit on mobile devices.
- No watermarks: Exports videos without adding watermarks, ensuring clean results even in the free version.
Step-by-Step Guide to Remove Objects from Video Using Remove Objects – Photo & Video:
Step 1: Upload your video
Open the app and select the video from which you want to remove objects. Use the "Video" tab to access your gallery and upload the desired file.
Step 2: Highlight the object to remove
Use your finger to highlight the object or area of the video you want to erase. The app's object removal tool will detect and remove the selected area.
Step 3: Preview and export
After the object has been removed, preview the video to ensure the edit is smooth. If satisfied, tap "Save" to export the video in your preferred format.
Part 5: Tips for Effective Object Removal in Videos
When you need to remove a person from video or any other unwanted object, achieving seamless results requires careful attention to detail. Here are some tips to ensure your edits look professional and natural:
1. Use Motion Tracking for Moving Objects
When removing moving objects or people, use motion tracking to ensure the object is erased consistently throughout the entire video, even as it shifts across the frame.
2. Maintain Background Consistency
Ensure the background stays natural after object removal by using tools that intelligently fill in gaps, like Content-Aware Fill or similar features, to avoid noticeable patches.
3. Preview Before Exporting
Always preview your edited video before exporting it to ensure the object removal is smooth and there are no glitches or unnatural transitions in the final version.
4. Use Multiple Editing Layers for Complex Edits
For more advanced edits, work with multiple layers. This gives you more control over how the removed object interacts with the video and lets you apply additional effects or corrections.
Conclusion
In this guide, we explored a variety of tools and techniques to remove objects from video, ranging from professional options like Adobe After Effects and Premiere Pro to beginner-friendly software like Movavi and VSDC. For mobile users, we also covered apps like Picsart and Remove Objects – Photo & Video that offer quick and simple solutions. Among all these options, UniConverter stands out for its balance of simplicity and advanced features. With its AI-powered object removal tool, UniConverter ensures that even complex objects can be erased smoothly and efficiently.
Whether you're a beginner or a professional, UniConverter's intuitive interface and high-quality results make it a top choice. If you're looking for a reliable tool to clean up your videos effortlessly, give UniConverter a try today and experience its powerful video editing features firsthand!


