There's nothing more convenient than learning how to create GIF on iPhone. With an iPhone GIF maker, you can create animated GIFs from Live Photos, photo albums, or videos. Even better, you don't need to install an app to convert photos and videos to GIFs. That's because iPhones have built-in Photos and Shortcuts apps to convert images and videos to GIFs. So, this post teaches you how to use these two free methods to create amazing GIFS on iPhone. We'll also discuss two excellent third-party GIF makers for iPhones.
Part 1. How to convert a Live Photo to GIF?
If you're an avid iPhone photographer, you need no introduction to Live Photos. An iPhone Live Photo is more or less like your traditional photo. But in this case, your iPhone will record video and audio 1.5 seconds before and after you tap the "capture" button. So, in short, iPhone Live Photos are moving photos made of JPG and MOV files.
Meanwhile, Live Photos are straightforward to take because this feature is set by default on your Camera App. Of course, you can disable it, depending you the model of your phone.
So, without wasting time, let's learn how to take a Live Photo and convert it to GIF using the Photos App:
Step 1. Launch the Camera App, then check if the Live Photos icon has a slash to enable it. To do that, click Settings > Camera > Preserve Settings. Now press the Shutter button to capture your Live Photo.
Step 2. Launch the Photos App and select the Live Photo you want to convert to GIF. After opening the photo, swipe the image up and choose Loop effect to convert the Live Photo into a repeating animated GIF. You can also tap Bounce to make the image move forward and backwards.
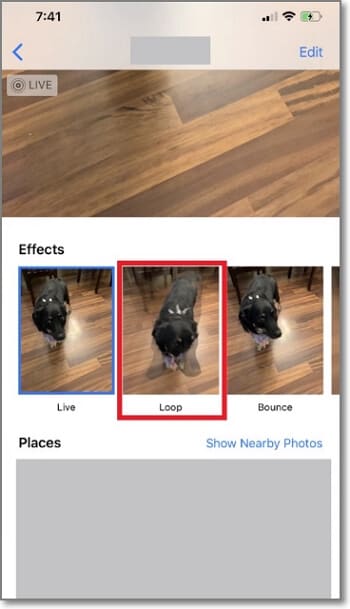
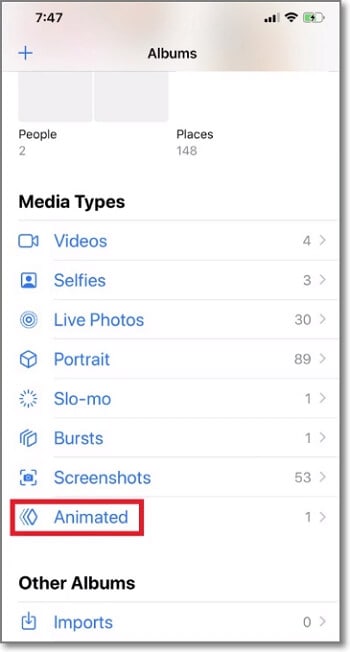
Step 3. After choosing Loop, you'll see the selected effect on top of the screen. If satisfied, tap the Upload icon on the lower-left corner and save the GIF photo. To find the animated photo, open the Albums folder and tap Animated.
Part 2. How to use the built-in app of Shortcuts to create GIFs on iPhone
Converting Live Photos to GIFs is undoubtedly super convenient as you don't need to install a third-party app. This method won't necessarily convert your Live Photo to a GIF, meaning that you can't open the GIF on other devices. To that end, use the Shortcuts App to convert photos to GIFs with a mere screen tap or by asking Siri.
It's a nice, simple app that makes doing things on your iPhone quick and automatic. Besides generating animated GIFs from burst photos or Gallery pictures, Shortcut allows you to directly share the GIF on social media apps or save it to Gallery. Just make sure that you're running iOS 12.0 or newer.
Follow these steps to create GIFs on iPhone with Shortcuts:
Step 1. Open Shortcuts on your iPhone. This app usually pre-installed on your phone. But if you don't have it, download it for free from App Store.
Step 2. Tap Add (+) at the top-right corner and tap Add Action. Now search for the "GIF" word and choose to Make GIF.
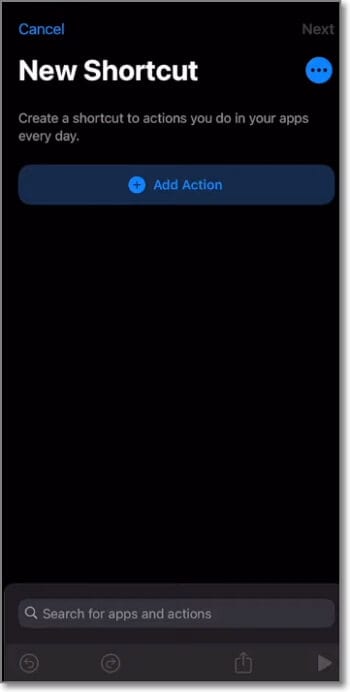
Step 3. Click Content on the "Make GIF from" search result and choose Shortcuts input. Once that's done, tap the Ellipsis icon and name your Shortcut content. Also, enable the "Show in share sheet" toggle. Click Done.
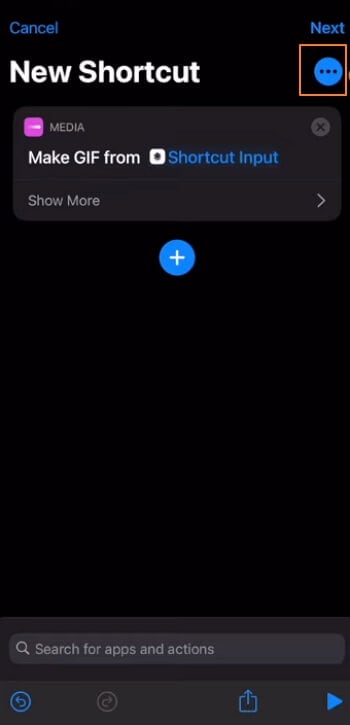
Step 4. Next, click the plus button to choose a destination folder for your GIF. For example, choose Photo Album before clicking Done.
Step 5. Now open Photos and choose the picture or video to convert to GIF. After selecting the photo, click Upload at the bottom-right corner and scroll down the options until you find the GIF Shortcut you created. Click the name, and your video will convert to GIF automatically.
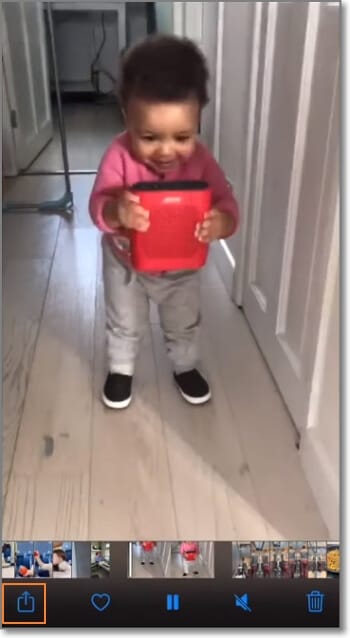
Step 6. Find the GIF on Photos Album and play it or share it with your online friends. And that's it!
Part 3. How to make GIF with apps in Apple Store
Using Shortcuts to create a GIF on iPhone is free and convenient. However, some beginner users can find customizing this app a bit challenging. For this reason, we want to learn how to create a GIF on iPhone easily using standalone third-party apps. Below are our recommendations.
Use Memegrab:
For only $0.99, you'll get one of the most straightforward iPhone GIF makers. With Memegrab, you can generate animated GIFs from live videos and photos. As its name suggests, you can also convert videos and photos into hilarious memes. But remember, the maximum video direction you can record is 60 seconds.
Step 1. Install and run Memegrab and point your camera at the video or movie you want to record. Then, point the cursor on each corner to recognize and highlight the video screen in a clockwise direction.
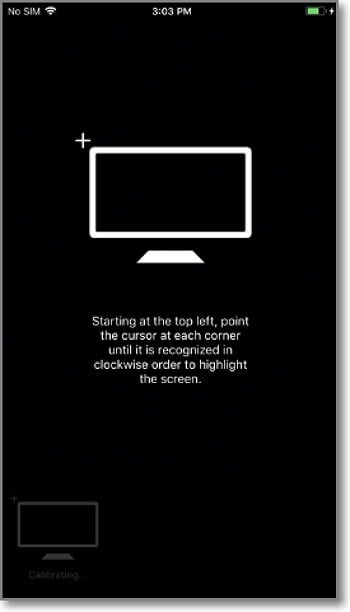
Step 2. After highlighting the video, long press the Record button to start capturing.

Step 3. The meme will be auto-saved to the Photos App for seamless sharing. It's that easy!
Use GIF Me:
Another excellent third-party app to create amazing GIFs on iPhone is GIF Me. With this app, you can create and share short video clips in MP4 or GIF. It features a nice inbuilt camera to capture those live movie moments and add frames, color, effects, filters, and texts. And once you've created the GIF, you can directly share it on email, Facebook, Twitter, Instagram, etc. Follow these steps:
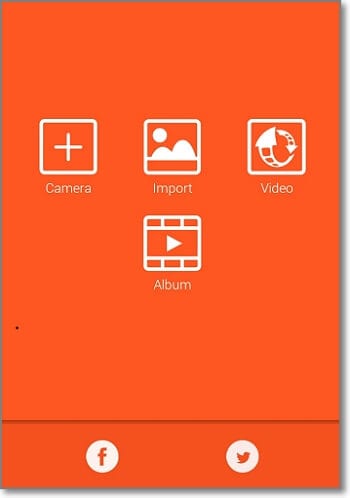
Step 1. Install GIF Me on your iPhone and launch it. Then, decide whether to import a video or photos from a camera or local storage.
Step 2. After selecting a video, trim it to reduce the playback duration. Also, you can adjust the GIF size and frame rate.
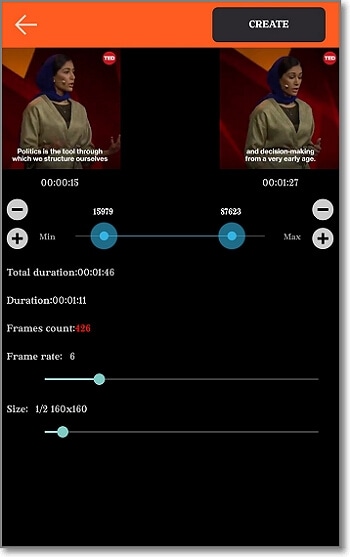
Step 3. If satisfied, tap the upload button to begin processing the GIF file.
Conclusion
Now you know how to create a GIF in iPhone using multiple solutions. With the first method, you can convert Live Photos to a GIF, although you can't share the file to other devices as a GIF file. The Shortcuts App is another excellent solution, even though the steps can be complex. So, if these two methods don't work for you, use the third-party GIF makers to create animated GIFs from Live Photos, videos, and pictures. But overall, choose a GIF-making method that works best for you.

