Maybe many of you who want to remove audio from the video will still not know how. "iMovie remove audio from video"; therefore, you can use an app to remove audio from video. This article will tell you how to use iMovie to remove audio from videos. Even though iMovie removes sound, iMovie only applies to iOS users. Fortunately, this article will also discuss an exceptional tool to remove audio from video for Windows users
Part 1: How to mute audio in iMovie on iPhone and iPad
If you want to mute a video on your iPhone or iPad, you can use the iMovie app. iMovie is sometimes already on your iPhone or iPad when you bought it. But if you don't have it, you can get iMovie for iOS.
Follow the steps below to mute your videos in iMovie once you've downloaded to your iPhone or iPad.
Step 1: Firstly, you need to download the iMovie app from the App Store and launch it on your iPhone or iPad. After launching iMovie, select the "+" icon to begin a new movie project.

It will allow you to navigate the folders on your iPhone or iPad to choose your video file to edit. After selecting the file, simply select it and hit the "Create Movie" to load the video file into the iMovie interface.
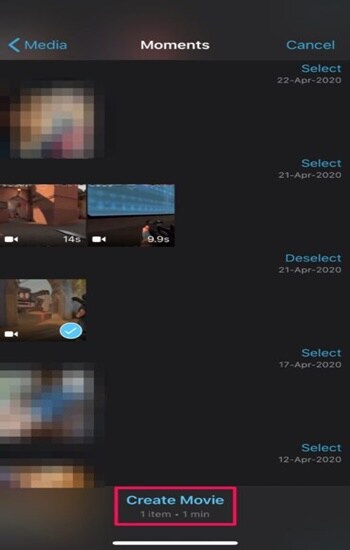
Step 2: iMovie remove audio in iPhone/iPad iMovie. Once the video is loaded, you may view its icon on the timeline and a preview at the top. Now, simply tap the video icon in the timeline to reveal a selection of options at the bottom.
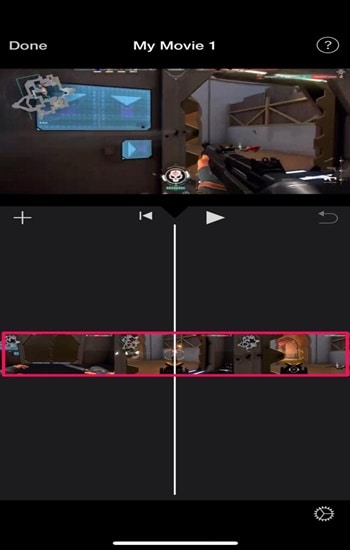
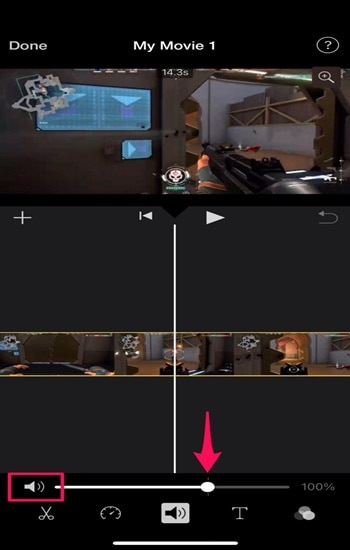
Step 3: Tap the sound icon from the list of options at the bottom of the screen. Then you can move the bar left or right to change how loud the sound is in your video. Meanwhile, iMovie reduce background noise so you could also remove audio from a video in iMovie on an iPhone or iPad by tapping on the sound icon on the side.
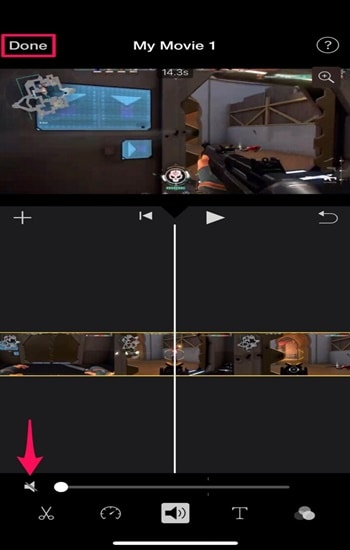
Step 4: Save the changes and export it.
If you have already taken the sound out of your video, tap "Done" to save your changes. Also, when you're done with the project, you can tap the share button at the bottom and save the changed video to your iPad or iPhone.
Part 2: How to remove audio from video in iMovie on Mac
iMovie for Mac allows you to delete audio from a video clip, like on iPhone and iPad. Nevertheless, the Mac application of iMovie offers some additional editing options that may be useful. Follow these simple steps to learn how to delete audio from a video in iMovie on a Mac.
Step 1: Import your video on iMovie. Run the iMovie software on your Mac and pick to work on a new project before beginning to remove your audio. After that, you can drag and drop the movie into iMovie or select the Import button to load the video file.
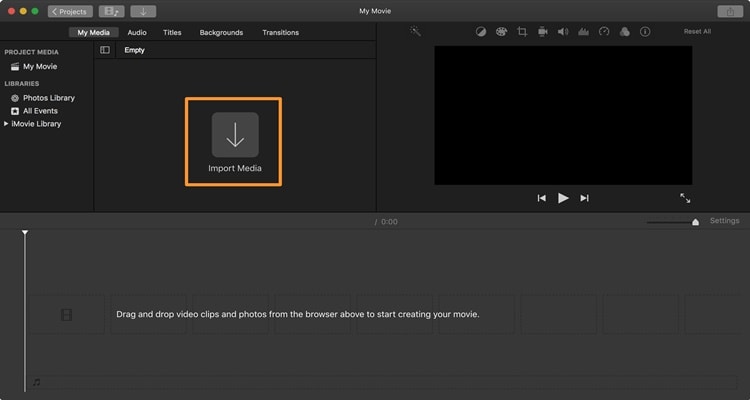
Step 2: After loading the video, you can see the thumbnail from the file section. Simply drag and drop the video onto the timeline at the bottom to make the necessary edits.
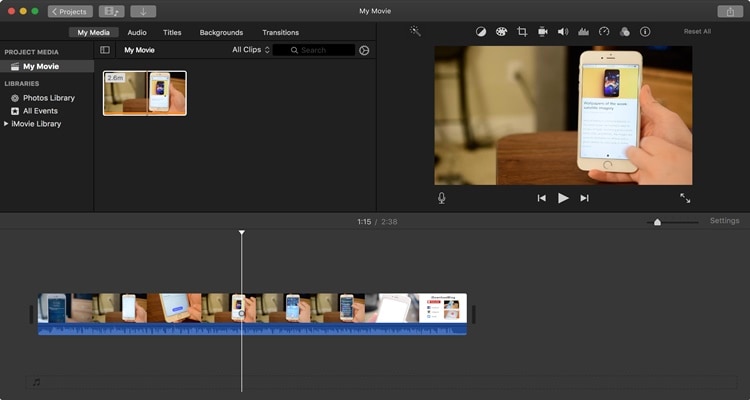
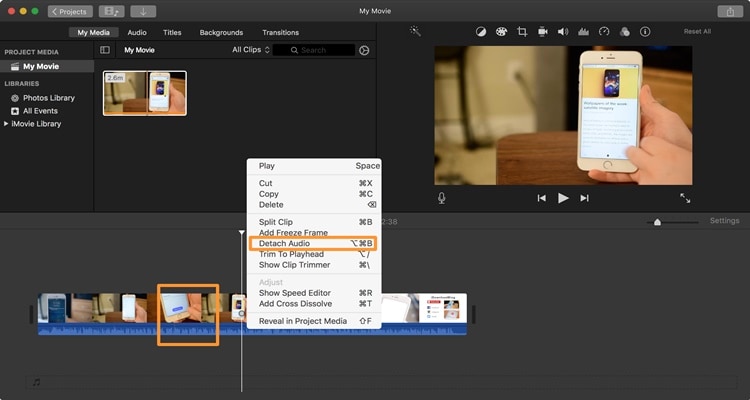
Once you have dragged your video into the timeline, you can right-click the video's thumbnail in the timeline. Now, you'll see different context menus, and you can choose "Detach audio from file" from one of them.
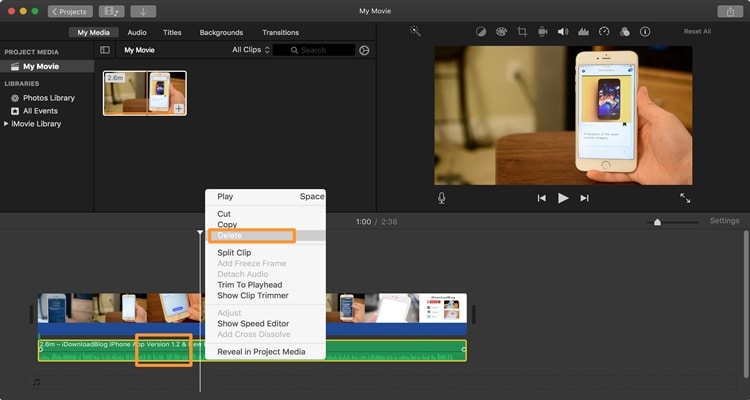
Step 3: It will show the audio part of the file right under the video. In iMovie, you can separate the audio from the video by right-clicking the audio part and choosing to delete it. Also, you could change the audio if you want to.
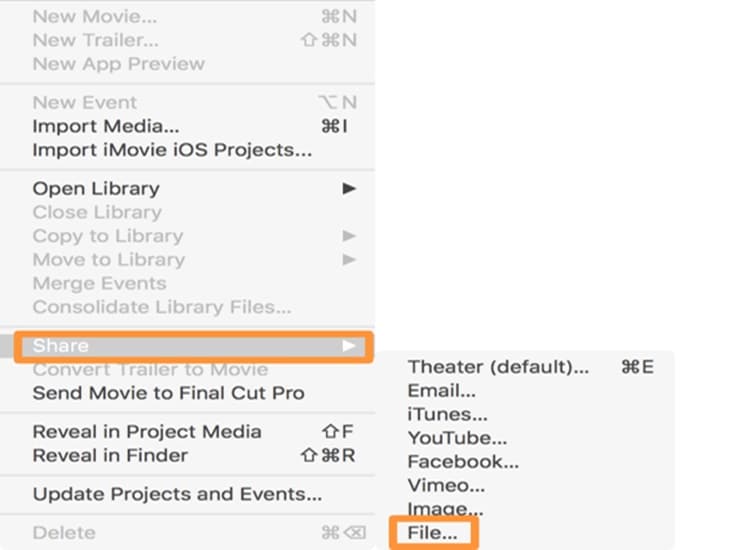
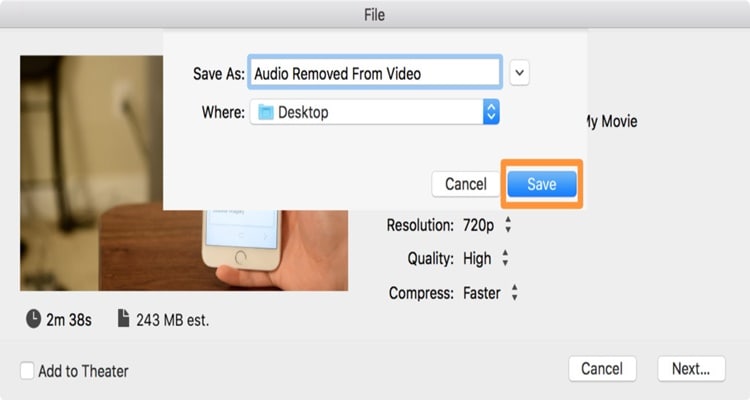
Step 4: After you've made all the changes you want, you can save the project on your Mac by going to the iMovie menu, clicking "File," then "Share," and selecting "Save File."
Bounus tip: How to extract human sound from music with another powerful tool
Indeed, you can use iMovie as a remover sound. However, iMovie is only available for iOS devices. Therefore, there is another powerful tool you can use instead. Wondershare UniConverter is a very simple and efficient tool to extract musical sound.
UniConverter has an outstanding feature called Vocal Remover. Vocal removal is an AI-powered instrument for removing voices from any song. With UniConverter's Vocal Remover, you may quickly extract voice for various purposes. Additionally, it is free to use. Follow the steps below to know how to remove a voice from a song using UniConverter on Windows.
Wondershare UniConverter — All-in-one Video Toolbox for Windows and Mac.
Edit videos on Mac by trimming, cropping, adding effects, and subtitles.
Converter videos to any format at 130X faster speed.
Compress your video or audio files without quality loss.
Excellent smart trimmer for cutting and splitting videos automatically.
Nice AI-enabled subtitle editor for adding subtitles to your tutorial videos automatically.
Step 1: First, you must download and launch the UniConverter software on your laptop or PC. Afterward, you can click on "Voice Remover" on the UniConverter home screen.
Step 2: In this part, click the "Add File button" to upload the file from which you wish to delete vocals or drag the file directly onto the interface.
Step 3: The Vocal Remover will automatically analyze the file and extract vocals using artificial intelligence as soon as you load it.
Step 4: Once the analysis is done, you will get two tracks: the vocal and the instrumental. Before you set the File Location, click the Export button next to the audio tracks to save the instrumental track or vocal file.
Conclusion
If you are an iOS or macOS user, you can easily remove the audio from the video using the iMovie application. Unfortunately, for those of you who are Windows users, you can't use iMovie. Luckily there is UniConverter editing software that lets you remove the sound in the videos.


