

If you’ve ever noticed red-eye or yellowed smiles ruining your favorite photos, this guide is for you. We’ll walk you through exactly how to whiten teeth in photos and remove red eyes, using tools like UniConverter, Photoshop, Lightroom, and top teeth whitening apps.
We start with UniConverter—a hidden gem that combines batch teeth whitening with AI-powered red-eye removal—then move through desktop and mobile solutions to fit any workflow.
In this article
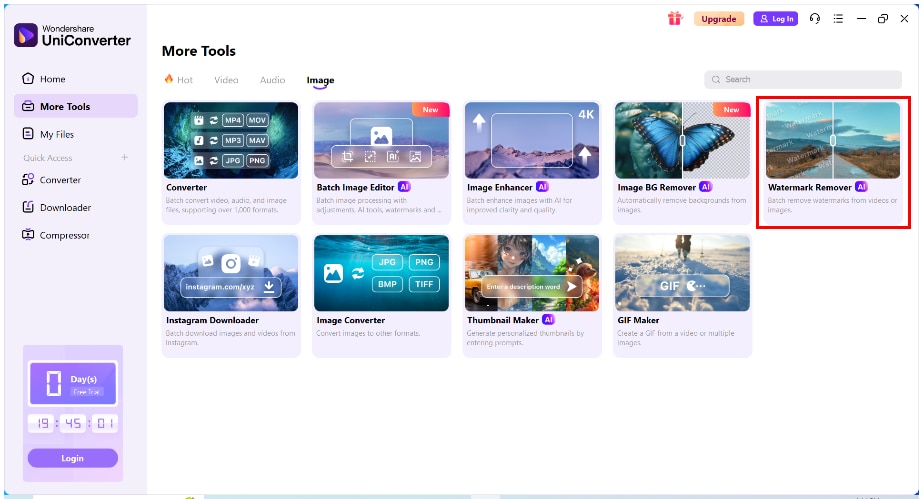
Part 1. [Most Recommended] How to Batch Whiten Teeth in Photo with Uniconverter
If you’re looking to whiten teeth in photo collections effortlessly, especially when dealing with dozens or hundreds of pictures, Wondershare UniConverter is the ultimate solution. It's more than just a converter—it’s a powerful teeth-whitening photo editor with AI-enhanced capabilities. Whether you're a professional photographer or someone just looking to make teeth whiter in photo albums, UniConverter lets you transform multiple images with a few clicks.

Unlike many free teeth whitening photo editor online tools that focus on single-image editing, UniConverter offers batch teeth whitening combined with advanced AI to target smiles in high-resolution photos. It’s ideal for wedding photographers, influencers, or anyone seeking a fast, seamless way to improve their photos without sacrificing quality.
Key Features:
AI Image Enhancer: Automatically identifies and improves facial highlights like teeth brightness while preserving texture and contrast in high-res images.
AI Watermark Remover: Erases unwanted elements such as camera timestamps or overlays without affecting image quality, making your photo cleaner overall.
Image Converter: This feature allows you to batch-convert enhanced photos into various formats, optimizing them for web uploads, printing, or archiving.
AI Tools: The tool offers various AI editing options, such as background remover, enhancer, and noise reduction, providing an all-in-one workflow for photo refinement.
Here’s how to whiten teeth using UniConverter in 4 simple steps:
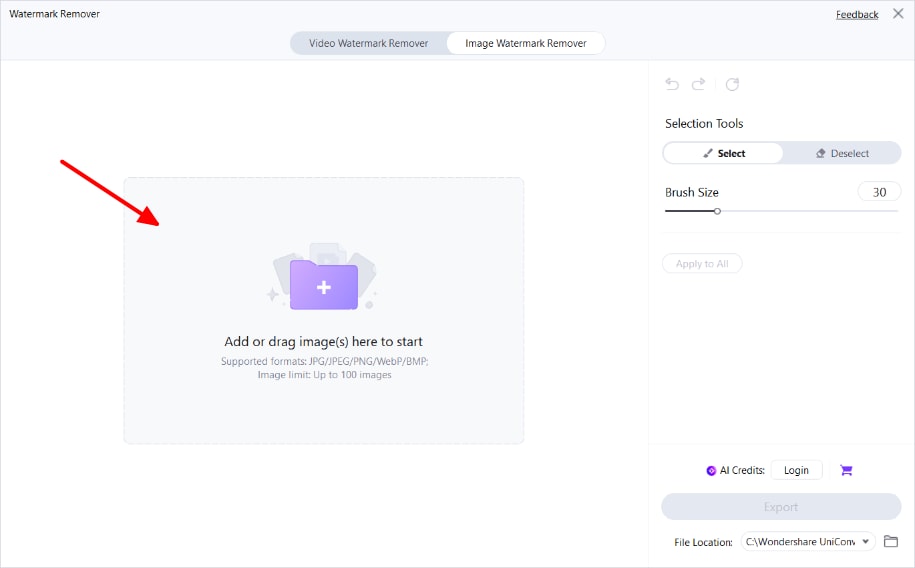
Step 1: Open UniConverter and select “Watermark Remover.” Launch UniConverter, then go to the Image Converter module and choose Watermark Remover. This feature uses AI detection to help target areas like teeth automatically.
Step 2: Upload Multiple Photos Drag and drop a batch of images into the workspace. The batch-processing capability is one of UniConverter’s strongest key features—great for whitening teeth in multiple images at once.
Step3:UsetheBrushTooltoHighlightTeethClickthebrushicontomarkovertheteethareas.UniConverter’shttps://videoconverter.wondershare.com/ai-watermark-remover.html\hwilldetectandenhanceteethbrightnesswithoutcompromisingsurroundingskintones.
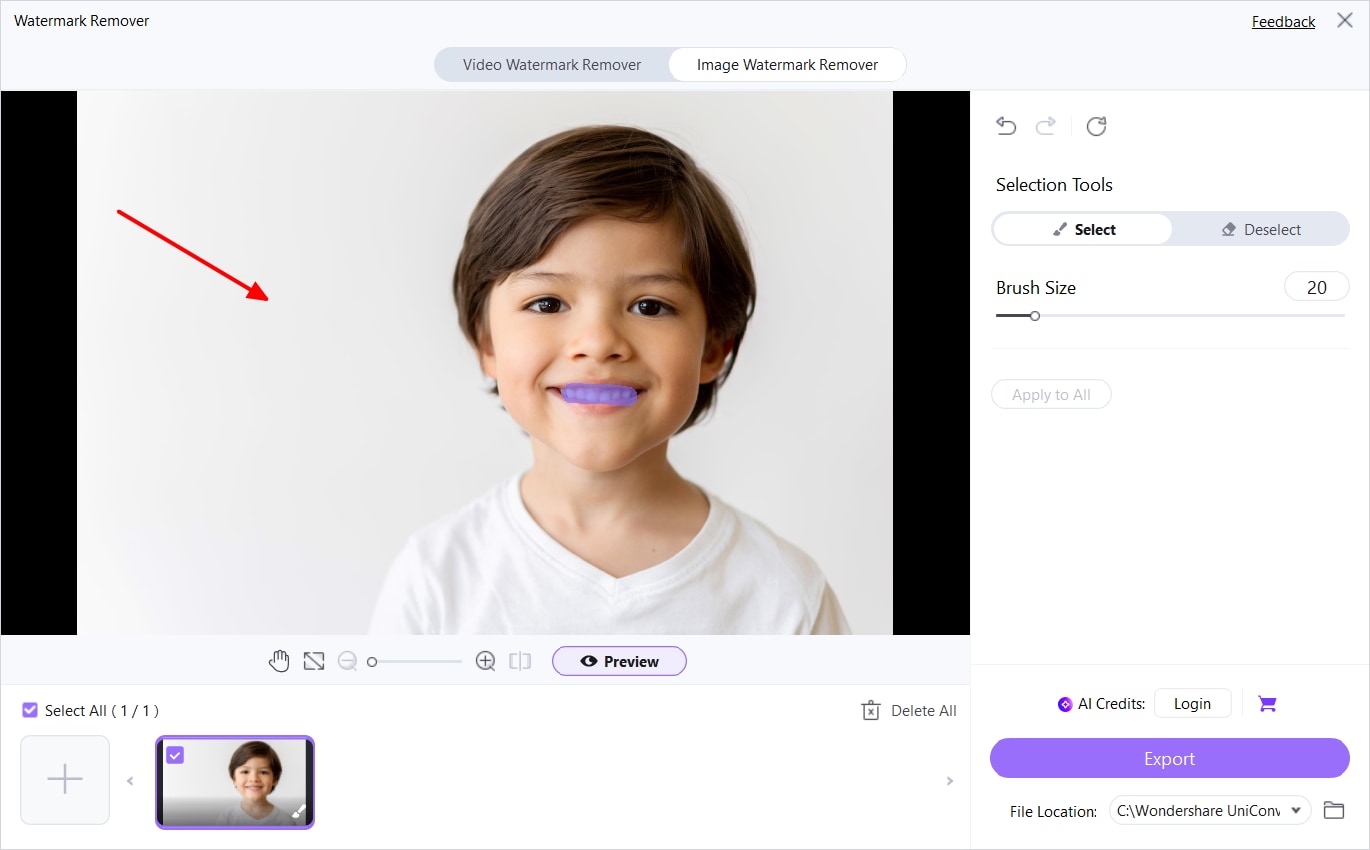
Step 4: Preview and Export Click “Preview” to see your enhanced photo. Next, click "Export" to download all of the high-quality images. UniConverter ensures your images stay crisp—perfect for printing or sharing online

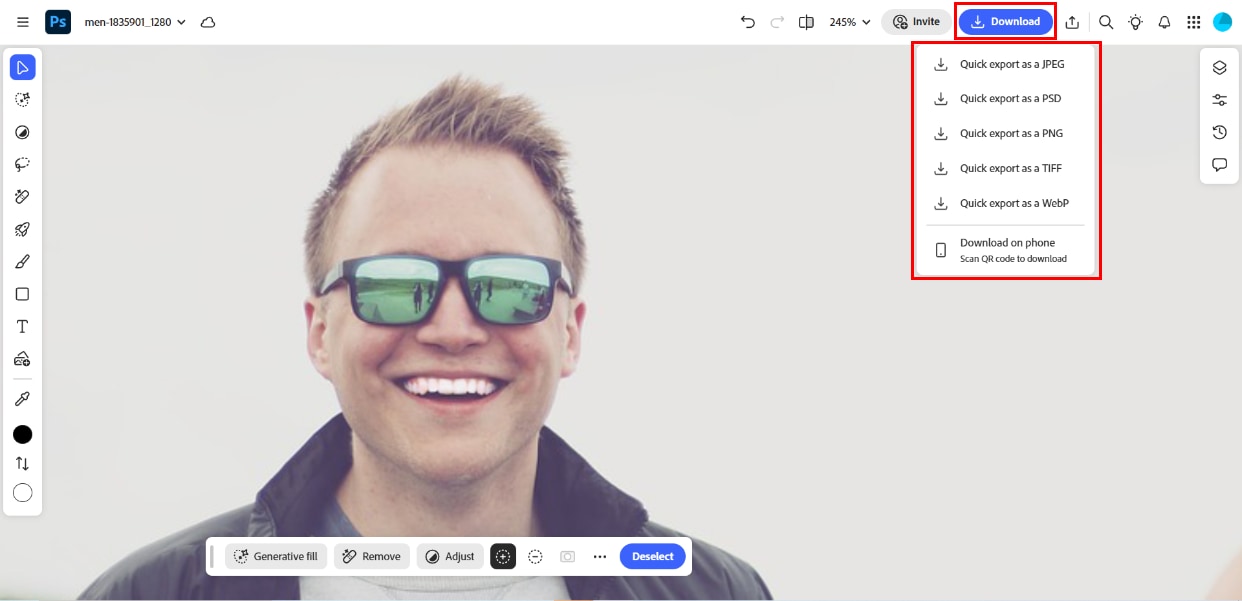
Up next: Want to adjust every detail of a photo manually? Learn how to make teeth white in Photoshop using professional tools in Part 2.
Part 2. How to Whiten Teeth in Photoshop (Manual, Professional Editing)
If you prefer complete control over every pixel, Adobe Photoshop is the top choice for anyone looking to whiten teeth in photo edits with studio-level precision. This advanced tool is ideal for those searching for ways to make teeth white in Photoshop, whether you’re enhancing portraits, headshots, or wedding photography. Unlike automatic apps, Photoshop allows fine adjustments of saturation, hue, and brightness—making it a powerful teeth whitening picture editor for professionals.
Many photographers and content creators ask how to make teeth whiter in Photoshop, especially when aiming for realistic yet noticeable changes. Photoshop delivers the ability to isolate teeth, apply selective whitening, and preserve all-natural shadows—something you won’t get from a typical free teeth whitening photo editor.
Pros & Cons
Photoshop continues to be the preferred choice for teeth whitening in photo workflows, particularly for individuals already acquainted with the Adobe ecosystem. Here's your step-by-step guide for those wondering how to whiten teeth in Photoshop efficiently:
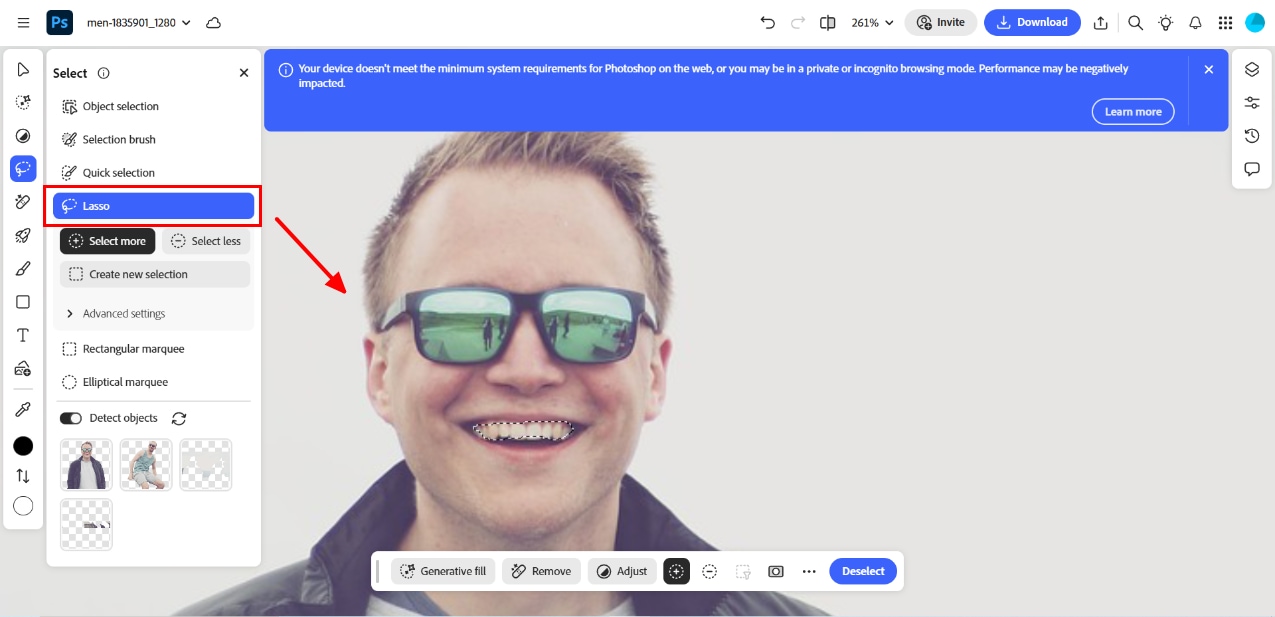
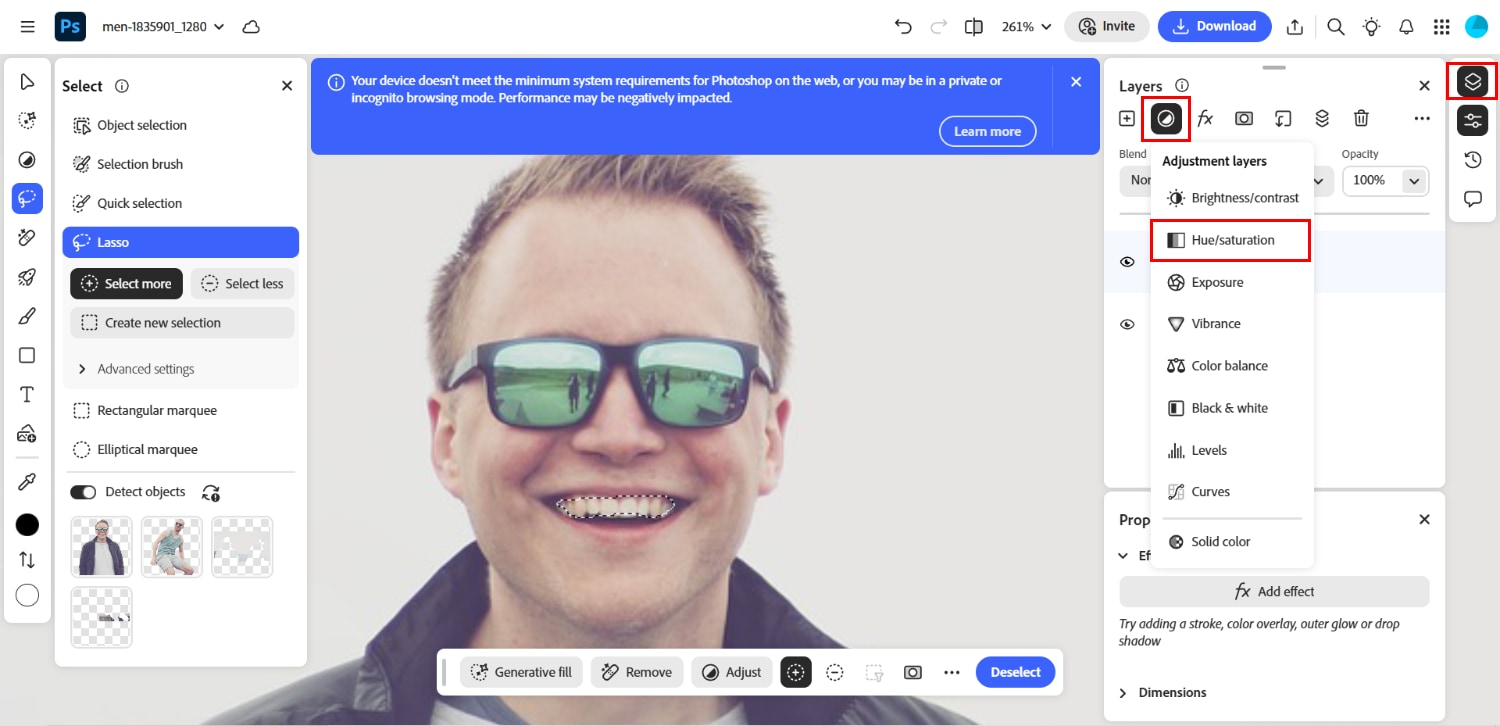
Step 1: Select the Teeth Area Using the Lasso Tool Open your photo and use the Lasso Tool under the “Select” section to draw around the teeth. Precision selection guarantees that it only affects the teeth, leaving the lips and gums untouched
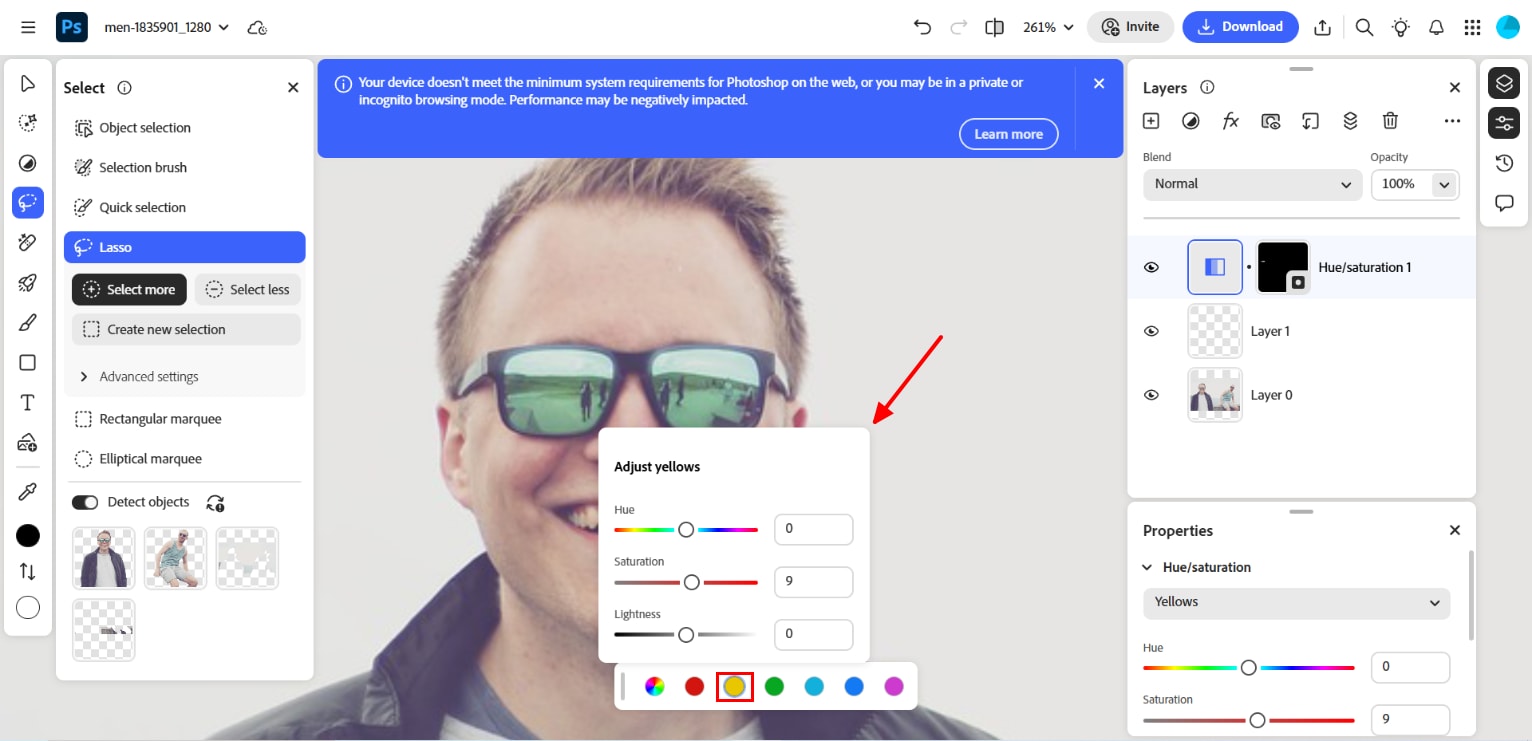
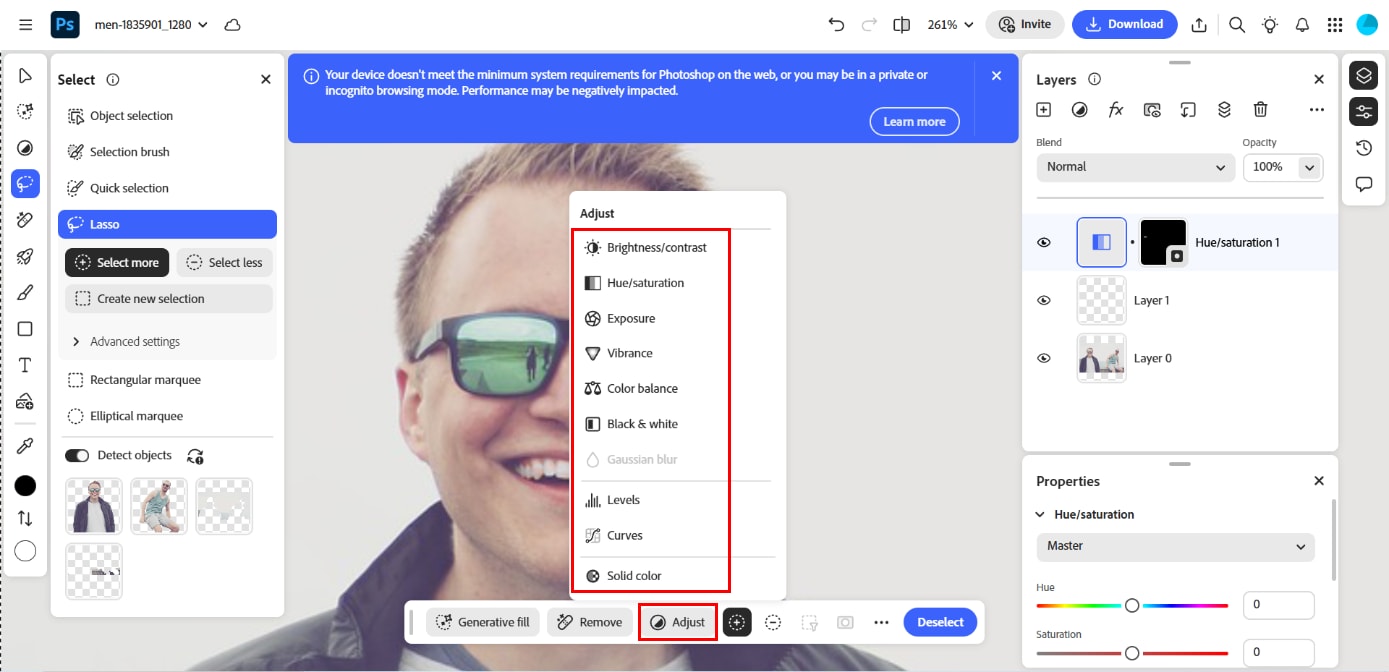
Step 2: Add a Hue/Saturation Adjustment Layer Go to Layer → New Adjustment Layer → Hue/Saturation. Select “Yellows” from the dropdown and reduce saturation. This classic teeth whitening Photoshop tactic removes yellow tones while preserving texture
Photoshop isn’t just a teeth whitening photo editor—it’s a complete creative suite. If you don’t mind manual work and want top-tier results, it’s worth every click.
Next, want a more straightforward and faster approach for batch editing? See how to whiten teeth in Lightroom in Part 3.

Easy to Use Batch Object Remover for Win and Mac
Part 3. How to Whiten Teeth in Lightroom (Quick and Precise Workflow)
If you're looking for a more intuitive and streamlined method to whiten teeth in photos, Adobe Lightroom offers a clean, user-friendly workflow—perfect for beginners and intermediate editors. Whether you're managing a single portrait or need to edit an entire photoshoot, Lightroom simplifies the process, especially if you’re wondering how to whiten teeth in Lightroom or asking, "How do I whiten teeth in Lightroom?"
Unlike Photoshop, Lightroom uses presets and brushes, which make the process much faster. This creative suite makes it ideal for users searching for a teeth whitening photo editor that doesn’t require masking or layer adjustments. With just a few clicks, you can easily make teeth whiter in a photo while preserving natural color tones.
Pros & Cons
Lightroom is a beginner-friendly teeth-whitening photo editor that works excellently for batch edits. Here's your easy guide:
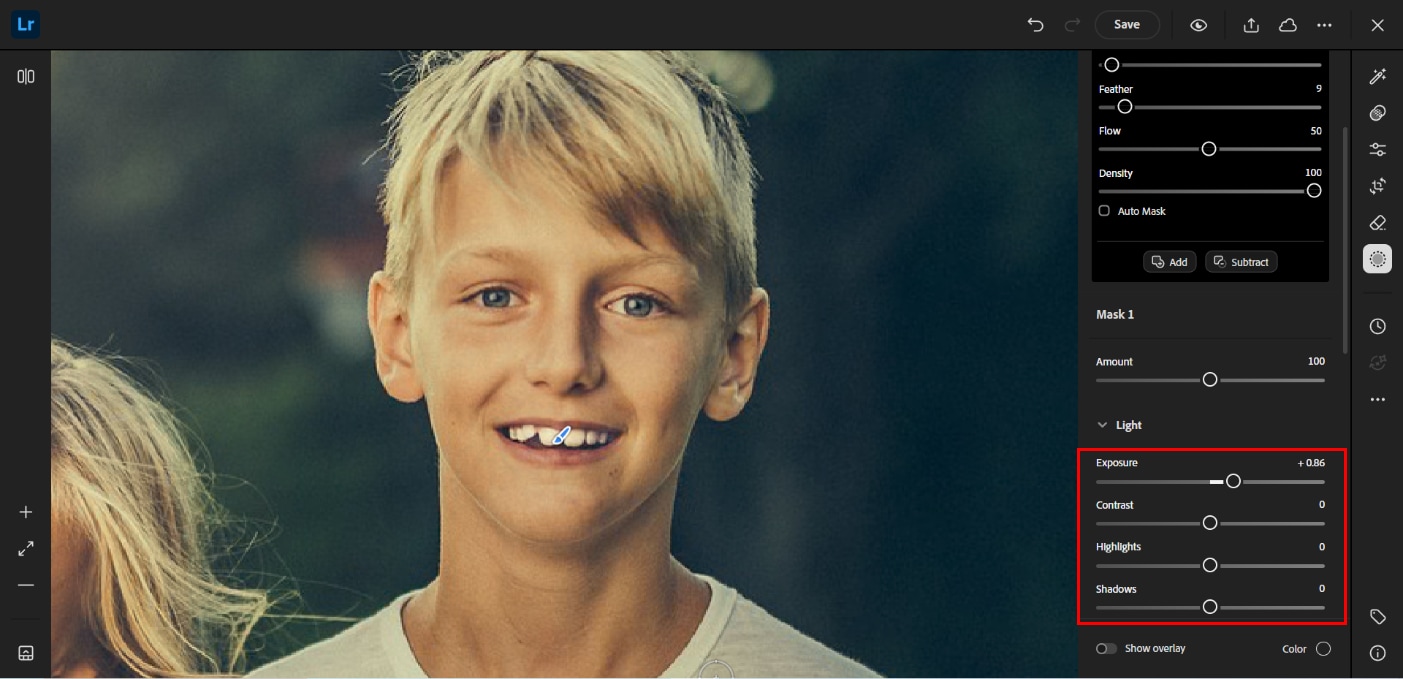
Step 1: Import Your Photo and Select Adjustment Brush Open Lightroom and select the “Adjustment Brush” under the “Masking” section. Choose the teeth whitening area by highlighting it with a brush and selecting it to see the magic
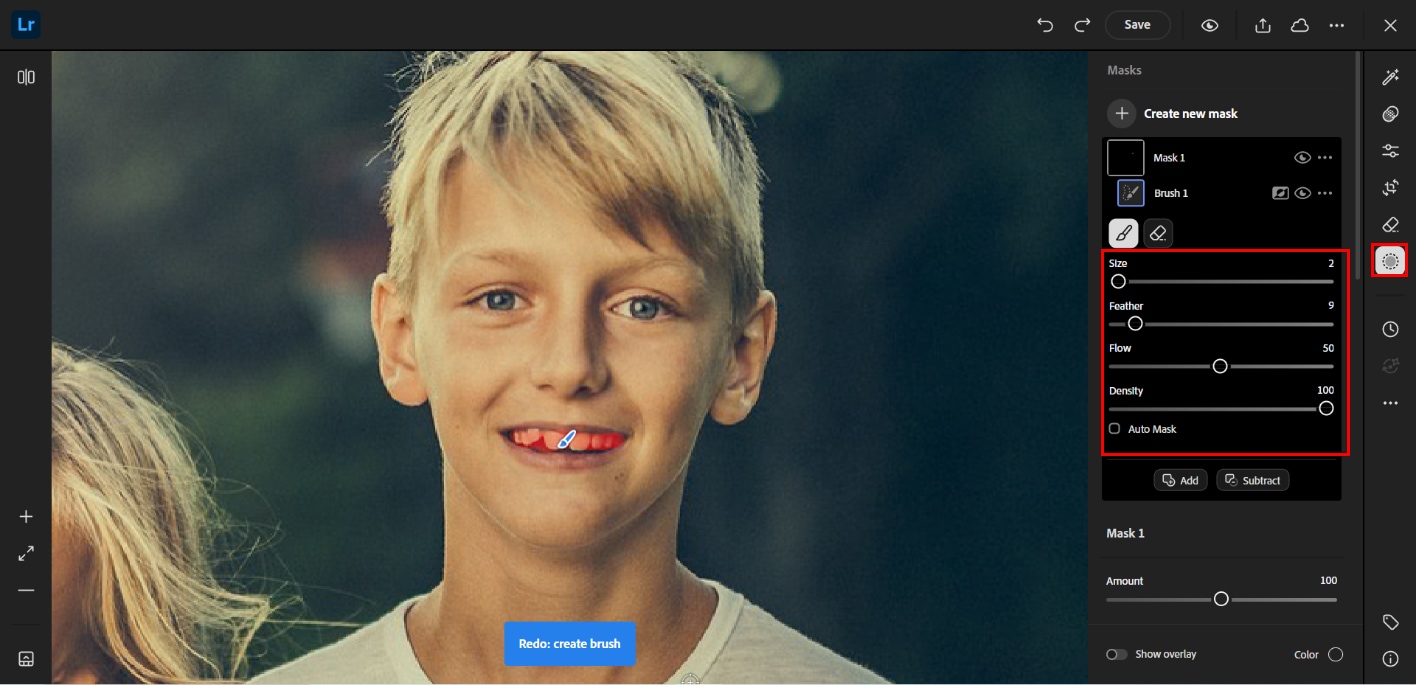
Step 2: Adjust the Paint Over Teeth Area Zoom in and gently brush over the teeth. Adjust sliders for exposure and warmth to achieve a natural result—no need for manual layering. You can also select multiple photos and hit “Sync Settings” to apply the same whitening effect across all—perfect for consistent photo sets

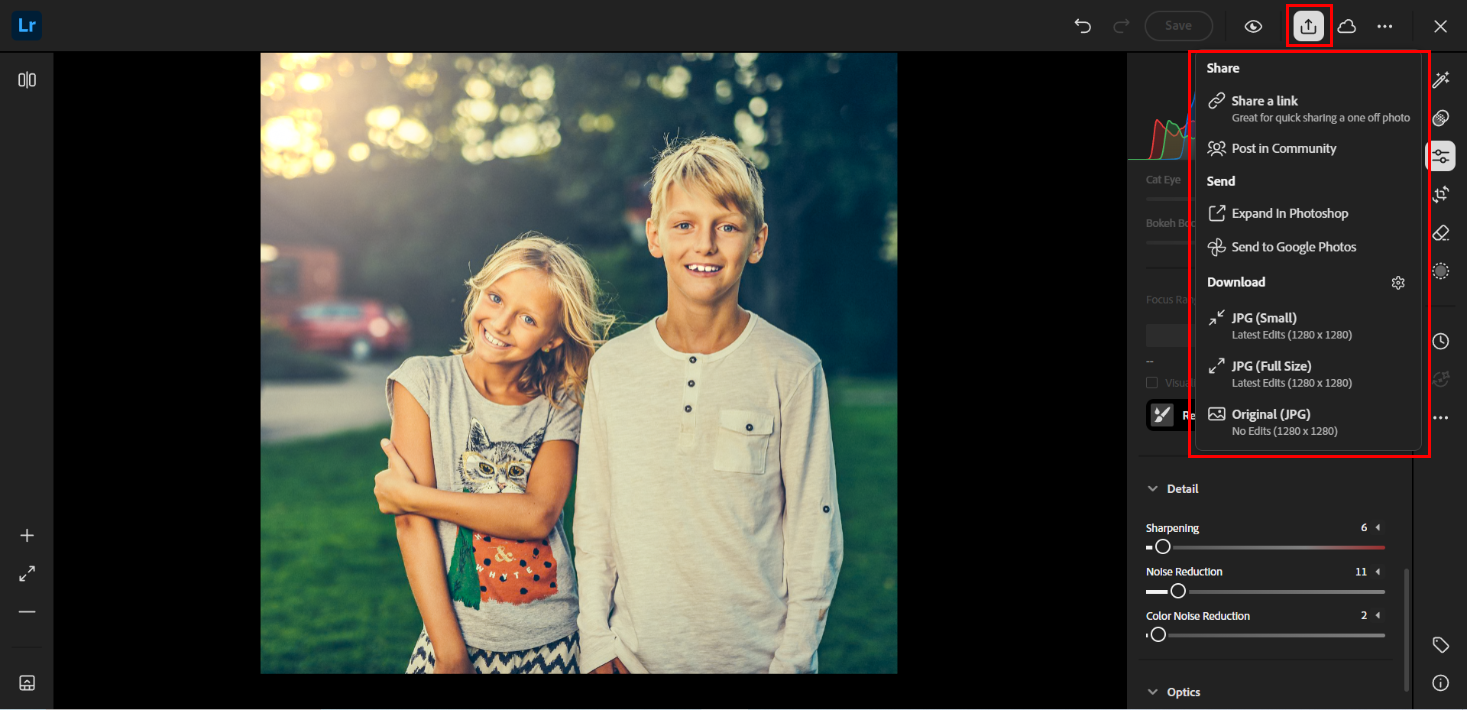
Whether you're using it for social media portraits or business headshots, Lightroom gives you the tools to whiten teeth in pictures quickly and beautifully. And with built-in AI presets, it’s often the best teeth-whitening photo editor online free alternative for creatives on a budget.
Up next: Want to edit on your phone with minimal effort? Jump to Part 4 to learn how to whiten teeth in photos using the PicsArt app.
Part 4. How to Whiten Teeth in Picsart (Mobile)
If you’re on your phone and searching for a quick way to whiten teeth in photo, Picsart is one of the most accessible options available. Ideal for social media users, beginners, or influencers, it’s both a free teeth whitening app and a complete teeth whitening photo editor wrapped into one. Whether you're on Android or iOS, this versatile tool allows you to make teeth whiter in photo edits with just a few taps.
Picsart’s Retouch tool includes a dedicated Teeth Whiten feature that enhances your smile automatically. If you've been wondering how to whiten teeth on a photo without needing advanced skills, this app has your answer. It also appeals to users searching for a free online photo editor teeth whitening tool but need something more portable.
Even if you’ve never edited a photo before, the intuitive UI guides you through each step. It’s beneficial for casual use or if you're editing selfies, family photos, or group shots on the go. For anyone looking to whiten teeth on photos without Photoshop, this app is a perfect alternative.
Pros & Cons
Whether you're editing vacation photos or selfies, Picsart can assist you in achieving natural-looking white teeth with the convenience of an online photo editor.

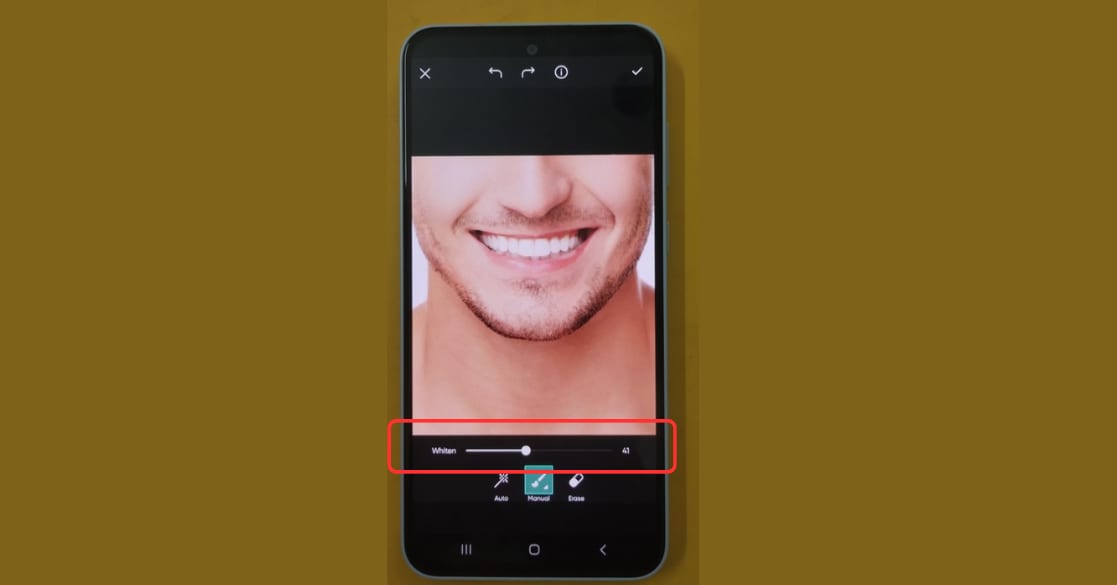
Step 2: Brush Over Teeth Area Use your finger or stylus to cover the teeth gently with the “Manual” option. You’ll see them brighten as you go—even beginners can produce natural results

Picsart proves that you don’t need expensive software to get outstanding results. Whether you’re using it as a free teeth whitening photo editor online or a mobile-friendly alternative to teeth whitening Photoshop tools, it delivers fast, quality edits. And for those wondering how to make teeth whiter in pictures without subscriptions, Picsart is a top choice.
Conclusion
When it comes to how to whiten teeth on a photo, the method you choose depends on your device, skill level, and how many photos you’re editing. For beginners or professionals who want immediate, batch-friendly results, UniConverter stands out as the easiest and most innovative solution. Its AI-enhanced workflow, batch editing tools, and image enhancement capabilities are perfectly aligned with what modern users want—fast, private, high-quality edits. For professionals seeking granular control, Photoshop and Lightroom are excellent options, while mobile apps such as PicsArt offer fast and practical teeth-whitening features directly in your photos. Whether you’re a beginner or a pro, UniConverter helps you make teeth whiter in photos without compromising detail. Skip the hassle of manual edits—try UniConverter for brighter, cleaner smiles in every shot.
Easy to Use Batch Object Remover for Win and Mac
FAQs
-
1. What’s the best free teeth whitening photo editor online?
For desktops, UniConverter offers a free trial. PicsArt and Snapseed are dependable and cost-free on mobile devices. -
2. Can I batch whiten teeth without manual brushing?
Yes—UniConverter’s AI tools automatically detect and correct smiles across entire batches. -
3. Is there an online-only tool that does teeth whitening?
Services like Fotor and Pixlr are web-based, but UniConverter works offline and produces higher-quality results. -
4. How do I whiten my teeth in Lightroom?
Use the Adjustment Brush, select the Teeth Whitening preset, brush over the teeth, and export—quick, easy, and precise. -
5. Is UniConverter safe?
Yes. It runs offline, saves images in high resolution, and its AI tools are beginner-friendly and privacy-conscious.

