iPhone Tips
- TRY IT FREE TRY IT FREE
- 1. Transfer Tips+
-
- 1.1 How to Import Videos From iPhone to Mac
- 1.2 How to Transfer Videos From Mac to iPhone
- 1.3 Mail Drop iPhone
- 1.4 Convert iPhone to Android
- 1.5 How to Send Video From iPhone to Android
- 1.6 How to Send Video From iPhone Without Losing Quality
- 1.7 Import Video to iPhone
- 1.8 How to Upload Video to iPhone
- 1.9 How to Add Videos to iPhone
- 1.10 Transfer MP4 to iPhone
- 1.11 How to Transfer GoPro Videos to iPhone
- 2. Edit Photos on iPhone+
- 3. Edit Videos on iPhone+
-
- 3.1 iPhone Video Format
- 3.2 iPhone Supported Video Formats
- 3.3 Reduce Video Size iPhone
- 3.4 Resize video iphone
- 3.5 How to Trim a Video on iPhone
- 3.6 How to Clip a Video on iPhone
- 3.7 iPhone Video Upside Down
- 3.8 Change Video Orientation iPhone
- 3.9 Zoom Video iPhone
- 3.10 How to Merge Videos on iPhone
- 3.11 How to Brighten a Video on iPhone
- 3.12 Play MKV on iPhone
- 3.13 Remove Audio from Video iPhone
- 3.14 How to Remove Sound from iPhone Video
- 4. Convert Video to iPhone+
- 5. Other Tips+
5 Easy Ways to Remove Audio from iPhone Video
by Christine Smith • 2026-01-21 18:55:14 • Proven solutions
To remove audio from video iPhone, media must be either copied to your Windows or Mac or imported to a media editor iOS app installed on your smartphone itself. In either case, learning the process of how to remove audio from iPhone videos is pretty simple and straight forward as long as the software you are using has simple UI and is capable enough to handle the files efficiently. Here, you will learn five easiest ways to remove sounds not only from iPhone videos but from any footage that you may have captured or received from any source.
- Part 1. How to Remove Audio from iPhone Video with Wondershare UniConverter
- Part 2. How to Remove Audio from iPhone Video with Wondershare Filmora
- Part 3. 3 Best Apps to Remove Audio from iPhone Video
Part 1. How to Remove Audio from iPhone Video with Wondershare UniConverter
As the name suggests, UniConverter by Wondershare is a universal conversion tool that can convert files to their other relevant formats in order to make them playable on compatible devices or media players as needed. First unveiled in 2009, Wondershare UniConverter can now support 4K videos with up to 60 fps (frames per second), that, at the time of this writing, is the highest display resolution present in the industry.
To remove audio from iPhone videos with Wondershare UniConverter, you can follow the steps given below.
 Wondershare UniConverter - All-in-one Video Toolbox

- Remove audio from iPhone video on Mac/Windows easily without losing quality.
- Edit iPhone videos easily with trimming, cropping, cutting, adding subtitles, applying effects, etc.
- Support 1000+ video formats like MP4, AVI, WMV, FLV, MKV, and more others.
- Convert videos to optimized preset for almost all devices, like iPhone, iPad, Huawei phone, etc.
- 90X faster conversion speed than common converters with unique APEXTRANS technology.
- Burn and customize videos to your DVD or Blu-ray disc with free DVD menu templates.
- Download or record videos from YouTube and other 10,000+ video sharing sites.
- Versatile toolbox: Add video metadata, GIF maker, video compressor, and screen recorder.
- Supported OS: Windows 10/8/7/XP/Vista, macOS 11 Big Sur, 10.15 (Catalina), 10.14, 10.13, 10.12, 10.11, 10.10, 10.9, 10.8, 10.7, 10.6.
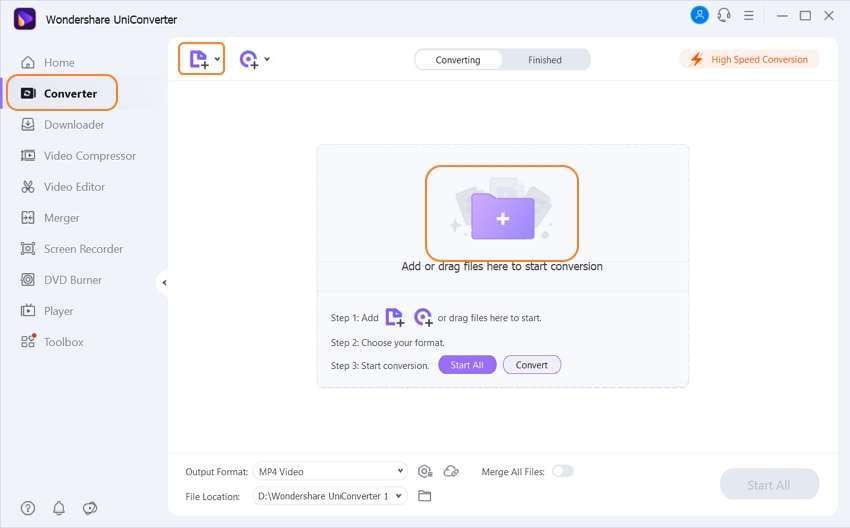
Step 1 Click add files to import video clips.
Start Wondershare UniConverter on your Windows or Mac computer, make sure that you are on the Converter window (check that the Converter tile is selected from the top), click the  icon (the huge folder symbol at the center), and use the Open box to locate, select, and import the video file you want to remove audio from.
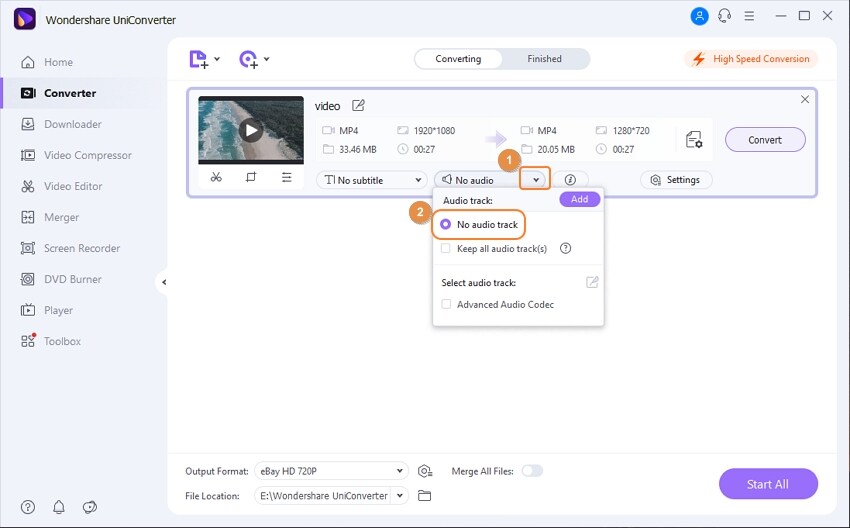
Step 2 Uncheck the audio boxes to remove audio and produce the video.
Click the English-Advanced Audio Codec list from under the Target section of the window in the left, uncheck the Select all audio track(s) box (notice that the English-Advanced Audio Codec box is automatically unchecked), and click anywhere outside to close the menu. Notice that the caption of the menu has now changed to No audio.
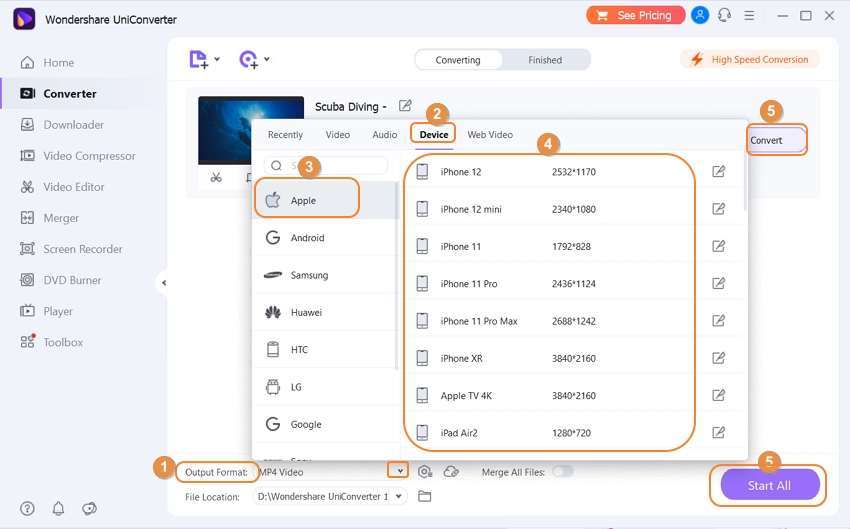
Step 3 Select iPhone as output format.
Click to open the Output Format menu from the bottom-left corner of the Video Converter window, select Device from the top, select Apple from the left pane of the Device menu, and click your iPhone model from the right (iPhone Xs, Xs Max for this tutorial). Specify a destination folder for the modified video in the File Location field at the bottom, and click Convert to remove audio from video iPhone will play after the file is produced.
Part 2. How to Remove Audio from iPhone Video with Wondershare Filmora
Another dynamic and robust product by Wondershare, Filmora, is a video editing and post-production solution for professionals to produce industry-standard videos and movies that could be telecasted or broadcasted on various screens for both personal and commercial purposes. Available for both Mac and Windows platforms, the software has a plethora of built-in presets and effects to customize and beautify the footage before they are released for the target audience.
You can learn the process of how to remove audio from iPhone video with Wondershare Filmora by following the steps given below:
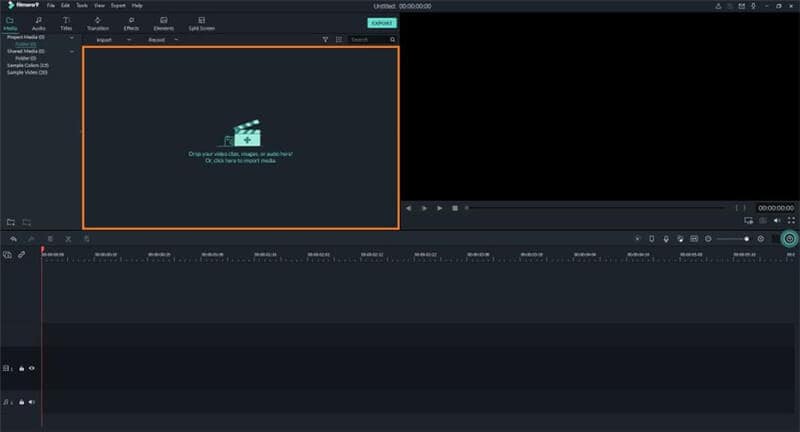
Step 1: Click Media Bin to Import Source Video.
Launch Wondershare Filmora on your Mac or Windows computer, click anywhere inside the Media Bin present at the upper-left section of the interface, and use the Open box to import a video file that needs the audio be removed from.
Step 2: Add Video to Timeline.
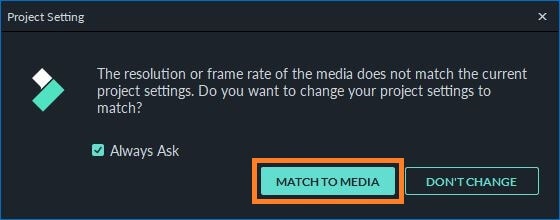
Hover mouse to the video you imported in the previous step, click the + icon that appears in the middle of the thumbnail, and click MATCH TO MEDIA on the Project Setting box to add the video to the Timeline at the lower section of the window.
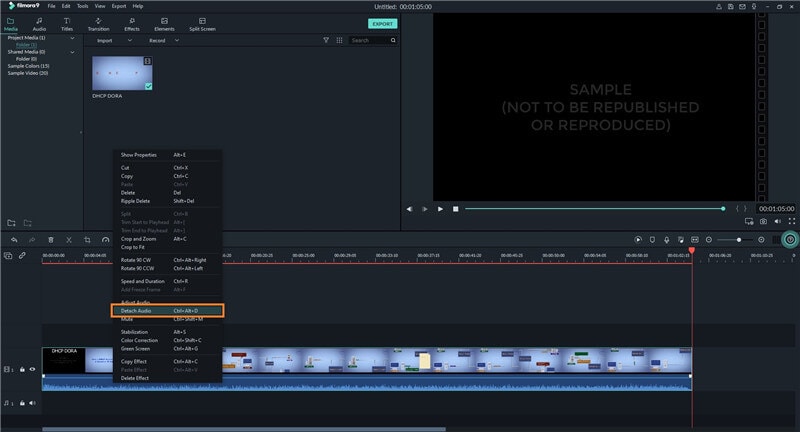
Step 3: Right-Click the Video and Remove Audio.
Right-click the video in the Timeline, and click Detach Audio from the context menu. Next, right-click the audio track in the Timeline, and click Delete to remove audio from iPhone video.
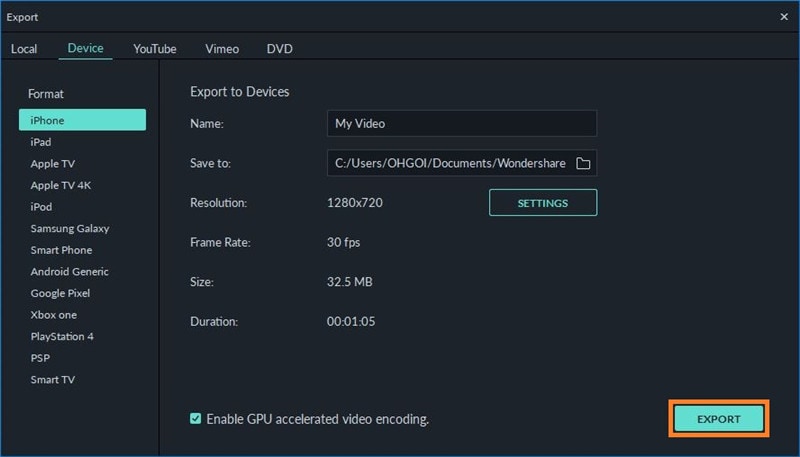
Step 4: Click EXPORT and Save the Video
Click EXPORT from the top-center of the interface, click Device from the top of the Export box, select iPhone from the left pane, adjust other settings and the output folder in the right, and click EXPORT from the bottom-right corner of the box to remove audio from video iPhone will play post exporting.
Part 3. 3 Best Apps to Remove Audio from iPhone Video
If you don’t want to remain depended on a laptop of a desktop computer merely to remove audio from iPhone video or other basic audio or video editing tasks, you can try any of the following iOS apps that can be installed on your iPhone and can serve the purpose well:
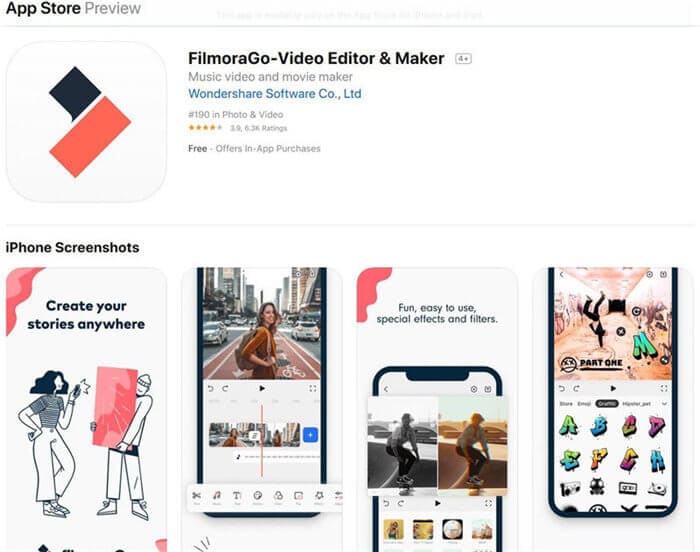
- FilmoraGo
The iOS variant of Wondershare Filmora, FilmoraGo, is as robust as its elder sibling for PCs. Also, the process of how to remove audio from video iPhone has is almost identical to that of Filmora. Some other useful tasks that FilmoraGo can do right on your iPhone include adding filters, adjusting video display, adding a video clip on top of an existing video to produce Picture-in-Picture footage, adding stickers and texts, and much more.
- iMovie
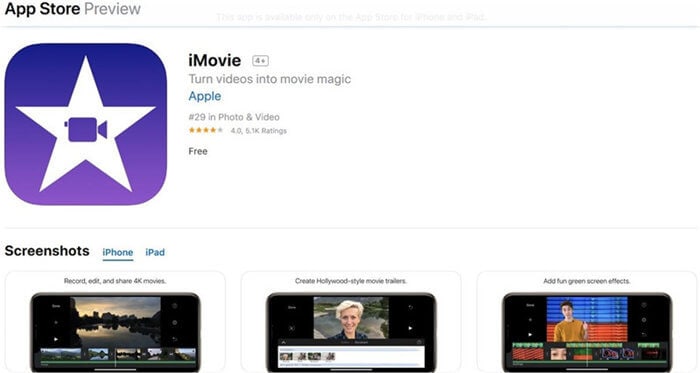
iMovie is an Apple’s proprietary product that is available for both iOS devices and Mac desktop and laptop computers and is absolutely free to download and use. In addition to making the process of how to remove audio from iPhone video extremely easy, the iOS version of iMovie also lets you choose your preferred trailer template from its library to produce industry-standard movie trailers, add slow-motion and fast-forward effects to the footages, transfer your projects to your other iDevices and Mac computer(s) using iCloud Drive or AirDrop, etc.
- Video Editor with Music Star
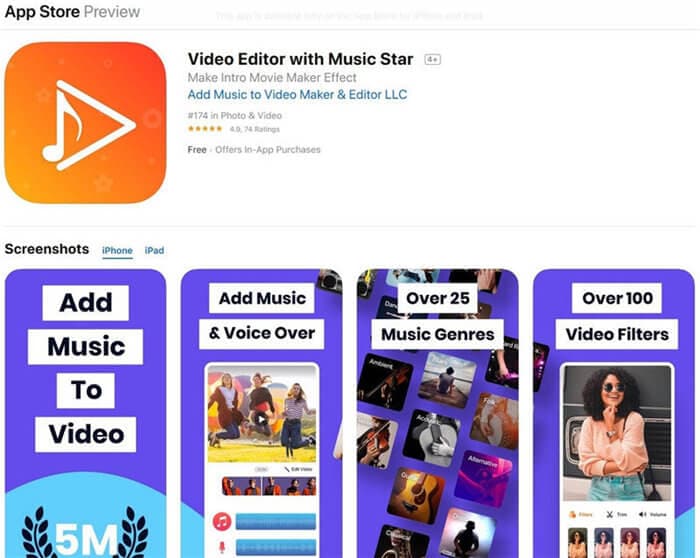
With a 4.5-star rating from around 6.7K reviews, Video Editor with Music Star is designed to add your own music or audio effects to an existing video clip. Because of this, the app puts the audio of the imported videos to mute by default, thus making the entire audio removal process pretty straightforward. To simplify, all you need to do is import a video file to the app and save it to your iPhone. That’s it. Apart from this, the program also lets you add your own voice, trim audio, and video, add more than one audio track to the video clips, etc.
Conclusion
Although the mobile apps offer ease of access when you want to remove audio from video iPhone has in a playlist, nothing can compete for the efficiency and robustness that the computer programs offer, especially the tools like Wondershare UniConverter and Wondershare Filmora that are designed and developed precisely for the purpose.

Christine Smith
chief Editor