Your Complete Video Toolbox
Wondershare UniConverter
- Reduce video size smaller on Windows and Mac easily.
- Compress and convert 1,000+ video formats without any quality loss.
- Transfer videos to iPhone/Android/Windows Phone from PC/Mac via a USB cable.

iPhone Tips
- TRY IT FREE TRY IT FREE
- 1. Transfer Tips+
-
- 1.1 How to Import Videos From iPhone to Mac
- 1.2 How to Transfer Videos From Mac to iPhone
- 1.3 Mail Drop iPhone
- 1.4 Convert iPhone to Android
- 1.5 How to Send Video From iPhone to Android
- 1.6 How to Send Video From iPhone Without Losing Quality
- 1.7 Import Video to iPhone
- 1.8 How to Upload Video to iPhone
- 1.9 How to Add Videos to iPhone
- 1.10 Transfer MP4 to iPhone
- 1.11 How to Transfer GoPro Videos to iPhone
- 2. Edit Photos on iPhone+
- 3. Edit Videos on iPhone+
-
- 3.1 iPhone Video Format
- 3.2 iPhone Supported Video Formats
- 3.3 Reduce Video Size iPhone
- 3.4 Resize video iphone
- 3.5 How to Clip a Video on iPhone
- 3.6 iPhone Video Upside Down
- 3.7 Zoom Video iPhone
- 3.8 How to Merge Videos on iPhone
- 3.9 How to Brighten a Video on iPhone
- 3.10 Play MKV on iPhone
- 3.11 How to Remove Sound from iPhone Video
- 4. Convert Video to iPhone+
- 5. Other Tips+
How to Use Mail Drop on iPhone(Step-by-Step)
by Christine Smith • 2026-06-23 14:38:54 • Proven solutions
With Mail Drop iPhone can send large files to the recipients via email attachments. In most cases, these gigantic files are Full HD (1080p) or Ultra HD (4K) video footages in High-Efficiency Video Coding () format that have been recorded via professional or 4K cameras.
Considering the above, here you will learn what is Mail Drop on iPhone and how to use Mail Drop on iPhone to send large attachments to the target email recipients. After reading this, you will have a clear understanding of the concept of the Mail Drop feature, its limitations, and the best workaround if your iPhone refuses to send a file as a Mail Drop attachment.
- Part 1. What is Mail Drop on iPhone
- Part 2. How to Use Mail Drop on iPhone in Easy Steps
- Part 3. When Can’t Use Mail Drop to Transfer Files
- Part 4. Best Alternative Recommended to Compress Large Files for Email
Part 1. What is Mail Drop on iPhone
Available in any iPhone running iOS 9.2 or above, Mail Drop is a feature that uses iCloud storage of your Apple ID, and automatically comes into play when you attempt to use the Mail app on your phone to send a file as an email attachment, but the size of the file exceeds the limit supported by your email service provider. For example, if you have configured your Gmail account with the Mail app on your iPhone, and the file that you want to send is larger than 25 MB (25 MB is the maximum file size that Gmail allows its users to send via mail as an attachment), the app prompts you to use Mail Drop instead.
With Mail Drop on the iPhone can easily send the files that are as big as up to 5GB in size. When these files are sent via Mail Drop, they remain available for the target recipients for the next 30 days, after which they are automatically removed from the server.
Part 2. How to Use Mail Drop on iPhone in Easy Steps
The process of using Mail Drop on the iPhone is extremely simple and straightforward. What you do is, you compose your email and attach a large file normally. However, you are prompted to use Mail Drop to send the attachment when you tap the “Send” icon, and the Mail app detects that the email server it is configured with does not support the size of the file you are trying to transfer. You can follow the steps given below to use Mail Drop on iPhone while sending a large file to the recipient(s):
Step 1: Launch the Mail App and Compose a New Mail.
On your iPhone, tap the Mail icon to launch the app, tap the New Mail icon from the bottom-right corner, populate all the fields with their relevant information, and type your message in the available box.

Step 2: Tap the Attach File Icon and Upload a File.
Once you are done typing your message, tap the More icon (<) from the right corner of the suggestion bar, tap the Attach File icon, and locate and tap the file you want to send as an attachment. (A small part of 45MB of a large video file is used for this demonstration.)

Step 3: Tap Send and Choose Mail Drop for File Attachment.
Tap the Send icon (Up arrow) from the top-right corner, and tap Use Mail Drop from the box that pops up at the bottom to use Mail Drop on iPhone to send a part of a large video file to the recipient(s).

Part 3. When Can’t Use Mail Drop to Transfer Files
As mentioned before, Mail Drop on iPhone automatically comes into the picture when the email service provider has specified some size limit for the files a user can attach to a mail. However, even Mail Drop has certain limitations. The feature allows a maximum of 5GB of the file(s) per the attachment and a maximum of 1TB of overall files regardless of the recipients or number of emails.
With that said, listed below are certain situations when you cannot use Mail Drop on iPhone to transfer the files:
- If the file you are trying to send is larger than 5GB in size
- If the overall limit of file transfers hits the threshold of 1TB
For optimum utilization of your iCloud space, the files sent via Mail Drop are automatically removed from the server after 30 days. This means you can start using Mail Drop on iPhone again to send more files to your friends and colleagues as soon as the lifespan of attachments has expired, i.e., after 30 days of sending, and iCloud has recovered its space by removing the file(s) from its server.
Part 4. Best Alternative Recommended to Compress Large Files for Email
Yes, Mail Drop on iPhone does a pretty good job when it comes to sending large files to the recipients via emails. But what if its efficiency isn’t sufficient because you need to send some videos that exceed the size limit defined for Mail Drop? The answer is, Wondershare UniConverter!
Formerly known as Wondershare Video Converter Ultimate, Wondershare UniConverter is not merely a tool to convert the files, and it is also equipped with many other programs that can help you perform almost all the media related tasks such as screen recording, streaming video/audio downloading, video editing, and much more. The best thing is, UniConverter works pretty well in conjunction with Mail Drop in a way that you can use the program to reduce the size of the videos with negligible quality loss, and then transfer those clips to your family, friends, and colleagues via Mail Drop on iPhone.
 Wondershare UniConverter - Your Complete Video Toolbox for Windows/Mac

- Compress large videos to small size without losing any quality.
- Support 1,000+ video/audio formats to compress and convert such as MP4/MKV/AVI/MOV/MP3/WAV and more.
- Edit videos with features of cropping, trimming, rotating, adding watermarks, and others.
- Transfer videos from PC/Mac to iPhone/Android/Windows phone easily via a USB cable.
- Download videos from YouTube and other 10,000+ video sharing sites by pasting URL.
- Supports batch processing to compress and convert multiple files at a time.
- Toolbox with additional functions like CD Burner, VR Converter, GIF Maker, Fix Media Metadata, and more.
- Supported OS: Windows 10/8/7/2003/Vista/XP, Mac OS 10.15 (Catalina), 10.14, 10.13, 10.12, 10.11, 10.10, 10.9, 10.8, 10.7, 10.6.
Although you can use the built-in editor to trim the videos in order to decrease the file size, this cannot always be the case as many times the footage may contain important details that you cannot afford to lose. This is where the video compression process comes into the picture. In fact, there are two methods to compress video files using Wondershare UniConverter, and both of them are explained below:
Method 1: From the Convert Window
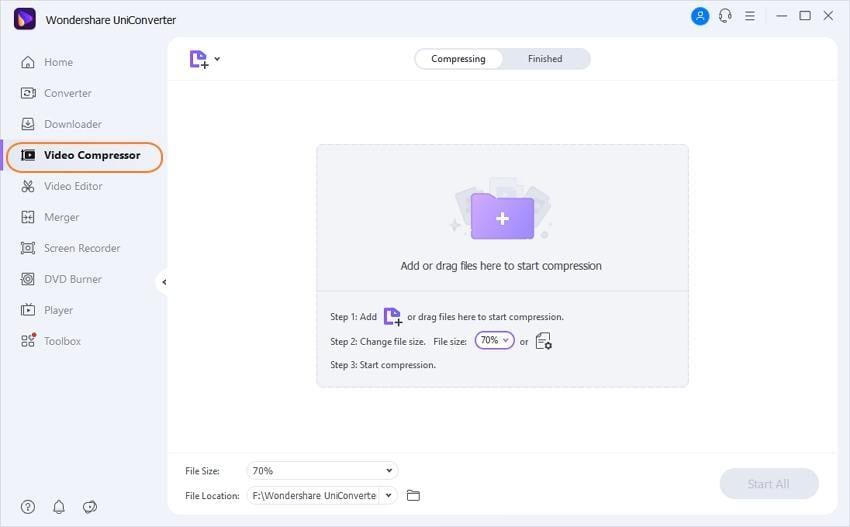
Step 1 Click Add Files and Import a Large Video.
Start Wondershare UniConverter on your computer, click the +Add Files icon from the Video Compressor window, use the Open box to browse and select the video you want to compress, and click Open from the bottom of the box to import the file to the UniConverter’s window.
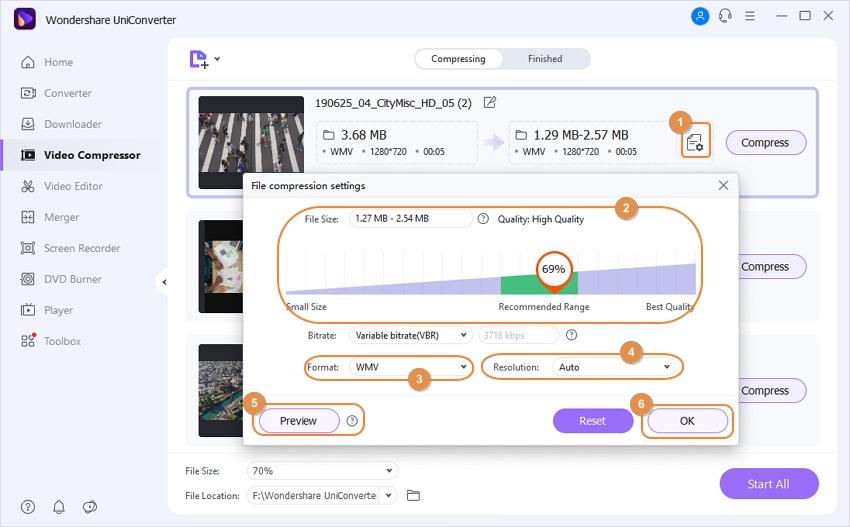
Step 2 Click the Compress Icon and Reduce the Video Size.
Click the Compression icon from under the Target section of the video you imported, and move the slider on the Your preferred output size box to the left to reduce the size. Notice how the values in the other fields change automatically when you move the slider.
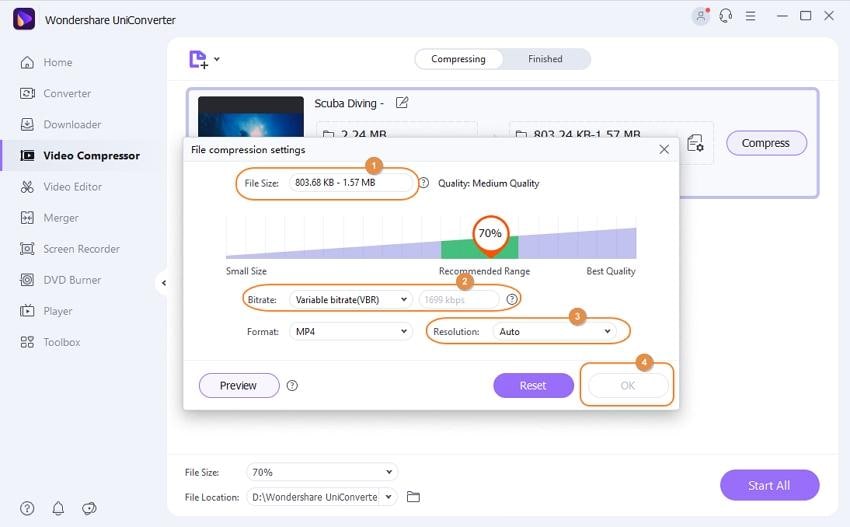
Step 3 Click OK to Save the Changes and Convert the Video.
Click the Preview button to preview the modified video for the quality you can expect post-compression (optional), and click OK to save the changes if the new size seems acceptable to be transferred via Mail Drop on iPhone. You can now choose your preferred output format from the Output Format menu from the bottom-left corner and click Convert to compress the video.
Method 2: Using the Compress Video Box
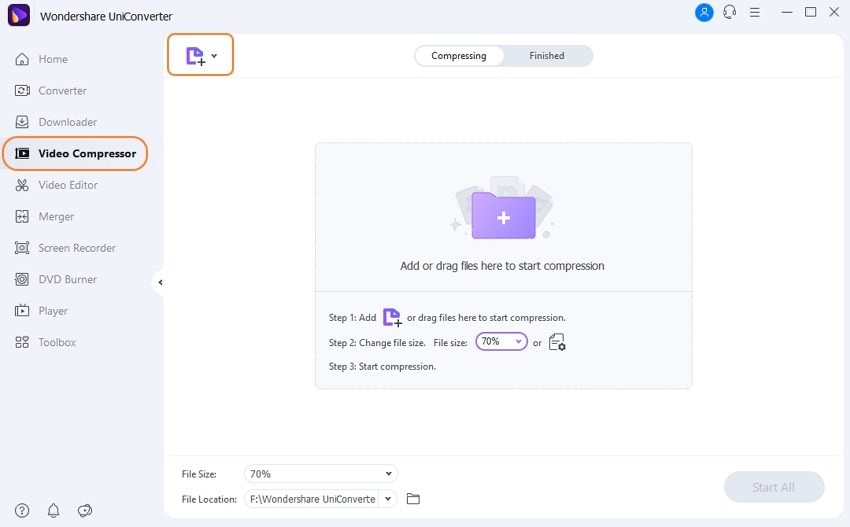
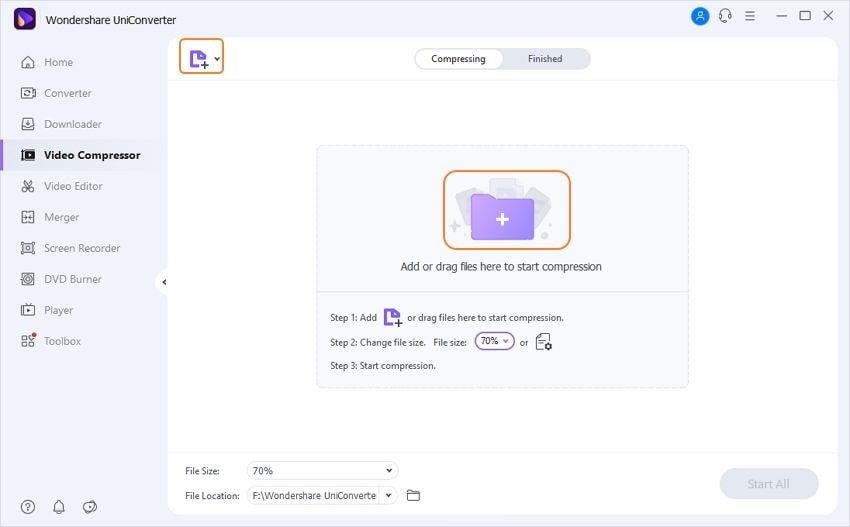
Step 1 Click Video Compress on the Video Compressor Tab.
Launch Wondershare UniConverter if it isn’t already started, go to the Video Compressor tab from the main menu.
Step 2 Click Add Files and Compress the Video.
Click the +Add Files icon, and use the method explained earlier to import the video you want to compress. Next, move the slider (from the top-right area of the box) to the left to reduce the size of the video. As before, notice the changes in the values in the other fields to adjust the slider accordingly.
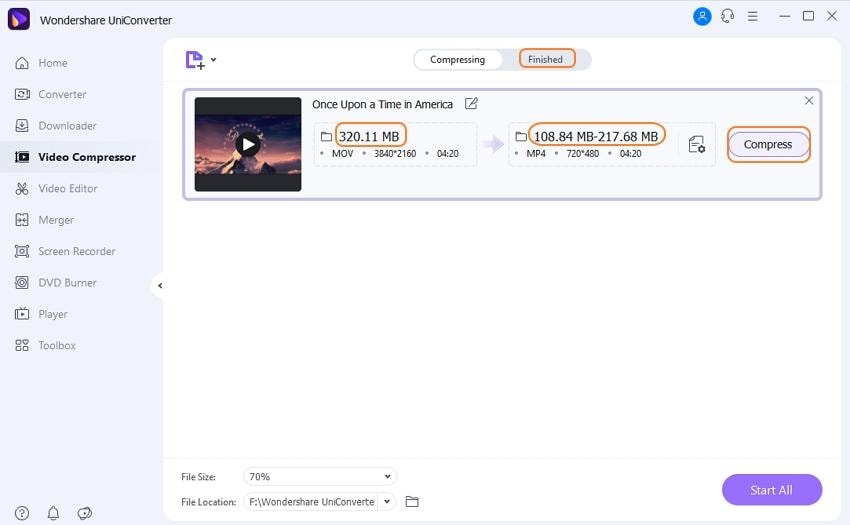
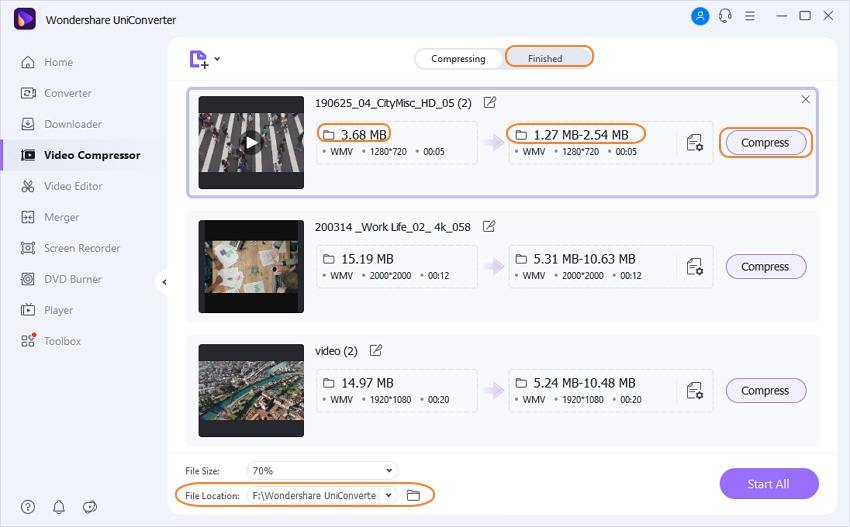
Step 3 Define the Output Folder and Begin Compression.
Use the File Location field to define a folder on your PC where you want to save the compressed video, and click Compress from the bottom to begin compressing the footage that can be used to transfer via Mail Drop on iPhone. You can always use the Preview button to check the video quality you can expect post-compression.
Conclusion
As long as your video is of 5GB or less in size, you can use Mail Drop to transfer it without making any changes. On the other hand, if the clip exceeds the given size limit, Wondershare UniConverter is the most recommended program to help you compress the footage before sending it to the target audience via Mail Drop iPhone has in the Mail app.
- Practical tips to tell you how to use Clownfish properly
- The most elaborate review of AV Voice Changer in 2026
- 8 Best VR Video Converters: Convert 2D to VR & VR to Normal (Free & Paid)
- How to Transfer GoPro Videos to iPhone in Simple Ways
- The Most Completed Voxal Voice Changer Review in 2026
- Powerful Top 14 voice changer for different ports: PC/Mobile/Online
- 15 Best Voice Remover Online and Offline in 2026 You Must Try
- Removing Vocals from a Song Has Never Been Easier!
- Top 6 CD Burners for Windows XP Recommended in 2026


Christine Smith
chief Editor