Your Complete Video Toolbox
Wondershare UniConverter
- Best video converter to convert GarageBand File to MP3, MP4, AVI, MKV and other 1000 formats.
- Transfer converted GarageBand File from PC/Mac to external devices easily via a USB cable.
- Download videos from YouTube and other 10,000+ video sharing sites.
- Additional functions such as Video Compressor, Screen Recorder, CD Burner, Cast to TV, etc.
MP3 Converter
- TRY FREE TRY FREE
- 1. Convert MP3 to Other Format+
- 2. MP3 Tools & Tips+
-
- 2.1 MP3 Converter for Mac
- 2.2 MP3 Converter
- 2.3 Free MP3 Converter
- 2.4 MP3 Player
- 2.5 Best MP3 Players
- 2.6 Convert iTunes to MP3
- 2.7 CD to MP3 iTunes
- 2.8 Convert DVD to MP3
- 2.9 Convert Spotify Playlist to MP3
- 2.10 MP3 to Text Converter
- 2.11 MP3 Converter for Android
- 2.12 Download MP3 to iPhone
- 2.13 Free YouTube to MP3 Converter
- 2.14 Export Audacity to MP3
- 2.15 Convert MIDI to MP3
- 2.16 Convert SoundCloud to MP3
- 2.17 Convert Voice to MP3
- 2.18 MP3 Sites
- 2.19 Upload MP3 to YouTube
- 2.20 MP3 Cutter
- 2.21 Online MP3 Size Reducer
- 2.22 MP3 Tag Editor
- 2.23 Save Garageband File in MP3
- 2.24 MP3 Recorder
- 2.25 Remove Vocals from MP3
- 2.26 Clip to MP3
- 2.27 Top MP3 Editors
- 2.28 Video to MP3 Converters for iPhone
- 2.29 Convert link to MP3
- 2.30 Video to MP3 Apps for iPhone and Android
- 2.31 Free MP3 to MP4 Converter Apps
- 2.32 Convert Recording to MP3
- 2.33 Free MP3 Song Converters
- 2.34 MP3 Extractors
- 2.35 Music to MP3 Converters
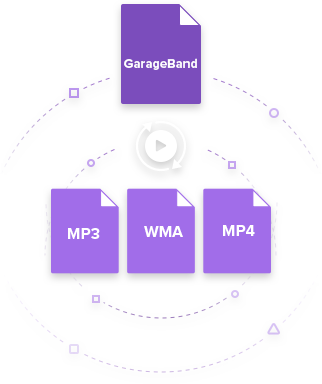
How to Export GarageBand to MP3
by Christine Smith • 2026-06-23 14:38:28 • Proven solutions
As is known, GarageBand is so popular that has seen some award-winning artists come up with a hit song with its help. Umbrella created by Rihanna using GarageBand loops is such a big success. Surely, the all-in-one features are the main reason making it well-known. Here we'd like to give you an all-round introduction over how to export GarageBand to MP3 and other all around questions.
- [Tool Overview] GarageBand is a powerful digital music studio for creating, recording, and editing audio on Mac and iOS.
- [Export Process] Audio projects can be exported via the Share option and saved in formats like MP3 for wider compatibility.
- [Format Options] GarageBand supports export to MP3, AAC, WAV, and AIFF depending on quality and use case.
- [Efficient Solution] Wondershare UniConverter enables further conversion, compression, and sharing across 1000+ formats and devices.
- Part 1. What is GarageBand
- Part 2. How to Export a Podcast as MP3 in GarageBand
- Part 3. How to Convert GarageBand File to various format with Wondershare UniConverter
- Part 4. How to Record Your Voice with GarageBand
- Part 5. How to Share GarageBand Files
- Part 6. Tips for Maximum Quality GarageBand MP3 Export
- Conclusion
- FAQ
Part 1. What is GarageBand
GarageBand is a digital music studio developed by Apple for macOS and iOS. Novice and professional artists can use this software to create music. It is built with instruments, voice, percussionists and drummers. All these virtual musical instruments make it easier to express your musical creativity and come up with a hit song. You can also record instruments as well as voices and share them. GarageBand works with iPhone and iPads that run iOS 10.3 and above. For Mac OS, it supports Mac OS X 10.11 and above.
Tip: You can check on Apple website for older versions that are compatible with older versions of Mac.
Part 2. How to Export a Podcast as MP3 in GarageBand
Once you have created your music and audios, which could be podcast on GarageBand, you may wish to have them on your mobile device. However, the produced on GarageBand can only be played on Garage thus you will be forced to convert them to other formats. Considering MP3 is an ideal audio format compatible with the most devices, to export the podcast to MP3, you can export to iTunes first and then export to MP3 from iTunes afterward. In the following section, we'll show you how to export GarageBand to MP3.
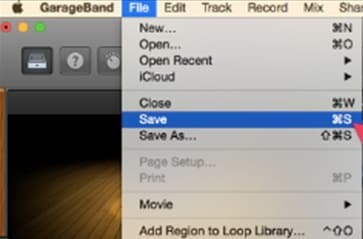
Step 1. First, ensure that you have saved the created podcast on GarageBand. To save, click on File on the main menu and select Save option.
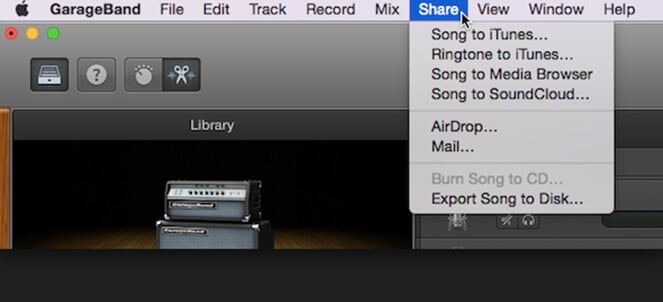
Step 2. After you have saved the file, you can begin the process of exporting your podcast. Click on the Share button on the main menu and then select Exporting Song to Disk button.
Step 3. Then a Exporting Song to Disk window would pop up requiring you to specify the location to save your podcasts and output format. Enter the title of the podcast, give a tag, location on your computer and then check on MP3 format. You can also select a preferred output quality and click on Export button.
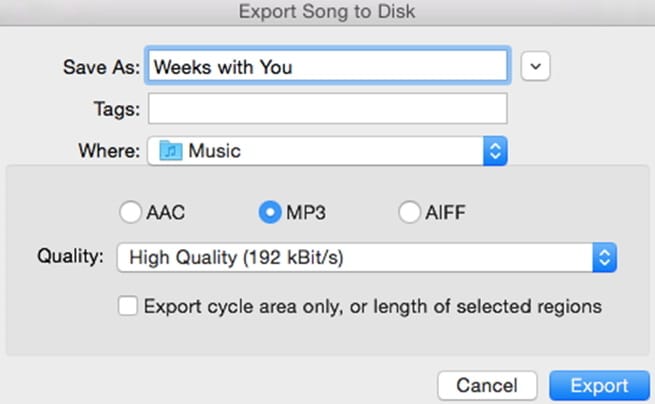
Step 4. Garage band will automatically export the podcast and you will be able to see the bouncing and exporting progress on a new window. After hese simple steps you can successfully export Garageband to MP3.
Once the process is complete you can locate the converted podcast on the location you had identified.
Part 3. How to Convert GarageBand File to various format with Wondershare UniConverter
GarageBand exported files are restricted formats like AIFF, AAC, and MP3. Therefore, when you are working on a website that supports MP4 formats only, and you want to upload content that you have created on GarageBand, you will be forced to convert the files. The best way to convert audio to various formats is by using media converter like Wondershare UniConverter.
 Wondershare UniConverter
Your Complete Video Toolbox

- Convert GarageBand File to 1000+ formats, like AVI, MKV, MOV, MP4, etc.
- Convert GarageBand File to an optimized preset for almost all of the devices.
- 30X faster conversion speed than any conventional converters.
- Edit, enhance & personalize your videos file.
- Burn video to playable DVD with attractive free DVD template.
- Download or record videos from video sharing sites.
- Versatile toolbox combines fix video metadata, GIF maker, VR converter and screen recorder.
- Stream your videos from Windows or Mac to other devices, including Chromecast, Roku, Apple TV, Xbox 360 or PS3.
- Supported OS: Windows 10/8/7/XP/Vista, macOS 11 Big Sur, 10.15 (Catalina), 10.14, 10.13, 10.12, 10.11, 10.10, 10.9, 10.8, 10.7, 10.6.
Wondershare UniConverter not only converts videos and audios to different formats but supports compressing and converting videos to devise formats like iOS, Androids phone, Game consoles, DVDs, and social networks. Therefore, if you plan to share GarageBand files to YouTube, Vimeo, or Facebook, it is undoubtedly your top choice. Without further ado, let us have a look on how to convert GarageBand files to MP4 with Wondershare UniConverter for Mac.
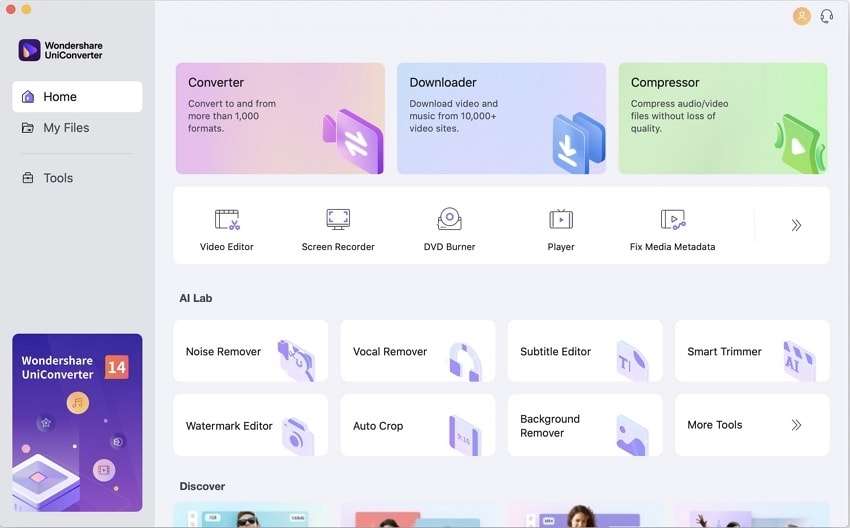
Step 1 Launch Wondershare UniConverter.
Download Wondershare UniConverter via the download button above, follow the instruction to install it then open the installed program to get the primary interface.
Step 2 Upload Exported AIFF GarageBand File.
Tap the Video Converter section on the top and then click on the ![]() button. Alternatively, you can drag and drop the file to the program.
button. Alternatively, you can drag and drop the file to the program.

Note: Wondershare UniConverter supports batch conversion, so you can add a single file or folder of files.
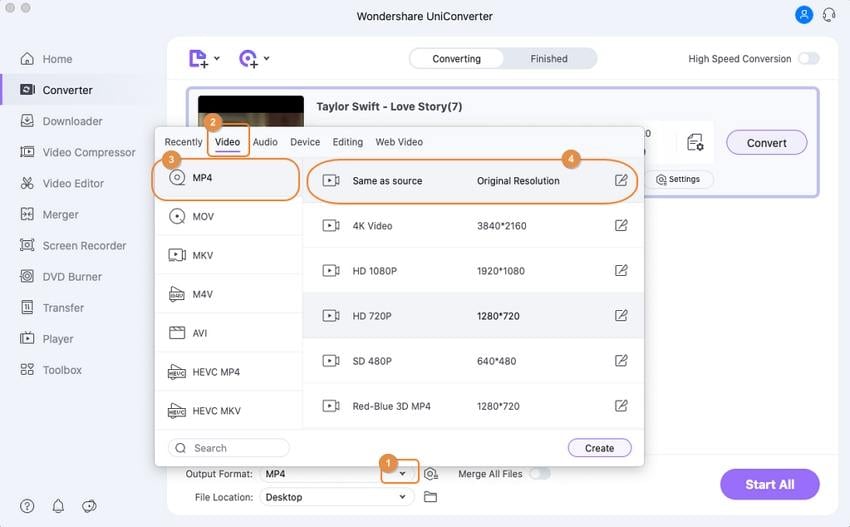
Step 3 Set Output Format.
To choose the output format, click on Output Format: to expand output formats, and then select Audio > MP4 format.
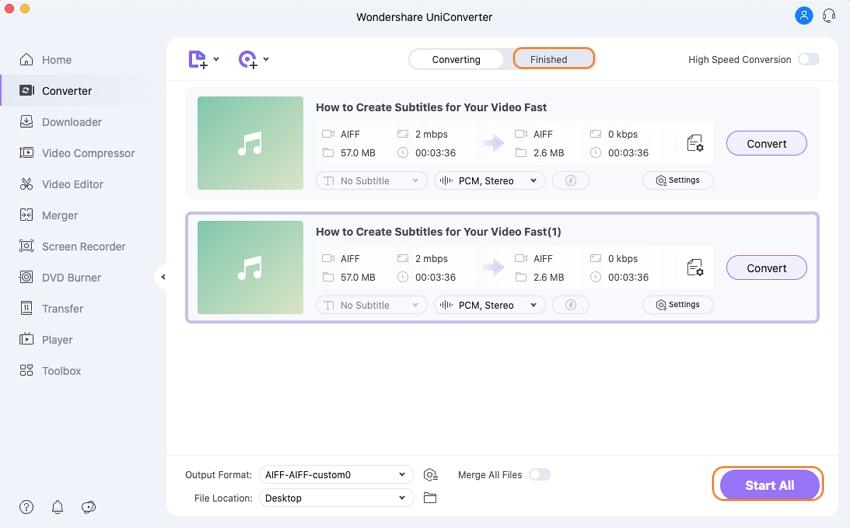
Step 4 Convert GarageBand Files to video format easily.
Finally, you can click on the Start All button in the bottom right start GarageBand file to MP4.
Part 4. How to Record Your Voice with GarageBand
Are you eager to record a voice with GarageBand? Well, it is pretty simple to follow these steps.
Step 1. Download and launch GarageBand software on your computer under Applications folder.

Step 2. On the home screen, click on New Project and select Empty Project.

Step 3. Next, you will have to select tack type. Go to audio and select Microphone option and then click on Create button.

Step 4. A works space window will appear on the screen. Here you will have to select the header of your audio.

Step 5. Next, you need to set the starting point of your recording and the metronome. After that click, on the red REC button to begin recording your voice.

Part 5. How to Share GarageBand Files
GarageBand also lets you share your projects with friends and family. You can send the songs to iTunes, iCloud, SoundCloud, mails, AirDrop or media browser. Let us see some of the ways that you can share your files.
1. Share to SoundCloud
After saving your project on GarageBand, just follow the simple clicks below.
- Click on the Share button on the main menu and select Song to SoundCloud, You will be redirected to SoundCloud.

- Sign in to your account or create an account, then you can upload and send your file.

2. Share to Mail
The presence of the Mail app on your computer makes it easy to share files.
- Click on Share on the GarageBand and select Mail option, then GarageBand will the process your file.

- Next, enter the recipient and a subject of the mail. You can also add a creative message before sending it.

Now you can record, convert and share your GarageBand recordings effortlessly.
Part 6. Tips for Maximum Quality GarageBand MP3 Export
Getting the highest quality export from GarageBand is crucial to ensure your music sounds professional and polished when you share it. Here are essential tips for exporting MP3 files at maximum quality.
Tips for Maximum Quality MP3 Export
The goal with MP3 is to find the perfect balance between manageable file size and audio fidelity.
1. Start with a Great Mix
No export setting can fix a bad mix. Before you export, ensure your levels are balanced, there's no clipping (red lights in the level meters), and you're happy with the sound. Use Mastering presents in GarageBand (found in the Master Track) for a final polish.
2. Use the Right Export Settings in GarageBand
For the absolute best MP3, export an AIFF master first (as described above). Then, use a dedicated audio converter app like XLD (X Lossless Decoder, free) or iTunes/Apple Music to convert that AIFF to a 320 kbps MP3. Many professionals argue these dedicated tools have slightly better encoders than GarageBand's built-in one.
3. Normalization: Be Careful!
-
In the export window, you'll see a "Normalize" option. Setting it to "On" will make your track as loud as possible without clipping.
-
Tip for Max Quality: For maximum dynamic range and fidelity, turn normalization Off. Normalization can sometimes make a track sound overly compressed and lifeless. If you've mixed and mastered your song to a good volume yourself, you don't need it.
Conclusion
We now have made a thorough overview of how to use GarageBand to create, export, and share music and audio projects, with practical steps to export Garageband to MP3 format for maximum compatibility and ease of sharing. It emphasizes simple conversion using GarageBand's built-in export features and highlights external tools like Wondershare UniConverter for broader format support when needed, ensuring users can effortlessly distribute their creations across devices, services, and platforms. The guide ultimately empowers both beginners and experienced users to make the most of GarageBand’s creative capabilities and export options for various content-sharing needs.
FAQ
What formats can GarageBand export or convert to?
GarageBand allows users to export songs in several formats:
- MP3: Compressed and suitable for sharing or uploading online.
- AAC: Another compressed format, also good for sharing.
- WAV/AIFF: Uncompressed formats best for mastering and retaining sound quality.
Choose the format most appropriate for your needs; WAV/AIFF for the highest quality, MP3/AAC for smaller file size.
How do I export GarageBand project files?
- Go to the Share menu.
- Select Export Song to Disk.
- Pick your desired format (MP3, AAC, WAV, or AIFF).
- Decide quality and save location, then click Export.
Why does GarageBand exporting sometimes fail or not work?
Exporting or saving may fail due to a full GarageBand project folder, software bugs, or incompatible media. Workarounds include:
- Removing files from the GarageBand folder.
- Using alternate share options, such as sending the song to Music or email.
- Copying all content to a new project and trying again.
How do I import or convert audio files for GarageBand?
GarageBand accepts AIFF, WAV, AAC, Apple Lossless, and MP3 formats, but some MP3s (like those from YouTube converters) may not work. To fix incompatible files:
- Convert them using Audacity or similar software before import.
- Change the file extension to .wav, if necessary, for basic compatibility (note: this is not true conversion).
What's the best format to export for maximum quality?
For best quality, choose WAV or AIFF formats, which are lossless and standard for professional use or mastering.
How can I export my GarageBand project for video platforms like YouTube?
GarageBand exports audio files only. To upload to video platforms, use video editors to create a video file from your audio, or distribute through services that automatically generate videos with cover art.
- How to Convert M4A to MP3 in iTunes (Windows/macOS)
- Top 6 MP3 to AAC Converters to Convert MP3 to AAC
- Can't Play MP3 in iTunes? 2 Simple Solutions to Help You Out
- All Ways to Convert MP3 to WAV Free Online [2026]
- Lucida.to Music Download Review: Is It Safe, How It Works, and Better Alternatives
- 4 Widely-used Ways to Convert Audio to MP3
- AAC to MP3-Convert AAC to MP3 with 6 Best AAC to MP3 Converters
- How to Convert MP3 to MP4 Free Easily
- Top 5 Vocal Remover to Remove Vocals from MP3 Recommended


Christine Smith
chief Editor