CD Burner
- TRY IT FREE TRY IT FREE
- 1. Burn Different Formats to CD+
- 2. Other CD Burners +
-
- 2.1 Burn Audio CD Mac
- 2.2 Best Audio CD Burning Software
- 2.3 Music Burning Software
- 2.4 Burn CD to MP3
- 2.5 How to Burn a CD on a Macbook Pro
- 2.6 Burn CD Online
- 2.7 CD Burner
- 2.8 CD Burner Download
- 2.9 CD Burner App
- 2.10 CD Burner for Mac
- 2.11 Audio CD Burner
- 2.12 Linux CD Burner
- 2.13 Free CD Burner
- 2.14 XP Burner
- 2.15 Easy CD Burner
- 2.16 Free MP3 to CD Converter & Burner
- 2.17 CD Burner Windows 7
- 2.18 Windows XP CD Burner
- 2.19 CD DVD Burner
- 2.20 Free CD DVD Burner
- 2.21 Disc Burner
- 3. Other Tips& Tricks+
3 Excellent Ways to Burn Photos to a CD
by Christine Smith • 2026-06-23 14:37:54 • Proven solutions
Ever wondered why you would need to burn photos to CD on Windows 10 or Mac? Well, then you haven’t had a data loss experience, yet. Don’t wait until you accidentally delete your pictures and lose them permanently, start backing up your frozen memories now! Whether you have a Mac or Windows machine, you can burn photos to a CD and avoid the trouble of finding data recovery software to retrieve lost data files. In this article, we will look at how to burn photos to a CD for Windows 10 and burn photos to a CD for Mac users and the best way to go about the burning in the final part. Do you dread ever losing your memories from your childhood or prom dance night or wedding day or road trip you had with your gang? Yes? Then keep scrolling to figure how not to lose these beautiful memories.
- Part 1. Best Way to Burn Photos to CD for Windows
- Part 2. How to Burn Photos to CD for Mac
- Part 3. How to Burn Photos to CD with the Best CD & DVD Burner
Part 1. Best Way to Burn Photos to CD for Windows
In this section, we are going to show you how to burn photos to CD on Windows. The steps to be followed are the same for Windows 8 and advanced versions since their features don’t vary in style so much. You don’t need a manual to use this in-built feature, have a blank Disc and driver at your disposal, and you are good to go.
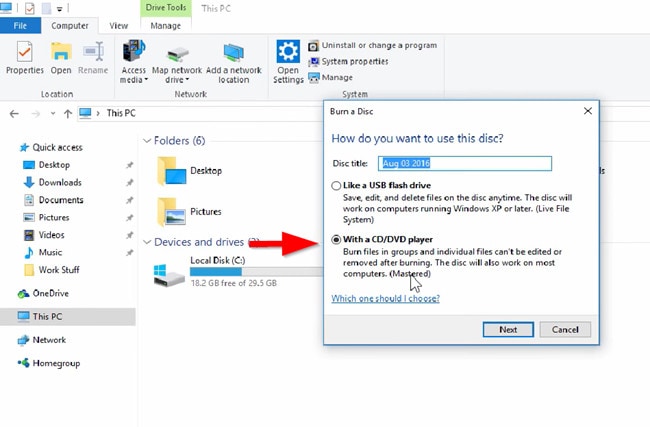
Step 1: First, put a blank Disc into an empty driver. A popup will appear on your screen so that you can decide how you want to use the Disc. If there is no popup, open the File Explorer, then go to This PC and look for your Disc. Double-click on it, and the popup will appear. Now click on With a CD/DVD player then tap on Next.
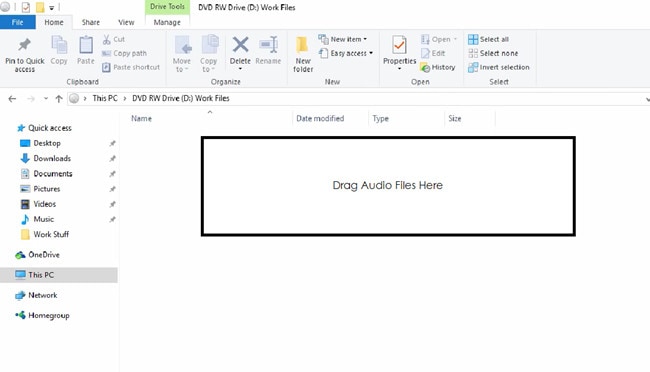
Step 2: On the blank folder that appears, drag and drop the photos and audio files you want to copy to the CD.
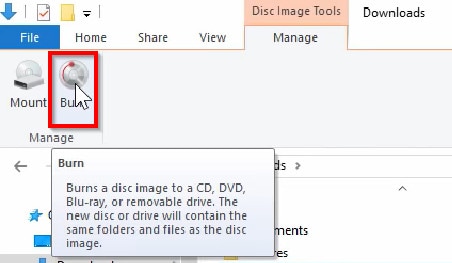
Step 3: Once you are over selecting photo files you want to burn, find the Manage tab on the top right of the screen, and select the Burn icon. Just like that, you get to burn photos to CD on Windows PC!
Your memories are safely stored now. Relax.
Key Features:
- It allows you to immortalize your favorite memories on CD, DVD, or BD.
- It guarantees you security for your files with its pros-with SecurDisc 4.0 technology.
- It will enable you to copy files multiple times while maintaining their original quality.
- It supports a variety of file formats compatible with computers, smartphones, and MP3 players.
Part 2. How to Burn Photos to CD for Mac
Just like in Windows, to burn photos to CD on Mac, you will utilize the built-in feature in Mac OS PC. You don’t need any prior knowledge to go about the copying procedure, plus, if you can burn photos to CD on Windows, then burning pics to CD on Mac is going to be a walkover. Here are the steps to follow:
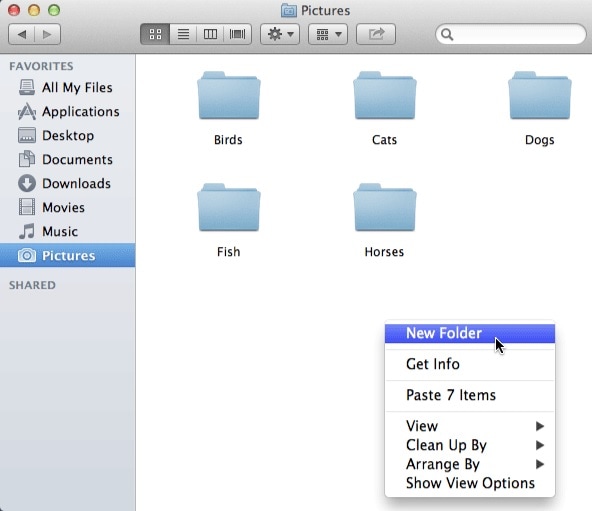
Step 1: Unlike Windows, for Mac OS, you have to create a separate folder that will then get burned onto the Disc. In case you don’t have a folder of the pics you want to burn, create a new one by right-clicking and choosing New Folder from the options.
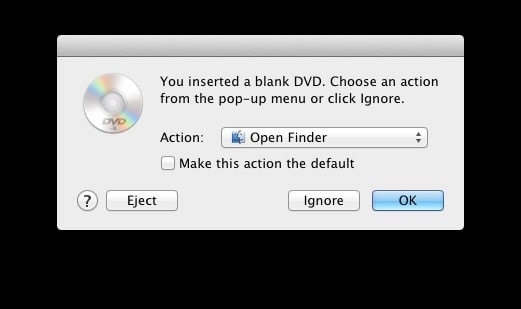
Step 2: With the photo folder created, now insert the Disc you want to burn your photos to. It takes a couple of seconds for the computer to read the Disc and display a popup which you can ignore by tapping on Ignore. Carry on to the next step.
Step 3: Do you remember the folder you created in Step 1? Find it and right-click to open the drop-down menu shown in the screenshot below. From it, choose to Burn _Folder Name_ to Disc.
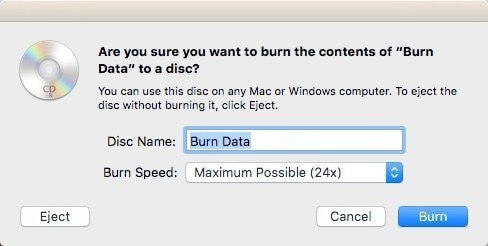
Step 4: Lastly, from the popup window that appears, you will be required to make some choices as follows:
- Disc Name: here, fill in the name of your Disc.
- Burn Speed: select the speed accordingly. Slower speeds are known for producing Discs of higher quality.
When you are satisfied with your choices, tap on Burn to start the burning process. Do not close your Mac or eject the Disc during this process.
Part 3. How to Burn Photos to CD with the Best CD & DVD Burner
Now, if you want to be on the next level when it comes to burning photos to CD on computers, be advised to try out Wondershare DVD Creator. It is designed effectively for Windows and Mac OS. Using this program not only preserves the quality of your media files but also allows you to create both CDs and DVDs effortlessly. So, if you are looking to create brilliant CDs packed with all your precious photos and memories, look no further for Wondershare DVD Creator has got your back.
To burn pictures to CD on PC using this excellent software, follow these four simple steps:
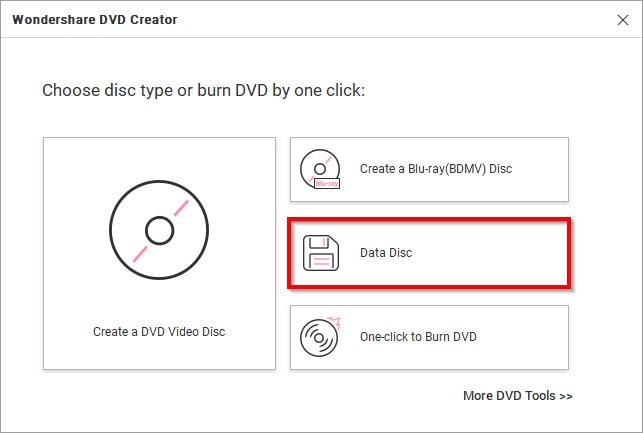
Step 1: Selecting the Disk Drive on DVD converter from Wondershare
After you have launched the program, you will be required to choose a Disc type for burning your photos. Select the Data Disc option.
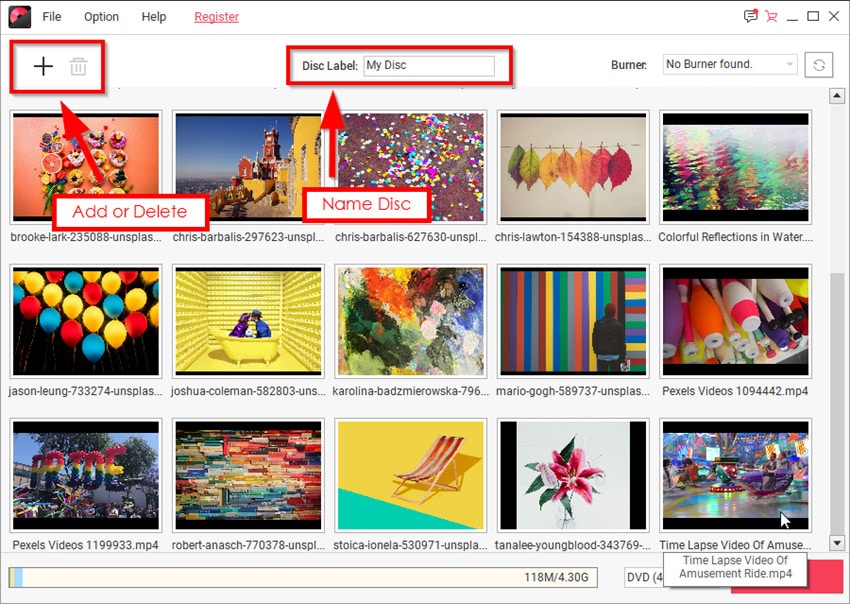
Step 2: Adding Pictures directly or drag-drop
To upload the pictures that you want to burn onto the CD, you can either click on the + (Add) icon or use the drag and drop method to move the files directly.

Step 3: Customizing the Disc
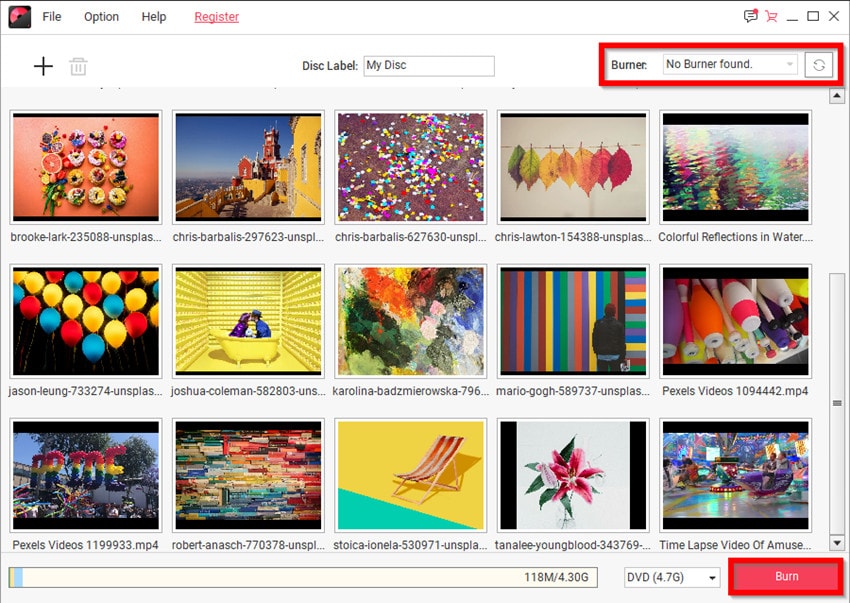
It is optional. However, you must get everything right before you start copying the files. To do so, you can scroll through the uploaded files and utilize the + (add) or Trash icons to add or delete data, respectively. Additionally, you can give the Disc a unique name by filling in the Disc Label box.
Step 4: Selecting Burner
Before starting the copying process, ensure you have a driver with blank Discs to burn the data. You will select it in the Burner menu on the top-right corner of the screen. Next, initiate the burning process by clicking on the Burn button in the bottom right-hand corner of the screen.
Conclusion
So, this marks the end of our article on burning photos to a CD on Windows or Mac. You now know of the various ways to save your data files and have a better insight into what would work best for you. I know what would work best for me too. Yeah, I am thinking of it also, Wondershare DVD Creator!
That’s right. If you want to create a viable CD and maintain the original quality of your photos and other data files, Wondershare DVD Creator is the app to use. So, now no need to get YouTube tutorials on how to use the program thanks to its user-friendly interface.
Let’s burn photos to a CD on Windows 10 and Mac now!
 Wondershare UniConverter
Your Complete Video and Audio Toolbox

- Burn audio files to CD easily on Windows/Mac.
- Work as a metadata management tool to edit video metadata files.
- Convert video to over 1000 formats like AVI, MKV, MOV, MP4, etc.
- Convert video to optimized preset for almost all of the devices.
- 90X faster conversion speed than other common converters.
- Edit, enhance & personalize your videos by trimming, croping videos, add subtitles and watermark, etc.
- Burn video to playable DVD with an attractive free DVD template.
- Download or record videos from 10,000+ video sharing sites.
- Versatile toolbox includes GIF maker, VR converter, and screen recorder.
- Supported OS: Windows 10/8/7/XP/Vista, Mac OS 10.15 (Catalina), 10.14, 10.13, 10.12, 10.11, 10.10, 10.9, 10.8, 10.7, 10.6
- [Solved] How to Play DVDs on Wii Easily
- DVD to iTunes Converter: How to Import DVD to iTunes Quickly
- PAL to NTSC Converter: How to Convert PAL to NTSC or NTSC to PAL Easily
- Cast DVD to Chromecast: How to Stream DVD from PC/Mac to TV via Chromecast
- Top 10 Disc Burner Software Recommended
- Top 5 Audio DVD Burners to Burn MP3 to DVD Easily
- Can PS4 or PS3 Play DVDs? Yes!
- [Solved] Different Solutions to Fix VLC Won't Play DVD


Christine Smith
chief Editor