CD Burner
- TRY IT FREE TRY IT FREE
- 1. Burn Different Formats to CD+
- 2. Other CD Burners +
-
- 2.1 Burn Audio CD Mac
- 2.2 Best Audio CD Burning Software
- 2.3 Music Burning Software
- 2.4 Burn CD to MP3
- 2.5 How to Burn a CD on a Macbook Pro
- 2.6 Burn CD Online
- 2.7 CD Burner
- 2.8 CD Burner Download
- 2.9 CD Burner App
- 2.10 CD Burner for Mac
- 2.11 Audio CD Burner
- 2.12 Linux CD Burner
- 2.13 Free CD Burner
- 2.14 XP Burner
- 2.15 Easy CD Burner
- 2.16 Free MP3 to CD Converter & Burner
- 2.17 CD Burner Windows 7
- 2.18 Windows XP CD Burner
- 2.19 CD DVD Burner
- 2.20 Free CD DVD Burner
- 2.21 Disc Burner
- 3. Other Tips& Tricks+
How to Burn WAV to CD Easily
by Christine Smith • 2026-06-23 14:37:48 • Proven solutions
It is common to come across media players with limited functionalities. Obtaining a quality burning tool's services will play a core role in helping you burn wav files to audio cd without restrictions. Dedicated burning programs also let users not only burn wav to cd but also store then in storage devices like Blu-ray discs and DVDs.
This article will take you through detailed steps on using a recommended wav to audio cd burner called Wondershare Uniconverter. You’ll also get to learn the steps of burning WAV to CD with iTunes and Windows Media Player.
- Part 1. How to Burn WAV to CD with Wondershare UniConverter?
- Part 2. How to Burn WAV to CD with iTunes
- Part 3. How to Burn WAV to CD with Windows Media Player?
Part 1. How to Burn WAV to CD with Wondershare UniConverter?
Wondershare UniConverter (originally Wondershare Video Converter Ultimate) is widely preferred and commonly used as a wav cd burner. The program supports common audio formats like WAV and burns them to discs without any loss in quality. Below is a glimpse of its features and how you can burn wav files to a cd using the program.
Features of Wondershare Uniconverter:
- User friendly: The software has clearly labeled buttons and keys, making it easier to perform functions without looking for help. Its display is also simple and intuitive and accommodates the drag and drop feature.
- File converter: Wondershare Uniconverter turned the previously slow and tedious conversion task into a fast and reliable endeavor. It lets users convert their audio, video, and image files to over a thousand existing ones.
- Device support: It is normally difficult to use files in unsupported devices such as Android and iOS devices. However, this program lets users create files to their native formats, making them compatible with the host device.
- In-built editor: This software lets you go a step further from just converting videos. You will get to perform tasks like rotation, trimming, adding subtitles, and joining videos, among others, before beginning the burning process.
- Compatibility: Wondershare UniConverter lets you sync converted files to other storage devices or stored on iTunes. Hence, you can easily have your converted files presented in different programs and devices.
 Wondershare UniConverter (originally Wondershare Video Converter Ultimate)
Your Complete Audio Toolbox

- Convert video to over 1000 formats like AVI, MKV, MOV, MP4, etc.
- Burn Audio files to CD easily on Windows/Mac.
- Work as a metadata management tool to edit video metadata files.
- Convert video to optimized preset for almost all of the devices.
- Support 90X faster conversion speed than other common converters.
- Edit, enhance & personalize your videos by trimming, croping videos, adding subtitles and watermarks, etc.
- Burn video to playable DVD with an attractive free DVD template.
- Support download or record videos from 10,000+ video sharing sites.
- Versatile toolbox includes GIF maker, casting video to TV, VR converter, and screen recorder.
- Supported OS: Windows 10/8/7/XP/Vista, Mac OS 10.15 (Catalina), 10.14, 10.13, 10.12, 10.11, 10.10, 10.9, 10.8, 10.7, 10.6
Steps of using Wondershare UniConverter:
Step 1 Open the Wondershare Uniconverter program in your device.
If you do not have it, you can easily download and install the program from its main website.
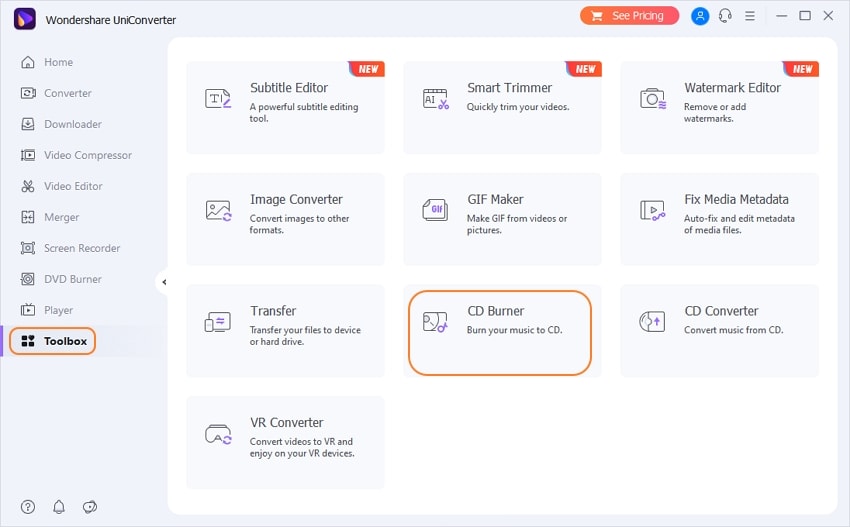
Step 2 Click on Toolbox
Go to the Toolbox option at the top toolbar of the main display, click on it, and then on the CD Burner.
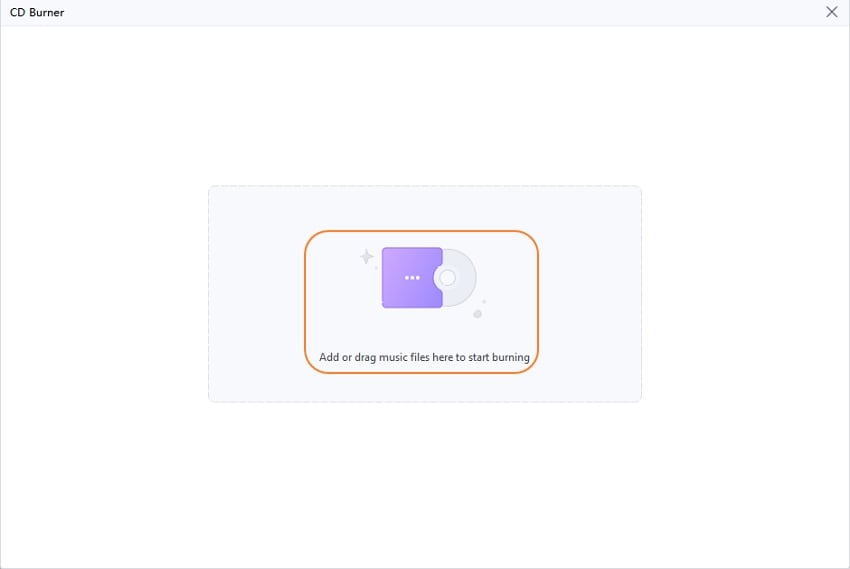
Step 3 Upload Wav Files
A new window will with a + sign be displayed. Click on the sign, and you will be taken to the device storage from where you can upload an audio file(s) to be burned.
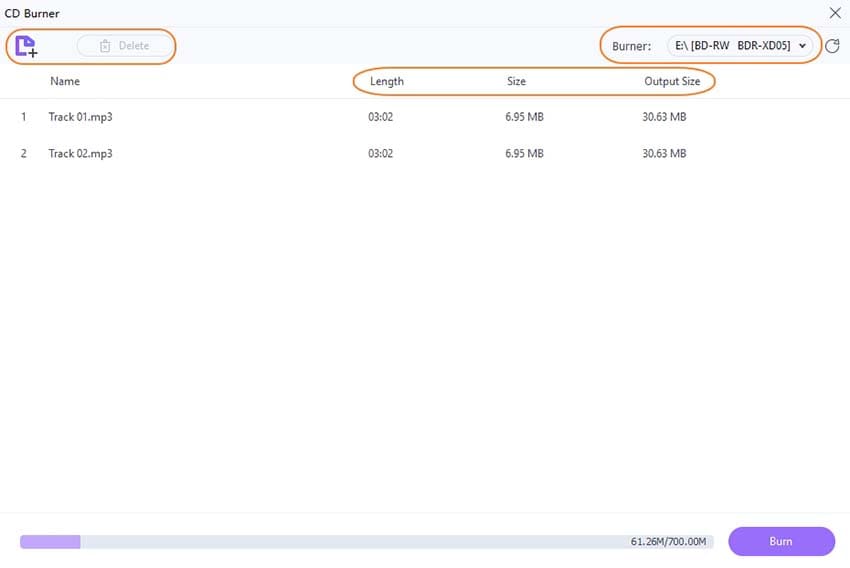
Step 4 You may use the add and delete icons on the top left corner.
The uploaded files that you would have selected will be shown. Before you burn wav to an audio CD, you can add or remove a file(s). Insert an empty CD when all is set. Click on the top-right key to select a burner.
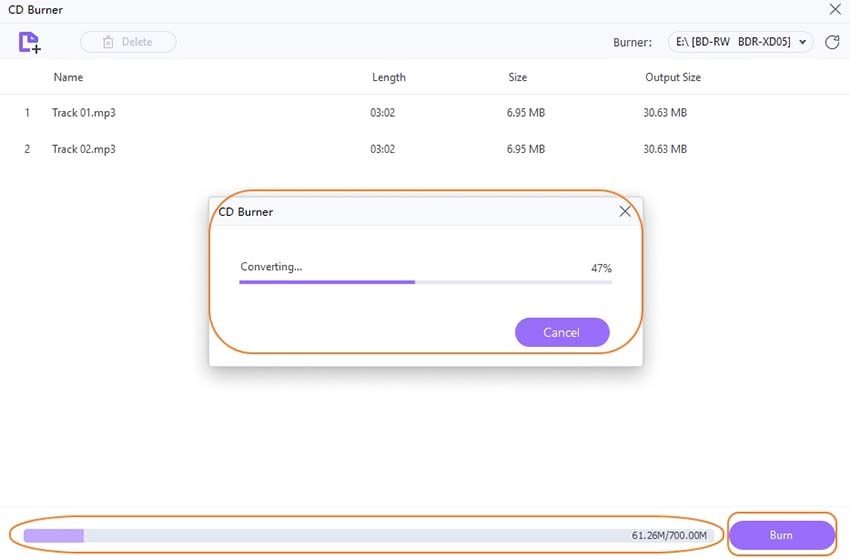
Step 5 Burn the Wav Files
Finally, click on the Burn button to start the process. You will be availed with a message on the screen once the process is done.
Part 2. How to Burn WAV to CD with iTunes
Nowadays, all music and files can be easily stored in our computer devices. But what if you want to share them with friends and family? You can do this through Spotify or Apple Music, but it is sometimes inevitable to avoid the old fashioned way. That is by burning WAV files to CD using iTunes through the following steps;
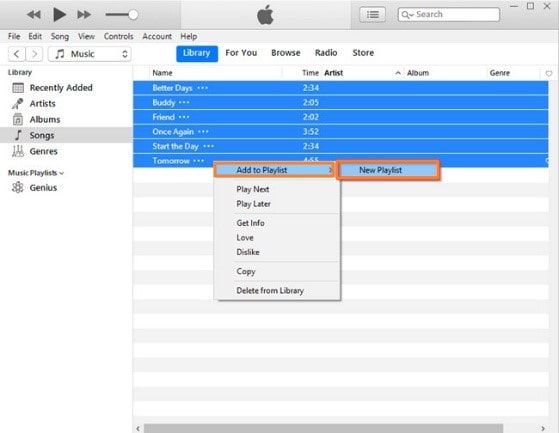
Step 1: After opening iTunes, click on File>New Playlist to make a new playlist.
Use the drag and drop technique to add the WAV files to be burned into the new playlist. The added files will be shown on the left side of the program. Put a blank CD to the CD Drive of your device.
This step will help you develop a new playlist that you will use to burn wav to cd.
Step 2: Start Burning the Files
When the playlist is created, go back to the File menu and click on Burn Playlist to Disc that’s at the drop-down menu.

Step 3: Burn the files
When all the files to be burned has been uploaded, select the playlist and click on Burn.

Step 3: Play the burned files
Remove the disc from your device when the burning process is completed from where you can proceed to play the files on any device of your choice.
Pros
- It’s available for free.
- Available on all Mac devices
Cons
- Limited platforms to be synced with.
- Not quite intuitive display.
Part 3. How to Burn WAV to CD with Windows Media Player?
Windows Media Player is a default Windows program that can easily play and organize various music files. Most people are aware of the MP3 audio format, but WAV is another popular format of audio. This program lets users burn WAV to CD through the following steps:
Step 1: Find the Windows Media Player and open it.
Click on the Start key, then to All Programs.
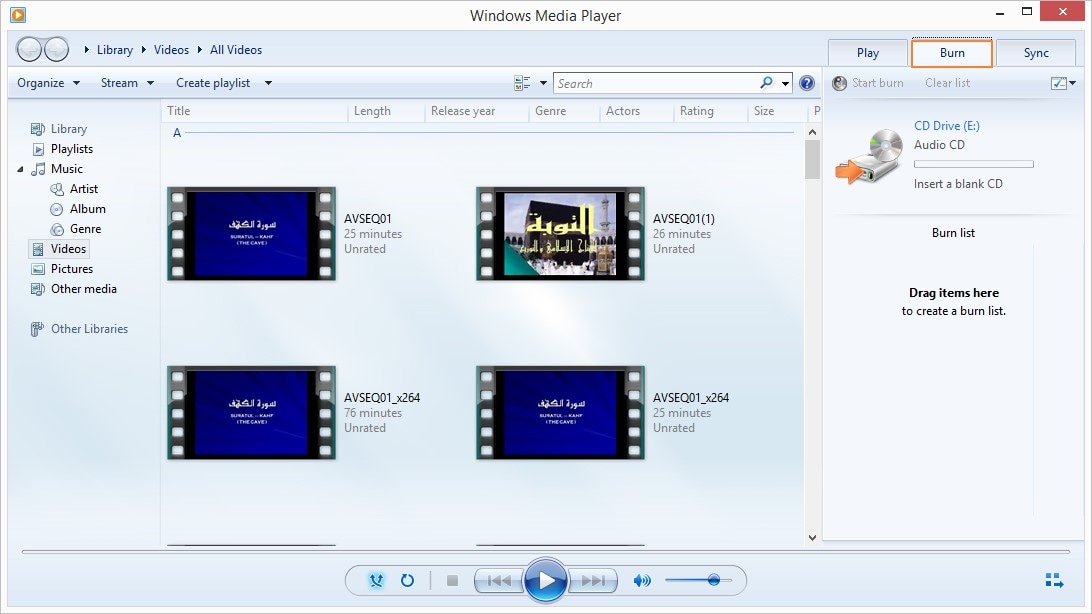
Step 2: Insert an empty CD into the CD drive of your device.
On the top right corner of the Windows Media Player, click on the Burn tab.
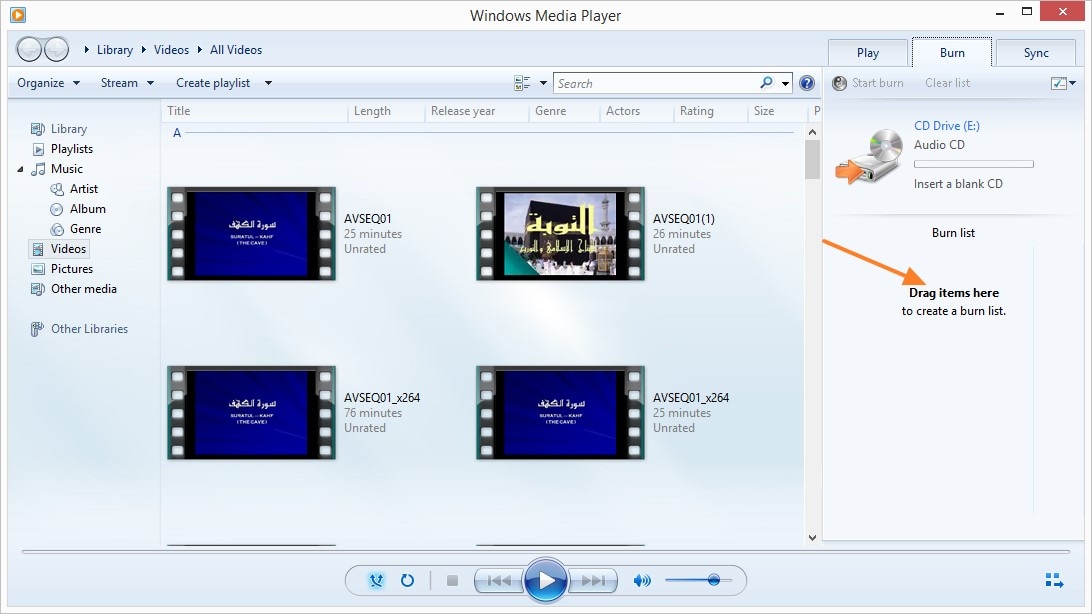
Step 3: Add the wav files
Drag and drop the WAV file to the center of the Windows Media Player. You can repeat the step to add as many files that you would want to be converted.
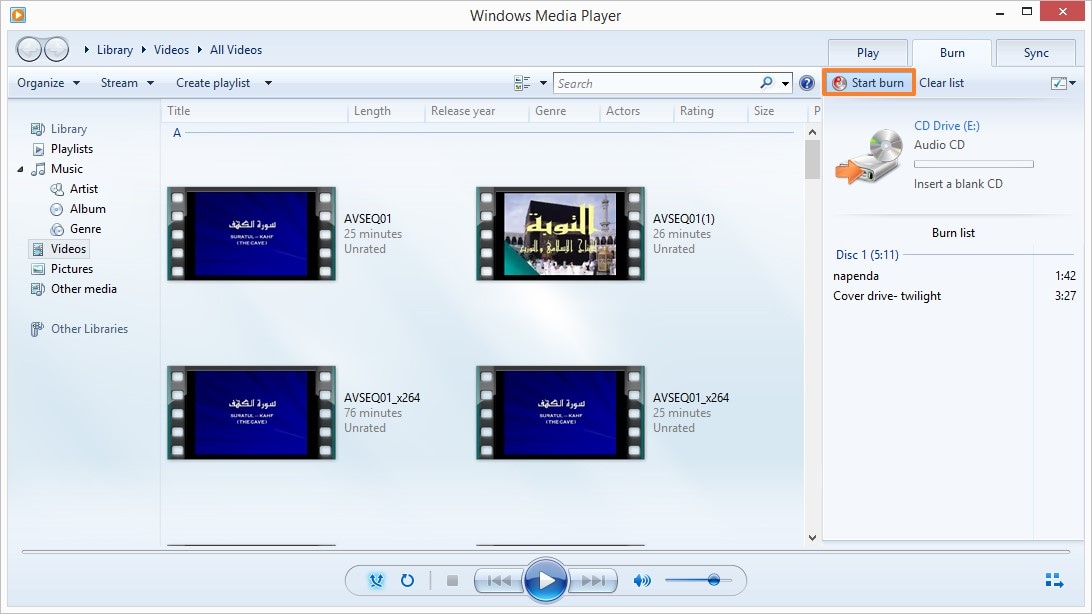
Step 4: Burn files
Finally, select Start burn.
- Available for free on Windows devices.
- Easy to learn
Cons
- Has less album cover art
- Downloads pictures of CD cover by 200*200 pixels, different from most programs using 300*300 pixels.
Conclusion
In this article, you’ve gotten to know the top recommendations when burning WAV files. All of the tools and steps discussed are efficient and can help you achieve your desired result. iTunes runs on mac devices, Windows Media Player in Windows, and Wondershare UniConverter on both devices. Wondershare UniConverter is powerful when compared to the two, and can be easily synced to other devices.
- Practical tips to tell you how to use Clownfish properly
- The most elaborate review of AV Voice Changer in 2026
- 8 Best VR Video Converters: Convert 2D to VR & VR to Normal (Free & Paid)
- Best MP4 to 360 Video Converter Online Recommended in 2026
- 10 Best Voice Changer Apps for Free Fire
- [100% Working] The most effective voice changer for popular games: Steam, Valorant, Pubg, Roblox
- Click here - Seek the best 15 voice changers to meet your different demands
- 12 Best Apps to Resize a Picture on iPhone and iPad Recommended
- How to Compress Photos on iPhone with Simple Steps


Christine Smith
chief Editor