

Image resizing is a necessary skill for anyone who works with photos. You may need to prepare pictures for a website or social media. Thus, knowing how to adjust image dimensions can affect visual quality and file size.
We will discuss various image resizing options later. This blog includes PC-based solutions, online tools, and mobile apps. To better choose the most suitable method, you must know what is image resizing, when to resize an image, and how to resize images on different platforms.
In this article
Part 1: Best Method to Resize Images on PC
Wondershare UniConverter is an excellent solution for resizing images on the computer. This versatile software offers a friendly interface. It has powerful features for handling various media types, including image resizing.
It is a unique media converter and editor that supports various file formats. It is known for video conversion. However, it also excels in image editing tasks like resizing and upscaling.
Guide to Resizing Images with UniConverter
UniConverter has a friendly interface and many helpful features. That makes it an excellent choice for everyone. Follow these steps;
Step 1 Install UniConverter
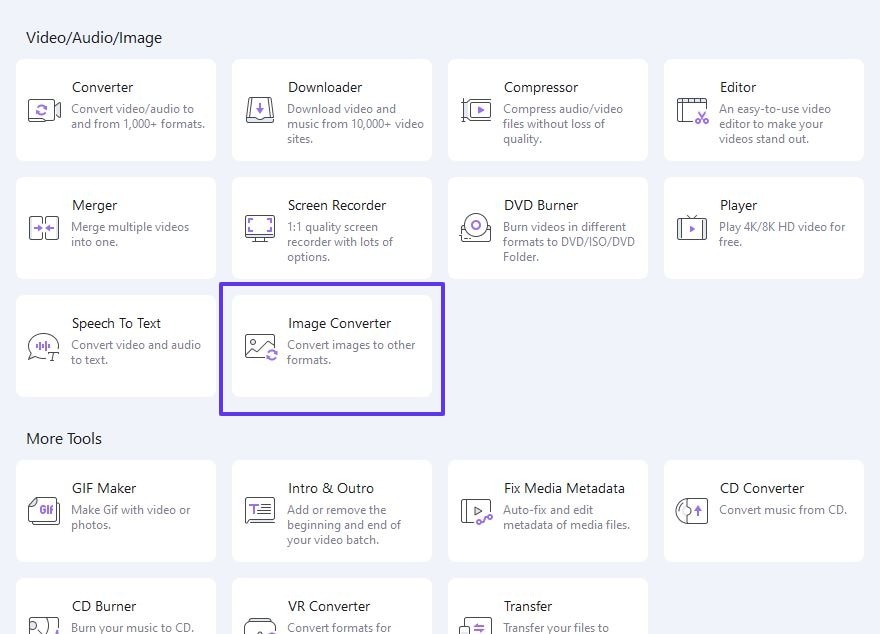
You can download UniConverter by clicking the button below. Open it and go to the Toolbox. You will find various tools, including the Image Converter.
Step 2 Add Your Images
Click Image Converter in the Toolbox. Then, select the Add Images option to upload files you want to resize. You can add many images at once for batch processing.

Step 3 Adjust Resize Settings
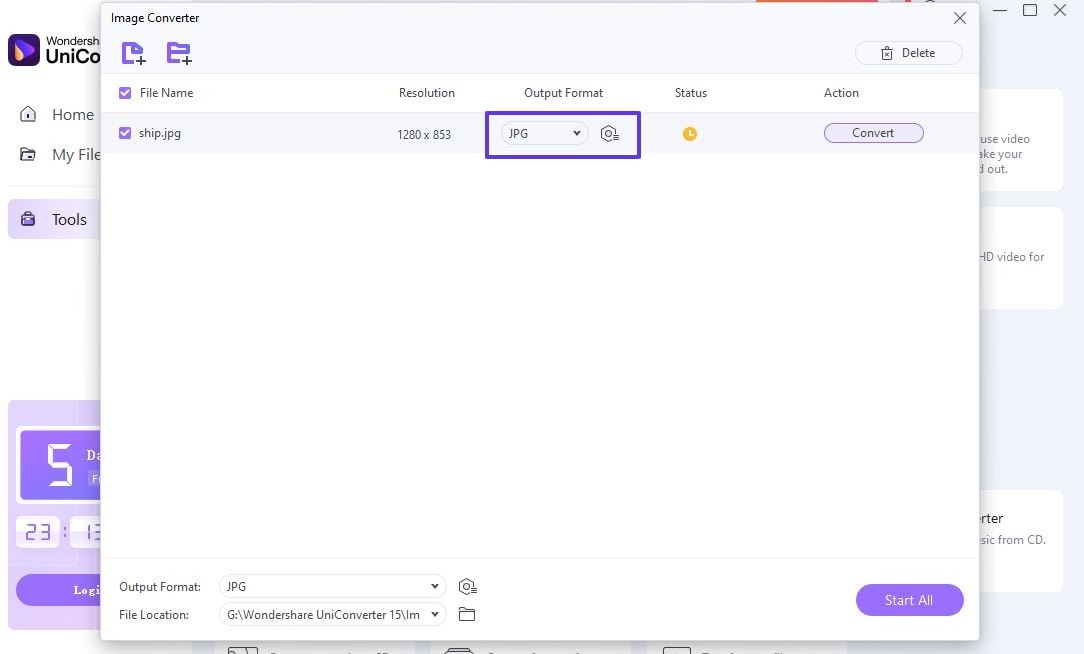
After adding, click the Settings icon next to each file to open the configuration window. Here, you can choose the required output format and adjust the quality.
Step 4 Set Output Options
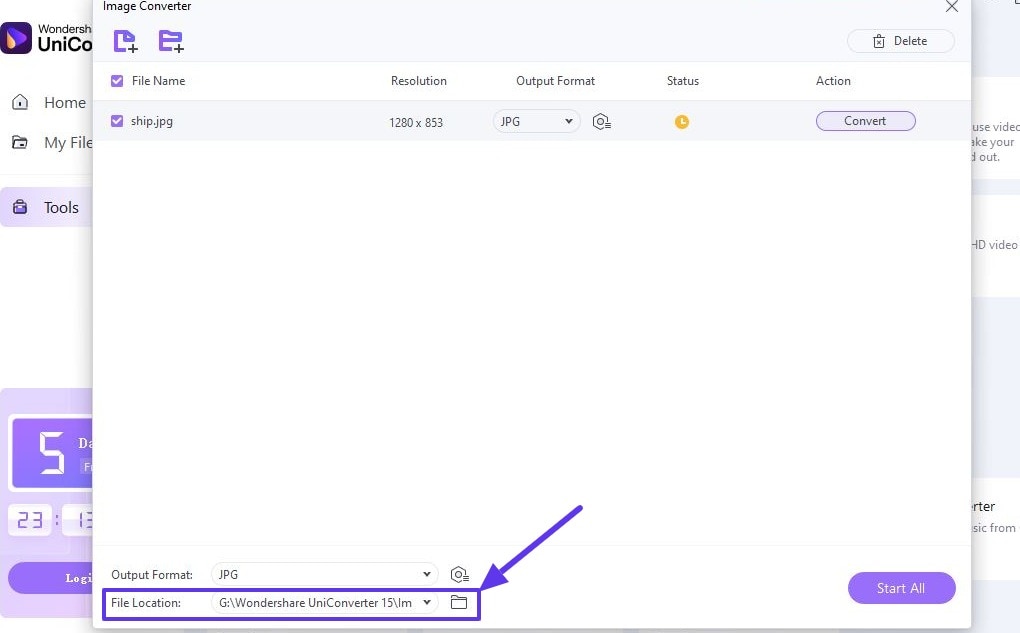
Choose where to save resized images by clicking File Location at the bottom. This step ensures your new photos will be easy to find once the conversion is complete.
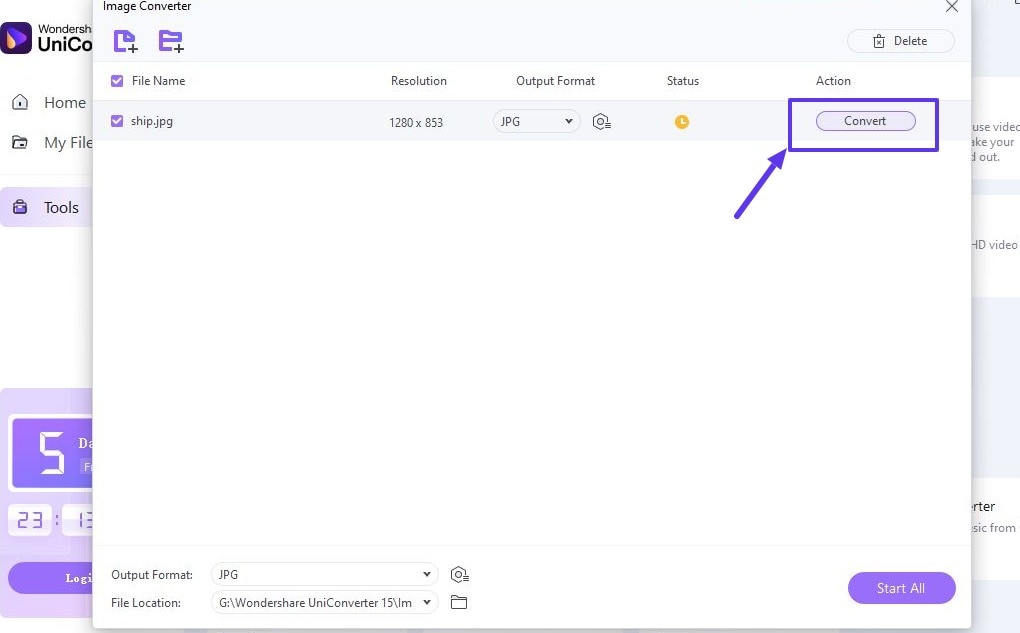
Step 5 Convert and Resize
Click the Convert button to start the image resizing process. The tool will create resized images according to specifications.
Bonus features of UniConverter:
Not only limited to resizing and converting images, UniConverter also provides you with multiple advanced features, such as the following:
- Batch processing: This unique quality is a huge time-saver. Instead of resizing images individually, you can select a whole bunch and let UniConverter work on them simultaneously. Try this tool to resize a folder full of photos or product images for your online store.
- Custom dimensions: It gives you precise control over image sizes. You can input exact pixel measurements to fit them into specific spaces on a website or document. You can scale by percentage if you want everything smaller or larger. So, this tool is handy for maintaining consistency across a set of images.
- Aspect ratio preservation: It helps you keep images looking right. Nobody wants blurry or stretched photos. UniConverter maintains the width and height ratio of your original image. Thus, the resized pictures always look natural and professional.
- Format conversion: You can also change file types while resizing. You can change them from a PNG to a more web-friendly JPEG. This feature is excellent for adapting images for different uses or platforms.
- Quality adjustment: It lets you balance file size and image clarity. You can choose the right amount of compression to load your images faster online.
Part 2: Best Method to Resize Images on Mac with Preview
Mac users have a unique tool for resizing images: Preview. Preview is Apple's default image and PDF viewer for macOS. This helpful app comes pre-installed on Mac devices. It offers a simple yet effective way to resize images.
However, many users still prefer UniConverter for more advanced image resizing options. This software provides various other features that can be used next to resizing.
Guide to Resizing Images with Preview
Below is a 4-step process for resizing images using the Preview app:
- First, find the image file you want to resize on your computer. Double-click it to open in the Preview app.
- Now, click the Tools menu at the top of the Preview window. From the dropdown options, you can select Adjust Size. It will open a window where you can input the desired dimensions for the resized image.
- Ensure the Scale proportionally box is checked in the Adjust Size window. This way, your image maintains its original aspect ratio. Moreover, this option prevents it from becoming distorted or stretched out of shape.
- Click OK after entering new size specifications and confirming the changes. Go to the File menu and choose Save to overwrite the original image. Also, you can select Export to save a new file with the resized version.
Part 3: How to Resize Images Online
Some users prefer to refrain from installing any software. They need a quick image resizing solution on any device. Well, online tools offer great flexibility in this. One notable option is Media.io, a powerful web-based media converter and editor.
This online platform offers various media editing tools, including image resizing. It's accessible from any device and requires no software installation.
Key Features:
- No download required
- Multiple file support
- Batch processing
- Custom dimensions
- Aspect ratio lock
- Cloud storage integration
Step-by-Step Guide to Resizing Images with Media.io
Below is a simple process for resizing images using Media.io.
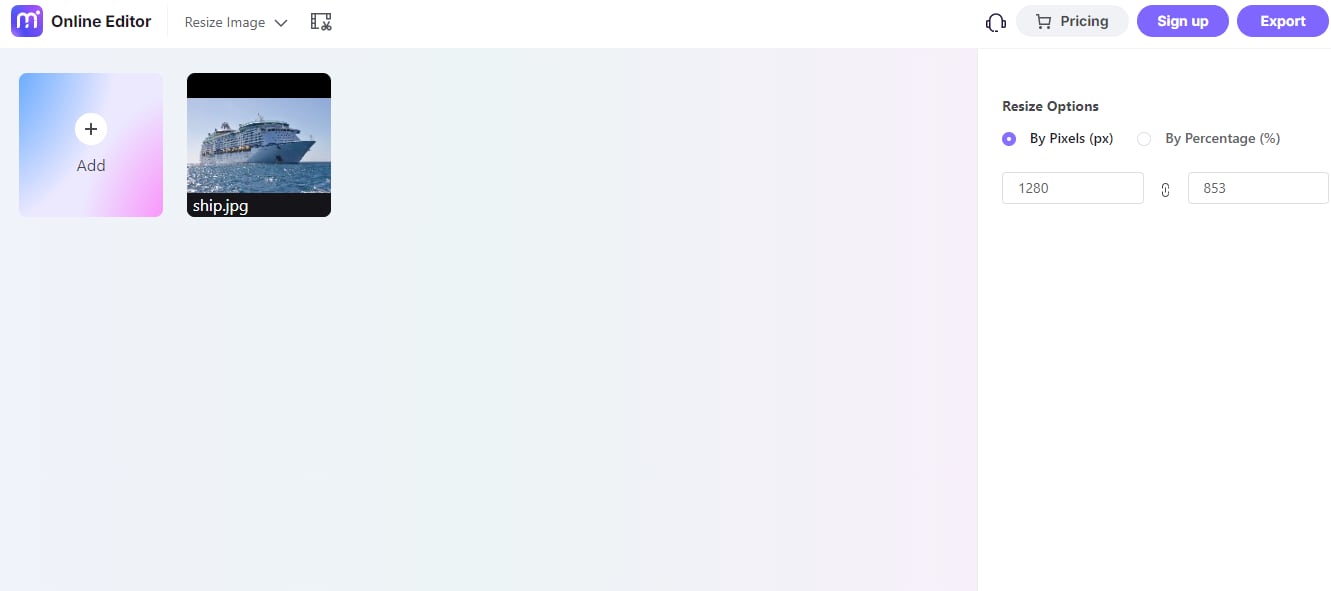
- Visit the Media.io website and locate the Image Resizer tool from the list of other tools. It will take you to the dedicated image resizing interface.
- Click the Choose Files button or drag and drop your image files directly onto the platform. Media.io will prepare your images for the resizing process.
- Save the image to another file type, like JPEG or PNG.
- With your images uploaded, you can now set the new size you want for them. Enter your desired width and height dimensions, or choose from a percentage.
- If needed, you can use extra options like aspect ratio preservation. Then, click the Start Resize button to begin the process. You can review the resized images in the preview window. If satisfied, click Download to save them.
With a friendly interface, this platform is an excellent choice for quick image resizing. Use it when you are away from a primary computer.
Part 4: What is Image Resizing
It is the process of changing the image dimensions. This process typically involves modifying the number of pixels in the image. You can make an image larger (upscaling) or smaller (downscaling).
Resizing tools recalculate the image data to fit into a new pixel grid. Well, this process can significantly affect the image quality when enlarging.
Note that resizing and cropping are not the same thing. Cropping means cutting out a portion of the image. It removes data. However, resizing retains all parts of the original image when changing its dimensions.
Part 5: When to Resize an Image
You must know when to resize an image. It is crucial for maintaining quality and optimizing file sizes across different platforms. Here are some scenarios where you can consider image resizing.
1) Web Publishing
You must resize large images to reduce file size and improve website loading speed. It allows you to adjust images to fit specific dimensions in web templates.
2) Social Media Sharing
Each social media has different image sizes for posts, profiles, and cover photos. You can resize images to prevent automatic cropping or compression by these platforms.
3) Email and Messaging
You can resize images to meet email attachment limits and improve sending speed. It allows you to adjust dimensions for better display on smaller screens.
4) Print Production
Companies must resize images to meet the required DPI (dots per inch) for printing. Resizing tools can adjust image dimensions for various print formats.
5) E-commerce
You need to use standard product photo sizes for consistent display in online stores. Image resizing lets you generate miniature versions of images for previews or catalogs.
6) Digital Presentations
You can resize images to fit presentation software specifications without distortion. Resizing tools adjust image sizes to complement text and other elements in slides.
7) Storage Management
Almost everyone needs to downsize high-resolution photos to get more storage space. You can also resize images to create smaller backup copies and keep the originals intact.
Conclusion
Image resizing is an essential task. It allows you to optimize visual content for various platforms and purposes. You should know when and why to resize your images. It will help you make a balance between visual quality and file size. Try UniConverter if you are looking for the best tool on the computer to do many functions beyond image resizing.

