Wondershare Uniconverter
-
 Set and adjust the color temperature of white objects in one click.
 - Correct color brightness, contrast, saturation to enhance your footage.
- Fast convert video/audio to MOV, MP4, AVI, and other 1000 formats.

Camera Videos
- TRY IT FREE TRY IT FREE
- 1. Import Camera Videos to Apps+
- 2. Convert Camera Videos to Other formats +
-
- 2.1 Play MTS on iPad
- 2.2 Play M2TS with Plex Media Server
- 2.3 Convert Panasonic MTS/M2TS to Any Format
- 2.4 Convert MTS to MPEG
- 2.5 Convert MTS to MOV on Mac
- 2.6 Best MTS to MOV Converter
- 2.7 Convert M2TS to MOV
- 2.8 Convert AVCHD to MP4
- 2.9 Convert M2TS to MP4
- 2.10 Convert MXF to MOV
- 2.11 Convert VRO to MP4
- 2.12 Convert MOD to MOV
- 2.13 Convert MOD to MP4
- 2.14 Convert VHS to Digital
- 2.15 Convert 8mm Film to Digital
- 2.16 Convert JVC Camcorder Videos on Mac
- 3. Camera Video Converters +
- 4. Other Tips & Tricks +
 Complete solutions for videos/pictures from any cameras>>
All Topic
- AI Tools Tips
-
- AI Photo Enhancer Tips
- Voice Changer Tips
- AI Thumbnail Maker Tips
- AI Script Generator Tips
- Smart Summarizer
- AI Subtitle Generator Tips
- Watermark Remover
- Vocal Remover Tips
- Speech to Text Tips
- AI Video Tips
- AI Image Tips
- AI Subtitle Translator Tips
- Video Extractor Tips
- Text to Speech Tips
- AI Video Enhancer Tips
- DVD Users
- Social Media Users
- Camera Users
- Photography
- Creative Design
- Movie Users
- Travelling Fans
- Educational Users
- More Solutions
- Holidays and Commemoration
- Game Lovers
- Other Tips
How to Quickly White Balance in Adobe Premiere Pro
by Christine Smith • 2026-05-20 17:37:17 • Proven solutions
White Balance is one of the important settings that make your videos look impressive. If the right white balance settings are not used while recording the video, you can adjust in the post-processing step. Adobe Premiere Pro is an excellent tool that will help you to get the task done. Loaded with an array of color-correction tools, Adobe Premiere Pro is a widely used video editing application developed by Adobe. Learn in detail about Premiere Pro wite balance in the following parts.
- Part 1. What is White Balance in the film?
- Part 2. How to correct White Balance in Adobe Premiere Pro?
- Part 3. The easiest way to adjust white balance through Wondershare UniConverter
Part 1: What is White Balance in the film?
In simplest terms, white balance refers to the camera setting that determines how the colors are captured in different lighting conditions. Using the Kelvin scale, the color temperature is measured that determines how your white objects will actually look in the film. This in turn further determines the appearance of the other colors.
When the right white balance is not selected, there is a color cast over the film making it look bluish, orangish, or reddish. Thus, depending on the lighting conditions and the color temperature, the right white balance settings have to be done to make the colors of the film appear right.
Part 2: How to correct White Balance in Adobe Premiere Pro?
Adobe Premiere Pro is one of the popular tools due to its tons of editing functions when it comes to video editing. The color-correction tools of the software allow you to adjust the white balance and other settings of the film.
The Auto Color effect feature of the software can be used for color correction, but this method does not give you much control over the settings. Another way to adjust the white balance in Premiere Pro is to use the Fast Color Corrector feature.
How to fix white balance in Premiere Pro:
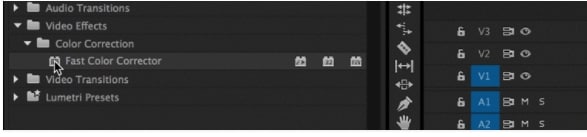
Step 1. Open the desired image or the film in Adobe Premiere Pro. From the Effects/Presets browser of the software, select Apply the Fast Color Corrector effect. You can simply drag and drop the effect to the chosen film.
Step 2. Next, you need to choose the white portion of the film using the eyedropper tool.
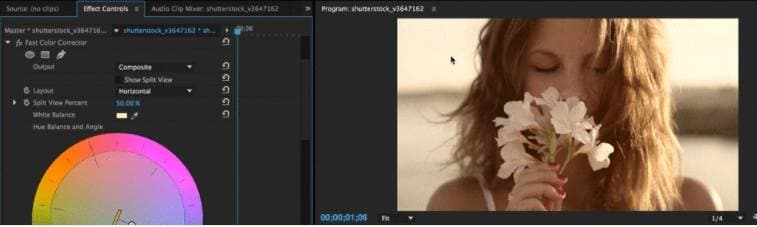
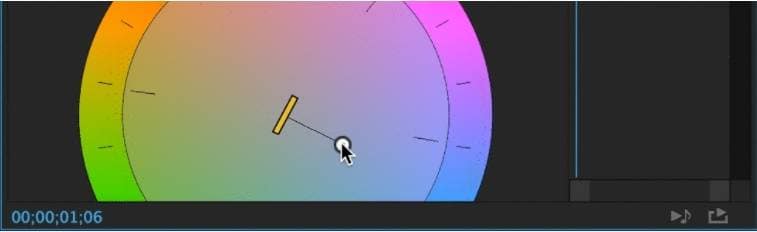
Step 3. As the white balance portion is selected, the footage will be white balanced to a great extent. Additionally, you can also make the manual adjustment if required by adjusting the level effects and selecting the white and the black points in the Fast Color Corrector.
Bonus trick: how do you fix overexposed videos in Premiere Pro?
When the lighting conditions are very dynamic, the recorded footage may become overexposed, and to correct the same, Adobe Premiere Pro can be used.
Steps to fix overexposed videos in Adobe Premiere Pro:
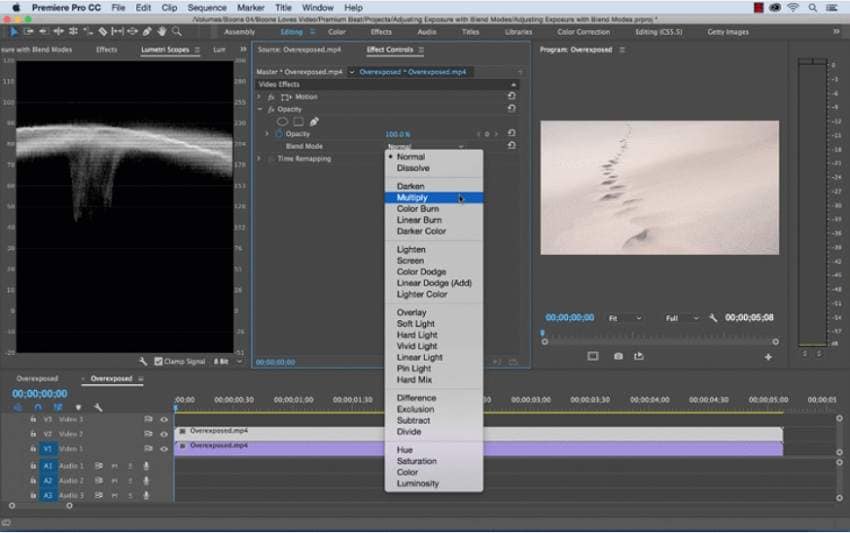
Step 1. Open the video in the software that you want to edit. Using the Lumetri scopes panel, check the waveform monitor of the video, and you will find that levels are quite high, which shows that the footage is overexposed.
Step 2. To start with, duplicate the clip, and then you need to overlay the copy over the original layer. Now you have two layers, and next, you need to change the blend of the top layer. This will lead to the composite of the two clips.
Step 3. You can choose several modes in the subtractive category to make your clips darker as needed. One of the modes that you can try is multiply mode.
Part 3: The easiest way to adjust white balance through Wondershare UniConverter
Adobe Premiere Pro is a feature-packed software but has a steep learning curve. Several complicated steps are needed to adjust white balance premiere and other settings in the software, making it difficult for beginners.
So, if you are looking for a simple and quick alternative, we suggest Wondershare UniConverter as the best choice. This is an excellent tool with tons of useful features that, along with its user-friendly interface, make the programs perfect for beginners and professionals.
The built-in editor of the software supports adjusting several file parameters, including the shite balance. The process is quick, and the steps are simple.
Key features:

Wondershare UniConverter - Best Video Converter for Mac/Windows
-
Adjust white balance, saturation, brightness, and other settings quickly and easily
-
Add videos directly from the devices as well as from the system
-
Preview option to check the change in the settings
-
Additional features include video conversion, video download, recording, DVD burning, and more
-
Windows and Mac compatible
Steps to adjust white balance using Wondershare UniConverter
Step 1 Add videos to the software
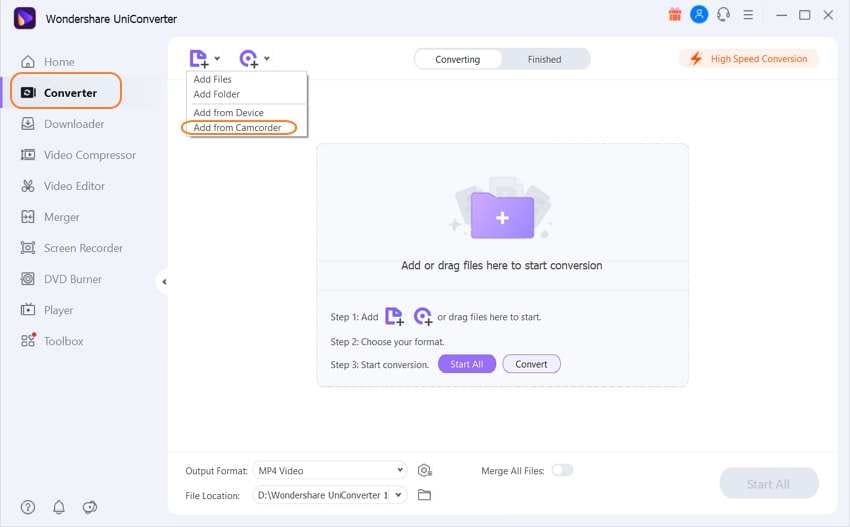
Open the installed software and from the Video Converter tab, click on the Add Files icon to browse and add the local videos. Expand the drop-down menu at the Add Files tab to import the videos directly from the camcorder as well as other connected devices.
Step 2 Edit the white balance
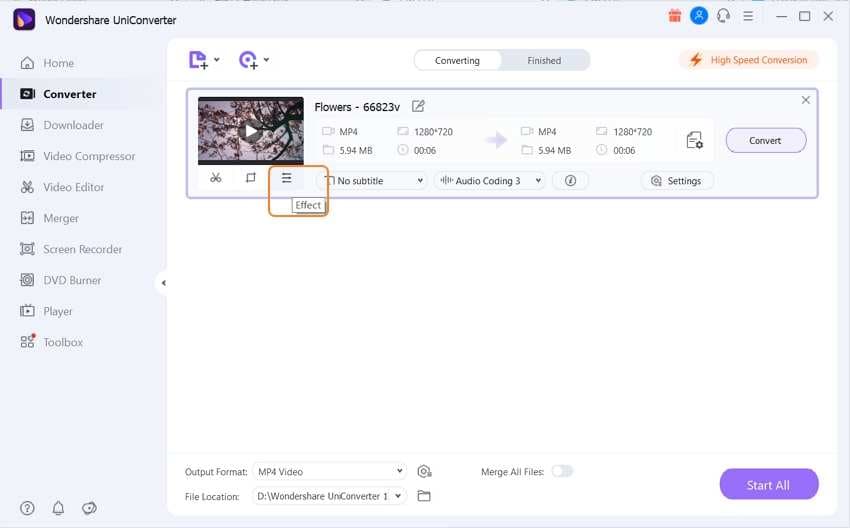
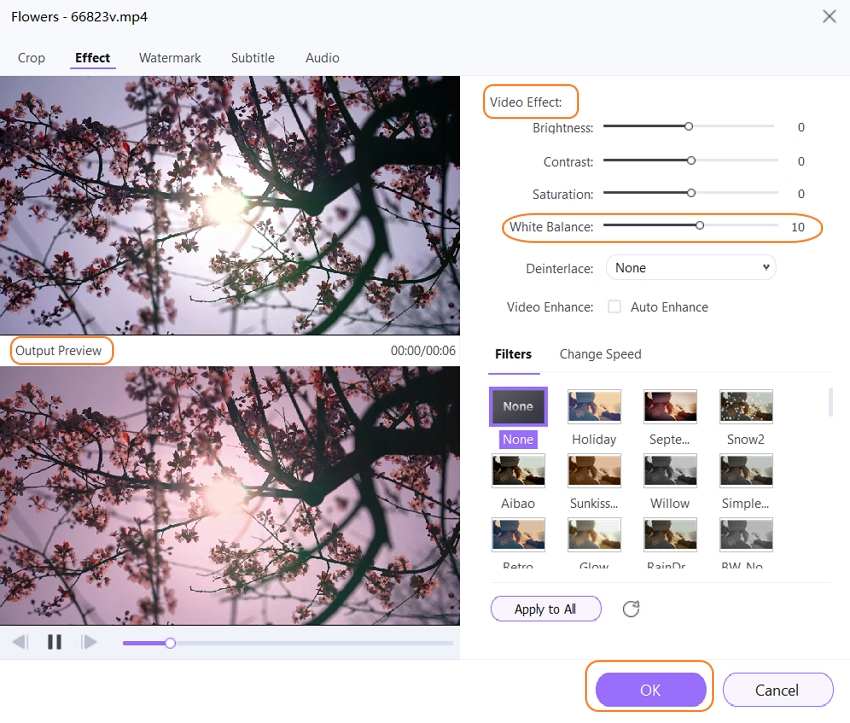
Under the added video thumbnail image, click on the Effects icon. A pop-up settings window will open. Under the Video Effect section, move the White Balance slider to make the adjustments as needed. The Output Preview section at the left-side can be used to see how the processed video will look. Once the settings are confirmed, click on the OK button.
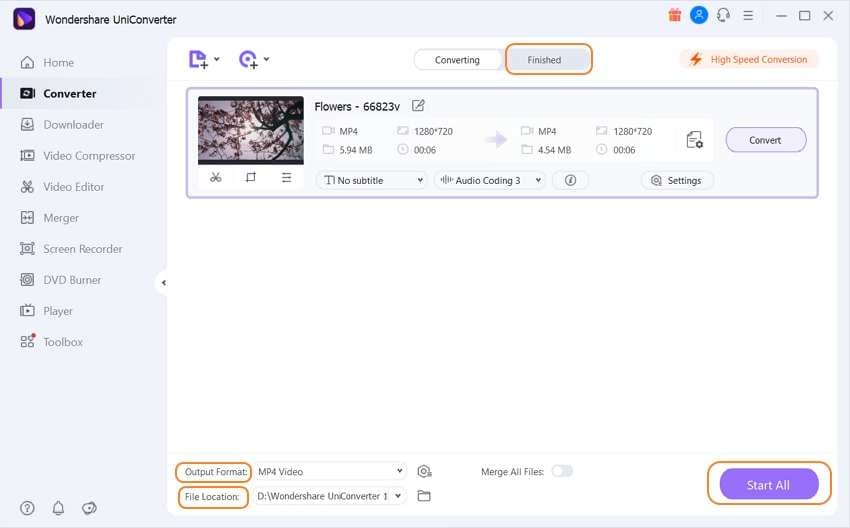
Step 3Process the video
The target format can be selected from the Output Format tab. The File Location section can be browsed to select the system folder to save the file. Finally, click on the Start All button to process the file.
After the processing is complete, check the Finished tab to find the videos on the interface.
Conclusion
It is important to keep the white balance settings correct to have the right colors in your footages. Though Adobe Premiere Pro can be used, the software is quite complicated, and you need to learn it thoroughly to use its features effectively. Wondershare UniConverter here works as an excellent alternative as the software is simple to use. The beginners who have no proper experience in editing can also use the software without any hassles.
Your complete video toolbox

Other popular Articles From Wondershare


Christine Smith
chief Editor