

Pixelated videos—those with blocky, blurry, or distorted visuals—can ruin your viewing experience. This common issue can occur for several reasons: excessive compression, low resolution, poor lighting, improper camera settings, or damaged files. Sometimes, it's not even the file but the media player, video format, or device that causes playback issues.
In this guide, we’ll show you multiple ways to fix pixelated videos using trusted tools like UniConverter, VLC, and Repairit—from AI-powered enhancement to format conversion and file repair. Let's get started with what causes it in the first place.
In this article
Part 1. What Causes Pixelated Videos?
A pixelated video—where large square blocks replace fine detail—can seriously impact your viewing or editing experience. Whether it's a personal project or a YouTube video pixel issue, understanding the root cause is the first step in learning how to unpixelate a video. Below are the most common reasons:
Common Causes of Pixelation or Grain: Below are the most common reasons:
Excessive Compression
Using low-bitrate formats like H.264/MP4 can significantly reduce quality and introduce artifacts.
Low Resolution Recording
Videos recorded at 240p or 360p often lack detail, resulting in grainy video when upscaled.
Poor Lighting Conditions
Especially in low-light conditions, cameras may introduce noise, forcing you to fix grainy video in editing later.
Improper Camera Settings
Incorrect ISO, shutter speed, or white balance can create a grainy video effect.
File Corruption
Damaged or partially downloaded files may display blocks or missing frames that need a video pixel remover.
Outdated Video Players or Codecs
An unsupported player might render your file improperly, making you think you need to fix pixelated video when it’s actually a compatibility issue.
Low Bandwidth Streaming
When the internet speed is low, platforms automatically lower the quality, leading to YouTube video pixel problems.
The good news? With the right tools, you can remove pixelation from video online, depixelate video, or even fix pixelated video online free. Read on to explore robust, beginner-friendly solutions.
Part 2. How to Fix Pixelated Videos in Bulk
One of the easiest ways to fix pixelated video is by using Wondershare UniConverter’s AI-powered Video Enhancer. Whether you're dealing with a grainy video, blurry footage, or compressed content, this one-click tool can unpixelate a video automatically—no editing experience required. It's ideal for those who want a clean, clear result without spending hours tweaking settings.
Key Features of UniConverter AI Video Enhancer
AI-Powered Quality Repair
Uses artificial intelligence to upscale resolution, sharpen edges, and reduce pixel noise in just one click.
Removes Blur and Grain
Automatically cleans up blurry or grainy video, making faces, text, and details more transparent and more natural.
Resolution Upscaler (SD to 4K)
You can enhance low-res videos up to Full HD or 4K, eliminating most YouTube video pixel or blocky screen issues.
Multiple Enhancement Modes
Choose from auto-enhance, denoise, upscale, or sharpen modes—tailored for different levels of pixelated video.
Format Flexibility
Exports the cleaned-up file in MP4, MOV, AVI, and more—great for creators who want platform-ready results.
Steps to Fix a Pixelated Video Using UniConverter
Step 1: Launch UniConverter and Open Video Enhancer
Download and open UniConverter. From the top tab, go to Toolbox, then click on Video Enhancer. This tool is dedicated to improving video quality using artificial intelligence. It's the easiest way to start fixing a pixelated video with minimal setup.
Step 2: Import Your Video and Apply AI Enhancements
Click + Add Files to upload the pixelated or blurry video you want to improve—formats like MP4, MOV, and AVI are all supported. Once the video loads and a preview appears, select your preferred AI enhancement options such as Quality Restoration, General Video Denoise, or Face Enhance.
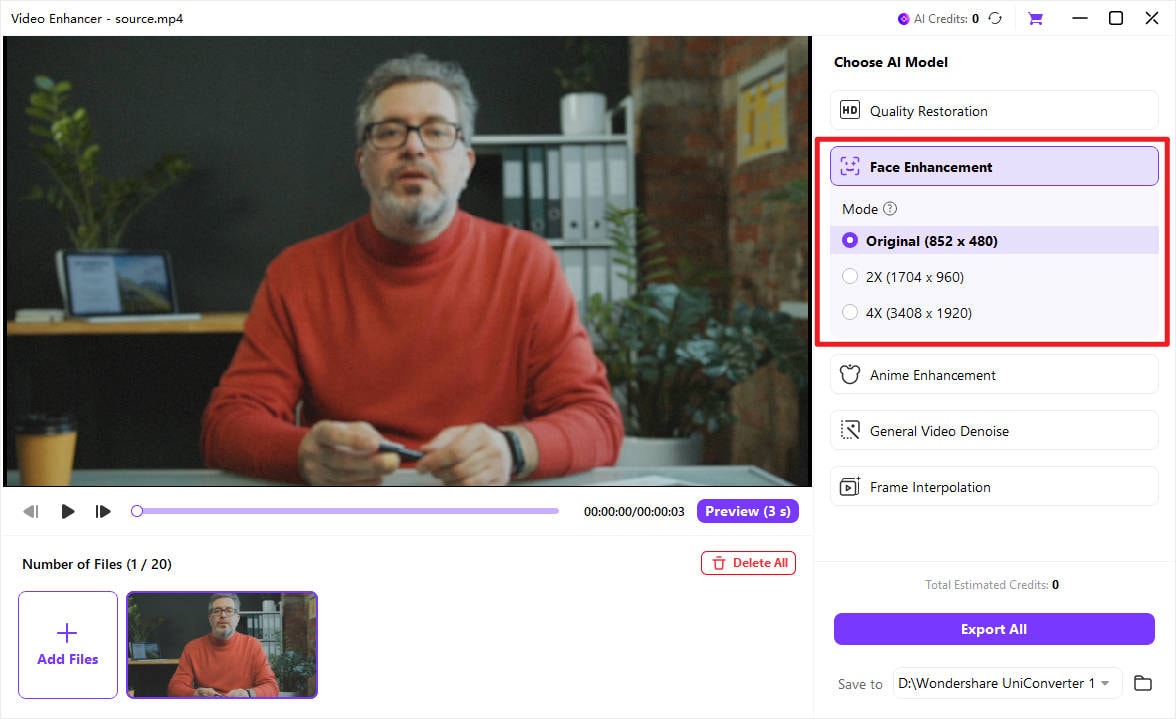
Step 3: Preview and Export
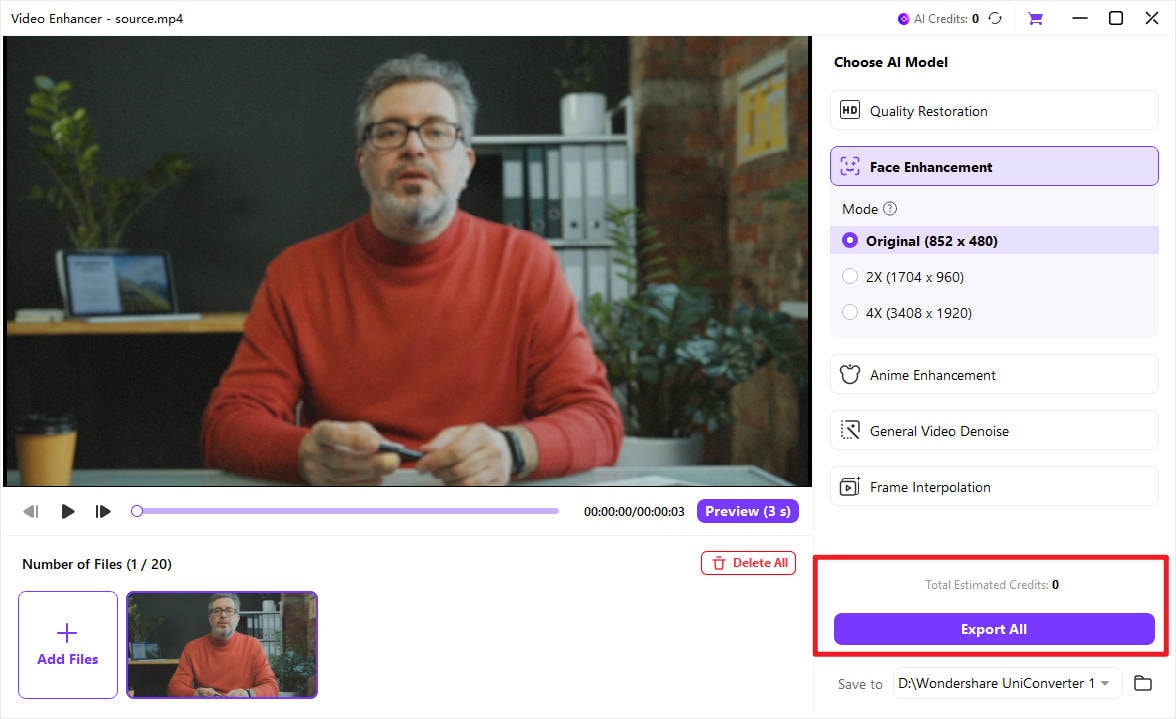
Select your desired mode (e.g., 2X or 4X) and hit the Preview button. When ready, click Export All to begin AI processing. In a few moments, your video will be enhanced and saved—cleaner, sharper, and free from pixelation or noise. You can also pick your preferred.
Part 3. How to Depixelate Videos by Converting to Proper Formats (UniConverter)
When file size matters—whether you're uploading to the web, sending by email, or optimizing for mobile—exporting to low-bitrate H.264/MP4 is a smart move. This format balances efficient compression with widespread compatibility, ensuring your videos look good while staying lightweight. With the right tools, like Wondershare UniConverter, you can compress videos without sacrificing visual clarity.
Key Features of UniConverter’s Format Converter
AI-Powered Video Compression
UniConverter offers innovative compression options—from Basic to Strong—and even AI-Compress, which can shrink your video size by up to 85% while maintaining impressive quality. Perfect for creators who want smaller files without the pixelation.
Advanced Customization
Looking for more control? UniConverter’s Advanced Settings let you fine-tune everything—bitrate, format, resolution, and frame rate—so you get exactly the output you want, every time.
Preview Before You Commit
No guessing here. UniConverter provides a 20-second preview, allowing you to verify quality before converting the full video. It's a quick and reliable way to ensure your content still looks sharp after compression.
Batch Processing + GPU Acceleration
Time is money. Compress multiple videos at once and take advantage of hardware acceleration for faster performance, especially helpful when dealing with large projects or bulk exports.
Supports a Wide Range of Formats
Whether you're exporting in MP4, MKV, AVI, or HEVC, UniConverter has you covered. It supports a wide range of formats and encoders, making it one of the most versatile video tools available.
This is especially helpful for video editors, content creators, and anyone dealing with exported footage from online tools or mobile devices.
Steps to Depixelate Video via Video Converter
Step 1: Launch UniConverter and Navigate to the Converter
Start by opening Wondershare UniConverter on your computer. From the main interface, navigate to the Video Converter tab at the top under Quick Access or from the tools under the Video tab. This section provides everything you need to convert and compress your videos, including format selection and advanced output settings.
Step 2: Import the Video Files You Want to Compress
Next, click the + Add Files button to upload your video. Whether you're compressing a single video or multiple files at once, this step is straightforward. Once uploaded, the videos will appear in the processing queue, ready for conversion.
Step 3: Choose MP4 (H.264) and Optimize for High Compression
After adding your video to Wondershare UniConverter, set the output format to MP4 and click the gear icon to access advanced settings. In the pop-up window, choose H.264 as the encoder, set the resolution to 1280×720, frame rate to 30 fps(same as original), and bit rate to 2000 kbps. These settings are ideal for creating a high-quality video at a smaller file size.
For the Profile, select Main, which ensures compatibility with most devices while keeping the file lightweight. Set the Level to 3.1, suitable for 720p videos at 30 fps. For Color Space, it remains as Auto, which is standard for compressed video and preserves good color quality at a low size.
If your video contains audio, enable the audio section, choose AAC as the encoder, set the channel to Stereo, sample rate to 44100 Hz, and bit rate to 128 kbps. (Optional)
After setting up all, ensure to hit the Save button.
Step 4: Export the Good Quality Compressed Video
Once everything is set, click the Convert All button to begin the export process. UniConverter will then compress and convert your file based on the parameters you selected. When the process is complete, you’ll find your newly compressed video in the designated output folder, ready to use, share, or upload.
Part 4. How to Unpixelate Videos Using VLC Media Player
VLC Media Player is a free, open-source tool known mostly for video playback, but it also has hidden features that can help unpixelate a video or fix grainy video during playback. While it doesn't permanently edit or export files like UniConverter, VLC can remove pixels from video using its filters and enhancement tools in real time. It's a handy, lightweight video pixel remover for fundamental viewing improvement.
Key Features of VLC for Fixing Pixelation
Built-In Video Filters
Offers sharpening, denoise, and smoothing filters that can reduce grainy video effects in real time.
No File Conversion Needed
Enhances your pixelated video during playback—no need to re-encode or export a new file.
Works Across Platforms
Available for Windows, Mac, and Linux, making it a universal option to fix pixelated video on any device.
Free and Lightweight
A 100% free solution to help users with low-end systems or limited storage who want to remove pixelation from video online alternatives.
Customizable Playback Settings
Let’s you tweak brightness, contrast, and sharpness for better visual clarity—ideal for depixelate video needs.
Steps to Fix Pixelated Video with VLC
Step 1: Open VLC and Load Your Pixelated Video
Launch VLC Media Player and open the video you'd like to enhance. You can drag the file directly into the player or use Media > Open File to locate it. This prepares the video for real-time enhancement without affecting the original file.
Step 2: Access Video Effects and Apply Filters
Go to Tools > Video Effects, then switch to the Basics tab inside it. Here, you’ll find a range of built-in tools to improve the experience of video playback. Still in the Video Effects panel, tweak settings like Brightness, Contrast, Saturation, and Gamma to improve overall clarity.
Step 3: Fine-Tune Image Settings and Enjoy Smooth Playback
Use the Video Effects panel now to see the changes in real time. Once satisfied, continue playing the video—enjoy live enhancements, offering a smoother, cleaner viewing experience without modifying the original file.
Part 5. How to Repair Damaged Grainy Video with Repairit
When you're dealing with corrupted or broken files, beyond just compression or blur, Wondershare Repairit is the best tool to fix grainy video and restore playback. Unlike video enhancers or players, Repairit is a dedicated repair software that fixes issues like missing frames, freezing, pixel blocks, or even audio desync. It’s a go-to solution when you want to unpixelate a video that’s damaged due to transfer errors, crashes, or incomplete downloads.
Key Features of Wondershare’s Repairit
Advanced Video Repair Algorithms
Recovers corrupted and pixelated video files caused by device failure, transfer issues, or software crashes.
Supports Multiple Formats
Fixes MP4, MOV, AVI, MKV, and other formats commonly used in mobile, camera, and screen-recorded files.
Quick & Advanced Repair Modes
Choose from quick repair or deep repair for severely damaged grainy video footage.
Batch File Recovery
Upload multiple damaged clips at once—great for restoring long recordings or entire projects.
Steps to Fix Grainy or Pixelated Video with Repairit
Step 1: Launch Repairit and Add Damaged Videos
Download and open Wondershare Repairit, then select the Video Repair module from the main dashboard. Click the + Add button to upload your pixelated, corrupted, or unplayable video files. You can import one or multiple videos at once, and Repairit will automatically begin analyzing the issues in the background.
Step 2: Choose Repair Mode and Begin Fixing
Click Repair to start with the Quick Repair option, ideal for fixing minor pixelation and playback issues. If the results aren’t satisfactory or the file is severely damaged, switch to Advanced Repair. Just upload a similar reference video in the same format—this helps Repairit better reconstruct and unpixelate your footage with higher accuracy.
Step 3: Preview, Save, and Enjoy the Fixed Video
Once the repair process is complete, click the Preview icon to review the result. If everything looks good—no pixel blocks, glitches, or playback issues—click Save and choose a destination folder. Your high-quality, repaired video is now ready for editing, sharing, or re-uploading without any playback concerns.
Part 6. Try a More Compatible Video Player
Sometimes, your video isn’t actually damaged—it just isn’t playing correctly in your current media player. Incompatible or outdated players can cause choppy playback, visible artifacts, or even trigger a pixelated video effect, especially with high-resolution or newer format files. Before going through repair steps, try switching to a more compatible video player.
Popular choices like VLC Media Player, PotPlayer, or KMPlayer offer wider codec support and better handling of HD or 4K videos. These players can help remove pixels from video visually during playback by using sharpening filters, hardware acceleration, and decoding optimizations.
If your current player shows constant lag, blocky visuals, or color banding, it’s worth testing the same file in another app before assuming it’s corrupted. This simple change may resolve playback issues instantly—no editing required.
Also, if you're watching a YouTube video pixel out during playback, consider clearing your browser cache or switching to a browser that supports higher-resolution streaming. Some browsers throttle quality on slow connections.
While media players don’t permanently unpixelate video, they often improve how videos appear, especially when dealing with older formats or grainy video files. It’s a brilliant first move before diving into repairs or conversion tools.
Part 7. Try on a More Compatible Device
Believe it or not, your device itself might be the reason you're seeing a pixelated video or grainy video playback. Low-spec devices, outdated graphics drivers, or older operating systems may struggle to decode high-resolution or high-bitrate videos smoothly, especially if you're watching 4K or heavily edited content.
If a video appears distorted, laggy, or blocky on one device, try playing it on a different one with better performance or updated software. For example, a video that stutters on an older Android phone might play smoothly on a newer iPhone or a modern desktop with optimized GPU support. This is a quick, no-effort trick to fix pixelated video during playback.
You can also lower the playback resolution to reduce pressure on your hardware. Many video apps and streaming platforms allow you to set resolutions manually—for instance, switching a 4K YouTube video pixel playback to 1080p or 720p can instantly improve stability and image quality.
Remember: changing the device won't unpixelate a video permanently, but it may prevent temporary playback glitches that resemble file corruption. It’s an easy diagnostic step before jumping into advanced fixes like repair tools or conversion software.
So, before you stress over how to remove pixels from video or start editing, give it a try on a better-suited device—you might save yourself time and effort.
Conclusion
A pixelated video doesn’t always mean your footage is ruined. Whether you're dealing with grainy video from poor lighting or low resolution, or blocky playback caused by compression or outdated software, the good news is—there are multiple ways to fix it.
Whether you're editing a vlog, sharing content online, or simply trying to enjoy your footage, now you know exactly how to fix a grainy video, depixelate video, and choose the best approach based on your situation. Try Uniconverter today and bring your blurry visuals back to life!
FAQs
-
1. How can I fix pixelated videos online for free?
You can use online tools like Clideo or convert your file with UniConverter's trial version to fix pixelated video online free. However, online tools may lack advanced AI enhancement and resolution control. -
2. What causes a grainy video or pixelation?
Common causes include low resolution, poor lighting, high compression, outdated players, or file corruption. These issues lead to the need to fix grainy video or remove pixelation from video online or with offline tools. No worries, UniConverter has a built-in tool for fixing all these issues and helps to enhance your video’s quality. -
3. Is there a way to unpixelate a video permanently?
Yes. Using tools like UniConverter AI Enhancer or Repairit, you can unpixelate a video by upscaling resolution, reducing noise, and correcting compression flaws. These methods create a clean export for permanent results.

