

Pixelated videos can ruin perfect moments - but they're fixable!
A video is pixelated if it has a polygon-like object floating on it, and this can reduce the visual quality of your video, compromising the overall viewers' experience.
To help you understand how to fix pixelated videos, we’ve prepared this guide explaining why videos become pixelated and seven reliable solutions to unpixelate video.
In this article
Part 1. Why Videos Become Pixelated
Before diving into solutions, it’s important to understand why videos become pixelated.
- Low Resolution: Videos with a small number of pixels lose clarity when enlarged. Since there aren’t enough details to fill a larger screen, the image appears blocky and pixelated.
- Compression Artifacts: When videos are heavily compressed to reduce file size, data loss occurs. This results in visible distortions, especially in fast-moving scenes or areas with solid colors.
- Upscaling Errors: Simply enlarging a low-resolution video without advanced enhancement techniques causes blurring and pixelation. AI-based upscaling tools can sometimes help, but standard upscaling methods often degrade quality.
- Bitrate Issues: A low bitrate means less data is used to render each frame, reducing overall video quality. This is common in streaming platforms where adaptive bitrate settings adjust to internet speed, sometimes leading to pixelation.
- Codec Limitations: Different video codecs handle compression differently. Some prioritize faster playback over quality, causing pixelation, especially when the compression is too aggressive.
Part 2. Unpixelated a Video with One-Click
Now that you understand the causes of pixelated videos, the foremost solution to fix pixelated video is the Wondershare Uniconverter AI Video Enhancer .
Uniconverter is one of the best software that offers many incredible video editing features, including a powerful video enhancer that allows you to fix pixelated videos within a few clicks.
Uniconverter’s AI video enhancer can unpixelate your videos to make them clearer, sharper, and crispier automatically without requiring any technical process. It can also increase your video frame rate to help reduce jitter and ensure a smoother viewing experience.

Best AI Video Enhancer
Key Features
- Powerful AI video enhancer to ensure premium enhanced video quality.
- Batch convert and edit video without reducing quality.
- Supports more than 1000+ video formats.
- It supports 4k, 8k, and HD video conversion.
- Its built-in GPU hardware acceleration allows you to accelerate the video editing and conversion process.
- A bunch of AI features to facilitate all your multi-media processing needs.
How to depixelate videos with one click with UniConverter:
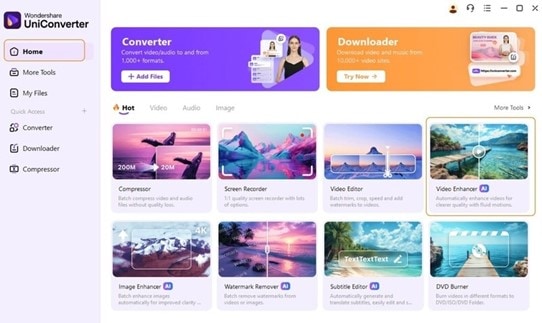
Step 1: Launch the “Wondershare Uniconcverter” software and choose “AI Video Enhancer” from the features under the “Hot” section.
Step 2: Upload the “video files” that you want to unpixelate. You can either drag and drop the files on the software or click the “+” button to upload the video(s).
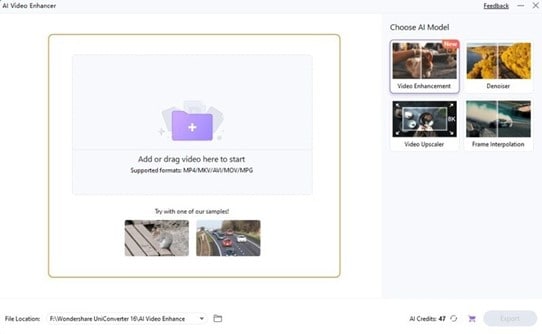
Step 3: Uniconverter AI Video Enhancer currently supports four AI models for video quality enhancement, which include Video Enhancement, General Denoiser, Frame Interpolation, and Video Upscaler.
- To unpixelate the video in a single click, use the Video Enhancement feature.
- Then, you can use the General Denoiser AI feature to reduce visual noise (grainy appearance in the video) - this is perfect for videos captured in low light.
- Frame Interpolation increases the video frame rate to make motions in the video smoother.
- Video Upscaler enhances the details of the video and, thus, the entire resolution and quality of the video.
We chose “Video Enhancement” for this task.
Step 4: Uniconverter will automatically unpixelate your video. After that, click the "Preview" button to see what the enhanced video looks like.
- If you’re satisfied with the output, click on “Export” to save the video file to your local storage.
Part 3. How to Fix a Graniy Video with Other Alternatives
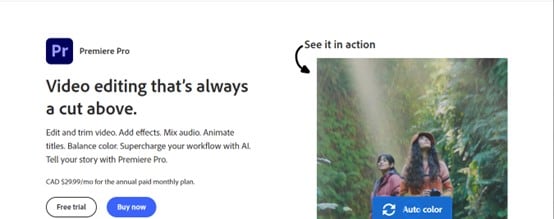
1. Adobe Premiere Pro
Adobe Premiere Pro is a professional video editing software widely used for its advanced features, including noise reduction and video enhancement tools. It offers built-in effects like the Lumetri Color panel and third-party plugins such as Neat Video to improve video quality. Ideal for professionals, Premiere Pro provides precise control over noise reduction while maintaining video clarity.
Key Features
- Lumetri Color Panel offers advanced color grading and noise reduction options.
- Compatible with third-party plugins for superior noise reduction.
- Supports exporting in 4K and beyond with minimal quality loss.
- Supports AI-Powered Auto Enhance for quick video improvements.
Step 1: Open Adobe Premiere Pro and import your video.
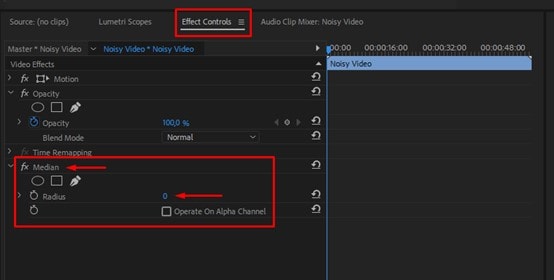
Step 2: Navigate to the Effects panel. Then, search for “Median” and use the effect to reduce the grainy video.
Step 3: Drag the effect onto your video clip. Then, use the “Pen” tool to move the “Mask” around the screen and resize it to cover the pixelated area.
Step 4: Change the Feather setting to +100 so the effect won’t have a visible edge.
- Repeat the “Mask” to ensure all the pixelated area is covered.
Step 5: Preview the changes and export your improved video.
2. DaVinci Resolve
DaVinci Resolve is a high-end video editing and color correction software known for its powerful noise reduction tools. The Studio version includes temporal and spatial noise reduction, making it a top choice for filmmakers and content creators. With its AI-powered tools and industry-grade editing features, DaVinci Resolve ensures high-quality video restoration.
- Supports Temporal & Spatial Noise Reduction to reduce different types of noise (pixelation) in videos.
- Offers advanced color grading features.
- Fairlight Audio Post-Production for professional sound editing.
- Enhances video resolution while maintaining clarity.
Step 1: Open DaVinci Resolve and create a new project.
Step 2: Import your video and navigate to the Color workspace.
Step 3: Select the Noise Reduction panel in the color grading section.
Step 4: Apply Temporal NR for moving objects and Spatial NR for static noise.
Step 5: Adjust the strength of noise reduction to balance clarity and detail.
Step 6: Render and export the enhanced video.
3. Topaz Video Enhance AI
Topaz Video Enhance AI uses artificial intelligence to upscale and enhance videos, reducing noise while improving resolution. Unlike traditional editing software, it leverages deep learning models to analyze and restore video details automatically. It’s perfect for users looking for an automated solution to fix grainy videos with minimal effort.
Key Features
- It uses deep learning to upscale and refine videos.
- Offers motion stabilization feature to help reduce shakiness while preserving detail.
- Built-in frame rate conversion enhances smoothness by adjusting frame rates.
- It can process multiple videos simultaneously for efficiency.
Step 1: Launch Topaz Video Enhance AI and load your video file.
Step 2: Choose the AI model that best suits your video type.
Step 3: Adjust settings like denoising strength and resolution enhancement.
Step 4: Preview the changes before processing the entire video.
Step 5: Click Start Processing and export the improved video.
4. Kapwing (Online)
Kapwing is a web-based video editor that provides basic noise reduction and video enhancement features, enabling to remove pixelation from video online. While not as powerful as desktop software, it offers an accessible way to improve video quality without downloading additional programs. Kapwing is ideal for quick fixes and casual users who need a simple online solution.
Key Features
- No software installation required.
- Supports many simple Video enhancement tools, such as brightness, contrast, and sharpness adjustments.
- Allows team members to edit videos online together.
- Supports multiple file formats like MP4, GIF, MOV, and more.
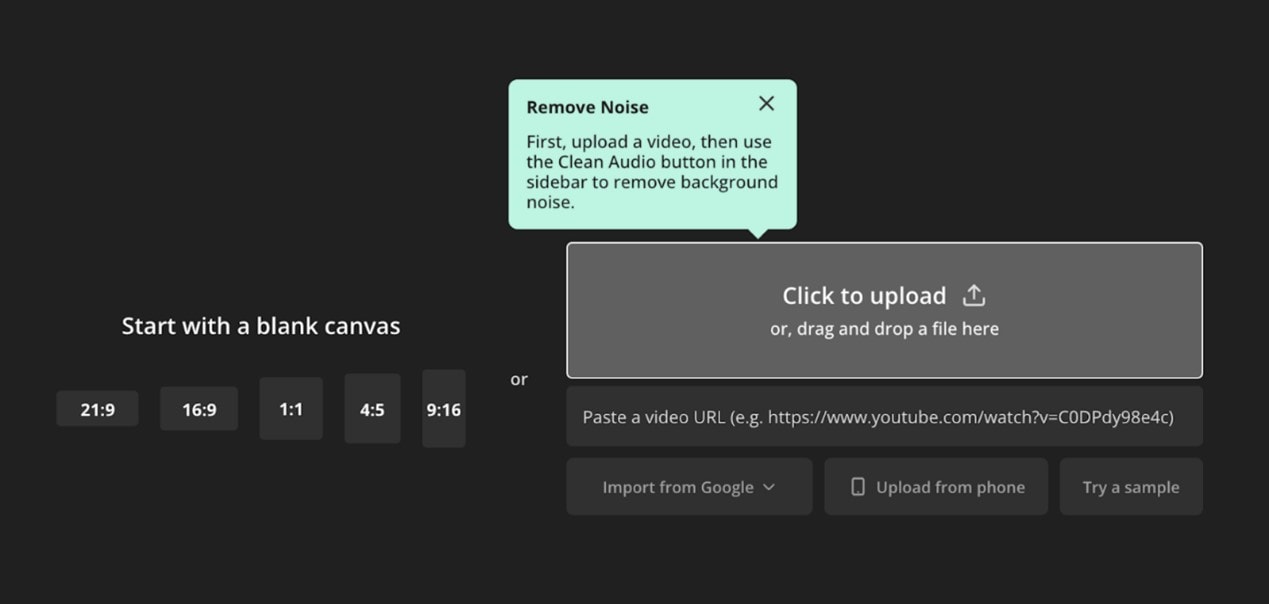
Step 1: Go to Kapwing.com and upload your video.
Step 2: Select your video from the timeline and navigate to the “video adjustment settings” on the right-hand sidebar.
- Adjust the opacity, brightness, contrast, saturation, blur, and zoom of your video to fix pixelation .
Step 3: Adjust other relevant settings for the video. Then, click on “Export project” to save the video.
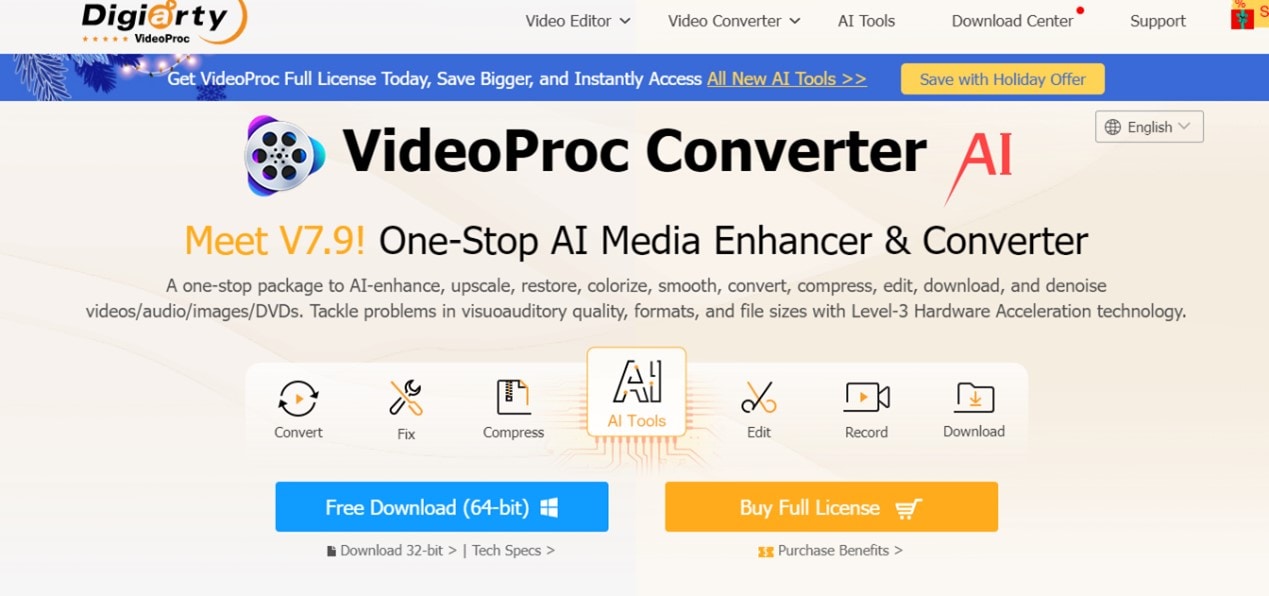
5. VideoProc Converter AI (Online)
VideoProc Converter AI is a video processing tool that includes AI-based noise reduction, allowing to depixelate video. It efficiently enhances low-quality videos by removing noise, stabilizing footage, and improving clarity, so that it can be used to unpixelate a video. Its user-friendly interface makes it suitable for beginners looking to fix grainy videos without complex editing steps.
Key Features
- Its AI-Powered noise reduction enhances video clarity.
- Its GPU Acceleration ensures fast processing speeds for large video files.
- Converts videos to different formats with minimal quality loss.
- Reduces motion blur and shakiness using advanced video stabilization.
Step 1: Open VideoProc Converter AI and choose “Super Resolution.” Then, choose “Super Resolution” and drag-and-drop your video.
Step 2: Select the type of “Video” (Anime or Reality). This enables the tool to employ the ideal AI model to fix your video.
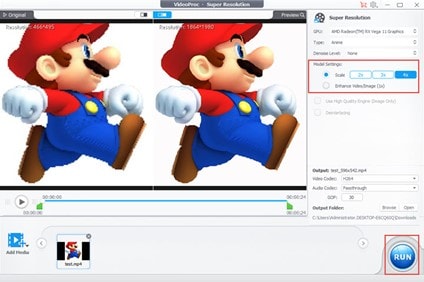
Step 3: After that, adjust the “Scale” option to 2x, 3x, or 4x. This will add more pixel and reduce the blocky squares.
Step 4: Choose an “Output folder” for the video and click “RUN” to export.
6. FilmoraGo (Android/iOS)
FilmoraGo is a mobile video editing app that provides noise reduction and enhancement features for on-the-go editing. It includes AI-powered enhancements, allowing users to improve video quality directly from their smartphones. FilmoraGo is perfect for casual users who need a quick and effective way to fix grainy videos.
Key Features
- It is designed for quick, on-the-go video enhancement.
- Automatic noise removal for clearer videos.
- It boasts a wide range of Preset Effects & Filters – that facilitates one-click enhancements for better visuals.
- Supports direct social media export to platforms like Instagram, TikTok, and YouTube.
Step 1: Open FilmoraGo on your Android or iPhone and click on “New Project”.
Step 2: Import the grainy video into the timeline. Then, navigate to “Effects” and find “Smart Denoise.”
Step 3: Choose “Apply” to apply the denoise to the video.
Step 4: Adjust other parameters like brightness, opacity, and contrast for additional clarity.
Step 5: Finally, “Preview” and “Export” the enhanced video.
Part 4. Measures to Prevent Videos from Pixelation
Now you know the causes of and solutions for pixelated videos, here are some tips you can use to prevent your videos from pixelation in the future.
- Use High-Resolution Cameras – Record videos in at least 1080p or 4K to ensure clarity and avoid pixelation when enlarging footage.
- Optimize Lighting Conditions – Poor lighting can force cameras to increase ISO, leading to grainy and pixelated footage.
- Use the Right Video Compression Settings – When exporting videos, choose high-bitrate settings and avoid excessive compression.
- Shoot in the Appropriate Frame Rate – Ensure the frame rate matches the intended output to prevent motion blur and pixelation.
- Keep Your Lens and Sensor Clean – Dust and smudges can degrade video quality and contribute to pixelation.
- Avoid Digital Zoom – Use optical zoom instead, as digital zoom enlarges pixels and reduces clarity.
- Use High-Quality Video Editing Software – Editing tools with AI enhancements can help maintain video quality during processing.
FAQs about Unpixelating Video
1. Is there a way to unpixelate videos?
Yes, unpixelating videos is possible using AI-powered tools such as Uniconverter, Topaz Video Enhance AI and VideoProc Converter AI. These tools use advanced technology to reconstruct lost details and improve video clarity.
2. How to fix distorted video?
To fix a distorted video, determine the cause of the distortion—whether it's due to compression, incorrect resolution, or corrupted files. Then, use a software like Uniconverter, Adobe Premiere Pro or DaVinci Resolve to correct aspect ratios and reduce compression artifacts.
3. Is it possible to remove pixelation from a video?
Yes, it’s possible to remove pixelation from a video. What you need is a powerful video editing software like the Wondershare Uniconverter or one of the other software programs recommended in the article above.
Conclusion
Fixing grainy or pixelated videos is achievable with the right tools. Professional software like the Wondershare Uniconverter offers a one-click solution to unpixelate your video. And you can also rely on alternative options like Adobe Premiere Pro, DaVinci Resolve, and other tools recommended in the article.
Ultimately, we recommend saving your precious memories with Uniconverter instead of deleting them due to pixelation.

