
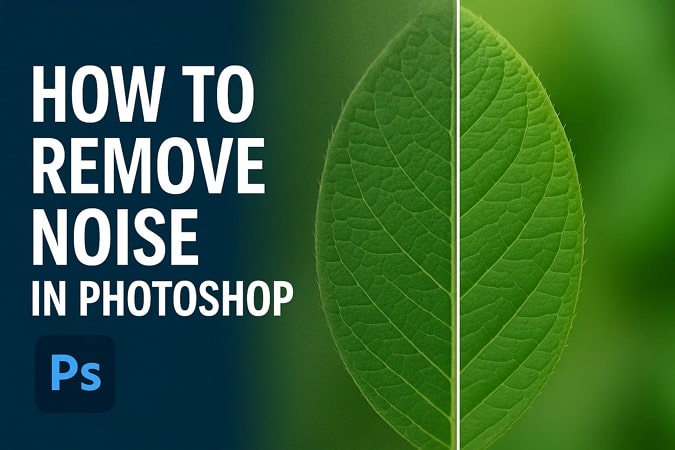
Grainy images can spoil a perfectly captured photo, and pixelation frequently appears in dim lightning, elevated ISO levels, or while editing underexposed pictures. It's a constant annoyance, particularly when the intricate details become obscured by unwanted blemishes and color alterations. Using a basic filter and enhancing the contrast won’t be sufficient.
This is why Photoshop provides various tools to address this problem yet understanding when and how to utilize them is essential. Photoshop removes noise through Camera Raw and various advanced techniques, each approach offering benefits and limitations. Hence, in this guide, we’ll break down all the essential approaches to do noise reduction in Photoshop, explain their limitations, and introduce a better alternative.
In this article
Part 1. A Complete Guide to Noise Reduction Photoshop [All Essential Methods]
It offers a suite of powerful tools to help you restore the clarity of your grainy images. At a glance, each tool addresses noise differently, such as the Camera Raw filter, which harnesses sophisticated algorithms, and Reduce Noise delivers a simple slider-based interface that lets you dial back the noise. Meanwhile, Surface Blur or Gaussian Blur can tone down the blur gently by blending pixel areas.

Beyond these, it lets you extract blur using layer masks and advanced blur modes, making it flexible for both subtle and heavy cleanup. Whether you are working on portraits or landscapes, noise reduction in Photoshop gives you the freedom to define every pixel without sacrificing essential details. To help you get the cleanest look, the following section has a breakdown of the most effective noise reduction available in this software:
Method 1: Reduce Grain in Photoshop with Camera Raw Filter
It is a powerful tool initially designed for editing RAW image files, but it's equally valuable to reduce grain in Photoshop. The tool provides specific sliders for reducing luminance and color noise, allowing for precise control over grainy textures. Its distinguishing feature is its capacity to implement noise reduction in a non-destructive manner, maintaining crucial image details such as skin texture and fine edges. Let’s understand how this tool works with a detailed guide:
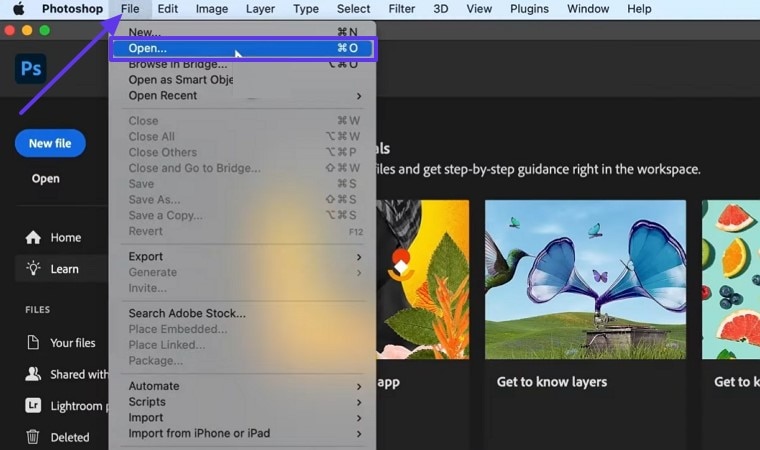
Step 1. Launch the software on your device and press the “File” tab to choose the “Open” option for inserting the target image.
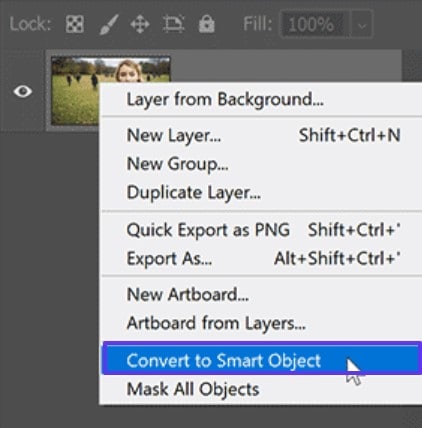
Step 2. Make a copy of the layer and right-click on the screen to choose “Convert to Smart Object” from the extended menu list.
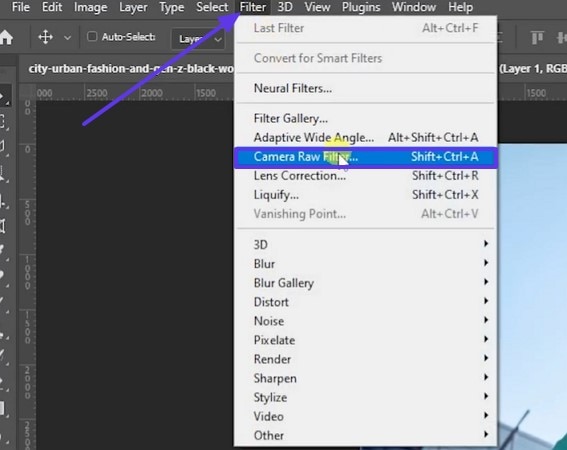
Step 3. Afterward, select the “Camera Raw Filter” option after you press the “Filter” tab to expand the drop-down menu.
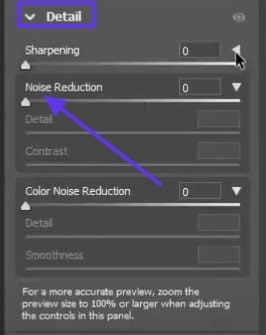
Step 4. From the right panel in the “Detail” section, modify the “Noise Reduction” setting and raise it based on your specific requirements. When you are pleased with the outcome, click the “OK” button to store the adjustments for a clear and precise image.
Method 2. Reduce Noise in Photoshop through Reduce Noise Filter
With Photoshop denoise AI, you can clean up the grainy or pixelated images as it's one of the core tools of this software. It is found under the Filter tab from the Noise menu and is designed to quickly lower both luminance and color noise through a simple toolbar. Users can control how much detail to preserve while softening harsh specks and blotches by doing the following steps:
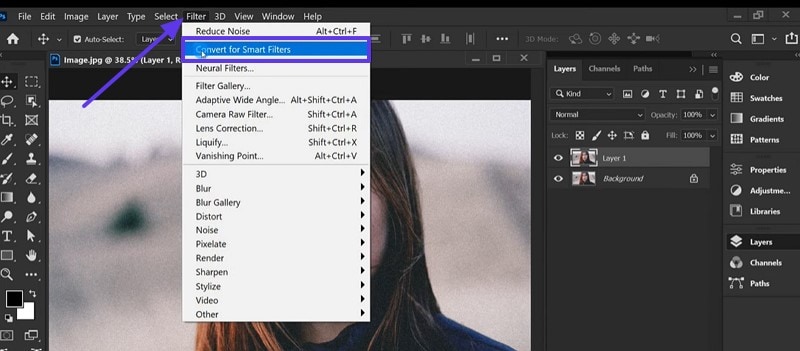
Step 1. After you open the file in Photoshop, hit the “Filter” tab to choose the “Convert for Smart Filters” option and start the noise reduction process.
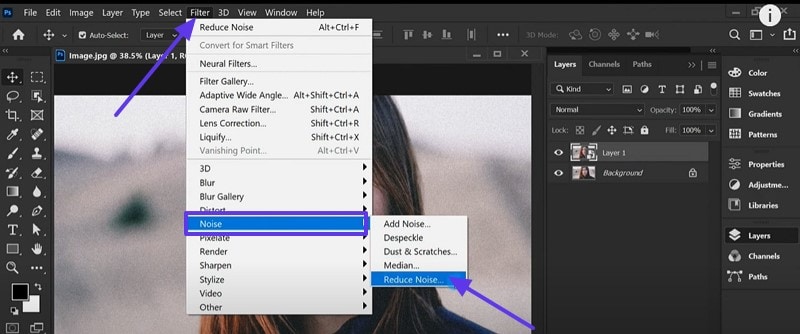
Step 2. Press the “Filter” tab once again to hover your mouse over the “Noise” option from the drop-down menu. From there, choose the “Reduce Noise” option and access its pop-up screen.
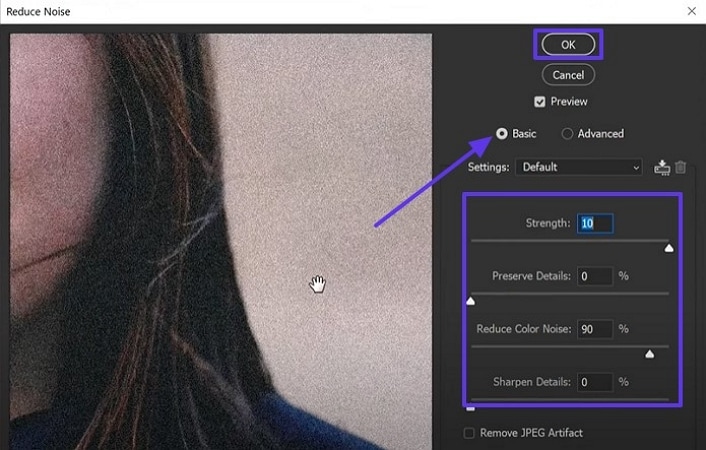
Step 3. From the menu screen, enable the “Basic” option and adjust the “Reduce Noise Color” “Strength” and other features. When you finally achieve a clear and sharp image, click the “OK” button at the top to save the change.
Method 3. Denoise in Photoshop with Surface Blur or Gaussian Blur
Though they are not traditional noise reduction Photoshop tools can still be creatively used to smooth out blurred areas in pictures. These filters work by softening the pixels based on surrounding tones, which helps blend harsh grain and reduce visual distraction. Surface Blur is more targeted and maintains edge contrast, while Gaussian Blur applies a border softening effect. The upcoming section will cover how to use a Gaussian Blur to make images clear:
Step 1. For this process, click the “Filter” tab once you convert the image to a smart object and choose the “Blur” option from the extended menu. Afterwards, select the “Gaussian Blur” option from the following drop-down menu and proceed further.
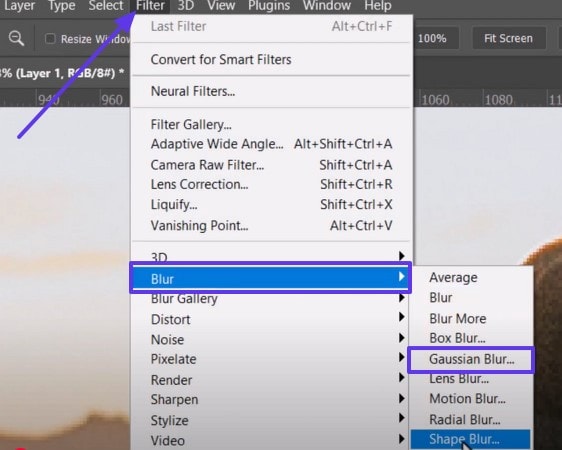
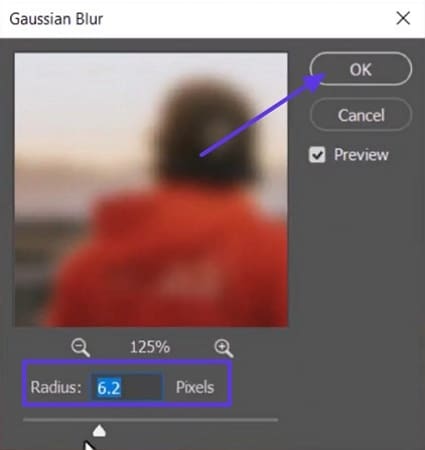
Step 2. From the “Gaussian Blur” pop-up screen, adjust the “Radius” using the toolbar and hit the “OK” button after you get the desired results.
Method 4. Remove Noise in Photoshop with Smart Sharpen
It is known to enhance image clarity but also includes built-in noise reduction features that make it a purposeful tool. Unlike the standard sharpening method, it intelligently detects edges and only applies it where it's needed. It offers a Reduce Noise filter in Photoshop, allowing you to smooth out grain while bringing back definition to details. By doing the given steps, you can sharpen and denoise both images that need clarity and cleanup.
Step 1. To add the image to the tool, press the “File” tab and click the “Open” option from the expanded menu list.

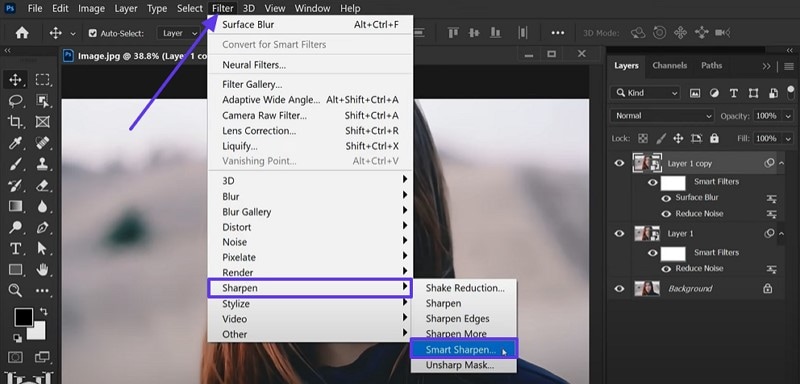
Step 2. After you make a copy of the layer and turn the image into a smart object, press the “Filter” tab from the top pane. Point to the “Sharpen” choice and select the “Smart Sharpen” from the ensuing extended list.
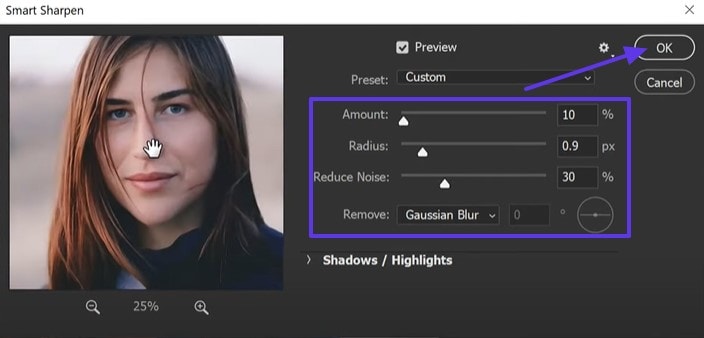
Step 3. It will open the “Smart Sharpen” menu screen, make sure the “Remove” option is on “Gaussian Blur.” Later, adjust other options like “Radius” and “Noise Reduction,” then hit the “OK” button once you achieve the desired look.
Part 2. Limitations of Using Denoising in Photoshop
Now that you know how to do the process of denoising in Photoshop, it is essential to understand the limitations users can face. The following section will cover the most common drawbacks that can affect your final result:
- Limited Files: Photoshop’s Denoise tool currently works with RAW files only, leaving commonly used formats such as JPEG and TIFF. This limitation prevents quick cleaning of images exported from smartphones or edited projects saved in non-RAW formats.
- Performance Impact & Crashes: Advanced denoise process, especially leveraging AI and GPU, can be slow or cause the software to crash, particularly on older systems. Users report long processing times and even a blue screen during the process of noise reduction.
- Complex Workflow: It offers more than one tool for denoising but understanding when to use and applying them selectively can be confusing. While layer masks allow precision, they can be too tedious and take time for complex edits.
- Artifacts like Banding & Halos: Over application can cause visible issues such as banding in smooth gradients or haloing around edges, making the image look unnatural and drawing unwanted attention. Experts want aggressive smoothing to often lead to flat or posterized areas.
- Compatibility Limitations: If your camera or file format is not supported, the Denoise option is completely greyed out, leaving no fallback with the same dialog. This forces users to find a workaround or switch tools entirely, which can disrupt editing speed and consistency.
Part 3. The Perfect Alternative to Reducing Grain in Photoshop
After learning about the limitations, like crashes and confusing toolsets, you don’t want your hours of hard work to go to waste. Therefore, you can use a better alternative to reduce noise in Photoshop, UniConverter, which offers an Image Enhancer tool. This software provides you with an exhaustive list of AI Models, such as Auto Enhancer, which immediately improves the quality of the picture and shows more details.
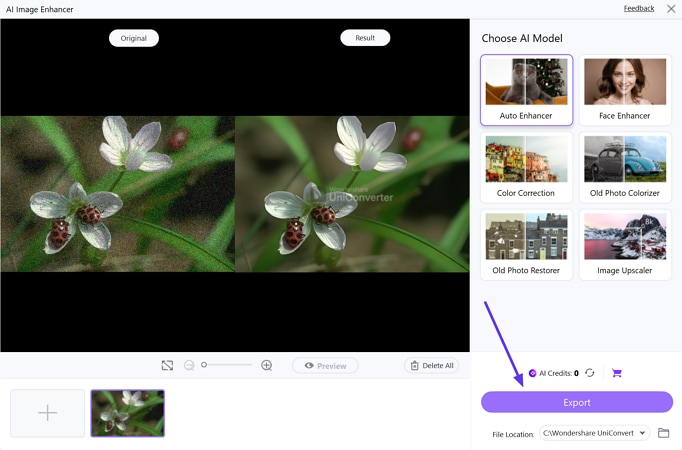
You can use this tool on any device as it's compatible with Windows and Mac, allowing you to denoise your images with ease. After you apply the Auto Enhancer model, the tool lets you see the before and after results with its preview feature. UniConverter gives you samples to try the Image Enhancer tool before you add your own images.

Best Image Noise Reduction Software
Key Features
- Supported Formats: You can edit any type of picture as it is compatible with up to 1000 file formats, including JPG and more.
- Image Upscaler: This model lets you increase the quality of the picture from 2X to 8X and turn them into sharp and defined visuals.
- Batch Processor: For multiple images in a large process, it comes with a batch tool that enables you to enhance more than one image at a time.
- Color Correction: With this model, users can increase the color cast and contrast of photos, bringing them realistically.
- Face Enhancer: For images with people, the tool provides you with a model that analyzes the skin texture and improves the quality.
A Guide to Reduce Noise from Images Using UniConverter
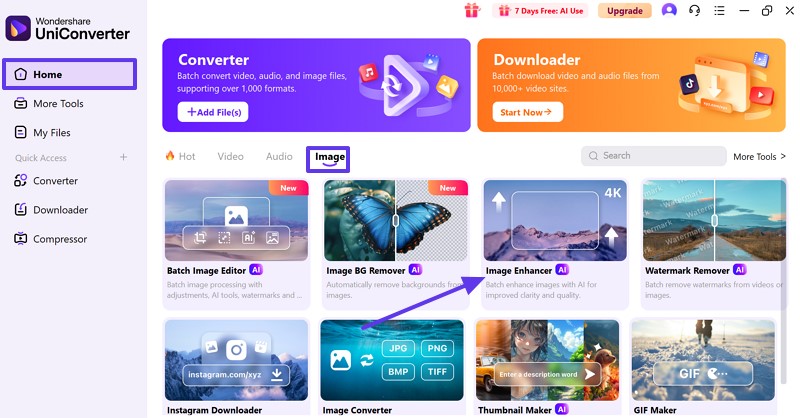
Step 1. Pick the Image Enhancer Tool from the Home Tab
Open the software on your device and choose the “Home” tab from the left panel. Next, click the “Image” tab and select the “Image Enhancer” tool to proceed.
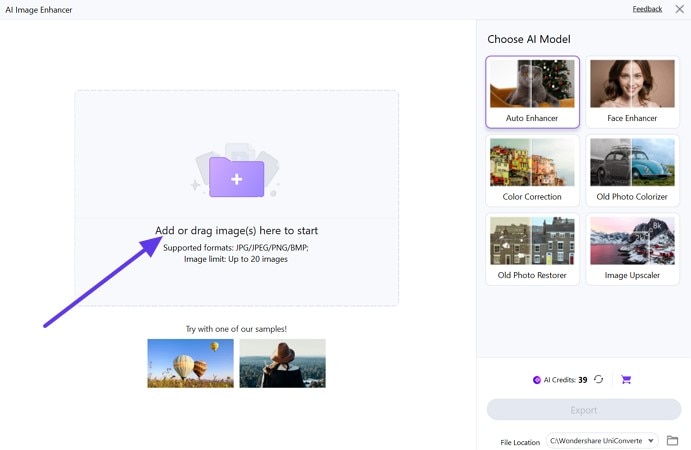
Step 2. Add the Blurry or Pixelated Photo
From the next screen, press the “Add or Drag Image(s) Here to Start” button and insert the image that you want to enhance.
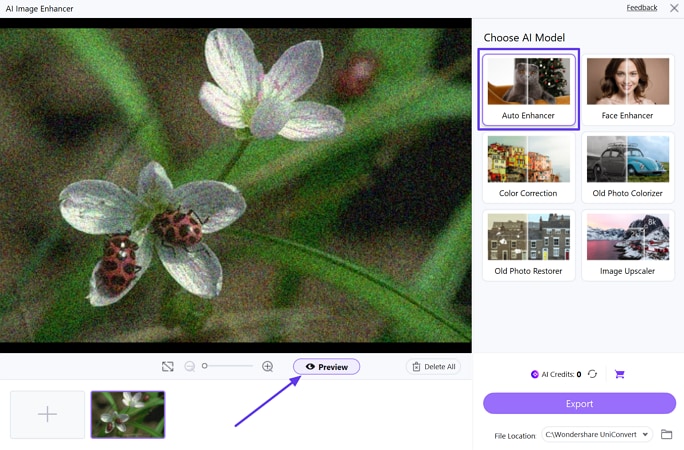
Step 3. Pick the Target Feature and Initialize It
Then, choose the “Auto Enhancer” option from the “Choose AI Model” area and press the “Preview” button to start enhancing the image.
Step 4. Check the Results and Save the Enhanced Photo
Afterwards, check the before and after results of the image from the main interface. Lastly, press the "Export" button to save the enhanced picture on your device.
Part 4. Pro Tips & Mistakes to Avoid When Reducing Grain in Photoshop
For improved outcomes in Photoshop AI noise reduction, it's crucial to do more than adjust sliders. Here are crucial tips and frequent errors to steer clear of to clean up grain without losing detail:
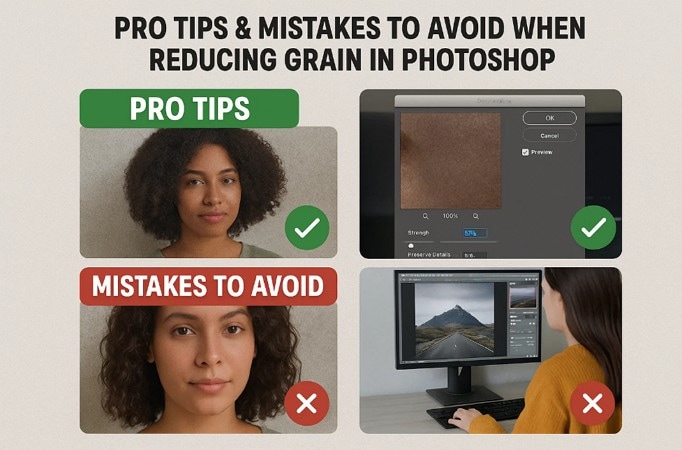
- Avoid Overdoing: Overapplying noise reduction can make your image look overly smooth and unnatural. To keep textures realistic, reduce noise gradually and monitor results quickly.
- Eliminate Color Noise: It shows up as small red, green, or blue dots, particularly in darker areas. Use the Color Noise detail to clean these artifacts without blurring details.
- Zoom In: Always enlarge to at least 100% when you reduce the pixelation to see how it's actually affecting fine details. Editing while zoomed out can hide flaws and lead to over processing.
- Use Multiple Methods: Different types of noise might require different tools or settings according to their intensity. Combine methods like Camera Raw, Reduce Noise Filter, and Smart Sharpen, which often deliver cleaner and more balanced results.
- Apply Selectively: Pixelation is not uniform across an image, so applying reduction everywhere can blur parts that don’t need fixing. Use layer masks or brushes to target only the problem areas for better control.
Conclusion
Noise in the image can ruin the overall look, no matter what precautions you take. Therefore, this guide has introduced you to the top 4 methods to reduce noise in Photoshop. From Camera RAW to Smart Shapes with a detailed stepwise guide, but it comes with various limitations. For that, you can use UniConverter to remove the grains from the images and make them sharp and clean.

