Recording Tips
- TRY FREE TRY FREE
- 1. Game Recorder+
- 2. Video Recorder+
-
- 2.1 All Ways to Record A Video
- 2.2 What's the Best Online Video Recorder Available in Market
- 2.3 5 Most Helpful Video Recording Software in 2020
- 2.4 Most Helpful Video Recorder Converter in Market
- 2.5 How to Record Video on Windows 10 with All Methods
- 2.6 What's A High-quality Video Recorder?
- 2.7 How to Record Video on Steam with Easy Steps
- 2.8 How to Record Video on SnapChat with Easy Steps
- 2.9 Most Helpful Tips about Video Recorder and Editor
- 3. Recording Software+
-
- 3.1 How to Record Stream with VLC and the Best Alternatives to VLC Recorder
- 3.2 What's Webex Recorder and How to Use It
- 3.3 How to Record with Fraps and Its Best Alternatives
- 3.4 Best Alternatives to Action! Recording Software
- 3.5 12 Most Helpful Recording Software in 2020
- 3.6 13 Best Webcam Recorders for All Platforms
- 4.Screen Recorder+
- 5. Record Devices+
- 6. Recording App+
- 7. Other Tips+
- 8. Audio Recorder+
- 9. Format+
- 10. Screen Recorder+
- 11. Record Social Network+
-
- 11.1 How to Record Somone's Instagram Live with Helpful Ways
- 11.2 All Ways to Record Hulu
- 11.3 How to Record BBC iPlayer with All Ways
- 11.4 What’s the Best YouTube Recorder App in 2020
- 11.5 How to Record Gameplay on Xbox One for YouTube with All Ways
- 11.6 Most Helpful Game Screen Recorder for YouTube in 2020
- 11.7 How to Record Videos from YouTube to Computer with All Ways
- 11.8 How to Record Netflix with All Ways
- 11.9 What's Best YouTube Recorder in 2020
How Do I Record a Conversation? Solved.
by Christine Smith • 2025-11-14 10:38:21 • Proven solutions
Have you ever hosted an online conference meeting before? It is a convenient way of having important discussions at a distance, and it provides the opportunity for a lot of flexibility in your work, including the ability to record your conversations. Yes, it is indeed possible, and we are going to show you all the different ways to go about it, whether it be on your Windows, Mac, Android, or iOS device.
- Part 1. Best Way to Record a Conversation on PC
- Part 2. How to Record a Conversation on Mac
- Part 3. How to Record a Conversation on iPhone
- Part 4. How to Record a Conversation on Android
Part 1. Best Way to Record a Conversation on PC
Whether you’re using a Mac or Windows PC, Wondershare UniConverter is the best app for recording a conversation. It works with all popular VoIP apps, including Skype, Zoom, Hangout, WhatsApp, etc. This app lets users capture desktop conversations in full screen or choose a specific capture area. To make it juicier, users can also add their own voice narrations and webcams to make the conversation more engaging to watch. Moreover, you can convert and edit the recorded conversation.
Wondershare UniConverter – Best Conversation Recorder for Desktops
 Wondershare UniConverter - Best Video Converter for Mac/Windows

- It works with all VoIP apps, including Zoom, Skype, MicroSIP, Ekiga, Jitsi, etc.
- Users can capture desktop conversations in full screen or choose custom frame sizes.
- Record a desktop conversation with a PIP effect using a webcam and voice narrations utilizing a mic.
- It lets users add demos as they record conversations using texts, shapes, lines, drawings, and more.
- Edit the recorded conversation by adjusting the sound level, adding subtitles, trimming, cropping, etc.
- Convert the conversation to MP3, M4A, M4R, OGG, MP4, VOB, FLV, MOV, etc.
- Best conversation recorder app for Win 10/7/8 & Mac OS X 10.9+ (Including Catalina).
Below are the steps to record a conversation with Wondershare UniConverter:
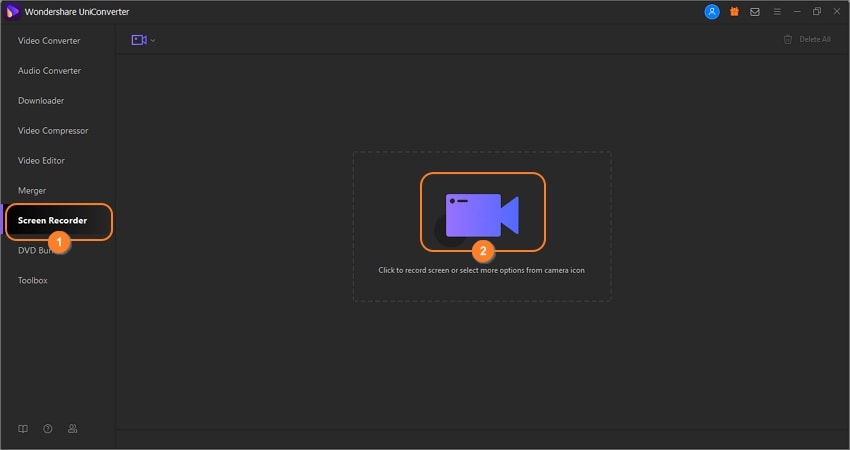
Step 1Launch the Screen Recorder.
Install and run the software on your PC, then tap Screen Recorder. Now hit the Camcorder button to open the conversation recorder tool.
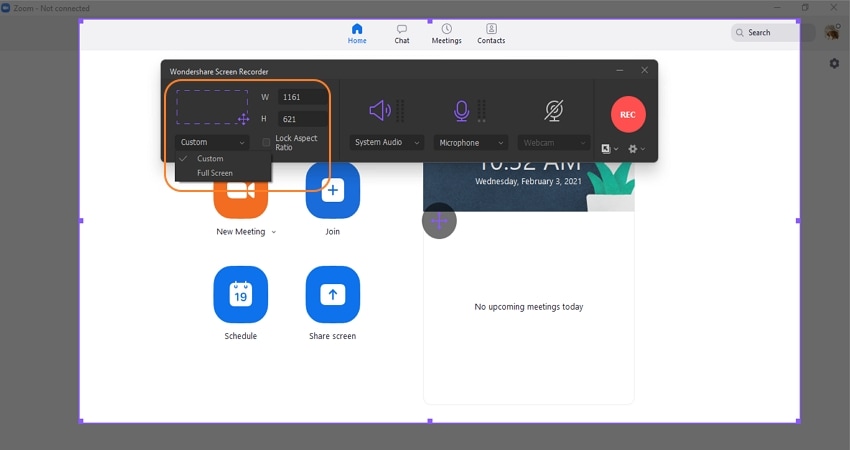
Step 2Choose a capture area.
Now launch the VoIP app you wish to record, then drag the recording frame to fit a capture area on the app. Alternatively, open the Recording Mode drop-down menu, then choose Full Screen or Custom. With the Custom mode, users can enter the frame dimensions, then tap Lock Aspect Ratio.
Step 3Configure the recording preferences.
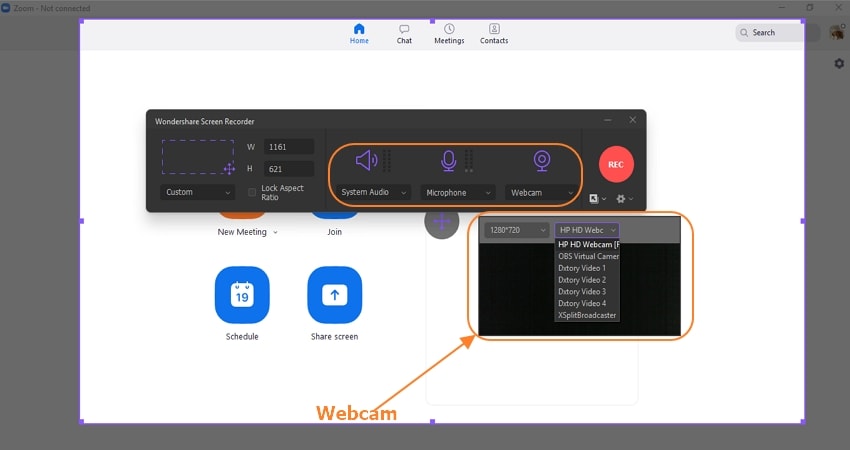
To ensure that you record all sound from the conversation app, choose a device under the System Audio menu. After that, proceed to select a device for adding your voice narrations under the Microphone menu. You can even record a video of yourself by choosing a Facecam under the Webcam section.
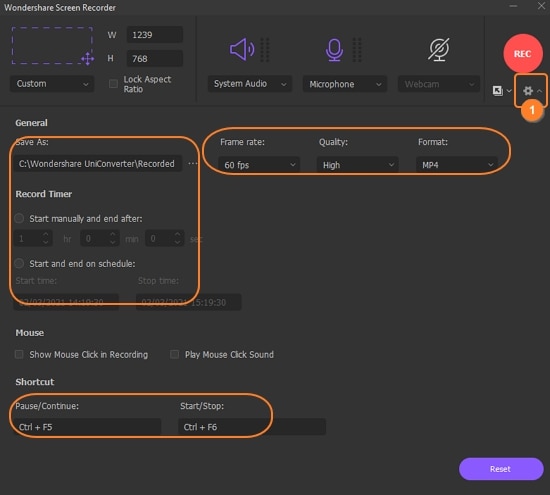
Meantime, open the Advanced Settings menu, then set the output frame rate, quality, format, recording timer, and folder path. This app lets you export the conversation to MP4, AVI, or FLV.
Step 4Start recording the video.
Launch the meeting or conversation, then preview the capture area once more. If everything looks polished, tap REC to begin recording a conversation on Mac/Win. Interestingly, you can add demonstrations using texts, shapes, lines, arrows, and so on. To do that, launch the taskbar, then click the Annotation icon. Finally, press Stop to complete the recording process.

Part 2. How to Record a Conversation on Mac
Here is our next method of recording a conversation on Mac this time. It is assumed that you are going to be holding the conversation on Skype, and we will be focusing on the software's built-in conversation recording function, which is available only in the Mac and iOS versions of Skype.
Of course, this won't be able to help you if you do decide to hold your conversation outside of Skype, but if that's the case since the Wondershare UniConverter is available on both Windows and Mac, we would recommend using it again for this purpose.
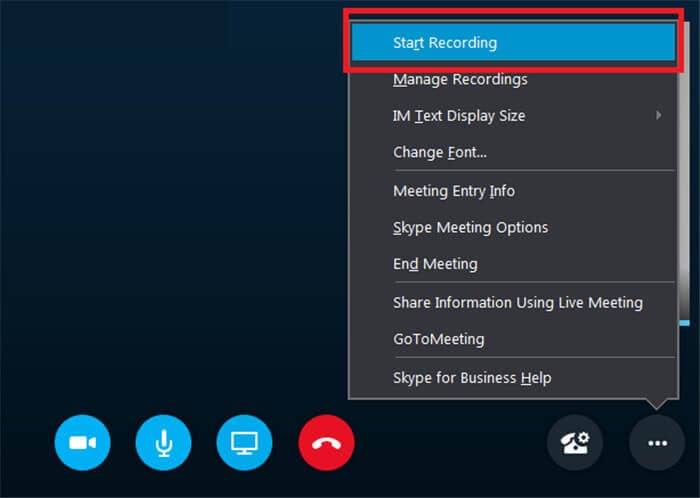
Use the Built-in Recording Function
Recording a conversation with the Mac version of Skype is quite simple. You will need to have a conversation going before doing this, but once started, it's as simple as selecting the options menu in the bottom right-hand corner of the UI and then selecting the Start Recording option.
That's it. After the conversation ends, you will be able to save the recording locally to your desktop for future review.
Part 3. How to Record a Conversation on iPhone
With this iPhone method, we strayed off online conversation apps like Skype, seeing as it's pretty much the same as the method we introduced in the Mac version. But we will still teach you how to record an actual phone call with TapeACall. It's an audio recorder only, so if you decide to hold a FaceTime conversation, it won't record video as the UniConverter does. However, it's still a pretty good way of recording and storing your conversations with permission from the other party, of course.
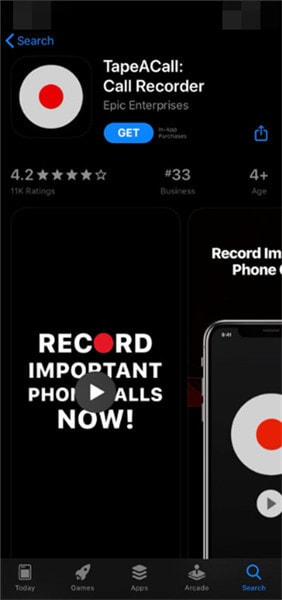
Step 1. Install the iOS App
TapeACall is a third-party app that is available for download in the Apple App Store. Get it there if you are interested in using it for yourself.
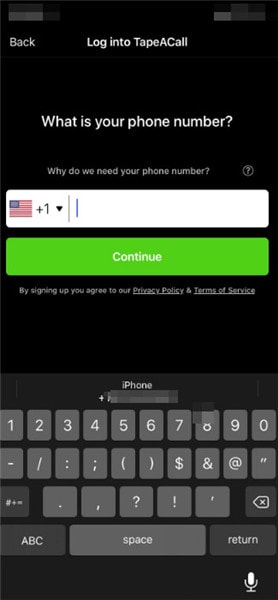
Step 2. Provide Account Details
Unfortunately, it won't start working immediately. You will need to set it up first. So, once the app has been installed, launch it and provide all the necessary account details asked for, like your Phone Number.
Step 3. Record a Call
Once you are done setting things up, you can now begin recording your calls. TapeACall will appear as a red floating icon highlighted in the image below over your phone calls. Simply click it to start recording.

Step 4. Share a Recording
Once a call is complete, the recording will be stored in the TapeACall app. Open it up to access a record and click the Share icon to share a specific recording.
You can share it as a downloadable URL, or you can use one of the other sharing options to store your recording in one of the popular online Cloud storage platforms like Google Drive, Dropbox, etc.

Part 4. How to Record a Conversation on Android
There is no way of recording a conversation on Android directly from the Phone app, either. Instead, you will have to use a third-party tool like Google Voice to record incoming calls. Fortunately, this seems simple enough, as we'll be showing you in the tutorial below. Google Voice will also automatically save recorded calls on your cloud to be exported or listened to by you after the fact.
Step 1. Adjust Google Voice Settings
Once you have the Google Voice app installed, launch the app and open up the menu so that you can access the Settings menu.
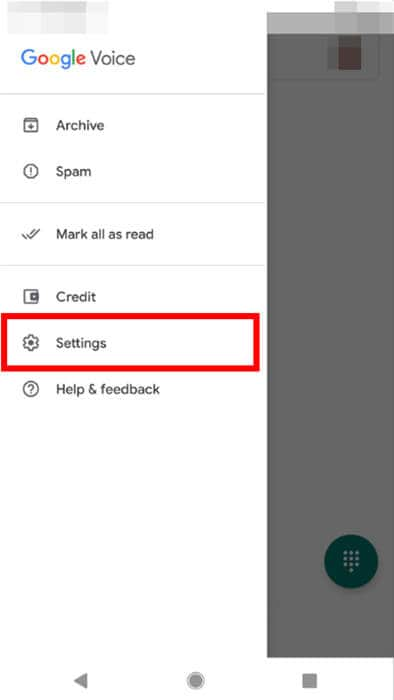
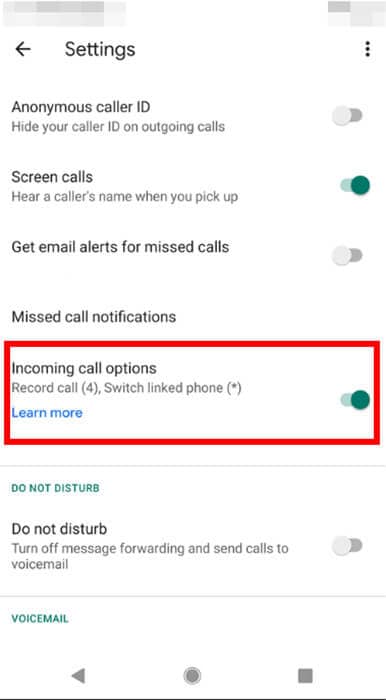
Step 2. Turn on Incoming Call Recording
In the Google Voice Settings page, locate and enable the Incoming Call Options. It is what will automatically record calls of any linked device.
Conclusion
There is plenty of different opportunities available out there for establishing secure communications with someone else. And as the world metaphorically grows smaller, methods of recording those communications become more prolific. Now that you know that you can use tools like the Wondershare UniConverter try it out today and save yourself the hassle of having to strain yourself to remember fleeting conversations held over the phone or on the Internet.


Christine Smith
chief Editor